How to Stop Moles from Destroying Your Garden

How to Stop Moles from Destroying Your Garden

A lush, green garden full of vibrant plants and flowers is every gardener’s dream. But that dream can quickly turn into a nightmare when moles invade. These small, burrowing mammals are known for creating unsightly tunnels, mounds of soil, and damaging root systems. While moles don’t eat plants directly, their underground activity disrupts soil stability and can harm your lawn and garden.

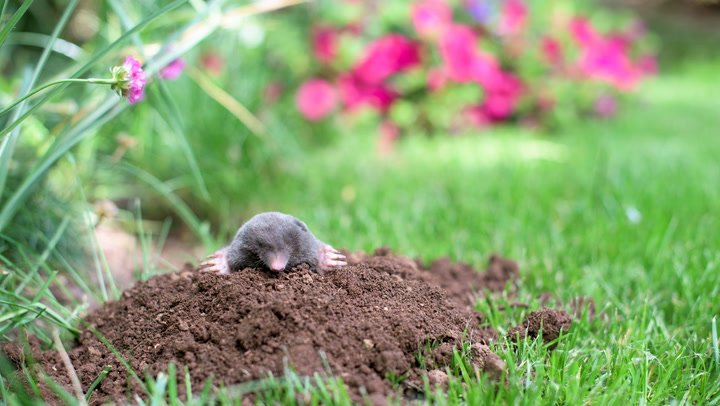
If you’ve noticed raised ridges in your lawn or small volcano-shaped soil piles, you’re likely dealing with moles. The good news? You don’t have to surrender your garden to them. With the right combination of strategies, you can deter moles effectively while maintaining a healthy outdoor space. In this article, we’ll explore what attracts moles, how they damage gardens, and the best natural, physical, and preventive methods to stop them from destroying your garden.


Understanding Moles and Their Behavior

Before you can stop moles, it’s important to understand why they show up in the first place.

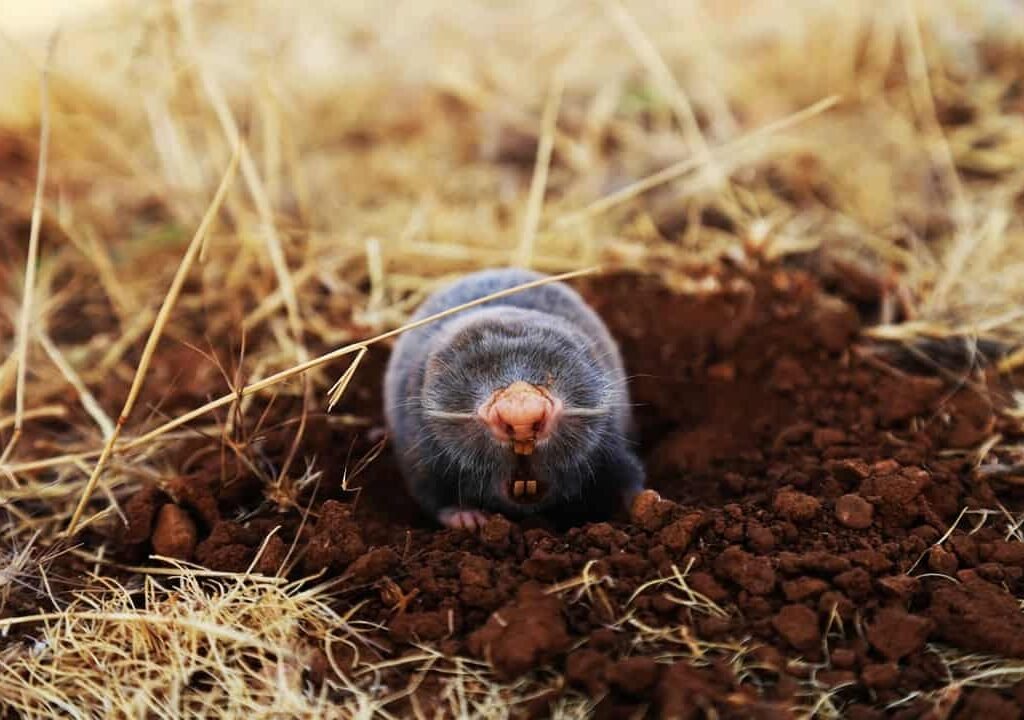
  • Diet: Moles are insectivores. They mainly feed on earthworms, grubs, and insects found underground. They don’t eat plant roots or vegetables directly. However, while digging for food, they unintentionally damage roots and disrupt soil.
  • Habitat: They prefer moist, loose soil because it’s easier to dig through. That’s why gardens and lawns with rich soil often attract them.
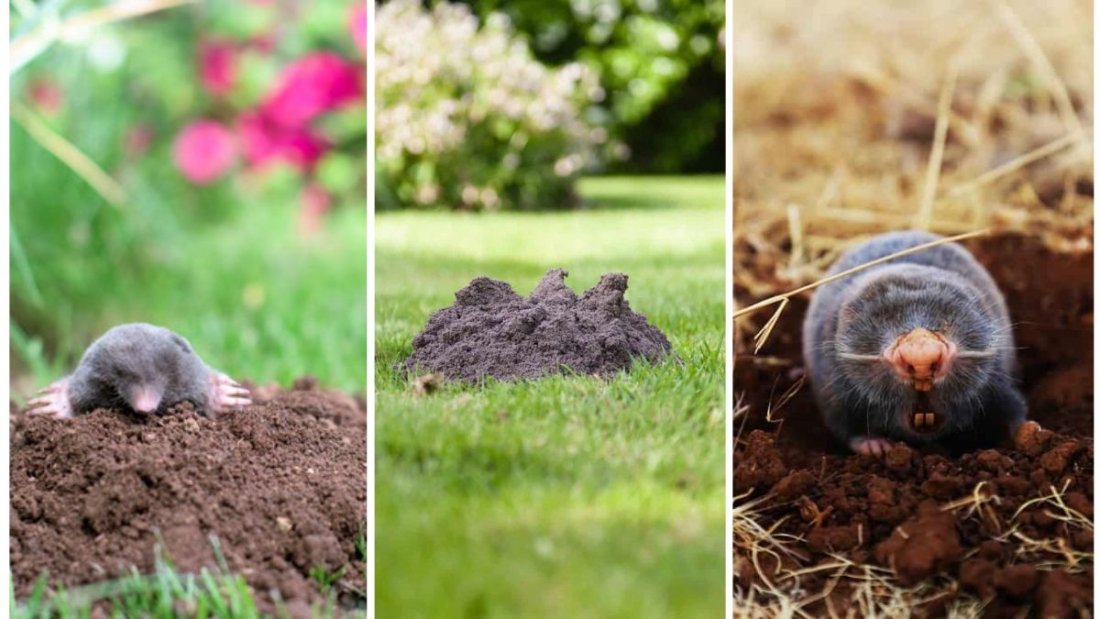
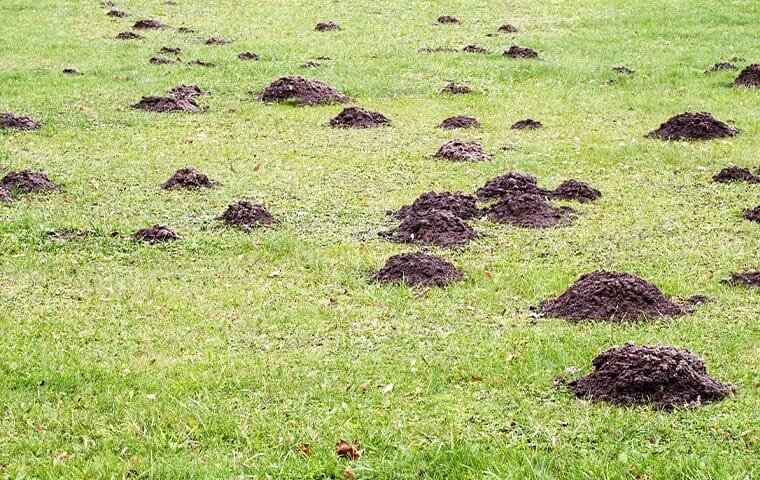
  • Signs of Mole Activity:
    • Raised ridges or surface tunnels in the lawn.
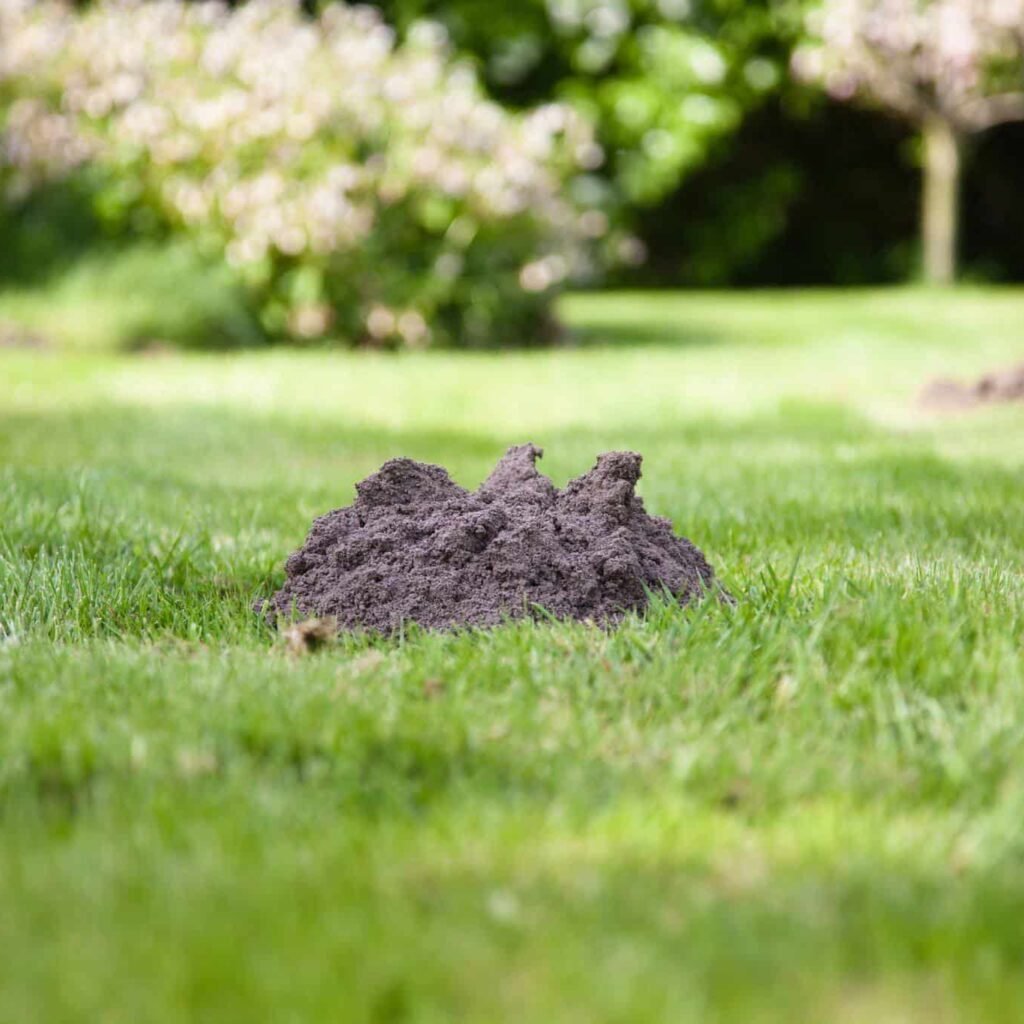
    • Small cone-shaped mounds of dirt (molehills).
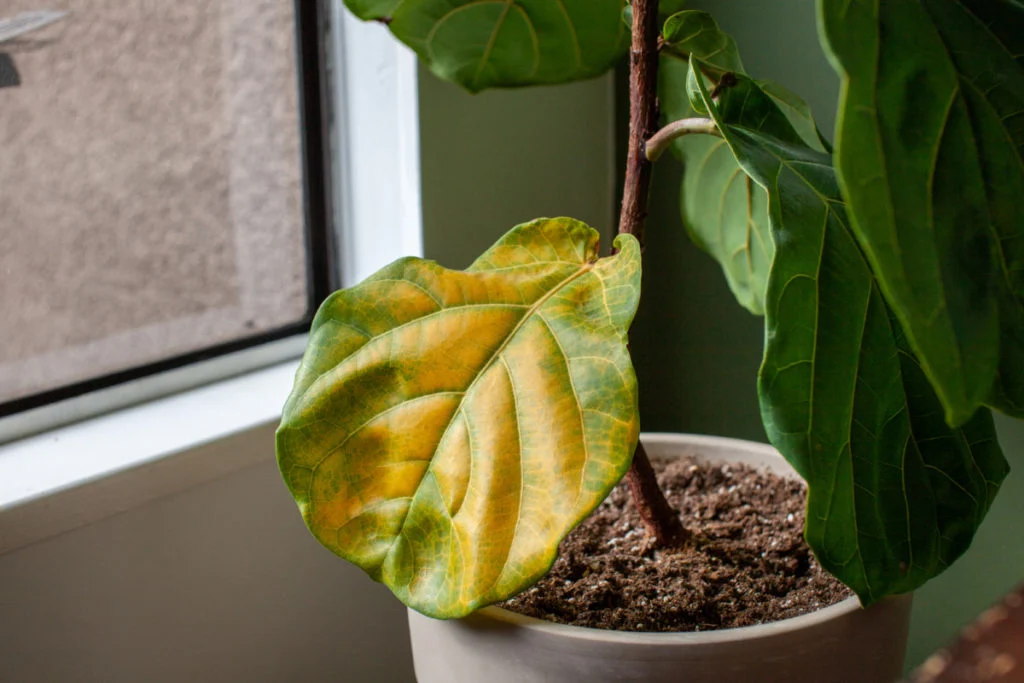
    • Plants that appear to be wilting because their roots have been disturbed.

By identifying mole activity early, you can take steps before the damage becomes widespread.


Why Moles Are a Problem for Gardeners

Even though moles play a beneficial role in nature by aerating soil and controlling insect populations, they can cause chaos in a cultivated garden.

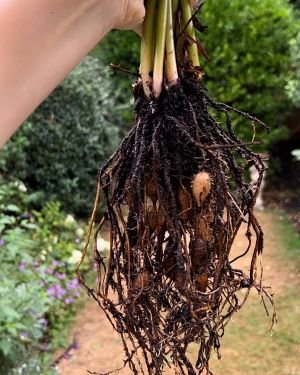
  • Root Damage: Their tunneling disrupts root systems, causing plants, flowers, and grass to weaken or die.
  • Uneven Lawns: The surface ridges make your yard bumpy and unattractive.
  • Weed Growth: Disturbed soil from mole tunnels often creates openings for weeds to sprout.
  • Soil Erosion: Extensive tunnels can destabilize garden beds, leading to soil washout during heavy rain.

So while moles aren’t out to eat your vegetables, their activity indirectly harms your garden’s health and beauty.


5 Effective Ways to Stop Moles from Destroying Your Garden

1. Remove Their Food Sources

Since moles come to your garden looking for insects and grubs, reducing their food supply can encourage them to leave.

  • Control grubs: Apply beneficial nematodes or milky spore to the soil. These natural treatments kill grubs without harming plants.
  • Reduce insects: Avoid overwatering, as moist soil attracts worms and insects.
  • Limit mulch layers: Thick organic mulch encourages insect activity, which may draw moles.

By cutting down on food availability, you make your garden less attractive to moles.


2. Use Natural Mole Repellents

Natural repellents can drive moles away without harming your plants or soil.

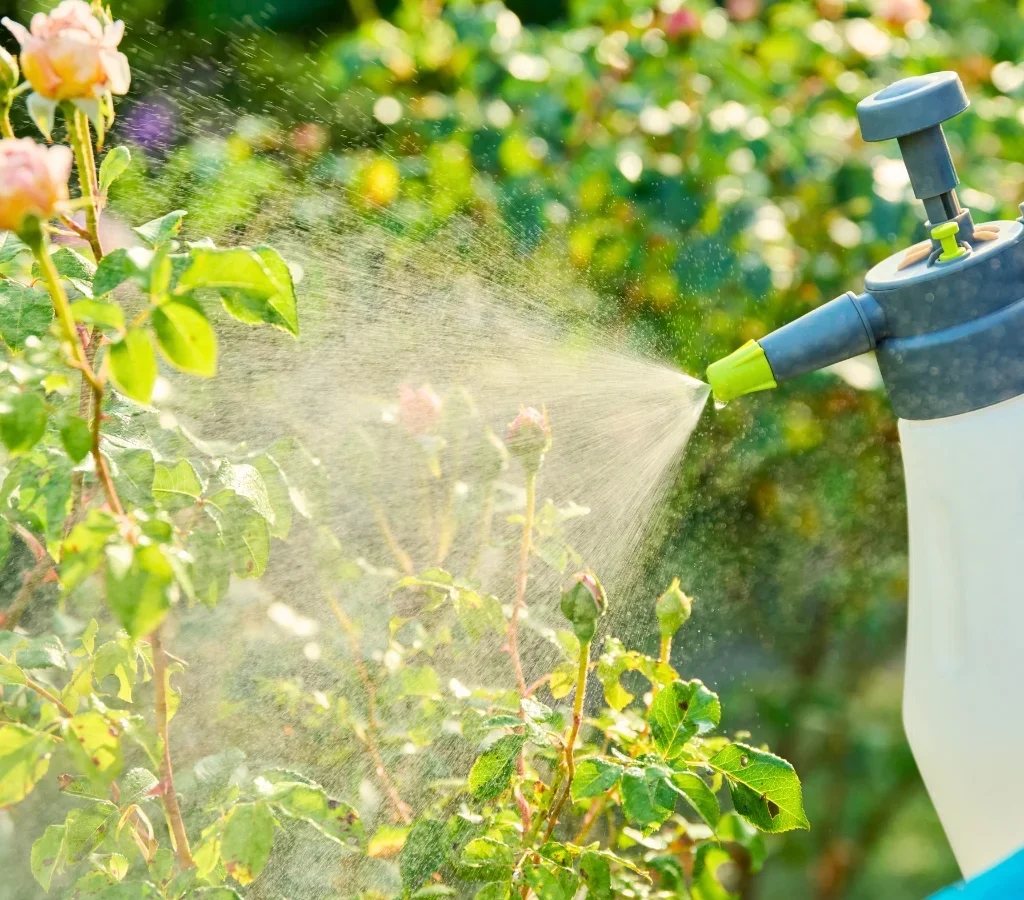
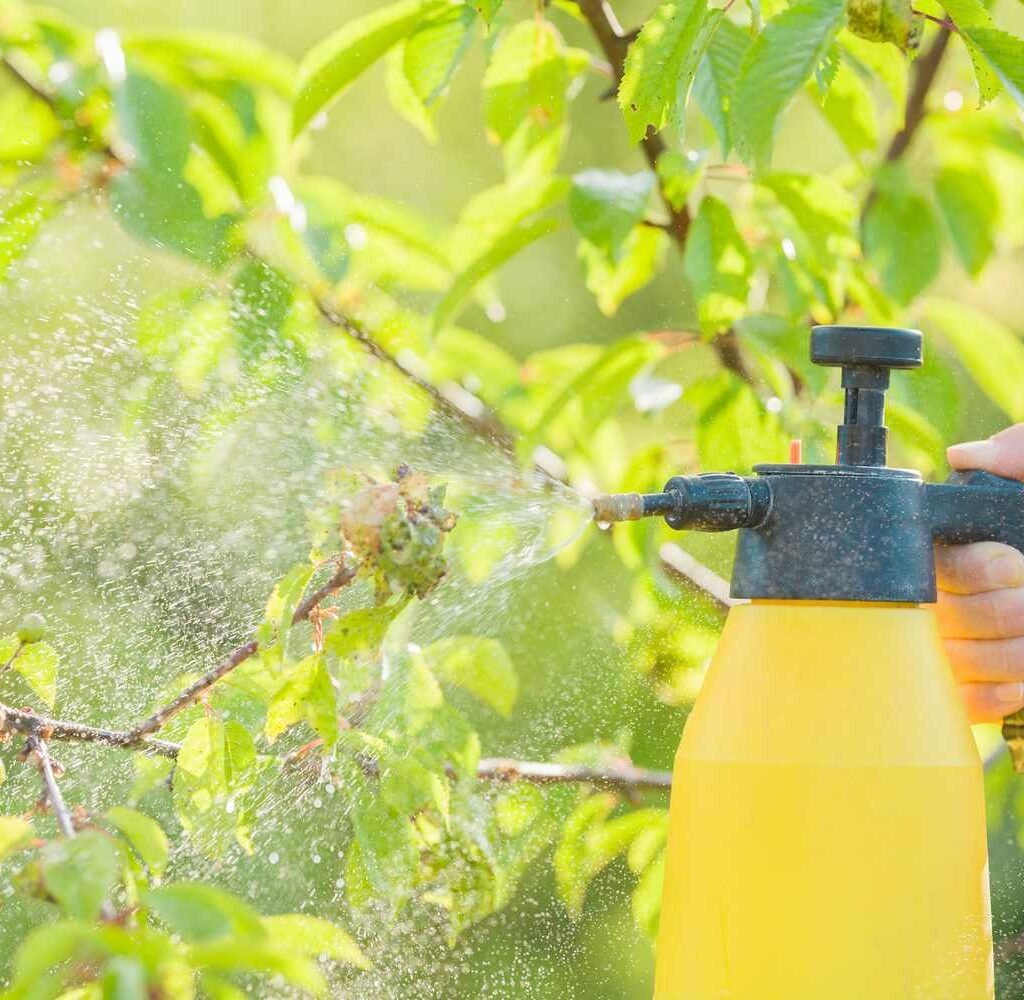
  • Castor oil spray: One of the most popular mole deterrents. Mix castor oil with water and a few drops of dish soap, then spray it over mole tunnels and garden beds. Moles dislike the taste and smell, forcing them to move.
  • Garlic and chili powder: Sprinkle around active tunnels to create an unpleasant environment.
  • Coffee grounds: Spread around garden beds. The strong smell deters moles while enriching the soil.

For best results, reapply repellents after rain or watering.


3. Install Physical Barriers

If you want a long-term solution, barriers are highly effective.

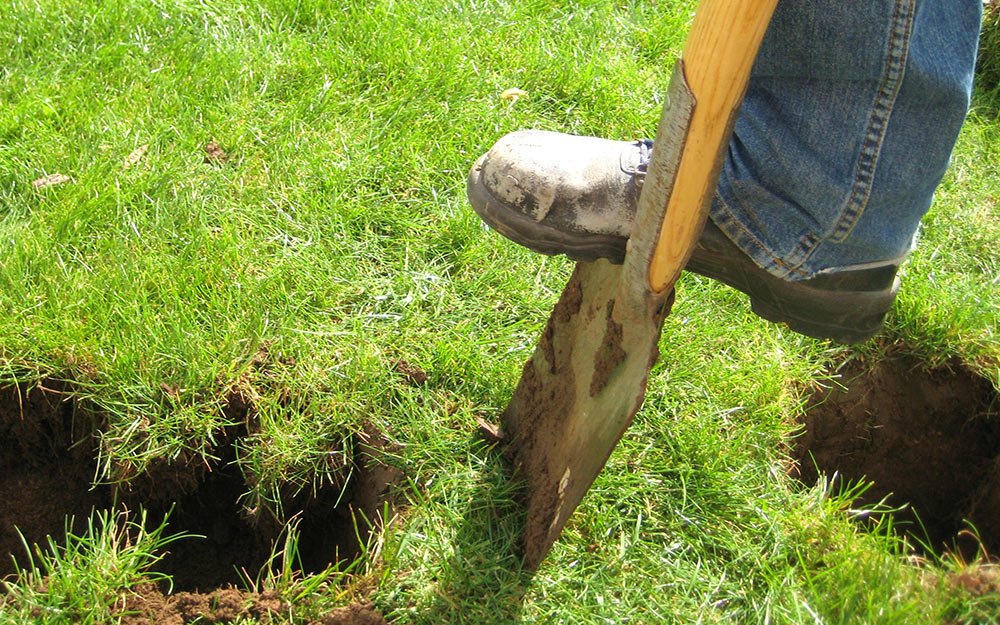
  • Underground fencing: Dig a trench about 2 feet deep around your garden beds and line it with hardware cloth or metal mesh. This prevents moles from tunneling into the area.
  • Raised beds with mesh bottoms: Great for vegetable gardens. Adding wire mesh beneath the soil keeps moles out while allowing roots to grow freely.
  • Garden edging: Installing strong edging around lawns and flower beds makes it harder for moles to invade.

Though labor-intensive, barriers are one of the most reliable mole control methods.


4. Encourage Natural Predators

Nature can help control mole populations if you attract the right animals.

  • Owls and hawks: Installing owl boxes or perches can encourage these birds to hunt in your yard.
  • Cats and dogs: Pets often scare away or catch moles.
  • Snakes: While not everyone welcomes them, some non-venomous snakes naturally reduce mole activity.

By encouraging predators, you create a natural balance in your backyard ecosystem.


5. Use Traps as a Last Resort

If the mole infestation is severe and other methods fail, traps may be necessary.

  • Scissor traps and harpoon traps: Placed directly in active mole tunnels, these are effective but should be used with care.
  • Humane traps: These allow you to capture and relocate moles without harming them.

Note: Trapping should be done responsibly and according to local wildlife regulations.


Preventing Moles from Returning

Stopping moles is only half the battle—preventing them from coming back is just as important.

  • Maintain a dry lawn: Avoid overwatering. Moles prefer moist soil for digging.
  • Regular soil checks: Watch for new ridges or tunnels so you can act quickly.
  • Healthy lawn care: Keep grass trimmed, aerate the soil naturally, and limit excessive fertilizer that may encourage insect populations.
  • Plant mole-repelling plants: Certain plants, like daffodils, marigolds, and alliums, are thought to deter moles due to their strong scent.

Are Moles Ever Beneficial?

Interestingly, while moles are frustrating for gardeners, they aren’t always entirely bad.

  • Their digging aerates compacted soil.
  • They help control harmful grub and insect populations.
  • Their tunnels improve water penetration into soil.

So, in some cases, gardeners in less manicured spaces choose to tolerate moles. But in ornamental gardens or lawns, their damage is usually too much to ignore.


Final Thoughts

Moles may be small, but their impact on a garden can be big. The key to dealing with them is a multi-layered approach: reduce their food sources, use natural repellents, install barriers, encourage predators, and if necessary, use traps. With patience and consistency, you can protect your garden from mole damage while keeping your outdoor space beautiful and thriving.

Remember, a healthy garden is not just about fighting pests—it’s about creating a balanced environment where plants, soil, and beneficial wildlife can flourish together. By stopping moles the smart way, you’ll reclaim your lawn and enjoy your garden without unwanted underground visitors.

How to Identify and Treat Root Rot Fast

How to Identify and Treat Root Rot Fast

Root rot is one of the most devastating issues a gardener can face. It silently attacks the roots of your plants, reducing their ability to absorb water and nutrients, eventually leading to wilting, stunted growth, and even plant death. Whether you’re growing vegetables, houseplants, or ornamentals, early identification and prompt treatment are crucial to save your plants from root rot.

In this guide, we’ll cover how to recognize root rot, understand its causes, and take fast, effective measures to treat and prevent it.


What is Root Rot?

Root rot is a disease that affects the root system of plants, primarily caused by soil-borne fungi such as Phytophthora, Pythium, and Fusarium. These pathogens thrive in overly wet soil conditions, often developing when drainage is poor or watering is excessive.

Key Characteristics of Root Rot:

  • Roots become brown, mushy, and foul-smelling.
  • Plant growth slows or stops, even with adequate sunlight and nutrients.
  • Leaves may yellow, wilt, or drop prematurely.
  • Stems near the soil line may appear discolored or soft.

Understanding the early signs of root rot allows you to take immediate action before the disease spreads too far.


Causes of Root Rot

Root rot is primarily linked to environmental and cultural factors. Knowing the causes helps gardeners prevent future infections.

Common Causes Include:

  1. Overwatering: Excess water saturates the soil, depriving roots of oxygen and creating a breeding ground for fungi.
  2. Poor drainage: Heavy clay soils or compacted pots prevent water from flowing away.
  3. Infected soil or tools: Fungal spores can spread through contaminated soil, pots, or pruning tools.
  4. Crowded planting: Lack of space reduces airflow and traps moisture around roots.
  5. Low temperatures: Cold, wet conditions slow plant metabolism, making roots more vulnerable.

Tip: Even healthy plants can develop root rot if environmental conditions are favorable for fungal growth.


How to Identify Root Rot Early

Early detection is key to saving affected plants. Watch for these warning signs:

Above-Ground Symptoms:

  • Yellowing or wilting leaves despite adequate watering
  • Drooping stems and poor growth
  • Leaf drop or discoloration, often starting from lower leaves

Below-Ground Symptoms:

  • Discolored roots: Healthy roots are white or light tan; rotting roots turn brown or black.
  • Soft or mushy texture: Gently squeeze roots; mushiness indicates rot.
  • Foul smell: A sour or decaying odor signals fungal infection.

Tip: Always inspect the root system if your plant shows unexplained wilting or yellowing. Catching root rot early gives you a better chance to save the plant.


Fast Treatment Options for Root Rot

Once root rot is identified, immediate action is crucial. The following steps can help you treat affected plants:

1. Remove the Plant from Soil

Carefully take the plant out of its pot or ground to inspect the roots. Shake off excess soil to see the full extent of the damage.

2. Trim Affected Roots

  • Use clean, sharp scissors or pruning shears to remove all brown, black, or mushy roots.
  • Cut back to healthy, firm roots that are white or light tan.
  • Sterilize your tools before and after use to prevent spreading the fungus.

3. Treat with Fungicide or Natural Remedies

  • Fungicides: Apply a suitable fungicide labeled for root rot to protect remaining roots.
  • Natural alternatives: Cinnamon powder can act as a natural antifungal; dip roots lightly before replanting.

4. Repot in Fresh, Well-Draining Soil

  • Choose a clean pot with proper drainage holes.
  • Use a fresh, sterile potting mix or soil amended with perlite or sand to improve drainage.
  • Avoid planting in the same contaminated soil to prevent reinfection.

5. Adjust Watering Practices

  • Water only when the top inch of soil feels dry.
  • Avoid letting water pool at the bottom of pots or beds.
  • Use pots with drainage holes or raised beds to improve soil aeration.

6. Improve Environmental Conditions

  • Provide good airflow around plants.
  • Keep plants in a location with appropriate light and temperature.
  • Avoid overcrowding, which can trap moisture around roots.

Prevention is Better Than Cure

Preventing root rot is far easier than treating it. Here are key strategies:

1. Choose Well-Draining Soil

  • Mix perlite, sand, or coarse compost into garden beds or pots to improve drainage.
  • Avoid heavy clay soils that retain water.

2. Proper Watering

  • Water deeply but infrequently, allowing the soil to dry between watering.
  • Avoid overhead watering on leaves that may drip to roots.

3. Use Clean Pots and Tools

  • Sterilize pots, trays, and tools before planting.
  • Avoid reusing contaminated soil without proper sterilization.

4. Select Resistant Plants

  • Some plants are naturally resistant to root rot pathogens. Research varieties suited for your climate and soil.

5. Monitor Plants Regularly

  • Inspect roots and leaves frequently.
  • Early detection allows for quick action, preventing widespread damage.

Signs Your Treatment is Working

After treating root rot, monitor your plant carefully. Positive indicators include:

  • New growth on leaves or stems
  • Firm, healthy roots developing at the base
  • Leaves remaining green and upright
  • No foul odor from the soil

Tip: Recovery may take several weeks. Be patient and maintain proper care during this period.


Conclusion

Root rot is a serious but manageable plant disease. By understanding its causes, recognizing early symptoms, and taking immediate action, you can save many plants from permanent damage.

Key Takeaways:

  • Early detection is essential—inspect roots when leaves yellow or wilt unexpectedly.
  • Remove infected roots and repot in fresh, well-draining soil.
  • Adjust watering and environmental conditions to prevent recurrence.
  • Use fungicides or natural remedies to protect remaining roots.
  • Preventive care, including proper soil, spacing, and hygiene, is the best long-term strategy.

With vigilance, proper care, and fast intervention, you can protect your plants from root rot and enjoy a healthy, thriving garden year-round.

5 Ways to Protect Your Plants From Fungus

5 Ways to Protect Your Plants From Fungus

Fungal infections are among the most common challenges gardeners face. From powdery mildew to root rot, fungi can damage leaves, stems, flowers, and even entire plants. These microscopic invaders thrive in moist, warm, and poorly ventilated environments, and they can spread quickly if left unchecked.

Protecting your plants from fungal infections is essential for maintaining a healthy and productive garden. The good news is that with proper care, preventive measures, and timely interventions, you can significantly reduce the risk of fungus affecting your plants. In this guide, we’ll explore five effective ways to protect your plants from fungal problems.


1. Ensure Proper Plant Spacing and Air Circulation

Crowded plants create the perfect environment for fungal growth. Poor air circulation and excessive moisture on leaves encourage fungal spores to germinate.

Tips for Optimal Plant Spacing:

  • Follow spacing guidelines: Check seed packets or plant labels for recommended distances between plants.
  • Prune regularly: Remove overcrowded branches and leaves to improve airflow.
  • Use raised beds or containers: Elevating plants reduces soil moisture and promotes better drainage.

Why It Works:
Good airflow prevents humidity buildup on leaves, which reduces the likelihood of fungal infections like powdery mildew and downy mildew.

Tip: Position taller plants to the north or east side of shorter plants to maximize sunlight penetration and airflow.


2. Water Plants Correctly

Overwatering or watering at the wrong time can make plants highly susceptible to fungal infections. Fungal spores thrive on wet leaves and saturated soil.

Best Practices for Watering:

  • Water at the base: Avoid overhead watering that wets leaves and stems.
  • Water early in the day: Morning watering allows leaves to dry quickly, reducing fungal growth.
  • Check soil moisture: Only water when the top inch of soil feels dry.

Why It Works:
Keeping foliage dry and soil well-drained prevents fungal spores from establishing and spreading.

Tip: Use a drip irrigation system for larger gardens—it delivers water directly to the roots and keeps leaves dry.


3. Apply Natural or Homemade Fungicides

Fungicides can help control existing fungal infections and prevent future outbreaks. While chemical fungicides exist, natural alternatives are safer for the environment and beneficial insects.

Effective Natural Fungicides:

  • Neem oil: Works as both a fungicide and insecticide. Mix with water and spray on leaves.
  • Baking soda solution: Mix 1 teaspoon of baking soda, 1 quart of water, and a few drops of liquid soap. Spray weekly to prevent powdery mildew.
  • Garlic or chamomile tea spray: Acts as a natural antifungal agent.

Application Tips:

  • Spray thoroughly on both leaf surfaces.
  • Reapply after heavy rain.
  • Test on a small leaf first to ensure no damage occurs.

Why It Works:
Natural compounds disrupt fungal cell growth and reduce spore viability, preventing infection before it spreads.


4. Practice Good Garden Hygiene

Fungal spores can survive on dead leaves, plant debris, and contaminated soil. Maintaining a clean garden environment is essential for disease prevention.

Key Hygiene Practices:

  • Remove dead or infected plant material promptly.
  • Sanitize gardening tools with rubbing alcohol or bleach solution.
  • Rotate crops: Avoid planting the same species in the same soil each season.
  • Compost carefully: Ensure compost is fully decomposed before applying to garden beds.

Why It Works:
Eliminating potential sources of fungal spores reduces the chances of infection and keeps your garden healthy.

Tip: Dispose of infected plant material far from your garden to avoid spreading spores.


5. Choose Disease-Resistant Plant Varieties

Starting with healthy, disease-resistant plants gives you a significant advantage against fungal infections. Many modern plant varieties are bred specifically to resist common fungal diseases.

How to Select Resistant Plants:

  • Check seed packets or plant tags for resistance information.
  • Research local varieties adapted to your climate and common garden diseases.
  • Rotate plant species to prevent soil-borne fungi from building up.

Why It Works:
Disease-resistant plants are less likely to develop fungal infections, reducing the need for repeated chemical or natural interventions.

Tip: Even resistant plants benefit from proper spacing, watering, and hygiene practices.


Additional Tips for Fungus-Free Gardens

  • Mulch appropriately: Use organic mulch to retain soil moisture, but avoid touching stems and leaves, which can trap moisture.
  • Monitor regularly: Inspect plants weekly for early signs of disease, such as discoloration or leaf spots.
  • Use proper soil amendments: Well-draining, nutrient-rich soil supports plant immunity.
  • Control humidity in greenhouses: Open vents and use fans to maintain air circulation.
  • Avoid over-fertilization: Excess nitrogen can encourage soft, succulent growth that is more susceptible to fungus.

Tip: Early detection and consistent preventive measures are far more effective than attempting to treat severe fungal infections later.


Conclusion

Fungal infections can quickly ruin a garden, but with the right preventive strategies, you can protect your plants naturally and effectively.

  • Proper spacing and airflow reduce humidity around plants.
  • Careful watering practices prevent wet leaves and saturated soil.
  • Natural fungicides help control and prevent infections safely.
  • Good garden hygiene minimizes fungal spore buildup.
  • Disease-resistant varieties give plants a natural advantage.

By combining these five approaches with regular monitoring and attention, you can enjoy a healthy, lush, and productive garden year-round. Fungi may be persistent, but with preparation and care, your plants can thrive without being overtaken by disease.

The Best Homemade Spray for Spider Mites

The Best Homemade Spray for Spider Mites

Spider mites are tiny, eight-legged pests that can wreak havoc on houseplants, vegetables, and ornamental plants. They feed on plant sap, causing yellowing, stippling, and leaf drop, and can reproduce rapidly in warm, dry conditions. While chemical pesticides are available, they often harm beneficial insects and may leave residues on your plants. The good news is that you can control spider mites naturally with a homemade spray—safe, effective, and easy to make.

In this article, we’ll explore why spider mites are so destructive, the signs of infestation, and the best homemade sprays and application techniques to keep them under control.


Understanding Spider Mites

Spider mites are not insects but arachnids, related to spiders and ticks. They are less than 1 mm long, making them nearly invisible to the naked eye. Despite their size, they can cause significant damage:

  • Feeding damage: They pierce plant cells and suck out the sap, leaving tiny yellow or white speckles on leaves.
  • Webbing: Severe infestations produce fine, silken webs covering leaves and stems.
  • Rapid reproduction: Spider mites lay eggs that hatch quickly, making infestations grow fast.

Plants Commonly Affected:

  • Houseplants like ficus, hibiscus, and ivy
  • Vegetables such as tomatoes, cucumbers, and peppers
  • Ornamentals like roses, marigolds, and chrysanthemums

Understanding their biology and preferred conditions (hot, dry environments) is key to controlling them effectively.


Signs of Spider Mite Infestation

Early detection is crucial for controlling spider mites. Common signs include:

  • Stippled or speckled leaves: Small yellow or white spots appear, starting on older leaves.
  • Webbing on leaves and stems: Especially in severe infestations.
  • Leaf discoloration and drop: Leaves may turn yellow, bronze, or brown and fall off prematurely.
  • Tiny moving dots: Spider mites are so small you may need a magnifying glass to see them on leaf undersides.

Ignoring these signs allows the mites to multiply, potentially killing the plant over time.


The Best Homemade Sprays for Spider Mites

Several natural ingredients can effectively control spider mites. Homemade sprays work by smothering mites, disrupting their feeding, or repelling them without harming your plants.

1. Soap and Water Spray

Ingredients:

  • 1–2 teaspoons mild liquid soap (like castile soap)
  • 1 quart (4 cups) of water

How to Make:

  1. Mix the soap with water in a spray bottle.
  2. Shake well to ensure even distribution.

How It Works:
Soap breaks down the outer protective coating of spider mites, causing them to dehydrate and die.

Application Tips:

  • Spray the undersides of leaves where spider mites hide.
  • Apply every 3–4 days until the infestation is under control.
  • Test on a small leaf first to ensure the plant doesn’t react adversely.

2. Neem Oil Spray

Ingredients:

  • 1–2 teaspoons neem oil
  • 1 quart water
  • Few drops of mild liquid soap

How to Make:

  1. Combine neem oil, water, and soap in a spray bottle.
  2. Shake well before each use.

How It Works:
Neem oil is a natural pesticide that disrupts the feeding and reproductive cycles of spider mites. It also has antifungal properties, making it a multi-purpose plant protector.

Application Tips:

  • Spray thoroughly on all plant surfaces, especially leaf undersides.
  • Apply in the morning or late afternoon to avoid sunburn.
  • Reapply weekly for ongoing protection.

3. Garlic and Pepper Spray

Ingredients:

  • 2 cloves garlic
  • 1 small chili pepper (optional for extra potency)
  • 1 quart water
  • Few drops of soap

How to Make:

  1. Blend garlic and chili with water.
  2. Let the mixture sit for a few hours.
  3. Strain and add a few drops of liquid soap.
  4. Pour into a spray bottle.

How It Works:
Garlic contains sulfur compounds that repel spider mites, while chili adds extra deterrent properties. The soap helps the mixture adhere to leaves.

Application Tips:

  • Spray every few days on affected plants.
  • Avoid spraying in direct sunlight to prevent leaf burn.

4. Alcohol Spray (For Severe Infestations)

Ingredients:

  • 1 part rubbing alcohol (70% isopropyl)
  • 3 parts water
  • Optional: few drops of mild soap

How to Make:

  1. Mix alcohol and water in a spray bottle.
  2. Add soap if desired.

How It Works:
Alcohol dehydrates and kills spider mites on contact.

Application Tips:

  • Spray lightly and avoid overuse to prevent damaging leaves.
  • Test on a small leaf before full application.
  • Use mainly for stubborn infestations or small plants.

Best Practices When Using Homemade Sprays

  1. Target the undersides of leaves: Spider mites prefer hiding there, so thorough coverage is essential.
  2. Regular application: Repeat every 3–7 days until mites are gone.
  3. Timing matters: Apply early in the morning or late afternoon to avoid leaf burn.
  4. Combine methods: Using neem oil and soap sprays alternately can be more effective.
  5. Clean affected leaves: Rinse plants occasionally to remove webs and eggs before spraying.

Additional Tips to Prevent Spider Mites

Preventing infestations is easier than dealing with them after they appear. Here’s what you can do:

  • Maintain humidity: Spider mites thrive in dry conditions, so misting indoor plants can discourage them.
  • Regular inspection: Check leaves, especially undersides, weekly for early signs.
  • Isolate new plants: Quarantine new additions to prevent introducing mites.
  • Remove heavily infested leaves: Dispose of them away from the garden.
  • Encourage natural predators: Ladybugs, predatory mites, and lacewings feed on spider mites naturally.

Conclusion

Spider mites may be tiny, but their impact on plants can be significant. The best way to deal with them is through early detection and consistent control. Homemade sprays—like soap and water, neem oil, garlic-chili, and alcohol solutions—offer safe, natural, and effective ways to eliminate spider mites without harming your plants, beneficial insects, or the environment.

By following the tips outlined in this guide, you can protect your plants, maintain healthy growth, and enjoy a beautiful, thriving garden—all while avoiding harsh chemical pesticides. Consistency, thorough application, and preventive care are the keys to keeping spider mites at bay.