Grow Green Peas Fast at Home: Transform Useless Plastic Buckets into a Productive Garden

Grow Green Peas Fast at Home: Transform Useless Plastic Buckets into a Productive Garden

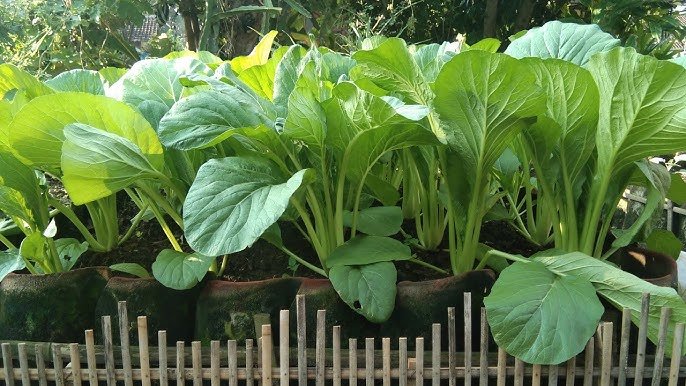
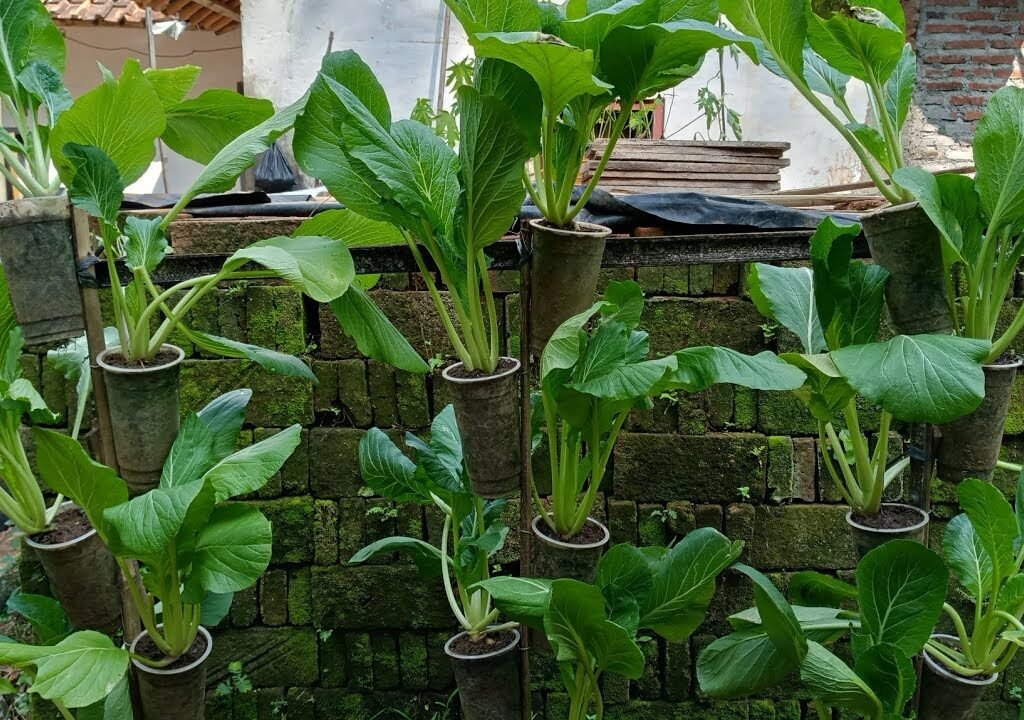
Growing your own vegetables at home has become increasingly popular, especially for urban dwellers with limited space. One vegetable that is both nutritious and easy to grow is the green pea. With the right techniques, even a simple, “useless” plastic bucket can be transformed into a thriving pea garden. Not only does this method save money and space, but it also allows you to enjoy fresh, home-grown peas in record time. In this article, we will explore how to fast-grow green peas at home using discarded plastic buckets and simple, practical steps.


Why Grow Green Peas at Home?

Green peas are a powerhouse of nutrition. They are packed with protein, fiber, vitamins, and minerals, making them a perfect addition to your daily diet. Growing them at home has several advantages:

  1. Freshness and Flavor: Home-grown peas are sweeter and more flavorful than store-bought ones.
  2. Cost-Effective: Buying peas from the market can be expensive, especially when purchased fresh. Growing them at home reduces these costs.
  3. Chemical-Free Produce: By growing peas yourself, you have full control over fertilizers and pesticides, ensuring safe and healthy vegetables.
  4. Fun and Educational: Gardening at home is an engaging activity that can be both fun and educational for children and adults alike.

Why Use Plastic Buckets?

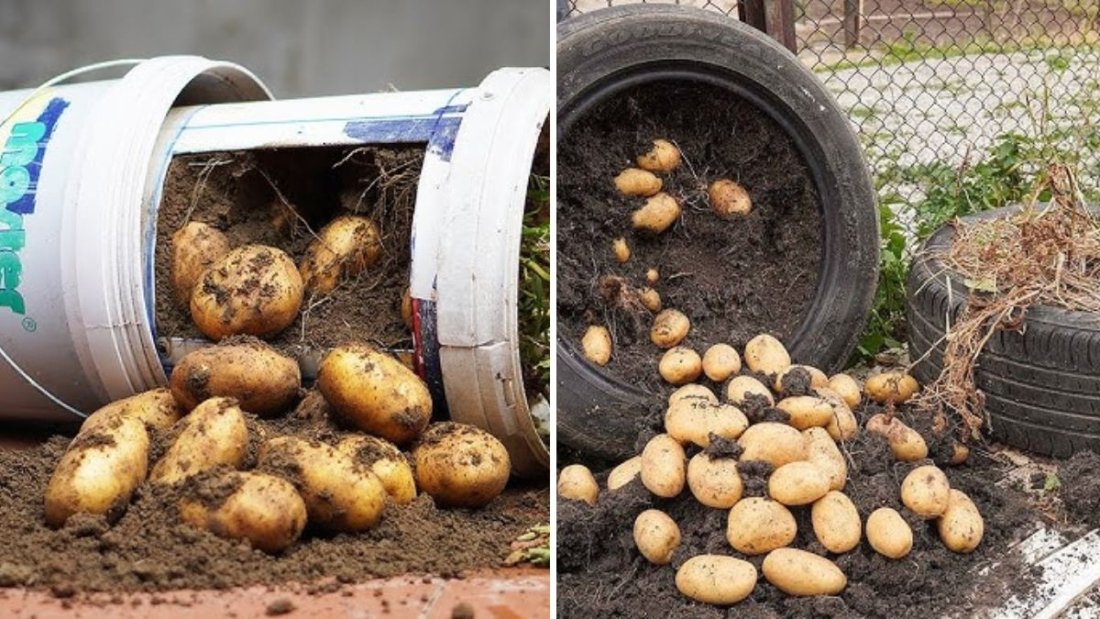
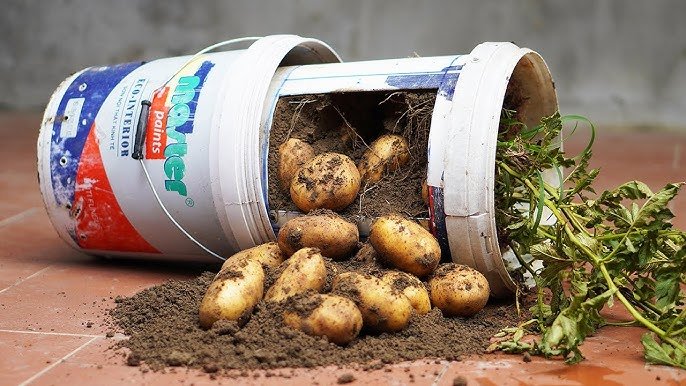
Plastic buckets are often considered waste after their initial use. Instead of throwing them away, you can recycle them to grow vegetables like green peas.

Benefits of Using Plastic Buckets:

  • Affordable and Accessible: Most households have spare plastic buckets, making them a low-cost gardening solution.
  • Space-Saving: Buckets can be placed on balconies, terraces, or small yards, making them ideal for urban gardening.
  • Portable: Unlike in-ground gardens, bucket gardens can be moved to catch sunlight or protect plants from extreme weather.
  • Reusable: Buckets can be reused for multiple growing seasons with proper cleaning and maintenance.

Step-by-Step Guide to Fast-Grow Green Peas in Plastic Buckets

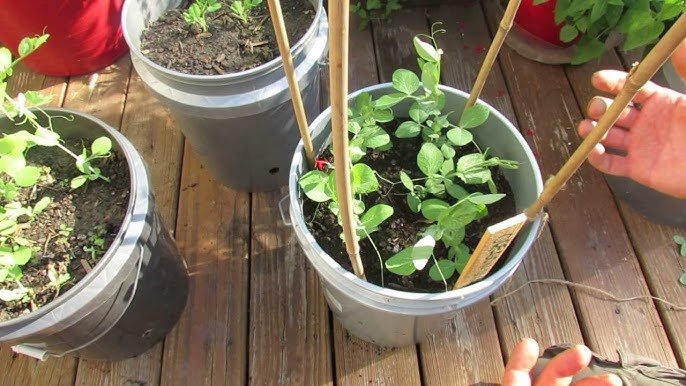
1. Selecting the Right Bucket

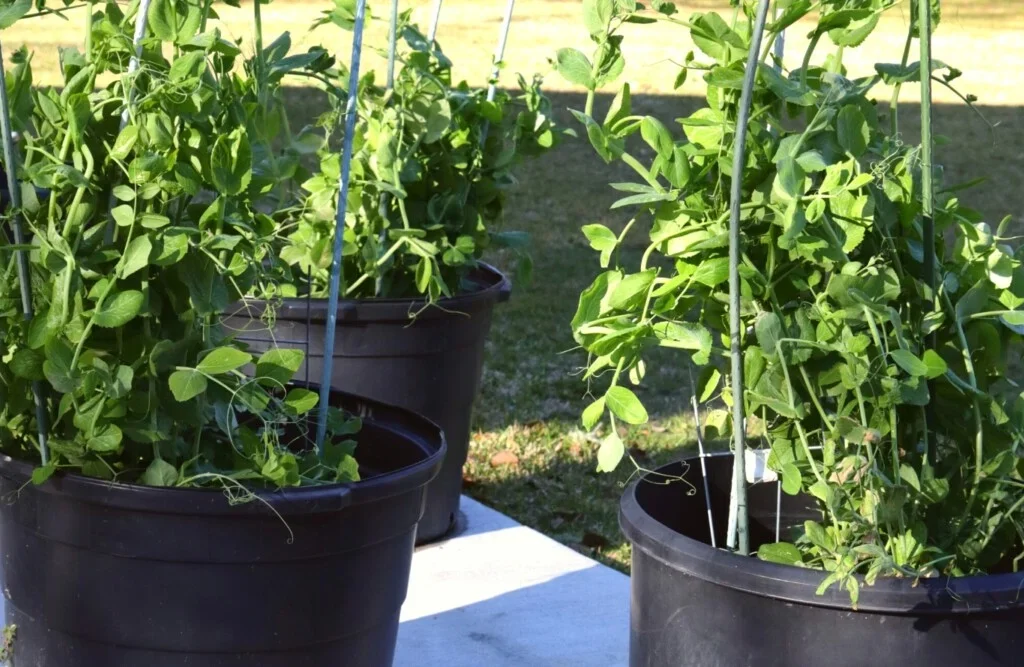
Choose a bucket that is at least 12 inches deep and has a wide base. This allows the roots to grow properly and provides enough space for soil and nutrients. Any discarded plastic bucket from household use, like detergent or paint containers, can be repurposed after cleaning thoroughly.

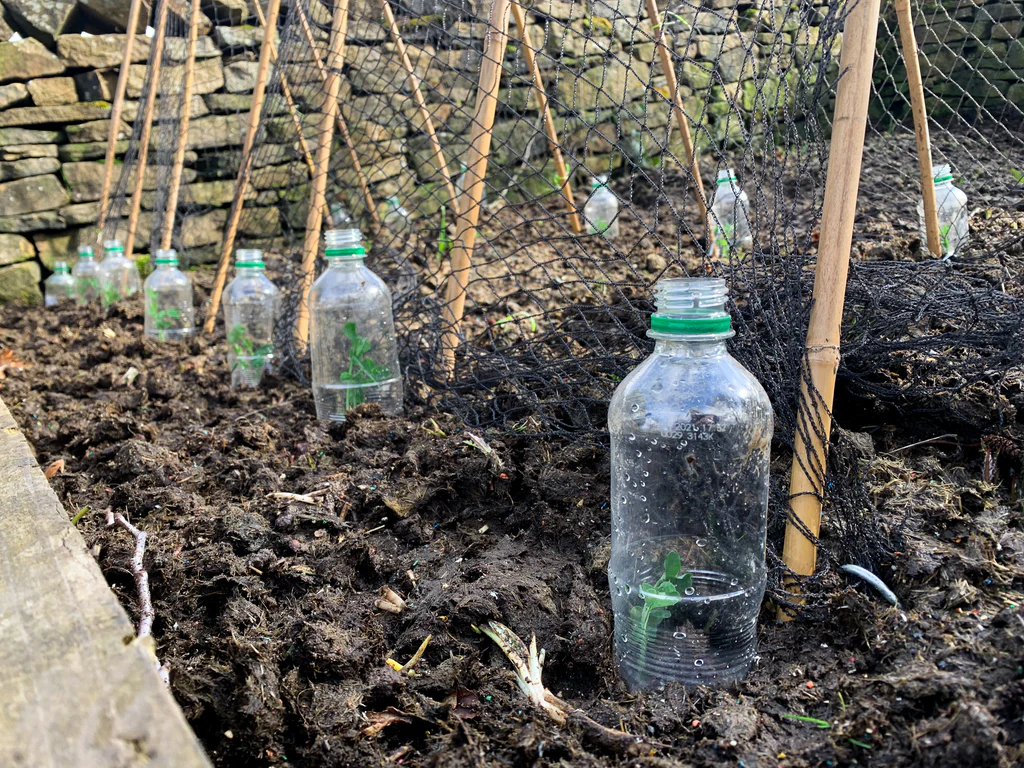
Tip: Drill 4-6 holes at the bottom for drainage. Proper drainage prevents waterlogging, which can damage the roots and stunt growth.


2. Preparing the Soil

Green peas thrive in nutrient-rich, well-draining soil. You can prepare a simple potting mix using:

  • 2 parts garden soil
  • 1 part compost or organic manure
  • 1 part sand (to improve drainage)

Mix these ingredients thoroughly. The compost provides essential nutrients, while the sand ensures the soil doesn’t retain excess water. Avoid using heavy clay soil, as it can restrict root growth.


3. Sowing the Seeds

Green pea seeds are easy to germinate. Here’s how to sow them in your bucket:

  1. Fill the bucket with the prepared soil mix, leaving 2 inches from the top.
  2. Make small holes about 1 inch deep and 2-3 inches apart.
  3. Place one seed in each hole and cover gently with soil.
  4. Water the seeds lightly.

Pro Tip: Soak pea seeds overnight before planting. This softens the seed coat and speeds up germination, ensuring faster growth.


4. Positioning Your Bucket Garden

Green peas require at least 4-6 hours of sunlight daily for optimal growth. Place your bucket garden in a sunny spot, like a balcony, terrace, or near a window that receives plenty of light.

If sunlight is limited, consider using reflective surfaces or indoor grow lights to supplement light for faster growth.


5. Watering and Fertilizing

Consistent watering is crucial for fast-growing green peas. Keep the soil moist but not soggy. Overwatering can lead to root rot, while under-watering slows growth.

Tips for Watering:

  • Water early in the morning or late in the evening to reduce evaporation.
  • Use a small watering can to avoid disturbing the seeds or seedlings.

Fertilizing helps your pea plants grow faster. Use organic fertilizers or compost tea once every 2-3 weeks. Avoid chemical fertilizers, as peas are sensitive and may get damaged.


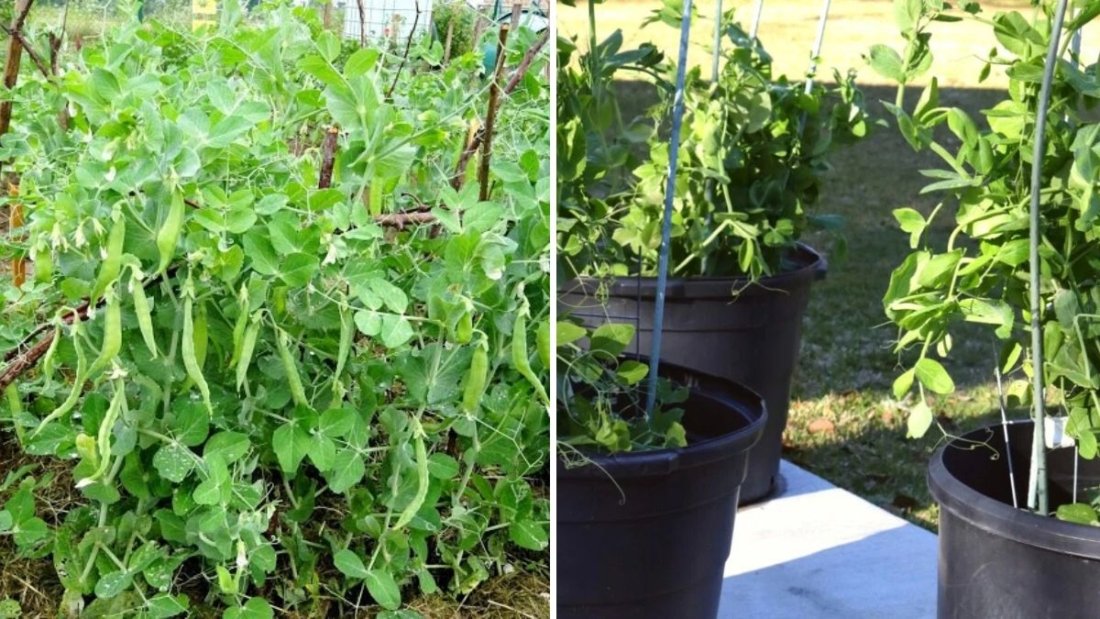
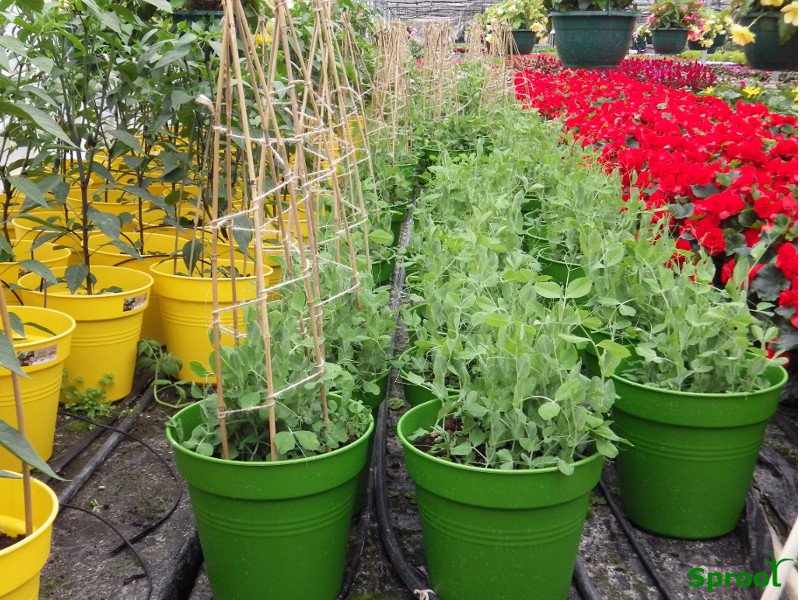
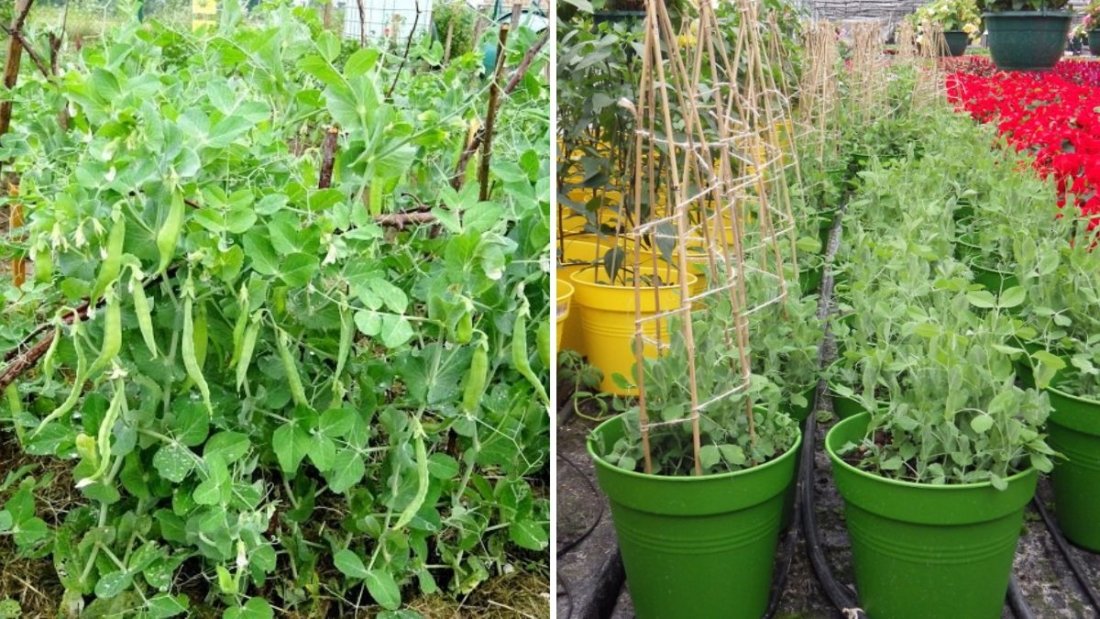
6. Supporting the Plants

Green peas are climbing plants. Even in a bucket, they will need support to grow vertically. This helps the plant produce more pods and keeps them off the soil, reducing disease risk.

Support Ideas:

  • Bamboo sticks arranged in a teepee shape
  • Trellis nets
  • Strings or wires attached to a wall or railing

Training the pea plants to climb these supports will encourage healthy, fast growth and increase yield.


7. Pest and Disease Management

Pea plants can attract pests like aphids or diseases such as powdery mildew. Early monitoring is key to preventing infestations.

Organic Pest Control Tips:

  • Spray neem oil solution once every 10-15 days to control pests.
  • Use a mixture of garlic and water as a natural pesticide.
  • Remove damaged leaves or diseased parts immediately to prevent spread.

Maintaining proper airflow by arranging supports and not overcrowding plants also helps reduce disease risk.


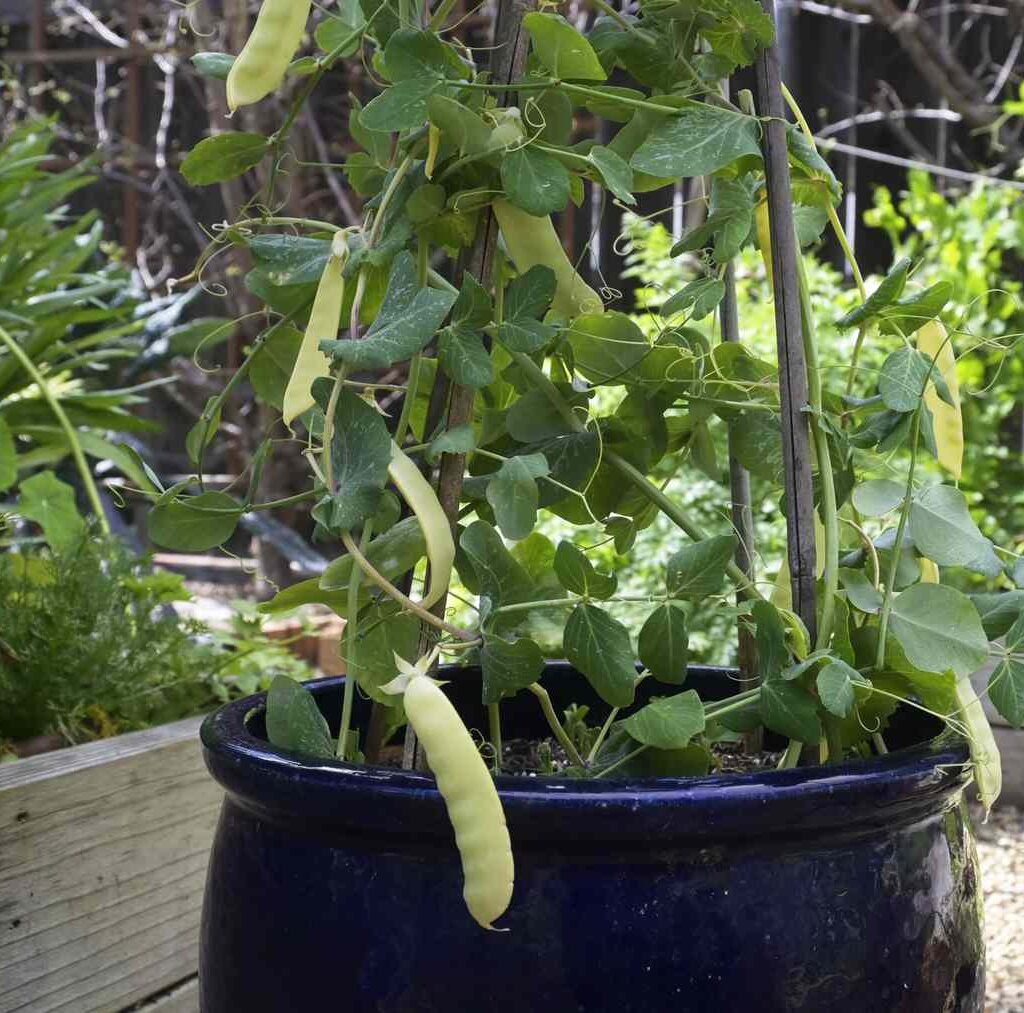
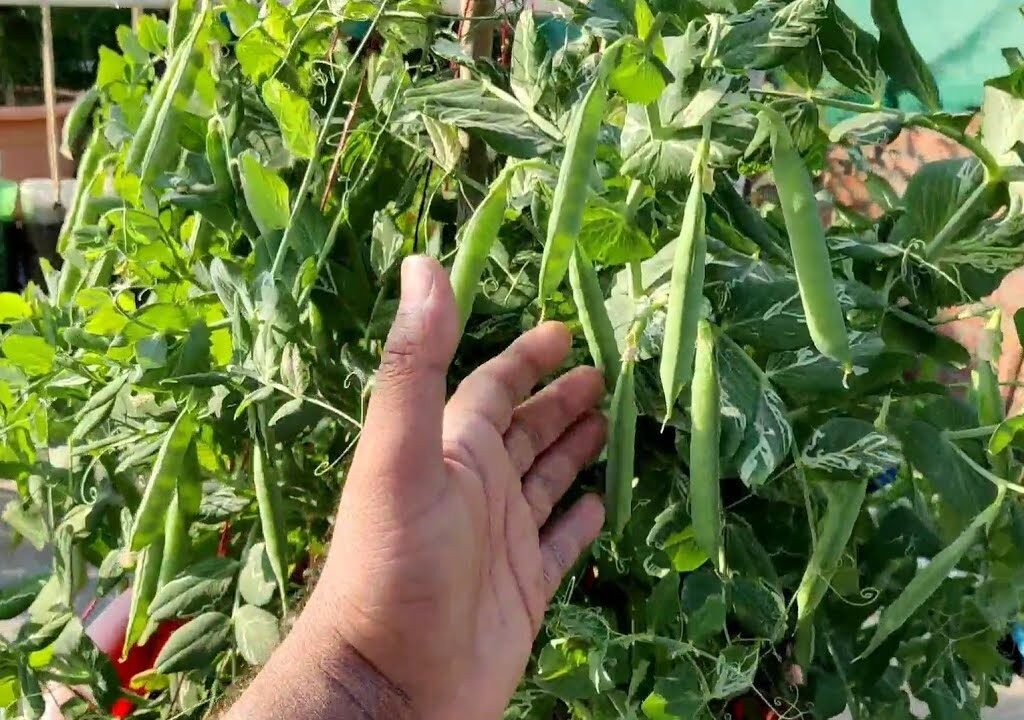
8. Harvesting Your Green Peas

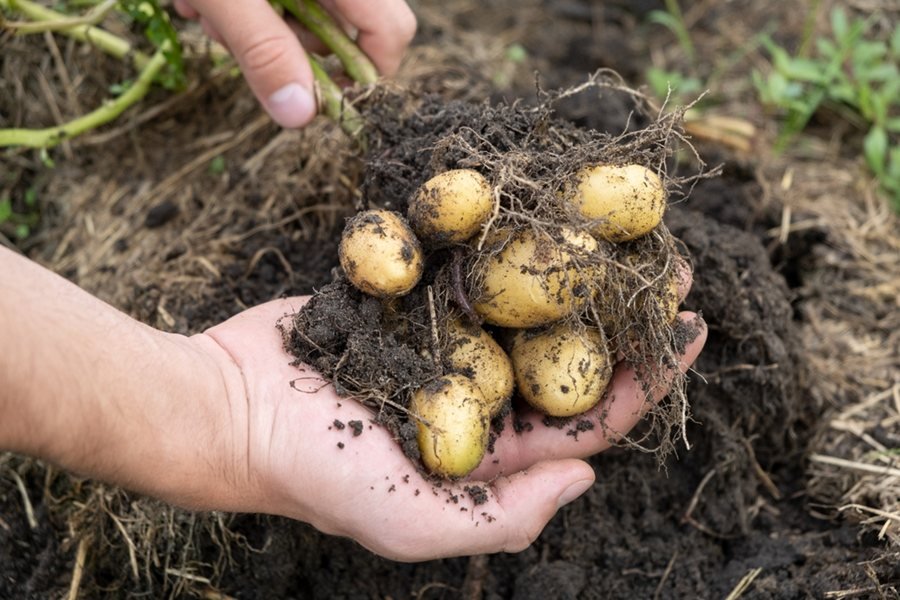
Green peas grow fast, and you can start harvesting within 50-60 days after sowing, depending on the variety. Harvest regularly to encourage the plant to produce more pods.

Tips for Harvesting:

  • Pick pods when they are plump but still tender.
  • Avoid letting pods over-ripen on the plant, as it slows further production.
  • Use clean hands or scissors to avoid damaging the plant while harvesting.

Freshly harvested peas can be eaten raw, added to salads, or cooked in your favorite dishes.


Advantages of Using Plastic Buckets for Fast-Growing Peas

  1. Rapid Growth: With proper soil, sunlight, and watering, peas in buckets grow faster than in-ground gardens.
  2. Urban-Friendly: Ideal for apartments or homes with limited outdoor space.
  3. Sustainability: Recycling plastic buckets reduces waste and contributes to eco-friendly gardening.
  4. Easy Management: Monitoring growth, watering, and harvesting is easier in buckets.

Creative Ideas for Bucket Pea Gardening

  • Stacked Buckets: For more vertical space, you can stack multiple buckets with drainage holes. Make sure water can reach lower levels efficiently.
  • Decorative Buckets: Paint old buckets or decorate them to add aesthetic value to your balcony or terrace garden.
  • Companion Planting: Plant herbs like mint or coriander around peas to repel pests naturally.

Final Thoughts

Growing green peas at home using “useless” plastic buckets is a simple, cost-effective, and eco-friendly gardening method. It allows anyone, even beginners, to cultivate fresh, nutritious vegetables in a short period. With proper preparation, consistent care, and smart use of space, you can enjoy a bountiful harvest of green peas all year round.

This technique not only transforms discarded items into productive gardens but also empowers you to take control of your food, save money, and contribute to sustainable living. Start today, and you’ll be amazed at how fast and efficiently your green pea plants grow in those humble plastic buckets!

Effortless Gardening: How Beginners Can Grow Peas Without Watering

Effortless Gardening: How Beginners Can Grow Peas Without Watering

Gardening is a rewarding hobby, but for beginners, the thought of constant watering and plant care can seem overwhelming. What if you could grow peas without the daily hassle of watering? Yes, it’s possible! With the right techniques, materials, and planning, even a beginner can cultivate healthy, thriving pea plants without the need for daily irrigation. This article explores the step-by-step method for growing peas for beginners without watering, making gardening simple, sustainable, and incredibly satisfying.


Why Grow Peas?

Green peas are one of the most versatile and nutritious vegetables you can grow at home. Packed with protein, fiber, vitamins, and minerals, they are ideal for soups, salads, stir-fries, or as a fresh snack straight from the garden.

Growing peas has several advantages for beginners:

  1. Fast Growth: Peas germinate and grow quickly, offering a rewarding harvest in a short time.
  2. Low Maintenance: Once established, peas can thrive with minimal care, especially using self-watering or water-retention methods.
  3. Eco-Friendly: Growing your own peas reduces dependency on store-bought produce, lowering your carbon footprint.
  4. Beginner-Friendly: Peas are resilient and can grow in a variety of containers and soil types, making them perfect for first-time gardeners.

How Is It Possible to Grow Peas Without Watering?

The secret lies in water-retentive gardening techniques. By creating an environment that retains moisture and provides nutrients naturally, peas can grow without daily watering. There are a few key methods to achieve this:

  1. Using Self-Watering Containers: These containers have a built-in water reservoir that supplies water to the plant roots gradually.
  2. Mulching: A thick layer of organic mulch over the soil keeps moisture from evaporating and maintains a consistent temperature.
  3. Water-Absorbing Soil Additives: Materials like vermiculite, coco peat, or hydrogel crystals absorb water and release it slowly to the plant roots.
  4. Recycled Water Methods: Capturing and using rainwater or leftover water from cooking vegetables can also support growth without additional watering.

By combining these methods, you can create a self-sustaining growing environment for peas.


Step-by-Step Guide to Growing Peas Without Watering

1. Choosing the Right Container

For beginners, containers are the easiest way to start. You can use pots, buckets, or any recycled containers with good depth (at least 12 inches) for root growth. If possible, select containers with a self-watering mechanism or the potential to add one using a simple DIY method.

DIY Tip: Drill small holes in a container, place a smaller pot inside with a gap, and fill the gap with water-absorbing material like coco peat. This will create a basic self-watering system.


2. Preparing the Soil

Peas grow best in well-draining, nutrient-rich soil. Mix the following for an ideal planting medium:

  • 2 parts garden soil
  • 1 part compost or organic manure
  • 1 part coco peat or vermiculite

This mix retains moisture without becoming waterlogged. Peas do not like soggy soil, so it’s important to balance water retention with drainage.

Pro Tip: Pre-soak pea seeds in water for 8-12 hours before planting. This accelerates germination and kickstarts growth without needing daily watering.


3. Sowing the Seeds

  1. Fill your container with the prepared soil, leaving 2 inches from the top.
  2. Create shallow holes about 1 inch deep and place seeds 2-3 inches apart.
  3. Cover the seeds lightly with soil and gently press down.

If you are using a self-watering setup, the seeds will draw moisture from the reservoir as needed. For mulch-based methods, cover the soil with a 1-2 inch layer of straw, dried leaves, or shredded coconut husk to lock in moisture.


4. Choosing the Right Location

Peas need at least 4-6 hours of sunlight per day to thrive. Place your container in a sunny spot, like a balcony, terrace, or windowsill.

For beginners without consistent outdoor space, a south-facing window or supplemental grow lights can help provide enough light. Proper sunlight ensures healthy growth and reduces the risk of disease.


5. Using Mulch to Reduce Watering

Mulching is key to growing peas without frequent watering. Organic mulches such as straw, hay, leaves, or shredded coconut husk serve multiple purposes:

  • Retains moisture in the soil
  • Regulates soil temperature
  • Suppresses weed growth
  • Adds organic matter as it decomposes

Apply a 1-2 inch layer of mulch immediately after sowing the seeds. Keep the mulch intact throughout the growing season, topping it up if it decomposes too quickly.


6. Supporting Your Pea Plants

Peas are climbing plants, so they need support to grow upright. Even in containers, you should provide:

  • Bamboo sticks arranged in a teepee or pyramid shape
  • Trellis nets attached to walls or balcony railings
  • Strings or wires for vertical growth

Proper support not only keeps plants healthy but also reduces soil contact, lowering disease risks. It also makes harvesting easier.


7. Nutrient Management

Even without frequent watering, peas need nutrients to grow quickly. Organic fertilizers like compost tea, vermicompost, or liquid manure can be applied once every 2-3 weeks. Avoid chemical fertilizers in self-watering setups, as concentrated nutrients can harm the plant.


8. Pest and Disease Control

Peas can attract aphids, powdery mildew, or fungal infections. In water-less setups, maintaining airflow and spacing is crucial.

Organic Pest Control Tips:

  • Spray a diluted neem oil solution every 10 days
  • Use garlic or chili water sprays to repel pests naturally
  • Remove infected leaves promptly to prevent spread

Mulching and proper support also reduce humidity-related diseases, which is especially important when watering is minimal.


9. Harvesting Your Peas

Fast-growing pea varieties can be harvested within 50-60 days. To ensure continuous production:

  • Harvest regularly when pods are plump but tender
  • Avoid leaving peas to over-mature, as this can slow further pod production
  • Use clean hands or scissors to minimize damage to the plant

Freshly picked peas are ideal for cooking, salads, and even freezing for later use.


Advantages of Growing Peas Without Watering

  1. Beginner-Friendly: Requires minimal attention and is perfect for busy schedules.
  2. Saves Water: Ideal for areas with water scarcity or for gardeners looking to conserve water.
  3. Eco-Friendly: Promotes sustainable gardening and reduces the need for plastic packaging from store-bought peas.
  4. Faster Growth: Moisture-retentive methods ensure plants get consistent hydration, leading to healthier and faster-growing peas.

Tips for Beginner Gardeners

  • Choose the Right Variety: Opt for fast-growing or dwarf pea varieties for container gardening.
  • Monitor Soil Moisture: Even self-watering setups need occasional checks to ensure the soil isn’t too dry or soggy.
  • Rotate Crops: After harvesting peas, consider rotating with other nitrogen-fixing plants or vegetables to maintain soil health.
  • Experiment with Container Sizes: Larger containers allow more roots and better growth.

Final Thoughts

Growing peas without watering may seem impossible, but with the right combination of self-watering systems, water-retentive soil, and mulching, it’s entirely achievable. For beginners, this method simplifies gardening, reduces maintenance, and makes growing fresh, home-grown peas a fun and rewarding experience.

Not only does this approach save time and effort, but it also conserves water, promotes sustainability, and ensures a bountiful harvest for your table. With patience and consistent care, even those new to gardening can enjoy a thriving pea crop without the hassle of daily watering.

Start today, implement these techniques, and discover the joy of effortless, productive gardening right at home.

Home Gardening: How to Grow Passion Fruit at Home for Unbelievable Productivity

Home Gardening: How to Grow Passion Fruit at Home for Unbelievable Productivity

Passion fruit, known for its sweet-tart flavor, aroma, and nutritional benefits, is a favorite among fruit lovers. Rich in vitamin C, antioxidants, fiber, and essential minerals, it supports immunity, digestion, and overall health.

Despite its popularity, many people think passion fruit is difficult to grow at home. However, the YouTube video “Home gardening | Growing passion fruit at home is surprising because of its unbelievable productivity” shows that with the right methods, care, and support, passion fruit can be highly productive, even in small spaces.

This guide will walk you through step-by-step techniques for growing passion fruit at home and tips to maximize yields, ensuring a bountiful and delicious harvest.


Why Grow Passion Fruit at Home?

Homegrown passion fruit offers several advantages:

  1. Fresh and Nutritious: Fruits are free from pesticides and chemicals.
  2. Cost-Effective: Save money compared to buying from the market.
  3. Space-Saving: Can grow on trellises, walls, or small backyard spaces.
  4. Highly Productive: Proper care yields dozens of fruits per vine.
  5. Aromatic and Delicious: Homegrown fruits are sweeter and more flavorful.

With these benefits, passion fruit is ideal for home gardeners who want maximum yield in minimal space.


Step 1: Selecting the Right Variety

Choosing the right variety ensures high yield and flavor:

  • Purple Passion Fruit: Sweet flavor, compact growth, suitable for small gardens.
  • Yellow Passion Fruit: High productivity, large fruits, slightly tart taste.
  • Hybrid Varieties: Disease-resistant and high-yielding.

Purchase certified seeds or seedlings from a reputable nursery for better growth and fruiting.


Step 2: Choosing a Suitable Location

Passion fruit vines require sunlight, support, and space to climb:

  • Full sun: At least 6–8 hours of direct sunlight daily.
  • Protection from strong winds, which can damage flowers and fruits.
  • Well-draining soil to prevent waterlogging and root rot.

The right location ensures vigorous growth and abundant flowering.


Step 3: Preparing the Soil

Passion fruit prefers loamy, fertile, and well-draining soil:

Recommended Soil Mix:

  • 40% garden soil
  • 30% compost or well-rotted manure
  • 20% cocopeat or peat moss for moisture retention
  • 10% sand for drainage

Optional: Add bone meal or rock phosphate to encourage flowering and fruit development.


Step 4: Planting Passion Fruit Seedlings or Seeds

For Seedlings:

  1. Dig a hole slightly larger than the root ball.
  2. Place the seedling and fill with soil, firming gently.
  3. Water immediately to settle the soil around roots.

For Seeds:

  1. Soak seeds overnight for faster germination.
  2. Sow in small containers with a moist soil mix.
  3. Transplant seedlings when they have 3–4 true leaves.

Proper planting ensures strong root systems and rapid vine establishment.


Step 5: Providing Vertical Support

Passion fruit is a climbing vine, so vertical support is essential:

  • Use trellises, bamboo poles, fences, or walls for vines to climb.
  • Tie young shoots gently to the support with soft strings.
  • Allow vines to spread horizontally for maximum flowering and fruiting.

Support not only improves yield but also prevents diseases by keeping leaves and fruits off the ground.


Step 6: Watering and Moisture Management

Consistent watering is key for healthy flowering and fruit development:

  • Water 2–3 times a week, adjusting based on rainfall and temperature.
  • Avoid waterlogging, which can cause root rot.
  • Mulch around the base with straw, leaves, or grass to retain soil moisture.

Proper watering ensures larger, juicier, and more numerous fruits.


Step 7: Fertilization for High Yield

Passion fruit is nutrient-demanding, especially during flowering and fruiting:

  • Apply organic fertilizers like vermicompost or cow dung slurry every 2–3 weeks.
  • Use potash-rich fertilizers to encourage flowering and fruit size.
  • Avoid excessive nitrogen, as it promotes leafy growth at the expense of flowers.

Balanced fertilization leads to more flowers, stronger vines, and high fruit productivity.


Step 8: Pruning and Training the Vine

Regular pruning improves air circulation, sunlight penetration, and productivity:

  • Remove dead or weak branches to direct energy toward fruiting shoots.
  • Trim excessive lateral shoots that crowd the vine.
  • Train the main vine along trellis or support to encourage horizontal growth.

Pruning helps maintain healthy, high-yielding vines.


Step 9: Pollination for Maximum Fruit Set

Pollination is critical for fruiting:

  • Encourage bees and pollinators by planting flowers nearby.
  • In areas with low pollinator activity, gently shake flowers or use a brush to transfer pollen.
  • Proper pollination increases fruit set and overall yield.

Healthy flowers and pollination result in more and larger fruits.


Step 10: Pest and Disease Management

Passion fruit can encounter pests and diseases, even in home gardens:

ProblemSolution
Fruit fliesCover fruits with mesh bags or use traps
AphidsSpray neem oil or mild soap solution
Fungal diseasesPrune crowded vines and ensure good airflow
Leaf spotRemove affected leaves and apply organic fungicide

Regular monitoring ensures healthy, productive vines.


Step 11: Harvesting Passion Fruit

Harvesting is straightforward:

  • Fruits are ready when they change color (purple or yellow depending on variety) and feel slightly soft.
  • Gently twist or cut fruits from the vine.
  • Regular harvesting encourages continuous flowering and fruiting.

Homegrown passion fruits are aromatic, juicy, and full of flavor, perfect for fresh consumption, juices, or desserts.


Step 12: Tips for Continuous High Productivity

  • Succession Planting: Plant new seedlings to maintain continuous harvest.
  • Proper Fertilization: Maintain nutrient levels during flowering and fruiting.
  • Mulching: Conserves moisture and reduces weed competition.
  • Regular Monitoring: Detect pests and diseases early to prevent losses.

Following these tips ensures unbelievable productivity that surprises friends and family.


Step 13: Benefits of Growing Passion Fruit at Home

  • Freshness: Enjoy fruit straight from the vine.
  • Cost Savings: Avoid buying premium fruit from markets.
  • Space Efficiency: Perfect for small spaces, terraces, and balconies.
  • High Yield: With care, one vine can produce dozens of fruits per season.
  • Sustainability: Home gardening reduces dependence on commercial farming and supports eco-friendly practices.

Passion fruit is not only delicious but also a rewarding and productive addition to any home garden.


Conclusion: Enjoy a Bountiful Passion Fruit Harvest at Home

Growing passion fruit at home is surprisingly easy and highly rewarding. By choosing the right variety, providing vertical support, proper watering, fertilization, pruning, and pest management, anyone can achieve unbelievable productivity even in small spaces.

Whether you have a backyard, terrace, or balcony, these methods ensure healthy, fruitful vines that yield dozens of sweet, aromatic fruits. Start your passion fruit garden today and enjoy the delicious taste and satisfaction of homegrown fruit!

How to Propagate Mango Trees Faster Using Egg and Chicken Methods: Best Tips for Successful Mango Cuttings

How to Propagate Mango Trees Faster Using Egg and Chicken Methods: Best Tips for Successful Mango Cuttings

Mango trees, often called the king of fruits, are prized not only for their delicious, sweet fruits but also for their shade, beauty, and cultural significance. Growing a mango tree from a seed or a cutting is rewarding, but many gardeners face the challenge of slow growth or low success rates when propagating mango cuttings.

The YouTube video “How To Propagate Mango Tree Cutting Faster With Egg Chicken! Best Ideas Propagating Mango Trees” reveals a fascinating and innovative method to accelerate mango cutting growth using natural ingredients like eggs and chicken manure. This guide explains step-by-step how to propagate mango trees faster at home, ensuring strong, healthy saplings that will bear fruit sooner.


Why Propagate Mango Trees from Cuttings?

While mango trees can be grown from seeds, using cuttings has several advantages:

  1. Faster Fruiting: Cuttings produce fruits earlier than seed-grown trees.
  2. Maintains Parent Traits: Ensures the new tree has the same fruit quality as the parent.
  3. Saves Space: Ideal for home gardens or terraces.
  4. Cost-Effective: Avoids purchasing expensive grafted plants from nurseries.

Using natural boosters like egg and chicken manure can further enhance rooting success and plant vigor.


Step 1: Selecting the Right Mango Cutting

The first step is choosing a healthy and suitable cutting:

  • Select a semi-hardwood branch (neither too young nor too old) from a mature mango tree.
  • The cutting should be about 12–18 inches long with at least 3–4 nodes.
  • Remove any flowers or fruit buds to allow energy to focus on root development.
  • Choose a disease-free branch for higher success.

Proper selection increases the chances of fast rooting and strong growth.


Step 2: Preparing the Cutting

  • Trim leaves by removing half of each leaf to reduce water loss.
  • Make a clean diagonal cut at the bottom to expose more area for rooting.
  • Lightly scrape the bark at the base to stimulate root formation.
  • Optional: Dust with natural rooting hormone or a homemade mix for faster results.

Preparation ensures the cutting can absorb nutrients and water efficiently, promoting quick rooting.


Step 3: Using Egg to Boost Root Growth

Eggs are a natural nutrient source rich in proteins, calcium, and vitamins, which support root development:

  • Crack an egg and mix the yolk and white into a paste.
  • Apply the mixture to the base of the cutting.
  • Eggs provide organic nutrients that strengthen root initiation and speed up growth.

Eggs are an affordable, natural, and eco-friendly method to enhance cutting propagation.


Step 4: Using Chicken Manure as Fertilizer

Chicken manure is rich in nitrogen, phosphorus, and potassium, which are essential for healthy root and shoot growth:

  • Mix well-aged chicken manure with soil or cocopeat in the planting container.
  • Place the cutting in this nutrient-rich medium, ensuring the base is well-covered.
  • Avoid using fresh manure, as it can burn the tender cutting.

Chicken manure provides sustained nutrients for faster rooting and vigorous saplings.


Step 5: Choosing the Right Planting Medium

A proper medium ensures aeration, drainage, and nutrient availability:

  • Cocopeat or peat moss retains moisture without waterlogging.
  • Sand improves drainage and prevents fungal issues.
  • Composted soil adds organic nutrients and beneficial microorganisms.

Mix equal parts of these components for the ideal rooting medium.


Step 6: Planting the Mango Cutting

  • Insert the cutting 4–6 inches deep into the prepared medium.
  • Firm the soil gently around the base to support the cutting.
  • Ensure at least one node is buried and one or two nodes remain above soil for new growth.
  • Keep the medium moist but not soggy.

Proper planting encourages strong root formation and stable growth.


Step 7: Providing Optimal Environment

Mango cuttings require a warm, humid, and protected environment:

  • Place the cutting in a shaded area away from direct sunlight initially.
  • Maintain a temperature of 25–30°C (77–86°F) for optimal root growth.
  • Cover with a transparent plastic bag or mini greenhouse to retain humidity.
  • Avoid overwatering to prevent fungal infection.

Creating the right environment ensures faster and healthier rooting.


Step 8: Watering and Care

  • Water the cutting daily or as needed to keep the medium moist.
  • Avoid waterlogging to prevent root rot.
  • Remove the plastic cover gradually after 2–3 weeks to acclimate the cutting to normal conditions.

Consistent care results in strong roots and healthy saplings ready for transplanting.


Step 9: Monitoring Root Development

Root development is usually visible within 4–6 weeks, depending on conditions:

  • Check gently for white, healthy roots forming at the base.
  • Trim any damaged or rotting roots immediately.
  • Once roots are well-developed, the cutting is ready for transplanting into larger pots or the ground.

Monitoring ensures high survival rate and healthy growth.


Step 10: Transplanting the Rooted Cutting

  • Choose a sunny location with well-draining soil.
  • Prepare the planting hole with compost and organic manure.
  • Gently remove the cutting from the container and plant in the ground.
  • Water thoroughly after transplanting and provide shade for 1–2 weeks to reduce stress.

Transplanting allows the mango cutting to grow into a full-fledged tree.


Step 11: Fertilization and Growth Care

  • Use organic fertilizers like vermicompost, cow dung, or neem cake to promote healthy growth.
  • Regularly prune the cutting to shape the tree and remove weak branches.
  • Mulch around the base to retain moisture and reduce weeds.
  • Water regularly, especially during dry periods, to maintain steady growth.

Proper care ensures the tree develops strong roots, healthy branches, and eventually bears fruit.


Step 12: Benefits of Using Egg and Chicken Manure

  • Natural and Safe: No chemical rooting hormones needed.
  • Fast Rooting: Nutrients in eggs and chicken manure accelerate root formation.
  • Cost-Effective: Affordable and easily available at home.
  • Healthier Saplings: Strong, disease-resistant, and vigorous plants.

This method is innovative, sustainable, and beginner-friendly, making it ideal for home gardeners.


Step 13: Common Mistakes to Avoid

  • Using fresh chicken manure directly on the cutting (can burn the base).
  • Planting in poorly drained soil leading to root rot.
  • Overwatering or underwatering during the first few weeks.
  • Exposing young cuttings to direct sunlight immediately.

Avoiding these mistakes increases the success rate and quality of your mango saplings.


Step 14: Harvesting Fruits from Cuttings

Mango trees grown from cuttings usually take 2–4 years to bear fruit, faster than seed-grown trees.

  • Ensure the tree receives full sun, regular watering, and fertilization.
  • Prune regularly to encourage flowering and fruiting.
  • Healthy, well-propagated trees will yield sweet, juicy, and high-quality mangoes.

With patience and care, you can enjoy homegrown mangoes faster using this propagation method.


Conclusion: Propagate Mango Trees Faster at Home

Propagating mango trees using egg and chicken manure is an innovative, effective, and natural method to grow strong saplings faster. By selecting healthy cuttings, providing a nutrient-rich medium, and giving proper care, anyone can produce vibrant, fruit-bearing mango trees in their home garden.

Whether you have a backyard, terrace, or balcony, this method ensures high survival rates, faster growth, and eventually, delicious homegrown mangoes. Start today and experience the satisfaction of growing your own mango trees using this simple, effective technique!

Tutorial Lengkap Menanam Sawi Caisim di Botol: Cara Mudah Dapat Panen Segar di Rumah

Tutorial Lengkap Menanam Sawi Caisim di Botol: Cara Mudah Dapat Panen Segar di Rumah

Sawi caisim atau mustard greens adalah salah satu sayuran favorit di dapur Indonesia dan Asia karena rasanya yang segar dan kaya nutrisi. Bagaimana jika Anda bisa menanamnya sendiri di rumah, bahkan tanpa kebun? Dengan menggunakan botol plastik, Anda bisa menanam sawi caisim dengan mudah, hemat tempat, dan tetap mendapatkan panen segar yang sehat. Panduan ini akan membahas cara lengkap menanam sawi caisim di botol, mulai dari persiapan hingga panen.


Mengapa Menanam Sawi Caisim di Botol?

Menanam sawi caisim di botol plastik memiliki banyak keuntungan, terutama bagi penghuni rumah yang tidak memiliki lahan luas:

  1. Hemat Ruang: Cocok untuk apartemen, balkon, atau dapur rumah.
  2. Biaya Rendah: Gunakan botol bekas dan media tanam sederhana.
  3. Kontrol Pertumbuhan: Mudah mengatur air, cahaya, dan nutrisi.
  4. Cepat Panen: Tanaman tumbuh lebih cepat karena media tanam terkonsentrasi.
  5. Ramai Anak-anak: Aktivitas menanam di botol edukatif dan menyenangkan bagi anak-anak.

Metode ini juga mendukung pertanian urban dan penggunaan ulang bahan bekas, ramah lingkungan, dan hemat biaya.


Alat dan Bahan yang Diperlukan

Sebelum mulai menanam, pastikan Anda menyiapkan bahan-bahan berikut:

  • Botol plastik bekas (1–2 liter)
  • Benih sawi caisim yang sehat
  • Media tanam: campuran tanah, kompos, dan pasir untuk drainase
  • Air bersih
  • Pisau atau gunting untuk memotong botol
  • Cangkul kecil atau sendok untuk menanam benih
  • Mulsa opsional: jerami atau daun kering

Semua bahan ini mudah didapat dan terjangkau. Dengan media tanam organik, sawi caisim yang dihasilkan juga lebih sehat dan bebas bahan kimia.


Langkah 1: Mempersiapkan Botol

Botol plastik akan menjadi wadah utama bagi tanaman sawi caisim:

  1. Bersihkan botol plastik secara menyeluruh.
  2. Potong bagian atas botol untuk memudahkan penanaman dan pemeliharaan.
  3. Buat beberapa lubang kecil di bagian bawah botol untuk drainase air. Drainase ini penting agar akar tidak membusuk.
  4. Isi dasar botol dengan kerikil atau kapas untuk menstabilkan media tanam dan mempermudah peresapan air.

Dengan botol yang sudah siap, proses penanaman akan lebih mudah dan tanaman lebih cepat tumbuh.


Langkah 2: Menyiapkan Benih Sawi Caisim

Benih sawi caisim yang sehat menentukan kualitas panen. Berikut tips menyiapkan benih:

  • Pilih benih yang besar dan utuh.
  • Rendam benih selama 2–3 jam dalam air bersih untuk mempercepat perkecambahan.
  • Setelah direndam, tiriskan dan siap ditanam.

Perawatan awal benih yang tepat akan memastikan pertumbuhan akar dan daun yang optimal.


Langkah 3: Menyiapkan Media Tanam

Media tanam harus gembur, subur, dan memiliki drainase baik. Campuran berikut efektif untuk sawi caisim:

  • 50% tanah kebun atau tanah organik
  • 30% kompos atau pupuk organik
  • 20% pasir untuk drainase

Isi botol dengan media tanam sekitar 3–5 cm dari dasar botol, sisakan ruang untuk benih dan pertumbuhan daun. Media tanam yang baik akan membantu akar berkembang dengan cepat dan mendukung pertumbuhan daun yang segar dan renyah.


Langkah 4: Menanam Benih

  • Tanam benih sawi caisim sekitar 1 cm ke dalam media tanam.
  • Jika menanam lebih dari satu benih, beri jarak minimal 2–3 cm agar pertumbuhan tidak saling bersaing.
  • Tutup benih dengan sedikit tanah dan siram ringan menggunakan air bersih.

Pastikan tanah tetap lembap tetapi tidak tergenang. Kelembapan yang tepat akan merangsang perkecambahan dan pertumbuhan daun muda.


Langkah 5: Perawatan Rutin

Sawi caisim di botol membutuhkan perawatan yang konsisten agar tumbuh subur:

  1. Penyiraman: Siram secara teratur, terutama jika media mulai mengering. Gunakan air bersih dan jangan terlalu banyak.
  2. Cahaya: Letakkan botol di tempat yang mendapat cahaya matahari sekitar 4–6 jam per hari. Sawi tumbuh optimal dengan cahaya cukup.
  3. Pemupukan: Tambahkan pupuk organik cair seperti air rendaman kompos atau sisa sayuran setiap 1–2 minggu untuk mempercepat pertumbuhan.
  4. Pengendalian hama: Gunakan larutan bawang putih atau sabun organik untuk mencegah serangan hama.

Perawatan yang tepat akan memastikan daun sawi caisim tumbuh lebat dan sehat.


Langkah 6: Memanen Sawi Caisim

Sawi caisim dapat dipanen relatif cepat, biasanya 25–35 hari setelah penanaman:

  • Pilih daun yang sudah cukup besar, sekitar 10–15 cm.
  • Potong daun dengan hati-hati menggunakan gunting atau pisau tajam.
  • Biarkan daun muda terus tumbuh sehingga panen berikutnya bisa dilakukan tanpa menanam baru.

Dengan teknik panen bertahap, Anda bisa mendapatkan sawi caisim segar secara berkelanjutan dari satu botol.


Keuntungan Menanam Sawi Caisim di Botol

  1. Hemat Ruang: Cocok untuk rumah kecil atau balkon.
  2. Cepat Panen: Media terkonsentrasi mendukung pertumbuhan cepat.
  3. Hemat Biaya: Botol bekas dan pupuk organik cukup.
  4. Sehat: Sayuran bebas pestisida dan kimia berbahaya.
  5. Edukasi: Cocok untuk anak-anak belajar menanam sayuran.

Menanam di botol juga memungkinkan Anda mengamati pertumbuhan akar dan daun dengan jelas, meningkatkan pengalaman belajar berkebun.


Tips untuk Hasil Optimal

  • Gunakan benih berkualitas untuk hasil terbaik.
  • Jangan biarkan media tanam terlalu kering atau terlalu basah.
  • Letakkan botol di tempat terang tetapi tidak terlalu panas.
  • Rutin tambahkan pupuk organik untuk daun lebih lebat.
  • Panen secara berkala untuk merangsang pertumbuhan daun baru.

Dengan tips ini, sawi caisim akan tumbuh subur, berdaun lebat, dan siap untuk dimasak setiap hari.


Kesimpulan

Menanam sawi caisim di botol adalah metode praktis, hemat tempat, dan ramah lingkungan untuk mendapatkan sayuran segar di rumah. Dengan bahan sederhana, perawatan rutin, dan sedikit kesabaran, Anda bisa menikmati daun sawi yang sehat dan lezat dalam waktu singkat. Metode ini cocok untuk penghuni apartemen, pemula, maupun anak-anak yang ingin belajar menanam sayuran.

Jadi, siapkan botol plastik bekas, media tanam organik, dan benih sawi caisim Anda. Mulailah menanam hari ini, dan nikmati panen segar dari botol di rumah Anda sendiri!

How to Grow Garlic in Water Bottles: Tips for Fast Growth, Plenty of Roots, and Quick Harvest

How to Grow Garlic in Water Bottles: Tips for Fast Growth, Plenty of Roots, and Quick Harvest

Garlic is a versatile and essential ingredient in kitchens worldwide, but growing it at home can save money, ensure freshness, and give you an endless supply. What if you could grow garlic even in small spaces using just water bottles? This simple, space-saving method is perfect for urban gardeners, beginners, and anyone looking to harvest garlic quickly. In this guide, we will explore step-by-step tips to grow garlic in water bottles, encourage abundant roots, and achieve a faster harvest.


Why Grow Garlic in Water Bottles?

Growing garlic in water bottles is an innovative and practical approach for several reasons:

  1. Space-Saving: Ideal for apartments, balconies, or small kitchens.
  2. Low Cost: Reuse plastic bottles, reducing the need for pots or planters.
  3. Quick Results: Water encourages rapid root development, giving you faster growth.
  4. Clean and Controlled Environment: Easy to manage water levels and prevent soil-borne diseases.
  5. Observation: You can watch root development clearly, making it perfect for learning about plant growth.

This method, often called hydroponic garlic growing, relies on water to stimulate root growth before planting in soil or continuing in the bottle for a full harvest.


Materials Needed

Before starting, gather the following items:

  • Plastic Water Bottles: 1–2-liter bottles work best.
  • Garlic Cloves: Choose large, healthy cloves. Organic garlic is preferred.
  • Water: Clean, preferably at room temperature.
  • Knife: To carefully cut the bottle if needed.
  • Optional: Small pebbles or cotton to stabilize cloves.

These simple items are often already available at home, making this method convenient and accessible.


Step 1: Preparing Garlic Cloves

Start with healthy garlic cloves. The bigger and firmer the clove, the better the results.

  • Separate the cloves carefully without damaging the skin.
  • Select the largest cloves for planting; they produce the most roots and vigorous growth.
  • Optional: Soak cloves in water for a few hours or overnight to speed up root initiation.

Healthy, well-prepared cloves are the foundation of a successful garlic harvest.


Step 2: Preparing the Water Bottle

Plastic bottles are versatile containers for garlic growth. Here’s how to prepare them:

  1. Clean the bottle thoroughly to prevent algae or bacteria.
  2. Cut the top of the bottle to create an opening if needed for easy planting.
  3. Optional: Fill the bottom with small pebbles or cotton balls to help stabilize the garlic cloves.
  4. Add water carefully, just enough to touch the bottom of the garlic clove. Avoid submerging it completely, as this can cause rot.

By maintaining the correct water level, you ensure the garlic clove develops strong, healthy roots without risk of drowning.


Step 3: Planting Garlic in the Bottle

Place the garlic clove in the bottle carefully:

  • Position the pointed end up and the flat end touching water or the stabilizing material.
  • Ensure water only touches the bottom of the clove to stimulate root growth without rotting the bulb.
  • If using multiple cloves, separate them slightly to allow room for roots to grow.

This setup encourages garlic to focus energy on root development, essential for a faster, bigger harvest.


Step 4: Encouraging Root Growth

Garlic roots develop rapidly in water if proper care is taken:

  • Place the bottle in a bright area with indirect sunlight. Direct sunlight can overheat the water and harm the cloves.
  • Change the water every 2–3 days to keep it fresh and prevent mold or bacteria growth.
  • Add a few drops of natural liquid fertilizer (like diluted compost tea) if desired to boost growth.

Within a week or two, you should see long, white roots forming at the bottom. Healthy roots indicate that your garlic is ready for further growth or transplanting into soil.


Step 5: Transplanting Garlic (Optional)

While garlic can continue to grow in water bottles, transplanting into soil can give larger bulbs:

  1. Prepare a pot or garden bed with loose, fertile soil rich in organic matter.
  2. Gently remove the garlic clove from the bottle without damaging the roots.
  3. Plant it with the roots down and the pointed end up, covering the base with soil.
  4. Water lightly after planting to help the plant settle in.

Transplanting allows the garlic to form bulbs faster while roots continue to develop in nutrient-rich soil.


Step 6: Caring for Garlic in Bottles

Garlic in water bottles requires regular maintenance for optimal growth:

  • Water Levels: Keep the bottom of the cloves in water, but prevent full submersion.
  • Sunlight: 4–6 hours of indirect sunlight per day is sufficient.
  • Temperature: Garlic prefers a moderate temperature between 15–25°C (59–77°F).
  • Cleaning: Ensure the bottle is clean to avoid algae, which can stunt growth.

Proper care ensures strong roots and healthy green shoots, making the harvest quick and plentiful.


Step 7: Fast Garlic Harvest Tips

To harvest garlic quickly, follow these tips:

  • Start with large cloves: Bigger cloves produce faster-growing bulbs.
  • Ensure root contact with water: Strong roots lead to vigorous growth.
  • Rotate bottles for sunlight exposure: This prevents uneven growth.
  • Optional pruning: Trim shoots to encourage energy flow to root and bulb development.

Typically, garlic cloves can develop roots in 2–3 weeks and produce green shoots suitable for consumption in about 4–6 weeks. Full bulb harvest may take 2–3 months, depending on variety and care.


Benefits of Growing Garlic in Water Bottles

  1. Space-Saving: Ideal for small homes, apartments, or balconies.
  2. Quick Root Development: Water stimulates roots faster than soil.
  3. Cost-Effective: Uses recycled bottles and minimal resources.
  4. Observation: Easy to monitor root growth and plant health.
  5. Educational: Great for teaching kids about plant growth.

This method allows gardeners to grow garlic year-round, even without a traditional garden, making fresh garlic accessible anytime.


Tips for Maximum Growth and Yield

  • Use organic garlic to avoid chemical residues.
  • Keep consistent water levels to avoid drying or rot.
  • Ensure indirect sunlight to prevent overheating the cloves.
  • Replace water regularly to maintain freshness.
  • Harvest green shoots for early use in cooking while bulbs continue to develop.

Following these simple tips ensures that your garlic grows fast, roots are abundant, and harvests are plentiful.


Conclusion

Growing garlic in water bottles is an innovative and practical method for anyone looking to grow garlic in limited spaces. With minimal materials, proper care, and attention to water levels, you can produce strong roots, healthy green shoots, and a faster harvest. This technique is perfect for urban gardeners, beginners, and anyone interested in hydroponic or small-space gardening.

So, grab some garlic cloves, recycle those water bottles, and start growing garlic at home today! With patience and care, you’ll enjoy fresh, homegrown garlic in just a few weeks, ready to enhance your meals and impress your family.

How to Grow GIANT Potatoes in a Plastic Tub with FREE Fertilizer for a Massive Harvest

How to Grow GIANT Potatoes in a Plastic Tub with FREE Fertilizer for a Massive Harvest

Potatoes are a staple in kitchens worldwide, but what if you could grow giant, healthy potatoes right at home, without the need for expensive fertilizers? The good news is, you can! With a few simple techniques, a plastic tub, and some natural ingredients, you can enjoy a huge yield of potatoes, perfect for your family and friends. This guide will walk you through every step to ensure your potato-growing journey is both productive and fun.


Why Grow Potatoes in a Plastic Tub?

Growing potatoes in a plastic tub is a convenient and space-saving solution, especially for those who don’t have a large garden. Traditional soil-based potato cultivation requires large plots of land and significant effort to manage weeds and pests. A plastic tub provides:

  • Portability: Move your tub to follow sunlight or protect it from extreme weather.
  • Controlled Growth: You control soil quality, drainage, and moisture levels.
  • Ease of Harvesting: No need to dig deep into the ground—you can lift the tub and collect your potatoes easily.

Plus, this method allows you to grow giant potatoes because the tub confines the soil, directing the plant’s energy into producing large tubers instead of sprawling roots.


Materials You Will Need

Before planting, make sure you have the following materials:

  1. Plastic Tub: A large tub, at least 20–25 gallons, works best. Make sure it has holes at the bottom for drainage.
  2. Potato Seeds or Seed Potatoes: Choose healthy, certified seed potatoes for better yields.
  3. Soil: Use a mix of garden soil, compost, and sand for good drainage.
  4. Organic Waste: Vegetable peels, coffee grounds, and crushed eggshells serve as free fertilizer.
  5. Watering Can: Regular watering is key to potato growth.
  6. Mulch: Straw or dried leaves help retain moisture and prevent weeds.

Using natural fertilizer reduces costs and enhances soil fertility over time. Not only is this eco-friendly, but it also ensures your potatoes are chemical-free and safe to eat.


Step 1: Preparing the Tub

Start by cleaning your plastic tub thoroughly. Holes at the bottom are crucial for drainage; without them, water can accumulate and rot your potatoes.

Tip: Elevate the tub slightly by placing it on bricks or small stones to improve water drainage and prevent waterlogging.

Once ready, fill the bottom of the tub with a layer of coarse material such as small stones or broken pottery. This further ensures proper drainage and prevents root rot.


Step 2: Choosing the Right Potato Seeds

Not all potatoes are created equal. For giant potatoes, choose large seed potatoes or tubers with multiple “eyes” (small sprouts). These eyes will grow into healthy stems.

  • Cutting: If your seed potato is large, cut it into pieces with 2–3 eyes each.
  • Healing: Let the cut pieces dry for a day or two before planting to prevent rotting.

Planting high-quality seed potatoes is critical because healthy tubers will directly impact your yield size.


Step 3: Preparing the Soil

Potatoes thrive in loose, nutrient-rich soil. A good mix includes:

  • 50% garden soil
  • 30% compost (or organic waste like kitchen scraps)
  • 20% sand for drainage

Layer the soil mixture in your tub about 6 inches deep. This provides enough room for the first set of roots to grow.

Tip: Avoid using soil that is too compact or clay-heavy—it can hinder root growth and reduce the size of your potatoes.


Step 4: Planting the Potatoes

Place your seed potato pieces in the soil with the eyes facing upward. Cover them with 4–6 inches of soil. Water gently to settle the soil around the seeds.

  • Keep the soil moist but not soggy.
  • Place the tub in a sunny location that receives at least 6 hours of sunlight daily.

As the plant grows, continue to add more soil gradually—a technique called “hilling.” This encourages the plant to produce more tubers along its stem.


Step 5: Using Free Fertilizer for Maximum Growth

One of the best parts of this method is using natural, free fertilizers:

  • Vegetable Scraps: Carrot peels, potato skins, and other vegetable leftovers break down quickly and enrich the soil.
  • Coffee Grounds: Add used coffee grounds for nitrogen, which promotes leafy growth.
  • Eggshells: Crushed eggshells add calcium, strengthening potato plants and reducing the risk of disease.

Sprinkle these organic ingredients around your plants and gently mix them into the soil. Over time, they will decompose, feeding your potato plants naturally.


Step 6: Watering and Mulching

Potatoes need consistent moisture, especially during tuber formation. Water your tub regularly to keep the soil evenly moist. Avoid overwatering, as this can cause rot.

Mulching with straw or dry leaves helps:

  • Retain soil moisture
  • Keep soil temperature consistent
  • Prevent weed growth

Mulch also makes your potato harvest cleaner, as the tubers remain covered and protected.


Step 7: Managing Pests and Diseases Naturally

Even in a tub, potato plants can attract pests like aphids or develop fungal infections. Use natural methods to protect your crop:

  • Neem Oil Spray: Safe and effective against insects.
  • Garlic or Chili Spray: Keeps aphids and other pests away.
  • Crop Rotation in Tubs: Avoid planting potatoes in the same soil repeatedly—this reduces disease risk.

Keeping your potato garden organic ensures healthier potatoes and a more sustainable growing practice.


Step 8: Harvesting Giant Potatoes

The most exciting part of growing potatoes is the harvest! Typically, potatoes are ready 10–12 weeks after planting, depending on the variety.

  • Stop watering a week or two before harvest to make digging easier.
  • Gently lift the tub and tip the soil onto a tarp.
  • Collect your giant potatoes carefully—these tub-grown potatoes are often larger than those grown in the ground due to controlled conditions.

Tip: Some gardeners even get multiple harvests from the same tub by leaving smaller tubers in the soil to grow again.


Benefits of Growing Potatoes in a Plastic Tub

  1. Cost-Effective: No need for expensive fertilizers; organic waste does the job.
  2. Space-Saving: Perfect for small yards, balconies, or urban gardening.
  3. High Yield: Hilling and tub confinement often produce larger tubers.
  4. Pesticide-Free: Organic methods reduce chemical usage.
  5. Educational and Fun: Great project for kids and gardening enthusiasts.

Tips for Bigger, Healthier Potatoes

  • Ensure at least 6 hours of sunlight daily.
  • Regularly add organic matter to feed the plants.
  • Keep soil loose and well-drained.
  • Don’t overcrowd your tub—give each potato enough space.
  • Protect plants from extreme heat or frost.

Following these steps consistently will increase your chances of harvesting giant, flavorful potatoes that will impress your friends and family.


Conclusion

Growing giant potatoes in a plastic tub using free fertilizer is a simple, cost-effective, and rewarding method. With proper preparation, care, and patience, anyone can achieve a huge yield of nutrient-rich, chemical-free potatoes. Whether you’re an experienced gardener or just starting, this technique is a fantastic way to enjoy fresh, homegrown produce right from your balcony or backyard.

So, grab a plastic tub, gather your seed potatoes, and start your potato-growing adventure today! Your giant, delicious harvest awaits.