How to Encourage Indoor Plants to Produce More Leaves

How to Encourage Indoor Plants to Produce More Leaves

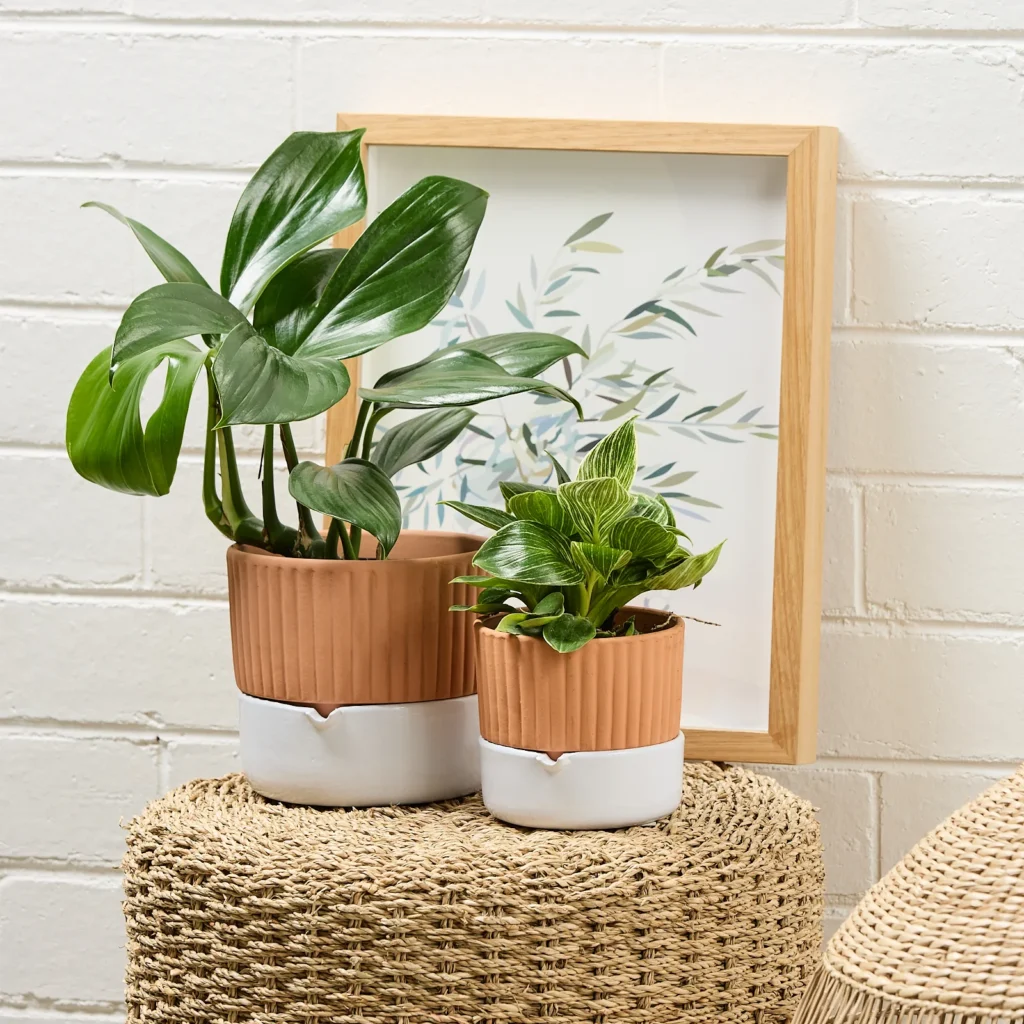
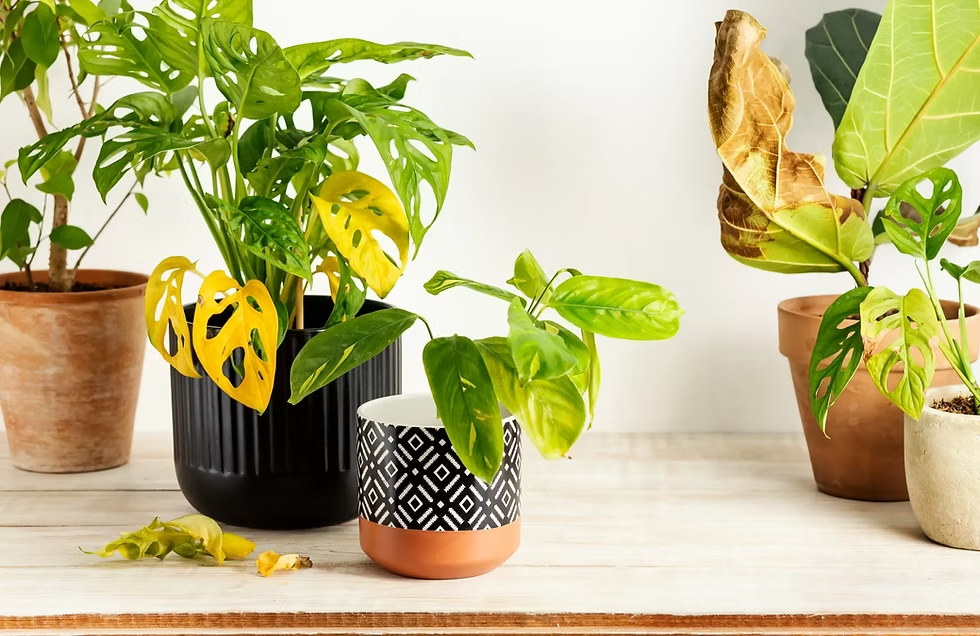
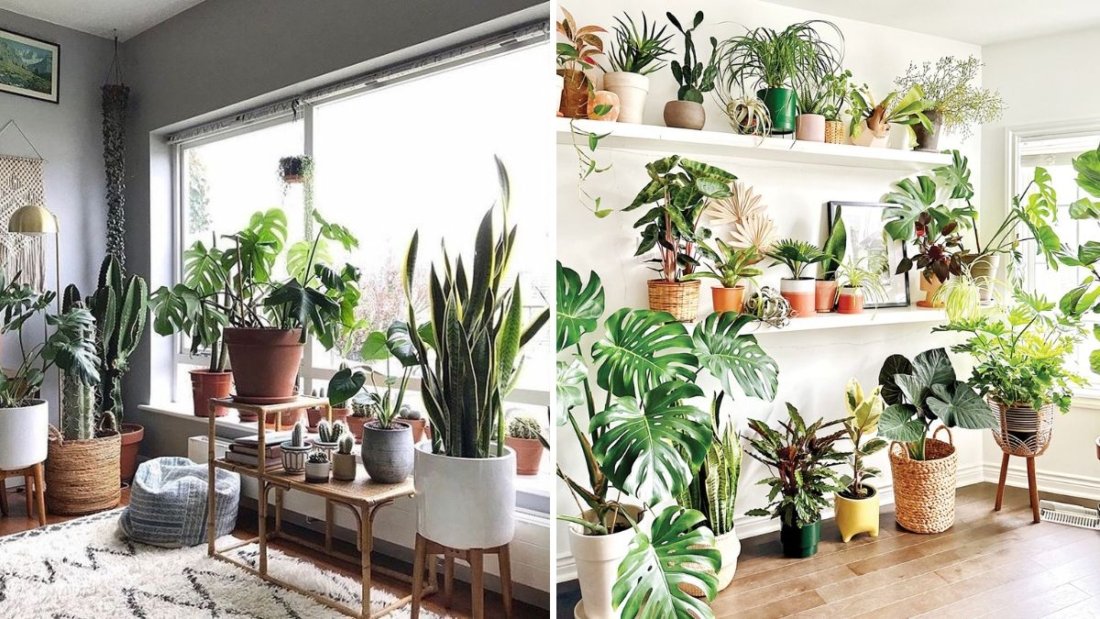
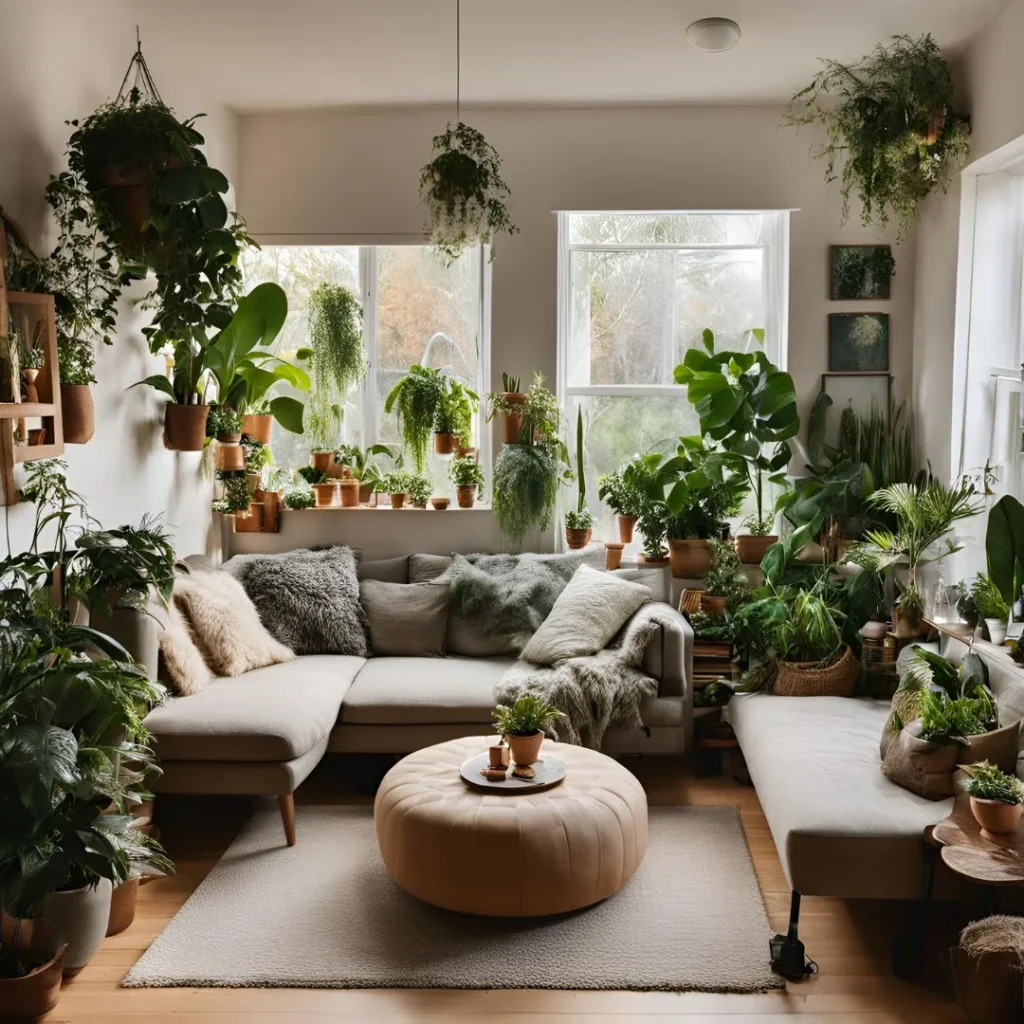
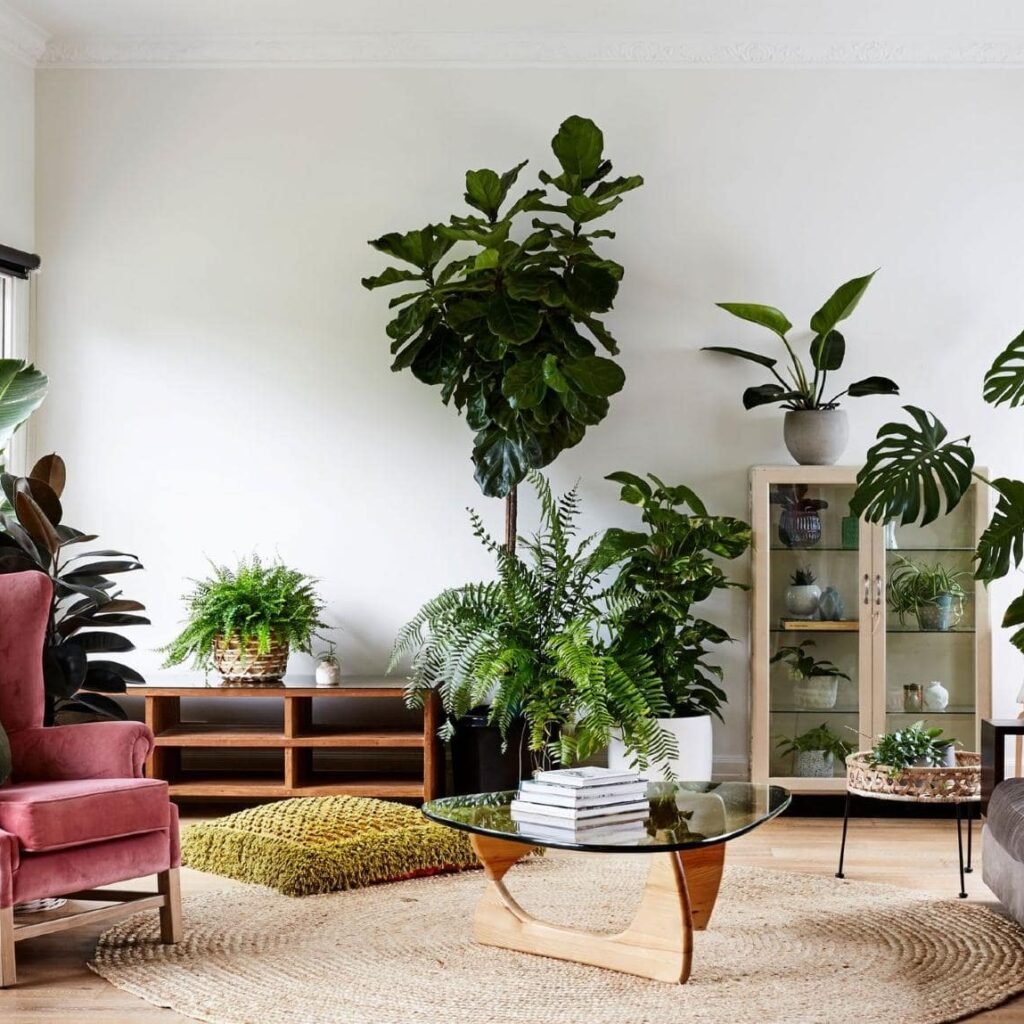
Indoor plants bring a breath of life into our homes, transforming dull corners into lush, vibrant spaces. Whether you’re nurturing a fiddle leaf fig, pothos, peace lily, or monstera, one of the most satisfying sights is watching your plants unfurl new leaves. However, if your plants seem to have stalled in growth or are producing fewer leaves than usual, it’s a sign they may need a little extra care and attention.

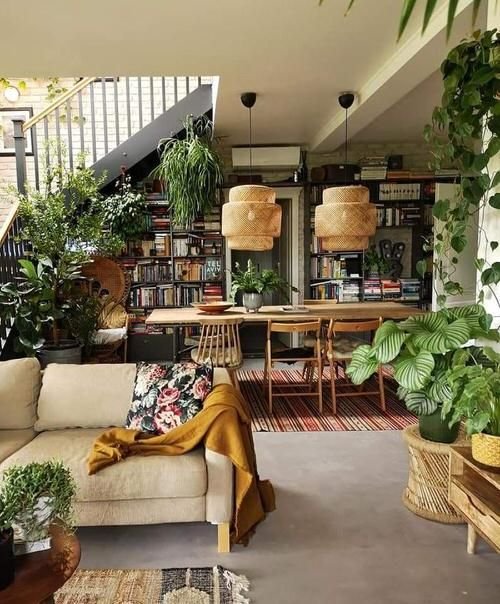
Encouraging indoor plants to produce more leaves isn’t just about watering more often—it’s about understanding the intricate balance between light, nutrients, humidity, and other factors that influence healthy foliage growth. In this comprehensive guide, we’ll explore how to stimulate lush, leafy growth and keep your indoor jungle thriving.


1. Understand Why Plants Grow More Leaves

Plants produce new leaves as a way of expanding their surface area to capture more sunlight for photosynthesis. The process of leaf production depends on several internal and external factors, including light intensity, soil health, humidity, and nutrient availability. When these conditions are optimal, plants use their stored energy to push out fresh, healthy leaves. Conversely, when the environment is stressful—too dry, too dark, or nutrient-deficient—plants conserve energy, slowing down leaf production.

Understanding this helps you create the right growing conditions that encourage vigorous, leafy growth.


2. Provide the Right Amount of Light

Light is the single most important factor in leaf development. Without sufficient light, plants can’t photosynthesize efficiently, leading to weak, leggy stems and sparse foliage.

Tips for Better Lighting:

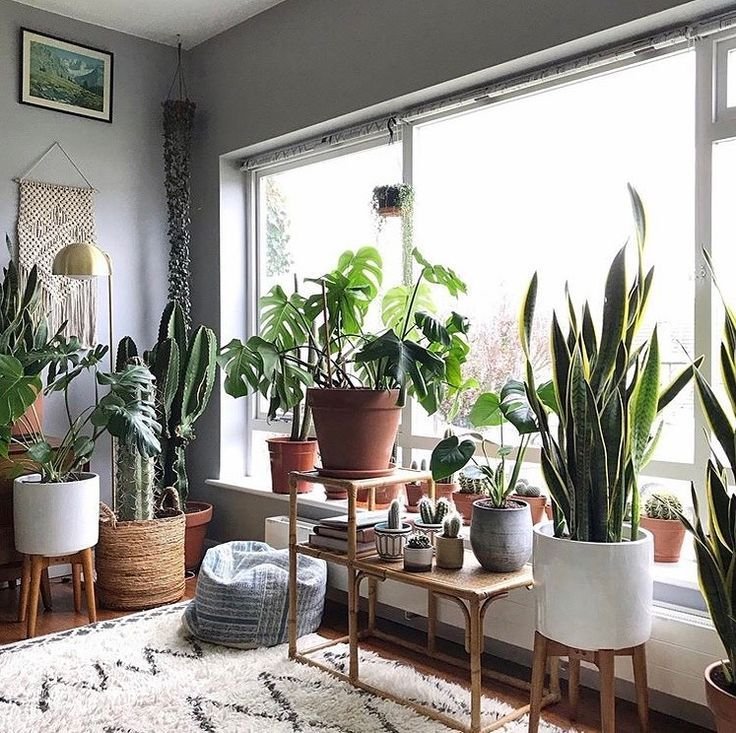
  • Place near windows: Position your plants close to east- or south-facing windows where they can receive bright, indirect light. Avoid direct, scorching sunlight, which can burn delicate leaves.
  • Use grow lights: For darker spaces, supplement with full-spectrum LED grow lights that mimic natural sunlight. Keep them on for about 12–14 hours per day.
  • Rotate your plants: Turn the pots every few weeks to ensure all sides receive equal light exposure, preventing one-sided growth.

If your plant’s leaves are pale or small, it may be craving more light. Conversely, scorched or curled leaves may signal excessive direct sunlight. Striking the right balance ensures consistent, lush growth.


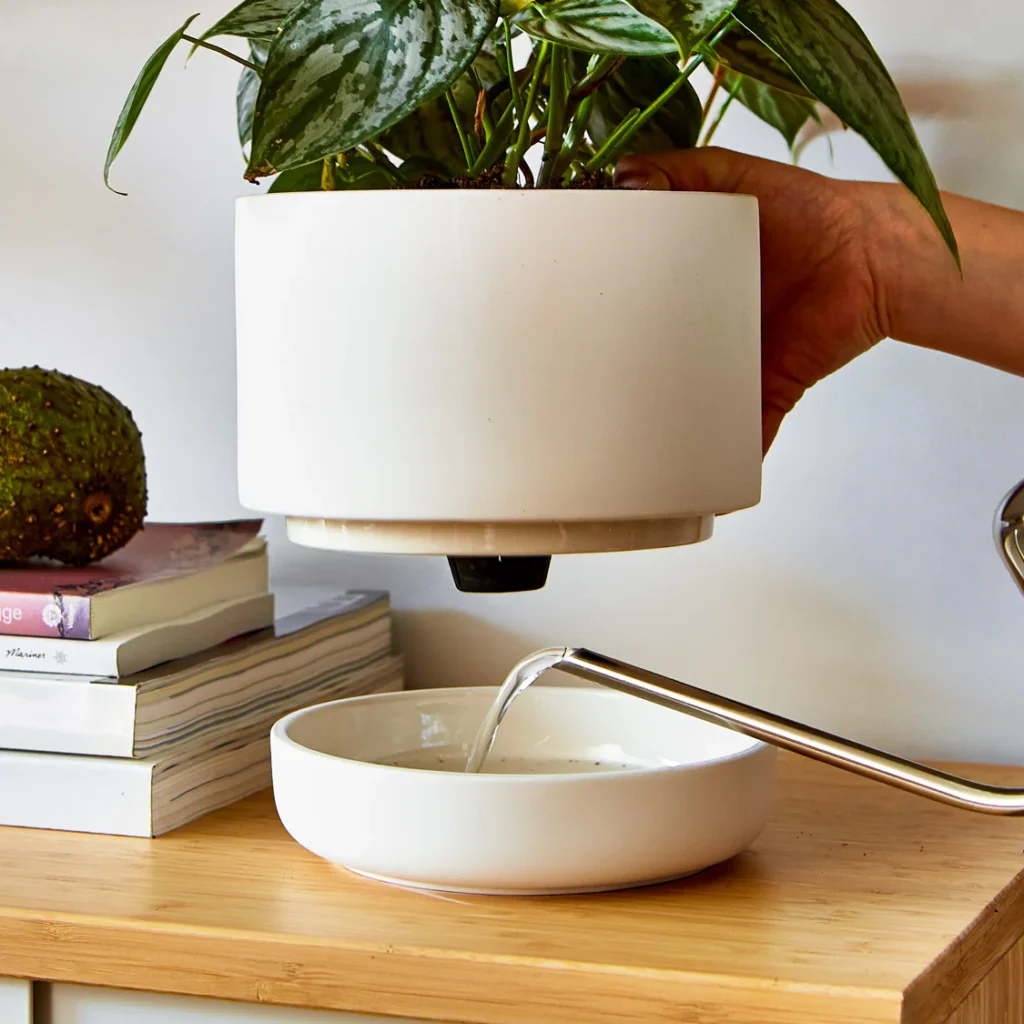
3. Maintain the Ideal Watering Routine

Water is essential for nutrient transport and photosynthesis. However, too much or too little can both hinder leaf growth.

How to Get It Right:

  • Check soil moisture: Stick your finger about an inch into the soil. If it feels dry, it’s time to water; if it’s still moist, wait a few more days.
  • Avoid waterlogging: Overwatering suffocates roots, leading to yellowing leaves or root rot. Always use pots with proper drainage holes.
  • Use room-temperature water: Cold water can shock the roots, especially for tropical indoor plants.
  • Adjust with the seasons: Plants grow faster in spring and summer, requiring more frequent watering, while they need less during winter dormancy.

Healthy, hydrated roots support vigorous leaf development, so staying consistent with your watering schedule is key.


4. Feed Your Plants with the Right Nutrients

Just like humans need vitamins, plants require nutrients to produce healthy new leaves. Nitrogen, in particular, is vital for leaf growth as it promotes chlorophyll production—the pigment responsible for photosynthesis.

Fertilization Tips:

  • Choose a balanced fertilizer: Use a water-soluble, balanced fertilizer (e.g., 10-10-10 or 20-20-20) every 4–6 weeks during the growing season.
  • Boost nitrogen: To specifically encourage leaf growth, select a fertilizer with a higher nitrogen content (e.g., 3-1-2 ratio).
  • Don’t overfeed: Over-fertilizing can cause salt build-up in the soil, which may burn the roots and stunt growth. Always follow the dosage instructions.
  • Use organic alternatives: Compost tea, worm castings, or seaweed extract are gentle, long-term options that improve soil health while feeding your plants naturally.

Consistent and appropriate feeding helps your plants channel more energy into producing lush, green leaves rather than just maintaining survival.


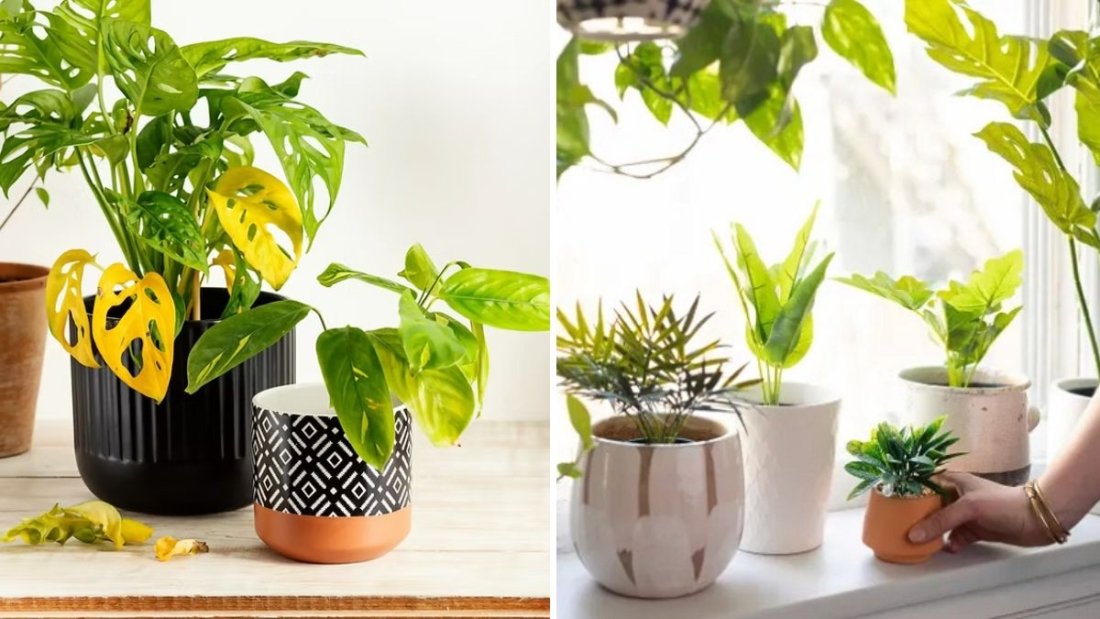
5. Keep Humidity Levels in Check

Many popular indoor plants—especially tropical varieties like ferns, calatheas, and monsteras—thrive in humid environments. Dry indoor air, especially during winter, can slow down leaf formation and cause brown leaf edges.

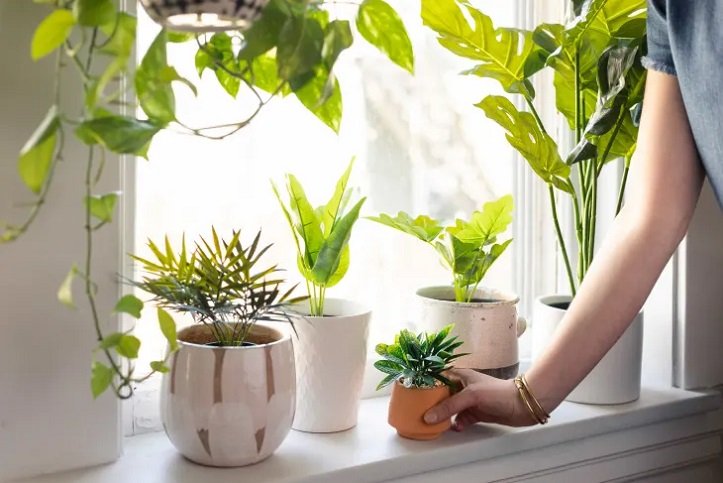
How to Increase Humidity:

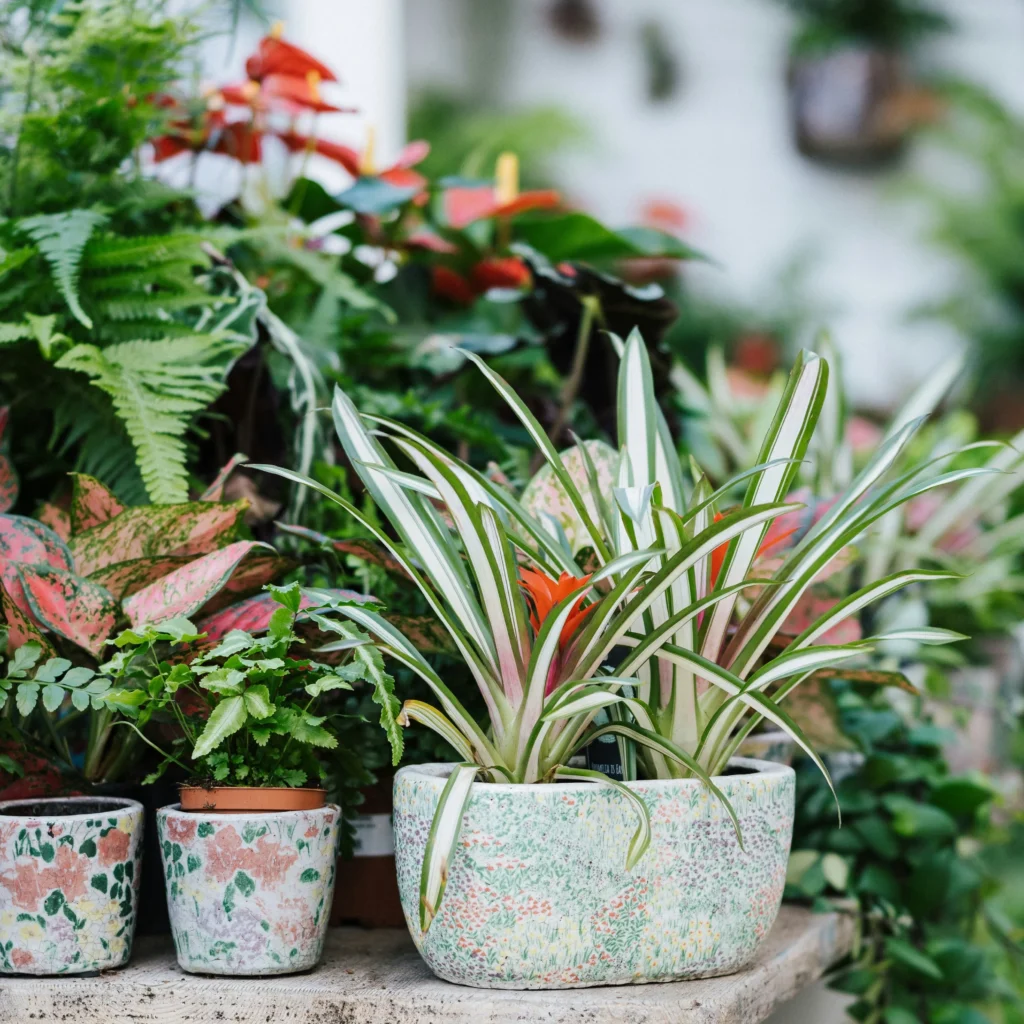
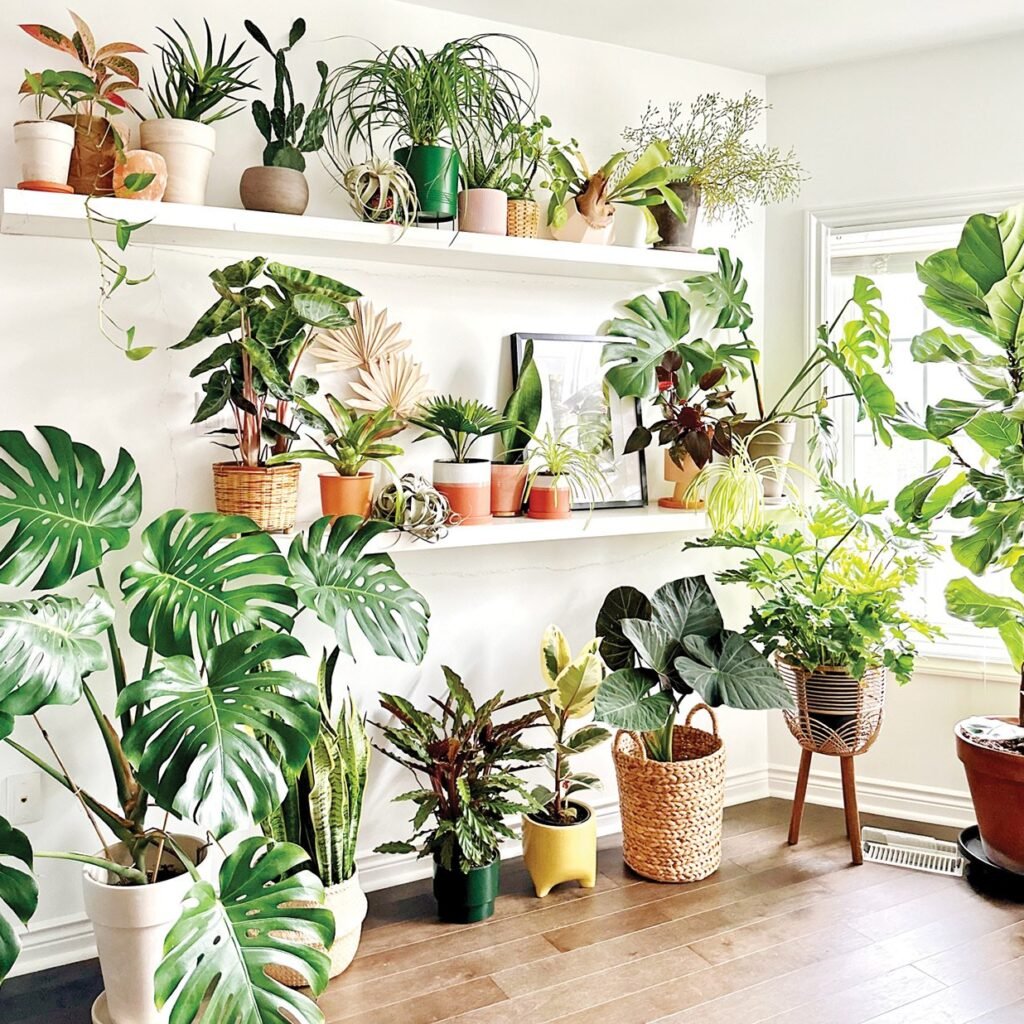
  • Group plants together: Plants naturally release moisture through transpiration, so clustering them helps maintain a humid microclimate.
  • Use a humidity tray: Place your plant pots on a tray filled with pebbles and water; as the water evaporates, it raises humidity around the plants.
  • Invest in a humidifier: For larger collections or particularly delicate plants, a humidifier is the most effective way to maintain consistent humidity.
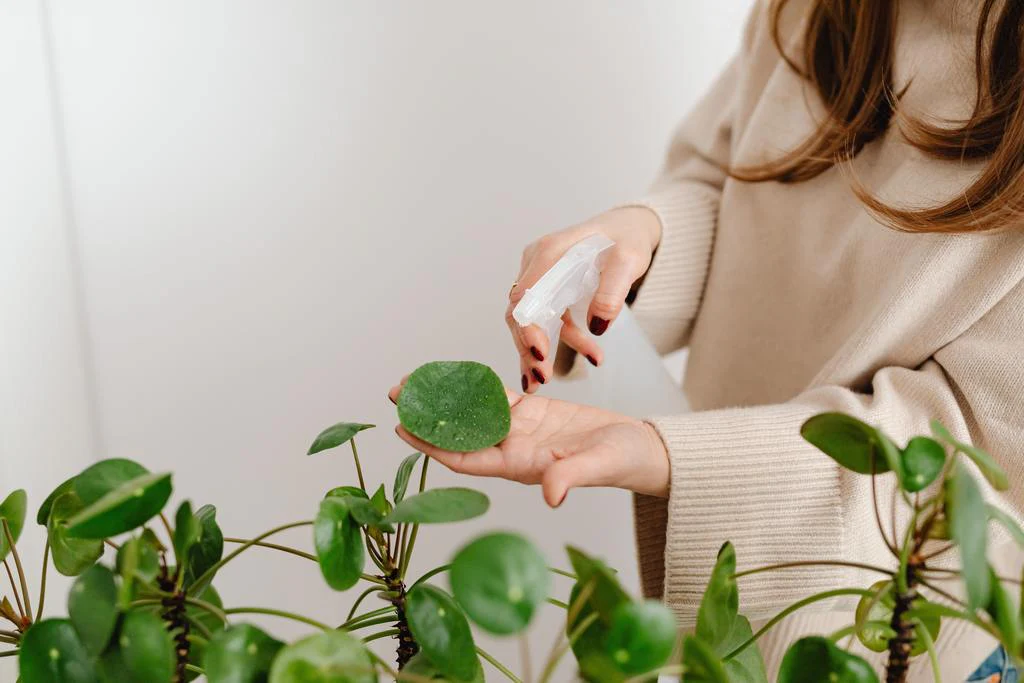
  • Mist occasionally: Lightly misting leaves in the morning can give plants a temporary moisture boost.

Aim for humidity levels between 50%–70% for tropical species to ensure healthy, robust leaf growth.


6. Prune Regularly to Encourage New Growth

Pruning isn’t just about aesthetics—it’s a vital technique for stimulating fresh growth. Removing dead or yellowing leaves redirects the plant’s energy toward new shoots.

Effective Pruning Practices:

  • Trim leggy stems: Cut just above a leaf node (where a leaf joins the stem). This encourages branching and the growth of new leaves from that point.
  • Remove damaged parts: Snip away yellowed, brown, or diseased leaves to prevent energy waste.
  • Pinch tips of young plants: Gently pinch the topmost leaves of young plants like basil or pothos to promote bushier growth.

Regular pruning helps maintain a compact, full shape and encourages the plant to focus on producing new foliage.


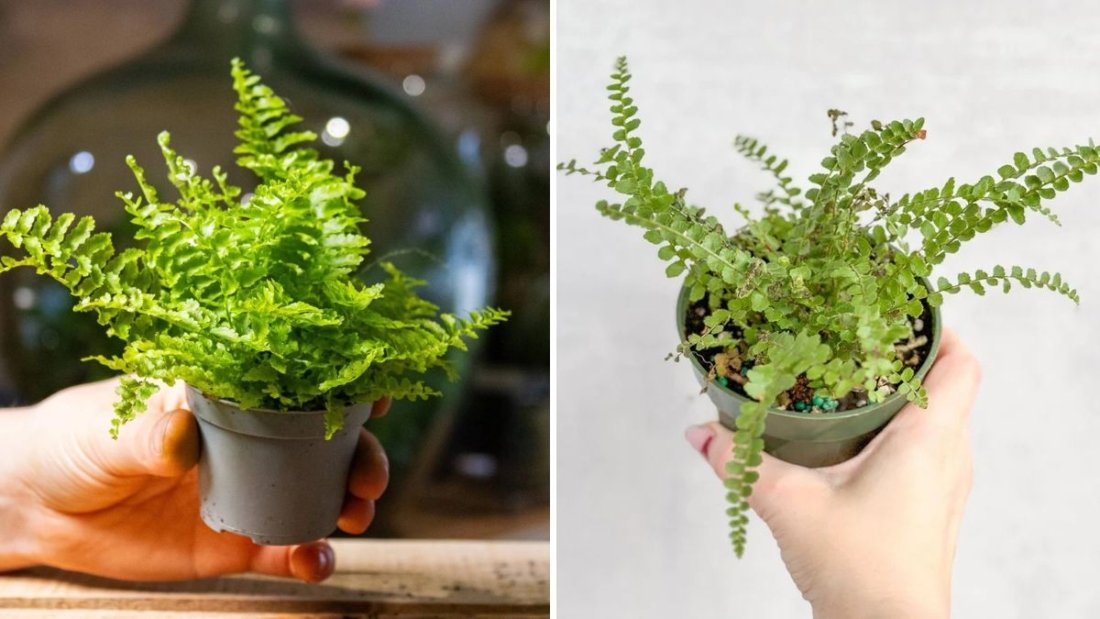
7. Repot When Necessary

If your plant has been in the same pot for years and growth seems stagnant, it might be root-bound. When roots circle tightly around the pot, they can’t absorb enough nutrients or water, limiting leaf production.

When to Repot:

  • Roots are growing out of drainage holes.
  • Water drains too quickly or sits on top of compacted soil.
  • The plant looks top-heavy or growth has slowed noticeably.

Choose a pot one size larger and refresh the soil mix. A loose, well-draining potting medium rich in organic matter gives roots space to breathe and expand—setting the stage for fresh leaf growth.


8. Ensure Proper Air Circulation

Stagnant air can lead to fungal diseases and pest infestations, both of which can hinder leaf development.

Tips for Better Airflow:

  • Keep plants spaced apart so air can circulate freely between them.
  • Use a small fan in stuffy rooms to keep air moving.
  • Avoid placing plants directly in drafty spots or near air conditioners.

Healthy airflow ensures your plants get the oxygen they need and reduces stress that could otherwise inhibit leaf growth.


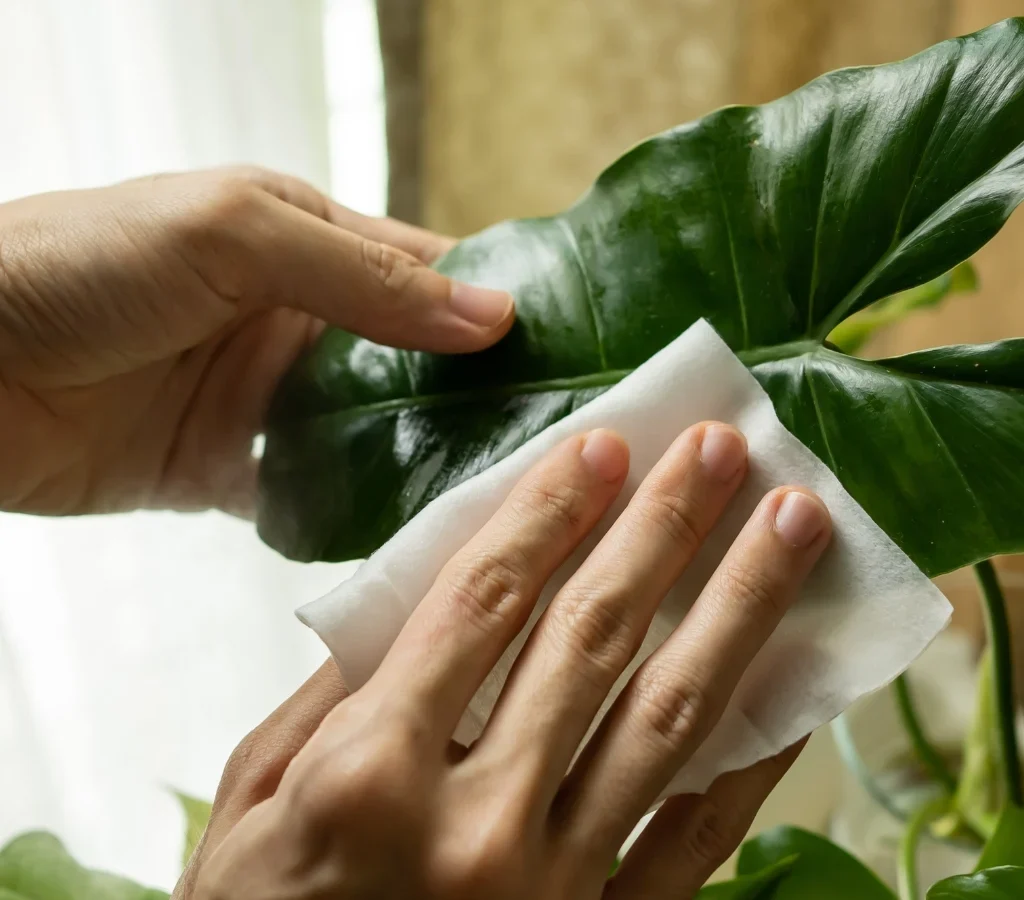
9. Watch for Pests and Diseases

Pests like spider mites, aphids, and mealybugs can sap your plant’s energy, reducing its ability to produce new leaves.

Pest Prevention & Treatment:

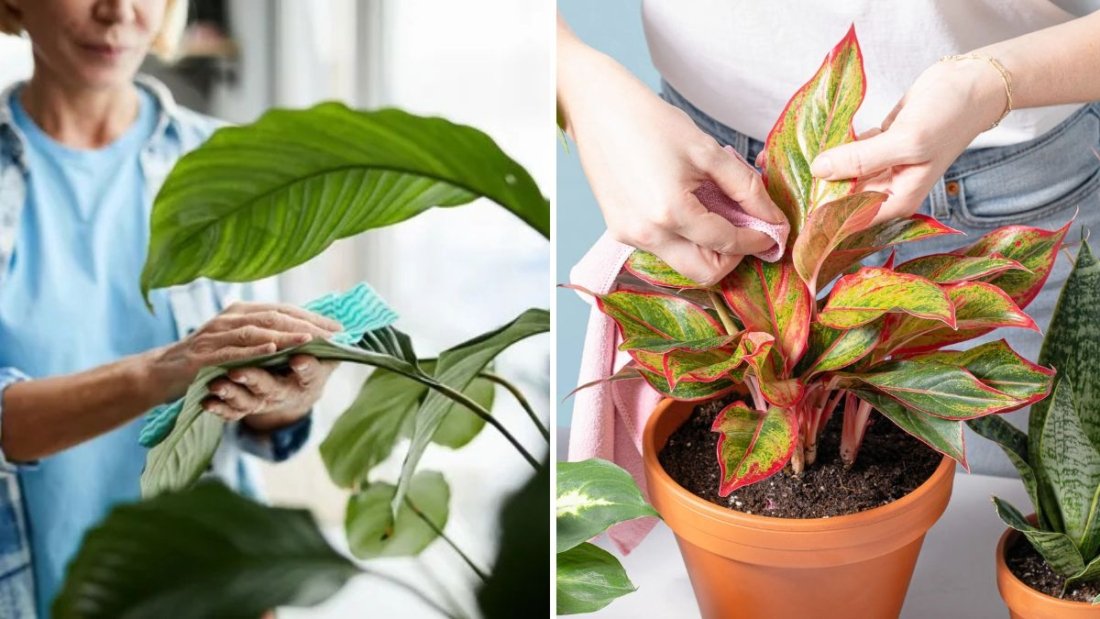
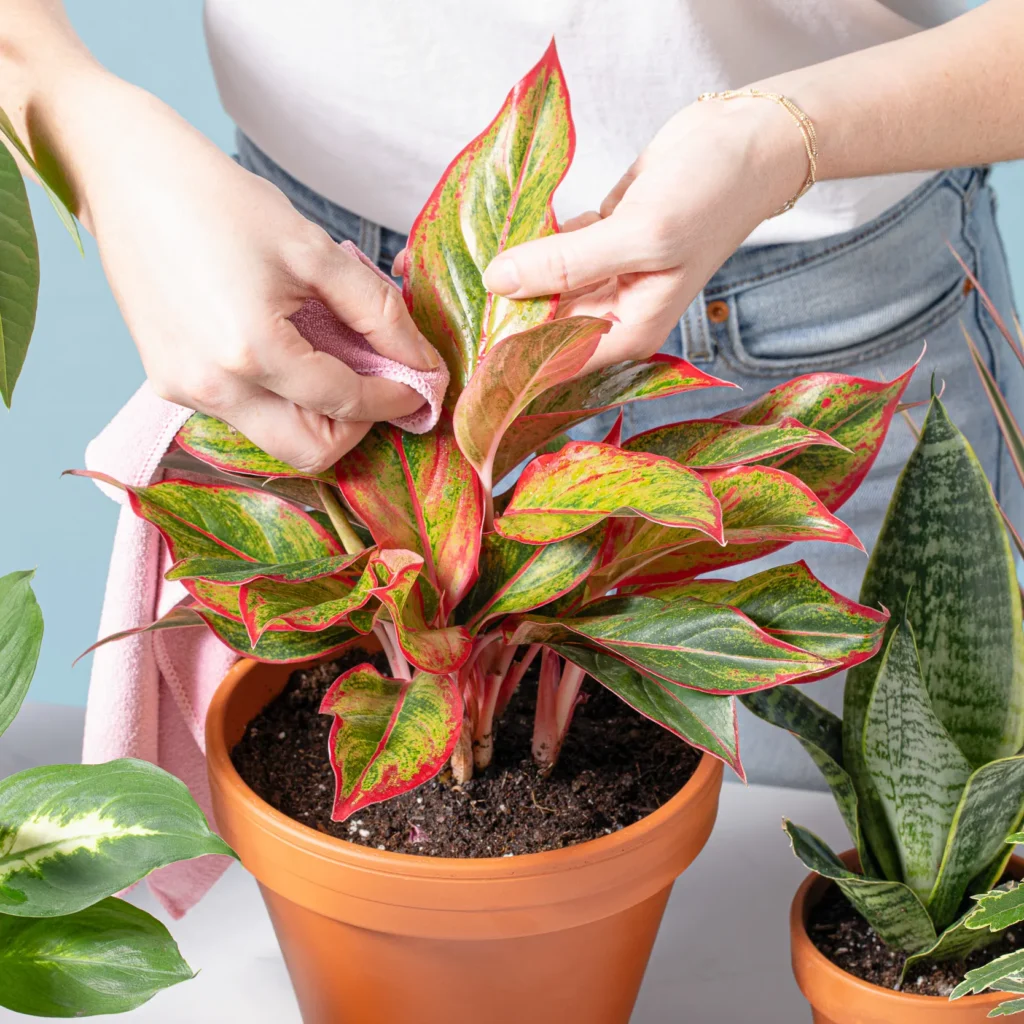
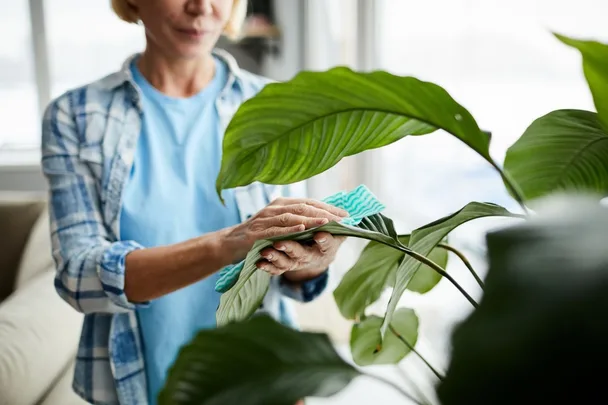
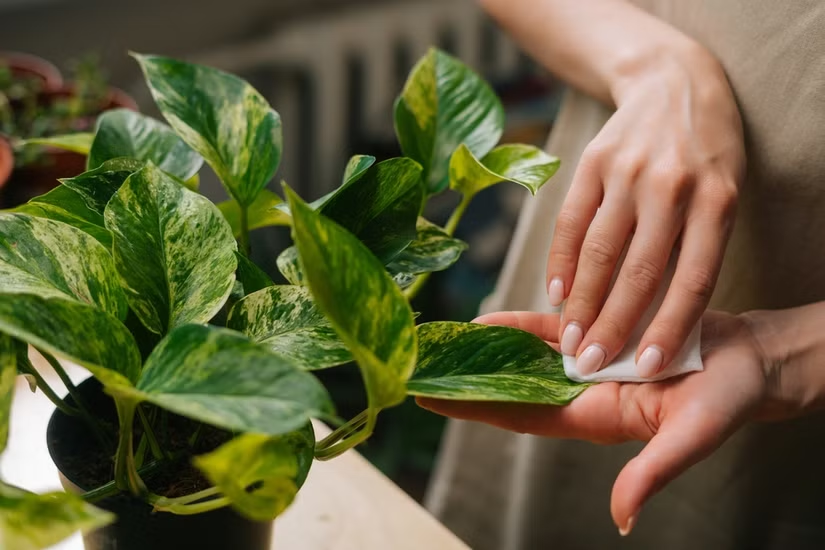
  • Inspect leaves regularly—especially undersides—for pests.
  • Wipe leaves with a mild neem oil solution or insecticidal soap to prevent infestations.
  • Quarantine new plants for a couple of weeks before placing them with others.

Keeping your plants pest-free ensures they can focus on healthy, lush foliage instead of repairing damage.


10. Be Patient and Consistent

Finally, remember that leaf production takes time. Most indoor plants have natural growth cycles, with bursts of activity during spring and summer and rest periods in winter. Stay consistent with your care routine—light, water, feeding, and pruning—and your plant will reward you with healthy new leaves in its own time.


Conclusion

Encouraging indoor plants to produce more leaves is about creating a balanced environment where they can thrive naturally. Provide ample light, feed them wisely, maintain humidity, prune thoughtfully, and stay consistent with care. Each new leaf is a reflection of your patience and understanding of what your plants truly need.

When you align your care routine with your plant’s natural rhythm, you’ll soon see your indoor garden flourish with vibrant, lush greenery—a living testament to the nurturing environment you’ve created.

The Best Watering Techniques for Plants in Ceramic Pots

The Best Watering Techniques for Plants in Ceramic Pots

Ceramic pots are among the most popular choices for indoor plants because of their elegant look, durability, and ability to keep soil cool. However, they can be tricky when it comes to watering. Many plant lovers unknowingly overwater or underwater their plants in ceramic pots, leading to root rot or dehydration. The key to thriving greenery lies in understanding the unique nature of ceramic containers and mastering the right watering techniques.

In this comprehensive guide, we’ll explore how to water plants in ceramic pots correctly, what to avoid, and the best practices to ensure your indoor plants stay lush, healthy, and vibrant year-round.


1. Understanding Ceramic Pots: Why They’re Different

Before diving into watering techniques, it’s essential to know what makes ceramic pots unique.

  • Porosity: Unglazed ceramic pots are porous, meaning they allow air and moisture to pass through their walls. This promotes aeration and prevents root rot but also means water evaporates faster.
  • Glazed Pots: Glazed ceramic pots are coated with a shiny layer that makes them non-porous. While they hold moisture longer, they also limit airflow to the roots, increasing the risk of waterlogging.
  • Weight and Drainage: Ceramic pots are heavier than plastic ones, providing stability for larger plants. However, drainage holes are essential — without them, excess water can’t escape, suffocating the roots.

Understanding these differences helps you tailor your watering habits to suit your specific pot type.


2. The Science of Watering Plants in Ceramic Pots

Every watering decision should consider three main factors: the pot type, the plant species, and the environment.

  • Pot Type: Unglazed pots require more frequent watering since moisture escapes faster. Glazed pots retain water longer, so they need less frequent watering.
  • Plant Species: Succulents, cacti, and snake plants need less water, while ferns, peace lilies, and pothos prefer consistently moist soil.
  • Environment: Humidity, temperature, and sunlight all influence soil moisture. Warm, dry air accelerates evaporation, while cooler or more humid conditions slow it down.

The best way to balance these elements is to observe your plant and the soil closely rather than following a strict schedule.


3. The Right Watering Techniques for Ceramic Pots

Here’s how to water plants effectively in ceramic pots to keep them thriving:

a. Check the Soil Before Watering

Never water on autopilot. Instead, insert your finger about 1–2 inches into the soil. If it feels dry, it’s time to water. If it’s still moist, wait a few more days.

Alternatively, you can use a moisture meter for more precision. This is especially useful for plants in deep ceramic pots where the surface may feel dry while the roots are still wet.

b. Water Slowly and Evenly

When watering, pour slowly around the base of the plant rather than dumping all the water at once. This ensures even absorption and prevents soil compaction.

Allow the water to seep down to the roots gradually, making sure it reaches the lower layers. If your pot has a drainage hole, water until you see it trickling out of the bottom — this ensures the entire root zone is moistened.

c. Use Room-Temperature Water

Cold water can shock plant roots, especially during cooler months. Always use room-temperature water to avoid stressing your plants.

d. Avoid Letting Water Sit in the Saucer

If your ceramic pot has a saucer, empty it after watering. Standing water can lead to root rot and attract pests like fungus gnats.

e. Consider Bottom Watering for Sensitive Plants

For delicate plants like African violets or those prone to leaf rot, try bottom watering.
Fill a shallow tray with water and place the ceramic pot (with drainage holes) on it for 15–30 minutes. The soil will absorb moisture through the drainage hole, hydrating the plant evenly without wetting the foliage.


4. Adjusting Watering Based on Season

Your plant’s watering needs vary throughout the year:

  • Spring and Summer: Plants grow actively, requiring more frequent watering. Check the soil every few days.
  • Autumn and Winter: Growth slows down, and evaporation decreases. Water less often — typically every 10–14 days, depending on indoor humidity.

If you use heating indoors during winter, the air can become dry, so monitor your plants closely. You might need to increase humidity instead of watering more.


5. How to Prevent Overwatering and Root Rot

Overwatering is the most common mistake with ceramic pots, especially glazed ones. Here’s how to prevent it:

  • Always use pots with drainage holes. If your ceramic pot doesn’t have one, consider drilling a small hole or using it as a decorative outer pot with a plastic liner inside.
  • Let the topsoil dry out between waterings for most indoor plants.
  • Elevate your pot slightly with pot feet or risers to improve airflow beneath it.
  • Use a well-draining potting mix, such as one containing perlite, pumice, or orchid bark, to prevent soggy soil.

If you suspect root rot, remove the plant from the pot, trim any mushy roots, and repot in fresh, dry soil.


6. The Role of Potting Mix in Water Retention

The type of potting mix you use plays a major role in how water behaves inside a ceramic pot.

  • For moisture-loving plants (like peace lilies, ferns, or calatheas): Use a mix rich in organic matter such as peat moss, compost, or coco coir to retain water.
  • For succulents and cacti: Use a gritty mix with sand, perlite, and pumice to encourage fast drainage.
  • For general houseplants: A balanced mix with peat moss, perlite, and a bit of compost works well.

Avoid compacted or dense soil that restricts airflow — this can cause stagnant moisture and lead to fungal growth.


7. Tips for Maintaining Ideal Humidity

Ceramic pots help maintain steady moisture levels, but indoor air can still dry out your plants, especially in air-conditioned or heated rooms.

To maintain ideal humidity:

  • Group plants together to create a microclimate of shared humidity.
  • Use a humidifier or mist your plants occasionally (avoid misting fuzzy-leaf plants).
  • Place pots on a pebble tray filled with water, ensuring the pot sits above the waterline.

This balance between humidity and proper watering ensures your plants thrive without becoming waterlogged.


8. Common Mistakes to Avoid

Many plant owners make small yet costly mistakes when watering ceramic pots. Avoid these pitfalls:

  • Watering on a fixed schedule rather than checking soil moisture.
  • Using pots without drainage holes.
  • Leaving water in saucers.
  • Using compact soil mixes that trap moisture.
  • Ignoring seasonal changes in plant water needs.

Remember, consistency and observation are key to healthy indoor plants.


9. Eco-Friendly Watering Tips

If you want to make your indoor gardening more sustainable, here are a few ideas:

  • Reuse aquarium or rice rinse water (as long as it’s unsalted and chemical-free).
  • Collect rainwater — it’s naturally soft and free of chlorine.
  • Use watering cans with narrow spouts to control flow and avoid splashing.

10. Conclusion: The Art of Perfect Watering

Caring for plants in ceramic pots is both an art and a science. The combination of moisture control, proper drainage, and attentive observation ensures your plants not only survive but flourish beautifully.

By understanding your pot type, checking soil moisture regularly, and adapting to seasonal needs, you can prevent overwatering, encourage healthy root growth, and keep your indoor plants looking their absolute best.

So, the next time you reach for your watering can, remember — it’s not just about giving water. It’s about giving just the right amount, in the right way, to create a thriving little ecosystem inside your ceramic pot.

How to Help Indoor Plants Adjust to a New Environment

How to Help Indoor Plants Adjust to a New Environment

Bringing home a new indoor plant is an exciting experience. The lush leaves, the vibrant color, the promise of fresh life in your living space — it all feels refreshing. But often, new plant parents notice something unexpected after a few days: leaves droop, colors fade, or the plant seems “unhappy.”

This doesn’t necessarily mean you did something wrong. Most plants experience a period of adjustment or “transplant shock” when they move to a new environment. Like humans adapting to new surroundings, plants need time — and the right care — to settle in.

In this detailed guide, we’ll explore why indoor plants struggle when moved, how to help them adapt smoothly, and the best care strategies to ensure they thrive in their new home.


1. Why Plants Need Time to Adjust

When a plant is moved — whether from a greenhouse, nursery, or even one room to another — it experiences sudden changes in conditions such as:

  • Light intensity and direction
  • Humidity and air circulation
  • Temperature levels
  • Soil moisture and watering habits
  • Exposure to drafts or heating systems

In their previous environment (usually a nursery), plants are grown under ideal, controlled conditions with perfect humidity, light, and watering. Once they’re moved to your home, the difference can feel drastic.

This adjustment period may cause temporary signs of stress, such as:

  • Drooping or curling leaves
  • Leaf yellowing or browning
  • Slower growth
  • Shedding of older leaves

The good news is — this phase is completely normal and can be managed with patience and care.


2. Step One: Give Your Plant Time to Settle

The first few weeks after bringing a plant home are crucial. Think of it as your plant’s “quarantine and adaptation” phase.

Avoid Overhandling

Resist the urge to repot or prune immediately. Let the plant settle for at least two weeks before making any major changes.

Keep It in a Stable Location

Choose a spot that offers the right light conditions for that species — not too harsh, not too dark. Sudden changes in lighting (like direct sunlight after a shaded nursery) can shock the plant.

Avoid Moving It Around

Find a good spot and let the plant acclimate there. Moving it frequently confuses its growth pattern and increases stress.


3. Step Two: Gradually Introduce Light

Light is the most important factor for plant adjustment. Too little, and it can’t photosynthesize; too much, and the leaves can burn.

For Bright-Light Plants (like Fiddle Leaf Fig, Rubber Plant, Monstera):

  • Start in indirect bright light for the first week.
  • Gradually increase exposure to sunlight over 10–14 days.
  • Avoid placing them right next to sunny windows initially.

For Low-Light Plants (like Pothos, ZZ Plant, Snake Plant):

  • Keep them in filtered or medium light for the first few weeks.
  • Even low-light plants need some natural light — avoid dark corners.

If your plant was previously grown in artificial nursery lighting, use grow lights to help bridge the adjustment period gradually.


4. Step Three: Adjust Your Watering Habits

Watering is often where new plant owners go wrong — especially right after bringing a plant home.

Nursery plants are used to consistent watering schedules and ideal soil moisture. Once they move into your home, differences in temperature and humidity change how quickly their soil dries out.

Tips for Proper Watering During Adjustment:

  • Check soil moisture before watering — use your finger or a moisture meter.
  • Avoid overwatering. A stressed plant absorbs less water, so keep the soil slightly moist but not soggy.
  • Use room-temperature water. Cold water can shock roots.
  • Ensure drainage. Always keep plants in pots with drainage holes to prevent root rot.

If your plant’s leaves droop, it might not always mean thirst — sometimes it’s stress. Always check the soil first.


5. Step Four: Maintain the Right Temperature and Humidity

Temperature and humidity shifts are two of the biggest challenges for indoor plants adapting to new environments.

Most tropical houseplants thrive in temperatures between 65–80°F (18–27°C) and humidity levels around 50–60%.

Tips to Maintain Comfort:

  • Keep plants away from air conditioners, heaters, and cold drafts.
  • Use a humidifier or humidity tray (a shallow tray filled with pebbles and water) to increase moisture around your plants.
  • Group plants together — they release moisture through transpiration, naturally boosting humidity.
  • Mist leaves occasionally (only for non-fuzzy plants like pothos or philodendrons).

Plants like ferns, calatheas, and peace lilies are especially sensitive to dry indoor air, so extra humidity helps them adjust faster.


6. Step Five: Avoid Repotting Immediately

Many plant lovers make the mistake of repotting new plants right after purchase. However, repotting too soon can worsen stress.

Why You Should Wait:

When plants are shipped or moved, their roots get slightly disturbed. Repotting adds more pressure, as roots must readapt to new soil density, nutrients, and moisture retention.

When It’s Safe to Repot:

  • Wait at least 4–6 weeks after bringing the plant home.
  • Only repot if:
    • The plant is severely root-bound.
    • The nursery soil drains poorly or has pests.

When you do repot, use fresh, well-draining potting soil suited for your plant type (for example, orchid mix for orchids, cactus mix for succulents).


7. Step Six: Observe and Learn Your Plant’s Signals

Every plant species reacts differently to change. The best way to help your plant adapt is to observe and respond to its signals.

Common Signs and What They Mean:

  • Yellow leaves: Overwatering or sudden light change.
  • Brown tips: Low humidity or inconsistent watering.
  • Drooping: Shock, or too much/little water.
  • Slow growth: Natural adaptation phase — be patient.

Be Consistent

Plants thrive on routine. Try to water, mist, and feed on a schedule so they know what to “expect.” This consistency helps them stabilize faster.


8. Step Seven: Feed Gently (and Sparingly)

It might seem logical to give your new plant fertilizer for a growth boost — but resist the urge.

During the adjustment period, plants aren’t focused on growth; they’re trying to stabilize. Fertilizing too soon can overwhelm their delicate root system.

Fertilizer Guidelines:

  • Wait 4–6 weeks before feeding a new plant.
  • Use a diluted, balanced fertilizer (such as 10-10-10).
  • Feed lightly once a month during active growth seasons (spring and summer).
  • Avoid feeding during winter dormancy.

Think of fertilizer as a “reward” after your plant settles in, not a cure for stress.


9. Step Eight: Clean and Care for Leaves

Dust and dirt on leaves can block light and reduce photosynthesis — which is vital for plants during adjustment.

How to Clean Leaves Naturally:

  • Wipe broad leaves gently with a damp, soft cloth.
  • Use room-temperature water with a drop of mild liquid soap if needed.
  • For fuzzy leaves (like African violets), use a soft brush instead of water.

Clean leaves not only help plants absorb more light but also prevent pests like spider mites, which can attack stressed plants.


10. Step Nine: Reduce Stress Factors

Small environmental changes can make a big difference in helping plants feel “at home.”

Create a Calm Environment

  • Avoid placing plants near loud appliances or doors that open frequently — vibrations and airflow changes can stress them.
  • Keep them away from cigarette smoke, chemical sprays, or perfumes.
  • Give them a consistent day-night cycle by placing them in naturally lit rooms.

Remember — plants thrive in stability. The fewer fluctuations they experience, the quicker they adapt.


11. Step Ten: Be Patient — Adaptation Takes Time

Even with the best care, it can take weeks or even months for some plants to fully adjust. Don’t rush the process.

Over time, you’ll start to see signs of recovery and new growth — small buds, firm leaves, or vibrant colors. These are all indications that your plant has successfully adjusted and is thriving in its new home.

Patience, observation, and gentle care are the key ingredients to a happy plant.


12. Bonus Tips for a Smooth Transition

  • Quarantine new plants for 1–2 weeks before placing them near others. This prevents potential pest spread.
  • Rotate plants occasionally so all sides receive equal light exposure.
  • Talk to your plants — while this might sound funny, studies show that sound vibrations can positively influence growth!
  • Use plant stands or shelves to keep them at eye level — making observation easier and improving décor appeal.

Conclusion

Helping indoor plants adjust to a new environment isn’t about doing more — it’s about doing the right things at the right pace.

Your plants aren’t just decorations; they’re living beings learning to adapt to a completely different climate, light level, and care routine. With patience, observation, and a nurturing touch, you can guide them through this transition successfully.

To recap:

  • Give your plant time and stability.
  • Gradually introduce light and adjust watering.
  • Maintain humidity and temperature consistency.
  • Avoid repotting and fertilizing too soon.
  • Observe, learn, and respond to your plant’s needs.

Within a few weeks, you’ll start to see signs of recovery — fresh leaves, vibrant color, and strong new growth. That’s your plant’s way of saying: “I’m home.”

5 Indoor Plants That Instantly Make a Room Feel Cozier

5 Indoor Plants That Instantly Make a Room Feel Cozier

There’s something magical about a space that feels warm, welcoming, and alive. While cozy home décor often focuses on soft textures, warm lighting, and soothing colors, one of the most effortless and natural ways to make a room feel instantly inviting is by adding indoor plants. These living touches not only beautify your home but also bring calmness, purify the air, and create an atmosphere of serenity.

Whether you live in a compact apartment or a spacious home, certain indoor plants have the power to make any space feel cozier in minutes. In this guide, we’ll explore five of the best indoor plants that can transform the mood of your room — along with detailed care tips and design ideas to make them thrive.


1. Peace Lily (Spathiphyllum): The Elegant Touch of Calm

If you want a plant that radiates serenity and grace, the Peace Lily is the perfect choice. Its deep green leaves and soft white blooms create a gentle contrast that complements any interior. The Peace Lily isn’t just beautiful; it also purifies indoor air, removing toxins like benzene, formaldehyde, and ammonia.

Why It Makes a Room Cozy

The Peace Lily’s lush, full foliage brings softness to sharp corners or minimalistic spaces. Its natural, graceful shape adds movement and texture, making a room feel alive without overwhelming the design. The white blooms reflect light, brightening darker areas and making them feel warm and comforting.

Best Placement

  • Ideal for living rooms, bedrooms, or reading nooks.
  • Looks stunning near soft lighting or beside wooden furniture.
  • Thrives in indirect sunlight, making it great for rooms with filtered light.

Care Tips

  • Light: Bright, indirect light. Avoid harsh sun.
  • Water: Keep soil moist but not soggy; water when the top inch feels dry.
  • Humidity: Enjoys moderate to high humidity — mist occasionally.
  • Bonus Tip: Wipe the leaves every few weeks to keep them glossy and dust-free.

A well-placed Peace Lily can instantly turn a plain corner into a peaceful retreat.


2. Snake Plant (Sansevieria): The Modern Minimalist’s Favorite

If your home leans toward modern or minimalist décor, the Snake Plant (also known as Mother-in-Law’s Tongue) adds the perfect blend of style and comfort. With its upright sword-like leaves and striking variegation, it brings structure and warmth simultaneously.

Why It Makes a Room Cozy

The Snake Plant’s sculptural form adds visual interest without taking up much space. Its deep green tones complement wood, neutral palettes, and soft fabrics beautifully. It also releases oxygen at night, improving indoor air quality and creating a more restful environment — ideal for cozy bedrooms.

Best Placement

  • Perfect for bedrooms, living rooms, or entryways.
  • Works well beside floor lamps, sofas, or in corners that need a touch of greenery.
  • Because it tolerates low light, it’s excellent for rooms without direct sunlight.

Care Tips

  • Light: Adaptable; does well in low to bright indirect light.
  • Water: Water sparingly; allow soil to dry out between waterings.
  • Temperature: Prefers 60–85°F (16–29°C).
  • Bonus Tip: Use a decorative ceramic or terracotta pot to enhance its cozy appeal.

The Snake Plant’s simple elegance and air-purifying qualities make it a staple for those who want beauty with minimal effort.


3. Pothos (Epipremnum aureum): The Effortless Green Cascade

Few plants can rival the Pothos for its ability to soften and warm a space. Its trailing vines with heart-shaped leaves create a lush, relaxed vibe that instantly makes a room feel lived-in and cozy. Known as the “Devil’s Ivy,” this plant is almost impossible to kill, making it perfect for beginners and busy individuals alike.

Why It Makes a Room Cozy

The cascading vines of the Pothos add a natural drape and movement to interiors, much like curtains or fabric do. Whether you let it trail from a shelf, hang it from the ceiling, or allow it to climb a trellis, it creates visual warmth and a touch of wilderness indoors.

Best Placement

  • Great for bookshelves, kitchen corners, or window sills.
  • Hang in macramé planters to create an inviting boho look.
  • Perfect for bathrooms with filtered light and humidity.

Care Tips

  • Light: Thrives in bright, indirect light but can tolerate low light.
  • Water: Water when the top inch of soil dries out; avoid soggy soil.
  • Growth Tip: Prune occasionally to encourage bushier vines.
  • Bonus Tip: Place cuttings in water jars for extra green accents on tables.

The Pothos embodies the essence of coziness — natural, easygoing, and quietly beautiful.


4. Rubber Plant (Ficus elastica): The Statement of Warmth and Sophistication

For those who prefer a bolder, more structured look without losing warmth, the Rubber Plant is the ultimate cozy companion. With its large, glossy leaves and deep green or burgundy hues, it adds an earthy richness that grounds any room’s atmosphere.

Why It Makes a Room Cozy

The Rubber Plant’s dense foliage gives a sense of fullness and life. Its dark tones contrast perfectly with light walls and neutral furniture, creating balance and depth. It exudes a sense of calm, stability, and comfort — all the feelings associated with a truly cozy home.

Best Placement

  • Ideal for living rooms, dining areas, or near windows.
  • Looks great beside armchairs, coffee tables, or next to natural light sources.
  • Adds height and lushness without needing constant care.

Care Tips

  • Light: Prefers bright, indirect light; too much direct sun may scorch leaves.
  • Water: Let the top few inches of soil dry before watering again.
  • Humidity: Tolerates normal indoor humidity but enjoys occasional misting.
  • Bonus Tip: Wipe leaves weekly to keep them shiny and dust-free.

When paired with wooden décor, textured rugs, and warm lighting, the Rubber Plant creates a tranquil yet sophisticated retreat.


5. Fern (Boston Fern or Maidenhair Fern): The Lush Layer of Comfort

No plant says “cozy” quite like a Fern. With its feathery fronds and vibrant green foliage, the fern adds softness and freshness to any room. It’s a classic choice for creating a warm, natural, and timeless interior atmosphere.

Why It Makes a Room Cozy

Ferns have an organic, old-world charm that blends beautifully with rustic, bohemian, or traditional décor styles. Their delicate texture contrasts well with smooth furniture or minimalist spaces, instantly making them feel more inviting and layered.

Best Placement

  • Perfect for bathrooms, bedrooms, or near windows with filtered light.
  • Hang them in baskets or place them on pedestals for a cascading effect.
  • Combine with other houseplants for a lush jungle-like vibe.

Care Tips

  • Light: Indirect, filtered light is best. Avoid direct sunlight.
  • Water: Keep soil consistently moist but not waterlogged.
  • Humidity: Loves high humidity; mist regularly or place near a humidifier.
  • Bonus Tip: Trim dead fronds to encourage healthy new growth.

A well-kept fern instantly turns your home into a peaceful green sanctuary.


Design Tips to Maximize Coziness

Adding cozy plants is just the beginning — how you style and integrate them into your space makes a world of difference.

1. Use Natural Materials

Pair your plants with natural textures like rattan baskets, wooden stands, or ceramic pots. These materials enhance warmth and complement greenery beautifully.

2. Create Soft Lighting

Position your plants near warm-toned lamps or string fairy lights for a soft, golden glow in the evenings. The interplay between light and leaves creates magical shadows that enhance coziness.

3. Layer Plants at Different Heights

Use a combination of floor plants, shelf plants, and hanging plants to create depth and dimension, much like layering fabrics in cozy décor.

4. Pair with Comfort Elements

Plants look even more inviting alongside plush throws, warm-toned cushions, and candles. The natural greenery balances softness with freshness.

5. Group Plants Together

Instead of scattering plants around, group them in clusters to mimic nature’s abundance. A cluster of three or five plants with varying sizes and shapes looks both intentional and cozy.


Final Thoughts

Cozy homes are not just about décor — they’re about feeling. The right indoor plants transform your space into a living, breathing retreat that soothes your senses and connects you with nature.

The Peace Lily adds tranquility and purity.
The Snake Plant offers modern charm with minimal care.
The Pothos brings soft, cascading life to forgotten corners.
The Rubber Plant introduces grounding warmth and elegance.
And the Fern layers your home with lush, timeless beauty.

Together, these five indoor plants create a harmonious environment that feels comfortable, welcoming, and alive. Whether you’re curling up with a book, hosting friends, or simply relaxing after a long day, these green companions make your space feel more like home.

How to Create a Mini Jungle in Your Living Room

How to Create a Mini Jungle in Your Living Room

Bringing a touch of the wild indoors is one of the most rewarding design trends of recent years. A living room filled with lush greenery — often called a “mini indoor jungle” — doesn’t just make your home look stunning; it also improves air quality, reduces stress, and reconnects you with nature. Creating your own mini jungle might sound complicated, but with a thoughtful approach and the right plants, anyone can transform their living room into a green oasis.

In this detailed guide, you’ll learn how to design, arrange, and maintain your own indoor jungle naturally — even if you’re a beginner.


1. Why Create a Mini Jungle Indoors?

Before diving into the “how,” it’s worth exploring the “why.” Indoor jungles are more than a décor trend; they’re a lifestyle statement and a wellness choice.

Here are some powerful reasons to create your own mini jungle:

  • Cleaner Air: Many houseplants absorb toxins like formaldehyde, benzene, and carbon dioxide, leaving your indoor air fresher.
  • Stress Reduction: Studies show that being surrounded by plants lowers cortisol (stress hormone) levels and boosts mental well-being.
  • Natural Humidity: Plants release moisture through transpiration, helping balance humidity in your home — especially helpful in dry climates.
  • Aesthetic Appeal: A living room filled with vibrant foliage creates a relaxing, exotic vibe that elevates your home’s personality.
  • Connection with Nature: Indoor jungles bring nature closer, fostering mindfulness and a sense of peace.

With benefits like these, it’s easy to see why so many people are turning their homes into natural sanctuaries.


2. Planning Your Indoor Jungle Design

Before buying plants, plan your indoor jungle layout. Think of it as designing a layered ecosystem rather than a simple plant collection.

a) Assess Your Living Room Environment

  • Light: Observe how much natural light your room receives. South- or west-facing windows provide bright light; north-facing rooms may need grow lights.
  • Temperature: Most houseplants thrive between 65–80°F (18–27°C).
  • Humidity: Jungle plants love moisture. If your air is dry, consider using a humidifier or pebble trays.

b) Define the Style You Want

Your mini jungle can reflect your personality. Here are a few popular styles:

  • Tropical Paradise: Filled with large-leaf plants like Monstera, Bird of Paradise, and Philodendrons.
  • Bohemian Jungle: A mix of climbing, hanging, and trailing plants with woven baskets and natural textures.
  • Minimalist Green Corner: Fewer plants but with striking shapes and bold foliage.

c) Choose the Layout

  • Corner Jungle: Concentrate your plants in one lush corner of the living room.
  • Ceiling-to-Floor Design: Use tall plants, hanging vines, and small tabletop species for full visual impact.
  • Shelf Display: Layer different plants on open shelves for a vertical jungle effect.

Sketch a rough layout before you start placing plants.


3. Choosing the Right Plants for a Mini Jungle

The success of your indoor jungle depends largely on the plants you choose. The goal is to mix variety, texture, and color while ensuring they all thrive in similar light and humidity conditions.

a) Tall Statement Plants

These form the “trees” of your jungle — the backbone of your design.

  • Monstera deliciosa (Swiss Cheese Plant): Iconic split leaves and tropical appeal.
  • Bird of Paradise: Adds height and a bold, architectural look.
  • Fiddle Leaf Fig: Perfect for corners, but needs bright indirect light.
  • Areca Palm or Kentia Palm: Elegant, airy fronds that create a true jungle vibe.

b) Mid-Height Bushy Plants

These fill out the middle layer and create lush density.

  • Philodendron: Easy to grow and comes in climbing or upright varieties.
  • Calathea: Beautiful patterned leaves, great for medium light.
  • Peace Lily: Adds elegance and even blooms indoors.
  • Dieffenbachia: Large variegated leaves and easy maintenance.

c) Trailing and Hanging Plants

For vertical appeal and depth.

  • Pothos (Devil’s Ivy): Fast-growing, low-maintenance, and perfect for shelves.
  • Spider Plant: Excellent air purifier with cascading shoots.
  • English Ivy: Great for draping across mantels or hanging baskets.
  • String of Hearts or String of Pearls: Adds charm and movement.

d) Small Accent Plants

These add variety to tabletops and small spaces.

  • Fittonia (Nerve Plant): Brightly veined leaves for pops of color.
  • Baby’s Tears: Soft ground-cover effect for pots or terrariums.
  • Succulents or Mini Ferns: Great for small planters.

When choosing, try to include plants with different leaf shapes, heights, and textures to create that lush jungle diversity.


4. Layering: The Secret to a Real Jungle Look

Nature doesn’t grow in neat rows — and neither should your indoor jungle. Layering is key to creating depth and a sense of abundance.

Here’s how:

  • Back Layer (Tall Plants): Place your large plants like Monsteras or Palms near walls or corners.
  • Middle Layer (Medium Plants): Arrange bushy plants at sofa or table height for fullness.
  • Front Layer (Small and Trailing Plants): Add smaller pots or trailing plants that cascade over shelves or stands.
  • Vertical Layer: Use hanging planters, macramé holders, or wall shelves for height variation.

Mix heights, textures, and pot styles for a dynamic and natural flow.


5. Creating the Perfect Environment

To make your jungle flourish, you must recreate the conditions of a tropical forest — warmth, moisture, and indirect sunlight.

a) Light

  • Place most plants near east- or south-facing windows for bright, indirect light.
  • For low-light corners, add LED grow lights to mimic natural sunlight.
  • Rotate plants every few weeks for even growth.

b) Humidity

Jungle plants thrive in humidity levels of 50–70%.

  • Use a humidifier during dry months.
  • Place pebble trays with water near plants.
  • Group plants together — they naturally increase each other’s humidity through transpiration.

c) Watering

  • Keep soil evenly moist, not soggy.
  • Use filtered or rainwater if possible — some tropical plants are sensitive to chlorine.
  • Mist leaves occasionally to mimic rainforest conditions.

d) Temperature

Avoid cold drafts or heat from vents. Keep your jungle cozy between 65–80°F (18–27°C).


6. Styling Your Mini Jungle

Once your plants are chosen and arranged, styling them beautifully makes all the difference.

a) Choose Natural Materials

Use earthy, organic textures that complement greenery:

  • Woven baskets, terracotta pots, wooden stands, or rattan furniture.
  • Avoid too much plastic — it breaks the natural feel.

b) Use Multi-Level Displays

Varying heights give your space dimension. Combine floor plants with hanging ones, and use plant stands or shelves for vertical layering.

c) Add Decorative Touches

  • Fairy lights or warm LED strips for soft nighttime ambiance.
  • A small water feature or humidifier for atmosphere and moisture.
  • Mirrors to reflect light and make your jungle look more expansive.

d) Blend with Your Décor

Choose pots and planters that complement your living room’s color scheme — earthy tones, whites, and neutrals work best for a natural look.


7. Maintenance Tips for a Thriving Indoor Jungle

A mini jungle is alive and ever-changing. Consistent care keeps it lush and vibrant.

a) Clean the Leaves

Dust blocks light and slows growth. Wipe leaves gently with a damp cloth every 2–3 weeks to keep them breathing freely.

b) Rotate and Prune

Rotate plants for even sunlight exposure and trim yellow or overgrown leaves to encourage fresh growth.

c) Feed Naturally

Use organic fertilizers like compost tea, banana peel water, or seaweed solution once a month during spring and summer.

d) Watch for Pests

Inspect leaves regularly for pests like spider mites or mealybugs. Treat naturally with neem oil spray or insecticidal soap.

e) Repot When Needed

Every 1–2 years, refresh the soil and move plants to slightly larger pots to support growth.


8. Embrace Imperfection — Let Nature Take Over

Part of the beauty of an indoor jungle lies in its wildness. Allow plants to grow freely, intertwine, and create natural layers. Don’t strive for perfect symmetry — jungles thrive in organic chaos.

Remember, each plant grows at its own pace. Some will flourish quickly, while others take time. The goal isn’t perfection — it’s harmony.


9. The Emotional Impact of Living with a Mini Jungle

Living among plants changes more than just your home’s aesthetics — it transforms your mood and mindset. A mini jungle offers:

  • Peaceful Energy: Greenery has a calming psychological effect, helping you unwind after a busy day.
  • Creativity Boost: The natural environment inspires focus and imagination.
  • Mindful Living: Caring for plants encourages patience, observation, and connection with nature.

Your living room becomes not just a physical space but a sanctuary of growth and tranquility.


10. Conclusion

Creating a mini jungle in your living room is more than a design project — it’s a journey toward a greener, calmer, and more vibrant lifestyle. With careful plant selection, thoughtful layering, and a nurturing touch, you can bring the magic of the rainforest right into your home.

Your indoor jungle will reward you with lush beauty, cleaner air, and a daily reminder of the serenity that only nature can offer. Whether your space is large or small, every leaf, vine, and frond adds life to your living room — turning it into a lush retreat you’ll never want to leave.

Why You Should Wipe Plant Leaves Regularly and the Right Way to Do It

Why You Should Wipe Plant Leaves Regularly and the Right Way to Do It

Indoor plants bring life, color, and freshness to any space. But as time passes, their leaves can collect dust, grime, and residue from the surrounding environment. What many plant owners don’t realize is that this thin layer of dirt does more than just dull the shine of your foliage — it can actually hinder plant health and slow growth.

Cleaning plant leaves might sound like a small detail, but it’s one of the most powerful ways to keep your indoor garden thriving. In this detailed guide, you’ll learn why leaf cleaning is essential, what benefits it offers, and how to do it safely and effectively — the natural way.


1. Why Leaf Cleaning Matters More Than You Think

Just like humans need clear skin to breathe, plants need clean leaves to “breathe” and function properly. The tiny openings on a leaf’s surface, called stomata, are crucial for photosynthesis, transpiration, and gas exchange. When these pores are clogged by dust and debris, the plant’s overall health declines.

Here’s what happens when you don’t wipe your plant leaves regularly:

  • Reduced Photosynthesis: Dust blocks sunlight, which plants need to convert light into energy. Less light means slower growth and duller foliage.
  • Clogged Pores: Stomata get blocked, making it difficult for the plant to “breathe” and regulate water.
  • Increased Pest Risk: Dusty leaves attract pests like spider mites and aphids that thrive in dirty environments.
  • Lower Humidity Absorption: Plants also absorb moisture through their leaves — a layer of grime can prevent this.
  • Unhealthy Appearance: Dirty leaves lose their natural shine and color, making your indoor space look neglected.

Simply put, cleaning leaves is more than a cosmetic task — it’s part of essential plant care.


2. The Benefits of Wiping Plant Leaves Regularly

Regularly cleaning your plant leaves improves both their health and aesthetic appeal. Let’s explore the major benefits in detail:

a) Boosts Photosynthesis

When you remove dust, you allow maximum light to reach the leaf surface. More light means stronger, greener, and faster-growing plants.

b) Enhances Air Quality

Clean leaves absorb carbon dioxide more efficiently and release more oxygen, helping purify the air in your home naturally.

c) Prevents Pest Infestations

Pests love dirty environments. By keeping your plants clean, you discourage common intruders like mites, whiteflies, and mealybugs.

d) Improves Aesthetic Value

Shiny, vibrant leaves look healthier and instantly make any room feel more alive and well cared for.

e) Reduces Fungal and Mold Growth

Dust and residue can trap moisture, leading to mold or mildew on the leaf surface. Cleaning prevents these issues before they start.

f) Promotes Longevity

A clean leaf system helps your plant breathe and function better, extending its lifespan.


3. How Often Should You Clean Plant Leaves?

The ideal cleaning frequency depends on your environment and the type of plant.

  • In urban or dusty areas: Wipe leaves every 7–10 days.
  • In less dusty homes: Every 2–3 weeks is sufficient.
  • For large collections: Rotate cleaning days — a few plants at a time.

A simple test: if you run your finger along a leaf and it leaves a visible dust mark, it’s time for a cleaning session.


4. The Right Way to Wipe Plant Leaves — Step-by-Step

Cleaning leaves the wrong way can actually harm your plants. Follow these gentle, natural steps to keep your indoor greenery spotless and safe.


Step 1: Gather the Right Supplies

You don’t need fancy tools — just the basics:

  • Soft microfiber cloth or a clean sponge
  • Spray bottle with lukewarm water
  • Mild natural soap (optional)
  • Small soft brush (for hairy or textured leaves)
  • Bowl or bucket for water

Avoid using chemical leaf polishers or oils — they can clog pores and attract more dust.


Step 2: Dust the Leaves First

Start by dusting the leaves dry before using water. Use a soft brush or microfiber cloth to gently remove loose dust. Always support the leaf from underneath with one hand to avoid snapping delicate stems.

For plants with fine leaves (like ferns or asparagus plants), use a small paintbrush or makeup brush.


Step 3: Prepare a Gentle Cleaning Solution

For tough grime or sticky residue, mix a simple natural cleaning solution:

  • 1 quart (1 liter) of lukewarm water
  • A few drops of mild liquid soap (like castile or baby soap)

Avoid strong detergents, alcohol, or vinegar — they can damage leaf tissue.


Step 4: Wipe Each Leaf Carefully

  1. Dip your cloth or sponge in the cleaning solution and wring it out so it’s damp, not dripping.
  2. Gently wipe the top and underside of each leaf. The underside is especially important — that’s where pests hide and stomata are located.
  3. Rinse the cloth regularly to avoid spreading dust back onto the leaves.

Tip: Always wipe in the direction of the leaf’s veins to prevent tearing.


Step 5: Rinse (If Necessary)

If your plant has many leaves or large foliage (like Monstera or Rubber Plant), you can give it a gentle rinse under a lukewarm shower or spray. Let excess water drain thoroughly afterward to avoid waterlogging.


Step 6: Let the Leaves Dry Naturally

After cleaning, allow the leaves to air-dry in a shaded spot with good airflow. Avoid direct sunlight — wet leaves can burn easily under strong light.


5. Special Cleaning Techniques for Different Types of Plants

Not all plants can be cleaned the same way. Their leaf type determines the safest cleaning method.

a) Smooth, Broad Leaves (e.g., Monstera, Rubber Plant, Peace Lily)

  • Use a soft cloth and gentle wiping method.
  • Clean both sides carefully — these plants collect the most dust.

b) Fuzzy or Hairy Leaves (e.g., African Violet, Begonia Rex)

  • Never use water directly — it can cause leaf spots and rot.
  • Use a soft brush to dust off dirt gently.
  • If needed, use a slightly damp brush tip to remove stubborn grime.

c) Delicate or Small Leaves (e.g., Ferns, Asparagus Fern, Maidenhair Fern)

  • Misting works best. Use filtered water to remove light dust.
  • Avoid wiping, as fronds are fragile and can break easily.

d) Succulents and Cacti

  • These plants gather dust too, but their waxy or spiny surfaces make them tricky.
  • Use a soft brush or compressed air to remove dust between ridges.

6. Natural Ingredients That Help Shine and Clean Leaves

Instead of store-bought leaf shine sprays, try these natural and safe alternatives that clean and add gentle luster:

  • Banana Peel Wipe: Rub the inside of a banana peel gently on broad leaves, then wipe with a soft cloth for a natural shine.
  • Aloe Vera Solution: Mix 1 tablespoon of aloe gel in 1 liter of water and wipe — adds a healthy glow and mild antifungal protection.
  • Neem Oil Spray: A few drops mixed in water help clean leaves and deter pests naturally.
  • Green Tea Solution: Mild green tea can remove sticky residue and add a gentle sheen.

Always test any natural cleaner on a single leaf first to ensure no damage occurs.


7. Mistakes to Avoid When Cleaning Plant Leaves

Even with good intentions, many plant lovers make mistakes that can harm their greenery. Avoid these common errors:

  • ❌ Using commercial leaf shine products — they clog pores and attract dust.
  • ❌ Spraying plants in direct sunlight — can cause sunburn or leaf spots.
  • ❌ Using cold or hot water — extremes shock the plant and damage tissues.
  • ❌ Forgetting the underside of leaves — that’s where stomata and pests hide.
  • ❌ Cleaning too aggressively — can tear leaves or bruise them.

8. How to Keep Leaves Clean for Longer

After cleaning, you can take steps to reduce how quickly your plants get dusty again:

  • Keep windows and air vents clean to minimize dust circulation.
  • Wipe nearby surfaces — dust settles from furniture to leaves.
  • Use an air purifier to reduce indoor particles.
  • Maintain humidity levels — higher humidity helps prevent dust buildup.
  • Regularly mist your plants to keep them hydrated and fresh-looking.

These simple habits keep your plants glowing between cleaning sessions.


9. The Emotional and Aesthetic Rewards

Beyond plant health, cleaning leaves regularly can be therapeutic. It gives you a chance to slow down, observe your plants closely, and spot early signs of trouble like pests or nutrient deficiencies.

Watching the leaves regain their rich color and shine also offers a sense of satisfaction — your plants look happier, and your space feels cleaner and more vibrant.

A well-maintained indoor plant doesn’t just grow better; it uplifts the entire atmosphere of your home.


10. Conclusion

Wiping plant leaves regularly might seem like a small act, but it’s one of the most impactful things you can do for your indoor garden. Clean leaves mean more light absorption, better respiration, and stronger growth — all of which contribute to a lush, thriving, and radiant indoor environment.

By using gentle, natural cleaning methods and making it a consistent part of your plant care routine, you’ll help your plants stay healthy and beautiful for years to come.

So next time you notice a thin layer of dust dulling your plant’s glow, take a soft cloth, some water, and a few quiet minutes. Your plants — and your indoor space — will thank you with fresh, glossy leaves and vibrant energy all around.

How to Revive a Dying Indoor Fern Naturally

How to Revive a Dying Indoor Fern Naturally

Ferns are some of the most beautiful indoor plants you can grow — their soft, feathery fronds and lush green color add instant freshness and elegance to any room. But these tropical beauties can also be a bit sensitive. A slight change in humidity, light, or watering routine can make them look droopy, brown, or even close to death. If your fern is looking wilted, dry, or lifeless, don’t give up hope yet! With the right care and a few natural remedies, you can bring your dying indoor fern back to life.

This comprehensive guide explains how to identify the cause of decline, revive your fern naturally, and keep it thriving long-term.


1. Understanding Why Ferns Die Indoors

Before you can rescue your fern, it’s essential to understand what caused it to decline in the first place. Indoor ferns are usually affected by one or more of these common problems:

  • Low Humidity: Ferns naturally grow in moist, shaded forests. Dry indoor air—especially during winter—can cause the fronds to crisp up.
  • Overwatering or Underwatering: Ferns love moist soil, but not soggy roots. Overwatering leads to root rot, while underwatering dries out the leaves.
  • Too Much Direct Sunlight: Bright sun can scorch delicate fronds, leading to brown edges and leaf drop.
  • Poor Soil Drainage: Ferns hate sitting in waterlogged soil. Compacted or heavy soil suffocates roots.
  • Lack of Nutrients: Without adequate organic matter, ferns can lose their lush green color.
  • Cold Drafts or Heat Exposure: Sudden temperature changes can shock your fern.
  • Neglect or Stress: Moving the plant, changing pots, or inconsistent care can weaken its system.

Once you’ve pinpointed the cause, you can take the right steps to restore your fern naturally.


2. Assess the Damage: Is Your Fern Still Alive?

The first thing to do is determine if your fern still has a chance. Don’t panic if most of the leaves look brown — the key is checking the roots.

How to check:

  1. Gently remove the fern from its pot.
  2. Examine the roots — healthy roots should be firm, light tan, or white.
  3. If the roots are dark, mushy, or smell foul, those parts are dead.
  4. Trim off the damaged roots with clean scissors, keeping only the healthy ones.

If some fronds are still green or soft at the base, your fern can recover with care.


3. Step-by-Step Guide to Reviving a Dying Fern Naturally

Let’s walk through the process of bringing your fern back to life — the natural way, without chemicals or synthetic fertilizers.


Step 1: Trim Away Dead or Damaged Fronds

Start by removing all brown, crispy, or yellow fronds. Use sterilized scissors to avoid spreading disease.
This helps redirect the plant’s energy to new, healthy growth instead of trying to save dying leaves.

After trimming, your fern may look sparse — don’t worry! New fronds will emerge once it begins recovering.


Step 2: Refresh the Soil

Old, compacted, or soggy soil can suffocate roots. Replant your fern in fresh, well-draining soil rich in organic matter.

Natural soil mix for ferns:

  • 1 part peat moss or coco coir (for moisture retention)
  • 1 part compost or leaf mold (for nutrients)
  • 1 part perlite or sand (for drainage)

Make sure the pot has proper drainage holes to prevent waterlogging.


Step 3: Rehydrate the Roots

If your fern has dried out, it needs a deep soak to rehydrate its roots.

Here’s how:

  1. Fill a bowl or basin with room-temperature water.
  2. Submerge the pot until air bubbles stop rising (about 15–20 minutes).
  3. Let it drain thoroughly before putting it back in its spot.

This gentle soaking mimics rainfall in nature and helps revive wilting ferns without shocking the roots.


Step 4: Create the Right Humidity Environment

Ferns love humid air — ideally between 50% and 80% humidity. In dry indoor conditions, humidity is often the missing ingredient.

Natural ways to boost humidity:

  • Misting: Lightly mist your fern once or twice a day using distilled or rainwater. Avoid drenching the fronds.
  • Pebble Tray: Place a tray with pebbles and water under your plant’s pot. As water evaporates, it creates a humid microclimate.
  • Group Plants Together: Plants release moisture through transpiration; clustering them increases humidity naturally.
  • Bathroom Placement: If your bathroom has a window, it can be the perfect humid haven for a recovering fern.

Step 5: Adjust Light Levels

Too much light can burn ferns, while too little can weaken them.

Ideal lighting:

  • Place the fern near an east- or north-facing window for bright but indirect light.
  • Avoid placing it under harsh sunlight or directly next to a window where rays hit the leaves.
  • If light is insufficient, use a low-intensity LED grow light for 6–8 hours daily.

This balanced lighting helps your fern photosynthesize without drying out.


Step 6: Follow a Gentle Watering Routine

Proper watering is key to your fern’s revival. Ferns like consistently moist soil — not bone dry or soggy.

Natural watering tips:

  • Water only when the top inch of soil feels slightly dry.
  • Use filtered, rain, or dechlorinated water, as tap water may contain chemicals harmful to ferns.
  • Water from the bottom once a month to encourage deep root growth.
  • Reduce watering in winter when growth slows.

Consistency is more important than frequency. Avoid cycles of overwatering and underwatering.


Step 7: Feed with Natural Fertilizers

Avoid synthetic fertilizers, which can burn fragile roots. Instead, nourish your fern with gentle, natural options once it starts showing new growth.

Natural fertilizers for ferns:

  • Compost tea: Steep compost in water for 2–3 days, strain, and use it as a liquid fertilizer.
  • Banana peel water: Soak banana peels in water for 48 hours — rich in potassium and magnesium.
  • Diluted seaweed solution: Provides trace minerals for healthy fronds.

Feed lightly once every 4–6 weeks during the growing season (spring and summer).


Step 8: Maintain a Stable Temperature

Ferns are sensitive to temperature changes. Keep them in a room with consistent warmth between 65–75°F (18–24°C).

Avoid:

  • Cold drafts near windows or doors
  • Hot air from heaters or vents
  • Sudden temperature shifts

If your home is very dry in winter, place the fern away from direct heat sources and use a humidifier if necessary.


4. Natural Remedies for Specific Fern Problems

Here are quick, natural fixes for some common fern issues:

  • Brown Leaf Tips: Caused by dry air or fluoride in water. Use rainwater and increase humidity.
  • Yellow Leaves: Often due to overwatering — allow the soil to dry slightly before watering again.
  • Wilting or Drooping Fronds: Check for root rot and trim dead roots. Replant in fresh, airy soil.
  • Pest Infestation (like spider mites or mealybugs): Spray with a neem oil and water mixture (1 teaspoon neem oil + a few drops of mild soap in a liter of water).
  • Slow Growth: Give it time — most ferns bounce back slowly. Ensure proper humidity and indirect light.

5. Ongoing Care Tips to Keep Your Fern Thriving

Once your fern has recovered, maintaining its health naturally is key to long-term success.

  • Dust the Fronds Regularly: Dust blocks light and hinders photosynthesis. Gently wipe leaves with a soft, damp cloth.
  • Prune Old Fronds: Cutting away aging fronds stimulates new growth.
  • Repot Every 2 Years: Refresh the soil to keep nutrients flowing and prevent compaction.
  • Rotate Your Plant: Turn it occasionally so all sides receive even light exposure.
  • Stay Consistent: Ferns love routine. Try to keep their environment stable without frequent moves or changes.

6. Patience: The Secret Ingredient

Reviving a dying fern is not an overnight process. It can take several weeks to months before you see strong, healthy new fronds. During this period, patience is your best tool. Continue giving it steady care and monitor small signs of recovery, like tiny green shoots emerging from the crown.

The good news is, once a fern’s roots start regenerating, it can quickly return to its lush, vibrant state — often even fuller than before.


Conclusion

A dying fern doesn’t have to be the end of your indoor garden story. With natural remedies, gentle care, and a bit of patience, you can restore your fern’s beauty and vitality. By maintaining proper humidity, light, water, and nourishment, you’re creating the same peaceful, moist environment that ferns love in the wild.

Remember, every plant has resilience built into its nature. All it needs is your attention, consistency, and a nurturing touch. Once your fern bounces back, it will reward you with lush green fronds that bring life, calm, and freshness to your indoor space — all year round.