How to Train Vining Plants to Climb Indoors

How to Train Vining Plants to Climb Indoors

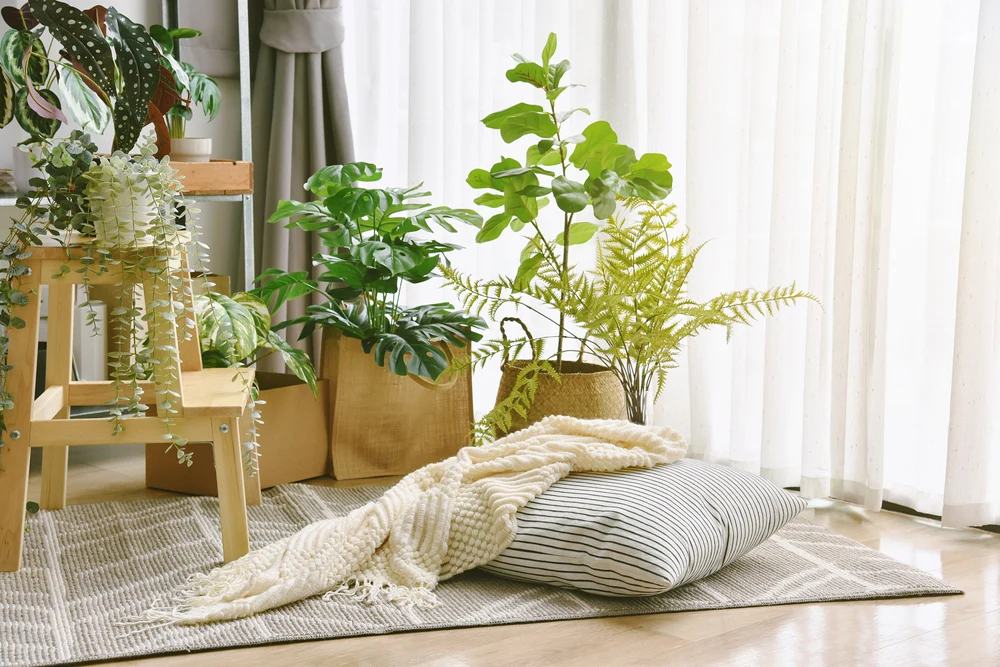
Vining plants bring a unique charm to any indoor space. Their cascading stems and lush foliage create a natural, living artwork that can transform bare walls, windows, and corners into green masterpieces. But to make these climbers flourish indoors, they need more than just sunlight and water—they need proper training and support.

Learning how to train vining plants to climb indoors allows you to shape your greenery into elegant displays while promoting healthier, fuller growth. In this detailed guide, we’ll explore the best techniques, materials, and care tips for training indoor vines, ensuring they thrive and beautify your home all year round.


Why Train Indoor Vining Plants?

Vining plants naturally grow toward light sources, stretching their stems in search of sunlight. In the wild, they climb trees, walls, or rocks to reach the canopy. Indoors, however, they need your guidance to mimic those conditions.

Training vines to climb provides several benefits:

  1. Space Optimization: It keeps plants off the floor and furniture, using vertical areas like walls and windows efficiently.
  2. Healthier Growth: Climbing encourages stronger stems and better air circulation, reducing the risk of mold and pests.
  3. Aesthetic Appeal: Trailing vines can be shaped into living walls, cascading arches, or intricate patterns.
  4. Natural Décor: Vining plants soften harsh lines, purify indoor air, and create a tranquil, organic atmosphere.

Best Indoor Vining Plants for Training

Before learning the techniques, it’s important to choose vines that thrive indoors and respond well to training. Here are some of the most popular options:

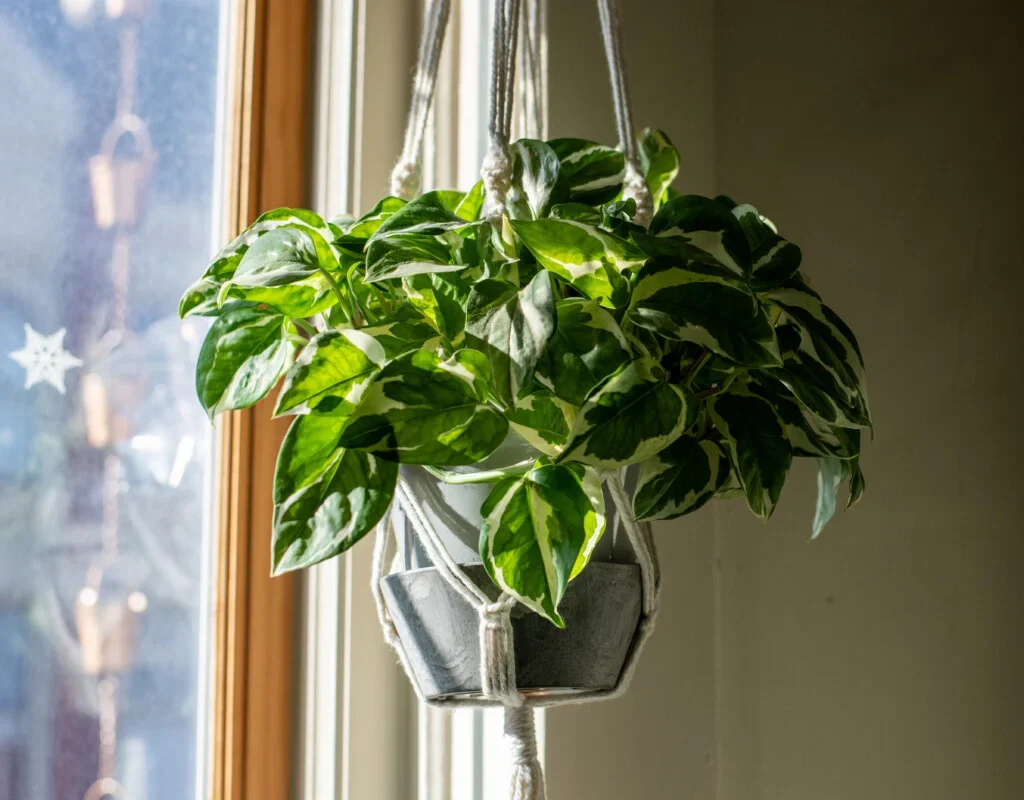
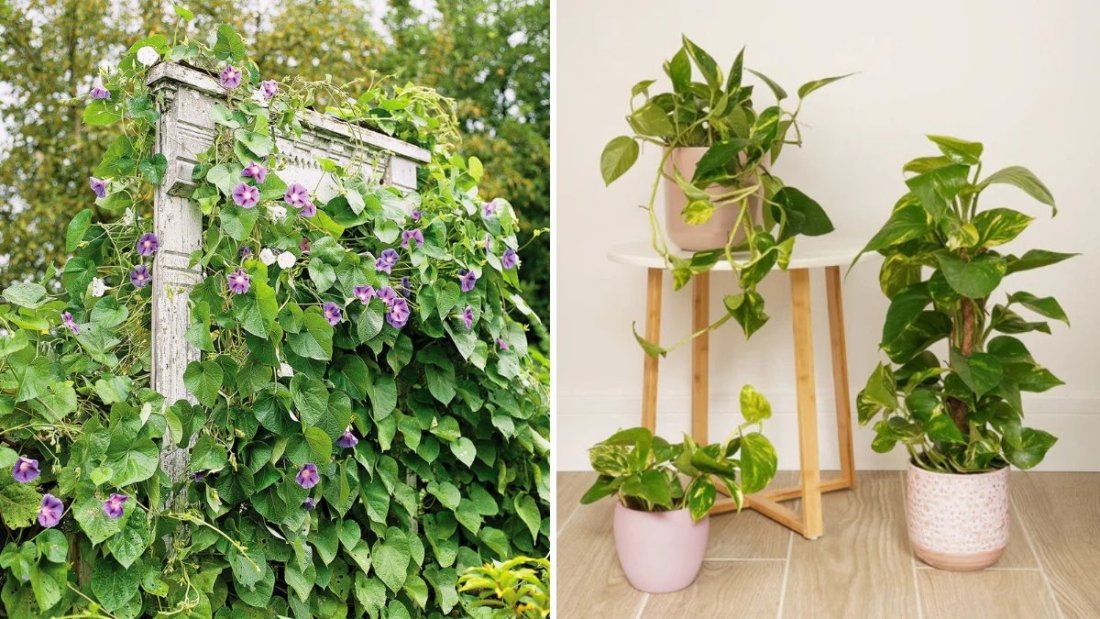
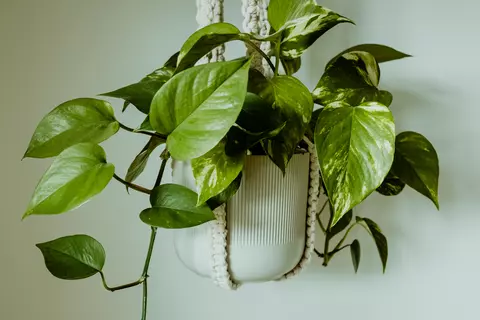
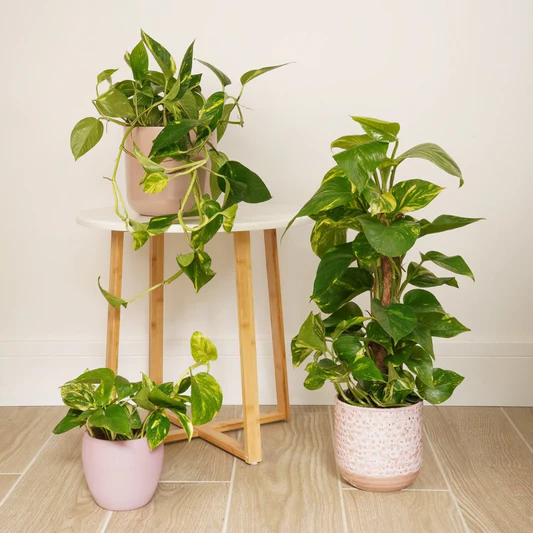
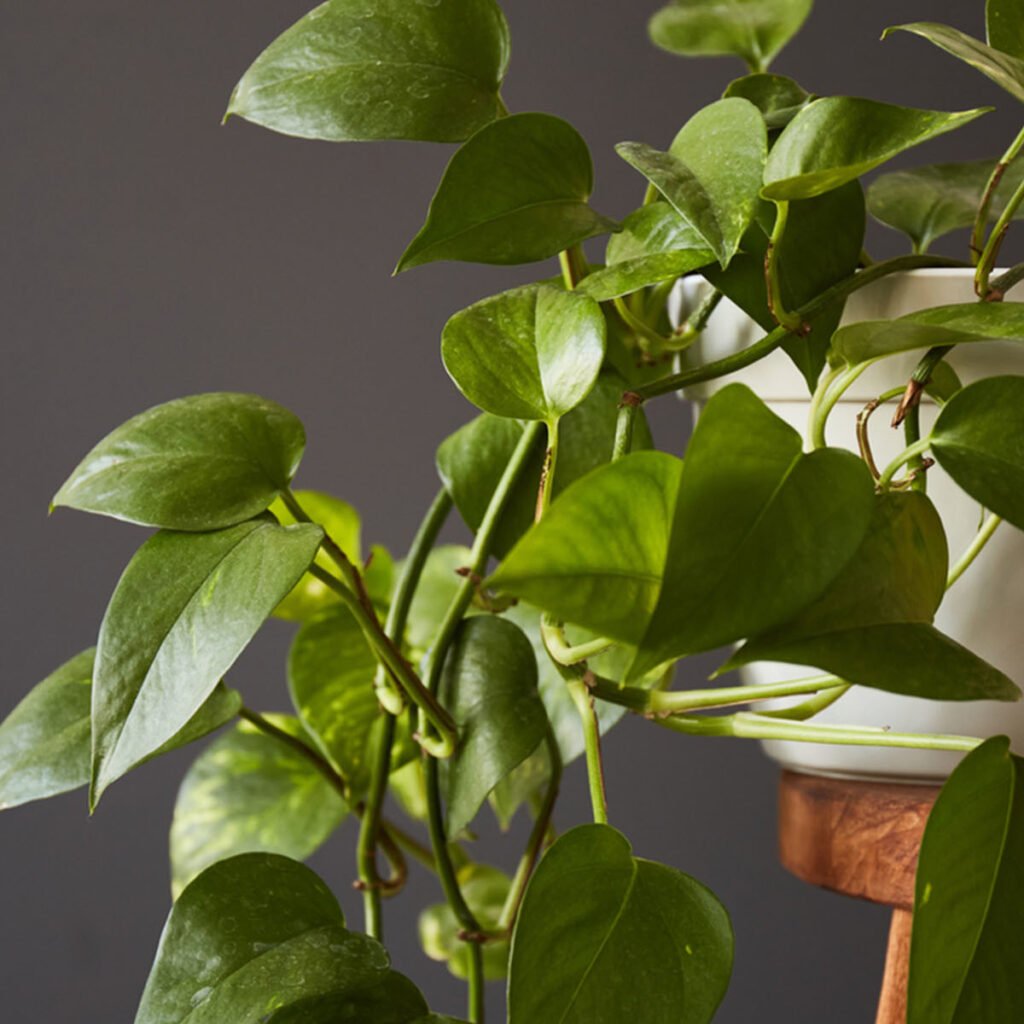
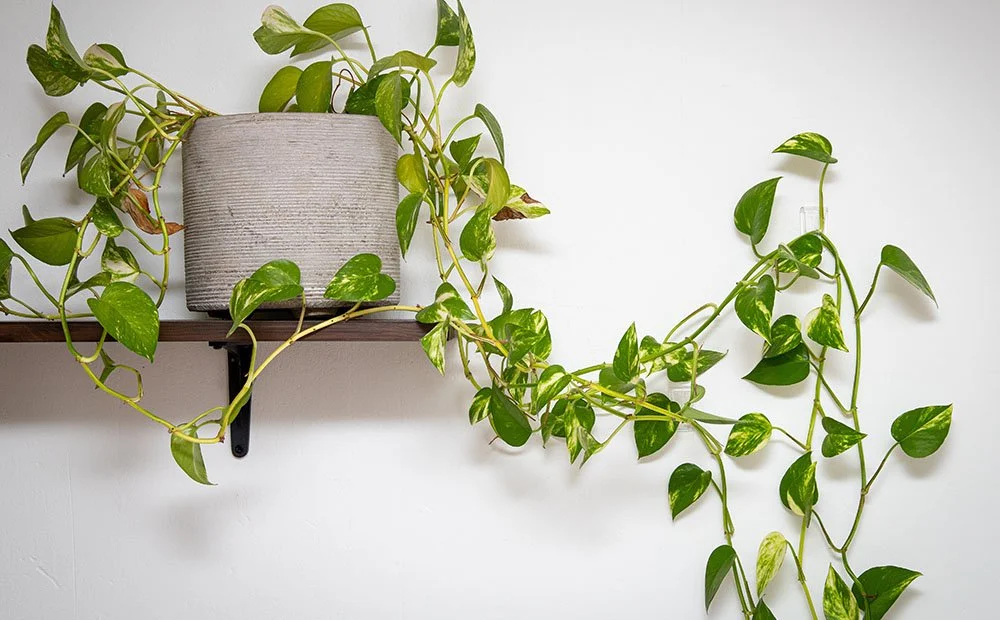
1. Pothos (Epipremnum aureum)

  • Growth: Fast-growing and easy to shape.
  • Training Tip: Ideal for trellises, poles, or wall hooks.

2. Philodendron (Heartleaf or Brasil)

  • Growth: Flexible stems that quickly attach to supports.
  • Training Tip: Perfect for moss poles or wire frames.

3. English Ivy (Hedera helix)

  • Growth: Dense and elegant with small leaves.
  • Training Tip: Great for framing windows or creating topiaries.

4. Monstera adansonii (Swiss Cheese Vine)

  • Growth: Loves climbing and produces iconic perforated leaves.
  • Training Tip: Use a moss pole or jute-covered rod for best results.

5. String of Hearts (Ceropegia woodii)

  • Growth: Delicate, heart-shaped leaves on thin vines.
  • Training Tip: Train around hoops or hanging trellises for a romantic look.

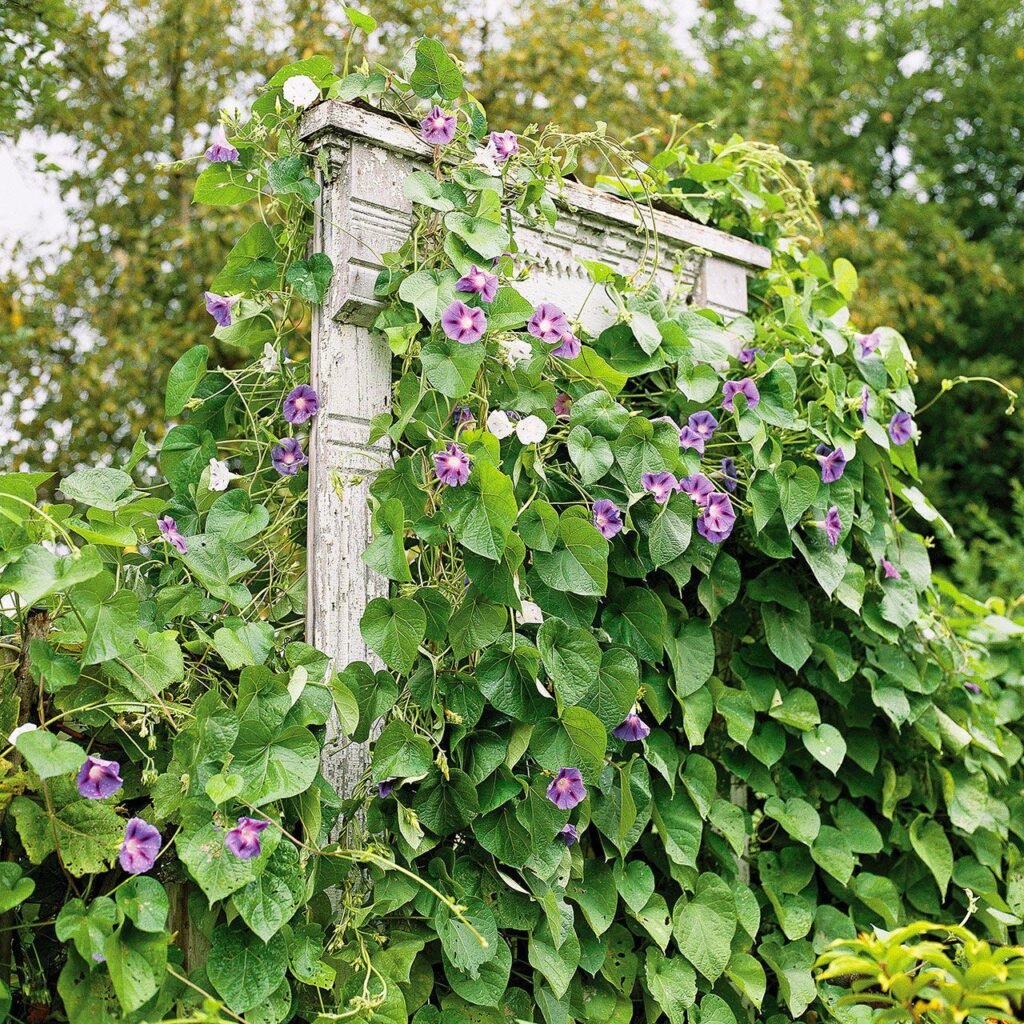
6. Jasmine (Jasminum polyanthum)

  • Growth: Produces fragrant white blooms.
  • Training Tip: Needs a sturdy trellis and regular pruning indoors.

7. Hoya (Wax Plant)

  • Growth: Thick, waxy leaves and fragrant blooms.
  • Training Tip: Train around circular supports or hanging hoops.

Essential Tools and Materials for Training Indoor Vines

To properly train vining plants, you’ll need the right tools and supports. Here’s what to prepare:

Supports:

  • Moss Poles: Great for tropical vines like monstera or philodendron.
  • Trellises: Ideal for walls, windows, or large pots.
  • Bamboo Sticks or Wooden Stakes: For smaller indoor plants.
  • Wire Frames or Arches: To create artistic patterns or living wall designs.
  • String or Jute Twine: Gentle and eco-friendly for tying stems.

Tools:

  • Pruning shears or scissors (for shaping and removing old growth).
  • Plant clips or soft ties.
  • Spray bottle (to keep moss poles moist).
  • Gloves (especially when handling plants with sap).

Step-by-Step Guide: How to Train Vining Plants to Climb Indoors

Training vining plants requires patience and a gentle touch. Follow these simple steps to help your plants grow upward beautifully and healthily.


Step 1: Choose the Right Support Structure

Pick a support that complements both your plant’s growth pattern and your interior décor.

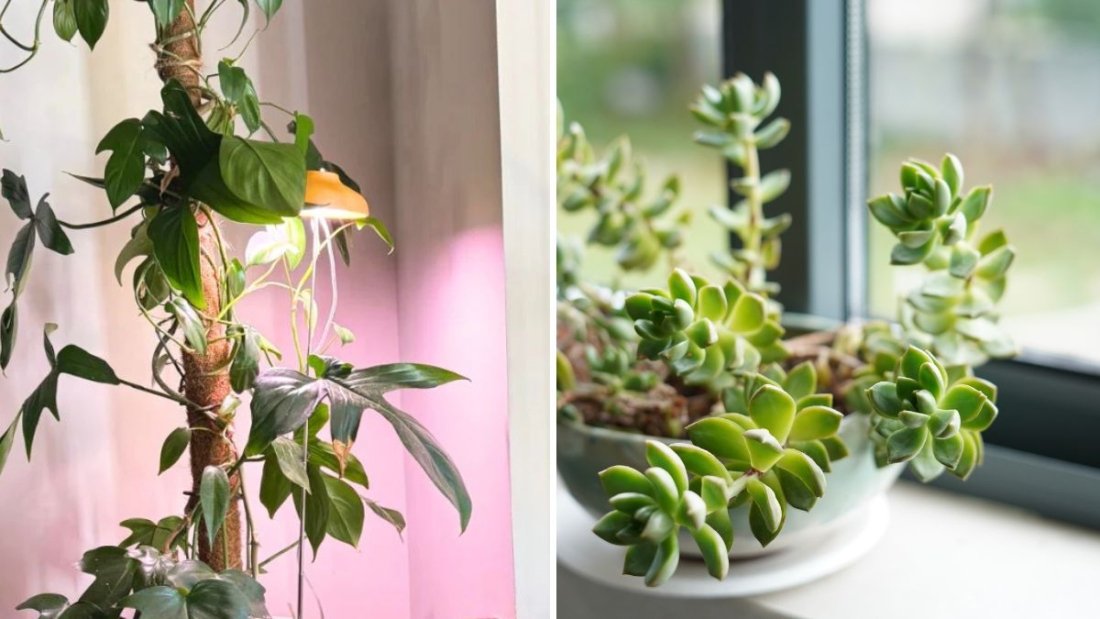
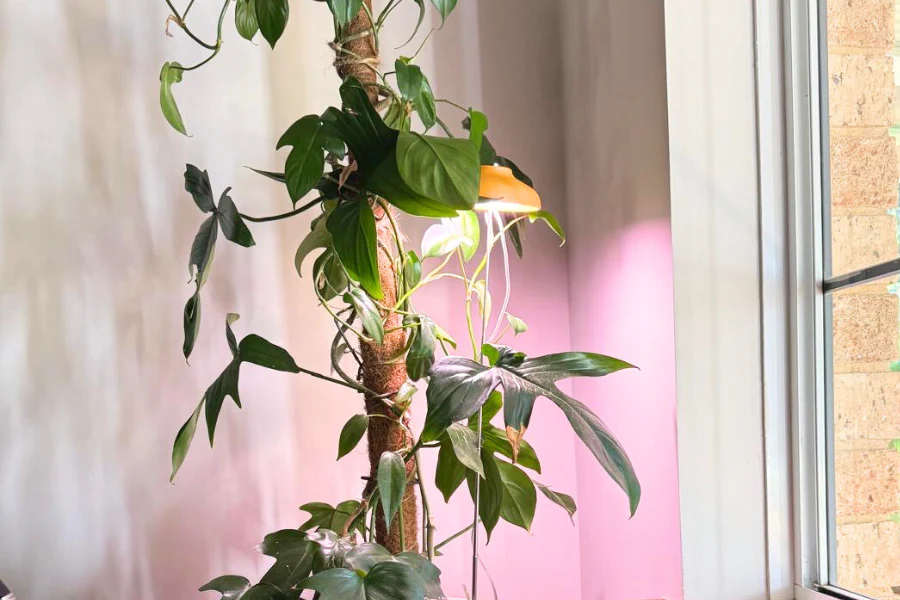
  • Moss poles mimic tree trunks, helping aerial roots attach naturally.
  • Wall trellises or grids let you direct vines in artistic patterns.
  • Hanging supports are great for trailing plants that you want to guide upward or sideways.

Make sure your chosen support is sturdy and inserted deeply into the pot so it doesn’t wobble as the plant grows.


Step 2: Guide the Stems Gently

As your vine grows, identify the longest, healthiest stems and start winding or tying them gently to the support.

  • Use soft ties or garden clips to secure the stems loosely—never tie tightly, as it can damage the plant.
  • Position the stem so that the leaf nodes (where roots and new leaves emerge) are close to the support structure.
  • For plants with aerial roots, lightly press them against moss poles or wet surfaces to encourage attachment.

Step 3: Encourage Natural Climbing

Most vining plants naturally produce aerial roots or tendrils that help them cling to surfaces.

  • Keep the support slightly moist (especially moss poles) to encourage root attachment.
  • Rotate the pot occasionally to ensure even light exposure and balanced growth.

If your plant isn’t attaching on its own, continue to guide it manually until it begins to climb independently.


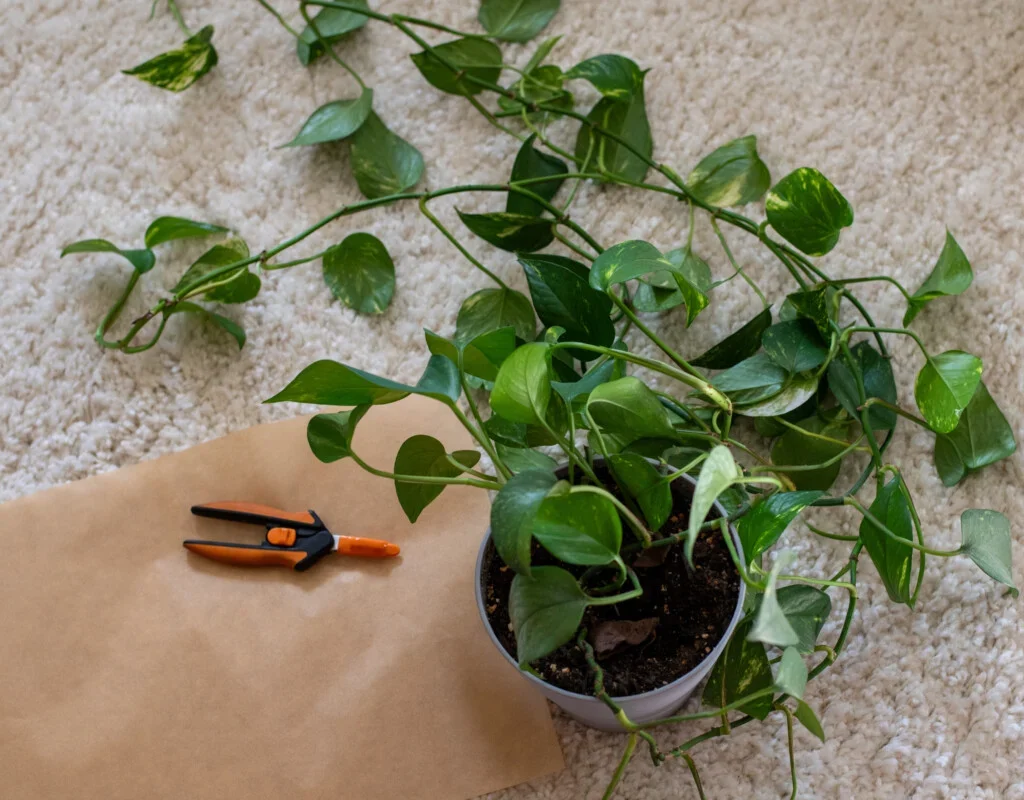
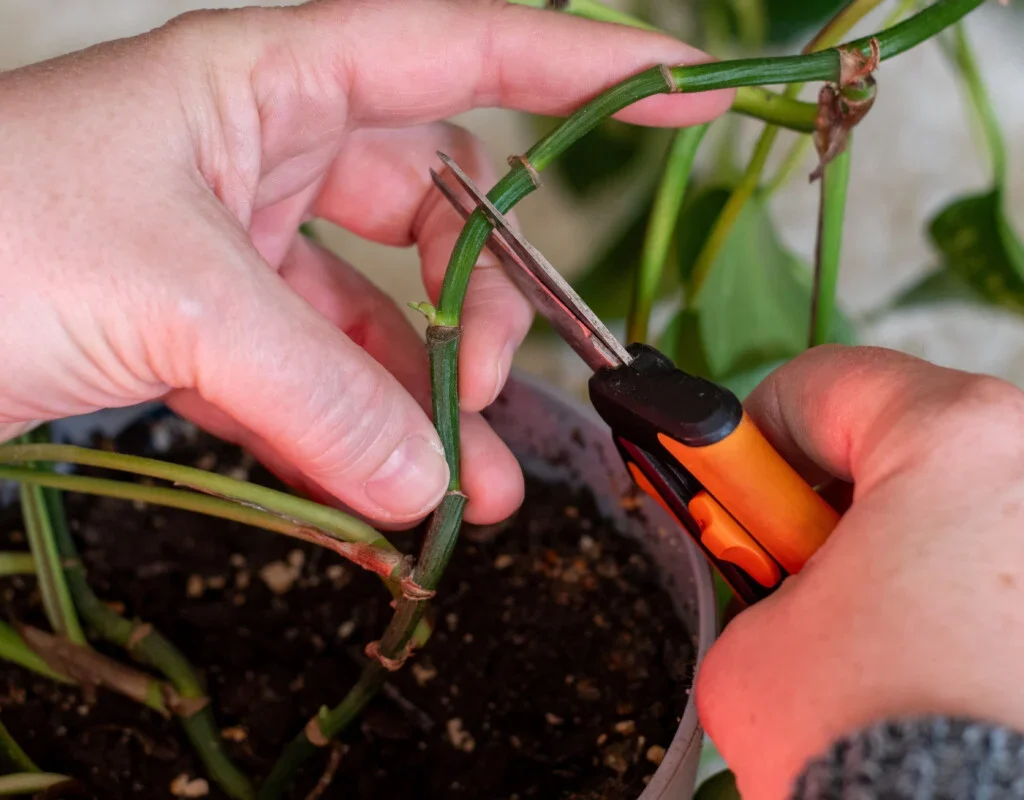
Step 4: Prune Regularly to Maintain Shape

Regular pruning keeps your vines full and healthy.

  • Trim long, leggy stems to encourage bushier side shoots.
  • Remove yellow or weak leaves to redirect energy to new growth.
  • Use clean scissors to prevent disease spread.

Tip: You can propagate trimmed stems in water or soil to create new plants!


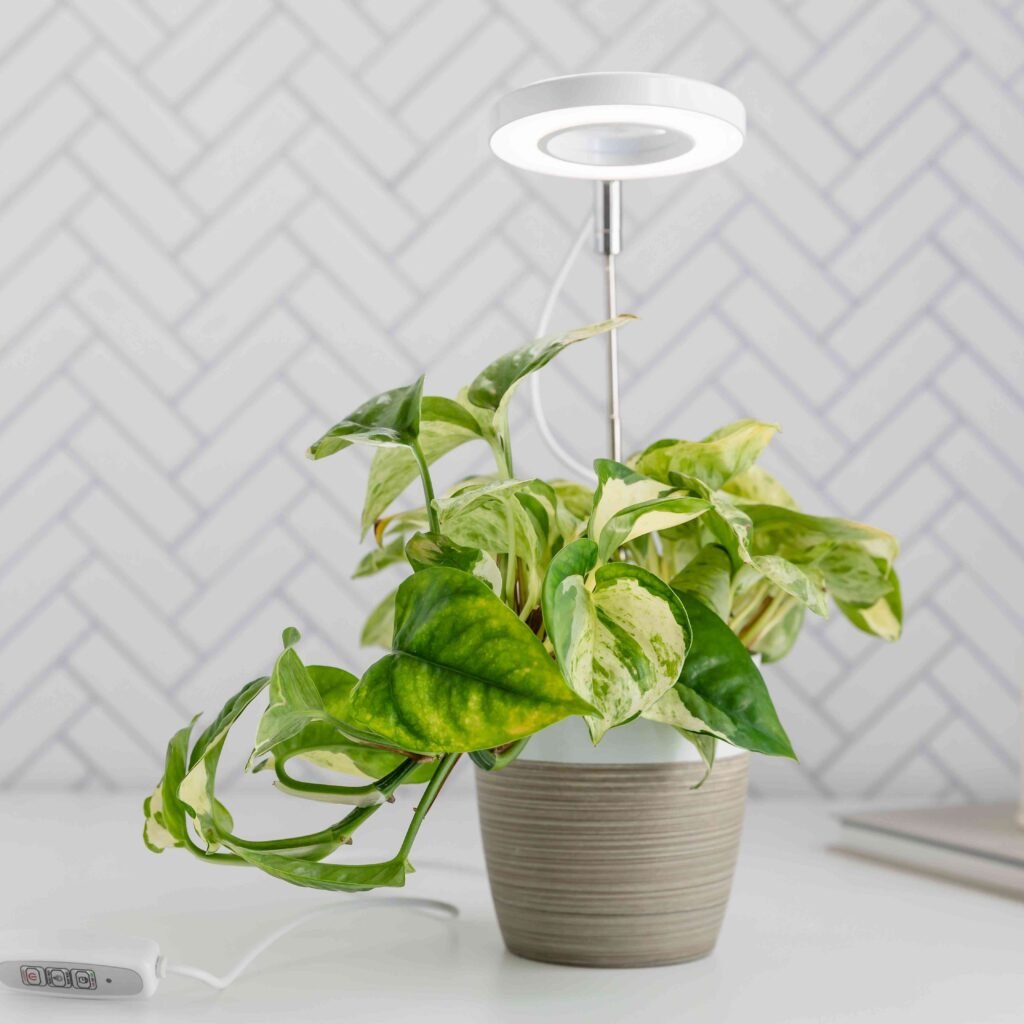
Step 5: Provide Adequate Light and Humidity

Indoor vines need sufficient light to grow strong and maintain their shape.

  • Place them near bright, indirect light—like an east- or north-facing window.
  • Avoid harsh direct sunlight, which can scorch leaves.
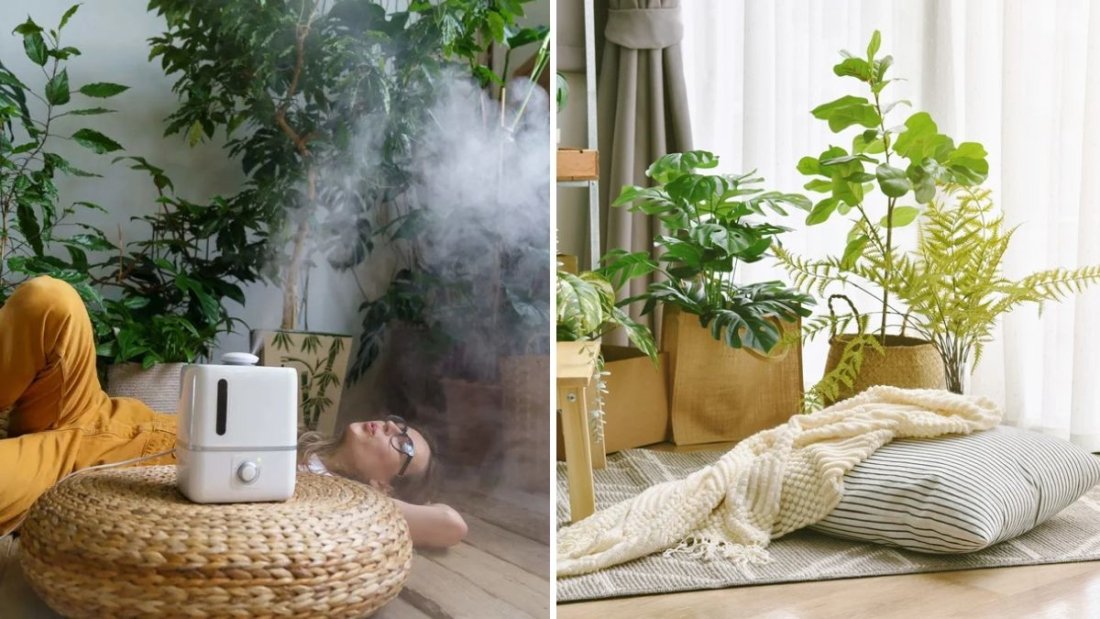
  • Maintain 50–60% humidity using a humidifier or a pebble tray, especially for tropical vines.

Low light may cause vines to stretch out and lose density, while dry air can lead to crispy leaf edges.


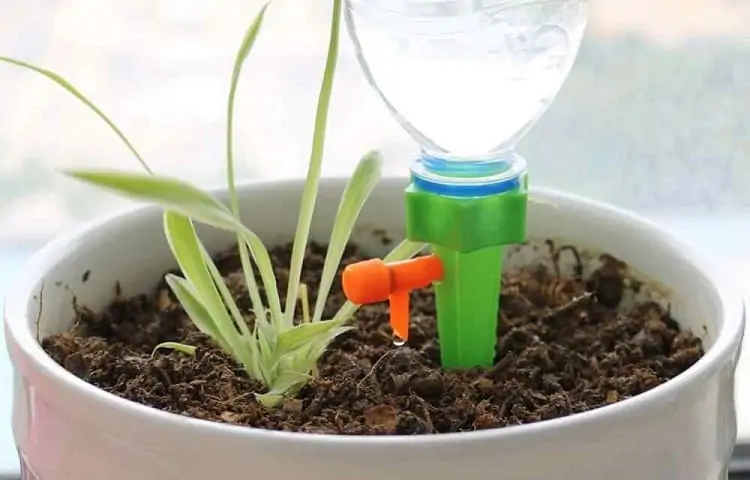
Step 6: Feed and Water Wisely

Trained vines need consistent nourishment to support vertical growth.

  • Water: Keep soil slightly moist but never soggy. Let the top inch dry before watering again.
  • Fertilizer: Feed monthly during the growing season (spring and summer) using an organic or balanced liquid fertilizer.

Avoid overfertilizing—it can cause root burn or weak, spindly growth.


Step 7: Adjust and Re-Tie as Needed

As the plant grows, check ties every few weeks. Loosen them if the stem thickens to avoid constriction.
Continue redirecting new stems along the support to maintain a balanced, symmetrical shape.


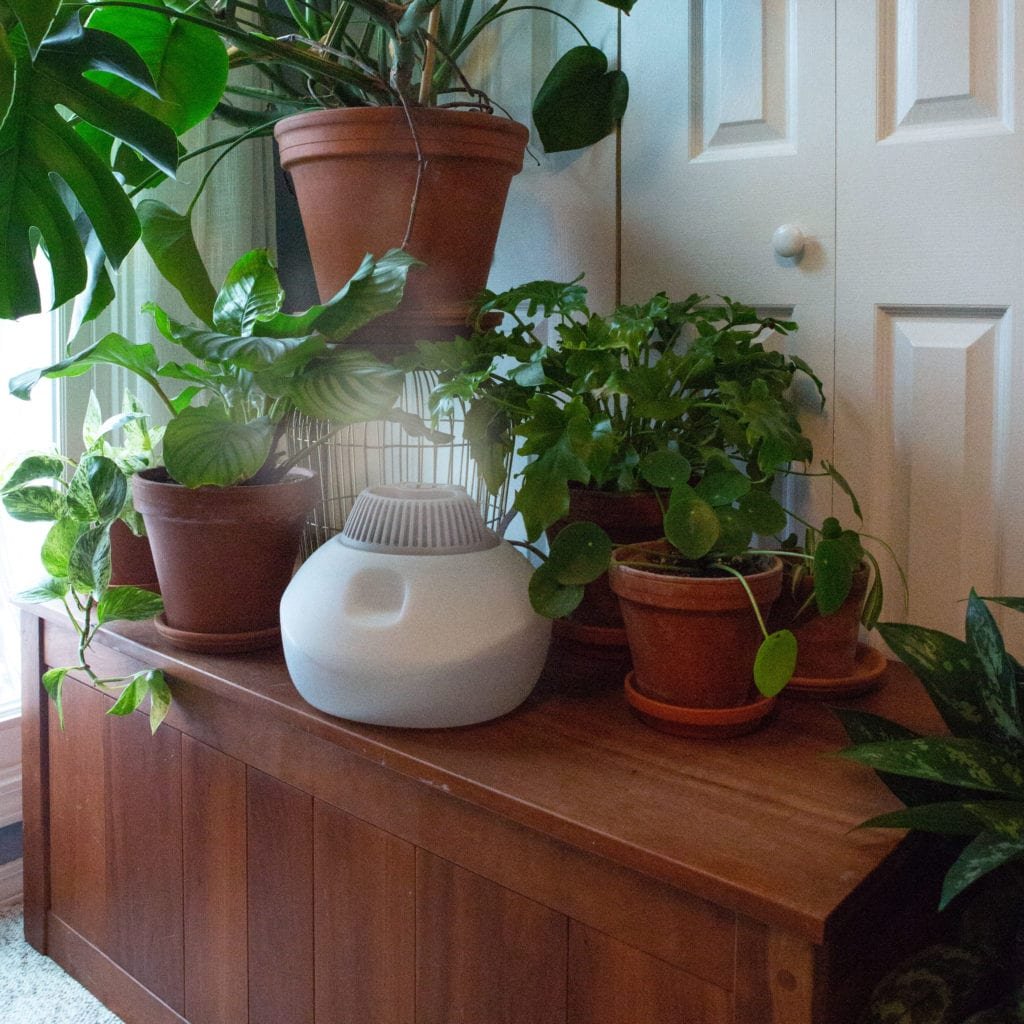
Creative Ways to Display Climbing Houseplants

Training vines doesn’t just serve a practical purpose—it can also turn your home into a living art gallery. Here are some creative ideas:

1. Wall-Mounted Trellis Designs

Attach a simple grid or wire trellis to your wall and guide the vines to create geometric patterns or heart shapes. This design adds a stunning visual element to bedrooms or living rooms.

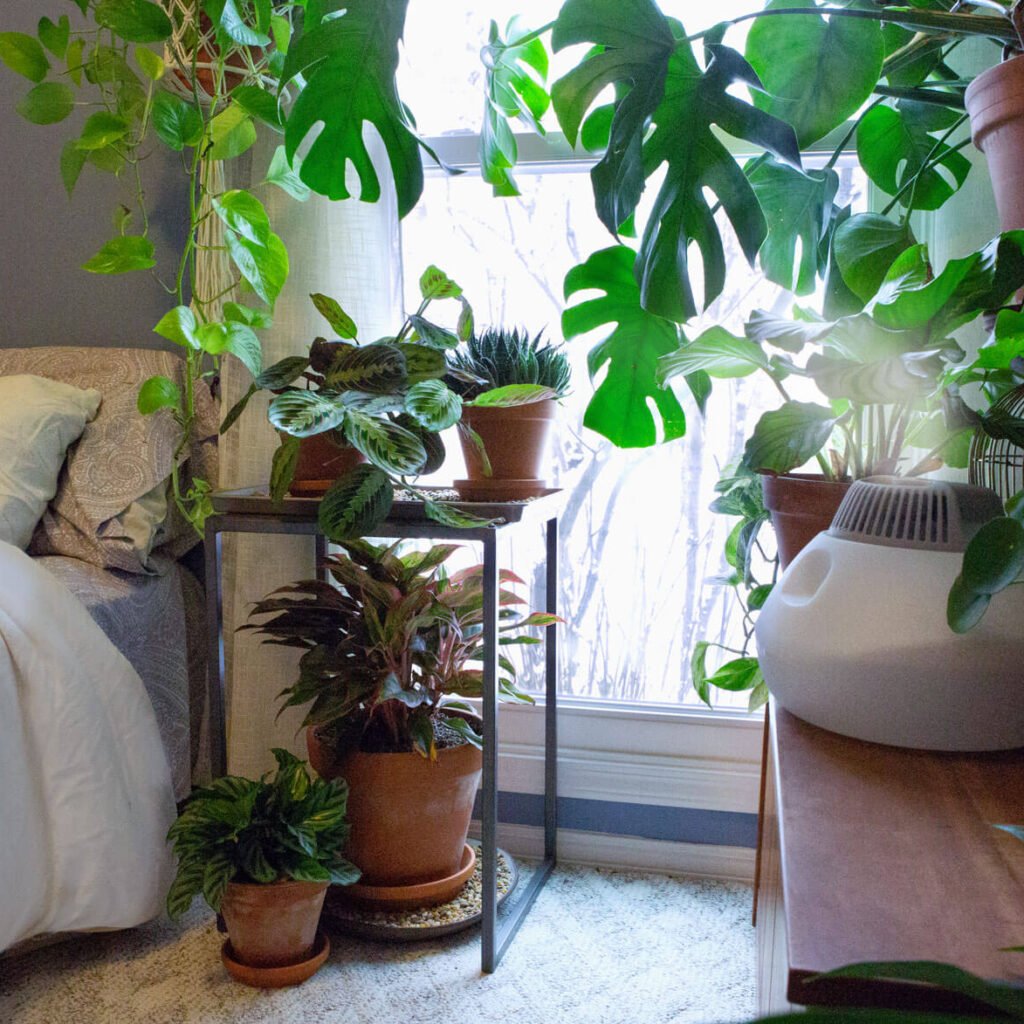
2. Window Frame Garden

Train ivy, pothos, or philodendron around a window frame. The sunlight streaming through the leaves creates a peaceful, jungle-like ambiance.

3. Hanging Hoops and Rings

Wrap delicate vines like string of hearts or hoya around circular frames to form elegant hanging orbs.

4. Bookshelf or Ladder Display

Place vining plants on top of shelves and train them to climb upward or weave around books and décor items.

5. Indoor Plant Wall

Use a combination of trellises, hanging pots, and climbing supports to create a lush, vertical “living wall” that acts as a natural centerpiece.


Common Mistakes to Avoid When Training Indoor Vines

Even experienced plant parents make a few mistakes when dealing with climbers. Here’s what to watch out for:

  1. Tying Too Tightly: This can damage stems or restrict growth.
  2. Ignoring Light Needs: Without enough light, vines stretch and lose leaves.
  3. Overwatering: Climbing plants in large pots can suffer root rot if the soil stays wet.
  4. Neglecting Pruning: Unpruned vines become tangled and lose shape.
  5. Using Harsh Materials: Avoid metal wires or plastic strings that can cut into stems.

Troubleshooting Growth Problems

If your vining plant seems unhappy, look for these signs and solutions:

ProblemLikely CauseSolution
Long, thin stemsInsufficient lightMove closer to window or add grow light
Yellow leavesOverwateringAllow soil to dry before watering again
Dry, brown edgesLow humidityUse humidifier or mist regularly
Stunted growthNutrient deficiencyApply gentle fertilizer monthly
Weak attachment to supportDry or smooth surfaceKeep moss pole damp or use soft ties

Benefits of Indoor Climbing Plants

Beyond their visual appeal, trained indoor vines offer practical and psychological benefits:

  • Air Purification: Vines like pothos and philodendron remove toxins such as formaldehyde and benzene.
  • Improved Mood: Greenery reduces stress and enhances mental well-being.
  • Better Air Humidity: Plants release moisture, balancing indoor dryness.
  • Creative Expression: Shaping vines lets you personalize your living space naturally.

Final Thoughts

Training vining plants to climb indoors is both a creative art and a nurturing science. By providing the right support, guidance, and care, you can transform ordinary vines into stunning vertical gardens that breathe life into your home.

From guiding a pothos along a wall trellis to shaping a philodendron around a moss pole, the process is rewarding and relaxing. With patience and consistency, your climbing plants will reward you with lush growth, beautiful foliage, and a serene, natural atmosphere.

How to Fertilize Houseplants Naturally Using Kitchen Scraps

How to Fertilize Houseplants Naturally Using Kitchen Scraps

Keeping houseplants lush, green, and thriving doesn’t always require expensive fertilizers or fancy products. In fact, some of the most effective and eco-friendly fertilizers are already sitting right in your kitchen! Every day, households throw away food scraps that are rich in essential nutrients plants love—such as potassium, nitrogen, phosphorus, and calcium.

Learning how to fertilize houseplants naturally using kitchen scraps not only nourishes your indoor plants but also reduces waste, saves money, and promotes sustainable living. In this detailed guide, we’ll explore how kitchen leftovers can become powerful organic fertilizers, the best ways to prepare and use them, and the science behind how they help plants grow strong and healthy.


Why Use Natural Fertilizers for Houseplants?

Before diving into methods, it’s important to understand why natural fertilizers are beneficial for your indoor garden.

Unlike synthetic fertilizers, which often contain concentrated chemicals that can burn plant roots or build up salts in the soil, natural fertilizers release nutrients slowly and safely. They improve soil structure, encourage beneficial microbes, and create a balanced ecosystem that supports steady, long-term growth.

Benefits of Using Kitchen Scrap Fertilizers:

  1. Eco-Friendly: Reduces household waste by reusing organic materials.
  2. Cost-Effective: No need for store-bought fertilizers.
  3. Soil Health: Adds organic matter, improving soil aeration and water retention.
  4. Balanced Nutrition: Provides natural sources of macro- and micronutrients.
  5. Safe for Plants: Less risk of root burn or overfertilization.

Essential Nutrients Plants Need

Every plant needs three main macronutrients, plus a variety of micronutrients, for optimal growth:

  • Nitrogen (N): Promotes leaf and stem growth, making foliage lush and green.
  • Phosphorus (P): Strengthens roots and boosts flower and fruit production.
  • Potassium (K): Enhances overall plant health and disease resistance.
  • Calcium, Magnesium, and Iron: Support cell structure, chlorophyll production, and enzyme functions.

Kitchen scraps, when used correctly, can supply all of these naturally.


Top Kitchen Scraps That Make Excellent Natural Fertilizers

Here are the most effective household waste items that can transform into nutrient-rich plant food.


1. Banana Peels

Best For: Flowering plants, ferns, and indoor fruit trees

Banana peels are rich in potassium and phosphorus, essential for strong roots and healthy blooms.

How to Use:

  • Chop and Bury: Cut peels into small pieces and bury them 1–2 inches deep in the soil.
  • Banana Peel Tea: Soak banana peels in a jar of water for 48 hours, then use the nutrient-infused water to water your plants.
  • Dry and Blend: Dry the peels, grind into powder, and sprinkle a teaspoon into the potting mix.

2. Coffee Grounds

Best For: Acid-loving plants like peace lilies, African violets, ferns, and philodendrons

Coffee grounds contain nitrogen, magnesium, and potassium, making them an excellent organic fertilizer. They also improve soil texture.

How to Use:

  • Dry First: Let used coffee grounds dry to prevent mold.
  • Sprinkle Sparingly: Mix a small amount into the topsoil.
  • Compost: Add to compost piles to balance nitrogen levels.

Caution: Avoid overusing coffee grounds—they can make soil too acidic or compacted if not mixed well.


3. Eggshells

Best For: Plants that need calcium, like spider plants and succulents

Eggshells are packed with calcium carbonate, vital for strong cell walls and preventing blossom-end rot in fruiting plants.

How to Use:

  • Crushed Shells: Rinse, dry, and crush into fine bits. Sprinkle into the soil or mix into potting mix.
  • Eggshell Tea: Boil crushed shells for 10 minutes, let cool, and water your plants with the calcium-rich liquid.

4. Vegetable Cooking Water

Best For: All houseplants

When you boil vegetables, the water absorbs many of their nutrients—like iron, phosphorus, and potassium.

How to Use:

  • After boiling veggies, let the water cool completely.
  • Use it to water your plants.

Tip: Avoid using salted or oiled water—it can harm plants.


5. Tea Leaves and Tea Bags

Best For: Ferns, philodendrons, and other foliage plants

Used tea leaves are rich in tannic acid and micronutrients that promote lush, green growth.

How to Use:

  • Loose Tea: Spread used leaves around the base of the plant and lightly mix into the soil.
  • Tea Water: Steep old tea bags in water for 24 hours, then use the liquid as mild fertilizer.

Caution: Avoid flavored or heavily processed teas; stick to natural black or green tea.


6. Vegetable and Fruit Peels

Best For: Most indoor plants

Peels from carrots, cucumbers, potatoes, and apples contain various nutrients like potassium, magnesium, and phosphorus.

How to Use:

  • Compost: Add to your compost bin to create a balanced organic fertilizer.
  • Blend into Smoothie Fertilizer: Mix peels with water in a blender and pour the nutrient smoothie around plant bases.

7. Rice Water

Best For: Tropical plants like monstera, calathea, and pothos

Rice water—the starchy liquid left after rinsing or boiling rice—is a gentle fertilizer rich in vitamins, minerals, and amino acids.

How to Use:

  • Collect water from the first rinse or after boiling rice (unsalted).
  • Let it cool and use it as a natural liquid fertilizer once a week.

8. Onion and Garlic Peels

Best For: Pest-prone plants

While not a nutrient powerhouse, onion and garlic peels have antifungal and antibacterial properties that help deter pests and promote healthy roots.

How to Use:

  • Soak peels in water overnight, strain, and spray the liquid on leaves or soil to keep bugs at bay.

9. Stale Bread or Yeast Water

Best For: Foliage plants

Yeast contains beneficial microorganisms that promote root health and nutrient uptake.

How to Use:

  • Mix a small piece of stale bread or ½ teaspoon yeast with water and let it ferment for a day.
  • Use the diluted solution to water your plants occasionally.

10. Citrus Peels (Used Cautiously)

Best For: Pest control, not direct fertilization

Citrus peels contain natural oils that can repel pests but may acidify the soil.

How to Use:

  • Dry and grind the peels into powder.
  • Sprinkle a small amount on top of the soil as a natural insect deterrent.

How to Make Homemade Compost from Kitchen Scraps

If you want to take your natural fertilizing a step further, composting is the best method to recycle all kitchen waste into rich, organic plant food.

Step 1: Collect the Right Materials

Use:

  • Fruit and vegetable scraps
  • Coffee grounds
  • Eggshells
  • Tea leaves

Avoid:

  • Meat, dairy, oily foods, or cooked items (they attract pests and slow decomposition).

Step 2: Balance Greens and Browns

To make effective compost, balance:

  • Greens (Nitrogen-rich): Food scraps, grass clippings, coffee grounds.
  • Browns (Carbon-rich): Dry leaves, shredded paper, cardboard.

Maintain roughly 1 part greens to 3 parts browns.


Step 3: Let It Decompose

Store scraps in a small bin or bucket with a lid. Stir weekly to allow air circulation. After 4–6 weeks, you’ll have dark, crumbly compost that smells earthy—perfect for houseplants.


Step 4: Use Compost for Indoor Plants

  • Mix a handful into potting soil before planting.
  • Sprinkle a thin layer on top of pots every few weeks as a nutrient booster.

Liquid Compost Tea for Quick Results

For faster nutrient absorption, you can make a liquid compost fertilizer using kitchen scraps.

How to Make:

  1. Fill a bucket with water.
  2. Add vegetable peels, banana skins, and coffee grounds.
  3. Let it steep for 3–5 days, stirring occasionally.
  4. Strain and dilute (1 part tea to 2 parts water).
  5. Water your houseplants with it once every two weeks.

This method provides plants with immediate nutrients in a gentle, organic form.


Tips for Using Kitchen Scrap Fertilizers Safely

  1. Avoid Overfeeding: Even natural fertilizers can cause nutrient buildup—feed once or twice a month.
  2. Monitor Plant Response: Yellow leaves may indicate too much nitrogen; adjust accordingly.
  3. Keep It Clean: Remove moldy or rotten scraps from the soil.
  4. Use Unsalted, Unflavored Ingredients: Salt or sugar can harm plant roots.
  5. Store Properly: Keep compost or teas sealed to prevent odors or fruit flies.

Plants That Benefit Most from Kitchen Scrap Fertilizers

  • Leafy houseplants: Pothos, philodendron, ferns, and peace lilies.
  • Flowering plants: African violets, orchids, and begonias.
  • Herbs: Basil, mint, parsley, and cilantro.

Succulents and cacti, however, prefer nutrient-poor, dry soil—so avoid overfeeding them.


Final Thoughts

Nature has its own recycling system—and your kitchen can be a part of it. By learning how to fertilize houseplants naturally using kitchen scraps, you turn everyday waste into valuable plant food.

Banana peels, coffee grounds, eggshells, and veggie water may seem ordinary, but together they create a powerful, organic nutrient mix that keeps your indoor plants vibrant and resilient.

Not only will your houseplants flourish with greener leaves and stronger roots, but you’ll also contribute to a healthier planet by reducing food waste and chemical use.

So, the next time you peel a banana or brew your morning coffee, don’t toss the scraps—feed them to your plants. They’ll thank you with thriving, natural beauty all year long.

How to Create a Self-Watering Pot System at Home

How to Create a Self-Watering Pot System at Home

For plant lovers, keeping up with watering schedules can sometimes be a challenge—especially for those with busy lifestyles or frequent travel plans. Too much or too little water can quickly stress plants, leading to yellowing leaves, root rot, or dehydration. Fortunately, there’s a clever, low-maintenance solution: the self-watering pot system.

This smart setup allows your plants to absorb just the right amount of water whenever they need it. Not only does it reduce the risk of overwatering and underwatering, but it also ensures consistent moisture for healthy growth. Even better, you can easily create your own self-watering system at home with minimal tools and inexpensive materials.

In this detailed guide, we’ll explore how self-watering pots work, their benefits, and step-by-step instructions to build one yourself—plus expert tips to keep your plants thriving year-round.


What Is a Self-Watering Pot System?

A self-watering pot is a container designed with a built-in water reservoir that automatically supplies moisture to your plant’s roots through capillary action or a wicking mechanism.

Instead of watering from the top, water is stored in a lower chamber, and the soil or wick gradually pulls up moisture as the plant needs it. This creates a consistent water supply without the risk of waterlogging or drought stress.

Essentially, the system allows the plant to “drink” on its own schedule, just like it would in nature—drawing water from moist soil below.


Why Choose a Self-Watering Pot System?

Self-watering pots are ideal for anyone who wants healthier plants with less maintenance. Here are some of the key benefits:

1. Consistent Moisture Levels

Unlike traditional watering, where soil often fluctuates between too dry and too wet, a self-watering system provides steady, balanced hydration. This promotes stronger root development and steady growth.

2. Saves Time and Effort

No more daily watering routines! You only need to refill the reservoir once every few days—or even once a week, depending on plant size and environment.

3. Prevents Overwatering and Root Rot

Since plants absorb water only as needed, there’s less risk of overwatering—a common cause of fungal infections and root rot.

4. Water Efficiency

Self-watering pots reduce water waste because there’s minimal runoff or evaporation. Every drop counts, making them eco-friendly and ideal for dry climates.

5. Perfect for Busy or Forgetful Gardeners

Whether you’re away for a few days or simply forgetful, self-watering systems provide a reliable safety net to keep plants hydrated in your absence.


How a Self-Watering Pot Works

To understand how to build one, it helps to know the basic mechanics. A self-watering system has three essential parts:

  1. Water Reservoir: A lower compartment or chamber that holds water.
  2. Wicking System or Capillary Channel: A material (like cotton rope, felt strip, or soil bridge) that draws water upward from the reservoir to the plant’s roots.
  3. Overflow Hole: Prevents excess water from flooding the root zone by draining surplus water when the reservoir is full.

This simple yet effective design keeps soil moisture perfectly balanced.


Materials You’ll Need

Building a DIY self-watering pot doesn’t require expensive tools. Most materials are easy to find at home or in any local store.

For one self-watering pot, you’ll need:

  • Two plastic containers (one slightly smaller than the other)
  • A sharp knife or drill
  • Cotton rope, nylon cord, or old T-shirt strips (for wicking)
  • Potting mix suitable for your plant
  • Your favorite plant or seedling
  • Water
  • Optional: small plastic tubing or a watering spout for easy refilling

Step-by-Step Guide: How to Build a Self-Watering Pot System

Follow these steps to create a reliable self-watering setup at home:


Step 1: Prepare the Containers

You’ll need one container to act as the main pot (for soil and the plant) and another as the reservoir (to hold water).

  • Choose containers that fit snugly together—such as two buckets, or a large plastic bottle cut in half.
  • The top container should nest slightly inside the bottom one but leave enough space below (2–3 inches) for the water reservoir.

Step 2: Create a Wicking Mechanism

Cut 2–3 holes at the bottom of the upper container. These will serve as openings for the wicks.

  • Thread cotton rope, nylon cord, or fabric strips through each hole, leaving a few inches hanging down into the water reservoir and several inches above the bottom inside the soil chamber.
  • Alternatively, leave one large hole and fill it with a column of soil extending into the reservoir—this soil acts as a natural wick.

The wicking system is what delivers water gradually from the lower container to the root zone.


Step 3: Add the Overflow Hole

Drill or cut a small overflow hole near the top of the water reservoir (around 1 inch below the soil container’s base).

This prevents overfilling and ensures your plant roots don’t sit directly in water, which could cause root rot.


Step 4: Assemble the System

Place the upper container (with soil holes and wicks) into the lower container (the water reservoir). Ensure the wicks dangle properly into the water space.


Step 5: Add Potting Mix and Plant

  • Fill the upper container with a light, well-draining potting mix—avoid dense garden soil.
  • Position your plant in the center and gently pat down the soil around it.
  • Ensure the wicks are evenly distributed to deliver moisture across the pot.

Step 6: Fill the Reservoir

Pour water into the bottom chamber through a gap between the two containers, or create a small refill hole using a tube or funnel.

Fill until water reaches just below the soil base or until it begins to drip out of the overflow hole.


Step 7: Monitor and Maintain

Your self-watering pot is now ready! The plant will draw moisture as needed through the wicks.

  • Check the water level every few days, especially in warm weather.
  • Refill as needed when the reservoir runs low.
  • Clean the reservoir every few weeks to prevent algae or mineral buildup.

Alternative DIY Ideas for Self-Watering Pots

If you prefer something simpler or more creative, here are some alternative DIY approaches:

1. Plastic Bottle Wick System

  • Cut a plastic bottle in half.
  • Place the top half (with the cap removed or pierced) upside-down into the bottom half.
  • Thread a cotton rope through the neck of the bottle to act as a wick.
  • Fill the bottom half with water and add soil and plant to the top half.

This small, efficient setup works well for herbs or small indoor plants.


2. Capillary Mat System

  • Use a capillary mat (a thick felt or absorbent fabric) placed under several pots.
  • The mat sits on top of a water tray and absorbs moisture, which then moves into each pot through drainage holes.

This method is ideal for multiple small pots or seed trays.


3. Self-Watering Insert Cups

If you don’t want to build an entirely new pot, insert a small water cup with a wick into your existing planter. It’s a quick and budget-friendly solution.


Tips for Successful Self-Watering Plant Care

To make sure your plants thrive with a self-watering system, keep these practical tips in mind:

  1. Choose the Right Soil: Use a light, well-aerated potting mix. Dense soil blocks capillary movement.
  2. Avoid Overfertilizing: Nutrient salts can accumulate since the soil remains consistently moist. Use diluted fertilizer occasionally.
  3. Use Clean Water: If your area has hard water, use filtered or rainwater to reduce mineral deposits.
  4. Flush the Soil Monthly: Pour water from the top occasionally to prevent salt buildup.
  5. Monitor Light and Temperature: Even with perfect watering, inadequate light can hinder growth. Keep plants near windows or under grow lights.

Ideal Plants for Self-Watering Pots

While most houseplants benefit from self-watering systems, some thrive especially well in consistent moisture conditions. Great options include:

  • Herbs: Basil, mint, parsley, and chives.
  • Leafy greens: Lettuce, spinach, and kale.
  • Tropical plants: Peace lily, pothos, ferns, and calathea.
  • Flowering plants: African violets and begonias.

Avoid using self-watering pots for succulents and cacti, as they prefer dry soil and are prone to root rot with constant moisture.


Advantages of Building Your Own System

Creating your own self-watering pot system at home has multiple benefits:

  • Budget-friendly: Most setups cost less than a few dollars to make.
  • Customizable: Adjust size and design based on plant needs.
  • Eco-friendly: Reuse old bottles, jars, and containers.
  • Satisfying DIY project: It’s creative, educational, and rewarding.

Final Thoughts

Building a self-watering pot system at home is a smart, sustainable, and convenient way to keep your indoor or outdoor plants thriving. This simple DIY solution ensures your plants get consistent hydration, saves time, and promotes healthy growth—all while reducing water waste.

Whether you’re nurturing herbs in the kitchen, tending to tropical foliage in your living room, or managing a balcony garden, a self-watering setup will make your gardening life easier and your plants happier.

So gather your tools, pick your containers, and start building! With just a little effort, you’ll create a system that works like nature itself—efficient, balanced, and full of life.

How to Use Humidifiers to Keep Indoor Plants Happy

How to Use Humidifiers to Keep Indoor Plants Happy

Indoor plants bring beauty, freshness, and calm to any living space, but keeping them healthy can sometimes be challenging—especially when it comes to humidity. While many people focus on watering, light, and soil, one of the most overlooked factors in plant health is the moisture content in the air.

For tropical and humidity-loving plants like ferns, orchids, calatheas, and peace lilies, dry indoor air can lead to brown leaf edges, curling, and poor growth. Fortunately, there’s a simple and effective solution—humidifiers. When used correctly, humidifiers can recreate the natural moisture levels that plants thrive in.

In this article, we’ll explore everything you need to know about using humidifiers for indoor plants—why humidity matters, how to choose the right type, placement tips, maintenance advice, and how to create the ideal environment for your indoor jungle.


Why Humidity Is So Important for Indoor Plants

Humidity refers to the amount of water vapor present in the air. Most houseplants, especially those originating from tropical rainforests, thrive in environments where humidity levels are between 50% and 80%. Unfortunately, most indoor spaces, particularly during winter or when air conditioning is running, have humidity levels between 20% and 35%—far too dry for many species.

When humidity drops too low:

  • Leaves may curl or develop brown, crispy edges.
  • Buds may fail to open or drop prematurely.
  • Plants lose moisture faster through transpiration—their way of “breathing.”
  • Overall growth slows down, and leaves may become dull or weak.

By adding a humidifier, you help your plants absorb moisture through the air, reduce stress, and maintain lush, vibrant foliage.


Signs Your Plants Need More Humidity

Before investing in a humidifier, look for these telltale signs that your plants are suffering from dry air:

  1. Brown or crispy leaf tips (common in ferns, calatheas, and spider plants).
  2. Leaf curling or drooping, even when soil moisture is adequate.
  3. Dry soil that quickly loses moisture after watering.
  4. Wilting or stunted growth in tropical species.
  5. Buds or flowers that drop early.

If you notice these symptoms, a humidifier can make a world of difference.


How Humidifiers Benefit Indoor Plants

Humidifiers increase the amount of water vapor in the air, creating a microclimate that mimics a natural, tropical environment. The main benefits include:

  • Improved moisture retention: Plants lose less water through their leaves.
  • Better nutrient uptake: Roots work more efficiently in stable humidity.
  • Healthier foliage: Prevents brown tips and leaf damage.
  • Boosted growth: Encourages faster and stronger development.
  • Reduced pest problems: Dry air attracts spider mites and thrips—humid air helps deter them.

By maintaining consistent humidity, your plants can focus on healthy growth rather than surviving stress.


Types of Humidifiers for Indoor Plants

There are several types of humidifiers available, and each works a bit differently. Understanding them will help you choose the best one for your home garden.

1. Ultrasonic Humidifiers

These are the most popular and efficient options for plant enthusiasts. Ultrasonic humidifiers use high-frequency sound waves to break water into a fine mist, which is then dispersed into the air.

Pros:

  • Quiet operation—great for bedrooms or living spaces.
  • Energy-efficient and highly effective.
  • Produces a cool, gentle mist that’s safe for plants.

Cons:

  • Requires frequent cleaning to prevent mineral buildup.
  • Best used with distilled or filtered water to avoid white dust.

Ideal For: Small to medium plant collections and tropical species.


2. Evaporative Humidifiers

These use a fan to blow air through a wet wick or filter, naturally evaporating water into the air.

Pros:

  • Self-regulating—humidity output slows as the air becomes moister.
  • Affordable and widely available.
  • Produces cool mist without leaving residue.

Cons:

  • Can be noisier than ultrasonic models.
  • Wicks and filters need replacement over time.

Ideal For: Larger plant setups or whole-room humidification.


3. Warm Mist (Steam) Humidifiers

These heat water to produce steam, which cools slightly before being released into the room.

Pros:

  • Great for colder climates—adds warmth to the air.
  • Helps reduce bacteria and mold in the water tank due to heat.

Cons:

  • Can be hot to the touch—keep away from leaves or pets.
  • Higher energy use.

Ideal For: Winter months or rooms that are already cool and dry.


4. Cool Mist Humidifiers

These release room-temperature mist and are safer for use around plants, pets, and children.

Pros:

  • Energy-efficient and effective.
  • Easy to maintain.
  • Ideal for maintaining steady humidity in warm seasons.

Cons:

  • May require frequent cleaning to prevent bacterial growth.

Ideal For: Year-round humidity maintenance.


How to Use a Humidifier for Indoor Plants

To get the best results, it’s important to use your humidifier correctly. Here are step-by-step tips to create an optimal environment for your green companions.

1. Choose the Right Location

  • Place your humidifier close to your plants, ideally 2–4 feet away.
  • Avoid placing it directly underneath leaves or flowers—excess moisture can cause fungal problems.
  • Keep it on a stable, elevated surface to allow the mist to disperse evenly.
  • In large rooms, consider multiple smaller humidifiers to ensure balanced coverage.

2. Set the Ideal Humidity Level

Most indoor plants thrive in 40–60% relative humidity.

  • Use a hygrometer (humidity meter) to monitor levels.
  • During dry winter months, you may need to run the humidifier longer.
  • Avoid exceeding 70% humidity, as excessive moisture can encourage mold or mildew.

3. Run Your Humidifier Consistently

Plants prefer consistent humidity rather than sudden changes.

  • Run your humidifier for several hours each day, especially in the morning or afternoon.
  • Use a timer or smart plug to automate the process.
  • If your home is very dry, consider leaving it on low throughout the day.

4. Use the Right Water

Tap water often contains minerals that can leave white residue or dust.

  • Use distilled, filtered, or demineralized water for best results.
  • This also prevents buildup inside the humidifier.

5. Maintain and Clean Your Humidifier Regularly

Dirty humidifiers can harbor bacteria and mold, which are harmful to both plants and humans.

  • Empty and rinse the tank daily.
  • Deep-clean weekly using vinegar or a mild disinfectant.
  • Replace filters or wicks as needed.

Proper maintenance ensures clean, healthy humidity for your indoor garden.


Complementary Ways to Increase Humidity

In addition to humidifiers, you can use simple methods to keep the air around your plants moist:

  1. Group plants together: Plants release moisture through transpiration, creating a mini microclimate.
  2. Use pebble trays: Fill a shallow tray with pebbles and water—place pots on top so the evaporating moisture surrounds the plants.
  3. Mist plants occasionally: Lightly mist leaves in the morning, but avoid overdoing it to prevent fungus.
  4. Add water features: Small indoor fountains or aquariums can naturally raise humidity.

These techniques work well alongside a humidifier for optimal results.


Common Mistakes to Avoid

While humidifiers are helpful, using them incorrectly can cause issues. Avoid these pitfalls:

  • Placing humidifiers too close to plants: Excessive moisture on leaves encourages mold or leaf rot.
  • Over-humidifying the room: Constant high humidity can damage furniture and promote mold growth.
  • Using unclean water: Minerals and impurities can clog the machine or settle on leaves.
  • Neglecting maintenance: A dirty humidifier releases bacteria and spores into the air.

Regular monitoring and cleaning will ensure your plants get the right balance of moisture without unwanted side effects.


Best Humidifiers for Indoor Plants (2025 Recommendations)

If you’re ready to invest in a humidifier, here are a few top-rated options known for plant-friendly performance and reliability:

  1. Levoit Classic 300S Ultrasonic Humidifier – Quiet, smart app-controlled, and perfect for medium-sized plant areas.
  2. Honeywell Cool Mist Humidifier – Reliable, affordable, and great for consistent humidity control.
  3. Pure Enrichment MistAire Ultrasonic Humidifier – Compact and effective for small spaces.
  4. TaoTronics TT-AH001 Cool Mist Humidifier – Adjustable mist settings and automatic shutoff feature.
  5. Elechomes UC5501 Ultrasonic Humidifier – Large tank and dual mist nozzles for large plant collections.

Final Thoughts

Humidity plays a crucial role in keeping indoor plants healthy, lush, and happy. For many houseplants—especially tropical ones—it’s not just about watering or sunlight; the moisture in the air can make all the difference between dull, dry foliage and vibrant, thriving greenery.

A good humidifier helps recreate the natural conditions your plants crave, allowing them to absorb moisture, grow stronger, and resist stress. With proper placement, consistent use, and regular maintenance, you can turn your living space into a thriving indoor oasis year-round.

Remember: happy air means happy plants. So if your leaves are curling or crisping, it might be time to give your plants what they truly need—a little humidity love.

The Best Grow Lights for Healthy Houseplants

The Best Grow Lights for Healthy Houseplants

Indoor gardening has become a beloved hobby for plant enthusiasts around the world. Whether you live in a small apartment or simply want to bring more greenery indoors, houseplants can add life, color, and calmness to your living space. However, one of the biggest challenges indoor gardeners face is the lack of natural sunlight. Without enough light, even the hardiest plants can struggle to grow, lose color, or fail to bloom.

That’s where grow lights come in. These artificial light sources are designed to mimic natural sunlight, giving your houseplants the energy they need for photosynthesis and healthy growth. In this article, we’ll explore everything you need to know about grow lights—how they work, what types are available, and which ones are best for different kinds of plants.


Understanding Why Grow Lights Are Important

Light is essential for plant health. During photosynthesis, plants absorb light energy to convert carbon dioxide and water into glucose, their main source of food. When plants don’t receive enough light, they often become leggy, with long, weak stems and pale leaves. They may also stop growing or fail to flower.

Natural sunlight provides a full spectrum of light wavelengths—from ultraviolet (UV) to infrared (IR). But in many indoor environments, such as offices or shaded apartments, sunlight is either too limited or inconsistent. That’s why grow lights are a game changer—they deliver the right spectrum and intensity of light that plants crave.


Types of Grow Lights

Before choosing the best grow light for your indoor plants, it’s important to understand the different types available. Each has its own pros, cons, and ideal uses.

1. Fluorescent Grow Lights

Fluorescent lights are a popular choice for beginners and hobbyists. They are affordable, energy-efficient, and emit a soft, cool light that’s safe for most indoor plants.

Advantages:

  • Great for seedlings, herbs, and low-light plants like pothos and ferns.
  • Available in tubes (T5, T8, T12) or compact bulbs (CFLs).
  • Produce little heat, making them safe to place close to plants.

Disadvantages:

  • Not ideal for large or light-hungry plants.
  • Bulbs need replacement every 12–18 months for optimal performance.

Best For: Small houseplants, kitchen herb gardens, and propagation setups.


2. LED Grow Lights

LED (Light Emitting Diode) grow lights are the modern favorite among indoor gardeners. They are highly efficient, long-lasting, and customizable to deliver specific light spectrums for different growth stages.

Advantages:

  • Energy-efficient and eco-friendly.
  • Low heat output—safe for prolonged use indoors.
  • Available in full-spectrum options that mimic sunlight.
  • Can last up to 50,000 hours or more.

Disadvantages:

  • Higher upfront cost compared to fluorescents.
  • Some cheaper models have poor color balance or weak intensity.

Best For: All-purpose indoor gardens, from succulents to flowering houseplants.


3. High-Intensity Discharge (HID) Lights

HID lights are powerful and commonly used by professional growers. They come in two main types—Metal Halide (MH) for vegetative growth and High-Pressure Sodium (HPS) for flowering and fruiting.

Advantages:

  • Extremely bright and effective for large indoor plant setups.
  • Proven results for fast growth and abundant blooms.

Disadvantages:

  • Generate a lot of heat—require proper ventilation and distance.
  • Consume more electricity.
  • Not suitable for small spaces.

Best For: Large indoor gardens, tropical plants, and advanced growers.


4. Incandescent Grow Lights

Incandescent bulbs are inexpensive and easy to find, but they are the least efficient option for growing plants. They produce a lot of heat and have a poor light spectrum for photosynthesis.

Advantages:

  • Cheap and readily available.

Disadvantages:

  • High heat output can burn plants.
  • Very inefficient—use more energy for less light.
  • Short lifespan.

Best For: Supplemental decorative lighting, not primary growth.


5. Full-Spectrum Grow Lights

Full-spectrum lights are designed to mimic the complete range of natural sunlight, including blue, red, and even a bit of ultraviolet and infrared light.

Advantages:

  • Excellent for all stages of plant growth.
  • Promote natural coloration and strong structure.
  • Ideal for year-round use indoors.

Disadvantages:

  • Slightly more expensive.

Best For: All-purpose use—especially for indoor plant lovers who want natural growth and vibrant color.


How to Choose the Right Grow Light for Your Plants

When selecting a grow light, there’s no one-size-fits-all solution. The right choice depends on your plants’ needs, available space, and budget. Here are key factors to consider:

1. Light Spectrum

Plants need different wavelengths for various growth stages:

  • Blue light (400–500 nm): Encourages leafy growth and compact shape.
  • Red light (600–700 nm): Stimulates flowering and fruiting.
  • Full-spectrum light: Covers all wavelengths, promoting balanced, natural growth.

For houseplants, a full-spectrum LED is usually the best choice.


2. Light Intensity

The intensity of light affects how much energy your plant receives. High-light plants like succulents, cacti, or citrus trees require strong light, while shade-tolerant plants like ferns or pothos need less.

Check the PAR (Photosynthetically Active Radiation) rating on the grow light—it indicates the useful light range for photosynthesis.


3. Coverage Area

Make sure your grow light can cover the entire plant area. Adjustable or multi-head lights are perfect for shelves or larger displays, while small clip-on or bulb-style lights work well for individual pots.


4. Heat Output

Too much heat can damage delicate plants. LED and fluorescent lights emit minimal heat, making them safe to position close to foliage. HID lights, however, should be used with proper distance and ventilation.


5. Energy Efficiency

LED lights are the most energy-efficient, followed by fluorescents. Although they may cost more upfront, they save money in the long run through reduced electricity use and longer lifespan.


6. Aesthetic and Setup

Consider how the light will fit into your space. Clip-on or hanging LED panels work well for compact setups, while standing lamps can double as decorative pieces in living rooms.


Best Grow Lights on the Market (2025 Recommendations)

Here are a few top-rated grow lights based on performance, durability, and customer satisfaction:

  1. Spider Farmer SF-1000 Full-Spectrum LED – Highly efficient with dimmable brightness, great for all plant stages.
  2. GE Grow Light LED – Affordable and stylish, perfect for casual indoor gardeners.
  3. Viparspectra P-Series LED – Balanced spectrum and strong light intensity for serious plant growth.
  4. Barrina T5 LED Grow Light Bars – Great for multi-shelf or wall-mounted plant displays.
  5. Mars Hydro TS1000 LED – Popular among enthusiasts for its full-spectrum output and wide coverage.

Tips for Using Grow Lights Effectively

Even the best light won’t work properly if it’s not used correctly. Follow these tips for optimal plant growth:

  1. Set the right duration: Most plants need 12–16 hours of light per day. Use a timer to maintain a consistent schedule.
  2. Adjust distance: Keep LED lights 12–24 inches above plants; fluorescents can be closer (6–12 inches).
  3. Rotate plants regularly: This ensures even light exposure and balanced growth.
  4. Monitor plant response: Yellowing, stretching, or scorched leaves can indicate too much or too little light.
  5. Clean lights regularly: Dust can block light intensity over time.

Final Thoughts

Grow lights have revolutionized indoor plant care, allowing plant lovers to grow lush greenery even in dark corners or windowless rooms. Whether you’re nurturing herbs in the kitchen or creating a mini jungle in your living room, the right grow light can make all the difference.

For most home gardeners, LED full-spectrum grow lights strike the perfect balance between efficiency, affordability, and performance. They provide the light quality plants need to thrive year-round—no matter the weather outside.

How to Build a DIY Hydroponic System for Indoor Plants

How to Build a DIY Hydroponic System for Indoor Plants

If you love growing plants but have limited space, a hydroponic system might be the perfect solution. Hydroponics allows you to grow lush, thriving plants indoors without soil—using nutrient-rich water instead. Whether you’re cultivating herbs, leafy greens, or flowering houseplants, building your own DIY hydroponic system is easier and more rewarding than you might think. This guide will walk you through everything you need to know, from understanding how hydroponics works to setting up your own indoor garden step by step.


What Is a Hydroponic System?

Hydroponics is a method of growing plants in water mixed with mineral nutrients instead of traditional soil. In this system, roots have direct access to nutrients, oxygen, and water, leading to faster growth and higher yields. Because it doesn’t rely on soil, hydroponics can be done almost anywhere—apartments, basements, balconies, or even kitchen counters.

The idea may sound high-tech, but at its core, hydroponics simply focuses on giving plants exactly what they need—no more, no less. You control the growing environment, which reduces the risk of pests, soil-borne diseases, and inconsistent watering.


Benefits of Building a DIY Hydroponic System

Before jumping into the setup, it’s important to understand why hydroponics is such a great option for indoor gardeners:

  1. Space Efficiency: Hydroponic systems can be compact, making them perfect for small apartments or urban homes.
  2. Faster Growth: Plants grown hydroponically can grow up to 30–50% faster than those in soil because they receive nutrients directly.
  3. Water Conservation: Hydroponics uses up to 90% less water than traditional gardening, as water is recycled within the system.
  4. Less Mess: No soil means no dirt, making it cleaner and easier to maintain indoors.
  5. Year-Round Gardening: You can grow fresh herbs, vegetables, or decorative plants all year long, regardless of the weather outside.

Choosing the Right Hydroponic System

There are several types of hydroponic systems, and each has unique advantages. For beginners, some are much easier to build and maintain than others. Let’s look at a few simple options for DIY setups:

  1. Wick System:
    The simplest form of hydroponics, where a wick (like a rope) carries nutrient solution from a reservoir to the plant roots. It doesn’t need pumps or electricity—great for beginners.
  2. Deep Water Culture (DWC):
    In this system, plant roots are suspended in oxygen-rich nutrient water. Air stones and pumps provide oxygen to prevent root rot. DWC is perfect for fast-growing plants like lettuce or basil.
  3. Nutrient Film Technique (NFT):
    A thin film of nutrient water constantly flows over the roots. This system is efficient but requires a pump and some tubing setup.
  4. Ebb and Flow (Flood and Drain):
    The nutrient solution floods the root zone at intervals and then drains back into the reservoir. It’s slightly more advanced but excellent for larger plants.

For your first DIY indoor project, the Deep Water Culture (DWC) system is highly recommended—it’s simple, affordable, and produces quick results.


What You’ll Need to Build a DIY Deep Water Culture System

Here’s a list of materials and tools required to build a basic hydroponic setup at home:

Materials:

  • A plastic container or storage tote (serves as the nutrient reservoir)
  • Net pots (small plastic pots with holes for roots)
  • Hydroponic growing medium (clay pebbles, perlite, or coco coir)
  • Air pump and air stone (for oxygen circulation)
  • Hydroponic nutrient solution (pre-mixed or custom blend)
  • pH testing kit and pH up/down solution
  • Seedlings or plant cuttings
  • Drill (for cutting holes in the lid for net pots)

Optional but helpful:

  • LED grow lights (for areas with low natural light)
  • Timer for air pump or lights
  • Thermometer and hygrometer for monitoring conditions

Step-by-Step Guide to Building Your Hydroponic System

Step 1: Prepare the Reservoir

Choose a container that holds at least 10–15 liters of water. The container should be opaque to block light, preventing algae growth. Cut holes in the lid using a hole saw or drill—these holes should fit the net pots snugly.

Step 2: Install the Air Pump and Stone

Place the air stone at the bottom of the reservoir and connect it to the air pump using a flexible tube. This will keep the water oxygenated, ensuring healthy root growth. Turn it on to test for steady bubbling before proceeding.

Step 3: Mix the Nutrient Solution

Fill the reservoir with water and add hydroponic nutrients as per the package instructions. It’s crucial to measure accurately—too much can damage the plants. Use a pH testing kit to ensure the solution’s pH is between 5.5 and 6.5, the ideal range for most plants.

Step 4: Prepare and Insert Plants

Place your seedlings or cuttings in net pots filled with your chosen growing medium. The bottom of the net pot should slightly touch the nutrient solution so roots can start absorbing water.

Step 5: Provide Light

If your setup is indoors without sufficient sunlight, install LED grow lights above your plants. Keep them on for 12–16 hours a day, simulating natural daylight. Adjustable LED panels are energy-efficient and ideal for small spaces.

Step 6: Monitor and Maintain

Check the water level daily—top it up when needed. Replace the nutrient solution every two weeks to prevent salt buildup. Maintain a steady room temperature between 18°C–24°C (65°F–75°F) for best results.


Best Plants to Grow in a DIY Hydroponic System

Some plants thrive particularly well in hydroponics, especially those that grow fast and don’t require deep root systems. Here are great options for indoor growers:

  • Herbs: Basil, mint, oregano, parsley, thyme, and chives.
  • Leafy greens: Lettuce, spinach, kale, arugula, and Swiss chard.
  • Fruiting plants: Cherry tomatoes, peppers, strawberries (for advanced systems).
  • Flowers: Petunias, pansies, and orchids can adapt well to hydroponic setups with some modifications.

Common Mistakes to Avoid

While hydroponics is rewarding, beginners often make a few avoidable errors:

  1. Ignoring pH Levels: Incorrect pH can block nutrient absorption even if your solution is rich in minerals.
  2. Overfeeding Plants: More nutrients don’t mean faster growth. Always stick to recommended doses.
  3. Poor Aeration: Without adequate oxygen, roots can rot quickly.
  4. Excessive Light or Heat: Too much light can cause leaf burn. Keep lights at least 12 inches above the plants.
  5. Dirty Reservoir: Failing to clean the system regularly can lead to algae buildup and bacteria growth.

Maintaining a Healthy Hydroponic Garden

Once your system is running, regular monitoring ensures long-term success. Keep an eye on plant color and growth rate—healthy hydroponic plants are typically bright green and grow steadily. If you notice yellowing leaves or stunted growth, check your pH, nutrient concentration, and light setup.

Cleaning is essential—rinse and disinfect all components every month before refilling the reservoir. This prevents nutrient imbalance and disease. You can also prune older leaves and rotate plants to ensure even light exposure.


Sustainability and Cost Benefits

A DIY hydroponic system not only saves space but also supports sustainable living. Since water recirculates, it dramatically reduces waste. You can grow pesticide-free food at home, cutting down grocery costs and carbon footprint. The initial investment is relatively low—most basic setups cost under $50 if you repurpose containers and use budget-friendly supplies.

Over time, you’ll gain control over every growing condition—light, nutrients, and environment—making hydroponics one of the most efficient ways to garden indoors.


Conclusion

Building a DIY hydroponic system for indoor plants opens the door to a fascinating, productive, and eco-friendly way of gardening. You don’t need a huge yard, fertile soil, or even much experience—just a little curiosity and care. Once your system is running smoothly, you’ll enjoy watching your plants grow faster, healthier, and cleaner than ever before.

Whether you’re cultivating fresh herbs for your kitchen or simply bringing more greenery into your home, hydroponics empowers you to garden smarter, not harder. So grab your materials, follow the steps, and start your own indoor oasis today—the future of sustainable gardening is literally in your hands.

How to Fix Leggy Houseplants and Encourage Bushier Growth

How to Fix Leggy Houseplants and Encourage Bushier Growth

Houseplants bring life, beauty, and a calming presence to our indoor spaces, but a common problem many plant enthusiasts face is leggy growth. A leggy plant is characterized by long, weak stems with sparse foliage, often caused by insufficient light, improper pruning, or nutrient imbalances. While leggy growth can make plants look unattractive and unhealthy, it is entirely reversible with the right care and techniques.

This guide explores why houseplants become leggy, how to fix them, and strategies to encourage bushier, healthier growth.


1. Understanding Leggy Houseplants

Leggy growth is usually a plant’s response to stress or unfavorable conditions. Recognizing the underlying cause is the first step toward correction.

Common Causes of Leggy Growth:

  1. Insufficient Light: Plants stretch toward available light, leading to elongated stems and widely spaced leaves.
  2. Overcrowding: Plants in cramped spaces compete for light, causing stretching.
  3. Improper Pruning: Failing to trim encourages vertical, sparse growth.
  4. Nutrient Imbalances: Lack of nitrogen or other essential nutrients can weaken stems.
  5. Improper Watering: Inconsistent watering can stress plants, resulting in poor foliage density.

Tip: Identify the cause before applying corrective measures; treating symptoms without addressing the root problem may only provide temporary improvement.


2. Adjusting Light Conditions

Lighting is the most critical factor for bushy, compact growth in houseplants.

Tips for Optimal Light:

  • Bright, Indirect Light: Most houseplants thrive in bright, filtered sunlight. Direct sun can scorch leaves, while low light encourages stretching.
  • Rotate Plants: Turn plants regularly to ensure even exposure on all sides, preventing uneven leggy growth.
  • Supplement with Grow Lights: For low-light interiors, use LED or fluorescent grow lights to provide 12–16 hours of light per day.
  • Window Positioning: East or south-facing windows generally provide the best natural light for indoor plants.

Tip: Place leggy plants closer to the light source gradually to avoid shock and leaf burn.


3. Pruning and Pinching Back

Pruning is a highly effective way to revitalize leggy houseplants and encourage bushier growth.

Pinching Technique:

  • Pinch or trim the tips of stems just above a leaf node (the point where leaves grow).
  • This stimulates lateral growth, producing more branches and leaves.

Hard Pruning:

  • For extremely leggy plants, cut back stems to one-third of their length.
  • Remove damaged, yellow, or weak growth to redirect energy to healthier parts.

After Pruning Care:

  • Water thoroughly and provide adequate light.
  • Consider applying a mild liquid fertilizer to encourage new growth.

Tip: Regular pruning prevents legginess and maintains a compact, bushy appearance over time.


4. Propagating Cuttings from Leggy Plants

Propagation is a win-win solution for leggy houseplants. Not only do you revive the parent plant, but you also create new, healthy plants.

Steps for Propagation:

  1. Select healthy, leggy stems and cut just below a leaf node.
  2. Remove lower leaves to expose nodes for root development.
  3. Place cuttings in water or moist soil until roots form.
  4. Once rooted, transplant into small pots with well-draining soil.

Tip: Plants like pothos, philodendron, and coleus root easily from cuttings and respond quickly to propagation.


5. Adjusting Water and Nutrients

Proper watering and feeding are essential to restore a leggy plant’s vigor.

Watering Guidelines:

  • Keep soil evenly moist but not soggy; overwatering can lead to weak stems.
  • Ensure pots have good drainage to prevent root rot.
  • Allow the top inch of soil to dry between waterings for most indoor plants.

Fertilization Tips:

  • Apply a balanced, water-soluble fertilizer every 4–6 weeks during the growing season.
  • For plants with slow growth, use a fertilizer higher in nitrogen to encourage leaf production and stem strength.

Tip: Avoid over-fertilization, as excess nutrients can burn roots and worsen legginess.


6. Using Support and Training Techniques

For tall, leggy plants, structural support can prevent breakage and improve overall appearance.

Support Options:

  • Stakes or Bamboo Poles: Tie stems gently to stakes to support weak growth.
  • Trellises or Frames: Ideal for climbing plants or vines like pothos or hoya.
  • Wire or String: For creative training and shaping of trailing or sprawling plants.

Shaping Plants:

  • Train stems to grow outward or upward to even out growth and improve light exposure.
  • Remove overcrowded branches to encourage airflow and reduce leggy appearance.

Tip: Combining support with pruning accelerates bushier regrowth.


7. Repotting Leggy Plants

Repotting is often necessary for leggy plants to provide fresh soil, more nutrients, and room for root growth.

Repotting Steps:

  • Choose a pot 1–2 inches larger in diameter than the current one.
  • Remove old soil and inspect roots; trim any rotten or damaged roots.
  • Replant in well-draining potting mix suitable for the plant species.
  • Water thoroughly after repotting and allow plants to recover in bright, indirect light.

Tip: Repotting during active growth (spring or early summer) ensures quicker recovery.


8. Encouraging Natural Bushiness

Beyond pruning, light, and nutrients, certain practices promote naturally bushier growth over time:

  • Regular Rotation: Rotating plants prevents them from leaning toward a single light source.
  • Leaf Node Encouragement: Pinching above nodes forces multiple branches to emerge.
  • Humidity Maintenance: Some tropical plants develop stronger stems and fuller foliage in higher humidity.
  • Companion Planting: Grouping plants with similar needs can create microclimates that support robust growth.

Tip: Consistency is key; small daily or weekly adjustments yield long-term results.


9. Monitoring for Underlying Issues

Persistent legginess may indicate stress or pest problems.

Check for Common Issues:

  • Pests: Spider mites, aphids, or mealybugs can weaken stems.
  • Disease: Fungal or bacterial infections can stunt growth and cause yellowing.
  • Root Bound Plants: Crowded roots limit nutrient uptake and lead to weak stems.

Tip: Early intervention prevents legginess from worsening and supports strong recovery.


10. Choosing Naturally Compact Varieties

Some houseplants are genetically predisposed to bushy growth and are less prone to legginess.

Examples:

  • Peperomia: Naturally compact with small, dense leaves.
  • African Violet: Slow-growing, full rosettes of foliage.
  • Fittonia: Compact, colorful foliage ideal for low-light areas.

Tip: Selecting compact varieties for low-light rooms reduces the risk of leggy growth in the first place.


Conclusion

Leggy houseplants can be revived and transformed into bushy, healthy plants with proper care, pruning, and environmental adjustments. By addressing the root causes—such as insufficient light, improper pruning, or nutrient imbalance—you can restore the vigor and aesthetic appeal of your indoor greenery.

Key strategies include:

  • Adjusting light exposure and using supplemental grow lights.
  • Pruning, pinching, and propagating cuttings to stimulate lateral growth.
  • Maintaining proper watering, fertilization, and humidity levels.
  • Providing structural support and repotting when necessary.
  • Choosing compact varieties and monitoring for pests or diseases.

With consistent care and attention to environmental conditions, even the most leggy houseplants can flourish, resulting in full, lush foliage, stronger stems, and a visually vibrant indoor garden. A leggy plant is not a lost cause—it’s an opportunity to reshape, revitalize, and create a more beautiful, thriving indoor space.

Tip: Keep a growth journal to track pruning, rotation, and fertilizer schedules—this helps predict and prevent future legginess.