Why Your Houseplants Aren’t Flowering—and How to Help

Why Your Houseplants Aren’t Flowering—and How to Help

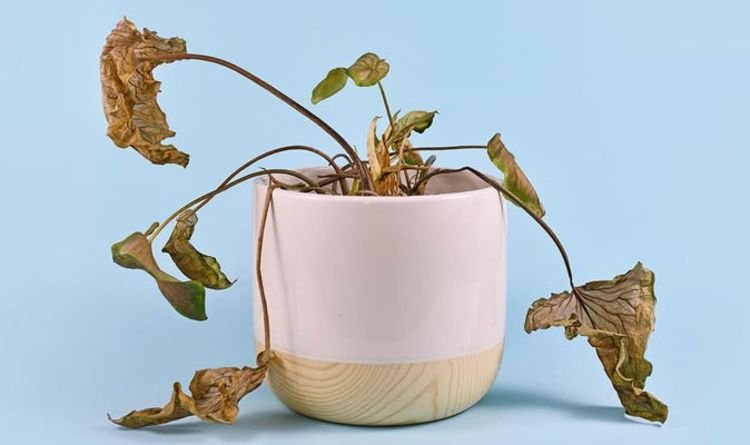
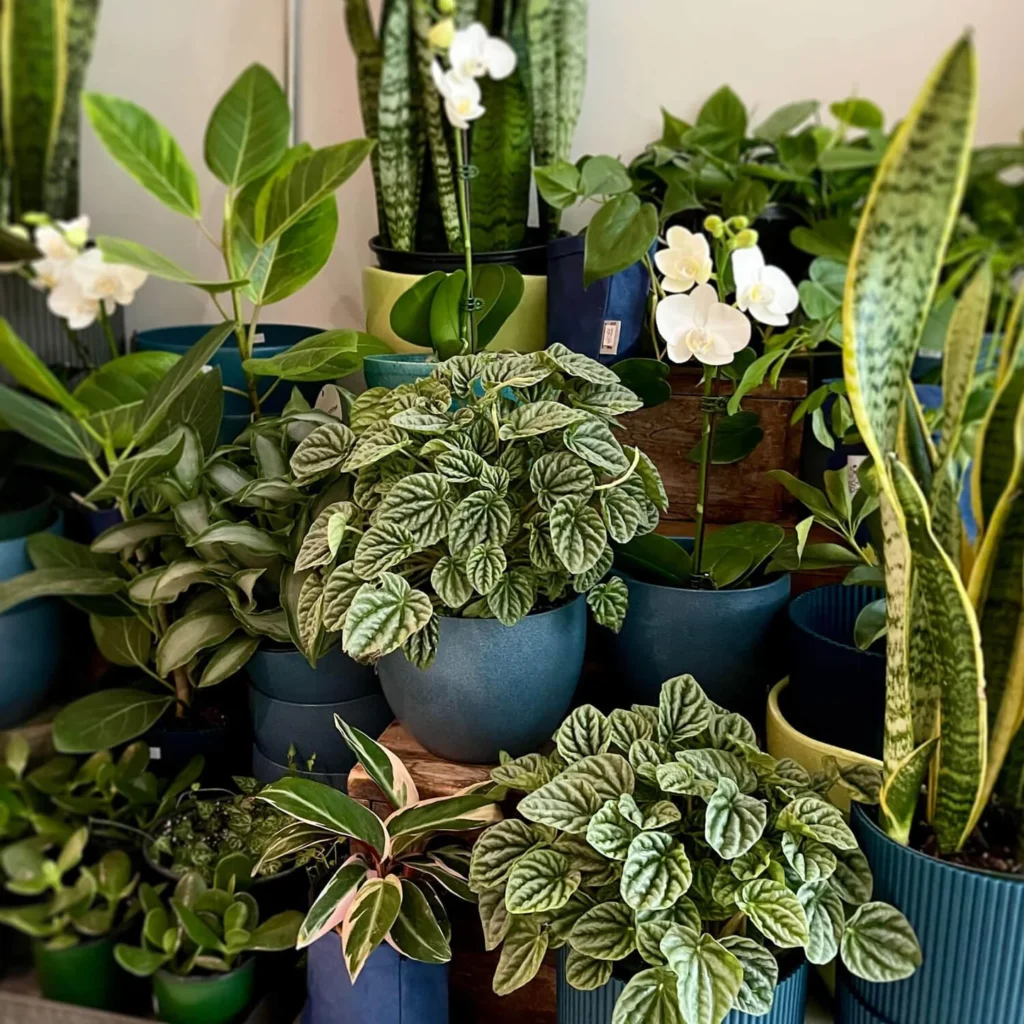
Few things are more frustrating for plant lovers than a lush, green plant that refuses to bloom. You water it, feed it, talk to it even—and still, no flowers! But before you give up, know this: non-flowering houseplants are a common issue, and the causes are often easy to identify (and fix).

Whether you’re caring for orchids, peace lilies, African violets, or hibiscus, flowering houseplants need a precise balance of light, nutrients, and care. Let’s explore why your houseplants aren’t flowering—and what you can do to encourage beautiful, consistent blooms.


1. Not Enough Light: The #1 Bloom Blocker

The most common reason houseplants don’t flower is insufficient light. In nature, flowering plants grow in bright, sunny conditions that trigger their natural blooming cycles. Indoors, however, the light intensity is much lower, even near windows.

Why It Happens

Light is essential for photosynthesis, which powers flower production. Without enough energy from sunlight, your plant focuses on basic survival—keeping its leaves green—rather than expending energy on blooms.

How to Fix It

  • Assess your plant’s light needs. Some flowering plants like hibiscus or jasmine need at least 6–8 hours of direct sunlight daily, while others like African violets or peace lilies thrive in bright, indirect light.
  • Relocate wisely. Move your plant closer to a bright window (preferably east or south-facing).
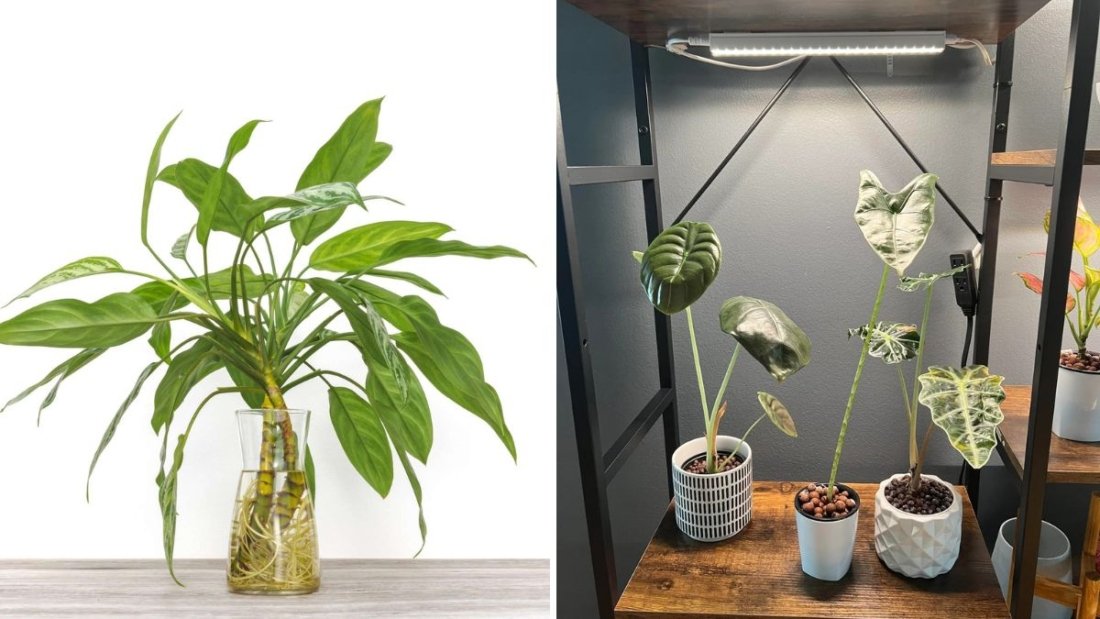
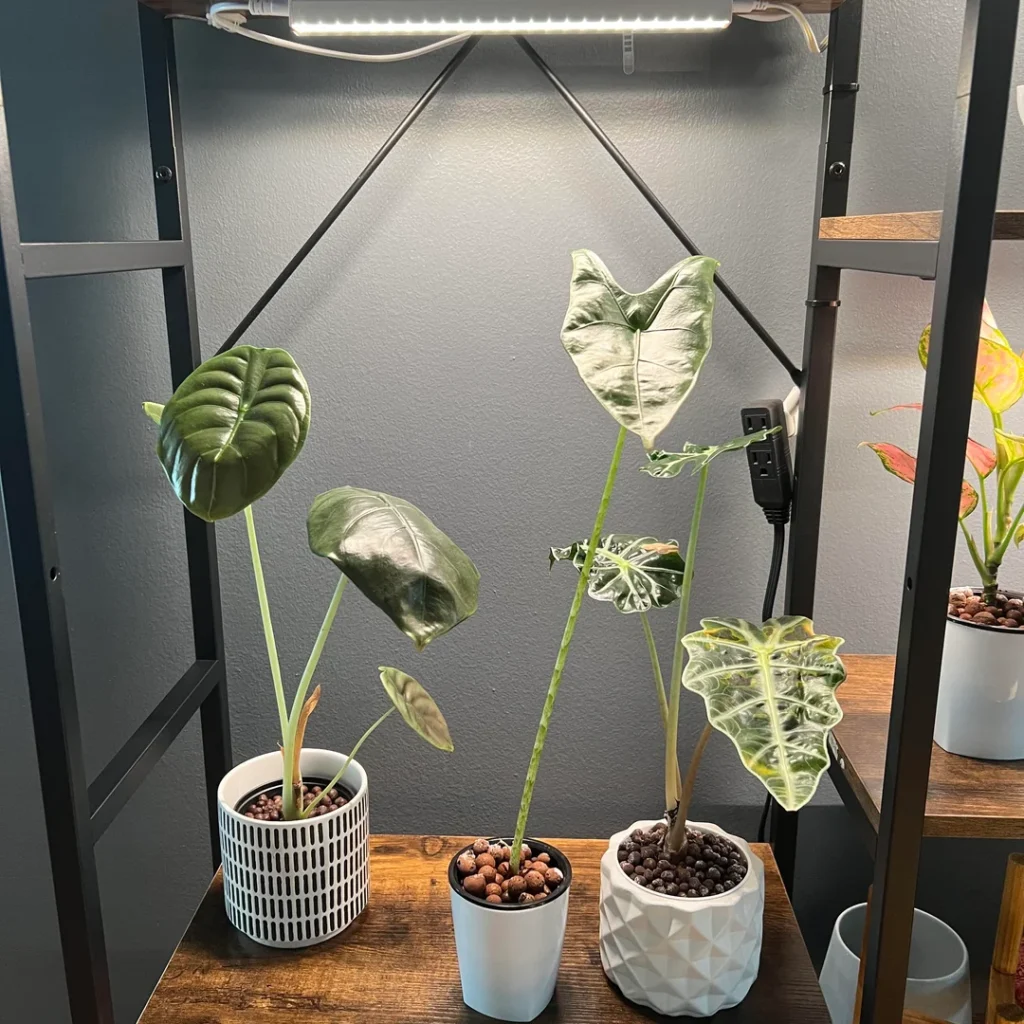
  • Supplement with grow lights. LED grow lights can help mimic sunlight for indoor plants in low-light rooms.

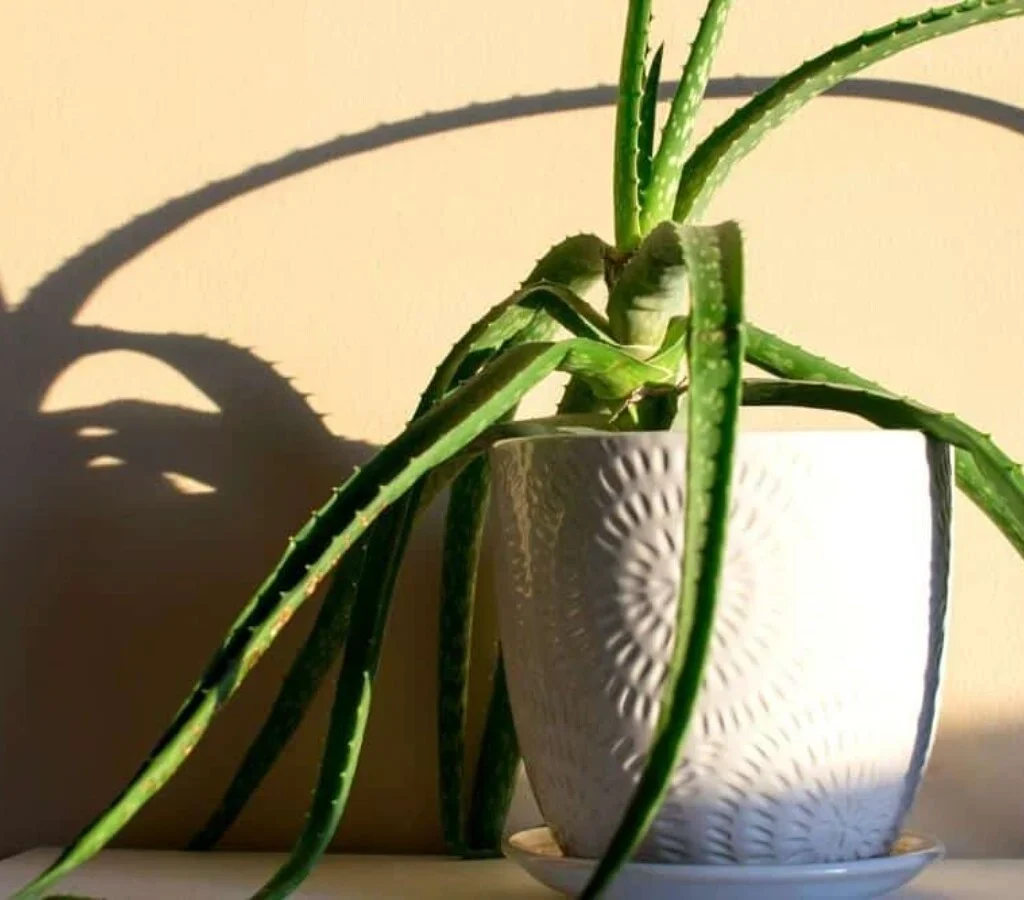
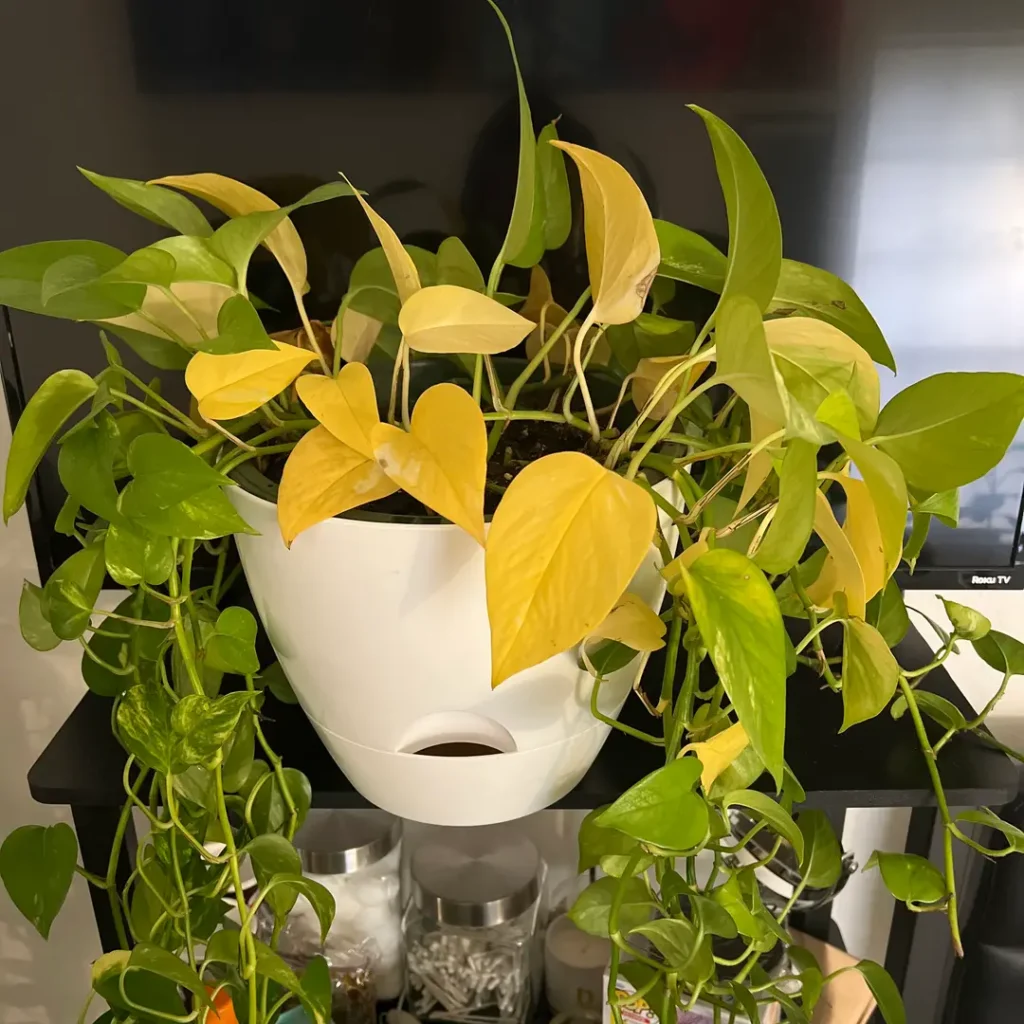
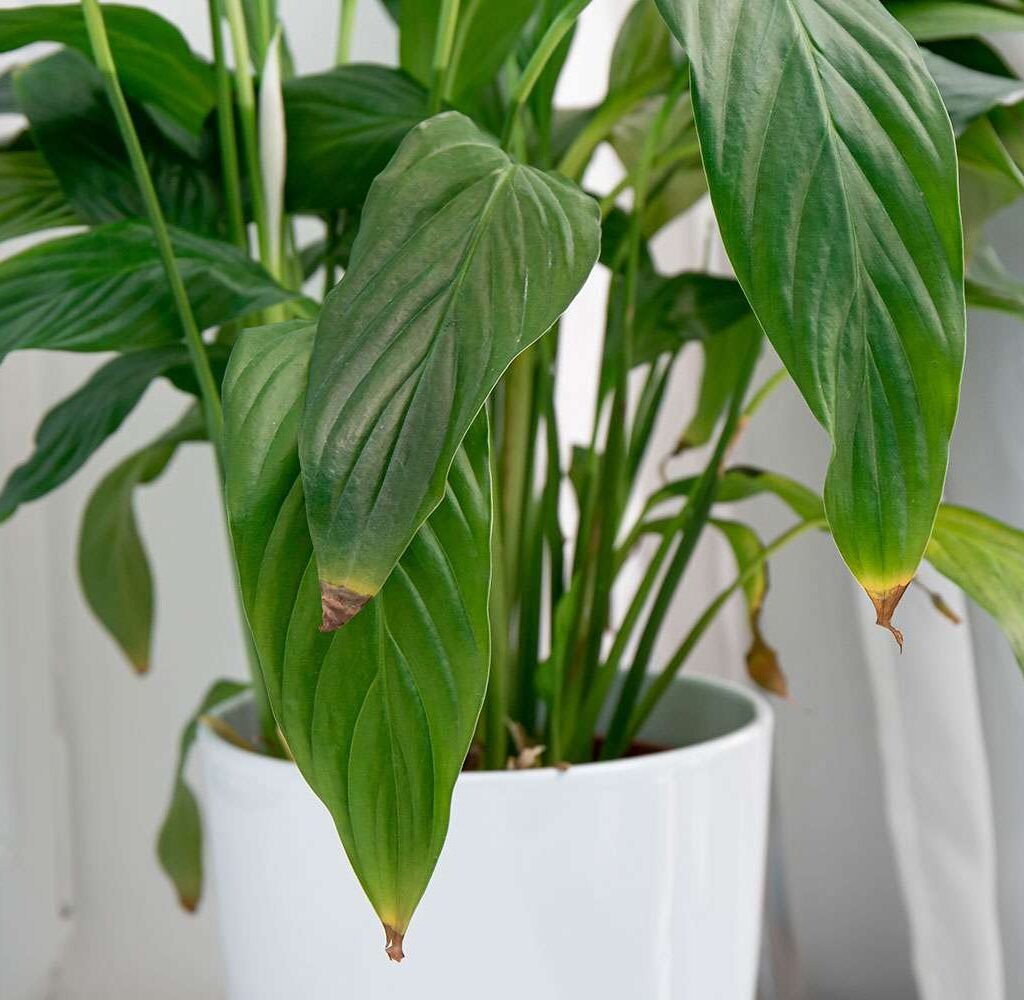
Tip: A plant’s leaves turning pale or leaning toward the window are clear signs it’s craving more light.


2. Wrong Temperature and Humidity

Many tropical flowering plants are sensitive to temperature changes. If your indoor environment is too cold, too hot, or has low humidity, the plant may go into “survival mode” and stop flowering.

Why It Happens

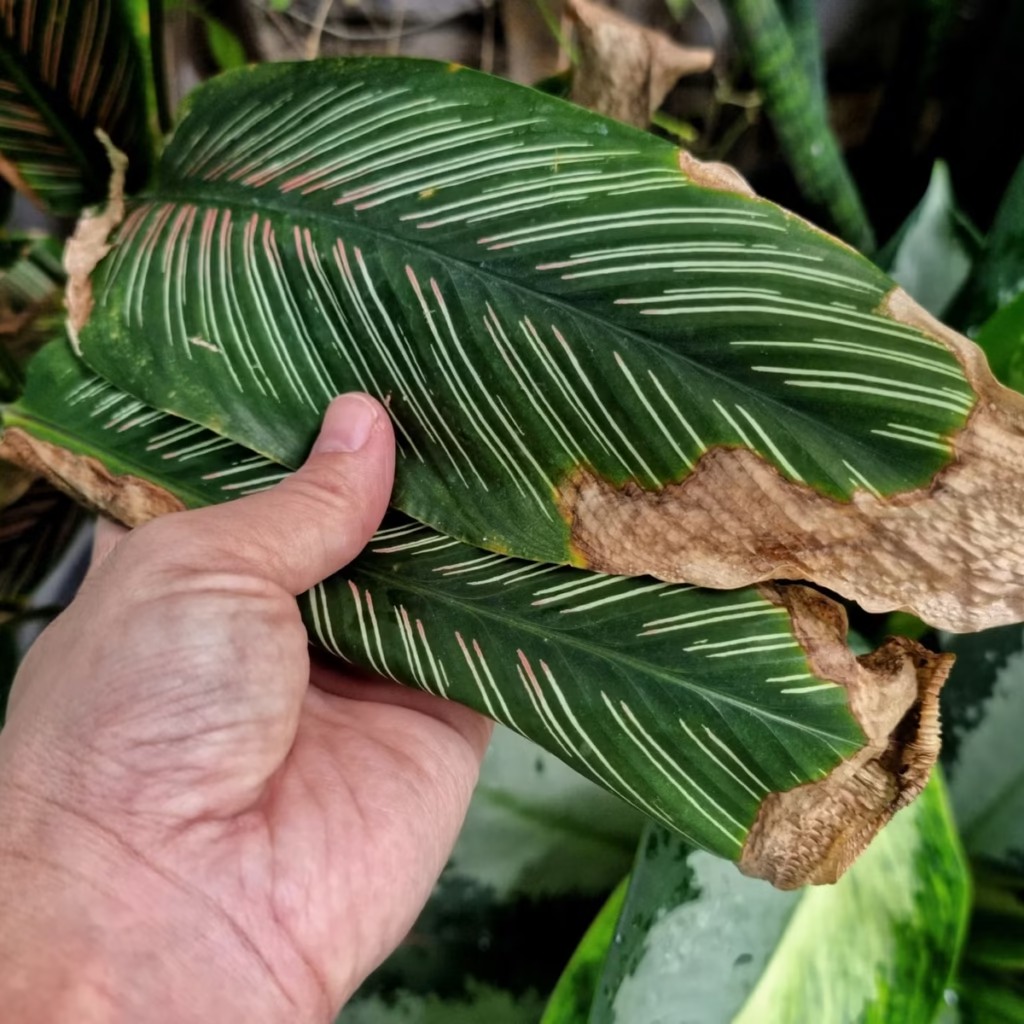
Flower buds are delicate and respond to stress. Sudden temperature drops, air conditioning drafts, or dry indoor heat can cause buds to drop or fail to form.

How to Fix It

  • Keep the room temperature between 65–80°F (18–27°C) for most tropical plants.
  • Avoid placing plants near AC vents, heaters, or drafty windows.
  • Use a humidifier or place a tray of water with pebbles beneath pots to increase moisture levels.

Tip: Orchids, bromeliads, and begonias love humidity. A daily misting can do wonders for them.


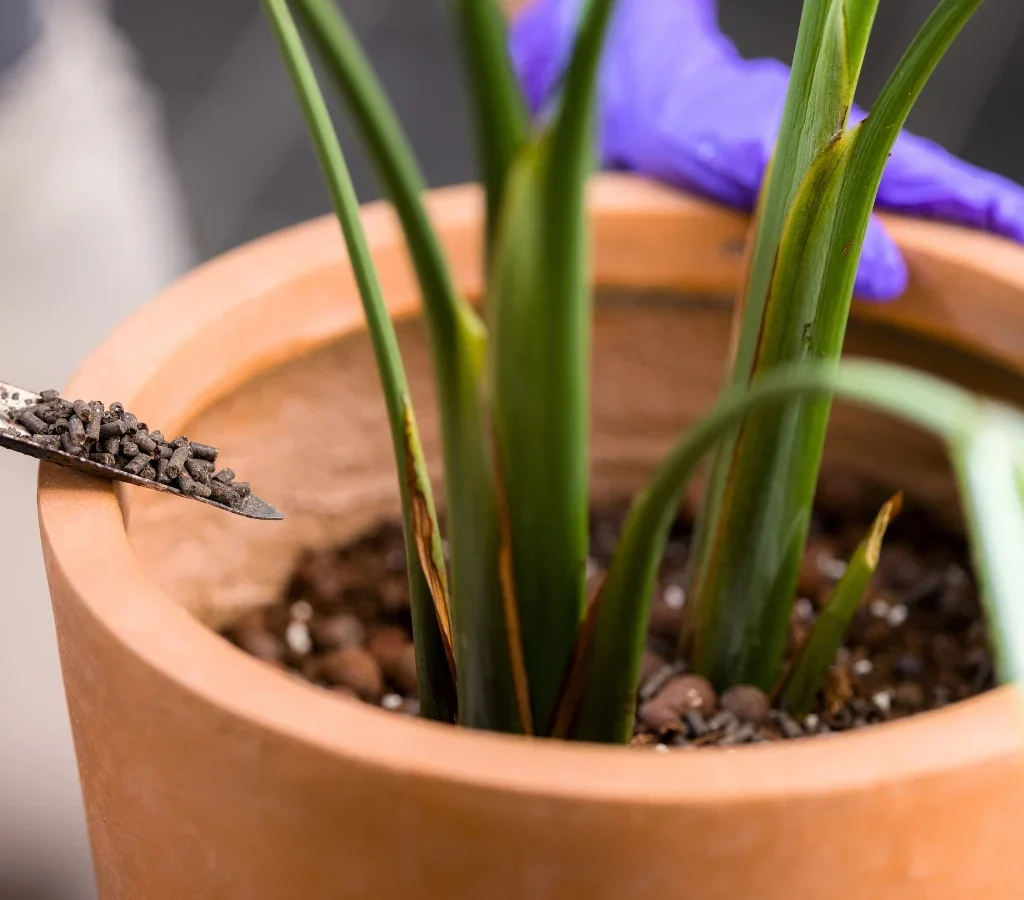
3. Overfertilizing—or Using the Wrong Fertilizer

While fertilizers encourage growth, too much nitrogen (the first number on the NPK label) can cause your plant to grow more leaves and fewer flowers. Nitrogen supports foliage growth, but flowering plants need more phosphorus (P) for blooms.

Why It Happens

When plants receive excessive nitrogen, they put all their energy into lush green growth at the expense of flowers. The result: a beautiful plant with no blooms.

How to Fix It

  • Choose a bloom-boosting fertilizer with a higher middle number—like 10-30-20 (N-P-K).
  • Feed sparingly. Most indoor plants only need fertilizer every 4–6 weeks during their active growing season (spring and summer).
  • Flush the soil occasionally. Excess fertilizer salts can build up in the soil—rinse it by running water through the pot for a few minutes every couple of months.

Tip: Use organic options like compost tea or liquid seaweed for gentle, natural feeding.


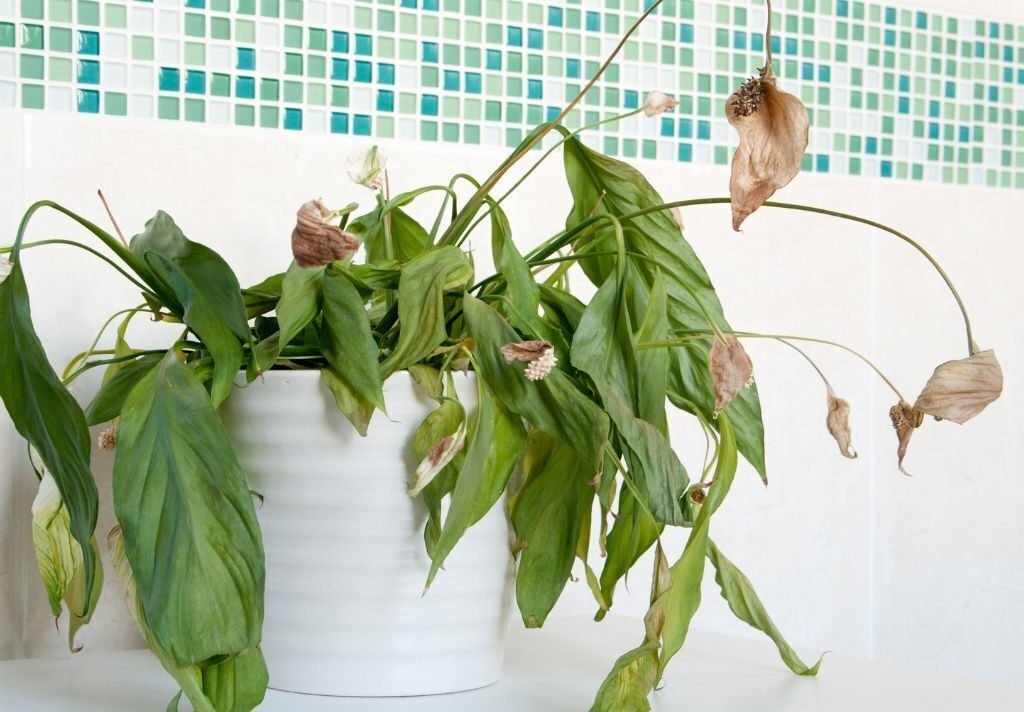
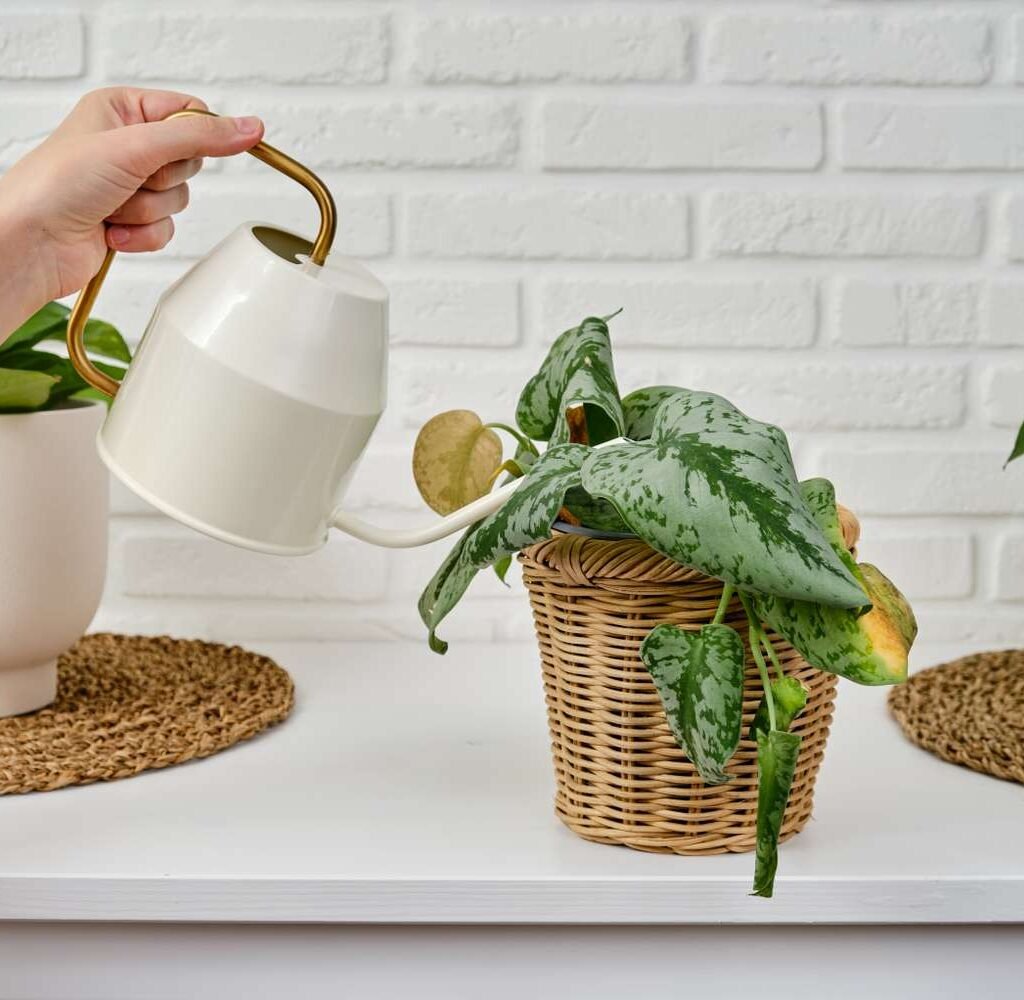
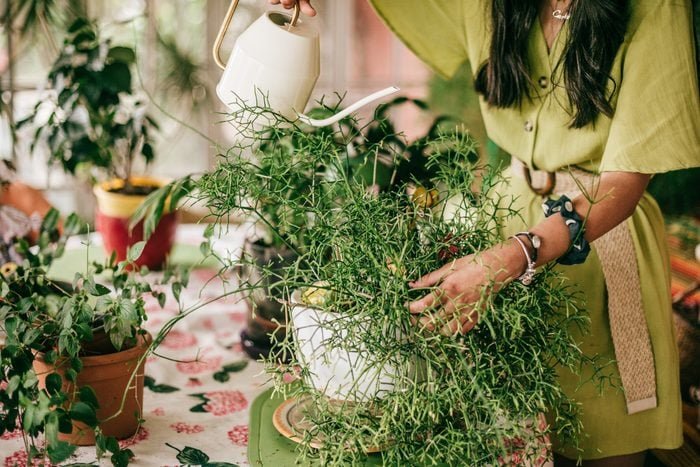
4. Watering Mistakes: Too Much or Too Little

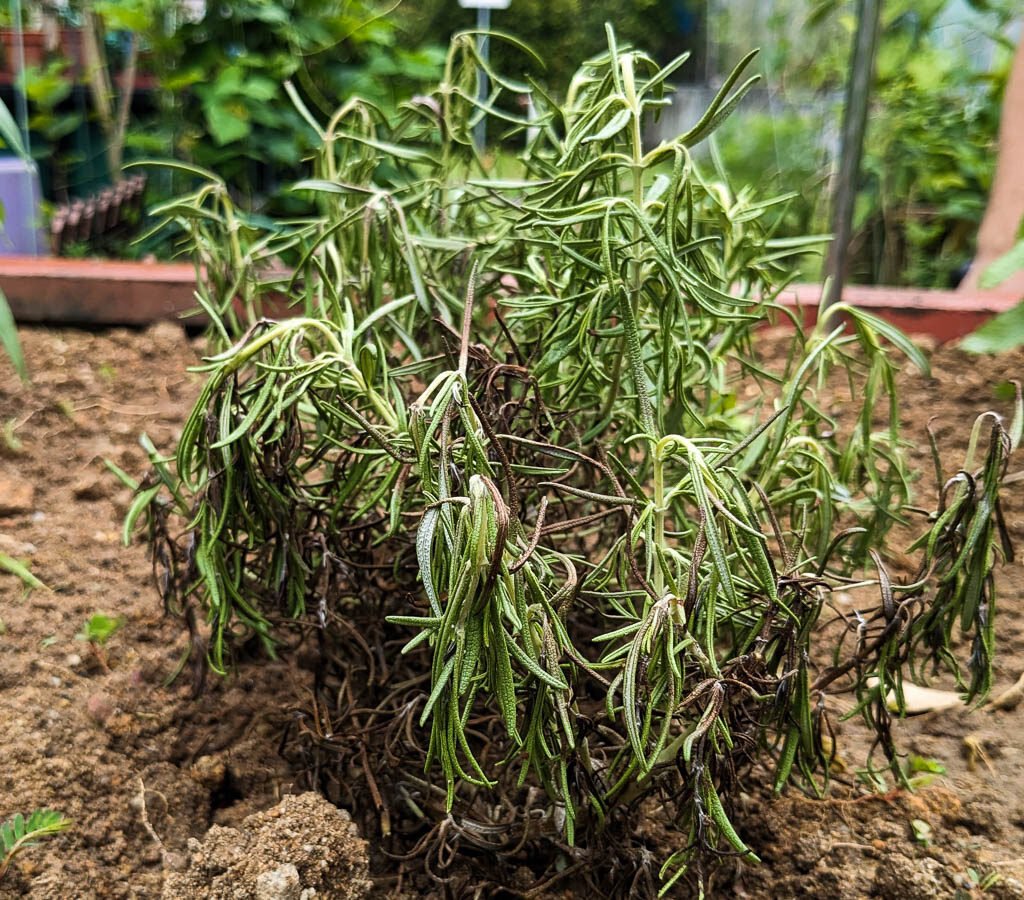
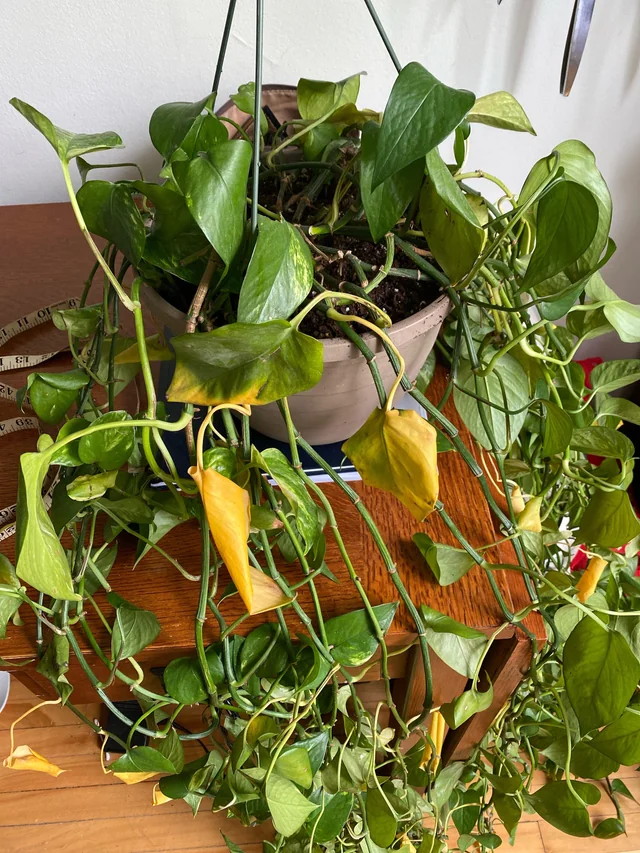
Inconsistent watering can severely stress your plants, preventing them from producing flowers. Overwatering causes root rot, while underwatering leads to dehydration—both of which halt blooming.

Why It Happens

Roots need oxygen and moisture balance to function properly. Overwatered roots suffocate, while dry roots can’t absorb nutrients efficiently, both making it impossible for the plant to flower.

How to Fix It

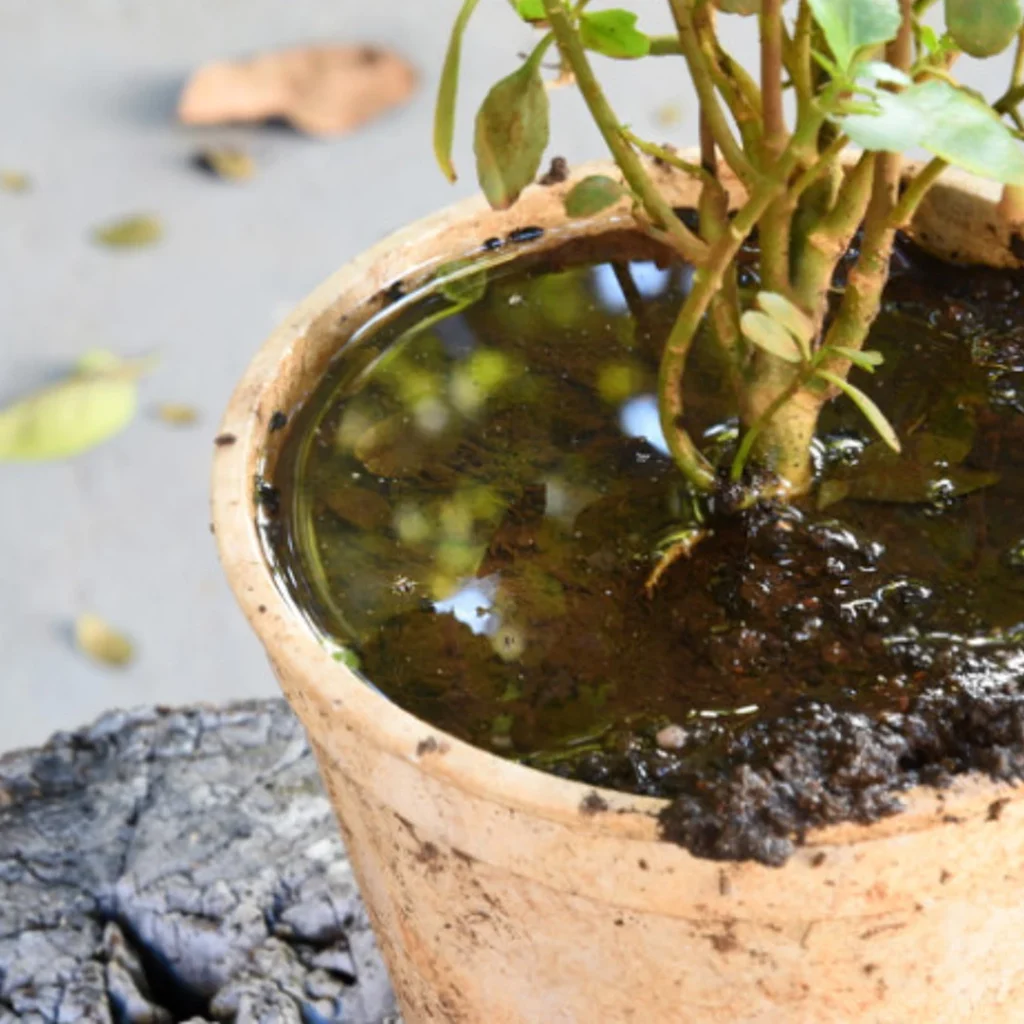
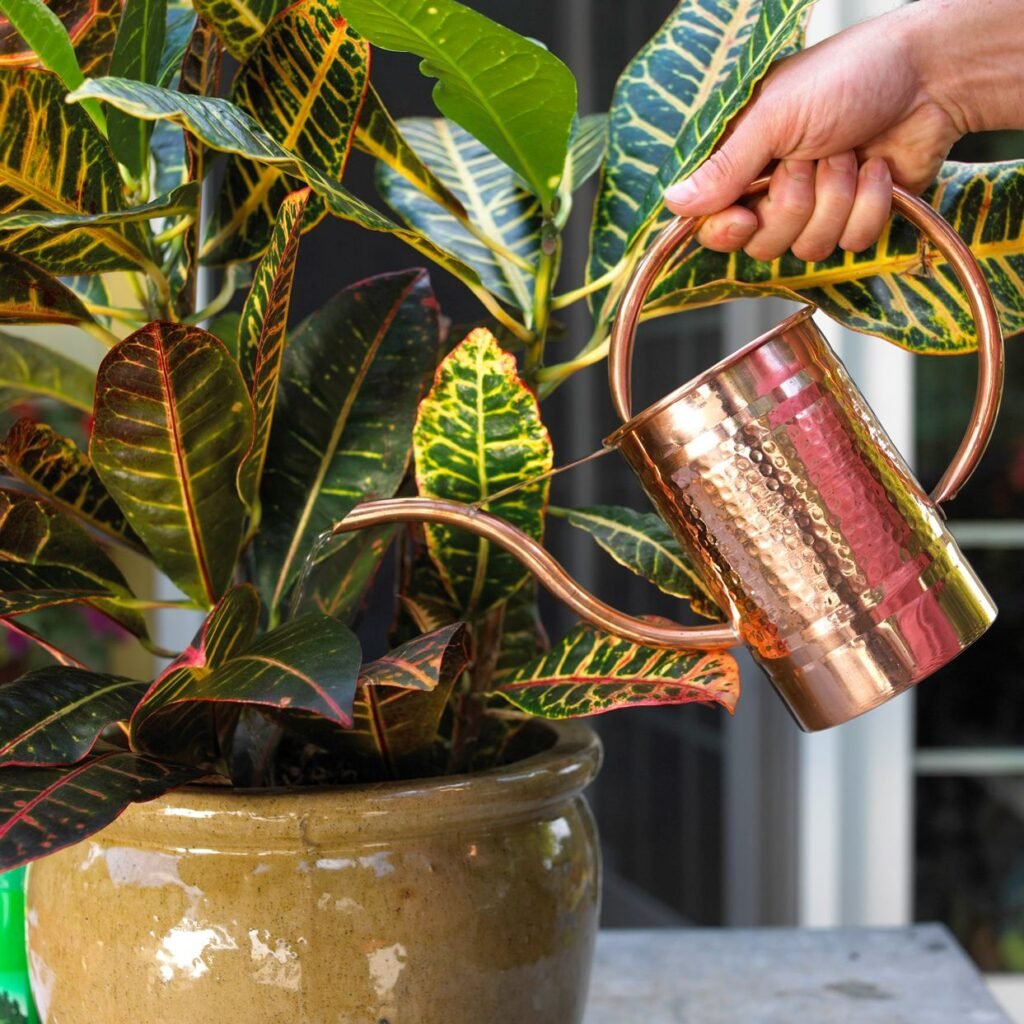
  • Check soil moisture before watering. Stick your finger 1–2 inches deep—if it feels dry, it’s time to water.
  • Use pots with drainage holes to prevent soggy soil.
  • Adjust watering with the seasons. Plants need less water in winter and more in spring and summer when they’re actively growing.

Tip: Always empty saucers under pots after watering to avoid root rot.


5. Lack of Dormancy or Rest Period

Some flowering plants, like amaryllis, cyclamen, and Christmas cacti, need a rest period before they can bloom again. If they’re not allowed to rest, they may stay alive but refuse to flower.

Why It Happens

In their natural habitats, many plants experience cooler, drier seasons that signal rest and regeneration. Without this dormancy, the plant doesn’t know it’s time to produce flowers again.

How to Fix It

  • Research whether your plant needs a rest period.
  • Gradually reduce watering and light during the dormant phase (usually in late fall or winter).
  • After 6–8 weeks, resume regular care with increased light and watering to trigger blooming.

Tip: For bulbs like amaryllis, cut back foliage after blooming and store them in a cool, dark place before replanting.


6. Pruning and Pinching Mistakes

Pruning helps shape plants and encourages healthy growth, but incorrect or excessive pruning can remove flower buds or the stems where new buds would form.

Why It Happens

Some plants bloom on new growth (like hibiscus), while others bloom on old growth (like orchids or jasmine). Pruning at the wrong time can accidentally remove next season’s flowers.

How to Fix It

  • Research the flowering pattern of your specific plant before pruning.
  • For most houseplants, light pruning after flowering encourages new shoots and more blooms.
  • Pinch back leggy stems to stimulate bushier, flower-producing growth.

Tip: Always use clean, sharp pruning shears to prevent plant disease.


7. The Plant Is Too Young—or Root Bound

Patience is key when it comes to flowering. Some plants need to mature before they’re ready to bloom, while others become stressed when their roots outgrow the pot.

Why It Happens

Immature plants aren’t biologically ready to flower yet. Conversely, a root-bound plant has limited space to grow and can’t absorb nutrients efficiently, preventing flowering.

How to Fix It

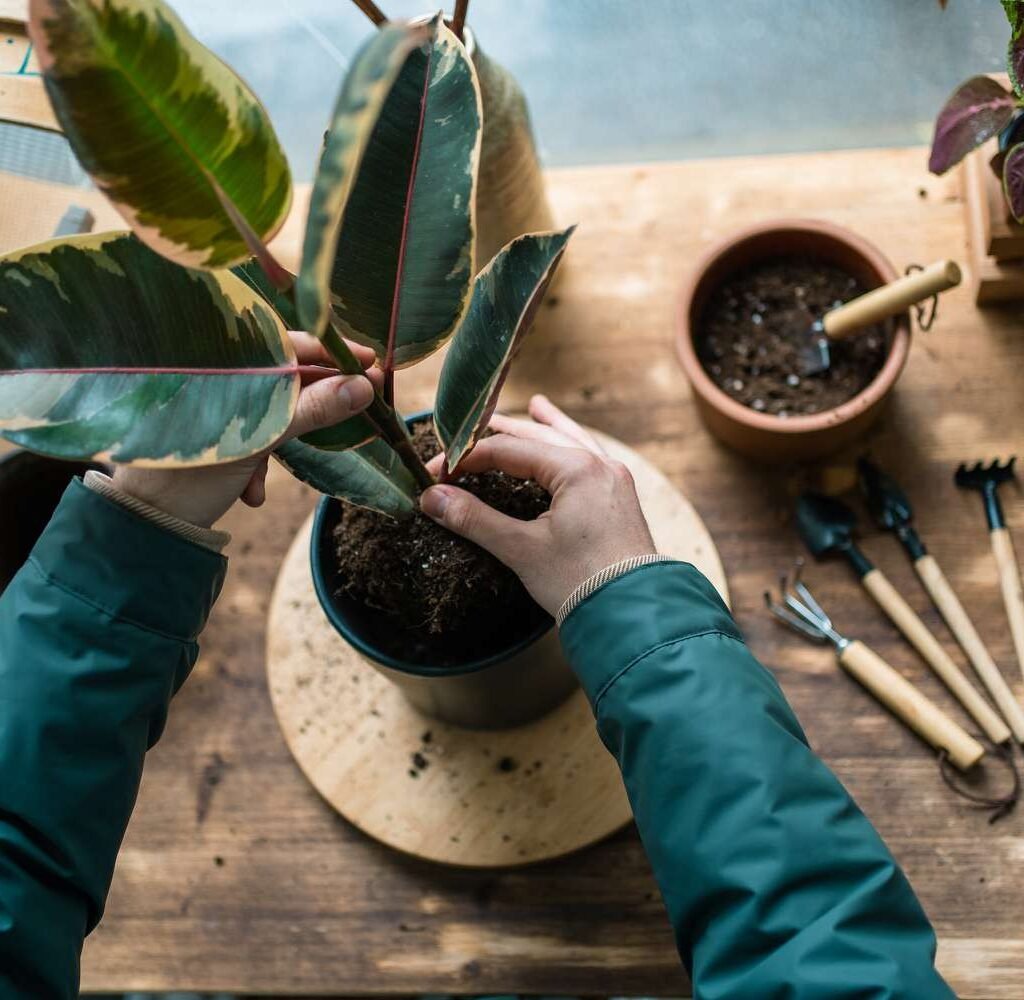
  • Check the roots. If you see roots circling the bottom or coming out of the drainage holes, it’s time to repot.
  • Choose a pot that’s 1–2 inches larger in diameter than the current one.
  • Use fresh, nutrient-rich potting mix to rejuvenate the plant.

Tip: For young plants, focus on balanced nutrition and stable growing conditions before expecting blooms.


8. Stress and Environmental Shock

Even small changes—like moving your plant to a new spot, repotting, or changing humidity—can stress your plant. Stress often delays or completely halts flowering.

Why It Happens

Plants are creatures of habit. When conditions change suddenly, they redirect energy toward adapting rather than blooming.

How to Fix It

  • Avoid moving plants frequently once they’re thriving.
  • Introduce environmental changes gradually (for example, acclimate them to new light levels slowly).
  • Give plants a few weeks to adjust after repotting before expecting blooms.

Tip: Keep a consistent watering, feeding, and light schedule to help your plants feel “secure.”


Bonus: Plants That Need a Little Extra Encouragement

Some plants are naturally shy bloomers indoors. To help them along, try “stress tricks” that mimic natural blooming cues:

  • Temperature dip: For plants like Christmas cactus, a few cool nights (55–60°F / 13–16°C) can trigger flower buds.
  • Shorter days: For photoperiod-sensitive plants like poinsettias, reduce light exposure to about 10 hours a day for several weeks.
  • Phosphorus boost: A gentle dose of bloom fertilizer can wake up stubborn plants.

Final Thoughts: Patience + Care = Flowers

Getting your houseplants to bloom isn’t about luck—it’s about understanding their needs. Once you give them the right mix of light, nutrients, water, and environment, most plants will reward you with stunning, long-lasting flowers.

Remember, each plant has its rhythm. Be observant, stay patient, and adjust your care routine accordingly. Soon enough, those quiet, leafy plants will burst into color, filling your home with natural beauty and joy.

How to Rescue Plants With Drooping Stems

How to Rescue Plants With Drooping Stems

Seeing your once-perky plant suddenly droop can be disheartening. Those limp stems and sagging leaves are often a clear distress signal—something in your plant’s environment or care routine isn’t quite right. But don’t worry! Most of the time, drooping stems don’t mean your plant is dying. With a little observation and the right care adjustments, you can bring your plant back to life and restore its natural vigor.

In this guide, we’ll walk through the most common reasons for drooping stems and provide simple, step-by-step solutions to rescue your plant before it’s too late.


Understanding Why Stems Droop

When a plant’s stems droop, it usually means it’s struggling to maintain water balance or cellular pressure (known as turgor pressure). Turgor pressure is what keeps stems firm and upright; when it drops due to dehydration, overwatering, temperature stress, or other factors, stems lose rigidity and begin to flop.

Drooping is your plant’s way of saying: “Something’s wrong—help me rebalance!”


1. Underwatering: The Most Common Cause

When a plant doesn’t receive enough water, its cells lose moisture and pressure, leading to wilted leaves and drooping stems. This is particularly common with plants like Peace Lilies, Calatheas, and Pothos, which are sensitive to soil dryness.

Signs of Underwatering:

  • Stems and leaves appear limp and thin
  • Soil is dry, cracked, and pulling away from the pot’s edges
  • Leaf tips are brown or crispy
  • Growth has slowed noticeably

How to Fix It:

  1. Check the soil moisture: Insert your finger about 1–2 inches deep. If it feels dry, your plant needs water.
  2. Water thoroughly: Slowly pour water until it drains from the bottom holes. This ensures the entire root system gets hydrated.
  3. Soak for deep hydration: For severely dehydrated plants, place the pot in a basin of water for 15–30 minutes so the roots can absorb moisture evenly.
  4. Establish a routine: Keep a consistent watering schedule based on plant type and season. Tropical plants may need weekly watering, while succulents thrive with less frequent moisture.

Pro Tip: Always empty the saucer after watering. Standing water can cause root problems (more on that next).


2. Overwatering and Root Rot: The Silent Killer

Ironically, too much water can cause the same droopy appearance as too little. When roots sit in soggy soil, they suffocate from lack of oxygen and begin to rot. Once roots are damaged, they can’t transport water efficiently, making the plant wilt—even in wet soil.

Signs of Overwatering:

  • Soil feels constantly wet or smells musty
  • Lower leaves turn yellow before wilting
  • Stems are mushy or soft near the base
  • Fungus gnats hover around the pot

How to Fix It:

  1. Stop watering immediately.
  2. Remove the plant from its pot and inspect the roots. Healthy roots are firm and white; rotten ones are brown or black and mushy.
  3. Trim off damaged roots with sterilized scissors.
  4. Repot the plant in fresh, well-draining soil. Choose a pot with proper drainage holes.
  5. Adjust your watering routine. Only water when the top 1–2 inches of soil feel dry.

Pro Tip: Add perlite or coarse sand to your potting mix for better aeration and drainage.


3. Light Imbalance: Too Much or Too Little

Light plays a crucial role in plant health. Insufficient light causes weak, elongated stems that can’t support their own weight. On the other hand, too much direct sunlight can scorch the leaves and dehydrate the plant, leading to drooping.

Signs of Light Problems:

  • Too little light: Pale, stretched stems leaning toward the window
  • Too much light: Burnt or crispy leaves, curling edges, and dry soil

How to Fix It:

  • For low-light issues: Move your plant closer to a bright window (east or north-facing is ideal).
  • For excess light: Relocate it away from direct sun or use a sheer curtain to filter light.
  • Use grow lights: If natural light is limited, LED grow lights can mimic sunlight effectively.

Pro Tip: Rotate your plants every few weeks so all sides receive even light exposure and balanced growth.


4. Temperature Stress and Drafts

Indoor plants are sensitive to sudden temperature changes. Exposure to cold drafts, heating vents, or air conditioners can shock your plant and cause drooping stems. Most houseplants prefer a consistent temperature between 65°F and 80°F (18°C–27°C).

Signs of Temperature Stress:

  • Sudden drooping after being near a drafty window
  • Yellowing or browning of leaves
  • Stunted growth during winter months

How to Fix It:

  • Keep plants away from heaters, AC units, and open windows.
  • Avoid drastic shifts: Move plants gradually when changing their location.
  • Group plants together during cold seasons to create a warm microclimate.

Pro Tip: A small indoor thermometer can help you monitor sudden drops or spikes in temperature.


5. Nutrient Deficiency or Overfertilization

Nutrients fuel plant growth, and imbalances can cause drooping. A lack of nitrogen, potassium, or magnesium can lead to weak stems, while too much fertilizer causes salt buildup, burning the roots and preventing water uptake.

Signs of Nutrient Problems:

  • Pale or yellowing leaves
  • Slow or distorted growth
  • White crust on soil surface (salt buildup)
  • Drooping despite proper watering

How to Fix It:

  • If overfertilized: Flush the soil thoroughly with clean water to wash out excess salts.
  • If nutrient-deficient: Feed the plant with a balanced, water-soluble fertilizer (10-10-10 or 20-20-20) once a month during active growth.
  • Avoid fertilizing in winter, as most plants rest during that time.

Pro Tip: Always dilute fertilizer to half the recommended strength—less is more when it comes to feeding houseplants.


6. Pest Infestation

Tiny pests like aphids, thrips, spider mites, and mealybugs can weaken plants by sucking their sap, which leads to drooping, curling, or deformed stems. Left untreated, infestations can spread quickly.

Signs of Pests:

  • Sticky residue on leaves (honeydew)
  • Fine webbing or visible insects
  • Yellow spots or curled stems
  • Slowed growth despite proper care

How to Fix It:

  1. Isolate the infected plant immediately.
  2. Wipe leaves gently with a damp cloth or soft brush.
  3. Spray with neem oil or insecticidal soap every few days.
  4. Maintain cleanliness: Dust leaves regularly and check new plants before bringing them indoors.

Pro Tip: A strong shower rinse can help remove most small pests and eggs from leaves and stems.


7. Repotting Shock or Root Damage

After repotting, it’s common for plants to experience transplant shock, where they temporarily wilt or droop due to root disturbance. Similarly, root damage from compacted soil or handling can prevent water absorption.

Signs of Repotting Stress:

  • Drooping right after moving to a new pot
  • No new growth for several weeks
  • Leaves dropping or turning pale

How to Fix It:

  • Water lightly after repotting—just enough to moisten the soil.
  • Avoid fertilizing for 4–6 weeks to let roots recover.
  • Keep the plant in indirect light and stable conditions until it stabilizes.

Pro Tip: Always choose a pot only 1–2 inches larger than the old one. Oversized pots retain too much moisture and can stress roots.


Step-by-Step Emergency Rescue Guide

If your plant’s stems are drooping and you’re not sure why, here’s a quick rescue plan to follow:

  1. Inspect the soil: Is it too dry or soggy? Adjust watering accordingly.
  2. Check the roots: Gently lift the plant—look for healthy, white roots. Trim rotten ones if necessary.
  3. Examine light exposure: Move to a bright, indirect light spot.
  4. Trim damaged stems and leaves: This encourages healthy regrowth.
  5. Support drooping stems: Use small stakes or soft ties until the plant regains strength.
  6. Avoid sudden changes: Keep temperature and humidity stable.
  7. Be patient: Recovery can take 1–3 weeks depending on the plant and severity.

Prevention: Keeping Your Plant Upright and Healthy

Once your plant recovers, focus on creating a consistent care routine to prevent drooping in the future:

  • Use well-draining soil suited to your plant type.
  • Water only when needed, not on a strict schedule.
  • Maintain humidity around 50–60% for tropical plants.
  • Feed moderately and avoid overfertilization.
  • Regularly rotate your plant for even growth and light distribution.

Final Thoughts

Drooping stems may look alarming, but they’re often just a temporary sign of stress, not a death sentence. Whether it’s underwatering, root rot, or environmental changes, your plant is simply communicating that it needs a little extra attention.

By taking the time to observe, diagnose, and respond with the right care, you can bring your plant back to its upright, healthy self. With consistent watering, proper lighting, and a touch of patience, those limp stems will soon stand tall again—proving that even the droopiest plant can bounce back with the right love and care.

7 Reasons Your Indoor Plant Leaves Are Curling—and How to Fix Them

7 Reasons Your Indoor Plant Leaves Are Curling—and How to Fix Them

Few things worry a plant parent more than seeing their once-lush, healthy leaves begin to curl. It’s a clear signal that something is off—but figuring out exactly what can feel like detective work. The good news? Curled leaves are a common issue and often reversible once you identify the cause.

Leaf curling is the plant’s way of saying, “I’m stressed.” Whether it’s from light, water, pests, or environment, there’s always a reason behind those curling edges or cupped shapes. In this article, we’ll explore seven major reasons your indoor plant leaves might be curling—and, more importantly, how to bring them back to their full, vibrant selves.


1. Underwatering Stress

One of the most common reasons leaves curl inward is underwatering. When your plant doesn’t receive enough moisture, it tries to minimize water loss by curling or folding its leaves inward.

Signs of Underwatering:

  • Leaves feel crispy or dry to the touch
  • Soil pulls away from the sides of the pot
  • Yellowing or browning leaf tips
  • Wilting during the hottest part of the day

What to Do:

Water the plant thoroughly until water drains out of the bottom of the pot. Be sure the pot has drainage holes—soggy roots can lead to a different issue (overwatering).
To prevent recurrence, set up a watering routine based on the plant’s type. For instance:

  • Tropical plants (like Calatheas or Peace Lilies) prefer consistently moist soil.
  • Succulents and cacti like their soil to dry completely between watering.

Also, always check the soil moisture before watering by sticking your finger about an inch deep—if it feels dry, it’s time to water.


2. Overwatering and Root Rot

Ironically, both too little and too much water can cause curling leaves. Overwatering suffocates the roots, cutting off oxygen and leading to root rot, which makes it difficult for the plant to absorb water—even though the soil is wet.

Signs of Overwatering:

  • Leaves curl downward or droop
  • Soil stays constantly wet or soggy
  • A musty or sour smell from the pot
  • Yellowing leaves that easily fall off

What to Do:

First, stop watering immediately. Check the roots by gently removing the plant from its pot. If they’re brown, mushy, or have a foul odor, trim off the affected roots and repot in fresh, well-draining soil.
To avoid overwatering, make sure:

  • Your pot has drainage holes.
  • You use a well-aerated mix (especially for tropicals and succulents).
  • You allow the top layer of soil to dry out before watering again.

A moisture meter can also help ensure your watering schedule stays balanced.


3. Low Humidity Levels

Indoor plants—especially tropical varieties like ferns, calatheas, and monsteras—thrive in humid environments. In dry indoor air (common during winter or in air-conditioned rooms), plants lose moisture through their leaves faster than they can absorb it, causing curling and brown edges.

Signs of Low Humidity:

  • Leaf edges curl or crisp
  • Brown tips or spots
  • Slow growth or faded leaf color

What to Do:

  • Mist the leaves daily using room-temperature water.
  • Place a humidifier nearby, especially in winter months.
  • Set plants together to create a microclimate that naturally increases humidity.
  • Try the pebble tray method: Fill a shallow tray with water and pebbles, then place the pot on top (not touching the water directly).

Maintaining humidity levels between 50–60% will help tropical plants thrive and keep leaves lush.


4. Pest Infestations

Tiny sap-sucking insects—like spider mites, aphids, and thrips—are notorious for causing leaf curling. These pests feed on plant juices, damaging leaf tissues and causing them to twist or deform.

Signs of Pest Infestation:

  • Sticky residue (honeydew) on leaves or nearby surfaces
  • Fine webbing (a sign of spider mites)
  • Deformed, curled, or discolored leaves
  • Tiny visible insects on the underside of leaves

What to Do:

  1. Inspect the plant closely, especially the undersides of leaves and stems.
  2. Isolate the affected plant from others.
  3. Wipe leaves gently with a soft, damp cloth to remove visible pests.
  4. Use insecticidal soap, neem oil, or a homemade solution (a few drops of mild dish soap in water) to treat infestations.
  5. Repeat every few days until pests are gone.

Prevent future outbreaks by keeping your plants clean and dust-free and inspecting new plants before introducing them indoors.


5. Too Much Direct Sunlight

While most indoor plants love bright light, direct sunlight can scorch their leaves, causing them to curl, dry, or turn brown. Plants like pothos, philodendrons, and ferns prefer bright but indirect light—strong sun rays can be too harsh for them.

Signs of Light Burn:

  • Leaves curl upward to avoid light
  • Bleached, yellow, or crispy patches on leaves
  • New growth appears smaller or stunted

What to Do:

Move the plant a few feet away from the window or place it behind a sheer curtain to diffuse sunlight. East- or north-facing windows generally provide gentle light that most indoor plants love.

If your space is too dark, consider using a grow light to supplement light safely without overheating your plants.


6. Nutrient Imbalance or Fertilizer Burn

Just like people, plants need a balanced diet. Too much or too little fertilizer can both lead to curling leaves. Overfertilization builds up salts in the soil, which draws water away from the roots—causing stress and curling.

Signs of Fertilizer Issues:

  • Leaf tips curl or turn brown
  • White crust or residue on the soil surface
  • Stunted or distorted new growth
  • Sudden yellowing of lower leaves

What to Do:

If you suspect overfertilization:

  1. Flush the soil thoroughly with clean water to remove excess salts.
  2. Let the water drain completely.
  3. Hold off on fertilizing for a few weeks until the plant recovers.

Always follow the recommended dilution on fertilizer labels. For most houseplants, feeding once a month during the growing season (spring and summer) is sufficient—less in fall and winter when growth slows.


7. Temperature Fluctuations and Drafts

Plants are sensitive to temperature changes. Exposure to cold drafts, heaters, or AC vents can shock their systems, leading to curling or shriveled leaves.

Signs of Temperature Stress:

  • Leaves curl or droop suddenly
  • Browning edges or tips
  • Slowed growth
  • Wilting after being near cold windows or vents

What to Do:

  • Keep plants in a stable temperature range—ideally between 65°F and 80°F (18°C–27°C).
  • Avoid placing them near radiators, heaters, air conditioners, or drafty windows.
  • Use thermometers to monitor room conditions, especially during seasonal changes.

Consistent warmth and stable humidity go hand in hand in keeping your houseplants healthy and relaxed.


Bonus Tip: Observe and Adjust

Every plant species communicates differently. The key to preventing curled leaves lies in observation and adaptation.
Ask yourself:

  • How often am I watering?
  • Is my plant near a vent, window, or direct sun?
  • Have I recently changed fertilizer or soil?

Keeping a plant care journal can help track changes in watering, feeding, and light exposure, making it easier to identify what’s causing stress.


Final Thoughts

Leaf curling may look alarming, but it’s often your plant’s way of calling for help—not a death sentence. With careful observation and the right adjustments, most plants bounce back beautifully.

Whether it’s tweaking your watering schedule, improving humidity, or relocating your plant to a gentler light spot, small changes can make a big difference.

Remember: Healthy plants are resilient. When you meet their needs consistently, those curled leaves will unfurl again, lush and strong—proof that a little plant care detective work truly pays off.

How to Revive Plants That Have Been Overfertilized

How to Revive Plants That Have Been Overfertilized

Fertilizer is often called “plant food,” and it’s true—nutrients like nitrogen, phosphorus, and potassium are vital for healthy growth. But just like with people, too much of a good thing can turn harmful. When plants are overfertilized, they suffer from what’s commonly known as “fertilizer burn”—a condition that can weaken, damage, or even kill your beloved greenery.

If your plant’s leaves are browning, curling, or dropping after a recent feeding, overfertilization could be the culprit. The good news? You can often reverse the damage with the right care and a bit of patience.

This guide will walk you through how to identify fertilizer burn, the science behind it, and—most importantly—how to save your overfertilized plants and prevent it from happening again.


Understanding What Happens When You Overfertilize

Fertilizers contain mineral salts that dissolve in water and are absorbed by plant roots. When you apply too much, these salts build up in the soil. As a result, the soil’s salt concentration becomes higher than that inside the plant’s roots.

This causes a process called reverse osmosis—instead of absorbing water, the roots start losing it. The roots then dry out, burn, and fail to transport nutrients properly. Essentially, the plant becomes dehydrated from the inside, even if the soil looks moist.

In other words, overfertilizing starves your plant while appearing to feed it.


Common Causes of Overfertilization

Even experienced gardeners can make mistakes when feeding their plants. Here are the most common causes:

  1. Using Too Much Fertilizer at Once
    Following the “more is better” mindset can lead to disaster. Plants can only absorb nutrients at a certain rate; excess salts just accumulate in the soil.
  2. Fertilizing Too Often
    Regular feeding is important, but doing it too frequently (especially during dormant periods) overwhelms plants.
  3. Not Watering Before Fertilizing
    Applying fertilizer to dry soil increases salt concentration instantly, burning root tips.
  4. Poor Drainage
    In pots without proper drainage, fertilizer salts can’t wash out, causing buildup over time.
  5. Using a Strong Formula or Wrong Type
    Some fertilizers are highly concentrated and meant for outdoor plants, not delicate indoor ones.

How to Recognize Overfertilization Symptoms

Overfertilization can mimic other plant problems, such as underwatering or disease. Here’s how to tell if fertilizer is to blame:

1. Brown or Burned Leaf Tips

This is the most common and immediate sign. The edges or tips of leaves turn brown and crispy while the rest of the leaf may still be green. This happens because excess salts pull moisture away from leaf cells.

2. Yellowing Leaves (Chlorosis)

Leaves that start yellowing from the edges inward could indicate nutrient stress or chemical burn.

3. Wilting Despite Moist Soil

If the soil is damp but your plant looks droopy, its roots may be too damaged to absorb water properly.

4. White Crust on Soil or Pot

A visible white or yellowish crust on the soil surface or pot rim means fertilizer salts have accumulated and dried out there.

5. Leaf Drop or Stunted Growth

Excess salts disrupt nutrient absorption, leading to slow growth, fewer new leaves, and eventually leaf shedding.

6. Root Burn (Underground Damage)

When you remove the plant from its pot, burned roots may appear brown or black instead of healthy white or tan.


Step-by-Step Guide: How to Revive Overfertilized Plants

Reviving an overfertilized plant is about flushing out excess salts, healing root damage, and restoring balance. Follow these steps carefully to give your plant the best chance at recovery.


Step 1: Stop Fertilizing Immediately

Cease all fertilizer applications right away. Even if you think the plant is starving, it’s essential to remove excess salts before reintroducing nutrients. Feeding more at this stage will only worsen the problem.


Step 2: Remove Visible Fertilizer and Salt Crust

Gently scrape off any visible fertilizer granules or white salt crust from the soil surface. Be careful not to disturb the roots or compact the soil further.


Step 3: Flush the Soil Thoroughly

Flushing helps wash out built-up salts from the root zone. Here’s how to do it:

  1. Move the plant to a sink, tub, or outdoor area.
  2. Slowly pour water through the soil—use at least three times the volume of the pot. For example, if you have a 1-liter pot, run 3 liters of water through it.
  3. Allow the excess water to drain completely from the bottom.

Repeat the flushing process once or twice over the next few days if symptoms are severe.

Tip: Use filtered or rainwater if possible—tap water sometimes contains minerals that can worsen salt buildup.


Step 4: Check for Root Damage

If your plant still looks weak after flushing, gently slide it out of the pot to inspect the roots.

  • Healthy roots: Firm, white, or light tan.
  • Damaged roots: Dark, soft, mushy, or foul-smelling.

Trim away any rotten or burned roots using sterilized scissors. This prevents further decay.


Step 5: Repot in Fresh Soil (If Necessary)

If salt buildup is severe or the soil smells musty, repotting is the best solution.

  1. Gently remove as much old soil as possible without breaking healthy roots.
  2. Use fresh, well-draining potting mix appropriate for your plant species.
  3. Choose a pot with drainage holes to prevent future salt accumulation.

After repotting, water the plant thoroughly and place it in a shaded area for a few days to recover from the stress.


Step 6: Adjust Watering Practices

Once your plant begins to stabilize, maintain a consistent watering schedule. Always water deeply until it drains out the bottom. This helps flush out minor salt buildup naturally over time.

Avoid watering in small sips, as that only keeps salts near the surface.


Step 7: Wait Before Fertilizing Again

Give your plant at least 4–6 weeks to recover before adding any fertilizer again. When you resume feeding:

  • Dilute fertilizer to half or quarter strength.
  • Apply only when the plant is actively growing (usually spring and summer).
  • Water before fertilizing to avoid burning roots.

Natural Remedies to Help Recovery

In addition to flushing and repotting, you can support your plant’s recovery with a few natural aids:

1. Add Activated Charcoal

Mixing a small amount into the new soil can help absorb residual toxins and balance pH levels.

2. Use Epsom Salt (With Caution)

If magnesium deficiency develops after flushing, dissolve a teaspoon of Epsom salt in a gallon of water and apply once a month—but only if the plant truly shows deficiency symptoms.

3. Apply Organic Soil Conditioners

Compost tea, worm castings, or seaweed extract provide mild nutrition without causing salt stress.


Preventing Future Overfertilization

Once you’ve revived your plant, prevention becomes key. Here’s how to avoid fertilizer burn in the future:

1. Follow Label Directions Exactly

Always read the fertilizer label carefully. More doesn’t equal better—stick to recommended dosages and frequencies.

2. Choose the Right Fertilizer Type

  • Liquid fertilizers are easier to control and less likely to cause salt buildup than slow-release granules.
  • Organic fertilizers release nutrients gradually and are gentler on roots.

3. Water Before Feeding

Always water your plant thoroughly before applying fertilizer. This helps buffer root tips and reduces the risk of salt burn.

4. Flush Regularly

Even if you fertilize correctly, salts can still build up slowly. Every few months, flush the soil with plain water to keep it fresh.

5. Match Fertilizer to Growth Stage

Plants in active growth need more nutrients. During dormancy (often in winter), reduce or stop feeding altogether.

6. Monitor and Observe

Your plant’s appearance is your best guide. If new growth is strong, leaves are green, and the plant looks vibrant, you’re likely feeding just right.


How Long Does Recovery Take?

The recovery timeline depends on how severe the damage is.

  • Mild overfertilization: Visible improvement within 1–2 weeks after flushing.
  • Moderate damage: May take a month or two to regain normal growth.
  • Severe cases (root burn): Can take 3–6 months for full recovery, or the plant may not survive if too much of the root system is destroyed.

Patience and consistent care are key—plants recover slowly but steadily once the stress is removed.


Final Thoughts

Overfertilization is a common plant care mistake, but it doesn’t have to be fatal. The key is recognizing the signs early—brown tips, yellowing leaves, or white crust on soil—and acting quickly to remove excess salts.

Remember, plants thrive on balance. Fertilizer is meant to support growth, not replace it. Think of it as a supplement, not a meal.

By learning how to flush, repot, and care thoughtfully after a feeding mishap, you can not only rescue your overfertilized plants but also prevent future problems. And once your plant starts producing healthy new growth again, you’ll know your efforts paid off—proof that even overfed plants can bounce back with the right touch.

How to Tell If Your Plant Is Getting Enough Light

How to Tell If Your Plant Is Getting Enough Light

One of the most overlooked aspects of plant care is light. Many new plant parents focus on watering schedules or soil types but forget that light is the single most important factor for healthy growth. Without enough light, even the most attentive watering or fertilizing won’t help your plant thrive.

But here’s the tricky part—different plants need different amounts of light, and the signs of too much or too little light aren’t always obvious at first.

If you’ve ever wondered whether your plant is getting the right amount of sunlight, this guide will walk you through everything you need to know. From recognizing telltale signs to adjusting your setup for optimal lighting, you’ll soon become a pro at reading your plants’ light needs.


Why Light Matters So Much

Plants rely on light for photosynthesis, the process that converts light energy into food. This energy allows them to grow leaves, roots, flowers, and fruit. Without sufficient light, a plant can’t produce enough energy to sustain itself—it becomes weak, leggy, and pale.

In indoor environments, light intensity is much lower than outdoors, even near a bright window. So understanding how much light your plant actually receives (and what it needs) is crucial to keeping it healthy.


Understanding Light Levels

Before we dive into the signs, let’s break down what “light” really means in plant care.

  • Bright, Direct Light: Sunlight that shines straight onto the plant for several hours. Usually found near south- or west-facing windows. Perfect for sun-loving plants like cacti, succulents, or bird of paradise.
  • Bright, Indirect Light: Light that’s abundant but softened—such as near an east-facing window or a few feet away from direct rays. Great for popular houseplants like pothos, monstera, or peace lilies.
  • Medium Light: Moderate brightness with no direct sun. Often found in bright rooms but away from windows.
  • Low Light: Minimal natural light, such as in north-facing rooms or corners far from windows. Only certain plants, like ZZ plants, snake plants, or cast iron plants, can survive here.

Understanding these categories helps you match plants to your home’s lighting conditions.


Signs Your Plant Is Not Getting Enough Light

Plants are excellent communicators—they show stress clearly if they’re not happy. The following are common signs of insufficient light:

1. Slow or No Growth

If your plant hasn’t produced new leaves in months, it may not be receiving enough light. Light-starved plants can’t photosynthesize efficiently, meaning they don’t have enough energy to grow.

2. Pale or Yellowing Leaves

Chlorophyll (which makes leaves green) depends on light. When there isn’t enough, leaves start to lose their vibrant color, appearing faded or yellowish.

3. Leggy Stems (Stretching Toward Light)

One of the clearest signs of poor light is leggy growth—long, stretched stems with wide gaps between leaves. This happens when the plant stretches toward the nearest light source in an effort to capture more sunlight.

4. Small, Sparse Leaves

If new leaves are smaller than usual or spaced farther apart, it’s a sign the plant doesn’t have enough energy to grow properly.

5. Leaves Turning Toward the Window

If your plant seems to “lean” or tilt toward a light source, it’s begging for more light. You might even notice it rotating its leaves throughout the day to follow the sun.

6. Soil Stays Damp for Too Long

In low light, the soil doesn’t dry out quickly because the plant isn’t actively using water. If your potting mix stays wet for days after watering, it could indicate poor light exposure.

7. Leaf Drop

Some plants shed older leaves when light becomes insufficient to reduce their energy demand. Fiddle leaf figs, for instance, often drop their lower leaves when light is too low.


Signs of Too Much Light

While lack of light is common, too much light can also be harmful—especially for shade-loving plants. Here are symptoms that your plant is receiving excessive sunlight:

1. Scorched or Bleached Leaves

Direct sunlight can burn delicate foliage, leading to brown, crispy patches or white, bleached spots.

2. Dry, Crispy Soil and Leaf Edges

Plants in intense light lose water quickly through transpiration. If the leaf tips or edges turn brown and dry out fast, too much sun could be the culprit.

3. Curling or Folding Leaves

To protect themselves from harsh light, some plants curl or fold their leaves inward to reduce exposure.

4. Faded Leaf Color

Excessive light can cause pigment loss, resulting in pale or dull-looking leaves.

5. Drooping During Midday

If your plant droops around midday but perks up later, it might be overwhelmed by the intensity of direct sunlight during peak hours.


How to Check Your Indoor Light Levels

It’s not always easy to judge light levels by eye. Here are some simple methods to determine how much light your plant is getting:

1. The Shadow Test

Hold your hand about a foot above the plant:

  • A sharp, well-defined shadow = bright, direct light.
  • A soft, fuzzy shadow = bright, indirect light.
  • A barely visible shadow = low light.

2. Use a Light Meter

A lux meter or PAR meter gives a more precise reading. For reference:

  • Low light = below 500 lux
  • Medium light = 500–2,000 lux
  • Bright indirect light = 2,000–10,000 lux
  • Direct sun = 10,000–50,000 lux

You can even use smartphone apps to estimate light intensity.

3. Observe Plant Placement

Look at how far your plants are from the window. Most houseplants thrive within 3–5 feet of a bright window. If it’s farther than 6 feet, it’s likely getting low light unless supplemented with grow lights.


How to Improve Lighting Conditions

Once you’ve identified that your plant isn’t getting enough (or too much) light, you can easily make adjustments.

1. Move the Plant Closer to the Window

Most indoor plants benefit from being closer to a light source. Move them within a few feet of bright windows, but avoid direct rays if they’re prone to burning.

2. Rotate Regularly

Plants naturally grow toward the light. Rotate your pots every week or two to encourage even growth on all sides.

3. Clean the Leaves

Dust blocks sunlight from reaching the leaf surface. Wipe leaves gently with a damp cloth every few weeks to keep them dust-free.

4. Supplement with Grow Lights

If your home doesn’t get enough natural sunlight—especially during winter—grow lights can be a game changer.

Types of Grow Lights:

  • LED Grow Lights: Energy-efficient and ideal for all plant types.
  • Fluorescent Lights: Good for seedlings and small indoor gardens.
  • Full-Spectrum Lights: Mimic natural sunlight for balanced growth.

Place grow lights 6–12 inches above your plants and keep them on for about 12–14 hours a day.

5. Use Reflective Surfaces

Position plants near light-colored walls, mirrors, or white curtains to help bounce light around the room.

6. Adjust Seasonally

Sunlight shifts throughout the year. During winter, move plants closer to windows; in summer, provide sheer curtains to filter strong rays.


Matching Plants to Light Levels

Here’s a quick guide to help you match popular houseplants to their ideal light conditions:

Light LevelBest-Suited Plants
Bright Direct LightSucculents, cacti, jade plant, aloe vera, bird of paradise
Bright Indirect LightMonstera, fiddle leaf fig, peace lily, pothos, philodendron
Medium LightSpider plant, rubber plant, dracaena, Chinese evergreen
Low LightSnake plant, ZZ plant, pothos (variegation may fade), cast iron plant

When you choose plants that naturally fit your lighting environment, maintenance becomes effortless.


Troubleshooting Example Scenarios

Let’s go over a few real-life examples to make this practical:

Scenario 1: A Drooping Pothos Far from a Window

The leaves are pale and the stems are long. Solution: Move it closer to a bright, indirect light source. Within two weeks, new leaves will grow greener and sturdier.

Scenario 2: Burned Leaves on a Peace Lily

Brown spots appear on leaves facing the window. Solution: Move it back 2–3 feet or use a sheer curtain to diffuse direct light.

Scenario 3: A Fiddle Leaf Fig with Uneven Growth

It’s growing lopsided toward the window. Solution: Rotate the pot weekly for balanced growth and clean the leaves regularly to improve light absorption.


Final Thoughts

Light is life for your plants. Getting it right isn’t about guessing—it’s about observation and adjustment.

Remember these simple rules:

  • If your plant is stretching, yellowing, or pale, it needs more light.
  • If it’s burning, curling, or fading, it’s getting too much.
  • And if it’s thriving, producing new leaves, and maintaining color, you’ve found the sweet spot.

By learning to read the subtle cues your plants give, you’ll create an environment where every leaf shines with health and vibrancy. Whether you rely on a sunny windowsill or supplement with grow lights, giving your plants the right light is the foundation of a thriving indoor garden.

How to Spot the Difference Between Underwatering and Overwatering

How to Spot the Difference Between Underwatering and Overwatering

Every plant parent has faced this moment: you notice your once-healthy houseplant drooping, its leaves curling or turning yellow, and you immediately ask yourself—“Am I watering it too much or not enough?”

It’s one of the most common questions in plant care, and one of the most misunderstood. Both underwatering and overwatering cause distressing symptoms that can look surprisingly similar. Yet, the fixes for each are completely opposite. Knowing the difference between the two can mean the difference between a thriving plant and one that never recovers.

In this guide, we’ll break down the signs of each problem, how to correctly identify which one your plant is facing, and—most importantly—how to bring it back to health.


Why Watering Mistakes Happen

Watering seems simple, but it’s actually one of the most nuanced parts of plant care. That’s because the right amount of water depends on several factors—plant species, pot size, soil type, light, humidity, and even the season.

Many plant owners make the mistake of watering on a fixed schedule rather than based on the plant’s actual needs. Unfortunately, what works in spring may not work in winter, and what suits a fern will drown a cactus.

Understanding the difference between underwatering and overwatering starts with knowing what happens inside the soil.

  • When you underwater, the soil dries out completely, starving roots of moisture and preventing the plant from absorbing nutrients.
  • When you overwater, the roots sit in soggy soil, which blocks oxygen and leads to root rot—a silent killer for many houseplants.

Now, let’s explore how to tell which issue your plant is suffering from.


Signs of Underwatering

Underwatering happens when a plant doesn’t receive enough moisture to support its basic functions. As the soil dries out, the roots can’t take up water, and the leaves begin to lose turgor (the pressure that keeps them firm).

Here are the most common signs:

1. Wilting and Drooping Leaves

The first and most visible symptom is drooping leaves that appear limp and lifeless. They may also feel thin and crispy to the touch.

Unlike overwatered plants, underwatered ones usually bounce back quickly after watering. If your plant perks up within a few hours of a deep soak, it was likely thirsty.

2. Dry, Crumbly Soil

Stick your finger about an inch into the soil. If it feels bone dry and pulls away from the sides of the pot, your plant is underwatered. The soil may even shrink and create gaps between itself and the pot edges.

3. Brown, Crispy Leaf Edges

The leaf tips and edges dry out first since that’s where moisture loss occurs most rapidly. In severe cases, the entire leaf may turn brown and fall off.

4. Slow Growth and Dull Leaves

Underwatered plants can’t photosynthesize efficiently. As a result, new leaves are smaller, and the overall color may look faded or dull.

5. Lightweight Pot

When you lift the pot, it feels unusually light—another sure sign the soil is too dry.

How to Fix Underwatering:

  1. Rehydrate Gradually: Give your plant a thorough soak. Place the pot in a sink or basin of water and let it absorb moisture from the bottom for 20–30 minutes.
  2. Avoid Sudden Flooding: Pouring too much water onto bone-dry soil can cause it to run off without absorption. Water slowly in small amounts to help the soil rehydrate evenly.
  3. Adjust Your Routine: Water when the top 1–2 inches of soil are dry. For tropical plants, that may be weekly; for succulents, it could be every few weeks.
  4. Maintain Humidity: Dry indoor air can worsen dehydration. Group plants together or use a humidifier to slow moisture loss.

Signs of Overwatering

Overwatering is one of the leading causes of houseplant death. It’s easy to assume your plant needs water when it’s drooping, but sometimes it’s drowning instead.

When roots are constantly wet, they can’t breathe. Over time, this suffocates them, leading to rot and fungal diseases that prevent water and nutrients from reaching the leaves.

1. Yellowing Leaves

One of the earliest and most common signs of overwatering is yellow leaves—especially older ones near the bottom. They often look soft and limp, unlike the crispy texture of underwatered leaves.

2. Mushy Stems and Soft Leaves

Overwatered plants often develop mushy stems or leaves that feel spongy instead of firm. This is a sign of internal rot caused by excess moisture.

3. Constantly Damp Soil

If the top layer of soil stays wet for days after watering, or if you notice a musty smell, it’s a red flag. Stagnant, soggy soil deprives roots of oxygen.

4. Root Rot

Root rot is the ultimate consequence of chronic overwatering. When you pull the plant out of its pot, you’ll see brown or black, mushy roots that emit a foul odor.

5. Mold, Fungus, or Gnats

Excess moisture creates the perfect environment for fungal growth. You may see white mold on the soil surface or tiny flying insects (fungus gnats) hovering nearby.

How to Fix Overwatering:

  1. Stop Watering Immediately: Let the soil dry out completely before adding more water.
  2. Check Drainage: Ensure your pot has drainage holes and that excess water can escape freely.
  3. Repot if Necessary: If the soil smells bad or the roots are rotting, remove the plant, trim away damaged roots, and repot in fresh, well-draining soil.
  4. Use the Right Mix: Combine potting soil with perlite, pumice, or coarse sand to improve aeration.
  5. Adjust Frequency: Water less often, and always test the soil before watering again.

Key Differences Between Underwatering and Overwatering

SymptomUnderwateringOverwatering
Leaf TextureDry, crispySoft, mushy
Leaf ColorBrown edges, dull greenYellowing, pale
Soil ConditionDry and hardWet and compact
SmellNeutral or earthyMusty or foul
Pot WeightLightHeavy
Recovery After WateringPerks up quicklyNo improvement or worsens
Root ConditionDry, brittleBrown, mushy, smelly

This table can serve as a quick reference whenever your plant looks unhappy.


The Finger Test: The Easiest Way to Know

One of the simplest and most reliable methods to determine watering needs is the finger test.

Here’s how:

  • Stick your finger about one inch into the soil.
  • If it feels dry, it’s time to water.
  • If it feels damp, wait a few more days.
  • If it feels soggy, your plant has been overwatered.

For a more precise check, you can also use a moisture meter—a handy tool that measures soil moisture levels and takes the guesswork out of watering.


How to Prevent Both Problems

Once you’ve identified and fixed the immediate issue, prevention is key to avoiding future watering mistakes.

1. Choose the Right Pot and Soil

  • Always use pots with drainage holes.
  • Avoid heavy garden soil indoors; use a well-draining potting mix suited to your plant’s type.
  • Consider adding materials like perlite, coco coir, or pumice to improve drainage.

2. Match Watering to the Environment

Plants drink faster in warm, bright, or dry conditions. In cooler, darker months, their water needs drop significantly. Adjust your watering schedule with the seasons.

3. Observe Your Plant’s Behavior

Each plant species communicates differently.

  • Succulents and cacti prefer their soil to dry completely between waterings.
  • Ferns and calatheas need consistently moist (but not soggy) soil.
  • Tropical houseplants like monstera and pothos fall somewhere in between.

4. Empty Saucers After Watering

Never let your plant sit in standing water—it leads to root rot. After watering, drain any excess water from the saucer or cachepot.

5. Use the Right Tools

A watering can with a narrow spout helps control flow and avoids flooding. A moisture meter or hydrometer can be especially helpful for large collections or finicky plants.


When in Doubt, Err on the Dry Side

A golden rule for most houseplants: it’s better to underwater than overwater.

Plants can recover more easily from temporary drought than from root rot. If you’re unsure, wait a day or two and check again. Most plants would rather be a little thirsty than constantly drenched.


Final Thoughts

Learning to recognize the difference between underwatering and overwatering takes time and attention—but once you master it, your plants will thank you with lush, vigorous growth.

The key is to look beyond the surface symptoms and consider the entire context: soil condition, leaf texture, pot weight, and even the season.

Remember:

  • Underwatered plants are dry, crispy, and light.
  • Overwatered plants are soft, yellow, and heavy.

By understanding these subtle clues, you’ll develop the intuition every great plant parent needs—the ability to “listen” to your plants and respond to their needs with confidence.

With patience, observation, and the right watering habits, you can say goodbye to droopy leaves and hello to a flourishing indoor jungle.

Why Your Plant Has Brown Leaf Tips—and How to Stop It

Why Your Plant Has Brown Leaf Tips—and How to Stop It

Few things are as disappointing to plant lovers as spotting brown, crispy edges on what were once vibrant, lush leaves. You water carefully, provide sunlight, and even talk to your plants—but those dry, brown tips keep showing up. The truth is, brown leaf tips are one of the most common plant problems, and they’re usually a sign that something in your plant’s environment or care routine needs adjustment.

The good news? This issue is often cosmetic and completely fixable. Once you understand why it happens, you can stop it from spreading and restore your plant’s healthy green glow.

Here’s a detailed guide on why your plant has brown leaf tips—and how to stop it for good.


1. Low Humidity Is Drying Out Your Plant

Indoor air, especially in homes with air conditioning or heating, can be far drier than most plants prefer. Many popular houseplants, like ferns, calatheas, peace lilies, and philodendrons, come from tropical regions where humidity levels hover around 60–80%. When indoor humidity drops below 40%, the leaf edges lose moisture faster than the plant can replace it—causing those brown, crispy tips.

Signs of Low Humidity:

  • Leaf tips or edges turning brown and dry.
  • Curling or thin, papery leaves.
  • Slower overall growth or drooping.

What to Do:

  1. Increase Humidity Naturally: Place plants close together to create a mini microclimate where they can share moisture.
  2. Use a Humidifier: A small humidifier near your plants can keep humidity steady, especially in winter.
  3. Try a Pebble Tray: Fill a shallow tray with pebbles and water, and place the plant pot on top. As the water evaporates, it gently raises humidity.
  4. Mist (with Caution): Lightly misting can provide short-term relief but shouldn’t replace other humidity methods.

Maintaining proper humidity not only prevents brown tips but also encourages vibrant foliage and stronger growth.


2. You’re Overwatering (or Underwatering)

Watering habits are a major culprit behind brown leaf tips. Both overwatering and underwatering stress your plant—but in different ways.

When overwatered, roots sit in soggy soil and can’t breathe properly. Over time, this leads to root rot, which disrupts nutrient uptake, causing browning and yellowing of leaves.
When underwatered, the plant can’t transport enough water to the leaf tips, leaving them dry and brown.

How to Identify the Problem:

  • Overwatering: Soft, yellowing leaves, mushy stems, and a musty smell from the soil.
  • Underwatering: Dry soil pulling away from the pot edges, wilting, and crispy brown leaves.

How to Fix It:

  • For Overwatered Plants:
    • Stop watering immediately.
    • Remove the plant from its pot and trim away any mushy, brown roots.
    • Repot in fresh, well-draining soil and a container with drainage holes.
  • For Underwatered Plants:
    • Give the plant a deep soak. Place the pot in a basin of water for 15–30 minutes.
    • Ensure the soil is evenly moist, not soggy.
    • Adjust your watering schedule—most plants prefer watering only when the top inch of soil feels dry.

A consistent watering routine tailored to each plant’s needs is the simplest way to prevent brown leaf tips caused by water stress.


3. Your Water Quality Might Be the Problem

Even if your watering habits are perfect, the type of water you use could be harming your plant. Tap water often contains chlorine, fluoride, or high mineral content, which can accumulate in the soil over time. These substances damage delicate root hairs and leaf tissues, causing brown tips, especially on sensitive species like spider plants, dracaenas, and calatheas.

Signs of Water Quality Issues:

  • Brown, crispy tips on new and old leaves alike.
  • White crust on the soil surface or pot edges (mineral buildup).
  • Slowed or distorted growth despite good lighting and humidity.

How to Fix It:

  1. Use Filtered or Distilled Water: These are free from chemicals that can harm roots.
  2. Let Tap Water Sit Overnight: Allowing it to sit uncovered for 24 hours lets chlorine evaporate.
  3. Flush the Soil: Once a month, pour clean water through the soil until it runs out of the drainage holes. This helps wash away built-up salts and minerals.

Over time, switching to cleaner water can completely eliminate brown tips and give your plant a fresh, green start.


4. Fertilizer Burn Is Scorching Your Leaves

Fertilizers are meant to feed your plant, but too much of a good thing can do serious damage. Over-fertilizing causes a buildup of salts in the soil, which draws moisture out of the roots and leaf tips—essentially “burning” them.

Symptoms of Fertilizer Burn:

  • Brown leaf tips or margins.
  • White crust on soil or pot surface.
  • Sudden leaf drop or stunted growth after feeding.

What to Do:

  1. Flush the Soil: Run water through the pot for a few minutes to wash away excess fertilizer salts. Let it drain fully.
  2. Skip Feeding for a Month: Give the plant time to recover before resuming any fertilization.
  3. Use Diluted Fertilizer: Always mix fertilizer to half the recommended strength.
  4. Feed Sparingly: Most indoor plants only need fertilizer every 4–6 weeks during their growing season (spring and summer).

If your plant’s tips have burned due to overfeeding, you can trim the brown portions with sterilized scissors to improve its appearance—but be sure to fix the root cause first.


5. Temperature Stress Is Hurting Your Plant

Extreme temperatures—either too hot or too cold—can also lead to brown tips. Indoor plants are particularly sensitive to sudden drafts, heaters, and air conditioning units. Rapid changes in temperature cause the plant to lose moisture faster than it can replenish it, leading to dehydration at the leaf edges.

Signs of Temperature Stress:

  • Leaves curling, drooping, or developing brown patches overnight.
  • Plants placed near radiators, windows, or vents showing leaf damage on one side.
  • Growth slowing or stopping unexpectedly.

How to Fix It:

  • Keep plants away from direct heat sources (like radiators or heaters).
  • Avoid placing them in cold drafts or near frequently opened doors.
  • Maintain indoor temperatures between 65–80°F (18–27°C) for most houseplants.
  • Use a digital thermometer to monitor room temperature stability.

Consistency is key—plants thrive when their environment remains steady.


6. Poor Air Circulation and Dust Buildup

Dusty leaves can actually suffocate your plant. When dust covers the leaf surface, it blocks light and prevents proper gas exchange, slowing photosynthesis and leading to stress symptoms like browning. Similarly, stagnant air increases the risk of fungal infections that can also cause discoloration.

How to Fix It:

  1. Clean Leaves Regularly: Wipe leaves with a damp, soft cloth every few weeks.
  2. Improve Airflow: Place a small fan nearby (on low speed) or occasionally open windows to let in fresh air.
  3. Space Out Plants: Avoid crowding—give each plant breathing room to reduce humidity-related stress and pest problems.

A simple leaf wipe routine not only keeps your plants healthier but also helps them look lush and vibrant.


7. It Might Be Natural Aging

Before you panic, remember that some browning is completely natural. Older leaves at the bottom of the plant often turn yellow or brown as the plant directs energy to new growth.

What to Do:

  • Gently trim away old, brown leaves using sterilized scissors.
  • Avoid removing too many leaves at once—let the plant shed naturally.
  • Focus on overall plant health: new growth, bright color, and firm stems are all good signs.

If browning is limited to older leaves, your plant is likely just following its normal growth cycle.


How to Trim and Refresh Damaged Leaves

If your plant already has brown tips, don’t worry—you can tidy it up safely.

How to Trim:

  1. Use clean, sharp scissors or pruning shears.
  2. Cut off only the brown portion of each leaf, following the leaf’s natural shape.
  3. Avoid cutting into healthy green tissue, as this can cause further damage.

After trimming, resume regular care and watch for new growth—it’s a sure sign your plant is bouncing back.


Final Thoughts

Brown leaf tips might look unsightly, but they’re rarely fatal. They’re your plant’s way of saying, “Something isn’t quite right.” Whether it’s dry air, poor watering habits, excess fertilizer, or temperature stress, a few small adjustments can make a big difference.

To prevent future problems:

  • Maintain steady humidity and temperature levels.
  • Water consistently but thoughtfully—neither too much nor too little.
  • Use clean, filtered water and avoid fertilizer buildup.
  • Dust and inspect your plants regularly to keep them breathing freely.

By paying attention to these details, you’ll not only stop brown tips in their tracks but also create an environment where your plants thrive—lush, green, and full of life.

Your plants are resilient—they just need a little fine-tuning to stay their best. With proper care, those once-browned leaves will soon be replaced by fresh, healthy growth, reminding you that every gardener learns through observation and love.