How to Store Herbs for Maximum Flavor

How to Store Herbs for Maximum Flavor

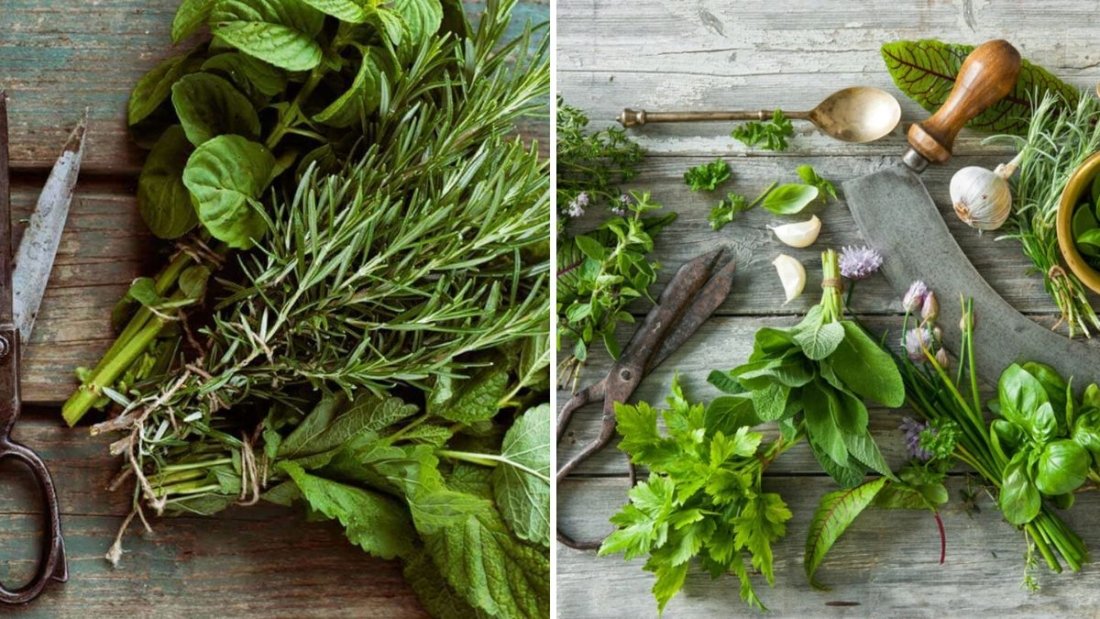
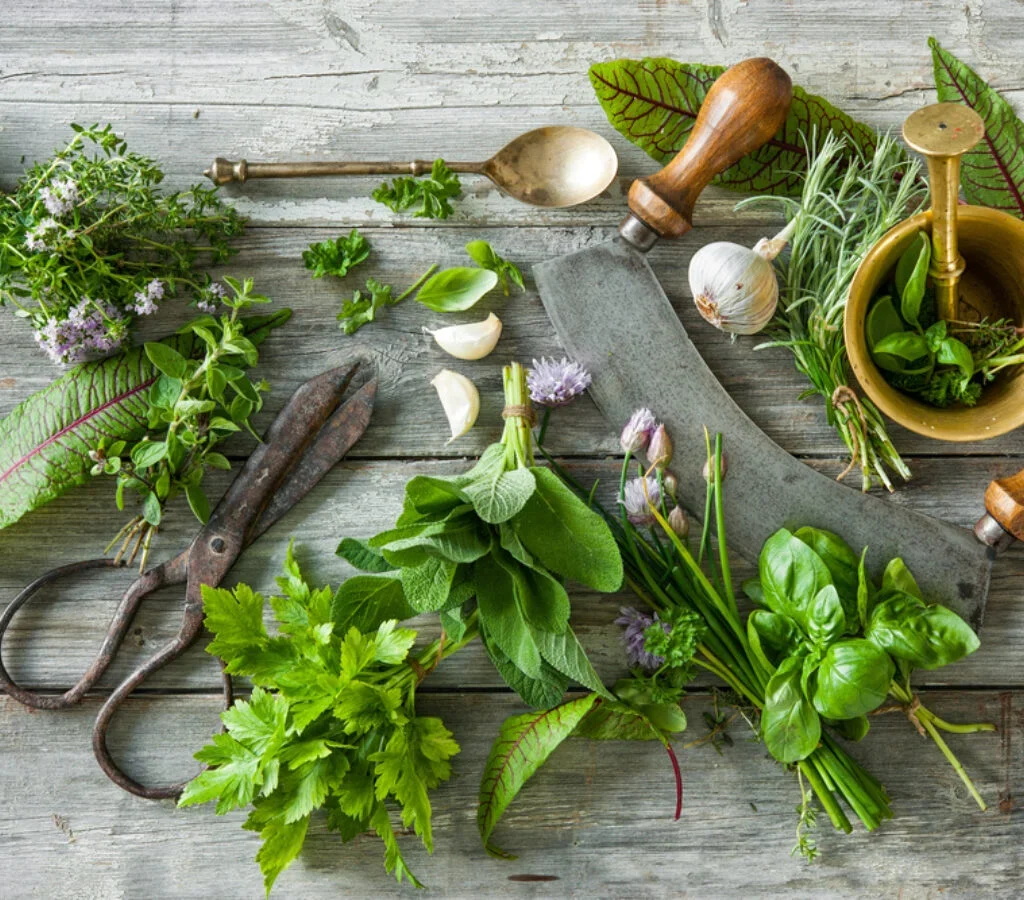
Fresh herbs are like little bursts of magic in the kitchen. A handful of basil can transform a simple tomato sauce, a sprig of rosemary can elevate roasted potatoes, and fresh mint can brighten a summer drink. However, herbs are also delicate. Without proper care, they quickly wilt, lose their fragrance, and become unusable.

The good news is that with the right storage techniques, you can keep herbs fresh for days—or even months—while preserving their maximum flavor. This guide covers everything you need to know about storing herbs, from handling fresh-cut stems to freezing and drying methods.


Why Proper Herb Storage Matters

Herbs are rich in essential oils, which give them their distinctive aroma and taste. Once harvested, these oils begin to degrade rapidly when exposed to light, heat, and moisture. Storing herbs correctly helps:

  • Preserve essential oils for stronger flavor.
  • Extend shelf life, reducing waste.
  • Maintain color and texture, so they remain visually appealing.
  • Ensure convenience, making it easier to cook with herbs whenever you need them.

Step 1: Know Your Herb Type

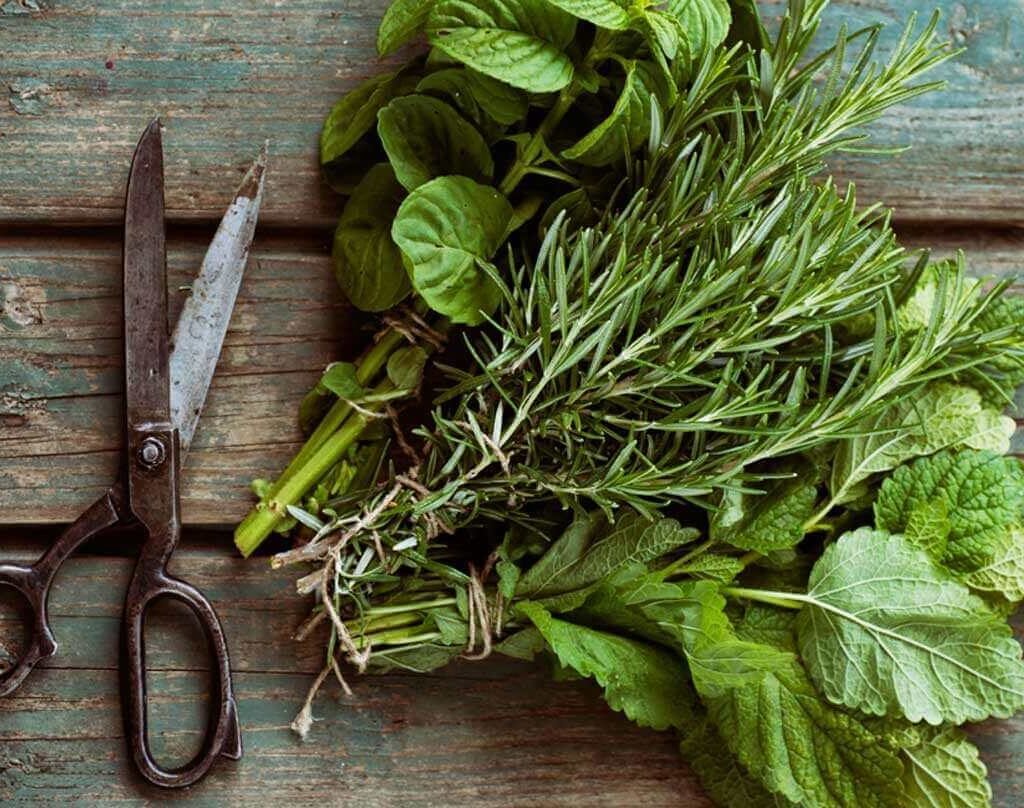
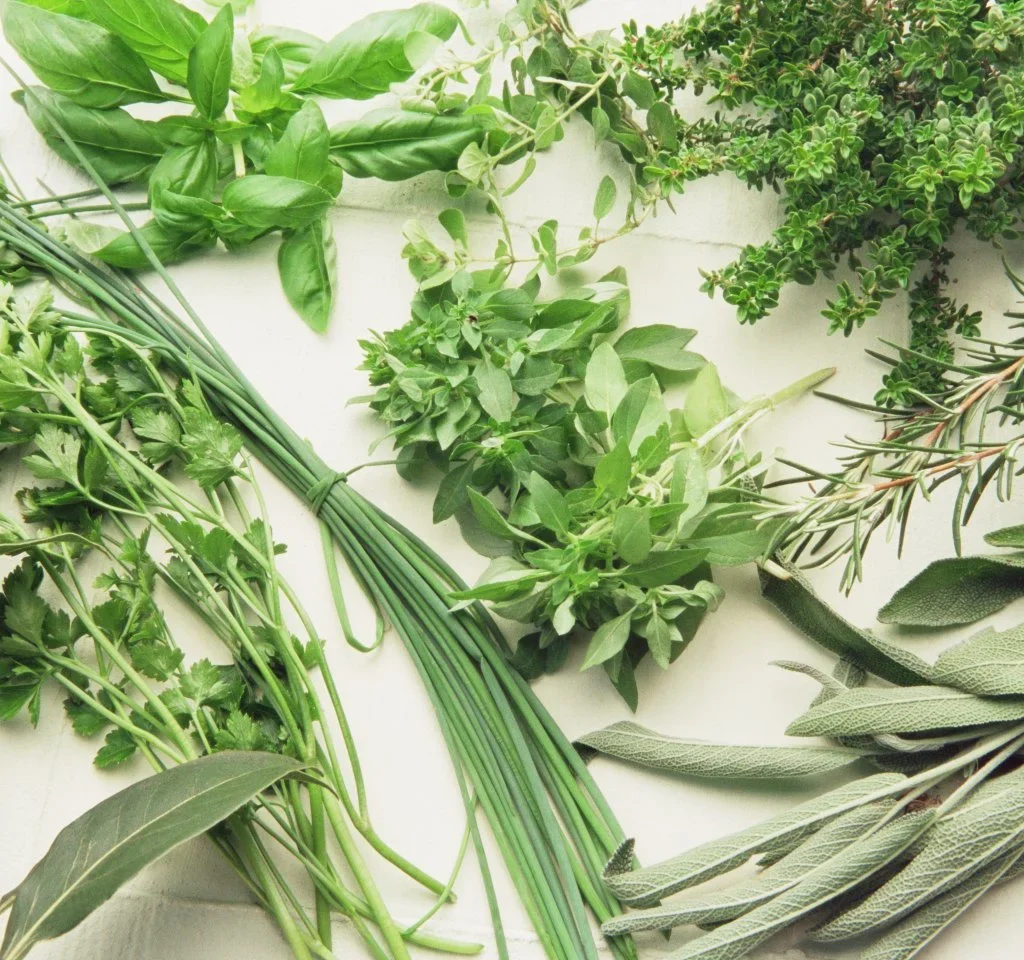
Not all herbs should be stored the same way. To keep them at peak flavor, it’s important to distinguish between tender herbs and woody herbs.

  • Tender Herbs: Basil, parsley, cilantro, mint, dill, tarragon.
    • These have soft stems and delicate leaves that wilt quickly.
  • Woody Herbs: Rosemary, thyme, sage, oregano, marjoram, lavender.
    • These have sturdier stems and leaves, making them naturally longer-lasting.

Each group benefits from slightly different storage methods.


Step 2: Short-Term Storage for Fresh Herbs

For Tender Herbs (Basil, Cilantro, Parsley, etc.)

These behave more like fresh flowers than vegetables.

Method: Jar in Water

  1. Trim the ends of the stems.
  2. Place them upright in a jar with about an inch of water.
  3. Loosely cover with a plastic bag to maintain humidity.
  4. Store in the refrigerator—except basil, which should be left at room temperature (cold air turns basil leaves black).
  5. Change water every 2–3 days.

Shelf Life: 5–10 days.

For Woody Herbs (Rosemary, Thyme, Sage, etc.)

These are more resilient and don’t need water jars.

Method: Damp Paper Towel Wrap

  1. Dampen a paper towel lightly (not soaking wet).
  2. Wrap herbs loosely in the towel.
  3. Place inside a resealable plastic bag or airtight container.
  4. Store in the crisper drawer of the fridge.

Shelf Life: 2–3 weeks.


Step 3: Long-Term Storage Methods

If you’ve harvested a large batch of herbs or bought more than you can use, long-term preservation is the best way to ensure maximum flavor.

1. Freezing Herbs

Freezing locks in freshness and essential oils far better than refrigeration.

Freezing Whole Leaves

  • Spread clean, dry herb leaves (like mint or basil) on a baking sheet.
  • Freeze for 1–2 hours.
  • Transfer to airtight freezer bags.

Freezing in Ice Cubes

  • Chop herbs finely.
  • Place into ice cube trays, covering with water or olive oil.
  • Freeze, then transfer cubes to freezer bags.
  • Use cubes directly in soups, stews, or sauces.

Shelf Life: 6–12 months.

2. Drying Herbs

Drying is one of the oldest methods of herb preservation. While it reduces some essential oils, proper drying can retain a surprising amount of flavor.
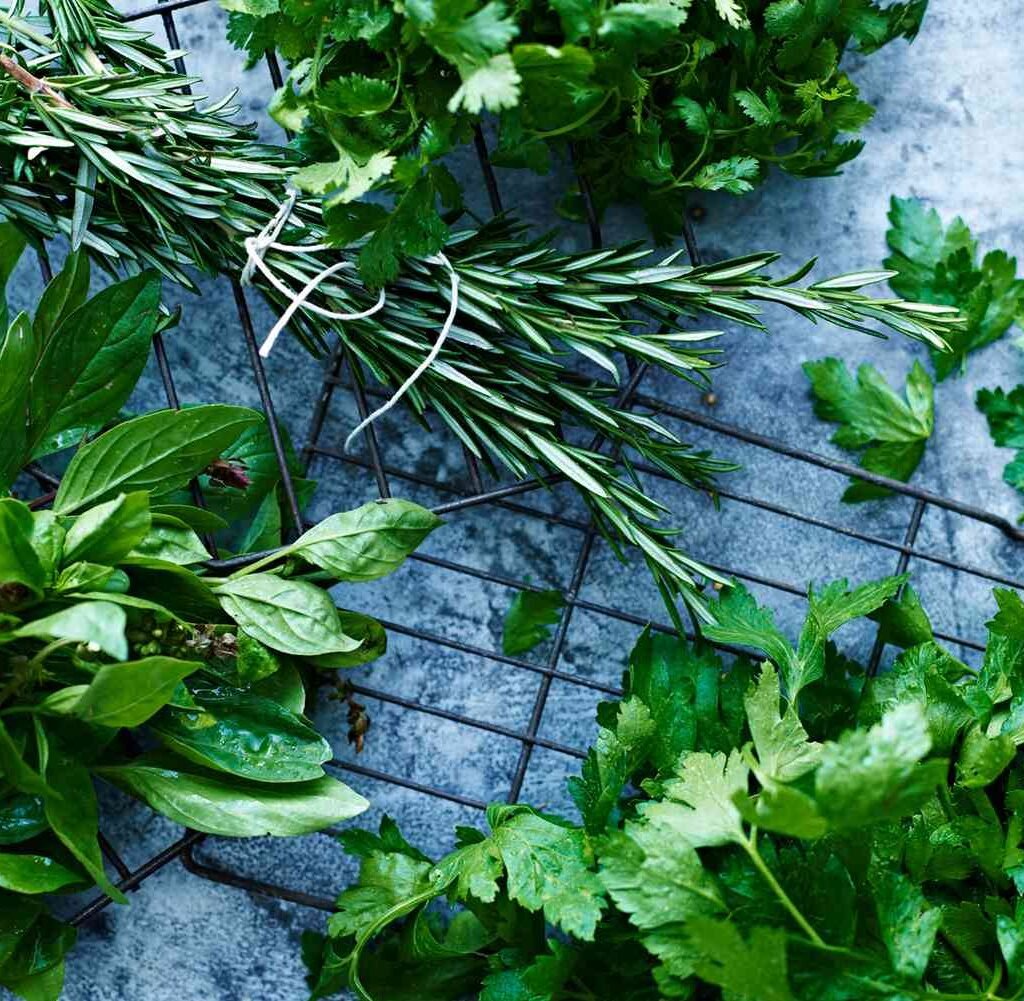
Air Drying

  • Gather herbs into small bunches and tie with string.
  • Hang upside down in a warm, dry, dark place with good ventilation.
  • Once leaves crumble easily, remove from stems and store in airtight jars.

Oven or Dehydrator Drying

  • Spread leaves in a single layer on trays.
  • Dry at 95–115°F in a dehydrator or on the lowest oven setting.
  • Check frequently to avoid burning delicate leaves.

Best Herbs for Drying: Oregano, thyme, rosemary, sage, marjoram, dill.
Shelf Life: Up to 1 year if stored in airtight containers away from light.

3. Herb-Infused Oils and Vinegars

Storing herbs in oil or vinegar not only preserves them but also creates flavorful condiments.

Infused Oil Method

  • Place clean, dry herbs (such as rosemary, thyme, or garlic chives) into a sterilized glass jar.
  • Cover completely with olive oil.
  • Store in the refrigerator.

Infused Vinegar Method

  • Place herbs in a sterilized bottle.
  • Cover with white wine vinegar or apple cider vinegar.
  • Seal and store in a cool, dark place for several weeks before using.

Shelf Life: Oils—2 weeks in fridge; Vinegars—6 months in pantry.

4. Herb Butters and Pastes

Turning herbs into butter or paste captures their essence in a convenient form.

Herb Butter

  • Blend softened butter with chopped herbs.
  • Shape into a log, wrap in parchment, and freeze.
  • Slice off as needed for cooking.

Herb Paste

  • Blend herbs with olive oil into a thick paste.
  • Freeze in ice cube trays.

Shelf Life: 6–9 months in freezer.


Step 4: Storage Containers and Conditions

No matter which method you choose, proper containers make all the difference.

  • Glass Jars – Best for dried herbs to keep moisture out.
  • Freezer Bags – Flexible and space-saving for frozen herbs.
  • Vacuum-Sealed Bags – Ideal for long-term storage to prevent freezer burn.
  • Dark Storage – Keep dried herbs in a cool, dark place away from sunlight.

Testing Herb Freshness and Flavor

Even with the best storage methods, herbs will eventually lose potency. Here’s how to check:

  • For Fresh Herbs – Leaves should look vibrant, not wilted or slimy.
  • For Dried Herbs – Crush a leaf in your hand. If it releases a strong aroma, it’s still good. Weak scent = time to replace.
  • For Frozen Herbs – They should look bright in color, not gray or frosted.

Common Mistakes to Avoid

  1. Storing Wet Herbs – Moisture causes mold. Always dry herbs thoroughly before storage.
  2. Using Plastic Without Ventilation – Fresh herbs need some airflow; sealed bags without ventilation can cause rot.
  3. Exposing Dried Herbs to Light – This fades color and flavor quickly.
  4. Freezing Without Blanching (for certain herbs) – Basil, for example, can turn black unless frozen in oil or blanched briefly.
  5. Forgetting to Label – Always date your containers; herbs lose potency over time.

Maximizing Herb Flavor in Cooking

Storage is only half the story—knowing when to add herbs to dishes helps preserve their flavor.

  • Tender Herbs (Basil, Cilantro, Parsley, Dill): Add near the end of cooking or use fresh as a garnish.
  • Woody Herbs (Rosemary, Thyme, Sage, Oregano): Add early in cooking to allow flavors to infuse.
  • Frozen Herb Cubes: Drop into soups, sauces, or sautés without thawing.
  • Dried Herbs: Use about one-third the amount you’d use for fresh, as they are more concentrated.

Conclusion

Storing herbs for maximum flavor is both an art and a science. By tailoring your storage method to the type of herb—whether tender or woody—you can keep them vibrant and aromatic for days, weeks, or even months. Freezing, drying, infusing, or cellaring herbs ensures that your cooking always benefits from their full flavor, no matter the season.

With just a little care, you can turn fleeting garden freshness into long-lasting culinary joy. The next time you gather a handful of parsley or rosemary, remember: storing them the right way is just as important as growing or buying them fresh.

Herbs are tiny, but when preserved properly, they add incredible depth to your meals year-round. Treat them well, and they’ll return the favor with flavor.

Why Seed Swapping Strengthens Local Gardens

Why Seed Swapping Strengthens Local Gardens

In today’s fast-paced world, where industrial agriculture and large seed companies dominate the food supply, community-led practices like seed swapping are making a powerful comeback. More than just an exchange of tiny kernels of life, seed swapping is about community building, biodiversity preservation, and creating resilient local food systems.

Gardeners who participate in seed swaps are not only saving money but also preserving cultural traditions, improving their gardens, and strengthening neighborhood ties. This article explores why seed swapping is such a vital practice, how it benefits local gardens, and why more gardeners should embrace this sustainable tradition.


What is Seed Swapping?

Seed swapping is the practice of exchanging seeds between gardeners, farmers, or community members. These events may be small gatherings among friends or larger community festivals, often hosted by libraries, schools, or gardening clubs. Participants bring extra seeds from their own harvests, trade them with others, and often share gardening tips and experiences along the way.

Seed swaps can take many forms:

  • In-Person Swaps – Local events where people trade seeds face-to-face.
  • Seed Libraries – Community spaces (often within public libraries) where members can “borrow” seeds, grow them, and return saved seeds for others to use.
  • Online Exchanges – Digital platforms where seeds are mailed between participants.

Regardless of the format, the concept remains the same: a grassroots exchange of life, knowledge, and community spirit.


Benefits of Seed Swapping for Local Gardens

1. Preserving Biodiversity

Commercial agriculture tends to focus on a limited number of high-yield, uniform varieties, leading to a loss of genetic diversity. Seed swaps, on the other hand, encourage the sharing of heirloom, rare, and region-specific varieties.

  • Heirloom tomatoes, unusual beans, or unique peppers are often passed down through generations and preserved only because gardeners continue to save and share them.
  • These unique seeds strengthen local gardens by increasing biodiversity, which makes ecosystems healthier and more resilient against pests and diseases.

2. Adapting to Local Conditions

Seeds saved and shared locally are already adapted to regional climates, soils, and pests. Unlike store-bought seeds bred for general use, locally adapted seeds perform better in specific environments.

For example, a bean variety saved for decades in a dry climate will naturally thrive in similar dry conditions when grown by another gardener in the same region. This adaptation strengthens local food security, as the plants are more resilient and require fewer external inputs like chemical fertilizers or pesticides.

3. Encouraging Sustainable Gardening

When gardeners swap seeds, they also share knowledge about how to grow them. Instead of relying on chemical-heavy farming practices, participants often exchange organic and natural methods for pest control, soil care, and watering techniques.

Seed swapping encourages:

  • Reduced dependence on corporations that sell patented or genetically modified seeds.
  • Self-reliance in producing and saving seeds year after year.
  • Lower costs, since swapping is free or nearly free compared to purchasing new packets annually.

4. Strengthening Community Bonds

Seed swaps bring people together. These events create opportunities to meet neighbors, exchange gardening tips, and celebrate the joy of growing food.

In many communities, seed swaps:

  • Foster intergenerational learning, where older gardeners pass down skills and traditions to younger ones.
  • Create cultural connections, as immigrants and ethnic groups share traditional crops from their homelands.
  • Promote local resilience, as people build networks that can share resources during times of scarcity.

5. Protecting Food Security

Seed swapping supports food independence at the local level. With rising concerns about climate change, supply chain disruptions, and corporate control of seeds, having access to a diverse pool of locally adapted seeds ensures that communities can continue to grow food—even during challenging times.


Practical Examples of Seed Swapping Success

  • Seed Libraries in the U.S. and Europe – Hundreds of libraries now lend seeds along with books. Members check out seeds, grow plants, and return saved seeds for others.
  • Community Festivals – Events like “Seedy Saturdays” in Canada attract thousands of gardeners eager to trade seeds, attend workshops, and learn about sustainable gardening.
  • Indigenous Seed Keepers Networks – Native communities are reviving traditional crops and cultural heritage by exchanging ancestral seeds that were once nearly lost.

These initiatives not only enrich local gardens but also safeguard cultural identity and food sovereignty.


How to Start Seed Swapping in Your Community

If you’re inspired to bring the benefits of seed swapping to your area, here are simple steps to get started:

1. Start Small

Begin by swapping seeds with a few friends or neighbors. Keep it informal at first, perhaps as part of a gardening club or community potluck.

2. Host a Seed Swap Event

  • Pick a date before planting season.
  • Invite local gardeners, schools, and community groups.
  • Provide envelopes, labels, and tables for organizing seeds.
  • Encourage participants to share growing tips along with their seeds.

3. Create a Seed Library

Partner with local libraries, community centers, or schools to establish a seed library. All it takes is a small cabinet of labeled envelopes and a system for borrowing and returning seeds.

4. Emphasize Education

Offer workshops on seed saving techniques, proper labeling, and the importance of biodiversity. Knowledge-sharing makes the swap more meaningful and sustainable.

5. Use Online Tools

If in-person gatherings aren’t possible, use online gardening forums, social media groups, or seed exchange websites to connect with other gardeners.


Best Practices for Successful Seed Swapping

  • Label Clearly – Always label seeds with the plant name, variety, harvest date, and any special growing instructions.
  • Save Only from Healthy Plants – This ensures disease-free seeds with strong genetics.
  • Respect Hybrids vs. Open-Pollinated Seeds – Hybrid seeds may not grow true to type, so be honest about what you’re sharing.
  • Encourage Diversity – Share multiple varieties to keep the seed pool rich.
  • Document Stories – Whenever possible, include the history of the seed variety. This creates a cultural and emotional connection for future growers.

Challenges and How to Overcome Them

While seed swapping has countless benefits, a few challenges can arise:

  1. Cross-Pollination Issues – Some crops (like squash or corn) cross-pollinate easily, which can lead to unexpected results. Solution: educate gardeners about isolation techniques or encourage trading self-pollinating crops first.
  2. Lack of Awareness – Many people don’t know about seed swapping. Solution: promote events through schools, local organizations, and social media.
  3. Seed Quality Concerns – Some seeds may be old or improperly stored. Solution: teach participants about proper seed saving and viability testing.

By addressing these challenges, communities can ensure that seed swaps remain successful and rewarding.


The Bigger Picture: Building Resilient Food Systems

Seed swapping is more than just a local gardening trend—it’s part of a global movement to reclaim control of food systems from corporate monopolies. Every seed shared is an act of resistance against the homogenization of agriculture and a step toward creating resilient, community-driven food networks.

When neighbors come together to exchange seeds, they are:

  • Preserving history.
  • Preparing for the future.
  • Strengthening their gardens and communities alike.

Conclusion

Seed swapping strengthens local gardens in ways that extend far beyond the soil. It protects biodiversity, adapts plants to regional conditions, encourages sustainability, and builds community resilience. Each seed exchanged carries not only the promise of food but also the stories, traditions, and connections of the people who nurture it.

In an era where food systems are increasingly fragile, seed swapping is a simple, grassroots practice that empowers communities. By saving and sharing seeds, gardeners ensure that local gardens remain vibrant, diverse, and sustainable for generations to come.

So the next time you find yourself with extra seeds, don’t let them sit unused. Share them with a neighbor, attend a seed swap, or start one in your community. In doing so, you’ll be planting more than seeds—you’ll be planting the roots of a stronger, more resilient future.

5 Easy Ways to Preserve Squash

5 Easy Ways to Preserve Squash

Squash is one of the most versatile and productive crops you can grow in your garden. Whether it’s tender summer squash like zucchini or hearty winter squash like butternut and acorn, these vegetables provide delicious meals throughout the season. However, squash plants are often prolific, leaving gardeners with more than they can eat at once. That’s where preservation comes in.

Preserving squash ensures you can enjoy its flavor and nutrition long after harvest season. From freezing and drying to pickling and canning, there are multiple easy techniques that keep squash fresh and ready to use year-round. This guide explores five simple, effective methods for preserving squash, along with step-by-step instructions and tips for success.


Why Preserve Squash?

Before we dive into methods, it’s helpful to understand why preservation is worth the effort:

  1. Extended Shelf Life – Fresh summer squash only lasts about a week in the fridge, while winter squash may last a few months in cool storage. Preservation methods extend usability to a year or more.
  2. Convenience – Having pre-prepared squash in your freezer, pantry, or jars makes cooking faster and easier.
  3. Reduced Food Waste – Preserving prevents surplus harvests from going to waste.
  4. Nutrient Retention – Many preservation methods maintain the vitamins, minerals, and antioxidants found in squash.
  5. Year-Round Enjoyment – Even when your garden is dormant, you can enjoy soups, casseroles, and stir-fries with preserved squash.

1. Freezing Squash

Freezing is the easiest and most popular way to preserve squash. It works best for zucchini, yellow squash, and even cubes of winter squash.

How to Freeze Summer Squash:

  1. Wash and Slice – Rinse squash and cut into ¼-inch slices or cubes.
  2. Blanching – Boil slices in water for 3 minutes (1 minute for grated zucchini). Immediately transfer to an ice bath to stop cooking. Blanching preserves color, texture, and nutrients.
  3. Dry – Pat slices dry with a towel to prevent ice crystals.
  4. Flash Freeze – Spread pieces in a single layer on a baking sheet and freeze for 2–3 hours.
  5. Package – Transfer frozen pieces into freezer bags or airtight containers. Remove excess air before sealing.

Freezing Grated Zucchini:

  • Grate zucchini, squeeze out excess water, and pack into freezer-safe bags in pre-measured portions (e.g., 2 cups for baking recipes).

Freezing Winter Squash:

  • Peel, cube, and blanch chunks before freezing. Alternatively, bake whole squash until tender, scoop out the flesh, mash it, and freeze in containers.

Storage Life: Up to 12 months.

Best Uses: Soups, stir-fries, casseroles, muffins, and breads.


2. Canning Squash

Canning is an excellent long-term preservation method, though it requires careful safety practices. Squash is a low-acid vegetable, so it must be pressure-canned to prevent harmful bacteria growth.

Pressure Canning Summer Squash (Not Recommended for Slices)

The USDA does not recommend pressure canning plain summer squash slices due to inconsistent density. However, squash can be canned safely in recipes such as soups or mixed vegetables following approved guidelines.

Pressure Canning Winter Squash (Puree Not Allowed)

  • Winter squash cubes can be safely canned. Pureed squash cannot be pressure canned, but it can be frozen.

Steps for Canning Squash Cubes:

  1. Wash, peel, and cube the squash.
  2. Boil cubes for 2 minutes.
  3. Pack hot cubes into jars, leaving 1-inch headspace.
  4. Cover with boiling water.
  5. Process in a pressure canner (pint jars: 55 minutes, quart jars: 90 minutes, at 10–15 pounds pressure depending on altitude).

Storage Life: Up to 18 months.

Best Uses: Soups, stews, casseroles, and curries.


3. Pickling Squash

Pickling transforms squash into a tangy, flavorful snack while also preserving it. Summer squash works especially well because of its tender texture.

Quick Refrigerator Pickles:

  1. Slice squash into thin rounds or sticks.
  2. Prepare a brine with vinegar, water, sugar, and spices (garlic, dill, mustard seeds, chili flakes).
  3. Pack squash into jars and pour hot brine over them.
  4. Seal jars and refrigerate.

Ready in 24–48 hours and lasts for 2 months in the fridge.

Water-Bath Canning Pickled Squash:

  • If you want shelf-stable pickles, use a tested pickling recipe with high vinegar content. Process jars in a boiling water bath for 10–15 minutes.

Storage Life: Refrigerator pickles last 2 months; canned pickles up to 1 year.

Best Uses: Sandwiches, salads, charcuterie boards, or as a tangy snack.


4. Dehydrating Squash

Dehydration removes moisture, concentrating flavor and nutrients. Dried squash takes up little space and rehydrates well in soups or stews.

How to Dehydrate Summer Squash:

  1. Wash and slice into ¼-inch rounds.
  2. Blanch for 1–2 minutes (optional but helps preserve color).
  3. Arrange slices on dehydrator trays in a single layer.
  4. Dry at 125°F for 8–12 hours, until brittle.

How to Dehydrate Winter Squash:

  1. Cook squash until tender.
  2. Scoop out flesh, puree, and spread thinly on dehydrator trays (use nonstick sheets).
  3. Dry into squash “leather.” Break into pieces for storage.

Storage Life: Up to 1 year in airtight containers.

Best Uses: Snacks, soups, casseroles, or ground into squash flour for baking.


5. Root Cellaring (for Winter Squash)

Unlike summer squash, many winter squash varieties (butternut, acorn, Hubbard, kabocha) naturally store well without processing. When cured and stored properly, they can last several months.

How to Store Winter Squash:

  1. Harvest at Full Maturity – Ensure rinds are hard and stems are dry.
  2. Cure Squash – Place squash in a warm (80–85°F), dry, well-ventilated spot for 10–14 days. This toughens skins and heals small scratches.
  3. Storage Conditions – Store cured squash in a cool, dark, dry place (50–55°F, 50–70% humidity). Avoid refrigeration, which can cause chilling injury.
  4. Check Regularly – Inspect for soft spots or mold. Use damaged squash first.

Storage Life: 2–6 months depending on variety.

Best Uses: Roasting, soups, stews, casseroles, and pies.


Bonus Tips for Preserving Squash

  • Label Everything – Always mark containers with the squash variety and date of preservation.
  • Use Vacuum Sealers – Extends freezer life by reducing freezer burn.
  • Combine Methods – Freeze grated zucchini for baking, pickle slices for snacks, and cellar winter squash for hearty winter meals.
  • Choose the Right Varieties – Some squashes store better than others. Butternut squash has a long shelf life, while zucchini is better suited for freezing or pickling.
  • Experiment with Recipes – Try squash soups, sauces, or even squash chips to enjoy preserved squash in creative ways.

Conclusion

Squash may grow in abundance, but with the right preservation techniques, you’ll never have to worry about wasting your harvest. Freezing, canning, pickling, dehydrating, and root cellaring are five easy methods that extend squash’s usefulness well into the colder months.

Each technique offers unique benefits: freezing for convenience, canning for long-term storage, pickling for flavor, dehydrating for lightweight preservation, and root cellaring for natural storage. By mastering these methods, you can enjoy the taste, nutrition, and versatility of squash all year long.

Preserving squash is more than just a practical skill—it’s a way to celebrate the bounty of your garden and ensure that none of your hard-earned harvest goes to waste. Whether you’re a beginner or an experienced gardener, these methods make squash a reliable staple in your kitchen every season.

The Ultimate Guide to Seed-Saving Techniques

The Ultimate Guide to Seed-Saving Techniques

Saving seeds is one of the most empowering and sustainable practices a gardener can adopt. Not only does it reduce reliance on commercial seed companies, but it also helps preserve heirloom varieties, adapt plants to local growing conditions, and ensure a self-sufficient food supply. For centuries, farmers and home gardeners alike have been practicing seed saving, passing down varieties that are uniquely suited to their region and taste. Today, with rising interest in sustainability and food security, seed saving has regained popularity as an essential gardening skill.

This ultimate guide walks you through the benefits of seed saving, techniques for collecting and storing seeds, and the best practices for ensuring strong, viable plants in future generations. Whether you are new to gardening or an experienced grower, learning these techniques will give you greater control over your garden’s future.


Why Seed Saving Matters

Before diving into the techniques, it’s important to understand why seed saving is valuable:

  1. Preservation of Biodiversity – By saving seeds, gardeners help maintain plant diversity, protecting heirloom and rare varieties from extinction.
  2. Cost-Effectiveness – Instead of buying seeds every year, saving your own reduces annual expenses.
  3. Adaptation to Local Climate – Seeds saved from your garden gradually adapt to your soil, weather, and pests, creating more resilient crops.
  4. Food Security – Maintaining your own seed bank means independence from market fluctuations and supply chain disruptions.
  5. Cultural Heritage – Many seeds are tied to traditions, family recipes, and regional farming practices, making them a living piece of history.

Understanding Plant Types for Seed Saving

Not all plants are equally easy to save seeds from. Understanding plant reproduction helps determine the right technique.

  1. Open-Pollinated Plants
    These reproduce naturally through wind, insects, or self-pollination. When you save seeds from these plants, the offspring will closely resemble the parent, making them ideal for seed saving.
  2. Heirloom Varieties
    These are open-pollinated plants passed down for generations. They are genetically stable and produce reliable results, making them perfect for seed saving.
  3. Hybrid Plants (F1)
    Created by cross-breeding two different parent plants, hybrids often have desirable traits like higher yields or disease resistance. However, seeds from hybrids usually don’t produce consistent results, making them less reliable for seed saving.
  4. Self-Pollinating Plants
    Plants like tomatoes, beans, peas, and peppers are self-pollinating, meaning they fertilize themselves. These are the easiest for beginners to save seeds from.
  5. Cross-Pollinating Plants
    Plants like squash, corn, and cucumbers often cross-pollinate with other varieties nearby. Special care, such as hand-pollination or isolation, is needed to maintain purity.

Step-by-Step Seed-Saving Techniques

1. Selecting the Right Plants

  • Always choose the healthiest, most vigorous plants for seed saving.
  • Avoid plants that are diseased, weak, or have undesirable traits.
  • Look for plants with good yields, strong growth, and resistance to pests.

2. Harvesting Seeds by Plant Type

a) Dry-Seeded Crops (Beans, Peas, Lettuce, Grains)

  • Allow seeds to dry on the plant until pods turn brown and brittle.
  • Harvest on a dry day to avoid mold.
  • Remove seeds from pods and further dry indoors before storage.

b) Wet-Seeded Crops (Tomatoes, Cucumbers, Squash, Melons)

  • Scoop seeds from ripe fruits.
  • For tomatoes and cucumbers, use fermentation: place seeds in a jar with water for 2–3 days until a moldy layer forms. This process removes the gelatinous coating that inhibits germination.
  • Rinse seeds thoroughly and dry them on a screen or paper towel.

c) Biennial Crops (Carrots, Onions, Beets, Kale)

  • These require two growing seasons to produce seeds.
  • Harvest roots in the first season, store them over winter, and replant in spring to allow seed stalks to form.
  • Collect seeds once flower heads dry out.

d) Large Crops (Corn, Sunflowers, Pumpkins)

  • For corn, allow ears to fully mature and dry on the stalk. Select seeds from the center of the cob for best vigor.
  • For sunflowers, wait until heads turn brown and seeds loosen easily.
  • For pumpkins and squash, scoop seeds from ripe fruit, rinse, and dry thoroughly.

3. Cleaning and Drying Seeds

  • Cleaning removes debris, pulp, and chaff. Methods include winnowing (blowing air to separate lighter materials) and screening.
  • Drying is crucial for seed longevity. Spread seeds in a single layer on a breathable surface like a screen or paper. Keep them in a cool, well-ventilated area out of direct sunlight.
  • Seeds are dry enough for storage when they break, not bend, under pressure.

4. Proper Storage Techniques

  • Store seeds in airtight containers like glass jars, envelopes, or seed packets.
  • Label each container with plant name, variety, and date of collection.
  • Keep seeds in a cool, dark, and dry place. Ideal conditions are below 50°F with low humidity.
  • For long-term storage, refrigerate or freeze seeds in airtight containers with a desiccant (like silica gel) to prevent moisture damage.

5. Testing Seed Viability

Even properly stored seeds lose viability over time. To test germination:

  1. Place 10 seeds on a damp paper towel.
  2. Roll it up and seal in a plastic bag.
  3. Keep in a warm spot for the recommended germination period.
  4. Count how many seeds sprout to determine the germination rate.

If fewer than 70% sprout, plant more seeds than usual or replace with fresh ones.


Tips for Successful Seed Saving

  • Isolate Cross-Pollinators: Separate varieties by distance or use physical barriers like row covers to prevent unwanted cross-pollination.
  • Save from Many Plants: To maintain genetic diversity, save seeds from at least 20–30 plants when possible.
  • Avoid Moisture at All Costs: Moisture is the biggest enemy of stored seeds, leading to mold or rot.
  • Rotate Seed Stock: Use older seeds first and replenish your supply each year.
  • Document Your Seeds: Keep a seed-saving journal with notes on performance, adaptations, and any challenges.

Common Mistakes to Avoid

  1. Saving seeds from hybrid plants expecting identical results.
  2. Harvesting seeds too early, leading to immature and non-viable seeds.
  3. Storing seeds in plastic bags without ventilation, causing mold.
  4. Forgetting to label seeds—leading to confusion the next planting season.
  5. Ignoring cross-pollination risks, which can alter desired plant traits.

Building a Personal Seed Bank

Creating a seed bank is an excellent long-term strategy. You can:

  • Save multiple generations of seeds to improve resilience in your garden.
  • Exchange seeds with local gardeners to diversify your collection.
  • Join seed libraries or cooperatives to access rare heirloom varieties.
  • Organize seeds by plant families and storage dates for easy rotation.

A well-maintained seed bank ensures a steady supply of high-quality seeds tailored to your unique growing conditions.


Final Thoughts

Seed saving is more than just a gardening practice—it’s a way of connecting with nature, history, and future sustainability. By learning the art of selecting, cleaning, and storing seeds, you not only save money and secure your food supply but also contribute to preserving biodiversity for generations to come.

The first step may feel small—saving tomato seeds from a single plant—but each effort builds toward self-sufficiency and resilience. With practice, patience, and attention to detail, you can create your own living legacy of plants that thrive year after year.

Seed saving is truly the gardener’s gift to tomorrow.

5 Easy Ways To Keep Flowers Blooming Until Frost

5 Easy Ways To Keep Flowers Blooming Until Frost

For most gardeners, nothing compares to the joy of seeing flowers burst with color across beds, borders, and containers. Yet, as summer fades and days shorten, many blooms begin to dwindle, leaving gardens looking tired just when you’d love them to shine. The good news? With the right care and techniques, you can keep your flowers blooming all the way until frost, ensuring your garden stays lively and colorful deep into autumn.

In this article, we’ll explore five easy, practical ways to extend your garden’s flowering season. Each method focuses on maximizing plant health, encouraging more blooms, and protecting your plants from early cold snaps.


1. Deadhead Regularly to Encourage New Blooms

One of the simplest and most effective ways to prolong flowering is deadheading—the removal of spent flowers before they set seed.

Why It Works

Plants naturally shift their energy toward producing seeds once flowers fade. By removing those spent blossoms, you redirect the plant’s energy back into producing new flowers instead of seedpods.

How to Do It

  • Pinch or snip: Use clean scissors or pruners to cut off faded flowers just above a healthy set of leaves or buds.
  • Pinch back annuals: For plants like petunias, zinnias, and marigolds, pinching also keeps them compact and bushy.
  • Perennials benefit too: Coreopsis, blanket flowers, and salvias will bloom repeatedly if you deadhead consistently.

Extra Tip

For plants that bloom in clusters (like phlox or yarrow), cut the entire cluster stem back when the majority of blooms fade—this often encourages a fresh flush of flowers.


2. Feed and Water Consistently

Flowers need consistent nutrients and hydration to keep producing blossoms, especially in late summer and early fall when they may be competing with changing weather conditions.

Feeding for Continuous Bloom

  • Balanced fertilizer: Use a water-soluble fertilizer every 2–3 weeks during the growing season. Look for a bloom-boosting mix with a higher middle number (phosphorus) to encourage flowering.
  • Organic options: Compost tea, fish emulsion, or bone meal also help enrich the soil and keep plants energized.
  • Don’t overfeed: Too much nitrogen promotes leafy growth instead of flowers.

Watering for Longevity

  • Deep watering: Water deeply 1–2 times a week instead of light daily sprinkling to encourage deep root growth.
  • Morning is best: Watering early prevents disease by allowing leaves to dry before evening.
  • Check soil moisture: Container plants dry out faster—stick a finger into the soil to test; water when the top inch feels dry.

Extra Tip

Mulching around plants retains moisture, regulates soil temperature, and reduces stress, which helps prolong blooming.


3. Extend the Season with Pruning and Pinching

Strategic cutting back can rejuvenate plants, encouraging fresh growth and new flowers even late in the season.

Midseason Cutbacks

  • Annuals: Trim leggy annuals like petunias, impatiens, and cosmos by one-third to stimulate dense, fresh growth.
  • Perennials: After their first bloom cycle, cut perennials like salvia, catmint, and coreopsis down by half for a second flush of flowers.

Pinching for Delay

Pinching back plants earlier in the season (June or July) can delay blooming, spreading flower production over a longer period. This technique works well for chrysanthemums and asters, ensuring they’re at their best just as fall arrives.

Extra Tip

Don’t be afraid to prune late bloomers lightly in August—many will respond with fresh buds that carry into October.


4. Choose and Combine Late-Blooming Varieties

If you want continuous color until frost, start with the right plants. Many flowers are naturally inclined to bloom into fall, especially annuals and hardy perennials bred for extended flowering.

Best Late-Blooming Annuals

  • Zinnias – Thrive until frost with bold colors.
  • Cosmos – Tall, airy plants that keep producing.
  • Marigolds – Hardy, cheerful flowers that shrug off cooler nights.
  • Snapdragons – Often rebound and bloom again in fall after summer heat fades.

Best Late-Blooming Perennials

  • Asters – Classic fall flowers in shades of purple, blue, and pink.
  • Coneflowers (Echinacea) – Strong bloomers that last until frost.
  • Black-eyed Susans (Rudbeckia) – Bright yellow daisy-like flowers that thrive late into the season.
  • Sedum ‘Autumn Joy’ – Succulent-like perennial with fall-blooming clusters.

Extra Tip

Mixing perennials with reseeding annuals (like cleome or cosmos) ensures a continuous rotation of blooms well into fall.


5. Protect Plants from Early Frost

Even the healthiest flowers can be stopped in their tracks by a surprise early frost. With a little preparation, you can shield your blooms and keep them thriving longer.

Frost Protection Techniques

  • Covers: Use old sheets, frost cloths, or lightweight blankets to cover plants on cold nights. Remove them in the morning once temperatures rise.
  • Cloche or row covers: Small, portable covers protect individual plants or rows. Great for tender annuals in vegetable or flower beds.
  • Move containers: Simply bring pots into a garage, porch, or sheltered area overnight during a cold snap.

Positioning for Warmth

  • Place containers near house walls, where residual heat provides a warmer microclimate.
  • Plant tender annuals in sheltered spots, like near fences or patios, where they’re less exposed to wind.

Extra Tip

Mulching heavily around perennials insulates the soil, protecting roots from early freezes while extending flowering.


Bonus Strategies for Prolonged Blooms

Beyond the five main methods, here are a few additional ways to keep flowers going strong:

  • Succession planting: Stagger plantings of fast-growing annuals like zinnias to ensure waves of flowers into fall.
  • Regular pest control: Aphids, spider mites, and powdery mildew often appear late season—keep plants healthy with vigilant monitoring.
  • Cut flowers regularly: Harvesting blooms for indoor arrangements encourages plants like cosmos, zinnias, and dahlias to keep producing.

Putting It All Together

Imagine your garden in October: vibrant zinnias still dazzling with color, asters buzzing with pollinators, and marigolds cheering up borders, while your containers overflow with fresh blossoms. This isn’t just wishful thinking—it’s the result of consistent care and planning.

By deadheading, feeding and watering regularly, pruning strategically, choosing late-blooming varieties, and protecting plants from frost, you can extend the life of your flowers far beyond summer. Each step requires only a little effort, but together they make a powerful difference.


Conclusion

Keeping flowers blooming until frost isn’t complicated—it’s about working with your plants’ natural cycles and giving them the right conditions to thrive. Deadheading redirects energy to new blooms, consistent feeding and watering sustain growth, pruning keeps plants fresh, late-blooming varieties provide seasonal resilience, and frost protection ensures your efforts aren’t cut short by the weather.

With these five easy techniques, your garden can remain a haven of color, fragrance, and pollinator activity right up until the first hard frost. So don’t pack away your gardening tools just yet—your flowers still have plenty of beauty left to give.

How To Use Ornamental Grasses for Fall Texture

How To Use Ornamental Grasses for Fall Texture

When autumn arrives, most gardeners think of chrysanthemums, asters, and pumpkins as the hallmarks of seasonal beauty. But one of the most versatile and underappreciated stars of the fall garden is ornamental grasses. Their waving plumes, graceful blades, and ever-changing colors provide unparalleled texture and movement, especially when paired with fall-blooming perennials and seasonal containers.

Whether you’re designing borders, refreshing containers, or creating focal points in the landscape, ornamental grasses offer dynamic interest that lasts well beyond the fall season. In this guide, we’ll explore how to use ornamental grasses for maximum texture in fall gardens, from choosing the right varieties to combining them with other plants and maintaining them for long-lasting appeal.


Why Ornamental Grasses Shine in Fall

Fall is when ornamental grasses come into their own. While they add beauty in spring and summer, it’s in the cooler months that they truly stand out:

  1. Seasonal plumes – Many grasses produce feathery seed heads in late summer and fall, catching the light beautifully.
  2. Movement and sound – Their graceful swaying in autumn breezes adds a soothing, dynamic element.
  3. Color transformation – Grasses often shift shades in fall, displaying golden, copper, red, or bronze tones.
  4. Low maintenance – They thrive with minimal care, resisting pests and drought.
  5. Winter interest – Even after frost, dried grasses maintain shape and structure, making them valuable year-round.

In short, ornamental grasses bridge the gap between summer’s lushness and winter’s dormancy, ensuring your garden retains texture and beauty.


Choosing Ornamental Grasses for Fall Texture

Not all ornamental grasses perform equally in the fall garden. For maximum impact, select varieties known for their late-season color, plumes, or structural interest. Here are some excellent options:

1. Miscanthus (Maiden Grass)

  • Tall, arching grasses with silvery or reddish plumes that glow in autumn sunlight.
  • Varieties like Miscanthus sinensis ‘Morning Light’ bring elegance to borders.
  • Height: 4–7 feet; best for dramatic backdrops.

2. Pennisetum (Fountain Grass)

  • Compact and mounded, with bottlebrush plumes that sway in the breeze.
  • Purple fountain grass (Pennisetum setaceum ‘Rubrum’) is particularly striking with burgundy foliage and fluffy flowers.
  • Ideal for containers or mid-border accents.

3. Panicum (Switchgrass)

  • Upright form with airy, cloud-like seed heads in late summer.
  • Foliage turns golden or reddish in autumn, adding vibrant contrast.
  • Great for naturalistic plantings or prairie-style gardens.

4. Calamagrostis (Feather Reed Grass)

  • Known for its upright habit and tall, feathery plumes.
  • Calamagrostis acutiflora ‘Karl Foerster’ is a classic for vertical structure.
  • Works beautifully in modern, minimalist landscapes.

5. Muhlenbergia (Muhly Grass)

  • Famous for its cotton-candy-like clouds of pink or purple flowers in fall.
  • Adds dramatic softness and color to sunny spots.
  • Perfect as a focal point in mixed borders.

6. Carex (Sedges)

  • Semi-evergreen with fine texture.
  • Smaller, shade-tolerant species that pair well with fall containers.
  • Provide subtle texture where taller grasses may overwhelm.

How to Design With Ornamental Grasses

The key to using grasses effectively in fall gardens lies in placement and combinations. Here are strategies to maximize their impact:

1. Create Seasonal Contrast

Pair bold grasses with fall flowers like chrysanthemums, asters, or rudbeckia. The feathery plumes contrast beautifully with solid flower forms.

2. Layer for Texture

Use grasses of varying heights—tall miscanthus in the back, medium-sized fountain grass in the middle, and compact carex in the front. This layered approach creates depth.

3. Soften Hardscapes

Grasses are perfect for softening patios, fences, or garden edges. Their flowing blades provide a natural counterbalance to rigid structures.

4. Design for Movement

Position grasses where they’ll catch breezes—near pathways, patios, or seating areas. Their swaying adds a dynamic, almost musical quality to the garden.

5. Use as Focal Points

Bold species like muhly grass or purple fountain grass can stand alone in a container or bed as a statement piece.

6. Combine With Foliage Plants

Pair with fall foliage plants like heucheras, coleus, or ornamental kale for eye-catching color and texture combinations.


Using Ornamental Grasses in Containers

Containers are one of the easiest ways to showcase ornamental grasses in the fall garden. Their verticality and texture make them ideal for mixed arrangements.

  • Thriller role – Use tall grasses like feather reed grass as the “thriller” in the center of large pots.
  • Filler role – Medium grasses like fountain grass serve as fillers alongside mums or pansies.
  • Spiller role – Trailing sedges or dwarf grasses spill gracefully over pot edges.

Design tip: Combine ornamental grasses with seasonal accents like small pumpkins, gourds, or trailing ivy for festive fall displays.


Maintenance Tips for Fall Grasses

One of the reasons ornamental grasses are beloved is their easy care. Still, a few seasonal practices will keep them looking their best:

  1. Watering – Most grasses tolerate drought but appreciate occasional watering in dry fall weather.
  2. Fertilization – Fertilize lightly in spring; avoid heavy feeding in fall to prevent weak late growth.
  3. Cutting back – Do not cut back in fall. Leave grasses standing through winter for visual interest and wildlife shelter. Cut them back in late winter or early spring before new growth.
  4. Division – Every 3–4 years, divide clumping grasses in spring to rejuvenate growth and prevent overcrowding.
  5. Winter care – Tall grasses may flop under snow. Tie them loosely with twine to maintain structure.

Pairing Grasses With Fall Bloomers

For maximum seasonal drama, pair grasses with other fall plants:

  • With asters: The airy plumes of switchgrass complement the daisy-like flowers of asters.
  • With rudbeckia: Bold yellow coneflowers pop against burgundy fountain grass.
  • With mums: The dense blooms of chrysanthemums contrast with the wispy texture of miscanthus.
  • With sedums: Sedum ‘Autumn Joy’ and feather reed grass create a sculptural, long-lasting combination.
  • With ornamental kale: The structural rosettes of kale balance the vertical lines of grasses in containers.

Ornamental Grasses for Different Garden Styles

  • Modern gardens: Opt for upright species like feather reed grass in clean, architectural plantings.
  • Cottage gardens: Choose flowing varieties like fountain grass or miscanthus for a romantic look.
  • Prairie gardens: Combine switchgrass and little bluestem with native wildflowers.
  • Mediterranean gardens: Use drought-tolerant grasses like stipa (Mexican feather grass) with lavender and sage.

Conclusion

Ornamental grasses are more than just background plants; they’re powerful tools for adding texture, movement, and seasonal drama, particularly in fall. Their plumes catch the light, their colors shift with the season, and their presence carries a garden gracefully into winter.

By choosing the right varieties and pairing them thoughtfully with fall flowers and foliage, you can create gardens and containers that feel vibrant, layered, and alive even as the days grow shorter. Low-maintenance yet high-impact, ornamental grasses are the unsung heroes of fall texture—once you start using them, you’ll wonder how your autumn displays ever did without them.

The Best Late-Season Flowering Plants for Containers

The Best Late-Season Flowering Plants for Containers

Container gardening has become a go-to solution for gardeners with limited space, or those who love to bring vibrant, seasonal color to porches, patios, and balconies. While spring and summer typically steal the show with bright blooms, late-season gardening offers just as much beauty and even more resilience. By carefully choosing flowering plants that thrive in cooler weather, you can extend your garden’s life and enjoy a splash of color well into fall, sometimes right up to the first frost.

In this article, we’ll explore some of the best late-season flowering plants for containers, along with planting tips, design ideas, and care strategies to keep your containers lively and stunning as the seasons change.


Why Choose Late-Season Flowering Plants for Containers?

Containers are versatile, mobile, and easy to maintain compared to garden beds. As temperatures cool in late summer and early fall, many summer bloomers fade. That’s where late-season flowering plants come in. They’re bred or naturally inclined to thrive in cooler nights, shorter days, and fluctuating weather conditions.

Here’s why they’re a smart choice:

  1. Extended beauty – They provide color when most gardens are winding down.
  2. Pollinator support – Late-season bloomers help bees, butterflies, and other pollinators stock up before winter.
  3. Low maintenance – Many are hardy, require less water than summer bloomers, and tolerate fluctuating temperatures.
  4. Portable accents – Containers allow you to move plants around, protecting them from frost or showcasing them where they’ll be most appreciated.

Top Late-Season Flowering Plants for Containers

Here are five of the best choices for extending container color into the late season:


1. Chrysanthemums (Mums)

Arguably the star of the fall garden, chrysanthemums are synonymous with autumn containers. They come in an endless array of colors, from bold oranges and reds to softer pinks and purples.

Why They Shine in Containers:

  • Compact and dense, mums provide a lush, full look in pots.
  • They bloom prolifically right when other flowers fade.
  • They tolerate cooler nights without skipping a beat.

Care Tips:

  • Place mums in full sun for maximum blooms.
  • Water consistently, but avoid soggy soil—containers should have good drainage.
  • Deadhead spent blooms to encourage continuous flowering.

Design Idea: Combine mums with ornamental grasses like fountain grass or switchgrass for a stunning fall display with texture and height.


2. Pansies and Violas

Pansies and violas may seem delicate, but they’re surprisingly hardy. They thrive in cooler weather, often blooming well into late fall and even bouncing back after frost.

Why They Shine in Containers:

  • Available in endless color combinations, including jewel tones perfect for autumn.
  • Compact habit makes them great for edging or filling small pots.
  • They bloom heavily, offering consistent color.

Care Tips:

  • Give them partial to full sun.
  • Keep soil evenly moist—dry spells reduce bloom production.
  • Fertilize every 2–3 weeks with a balanced, water-soluble fertilizer to encourage continuous flowering.

Design Idea: Plant pansies in shallow bowls or tiered container arrangements, mixing several colors for a cheerful, mosaic-like effect.


3. Asters

Asters bring starry, daisy-like flowers in late summer and fall, making them a classic late-season choice. Their blue, purple, pink, and white hues complement autumn tones beautifully.

Why They Shine in Containers:

  • Bloom late into fall when other flowers fade.
  • Provide nectar for migrating butterflies and pollinators.
  • Upright and bushy, perfect for adding vertical presence in containers.

Care Tips:

  • Place in full sun for best flowering.
  • Water regularly, but let soil dry slightly between waterings.
  • Pinch back early in the season (if planting in summer) to encourage bushier growth.

Design Idea: Combine asters with trailing ivy or variegated foliage plants for a striking mix of textures in a container.


4. Sedums (Stonecrop)

Sedums are succulents known for their drought tolerance and fleshy leaves. In fall, varieties like Sedum ‘Autumn Joy’ burst into bloom with clusters of rosy pink flowers that deepen to bronze as temperatures drop.

Why They Shine in Containers:

  • Extremely low-maintenance and drought-tolerant.
  • Provide bold structure with thick stems and foliage.
  • Flowers add color while dried seed heads continue to look attractive through winter.

Care Tips:

  • Provide full sun and well-draining soil.
  • Avoid overwatering; sedums prefer drier conditions.
  • Pair with compact plants, as sedums have a strong presence on their own.

Design Idea: Use sedums as the centerpiece of a large container, with trailing plants like creeping jenny cascading over the edge for contrast.


5. Ornamental Kale and Cabbage

Though technically not flowers, ornamental kale and cabbage add late-season color with their ruffled, vividly colored leaves in shades of purple, white, and green. They thrive as temperatures drop, looking their best after a light frost.

Why They Shine in Containers:

  • Extremely cold-tolerant, often lasting through winter.
  • Provide bold, textured rosettes that act as “living flowers.”
  • Low maintenance and pair beautifully with late-season bloomers.

Care Tips:

  • Place in full sun for the richest color development.
  • Water regularly but ensure the container has good drainage.
  • Combine with flowering plants to soften their strong, sculptural look.

Design Idea: Plant ornamental kale in tall urns alongside pansies and trailing ivy for a dramatic, long-lasting autumn display.


Tips for Designing Late-Season Containers

Creating a striking fall container involves more than just choosing plants—you’ll want to balance colors, textures, and forms for a harmonious effect. Here are some design strategies:

  1. Think in layers – Use the classic “thriller, filler, spiller” method: tall focal plants (thrillers), medium-height bloomers (fillers), and trailing plants (spillers).
  2. Use autumn tones – Select flowers and foliage in oranges, yellows, purples, and deep reds to complement the season.
  3. Mix foliage and flowers – Pair blooming plants with colorful foliage like heucheras, coleus, or ornamental grasses.
  4. Choose hardy containers – Terracotta or ceramic pots may crack in cold; fiberglass, resin, or wood containers handle frost better.
  5. Group containers – Place several pots together at varying heights for a layered, dynamic effect.

Caring for Late-Season Containers

To keep your containers thriving through the season, follow these care essentials:

  • Regular watering – Cooler weather can trick gardeners into thinking plants need less water, but containers dry out quickly.
  • Fertilize lightly – A balanced fertilizer every 2–3 weeks helps maintain blooms.
  • Deadhead flowers – Removing faded blooms encourages more blossoms and keeps containers tidy.
  • Protect from frost – Move portable containers indoors or cover them with frost cloth during sudden cold snaps.

Conclusion

Late-season flowering plants for containers prove that gardening doesn’t have to end when summer does. With chrysanthemums, pansies, asters, sedums, and ornamental kale, you can enjoy vibrant colors, textures, and even pollinator activity well into autumn. Combined with smart container design and proper care, these plants ensure that your porch, patio, or balcony remains a lively, cheerful oasis right up until winter.

So, whether you’re refreshing tired summer pots or starting new fall arrangements, embrace the unique beauty of late-season bloomers—and let your containers shine when others fade.