6 Signs Your Plants Are Suffering From Dry Soil

6 Signs Your Plants Are Suffering From Dry Soil

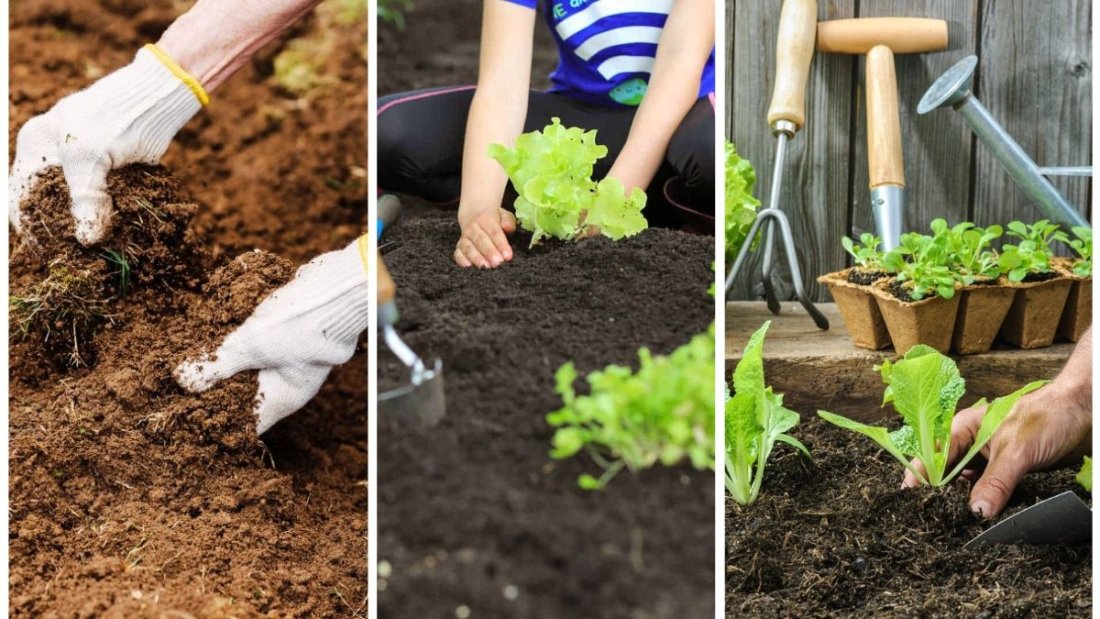
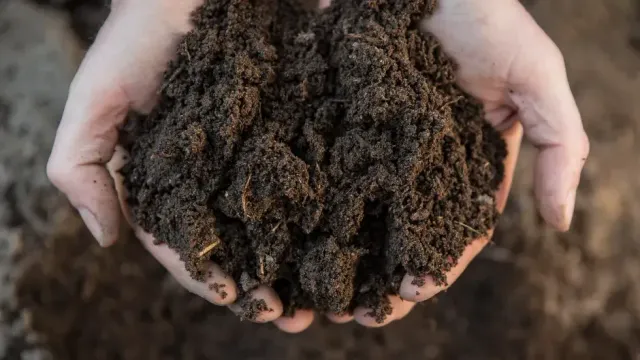
Healthy soil is the foundation of every thriving garden, but when soil becomes too dry, it can quickly stress plants and stunt their growth. Whether you’re caring for a small balcony container or a large backyard plot, understanding the signs of dry soil stress can help you intervene early and save your plants before irreversible damage occurs.

In this article, we’ll walk through six clear signs that indicate your plants are suffering from dry soil, explain why they occur, and share actionable solutions to restore soil moisture and plant vitality.


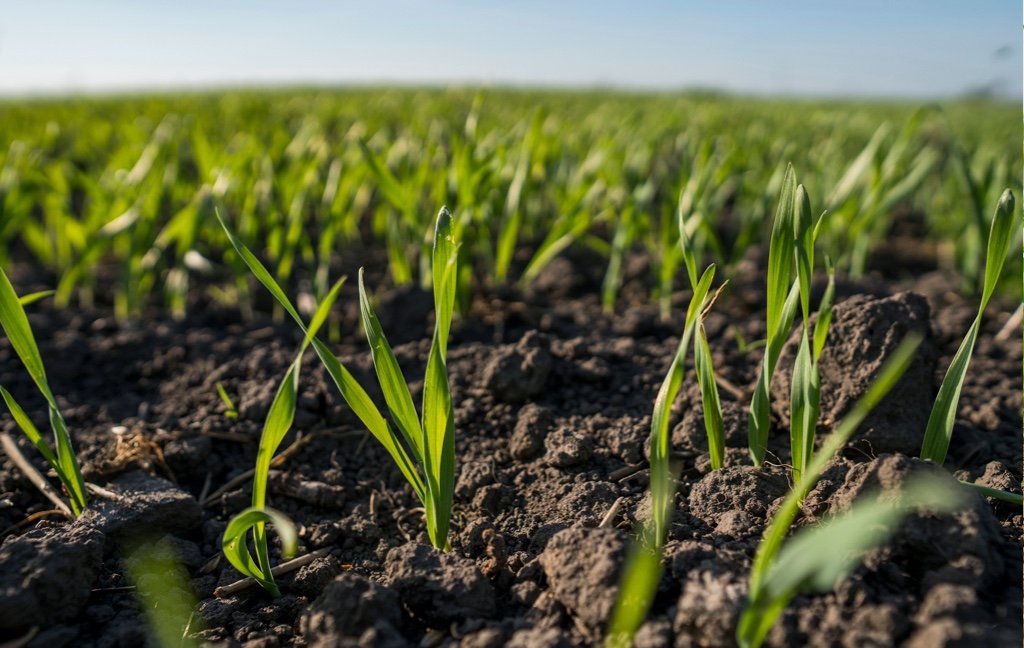
1. Wilting or Drooping Leaves

One of the earliest and most visible signs of dry soil is wilting leaves. When plants don’t have enough water, they cannot maintain turgor pressure—the internal water pressure that keeps leaves firm and upright.

  • Why it happens:
    Without sufficient moisture, roots cannot pull enough water to support the plant’s cells. As a result, leaves begin to droop or curl inward.
  • What to look for:
    Leaves may appear limp during the hottest part of the day but recover in the evening. If they stay wilted even after sunset, the soil is likely severely dry.
  • Solution:
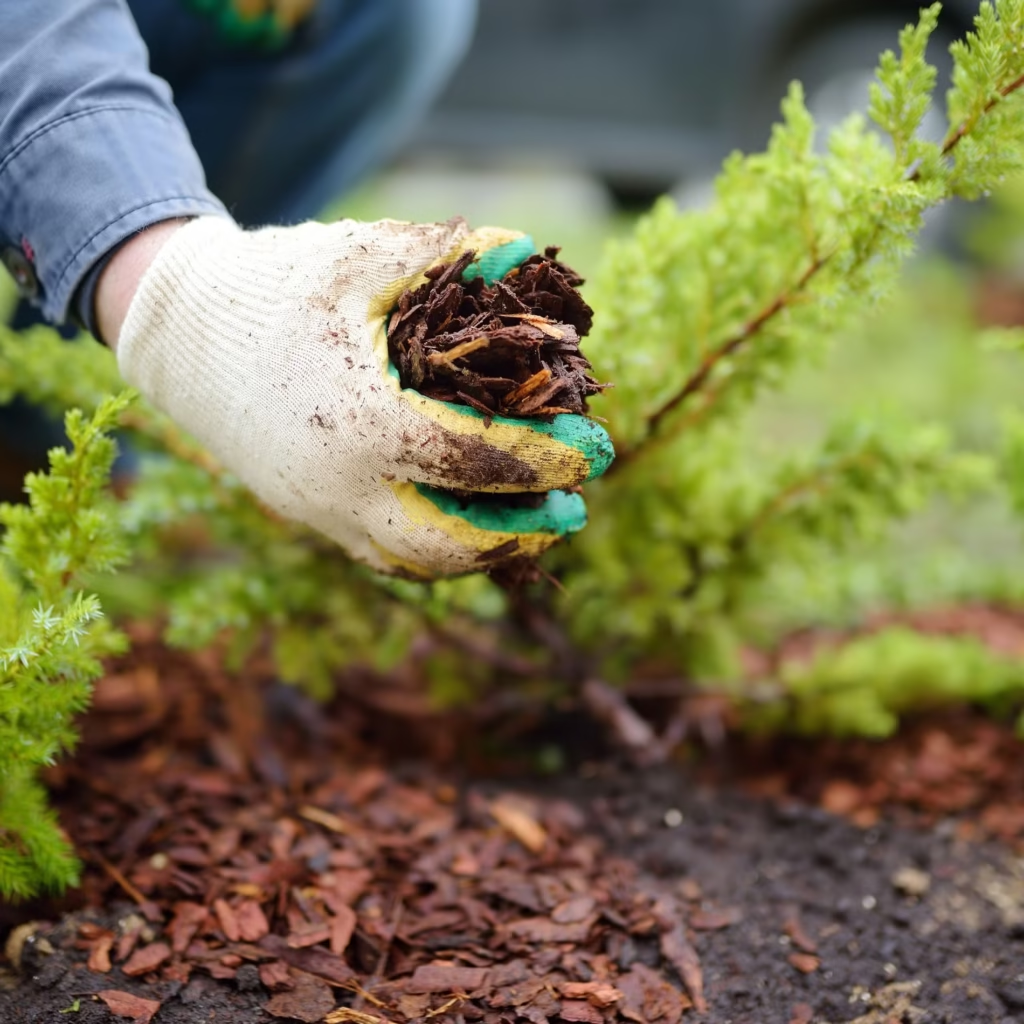
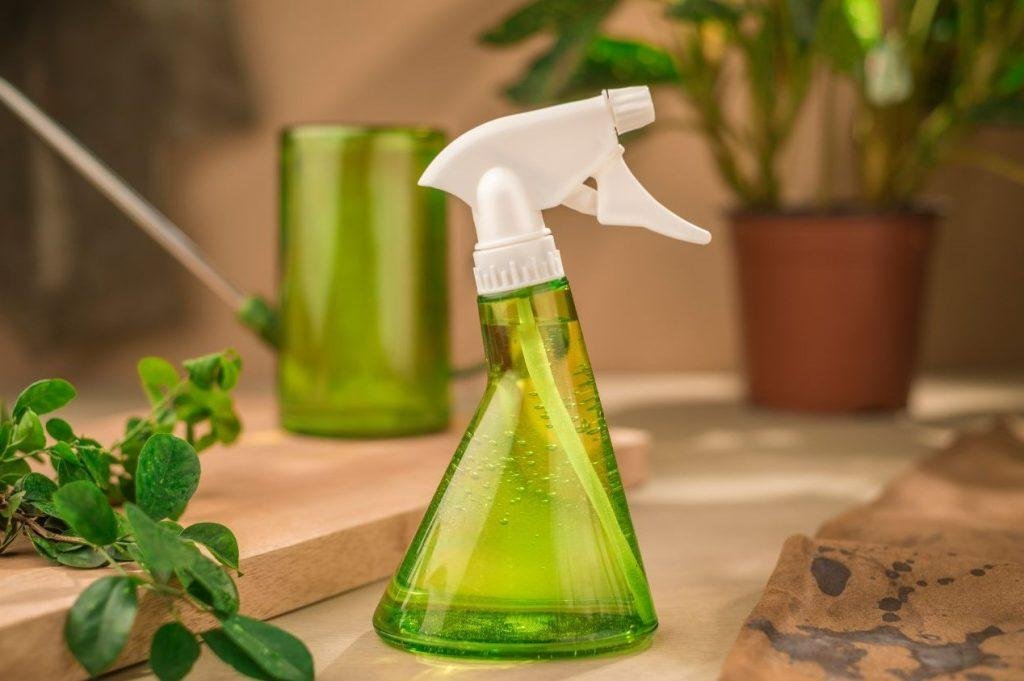
    Water deeply to ensure moisture reaches the root zone rather than just the surface. Adding mulch around plants can also help reduce evaporation and maintain soil moisture longer.

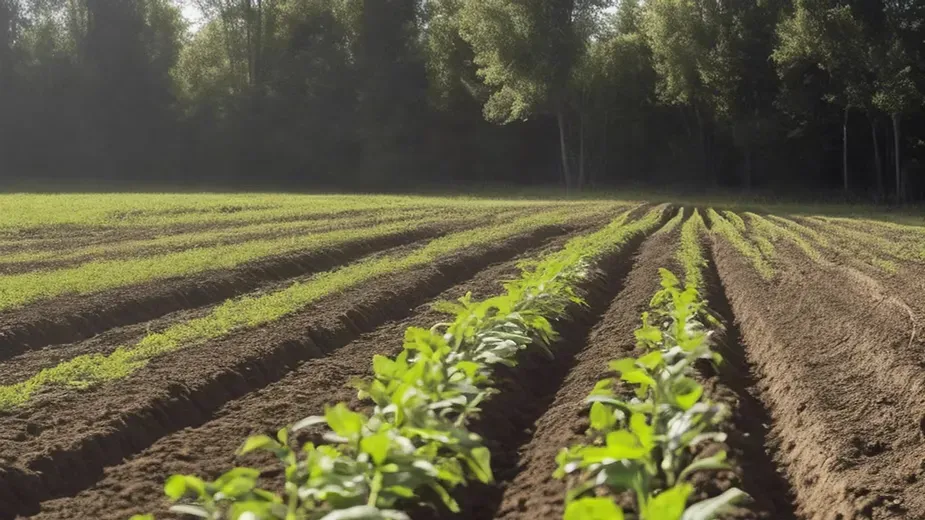
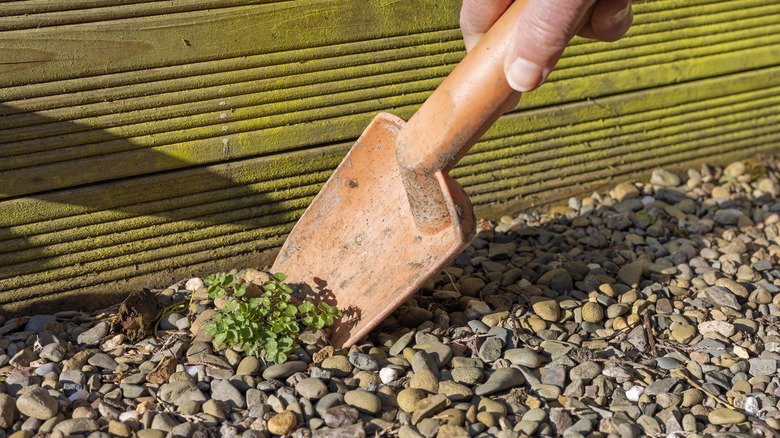
2. Dry, Crumbly, or Cracked Soil Surface

The soil itself often tells the story before plants do. If you notice dusty, cracked, or hard soil, it’s a strong indicator that moisture is lacking.

  • Why it happens:
    Extended periods of sun exposure and lack of watering cause the top layer of soil to dry out, creating a crusty surface that repels water instead of absorbing it.
  • What to look for:
    • Soil that pulls away from the edges of containers.
    • Large cracks in the ground in garden beds.
    • A pale, ashy appearance on the soil surface.
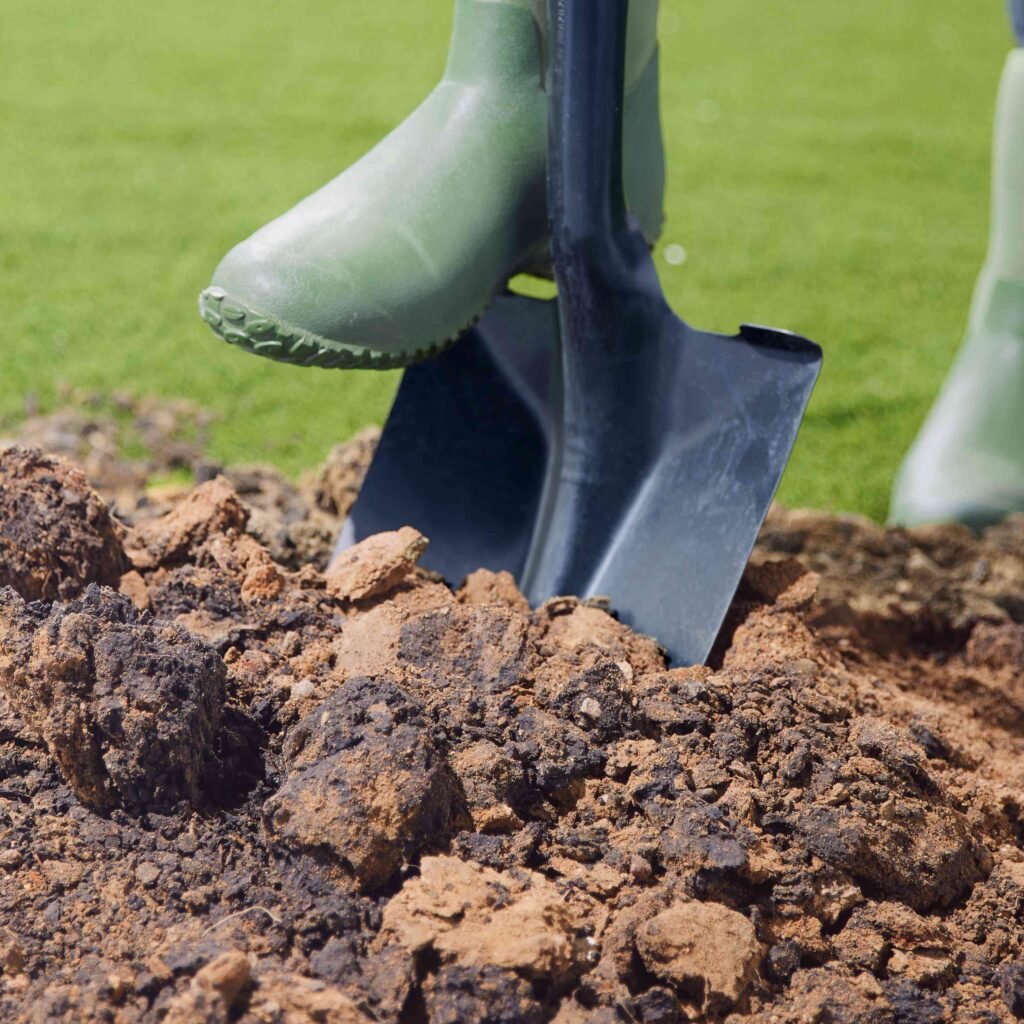
  • Solution:
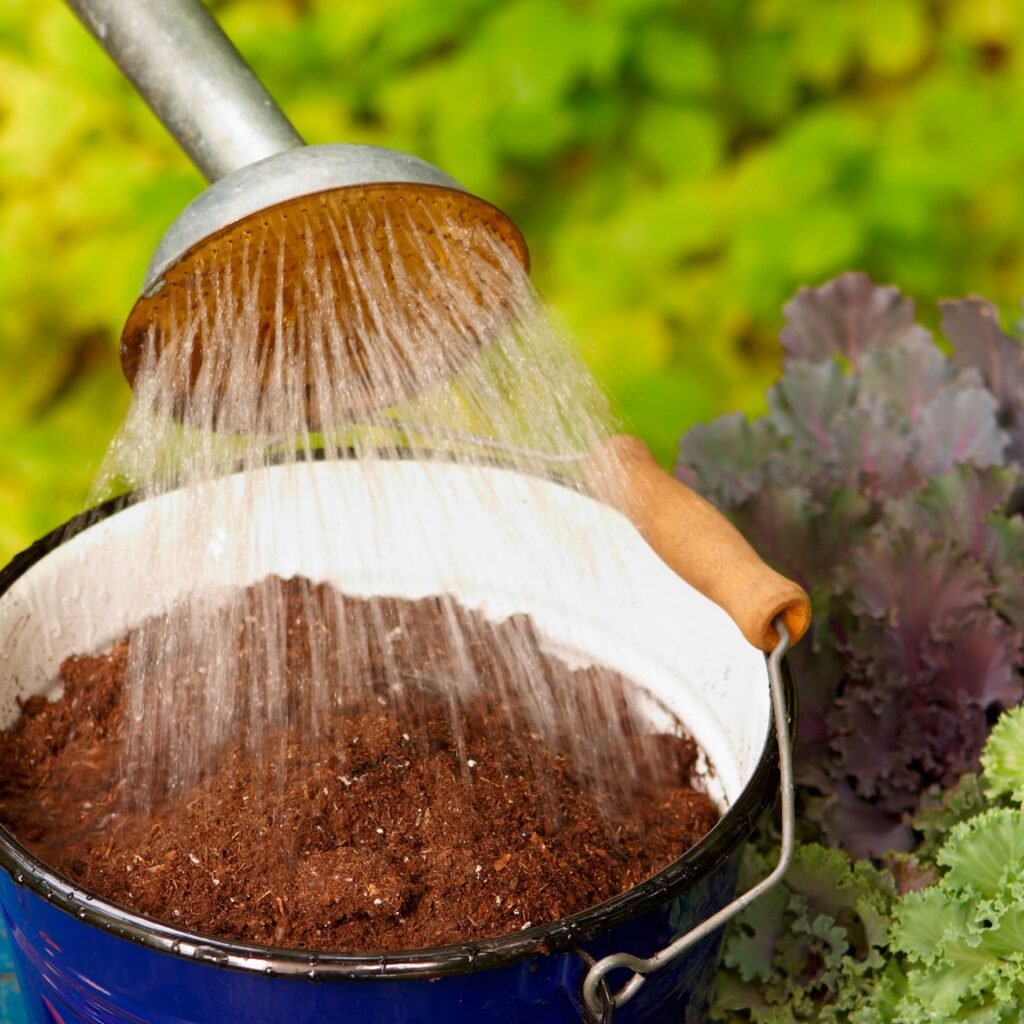
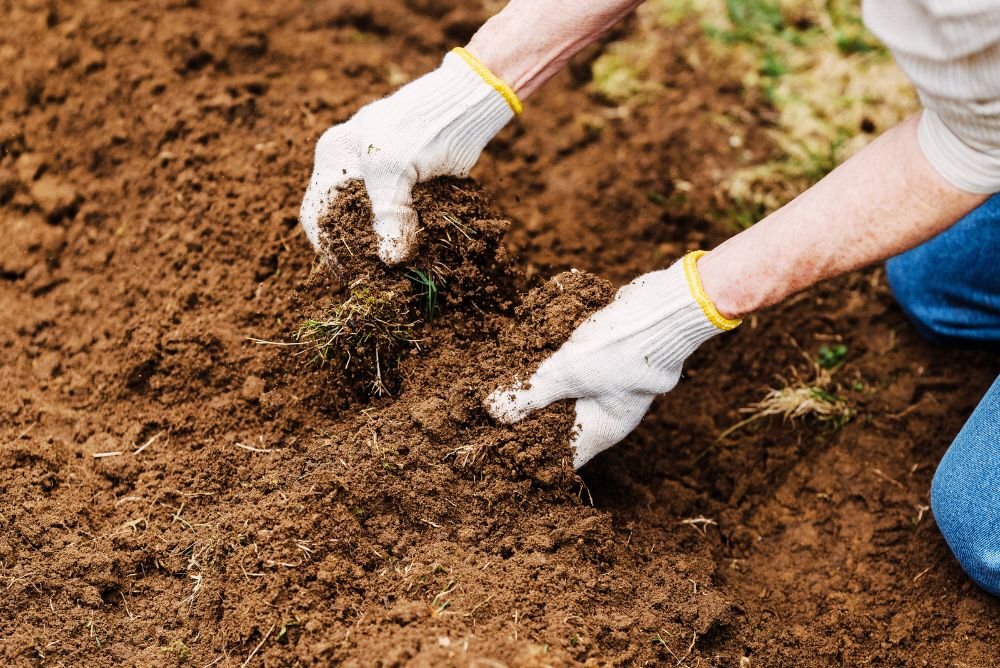
    Break up hardened soil gently with a garden fork, then water slowly so the soil absorbs moisture instead of letting it run off. Consider amending soil with compost or coconut coir, which improves water retention.

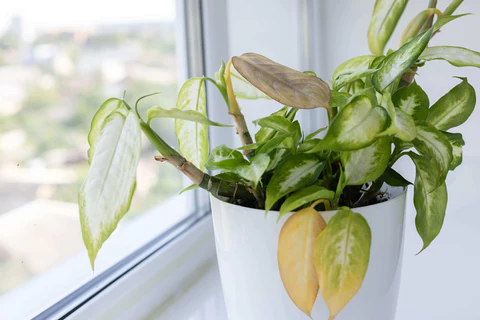
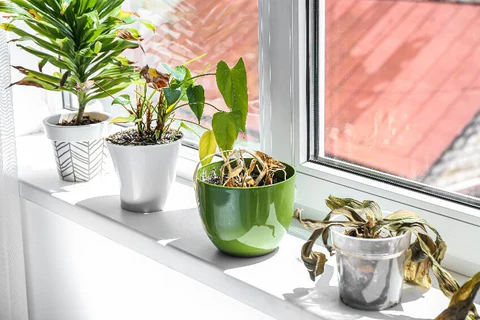
3. Yellowing or Browning Leaves

When soil is too dry, leaves may turn yellow at the edges or brown and crispy. While nutrient deficiencies can also cause discoloration, drought stress often shows up as scorched or brittle leaf tips.

  • Why it happens:
    With limited water, plants struggle to photosynthesize properly. The stress causes leaf cells to die, leading to visible browning and early leaf drop.
  • What to look for:
    • Leaves that look burnt around the edges.
    • Sudden yellowing of lower leaves while upper ones stay green.
    • Leaves falling prematurely from the plant.
  • Solution:
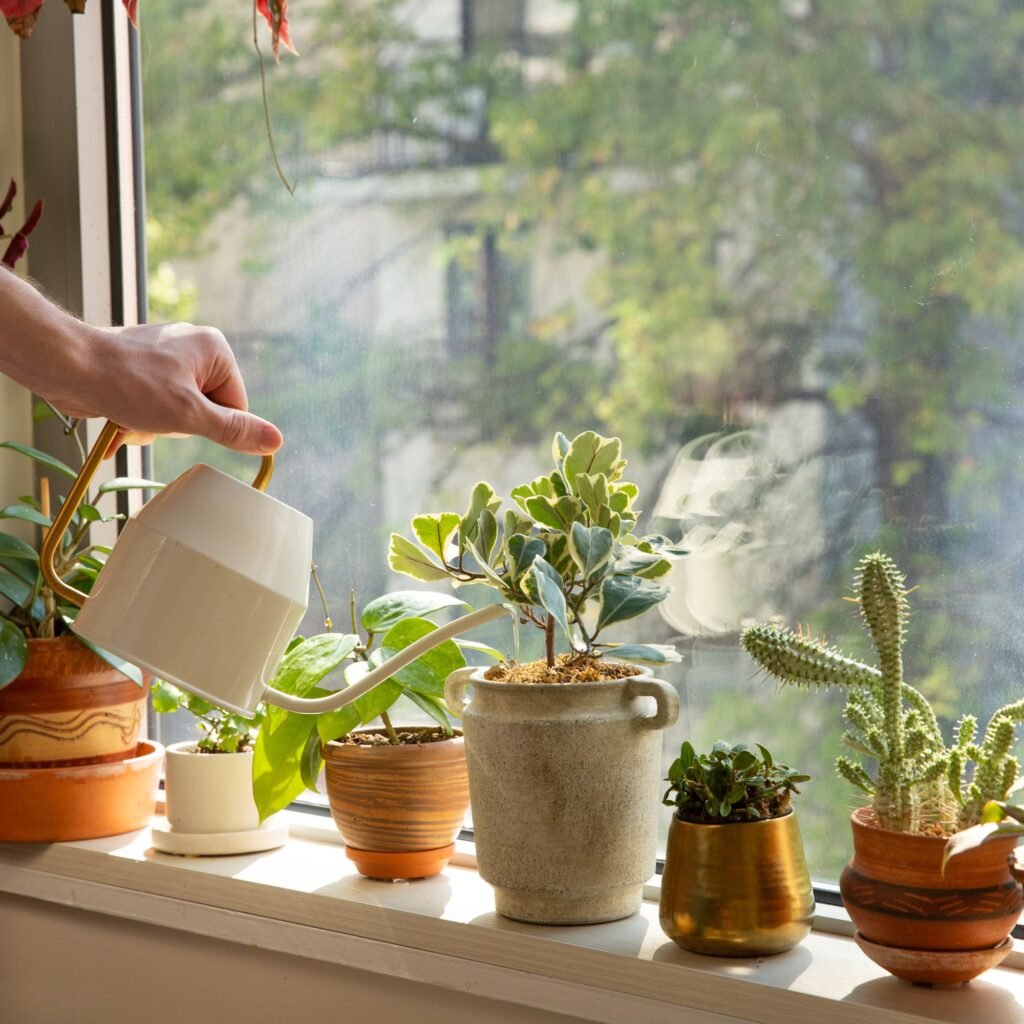
    Apply water directly to the root zone instead of just wetting leaves. For container plants, soak pots in a tray of water for 15–20 minutes to allow the soil to rehydrate fully.

4. Stunted Growth or Poor Flowering

If your plants seem stuck—producing fewer leaves, small blossoms, or failing to fruit—dry soil may be the culprit.

  • Why it happens:
    When water is scarce, plants enter survival mode. Instead of channeling energy into growth or reproduction, they conserve resources just to stay alive.
  • What to look for:
    • Plants that don’t grow taller or spread as expected.
    • Flowering plants that produce small or misshapen blooms.
    • Vegetable plants that fail to set fruit despite flowering.
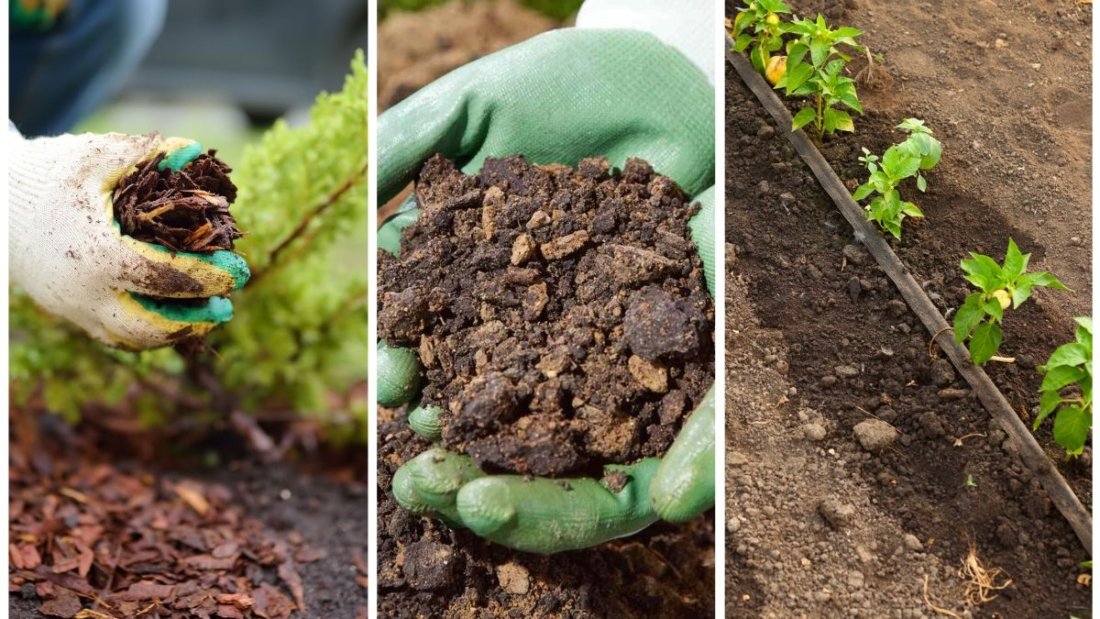
  • Solution:
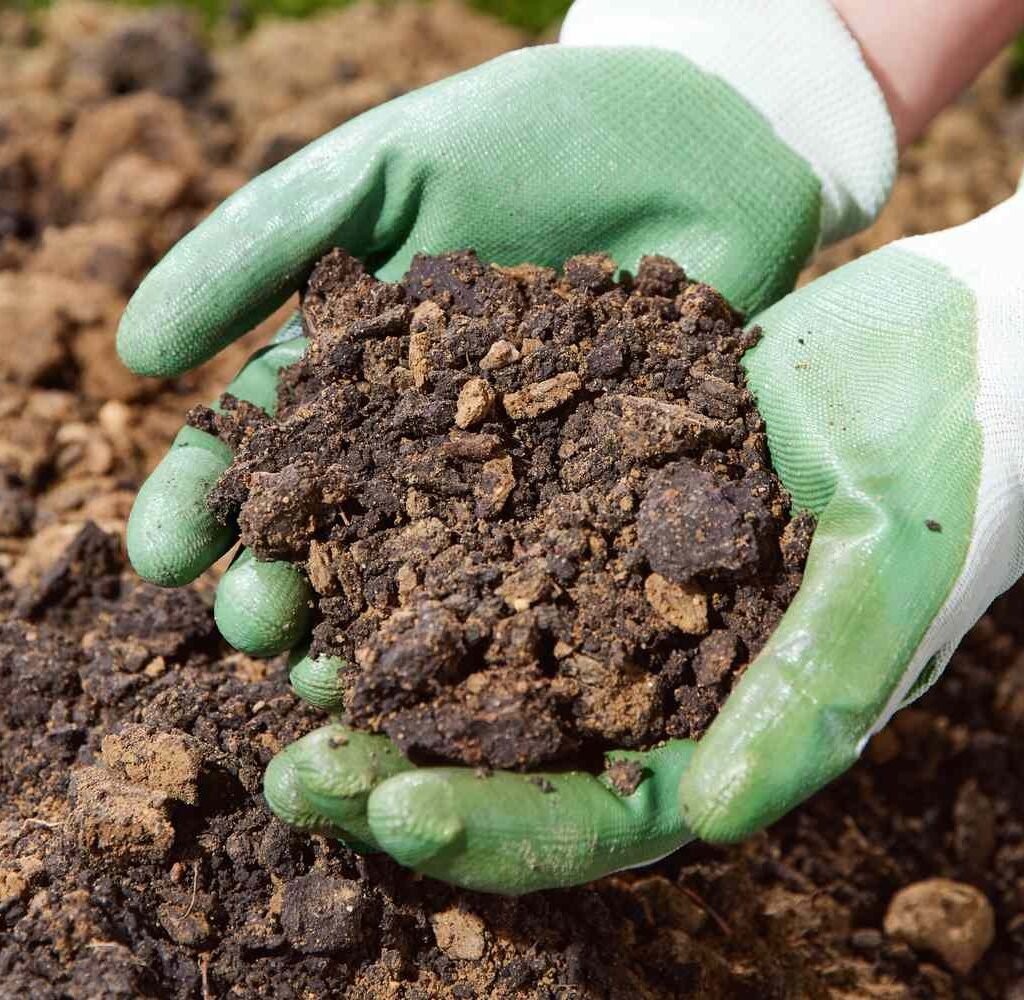
    Improve soil structure with organic matter such as compost or aged manure. This not only retains water but also provides nutrients plants need for robust growth. Regular, consistent watering schedules are also key—avoid cycles of overwatering and complete dryness.

5. Brittle or Weak Stems

Healthy plants typically have flexible stems, but when soil is too dry, stems may become weak, thin, or even snap easily.

  • Why it happens:
    Without water, plants can’t transport nutrients through their vascular system effectively. This weakens structural tissues, leading to brittle stems and slowed growth.
  • What to look for:
    • Stems that appear thin compared to normal growth.
    • Plants that flop over because stems cannot support them.
    • Cracks or shriveling along the stem base.
  • Solution:
    Provide steady hydration and protect the base of plants with mulch or ground covers. If growing in containers, make sure pots aren’t placed in direct heat that causes rapid drying.

6. Increased Pest Problems

A surprising sign of dry soil stress is a sudden increase in pests like spider mites, aphids, or whiteflies.

  • Why it happens:
    Stressed plants release chemical signals that attract pests. Additionally, dry conditions create an environment where pests like spider mites thrive, multiplying rapidly.
  • What to look for:
    • Fine webbing on leaves (spider mites).
    • Sticky residue (honeydew) left by aphids.
    • Clusters of small insects around weakened plants.
  • Solution:
    Rehydrate plants and restore their natural resilience. Regular misting (for non-fungal-prone plants) can also help deter mites. Strong, hydrated plants are less likely to succumb to pest infestations.

Preventing Dry Soil Stress

Recognizing the signs is important, but prevention is the best approach. Here are some proactive strategies:

  1. Mulching: Apply a 2–3 inch layer of organic mulch (wood chips, straw, or leaves) to keep soil cooler and retain moisture.
  2. Soil Amendments: Add compost, peat moss, or coconut coir to improve water-holding capacity.
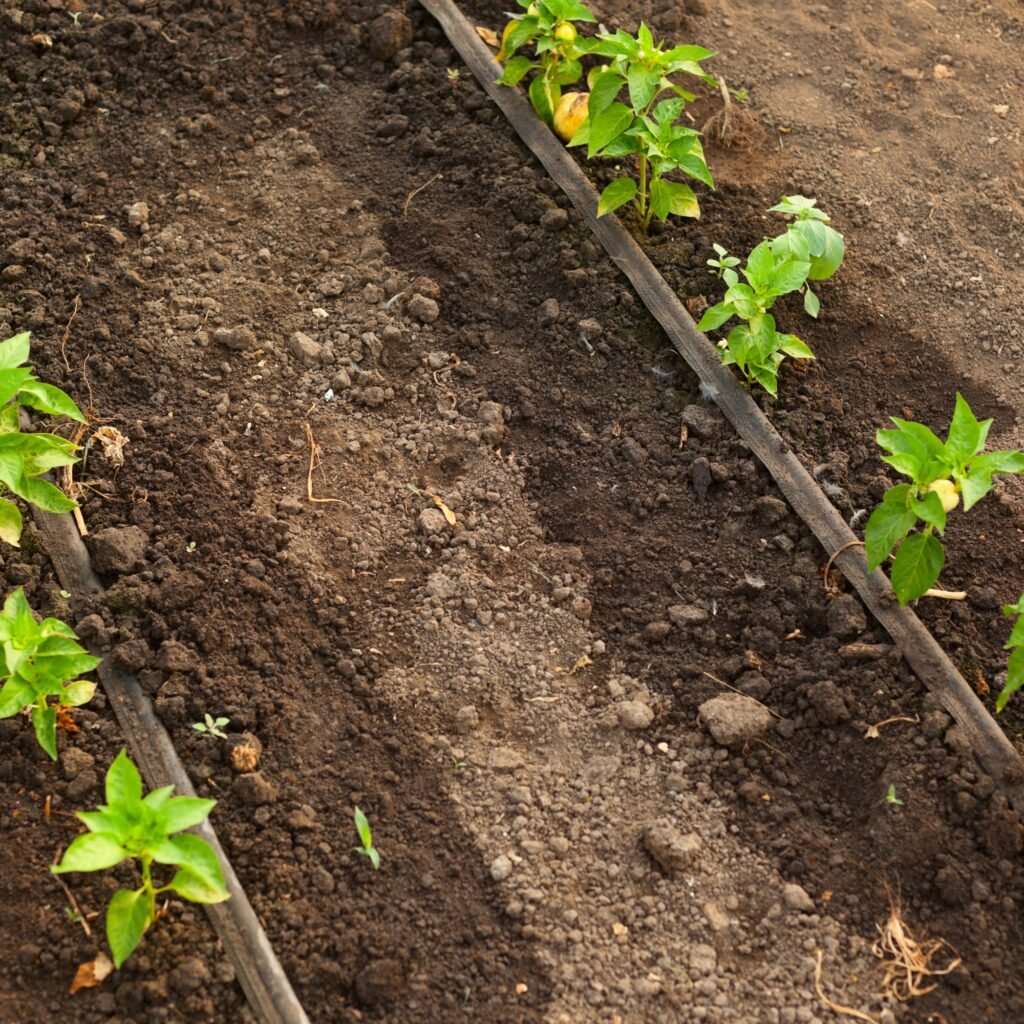
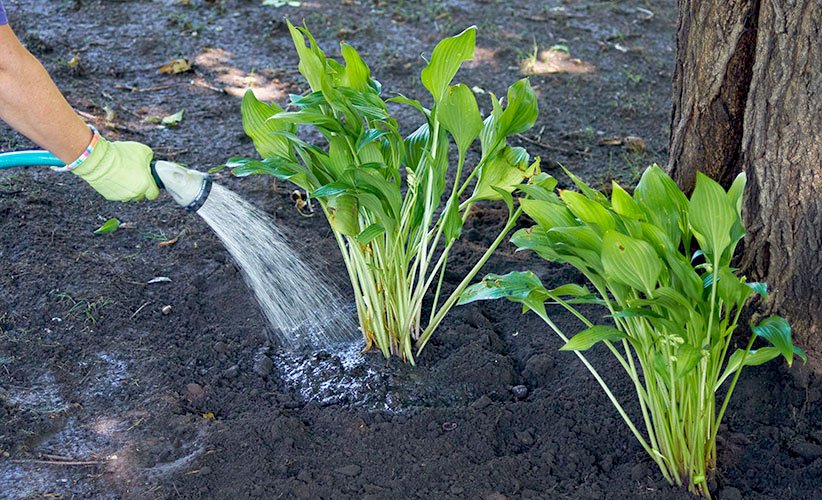
  3. Deep Watering: Water less frequently but more thoroughly to encourage deeper root growth.
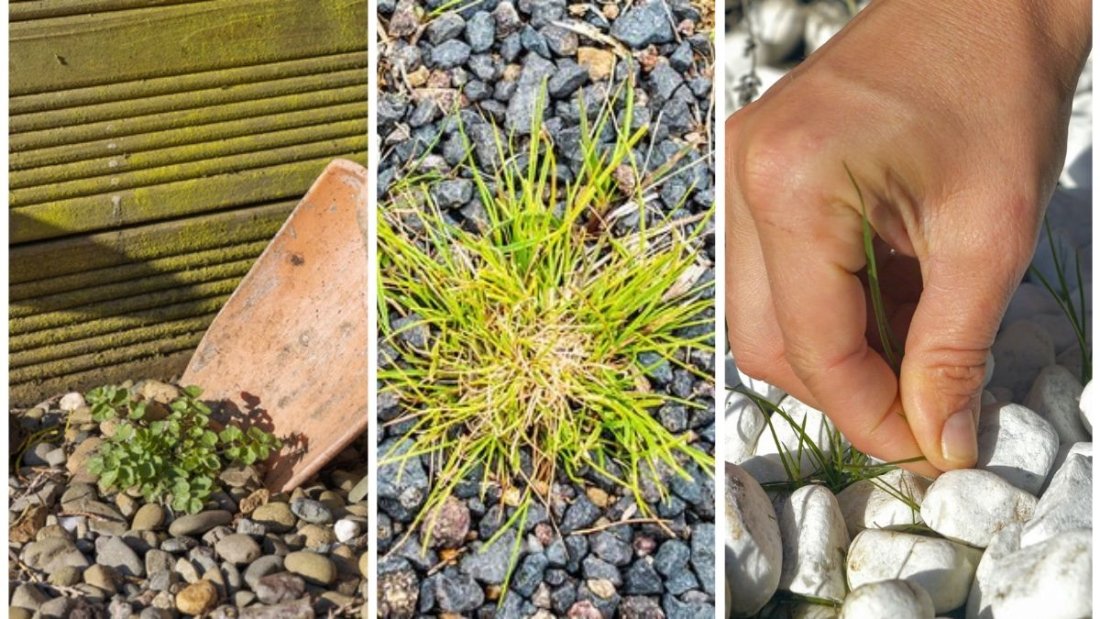
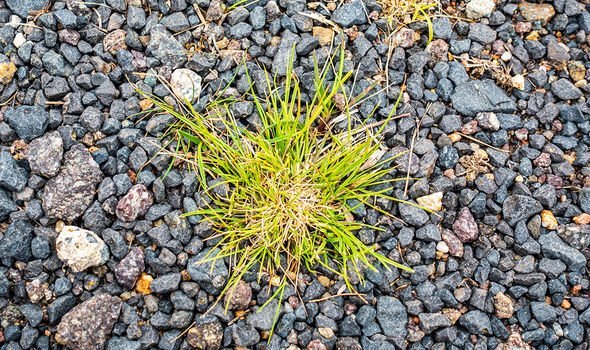
  4. Choose Drought-Tolerant Plants: If you live in a dry region, opt for species that naturally withstand dry conditions, like lavender, succulents, or ornamental grasses.
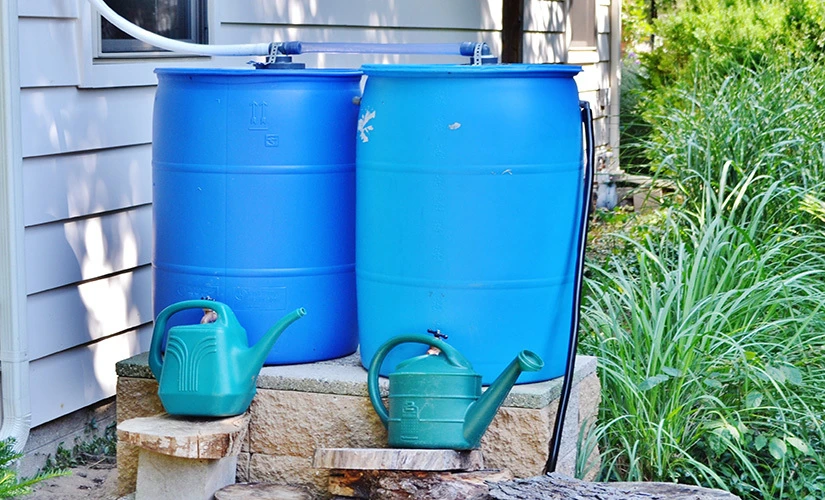
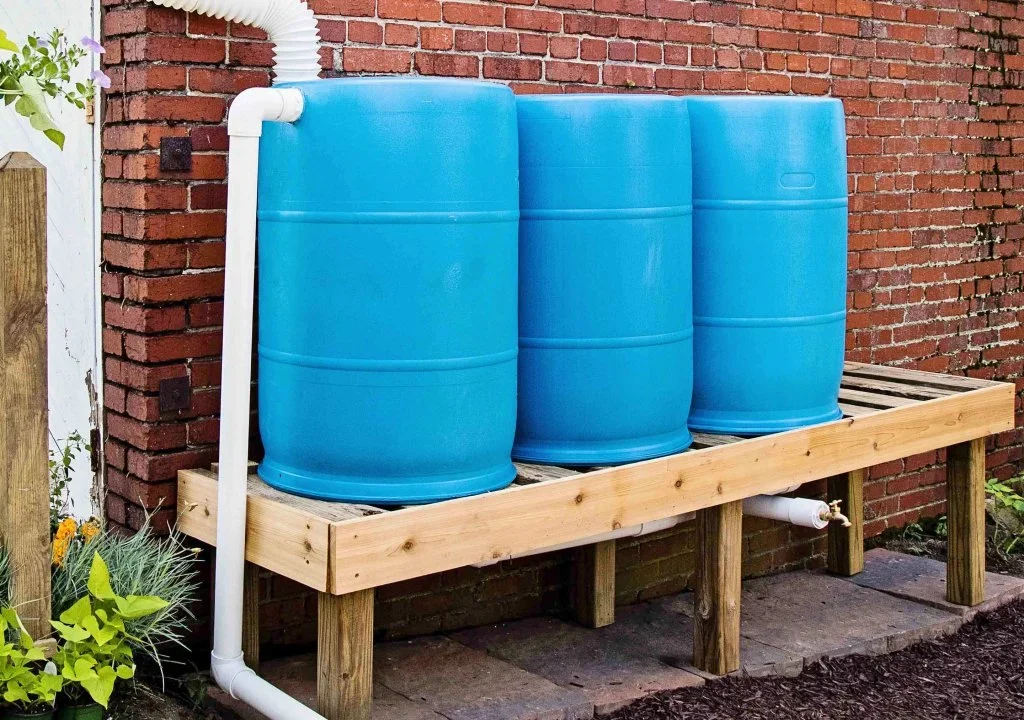
  5. Irrigation Systems: Use drip irrigation or soaker hoses for consistent moisture delivery.

Final Thoughts

Dry soil is one of the most common problems gardeners face, especially during hot summers or in regions with low rainfall. By recognizing the six key signs—wilting leaves, dry and cracked soil, yellowing foliage, stunted growth, brittle stems, and increased pests—you can take quick action to revive your plants and prevent long-term damage.

Remember, the health of your soil directly impacts the health of your plants. With proper care, smart watering techniques, and soil-enriching practices, you can keep your garden lush, vibrant, and resilient against dry spells.

The Right Way To Use Rain Barrels For Watering

The Right Way To Use Rain Barrels For Watering

Water is one of the most valuable resources in gardening, yet it’s often taken for granted. Between rising utility costs, unpredictable rainfall, and growing awareness of sustainability, many gardeners are turning to rain barrels as a smart, eco-friendly way to conserve water. Collecting rainwater isn’t new — it’s an age-old practice — but using it correctly can make a big difference in both your garden’s health and your water bill.

This article explores the right way to use rain barrels for watering, from setup and safety to efficient irrigation methods and long-term maintenance.


Why Use Rain Barrels?

Before diving into the “how,” let’s understand the “why.” Rain barrels aren’t just about saving money. They play an essential role in water conservation and soil health.

Key Benefits:

  • Reduces Water Bills: Rainwater is free and lowers reliance on municipal water.
  • Eco-Friendly: Less stormwater runoff means reduced pollution and erosion.
  • Better for Plants: Rainwater is naturally soft and chemical-free, unlike tap water that may contain chlorine, fluoride, or salts.
  • Emergency Backup: In times of water restrictions or drought, collected rainwater ensures your garden stays hydrated.

With these benefits in mind, let’s look at how to properly use rain barrels.


1. Choosing the Right Rain Barrel

Not all rain barrels are created equal. The right choice depends on your garden’s size, roof setup, and climate.

Features to Look For:

  • Capacity: Common sizes range from 50–100 gallons. Larger gardens may need multiple barrels connected.
  • Material: UV-resistant plastic is durable and lightweight, while wood barrels add charm but require more maintenance.
  • Overflow System: Prevents water from spilling over during heavy rains.
  • Spigot Placement: Ideally located near the bottom for easy hose attachment.
  • Screened Lid: Keeps out leaves, debris, and mosquitoes.

Pro Tip:

If possible, choose a rain barrel with a linking kit so you can connect multiple barrels for greater capacity.


2. Proper Placement and Setup

Where you place your rain barrel makes all the difference in how effectively it collects and distributes water.

Best Practices:

  • Locate Beneath a Downspout: Direct a gutter downspout into the barrel for maximum catchment.
  • Elevate the Barrel: Place it on cinder blocks or a sturdy stand to improve water pressure and make filling watering cans easier.
  • Ensure Level Ground: A full barrel is heavy (up to 400+ pounds), so it must sit on stable ground.
  • Install Overflow Hose: Direct excess water away from your home’s foundation.

A well-placed rain barrel can capture hundreds of gallons of water in a single storm, depending on your roof size.


3. Using Rain Barrel Water Safely

Rainwater is generally safe for plants, but proper handling ensures it remains clean and effective.

Do’s:

  • Water Edible Plants at the Soil Level: Use rainwater for fruits, vegetables, and herbs by applying it directly to the soil, not the leaves, to reduce risk of contamination.
  • Use Quickly: Stagnant water can breed algae and mosquitoes. Aim to use your rainwater within 7–10 days.
  • Keep it Covered: Always use a tight-fitting screen lid to keep pests and debris out.

Don’ts:

  • Avoid drinking rain barrel water unless it’s properly filtered and treated.
  • Don’t collect rainwater from roofs treated with toxic chemicals (like some older tar or copper-based materials).

4. Efficient Watering Methods with Rain Barrels

Simply dipping a watering can is fine for small gardens, but there are smarter ways to integrate rain barrel water into your irrigation system.

Options:

  1. Soaker Hoses: Attach a soaker hose to the spigot and let it slowly seep water directly into the soil. Best for vegetable rows and flower beds.
  2. Drip Irrigation Systems: With a pressure regulator or pump, rain barrels can power drip irrigation lines, saving water and time.
  3. Gravity-Fed Systems: By elevating the barrel, gravity creates enough pressure to fill cans or power short hose runs.
  4. Manual Watering: Use the spigot to fill buckets or cans for hand-watering delicate plants.

Pro Tip:

For maximum efficiency, water early in the morning or evening to reduce evaporation.


5. Seasonal Care and Maintenance

Rain barrels require periodic upkeep to keep water clean and the system functional.

Regular Maintenance:

  • Clean Filters and Screens: Remove leaves, pollen, and debris monthly.
  • Check for Leaks: Inspect spigots, hoses, and seals.
  • Scrub the Interior: Every few months, empty the barrel and scrub with a mild vinegar solution to prevent algae.
  • Prevent Mosquito Breeding: Use mosquito dunks (Bti tablets) if needed — they are safe for plants and pets.

Winter Care (in cold climates):

  • Drain barrels completely before freezing temperatures.
  • Disconnect from downspouts and store upside down to prevent cracking.
  • Reconnect in spring once the danger of freezing passes.

6. Maximizing Rain Barrel Efficiency

To get the most out of your rain barrel system, consider these strategies:

  • Install Multiple Barrels: Chain them together to increase storage.
  • Use Rainwater First: Prioritize barrel water before turning to tap water.
  • Combine with Mulching: Rainwater plus mulched soil extends moisture retention.
  • Track Rainfall: Know when your barrel is likely to fill by monitoring local rainfall averages.

Even a single 1,000-square-foot roof can yield over 600 gallons of water from just one inch of rainfall — enough to sustain most backyard gardens for weeks.


7. Common Mistakes to Avoid

New users often make simple mistakes that reduce efficiency or compromise safety.

  • Placing the barrel directly on soil → causes shifting and tipping. Always use a stand.
  • Ignoring overflow control → leads to flooding around foundations.
  • Using non-food-safe containers → can leach harmful chemicals into water.
  • Letting water stagnate for weeks → encourages algae and mosquito breeding.

Avoiding these errors keeps your system clean, safe, and productive.


8. Integrating Rain Barrels into Sustainable Gardening

Rain barrels are most effective when combined with other eco-friendly practices:

  • Compost Tea: Use collected rainwater to brew nutrient-rich compost tea.
  • Raised Beds with Drip Irrigation: Pairing rain barrels with raised beds creates a water-efficient growing system.
  • Native Plants: Combine rainwater use with drought-tolerant species for maximum water conservation.
  • Rain Gardens: Direct overflow into rain gardens to reduce runoff while beautifying your yard.

This integration not only conserves water but also builds healthier soil and reduces your garden’s ecological footprint.


Conclusion

Using rain barrels the right way isn’t just about collecting water — it’s about building a sustainable water cycle in your garden. From choosing the right barrel and setting it up properly, to maintaining it and using efficient irrigation methods, each step ensures that your plants benefit from fresh, chemical-free rainwater.

By adopting rain barrels, you’re not only saving money and reducing reliance on municipal systems but also contributing to a healthier environment. Every drop collected and reused is a step toward smarter gardening and more resilient soil.

So the next time it rains, let your roof do the work — and your rain barrel keep your garden thriving.

Why Rotating Crops Improves Soil Health

Why Rotating Crops Improves Soil Health

Soil is the living foundation of every successful garden and farm. Beneath the surface lies a bustling ecosystem of microbes, minerals, fungi, and organic matter — all of which play vital roles in plant growth. But when the same crop is grown in the same spot year after year, that natural balance begins to break down. Nutrients are stripped unevenly, pests become entrenched, and soil structure weakens.

Crop rotation — the practice of planting different types of crops in the same area in sequential seasons — is one of the oldest and most effective ways to maintain and even improve soil health. It’s a simple concept with powerful benefits, and it remains just as important today as it was in traditional agriculture centuries ago.

In this article, we’ll explore how and why rotating crops improves soil health, and how you can apply this practice to gardens of any size.


1. Balances and Replenishes Soil Nutrients

Every plant species has different nutrient demands. When you grow the same crop repeatedly, it continuously draws the same nutrients from the soil, leading to imbalances and deficiencies. Crop rotation prevents this by alternating crops with different nutrient needs.

How It Works:

  • Heavy Feeders: Crops like tomatoes, corn, and cabbage consume large amounts of nitrogen and phosphorus.
  • Light Feeders: Crops such as carrots, onions, and beets need fewer nutrients.
  • Soil Builders: Legumes (beans, peas, clover) fix atmospheric nitrogen into the soil, replenishing what other crops remove.

For example, following a nitrogen-hungry crop like corn with a nitrogen-fixing legume enriches the soil naturally, reducing the need for synthetic fertilizers. Over time, this rotation builds a more nutrient-balanced soil that can sustain healthier plants.


2. Reduces Pest and Disease Build-Up

Many soil-borne pests and diseases specialize in specific plant families. When their favorite host plants return to the same spot each year, their populations multiply and become harder to control. Crop rotation interrupts this cycle.

Example:

  • Root maggots thrive in brassicas (cabbage, broccoli). Rotating with non-brassicas like carrots or beans deprives them of a host.
  • Nematodes that attack tomatoes decline if the next crop is unrelated, such as lettuce or corn.

By changing crops annually, you “confuse” pests and pathogens, making it difficult for them to establish permanent colonies. This reduces reliance on pesticides and promotes a healthier, more resilient soil ecosystem.


3. Improves Soil Structure and Organic Matter

Different crops have different root structures — and that’s great news for your soil. Rotating crops with varied root depths and types improves soil structure, aeration, and organic matter content.

Root Diversity Benefits:

  • Deep-Rooted Crops (e.g., sunflowers, alfalfa): Break up compacted layers, improving drainage and root penetration for future plants.
  • Fibrous-Rooted Crops (e.g., grasses, wheat): Create a dense network that binds soil particles and prevents erosion.
  • Shallow-Rooted Crops (e.g., lettuce, spinach): Utilize topsoil nutrients without disturbing deeper layers.

As old roots decompose, they add organic matter, which enhances moisture retention and microbial activity. A rotation plan that alternates root types builds a healthier soil structure year after year.


4. Enhances Soil Microbial Life

Healthy soil isn’t just a mix of minerals — it’s alive with billions of bacteria, fungi, and other microorganisms. These organisms help break down organic matter, fix nitrogen, and make nutrients available to plants. But monocropping (planting the same crop repeatedly) favors only certain microbes and reduces diversity.

Crop rotation keeps the soil microbiome dynamic. Each plant releases unique root exudates (natural chemicals) that feed different microbial populations. By changing crops, you support a broader range of beneficial organisms, leading to improved nutrient cycling and disease suppression.

Microbial Benefits of Rotation:

  • Increased biodiversity improves soil resilience.
  • Mycorrhizal fungi thrive with diverse plant hosts.
  • Beneficial bacteria populations rebound, outcompeting harmful pathogens.

The result is soil that’s biologically active and more capable of supporting robust plant growth.


5. Boosts Soil Fertility Naturally

Synthetic fertilizers may provide short-term nutrition, but they can’t replace the natural fertility that builds over time with proper rotation. Rotating nitrogen-fixing crops with heavy feeders is particularly effective in maintaining soil fertility.

Example Rotation Sequence:

  1. Legumes (beans, peas): Fix nitrogen into the soil.
  2. Leafy Crops (lettuce, spinach): Benefit from nitrogen boost.
  3. Fruiting Crops (tomatoes, peppers): Use phosphorus and potassium for flower and fruit production.
  4. Root Crops (carrots, beets): Utilize deeper soil nutrients.

This cycle minimizes fertilizer needs and reduces nutrient leaching. Over time, it builds a naturally fertile soil environment where plants thrive with minimal external inputs.


6. Prevents Soil Erosion and Degradation

Monocropping often leaves soil vulnerable to erosion and degradation, especially when the same root types or growth patterns are used year after year. Crop rotation, especially when combined with cover cropping, stabilizes soil structure and protects against erosion.

  • Crops with dense root systems hold soil in place.
  • Deep-rooted species pull up nutrients from lower layers.
  • Rotating crops prevents depletion of surface organic matter.

This protective effect ensures that your soil remains rich, stable, and capable of supporting crops season after season.


7. Improves Water Retention and Soil Moisture Balance

Crop diversity doesn’t just improve fertility — it also enhances the soil’s ability to retain moisture. Crops with different root systems and canopy covers help regulate how water infiltrates and is stored in the soil.

  • Deep roots draw water from deeper layers, reducing surface evaporation.
  • Ground-covering plants shade soil, reducing moisture loss.
  • Organic matter from decomposed roots increases water-holding capacity.

Healthy, moisture-rich soil reduces the need for frequent watering and creates a more resilient garden, especially in dry seasons.


8. Encourages Sustainable and Regenerative Gardening

Perhaps the most significant advantage of crop rotation is its role in sustainable gardening. Instead of relying heavily on chemical fertilizers and pesticides, crop rotation leverages natural processes to maintain soil health.

It reduces input costs, minimizes environmental impact, and creates a regenerative system that improves with each passing season. Over time, gardeners and farmers who practice rotation often see:

  • Higher yields
  • Fewer pest outbreaks
  • Better soil structure and fertility
  • Improved long-term productivity

This makes crop rotation one of the simplest yet most powerful tools in regenerative agriculture.


How to Plan a Simple Crop Rotation

You don’t need a large farm to practice rotation — even a small garden can benefit. Follow these steps to design an effective plan:

  1. Group Crops by Family: Avoid planting the same family in the same spot. Common groups include:
    • Nightshades: Tomatoes, peppers, eggplant, potatoes
    • Brassicas: Cabbage, broccoli, kale
    • Legumes: Beans, peas
    • Umbellifers: Carrots, celery, parsley
    • Cucurbits: Cucumbers, squash, pumpkins
  2. Follow Nutrient Demand: Alternate heavy feeders, light feeders, and soil builders.
  3. Include Cover Crops: Use clover, rye, or buckwheat between rotations to add organic matter and protect soil.
  4. Keep Records: Track what you plant each year so you don’t repeat the same crop too soon.

With thoughtful planning, even a 3- or 4-year rotation cycle can dramatically improve soil quality.


Conclusion

Rotating crops is more than an old farming tradition — it’s a science-backed strategy for building and maintaining healthy soil. By balancing nutrient use, reducing pests and diseases, improving structure, and supporting beneficial microbes, crop rotation transforms the ground beneath your feet into a vibrant, living ecosystem.

The result? Stronger plants, higher yields, and a garden that gets healthier every season. Whether you’re managing a backyard vegetable patch or a large-scale farm, crop rotation is one of the most powerful tools you can use — not just to grow better plants, but to nurture the very soil that sustains them.

5 Easy Ways To Keep Soil Moist Longer

5 Easy Ways To Keep Soil Moist Longer

Soil is the lifeline of every garden, and water is its most precious resource. However, with rising temperatures, irregular rainfall, and the demands of thirsty plants, keeping soil consistently moist can feel like an uphill battle. Dry soil leads to stressed plants, lower yields, and more time spent watering. The good news is that with the right techniques, you can extend soil moisture, reduce water loss, and create a healthier garden with less effort.

In this article, we’ll explore five easy, proven ways to keep soil moist longer. These methods are not only effective but also sustainable, making them perfect for gardeners who want thriving plants while conserving water.


1. Mulching – Nature’s Blanket for Soil

If there’s one golden rule for moisture conservation, it’s mulching. A thick mulch layer acts like a protective blanket, shielding soil from the sun and reducing evaporation.

How Mulch Works:

  • Blocks direct sunlight, keeping soil cooler.
  • Reduces surface evaporation by up to 70%.
  • Prevents hard crust formation, allowing better water penetration.
  • Suppresses weeds that would otherwise compete for water.

Best Mulching Materials:

  • Organic Mulches: Straw, shredded leaves, wood chips, grass clippings, or compost. These break down over time, adding nutrients.
  • Inorganic Mulches: Gravel or landscape fabric; long-lasting but don’t improve soil fertility.

Pro Tip:

Apply a 2–4 inch layer around plants, keeping mulch a few inches away from stems to prevent rot. In vegetable gardens, straw mulch works wonderfully, while in flower beds, shredded bark or composted wood chips add both beauty and function.


2. Improve Soil Structure with Organic Matter

Soil rich in organic matter holds water much better than depleted, sandy, or compacted soils. Think of organic matter as a sponge that absorbs and releases water slowly, keeping soil moist for longer.

Why Organic Matter Helps:

  • Improves Soil Texture: Loamy soil retains moisture without waterlogging.
  • Feeds Microbes: Healthy microbial life improves water infiltration and retention.
  • Increases Soil Porosity: Allows water to soak in instead of running off.

Ways to Add Organic Matter:

  • Compost: A regular addition enriches soil and boosts its water-holding ability.
  • Aged Manure: Improves fertility while increasing moisture capacity.
  • Leaf Mold: Decomposed leaves retain 3–5 times their weight in water.
  • Coconut Coir or Peat Moss: Excellent for water retention in sandy soils.

Application Tip:

Work in 2–3 inches of organic matter into the top 6 inches of soil during planting season. Over time, this dramatically changes how well soil retains water.


3. Use Ground Covers and Living Mulches

Bare soil dries out faster, while covered soil stays cool and moist. Ground covers and living mulches not only beautify your garden but also protect soil moisture.

Benefits of Ground Covers:

  • Provide shade, reducing evaporation.
  • Create a microclimate that conserves humidity.
  • Suppress weeds that steal water.
  • Add organic matter when cut back or tilled under.

Excellent Options:

  • Low-Growing Herbs: Thyme, oregano, or creeping rosemary.
  • Leguminous Covers: Clover or vetch, which also fix nitrogen.
  • Quick-Growers: Buckwheat in summer or rye in cooler months.

Application Tip:

Use ground covers between rows or under trees to shield soil. For raised beds, living mulches like clover work well without overwhelming crops.


4. Smart Watering Techniques

Keeping soil moist isn’t just about how much water you apply — it’s about how and when you water. Smart watering methods reduce evaporation and ensure water penetrates deeply into the root zone.

Best Practices for Soil Moisture:

  • Water Deeply and Less Frequently: Encourages deep root growth, making plants more drought-tolerant.
  • Water Early in the Morning or Late Evening: Reduces evaporation compared to midday watering.
  • Soaker Hoses and Drip Irrigation: Deliver water directly to the roots, minimizing waste.
  • Use Self-Watering Systems: Great for container gardens to maintain steady moisture.

Bonus Trick:

Bury clay pots (ollas) or unglazed terracotta vessels filled with water near plants. These slowly seep water into the soil, maintaining consistent moisture with minimal effort.


5. Apply Natural Soil Conditioners

Soil conditioners enhance water retention and reduce the need for frequent watering. By amending soil with certain natural materials, you create a long-term buffer against dryness.

Top Moisture-Retaining Conditioners:

  • Biochar: Holds water and nutrients in microscopic pores while supporting microbial activity.
  • Vermiculite: Expands to trap water and release it slowly.
  • Zeolite: Natural mineral that increases water retention capacity.
  • Clay Additions (for sandy soil): Helps reduce quick drainage.

Organic Alternatives:

  • Aloe Vera Gel Watering: Retains moisture around roots and promotes plant health.
  • Compost-Enriched Topdressing: Adds both nutrients and water-holding ability.

Application Tip:

Mix conditioners into the root zone at planting or add as a top dressing in existing beds. Combine with mulch for best results.


Bonus Tips for Long-Lasting Moisture

While the five main methods work well, combining them with these additional tricks makes moisture management effortless:

  • Shade Structures: Use shade cloths during peak summer to reduce evaporation.
  • Windbreaks: Hedges or fences reduce drying winds.
  • Hydrogels or Water-Storing Crystals: Useful in containers but use sparingly in garden beds.
  • Plant Grouping: Place plants with similar water needs together to optimize watering.
  • Crop Rotation: Prevents soil exhaustion and improves water balance.

Putting It All Together

Let’s say you have a raised vegetable bed that dried out quickly last summer. Here’s how you might apply these strategies:

  1. Add 3 inches of compost and leaf mold to improve soil structure.
  2. Lay a 3-inch straw mulch layer after planting seedlings.
  3. Install a drip irrigation system to water at the root zone.
  4. Plant clover between rows as a living mulch.
  5. Mix in a small amount of biochar during soil preparation.

The result? Soil that stays moist for days longer, healthier plants, and less time dragging around a watering can.


Conclusion

Keeping soil moist longer doesn’t have to be a constant struggle. With mulching, organic matter, living ground covers, smart watering, and natural soil conditioners, you create a garden that naturally conserves water. These strategies not only save time and reduce water bills but also support a healthier, more resilient garden ecosystem.

By working with nature rather than against it, your soil becomes a living sponge — holding onto precious water and giving your plants the consistent moisture they need to thrive. With just a few thoughtful adjustments, you can transform dry, thirsty soil into a lush, productive foundation for seasons to come.

How To Rejuvenate Soil After A Long Summer

How To Rejuvenate Soil After A Long Summer

After months of hot sun, fluctuating rainfall, and heavy gardening activity, soil often feels tired and depleted. By the end of summer, it’s common to see compacted beds, faded nutrients, and weak soil structure that can’t fully support new plantings. Rejuvenating soil isn’t just about tossing in fertilizer — it’s about restoring life, balance, and resilience to your garden’s foundation. Healthy soil means healthier plants, better harvests, and a thriving ecosystem.

This guide covers practical, detailed steps on how to bring soil back to life after a long summer, whether you’re preparing for fall planting or giving your garden a head start for next spring.


1. Understand Why Soil Gets Tired in Summer

Before fixing your soil, it’s important to know what happens during the summer months:

  • Nutrient Depletion: Continuous watering and plant uptake strip soil of nitrogen, phosphorus, potassium, and trace minerals.
  • Compaction: Frequent foot traffic, watering, and root growth press soil particles together, reducing air and water flow.
  • Moisture Stress: Extended dry spells dry out soil, killing beneficial microbes and earthworms.
  • Heat Impact: High temperatures accelerate organic matter breakdown, leaving soil less fertile.
  • Salt and Chemical Buildup: If you use synthetic fertilizers, salts may accumulate, harming soil biology.

By late summer, soil often looks crusted, lifeless, and less absorbent — all signs that it needs rejuvenation.


2. Begin with a Soil Test

Rejuvenation starts with knowing what your soil lacks. A simple soil test provides data on pH levels, nutrient availability, and organic matter content.

  • DIY Test Kits: Affordable and easy, available at garden centers.
  • Professional Lab Test: Provides detailed results and customized recommendations.

If your soil is too acidic (below pH 6.0), add lime; if too alkaline (above pH 7.5), consider sulfur or organic amendments. Balanced pH ensures nutrients are accessible to plants.


3. Loosen Compacted Soil

Compacted soil suffocates roots and beneficial organisms. After summer, you should aerate and loosen it.

  • For Garden Beds: Use a broadfork or garden fork to lift and loosen without overturning soil layers.
  • For Lawns: Core aeration removes plugs of soil, improving air and water flow.
  • Avoid Tilling Too Deep: Deep tilling destroys soil structure and microbial life. Instead, focus on gentle loosening.

Adding coarse compost, leaf mold, or coconut coir after loosening helps improve structure and moisture retention.


4. Add Organic Matter Generously

The fastest way to revive soil is by replenishing it with organic matter. Organic matter improves fertility, structure, and microbial activity.

Best Options to Use:

  • Compost: Homemade or purchased compost restores nutrients and beneficial microbes.
  • Aged Manure: Rich in nitrogen and trace minerals, but only use well-aged to avoid burning plants.
  • Leaf Mold: Decomposed autumn leaves increase water-holding capacity.
  • Green Waste: Kitchen scraps (fruit peels, coffee grounds, eggshells) make excellent soil food.

Spread 2–3 inches of organic matter over the surface and gently incorporate into the top few inches of soil. This feeds the soil while preparing it for fall planting.


5. Balance Nutrients Naturally

After summer crops, soil often lacks key nutrients. Instead of relying solely on synthetic fertilizers, try natural alternatives:

  • Nitrogen Boosters: Blood meal, alfalfa meal, or fish emulsion.
  • Phosphorus Sources: Bone meal or rock phosphate encourage root strength.
  • Potassium Sources: Wood ash (in moderation), kelp meal, or greensand.

Balanced nutrition supports healthy plant growth while preventing nutrient lockout.


6. Rebuild Soil Biology

Soil is a living ecosystem of bacteria, fungi, protozoa, and earthworms. After a harsh summer, microbial life often declines. To rejuvenate it:

  • Compost Tea: Brewing compost in water extracts microbial life, which you can apply to soil.
  • Mycorrhizal Fungi: Inoculants improve root nutrient uptake.
  • Earthworms: Encourage them by adding organic matter and keeping soil moist.

A biologically active soil improves nutrient cycling, disease resistance, and long-term fertility.


7. Use Cover Crops for Recovery

Cover crops (also known as green manures) are an excellent way to restore soil naturally after summer.

Best Cover Crops for Fall:

  • Legumes (clover, vetch, peas): Fix nitrogen from the air into the soil.
  • Grasses (rye, oats, barley): Improve structure and prevent erosion.
  • Buckwheat: Fast-growing, suppresses weeds, and adds organic matter.

Simply sow seeds, let them grow until winter, and then cut them down or turn them into the soil in spring. Cover crops protect soil while enriching it.


8. Manage Soil Moisture

Summer heat often leaves soil parched. Rehydrating soil is vital for microbial revival.

  • Deep Watering: Instead of shallow sprays, soak soil deeply to reach root zones.
  • Mulching: Apply 2–4 inches of organic mulch (straw, wood chips, shredded leaves) to retain moisture and regulate temperature.
  • Avoid Overwatering: Waterlogged soil suffocates roots and microbes. Aim for consistent moisture.

9. Reduce Salt and Chemical Buildup

If you’ve used synthetic fertilizers or live in areas with hard water, salts may accumulate. This reduces plant growth and soil life.

Solutions:

  • Flush the soil with deep watering.
  • Add gypsum (calcium sulfate) to break up salt and improve drainage.
  • Switch to organic fertilizers to avoid future salt buildup.

10. Rotate Crops and Rest Beds

Continuous planting of the same crops depletes specific nutrients and invites pests. After summer:

  • Rotate crops so each bed grows a different plant family.
  • Rest some beds by covering with mulch or growing low-maintenance cover crops.
  • Avoid back-to-back heavy feeders like tomatoes and corn in the same spot.

This breaks pest cycles and balances nutrient use.


11. Add Biochar for Long-Term Fertility

Biochar, a carbon-rich material made by burning organic matter in low oxygen, can dramatically improve soil health.

Benefits include:

  • Increased nutrient retention.
  • Improved water-holding capacity.
  • Long-lasting soil fertility (biochar can remain active for decades).

Mix biochar with compost before adding it to soil for best results.


12. Encourage Natural Soil Builders

Nature has its own way of repairing soil — you just need to support it.

  • Beneficial Insects: Ground beetles and ants aerate soil.
  • Decomposers: Fungi and microbes break down organic matter.
  • Wildlife: Birds and small mammals contribute organic matter through droppings.

By minimizing chemicals and encouraging biodiversity, your soil becomes self-sustaining.


13. Long-Term Maintenance Tips

Once rejuvenated, you’ll want to keep your soil healthy year after year:

  • Add compost annually.
  • Mulch year-round to prevent erosion and maintain moisture.
  • Test soil every 2–3 years.
  • Rotate crops and mix in perennials for diversity.
  • Limit synthetic chemical use to avoid disrupting soil life.

Conclusion

Rejuvenating soil after a long summer isn’t a quick fix — it’s about rebuilding balance, fertility, and life beneath the surface. By loosening compacted layers, adding organic matter, restoring nutrients, and protecting soil with cover crops and mulch, you create a thriving environment where plants flourish naturally. Healthy soil is the true foundation of a successful garden, and the time you invest in restoring it now will reward you with abundant growth in the seasons ahead.

How To Prevent Weeds In Gravel Paths

How To Prevent Weeds In Gravel Paths

Gravel paths add charm, functionality, and a natural look to gardens, driveways, and outdoor spaces. They are low-maintenance compared to paved surfaces and allow water to drain easily into the soil. However, one common frustration that almost every homeowner faces with gravel paths is the appearance of weeds. Left unchecked, these weeds can quickly ruin the neat appearance of your path and make it look neglected.

Fortunately, with the right preparation and care, you can significantly reduce — or even prevent — weeds in gravel paths. In this article, we’ll explore why weeds love gravel, prevention strategies, and proven solutions to keep your paths clean and weed-free.


Why Do Weeds Appear in Gravel Paths?

Understanding why weeds thrive in gravel paths makes prevention easier. A few key reasons include:

  1. Sunlight exposure – Gravel is not solid like concrete, so sunlight can easily penetrate gaps, encouraging weed germination.
  2. Moisture retention – Gravel retains some moisture beneath the surface, creating a perfect environment for seeds.
  3. Soil beneath gravel – If gravel paths are not properly prepared with a barrier, the soil beneath allows weed roots to grow easily.
  4. Wind-blown seeds – Weeds are masters of spreading. Seeds carried by wind, birds, or even your shoes can land between the stones and sprout quickly.

By tackling these causes, you can stop weeds before they even begin.


Step 1: Proper Path Preparation

The best defense against weeds in gravel is prevention from the start. If you’re installing a new path, preparation is key.

  1. Excavate deeply – Dig out at least 4–6 inches of soil before laying gravel. This reduces access to nutrient-rich topsoil.
  2. Lay a strong weed barrier fabric – Place a high-quality landscape fabric or geotextile membrane across the entire path area. This prevents weeds from pushing up from the soil beneath. Avoid using plastic sheeting, as it can trap water and break down quickly.
  3. Use sharp-edged gravel – Angular gravel pieces (like crushed granite or limestone) interlock better than smooth pea gravel, leaving fewer gaps for seeds to settle.
  4. Add a solid base layer – Before spreading gravel, lay a 2–3 inch layer of compacted crushed stone or sand. This creates a firm base and makes it harder for weeds to root.

Step 2: Ongoing Weed Prevention

Even with preparation, some determined weeds may still try to sneak through. Regular maintenance helps you stay ahead.

  1. Rake the gravel regularly – This disturbs any tiny seedlings before they establish roots. It also refreshes the look of your path.
  2. Top up gravel annually – Adding a fresh layer of gravel every year helps smother emerging weeds and keeps the path neat.
  3. Sweep or blow debris away – Fallen leaves, soil, and organic material provide fertile ground for weeds. Keep paths clean to reduce buildup.
  4. Edge your paths – Install edging materials like steel, brick, or treated wood to keep grass and creeping weeds from invading the sides.

Step 3: Natural and Chemical Weed Control

If weeds appear, it’s best to deal with them quickly before they spread. You can choose from natural remedies or more conventional weed killers.

Natural Weed Solutions:

  1. Boiling water – Pouring boiling water directly on weeds kills them instantly by destroying cell structure. Best for small infestations.
  2. Vinegar spray – Household vinegar (5% acetic acid) works on young weeds, but horticultural vinegar (20%+) is stronger for tougher growth. Mix vinegar with a small amount of dish soap to help it stick.
  3. Salt – Sprinkle rock salt or dissolve it in water and pour on weeds. However, use sparingly — too much salt can damage nearby soil and plants.
  4. Flame weeding – A propane weed torch can scorch weeds between gravel without chemicals. This method is quick but requires caution.

Chemical Weed Killers:

If natural methods don’t cut it, selective or non-selective herbicides can be used. Glyphosate-based sprays are effective for gravel paths, but use responsibly to avoid harming nearby plants or soil. Always follow manufacturer guidelines and apply in calm weather to prevent drift.


Step 4: Long-Term Weed Management Strategies

Weed prevention isn’t a one-time job — it’s an ongoing process. To maintain a clean gravel path year-round, adopt these habits:

  • Apply a pre-emergent herbicide in spring – This prevents weed seeds from germinating in the first place. Corn gluten meal is an organic option, while chemical pre-emergents offer stronger results.
  • Inspect regularly – A few weeds can quickly spread if ignored. Pull them out by hand as soon as you spot them.
  • Compact the gravel – Over time, gravel can loosen, creating gaps for weeds. Periodic compaction with a tamper or roller helps maintain a solid surface.
  • Encourage foot traffic – Paths that are frequently walked on naturally suppress weed growth.

Common Weeds Found in Gravel Paths

Knowing your enemy helps in targeting weed control. Some of the most common weeds that appear in gravel include:

  • Dandelions – Strong taproots make them stubborn if not removed early.
  • Clover – Spreads quickly and thrives in gravel cracks.
  • Plantain – Broad leaves and deep roots allow it to tolerate poor soil.
  • Crabgrass – Germinates easily in sunny, loose gravel areas.
  • Chickweed – Loves moist, shady corners of gravel paths.

Each of these can be controlled with the methods discussed above.


Environmental Considerations

While keeping gravel paths weed-free is important for aesthetics and usability, it’s equally vital to think about environmental impact.

  • Avoid overusing chemical herbicides, as runoff can harm surrounding soil, waterways, and beneficial insects.
  • Use natural solutions when possible, especially boiling water or vinegar, which are effective and eco-friendly.
  • Choose permeable, sustainable materials for your gravel base to encourage healthy water drainage.

Final Thoughts

Weeds in gravel paths may seem inevitable, but with the right preparation, maintenance, and control methods, you can enjoy clean, attractive walkways all year long. The key lies in preventing weed growth from the beginning — digging deep, installing a weed barrier, and using sharp gravel. From there, simple habits like raking, topping up gravel, and spot-treating weeds will keep your paths looking pristine.

By combining smart design with consistent care, you’ll spend less time fighting weeds and more time enjoying your beautiful outdoor spaces.

6 Homemade Weed Solutions That Actually Work

6 Homemade Weed Solutions That Actually Work

Weeds are the uninvited guests of every garden. They sprout in cracks, compete with your vegetables and flowers, and often seem impossible to control. While chemical herbicides are widely available, many gardeners prefer safer, eco-friendly methods to keep weeds in check. The good news is that you don’t need expensive products—homemade weed solutions can be just as effective when used correctly.

In this article, we’ll explore six proven homemade weed solutions that actually work, explain how to use them, and share tips to ensure they are safe for your garden and the environment.


Why Choose Homemade Weed Solutions?

Before diving into recipes and techniques, it’s worth noting why homemade options are so valuable:

  1. Eco-Friendly – Unlike synthetic herbicides, homemade solutions are biodegradable and less harmful to soil health, pets, and pollinators.
  2. Budget-Friendly – Most ingredients are already in your kitchen or pantry, saving money.
  3. Safe for Kids and Pets – Properly used, they reduce exposure to toxic chemicals in family-friendly yards.
  4. Quick and Convenient – No need to visit a store; you can whip up effective weed killers in minutes.

That said, these solutions should be applied carefully—they don’t discriminate between weeds and desired plants. Always use them as targeted spot treatments, not blanket sprays.


1. Vinegar Spray (Acetic Acid Weed Killer)

How It Works:
Vinegar contains acetic acid, which draws moisture out of plant tissues. When sprayed directly on weeds, it causes them to wither and die.

Ingredients:

  • 1 gallon of white vinegar (5–20% acetic acid; stronger concentrations work faster)
  • Optional: 1 tablespoon dish soap (to help it stick to leaves)

Instructions:

  1. Pour vinegar into a spray bottle or garden sprayer.
  2. Add dish soap, mix gently.
  3. Spray directly on weed leaves during a sunny day.

Best Uses:

  • Young annual weeds like dandelions, chickweed, and crabgrass seedlings.
  • Driveways, sidewalks, and garden edges.

Caution: Vinegar is non-selective. Avoid spraying near vegetables, flowers, or grass you want to keep.


2. Boiling Water

How It Works:
The simplest solution of all—scalding hot water cooks plant tissues, killing weeds instantly at the surface level and damaging their roots.

Instructions:

  1. Bring a pot of water to a boil.
  2. Carefully pour directly onto weeds, especially those in cracks or between paving stones.

Best Uses:

  • Driveways, sidewalks, patios, and gravel paths.
  • Great for spot-treating small, isolated weeds.

Caution: Avoid near lawn or flower beds, as boiling water kills any plant it touches.


3. Salt Solution

How It Works:
Salt dehydrates plants and disrupts their ability to absorb water. Over time, it kills weeds completely.

Ingredients:

  • 1 cup of table salt or rock salt
  • 2 cups of warm water

Instructions:

  1. Dissolve salt in warm water.
  2. Pour directly at the base of weeds.
  3. For tougher weeds, increase concentration or combine with vinegar.

Best Uses:

  • Driveways, gravel paths, or areas where you want permanent weed suppression.

Caution: Salt can sterilize soil, making it difficult for anything (even desirable plants) to grow for months or years. Use only in non-garden areas.


4. Baking Soda

How It Works:
Baking soda increases salinity on leaf surfaces, burning foliage and preventing regrowth in cracks.

Instructions:

  1. Sprinkle baking soda directly onto damp weed leaves or cracks in sidewalks.
  2. Reapply every few weeks as needed.

Best Uses:

  • Sidewalk cracks, brick walkways, and patios.
  • Small annual weeds.

Caution: Excessive baking soda alters soil pH and harms beneficial plants. Keep away from flower beds.


5. Homemade Cornmeal Pre-Emergent

How It Works:
Corn gluten meal acts as a natural pre-emergent herbicide. It doesn’t kill existing weeds but prevents new seeds from germinating.

Ingredients:

  • Corn gluten meal (available at garden supply stores or online)

Instructions:

  1. Sprinkle corn gluten meal over garden soil or lawn.
  2. Water lightly to activate.

Best Uses:

  • Preventing crabgrass, dandelions, and other common lawn weeds.
  • Vegetable gardens (apply early in the season before planting).

Caution: Corn gluten meal also prevents germination of desirable seeds. Use only where you won’t be sowing new plants.


6. DIY Lemon Juice Spray

How It Works:
The citric acid in lemon juice acts like vinegar, drying out plant tissues. Its acidity helps weaken even stubborn weeds.

Ingredients:

  • Fresh lemon juice (or bottled, without added sugar)
  • Spray bottle

Instructions:

  1. Fill spray bottle with lemon juice.
  2. Spray directly on weed foliage in full sun.
  3. Repeat every few days until weeds wither.

Best Uses:

  • Small weeds in garden beds or containers.
  • Works well combined with vinegar for added strength.

Caution: Acidic sprays can harm surrounding plants. Use with precision.


Tips for Using Homemade Weed Solutions Effectively

  1. Target Application – Apply directly to weed foliage or roots, avoiding nearby plants.
  2. Choose Sunny Days – Sunlight boosts the effects of vinegar, lemon juice, and boiling water treatments.
  3. Act Early – Younger weeds are much easier to kill. Mature weeds with deep roots may need repeat treatments.
  4. Persistence Pays – Homemade remedies may require multiple applications compared to commercial herbicides.
  5. Combine with Physical Removal – After weeds die, pull them out to prevent regrowth.

Homemade vs. Commercial Herbicides

FeatureHomemade Weed SolutionsCommercial Herbicides
CostVery low (kitchen staples)Higher
Eco-ImpactSafer, biodegradablePotential soil/water contamination
EffectivenessBest for small-scale, young weedsWorks faster, larger infestations
SelectivityNon-selective (kills any plant)Some selective options available
PersistenceRequires repeat applicationsLonger-lasting

For home gardeners, homemade weed solutions provide a safer, cheaper option. For large infestations, commercial products may be necessary—but can often be reduced with consistent homemade approaches.


Preventing Weeds in the First Place

Killing weeds is only half the battle. To keep them from returning, adopt preventive measures:

  • Mulching – A 2–4 inch layer blocks sunlight and suppresses germination.
  • Dense Planting – Crowded, healthy plants leave no space for weeds to thrive.
  • Edging and Barriers – Keep lawn grass from creeping into flower beds.
  • Regular Maintenance – Weekly weeding prevents flowering and seed spread.

Homemade solutions work best as part of an overall weed management strategy that includes prevention.


Final Thoughts

Weeds may be persistent, but they don’t always require harsh chemicals to control. With simple, everyday ingredients like vinegar, salt, lemon juice, baking soda, and even boiling water, you can create six effective homemade weed solutions that actually work. Add in cornmeal for pre-emergent control, and you have a complete toolkit for tackling weeds naturally.

By applying these remedies carefully and combining them with good garden practices like mulching and regular upkeep, you’ll enjoy healthier soil, fewer weeds, and a more eco-friendly garden.

So the next time you see weeds sprouting, don’t reach for a chemical spray—head to your kitchen. The solution may already be on your shelf.