Why You Should Never Let Weeds Flower

Why You Should Never Let Weeds Flower

For many gardeners, weeds are simply an annoying part of maintaining a lawn or flower bed. You may pull a few here and there, mow them down, or ignore them altogether when time is short. But one golden rule of weed management stands above all others: never let weeds flower. Once weeds reach their flowering stage, they move quickly into seed production, setting the stage for years of frustration in your garden.

In this article, we’ll explore in depth why weeds should never be allowed to flower, what happens when they do, and how you can manage them effectively before they spread. By understanding their biology and reproductive strategies, you’ll see how a little proactive effort now can save countless hours of weeding in the future.


Understanding the Weed Life Cycle

To appreciate why weeds should never flower, it helps to understand their life cycle.

  1. Germination – Weed seeds sprout when conditions are right: warmth, moisture, and light.
  2. Vegetative Growth – The plant develops leaves, roots, and stems, competing with your crops or ornamental plants for resources.
  3. Flowering – The plant shifts its energy to reproduction. Flowers appear, attracting pollinators or preparing to self-pollinate.
  4. Seed Production – Fertilized flowers produce seeds, often in staggering numbers.
  5. Dispersal – Seeds spread through wind, animals, water, or even on your shoes.

The critical stage here is flowering. Once a weed flowers, it is dangerously close to completing its reproductive cycle—and undoing all your hard work.


The Hidden Danger: Seed Production

Most weeds are evolutionary experts at survival. They produce an enormous quantity of seeds, ensuring their species’ persistence even under harsh conditions.

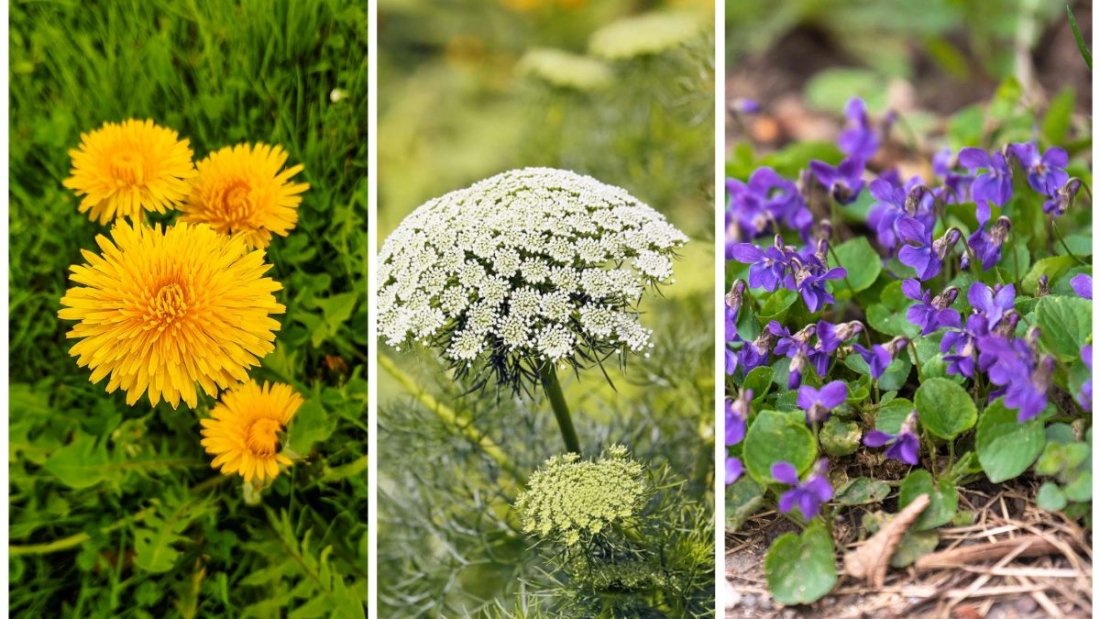
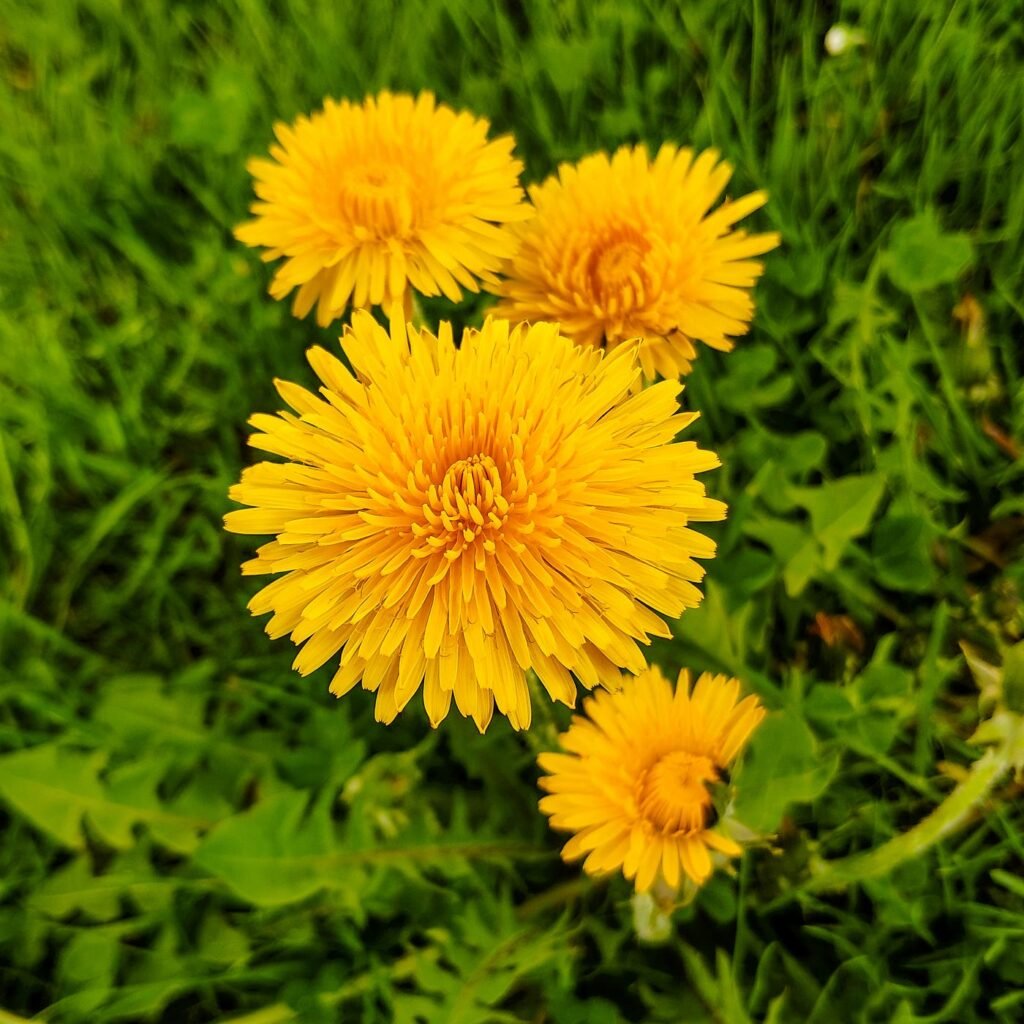
  • Dandelions – Each plant can produce up to 15,000 seeds per season, many carried far by the wind.
  • Pigweed (Amaranthus) – A single plant can produce more than 100,000 seeds.
  • Crabgrass – Each plant yields 150,000 seeds that can survive in the soil for years.

Allowing even one weed to flower and set seed can add tens of thousands of new weeds to your soil seed bank. And because many weed seeds remain viable for 5–40 years, you’re essentially planting problems for decades to come.


Why You Should Never Let Weeds Flower

1. Exponential Growth of Weeds

Weeds multiply rapidly once allowed to flower. A single flowering season can turn a small patch into an uncontrollable infestation. Gardeners often notice this in late summer when neglected weeds suddenly dominate garden beds.

2. Seed Bank Build-Up

The “seed bank” refers to dormant weed seeds in the soil. Every time you allow weeds to flower, you increase this bank. Even if you remove weeds later, the seeds they’ve left behind will germinate in future years, making long-term control more difficult.

3. Increased Competition for Resources

Flowering weeds often grow more aggressively, drawing energy from the soil, water, and sunlight that should be feeding your desired plants. This stunts your garden’s growth and reduces yields in vegetable plots.

4. Pest and Disease Havens

Weed flowers can attract pests that then move on to your crops. They may also host fungal spores or insect eggs that harm healthy plants. By allowing weeds to flower, you’re creating a breeding ground for future infestations.

5. Rapid Spread Through Multiple Methods

Weeds don’t rely only on seeds. Some weeds like creeping Charlie or bindweed also spread through rhizomes and stolons. When allowed to flower, these plants double their threat—expanding underground while spreading seed above ground.


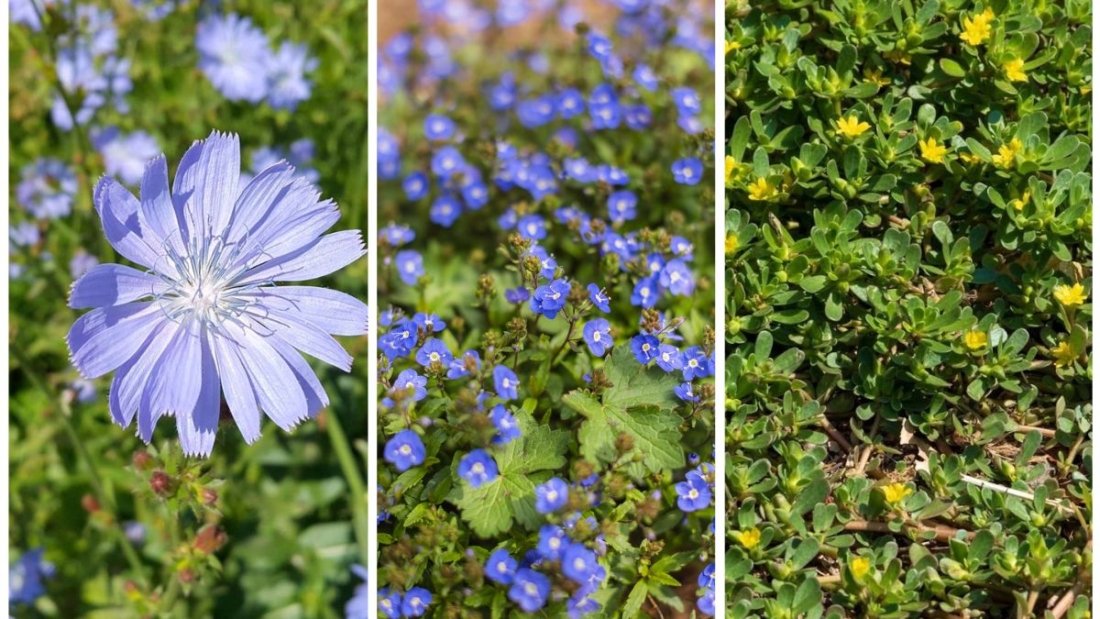
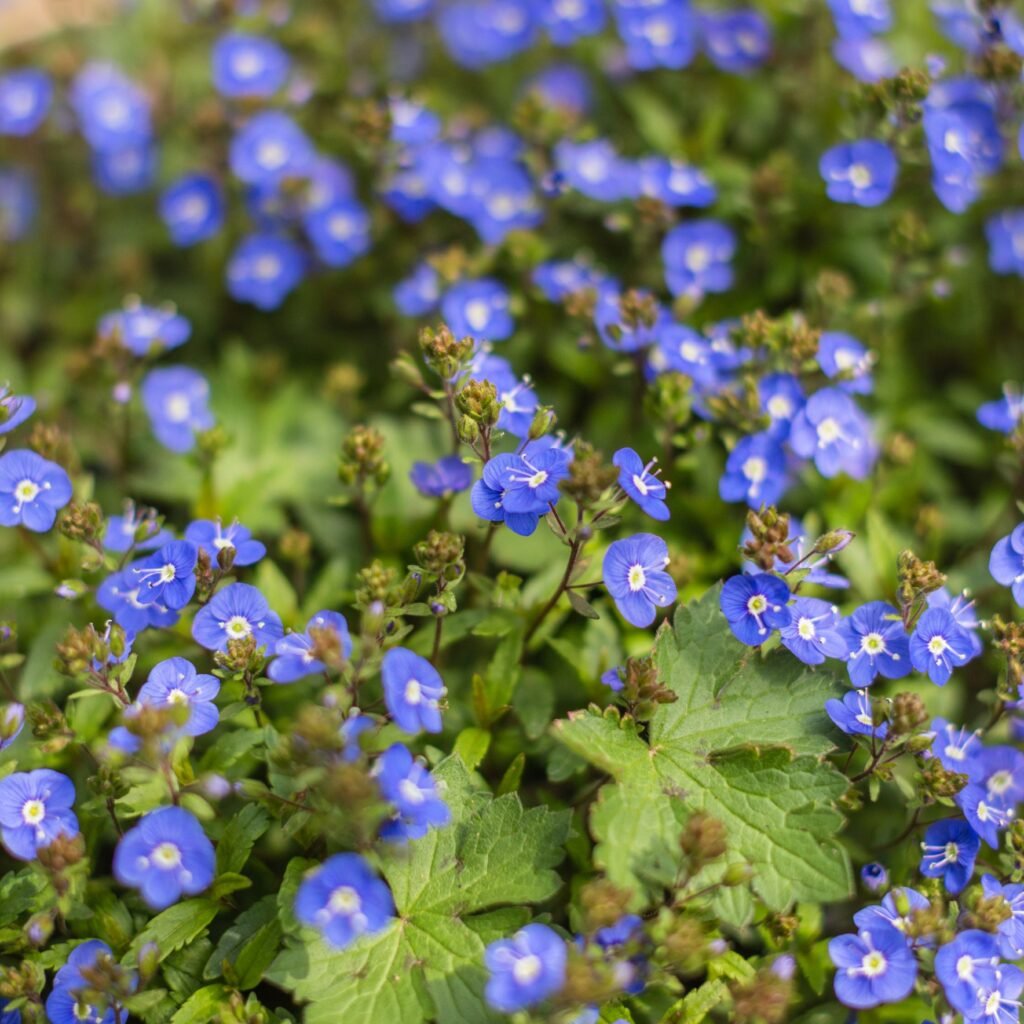
Common Weeds That Should Never Be Allowed to Flower

  1. Dandelions – Famous for their fluffy seed heads that spread effortlessly on the wind.
  2. Chickweed – Produces seeds multiple times in a single season.
  3. Pigweed / Amaranth – Can overwhelm vegetable gardens with its prolific seeding.
  4. Crabgrass – Infests lawns if seed heads are not cut before ripening.
  5. Thistles – Tough perennials with wind-borne seeds that spread quickly.

Each of these weeds becomes dramatically harder to control once flowers appear.


Effective Strategies to Prevent Weeds from Flowering

Stopping weeds before flowering requires consistency and the right techniques. Here’s how to do it effectively:

1. Regular Monitoring

  • Walk your garden weekly and pull weeds while they’re small.
  • Young seedlings are far easier to remove than mature flowering weeds.
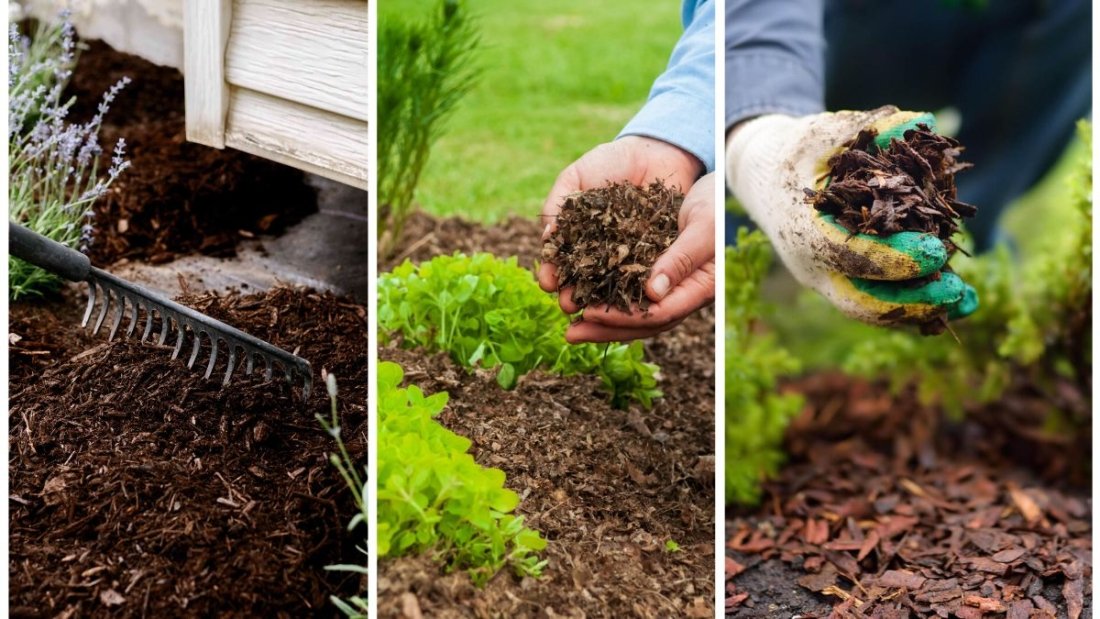
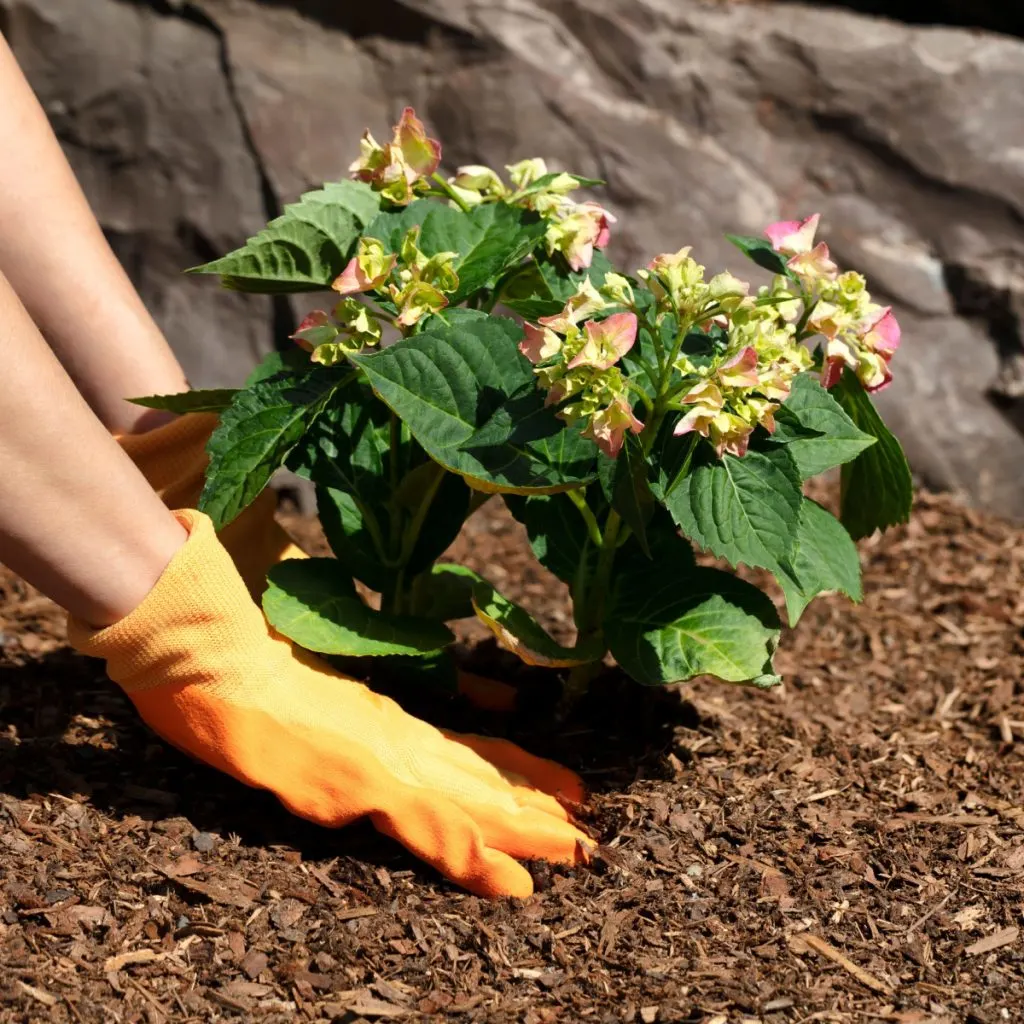
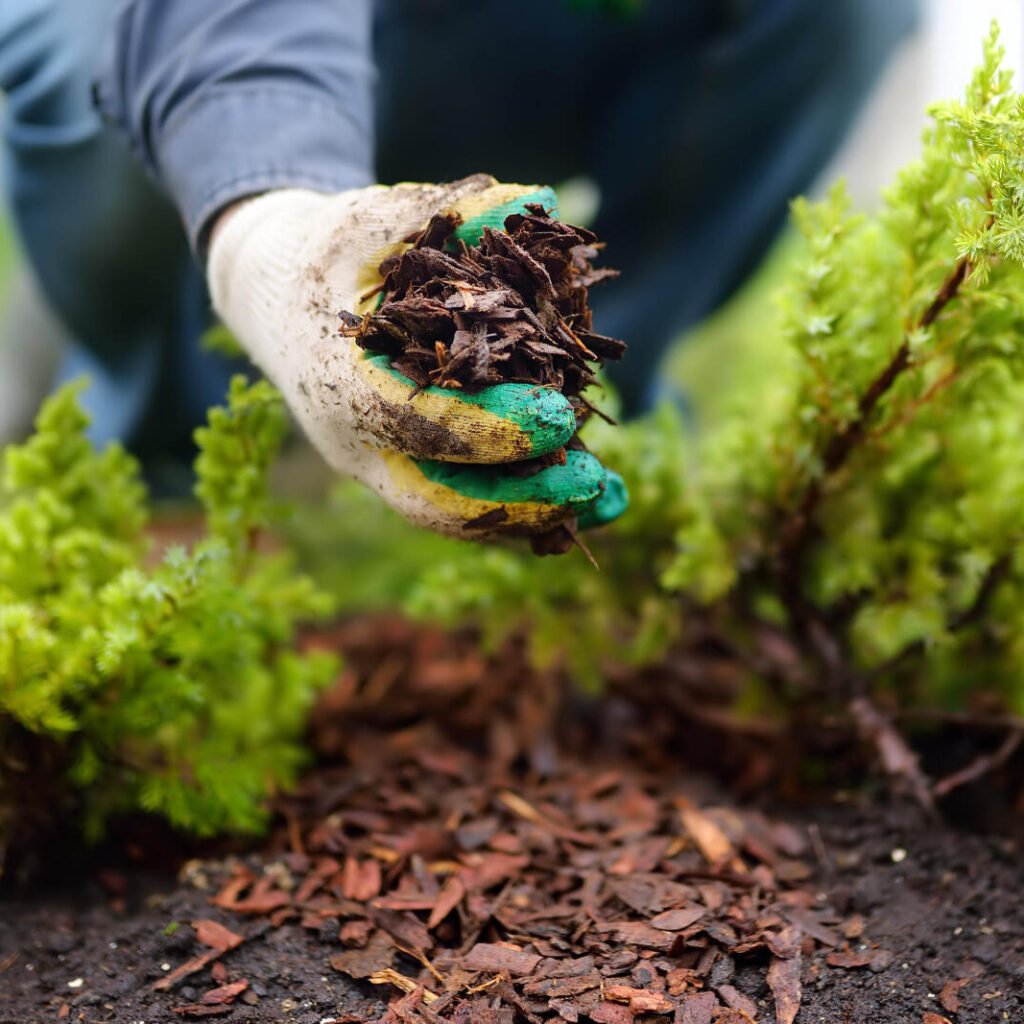
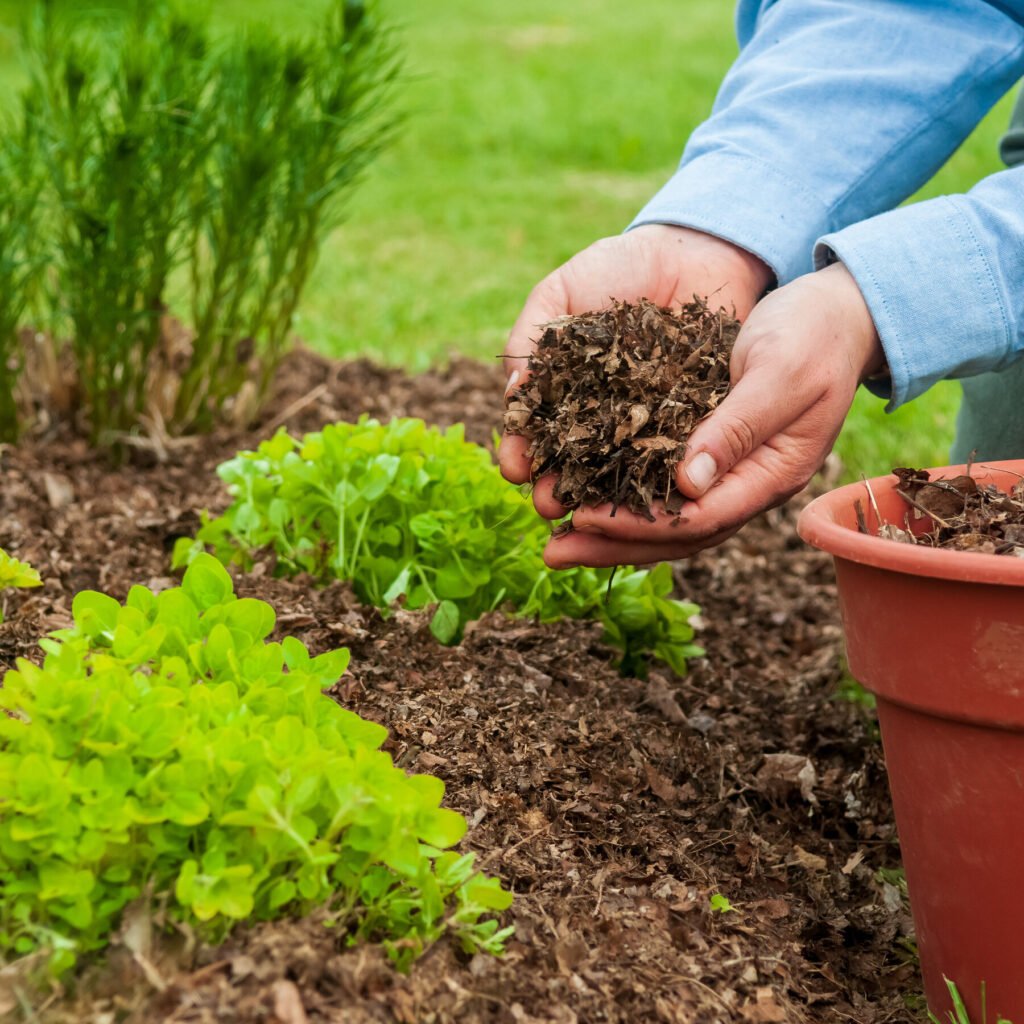
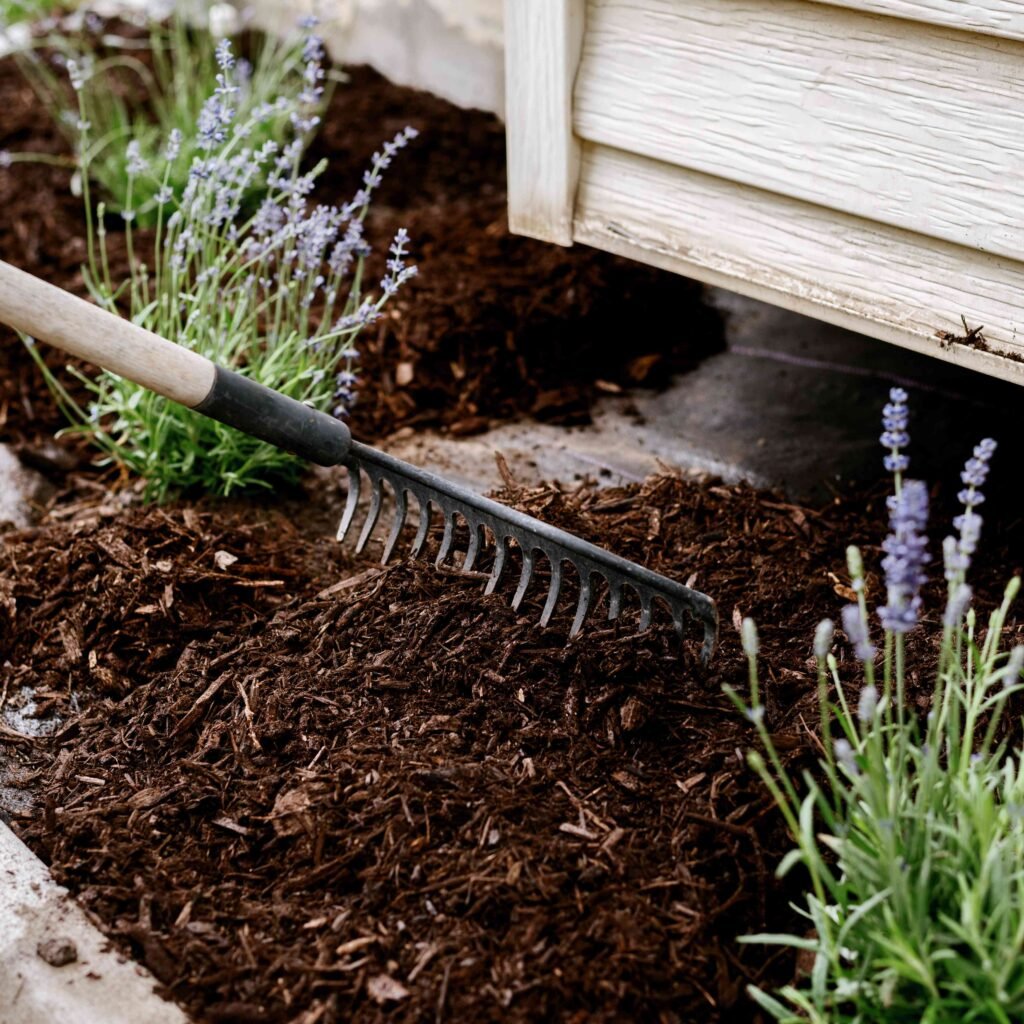
2. Mulching

  • Apply 2–4 inches of organic mulch (wood chips, straw, shredded leaves) to garden beds.
  • Mulch blocks sunlight, preventing weed seeds from germinating.

3. Timely Mowing or Cutting

  • For lawns and large areas, mow regularly to keep weeds from flowering.
  • Cutting weeds before flowers appear interrupts the reproductive cycle.

4. Hand Pulling and Hoeing

  • For small gardens, hand-pull weeds after rain when soil is moist.
  • A sharp hoe can slice seedlings just below the soil surface.

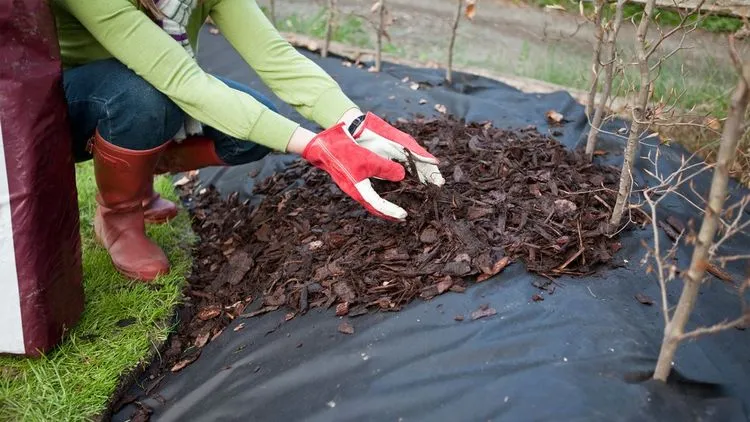
5. Use of Weed Barriers

  • Landscape fabric, cardboard, or newspaper under mulch provides a double barrier.
  • Particularly useful in perennial beds or pathways.

6. Proper Lawn and Garden Care

  • Dense, healthy grass and well-spaced crops naturally suppress weed growth.
  • Overseeding lawns in fall creates thicker turf that blocks out weeds.

Special Considerations for Perennial Weeds

Some perennial weeds—like bindweed, quackgrass, and Canada thistle—pose extra challenges because they reproduce through roots as well as seeds. For these:

  • Never let them flower, as seed dispersal adds to the problem.
  • Dig deeply to remove as much of the root system as possible.
  • Smother or solarize infested areas using black plastic to kill roots.

Even if you cannot fully eradicate them in one season, preventing flowering stops their spread while you work on long-term solutions.


The Cost of Ignoring Flowering Weeds

If weeds are allowed to flower, the long-term consequences can be significant:

  • Higher Maintenance – More weeding time in future seasons.
  • Lower Yields – Vegetable crops lose water and nutrients to aggressive weeds.
  • Poor Aesthetics – Flowering weeds make lawns and gardens look unkempt.
  • Soil Seed Bank Explosion – Every flowering season adds years of future weeding labor.

In short, letting weeds flower is a short-term convenience but a long-term burden.


Practical Weed Prevention Calendar

To keep weeds from ever reaching the flowering stage, here’s a seasonal approach:

  • Spring – Mulch beds, pull early sprouts, and hoe seedlings.
  • Summer – Monitor weekly, mow lawns regularly, and spot-pull weeds before flowering.
  • Fall – Overseed lawns and refresh mulch to reduce winter germination.
  • Winter – Plan crop rotation and soil solarization strategies for the coming year.

Final Thoughts

Weeds are nature’s opportunists, thriving wherever they find space, sunlight, and water. But the key to keeping them under control isn’t endless pulling—it’s stopping them before they reproduce. Never letting weeds flower is the single most effective way to prevent decades of recurring problems.

By staying vigilant, applying mulch, maintaining healthy soil, and removing weeds before flowers appear, you’re not just keeping your garden tidy—you’re building long-term resilience against invasions.

So next time you see a weed beginning to bloom, don’t wait. Act immediately. Because every flower you stop today is thousands of weeds you’ll never have to battle tomorrow.

The Right Way to Use Mulch to Block Weeds

The Right Way to Use Mulch to Block Weeds

Mulching is one of the most effective, natural, and time-tested methods of weed control in gardens and landscapes. While many gardeners know that mulch suppresses weeds, not everyone understands the right way to apply it for maximum effectiveness. Used incorrectly, mulch can actually encourage weeds or damage your plants. Used correctly, it becomes a powerful barrier that improves soil health, conserves moisture, and keeps unwanted growth at bay.

This article explores the right way to use mulch to block weeds, covering types of mulch, application techniques, common mistakes to avoid, and maintenance tips to ensure your garden thrives.


Why Mulch Works Against Weeds

Mulch suppresses weeds in two main ways:

  1. Blocking Sunlight – Most weed seeds need light to germinate. A thick layer of mulch prevents sunlight from reaching them, stopping their growth before it starts.
  2. Creating a Barrier – Mulch physically covers the soil, making it difficult for existing weeds to push through the surface.

In addition, mulch helps improve soil quality by retaining moisture, moderating temperature, and breaking down into organic matter that nourishes your plants. When used properly, it creates a healthier environment for desirable plants while making conditions unfavorable for weeds.


Choosing the Right Type of Mulch

Not all mulches are equally effective at blocking weeds. The right choice depends on your garden goals, budget, and whether you prefer organic or inorganic materials.

1. Organic Mulches

These break down over time, improving soil fertility. They are eco-friendly but need replenishment every year or two.

  • Wood chips / Bark mulch – Long-lasting, excellent weed barrier, ideal for shrubs and trees.
  • Straw or hay – Great for vegetable gardens, lightweight, but decomposes quickly.
  • Grass clippings – Free and readily available, but best applied thinly to avoid matting.
  • Compost – Nourishes soil and blocks weeds if layered thickly enough.

2. Inorganic Mulches

These don’t break down, so they last longer but don’t improve soil health.

  • Landscape fabric – Effective barrier under gravel or mulch; must be installed properly.
  • Plastic sheeting – Good for vegetable rows, but can trap heat and restrict water.
  • Gravel / Stone – Long-lasting, attractive, and weed-resistant, but doesn’t enrich soil.

Pro Tip: For blocking weeds, wood chips, bark mulch, and straw are among the most effective organic options.


The Right Way to Apply Mulch for Weed Control

Even the best mulch won’t work if it’s applied incorrectly. Here’s a step-by-step guide:

1. Prepare the Area First

  • Remove Existing Weeds – Pull or dig out as many weeds as possible before applying mulch. Mulch is not a magic eraser—it suppresses future growth but doesn’t kill established weeds.
  • Edge the Bed – Define clear borders to keep mulch in place and prevent grass or weeds from creeping in from the edges.

2. Use a Weed Barrier (Optional)

  • For long-term weed suppression, lay down newspaper, cardboard, or landscape fabric beneath the mulch. These block stubborn weeds like bindweed or nutsedge.
  • If using cardboard or newspaper, water it thoroughly so it lays flat and begins decomposing into the soil.

3. Apply the Right Depth

  • The golden rule: 2–4 inches thick.
  • Less than 2 inches won’t block light effectively.
  • More than 4 inches can suffocate plant roots and retain too much moisture, leading to rot or pests.

4. Keep Mulch Away from Plant Bases

  • Leave a 2–3 inch gap around tree trunks, shrubs, and flower stems.
  • Piling mulch directly against plants creates “mulch volcanoes,” which cause rot, attract rodents, and invite disease.

5. Spread Evenly and Smoothly

  • Use a rake or gloved hands to distribute mulch evenly.
  • Avoid clumps that allow weeds to sneak through exposed soil.

Mulching Mistakes That Invite Weeds

Even well-meaning gardeners sometimes misuse mulch, leading to the opposite effect—more weeds! Here are mistakes to avoid:

  1. Too Thin a Layer – Anything under 2 inches thick won’t block weeds effectively.
  2. Too Thick a Layer – More than 4 inches can suffocate plants and create fungus or mold.
  3. Using Fresh Wood Chips Directly – Fresh chips rob nitrogen from the soil as they decompose. Age them for a few months or use them as surface mulch only.
  4. Ignoring Edges – Weeds often creep in from the sides. Installing edging or trenching helps.
  5. Letting Mulch Break Down Completely – Over time, old mulch decomposes into soil, which becomes a seedbed for weeds. Refresh annually.

Seasonal Timing for Mulching

Timing matters when applying mulch for weed prevention.

  • Spring – Apply mulch after the soil warms up. Mulching too early keeps soil cold and slows plant growth.
  • Summer – Refresh mulch to retain moisture and protect roots during heatwaves.
  • Fall – Mulching in fall helps insulate plants and reduces winter weed germination.
  • Winter – In colder regions, mulch can be applied late fall to protect perennials, though weed suppression isn’t the main focus here.

Maintaining Mulch for Long-Term Weed Control

Mulch isn’t a one-and-done task—it needs maintenance. Here’s how to keep it effective:

  1. Inspect Twice a Year – Check for thin spots where weeds might sprout and replenish as needed.
  2. Fluff Compact Mulch – Break up crusted mulch with a rake to allow water and air to penetrate.
  3. Replace Every 1–2 Years – Organic mulch breaks down, so add fresh layers to maintain depth.
  4. Spot Weed Promptly – Pull any weeds that manage to push through before they spread seeds.
  5. Combine with Other Strategies – Mulch works best when paired with proper spacing, healthy soil, and strong plant coverage.

Additional Benefits of Mulch Beyond Weed Control

While weed suppression is the main focus here, mulch also provides other benefits that make it essential in any garden:

  • Moisture Retention – Reduces the need for frequent watering.
  • Soil Enrichment – Organic mulches add nutrients as they decompose.
  • Temperature Regulation – Keeps soil cooler in summer and warmer in winter.
  • Erosion Control – Prevents soil from washing away during heavy rains.
  • Aesthetic Appeal – Creates a neat, polished look in garden beds.

A Sample Mulching Strategy for Different Garden Areas

To make this more practical, here’s how you might apply mulch in various scenarios:

  • Vegetable Garden – Use straw or shredded leaves, 2–3 inches deep, refreshed every season. Add cardboard under mulch for stubborn weeds.
  • Flower Beds – Use shredded bark or compost, 3 inches deep, keeping a gap around plant stems.
  • Around Trees and Shrubs – Apply wood chips 3–4 inches deep, but never touching the trunk. Extend mulch to the tree’s drip line if possible.
  • Pathways and Walkways – Use gravel or stone mulch over landscape fabric for a durable, weed-free surface.

Final Thoughts

Mulch is one of the simplest, most effective tools in the gardener’s toolkit for weed control. But like any tool, it must be used correctly. By choosing the right mulch type, applying the proper depth, and maintaining it seasonally, you can create a natural barrier that suppresses weeds, conserves resources, and enhances your garden’s beauty.

Remember: mulch is not just about covering the soil—it’s about creating a balanced environment where your plants thrive and weeds struggle to survive. Apply it thoughtfully, and you’ll enjoy not only fewer weeds but also healthier, more resilient gardens year after year.

5 Weeds That Are Easier to Pull in Fall

5 Weeds That Are Easier to Pull in Fall

Gardening is a year-round task, but every season has its own set of challenges and advantages. When it comes to weed control, fall often provides an unexpected opportunity to gain the upper hand. The cooler temperatures, increased soil moisture, and the natural life cycles of plants make this season the perfect time to tackle some of the most stubborn weeds. Interestingly, many invasive species weaken during autumn, making them far easier to pull out compared to the scorching heat of summer or the dense, frozen ground of winter.

In this article, we’ll explore five common weeds that are easier to pull in fall, why this happens, and tips to remove them effectively so your garden beds, lawns, and walkways are prepared for a healthier spring.


Why Fall is the Best Time to Pull Weeds

Before diving into the specific weeds, it’s important to understand why fall gives gardeners an advantage:

  1. Moist Soil Conditions – Autumn often brings more rain, which softens the soil. Looser soil makes it easier to pull weeds out with their roots intact.
  2. Dying Back of Annuals – Many weeds begin to decline naturally in fall, so they’re less vigorous and easier to handle.
  3. Root Energy Transfer – Perennial weeds store energy in their roots during fall. If you pull them out completely now, they have less chance to return in spring.
  4. Reduced Seed Spread – Removing weeds before they fully disperse seeds in late fall prevents new growth in the next season.
  5. Less Competition for Desired Plants – Clearing weeds in autumn gives your lawn or flower beds a head start, allowing bulbs, grasses, and perennials to thrive without competition.

With these benefits in mind, let’s look at the five weeds that are much easier to deal with in fall.


1. Dandelions (Taraxacum officinale)

Dandelions are one of the most recognizable and persistent lawn weeds. In summer, their deep taproots make them notoriously hard to pull, often snapping and regrowing if not removed completely.

Why They’re Easier to Pull in Fall:

  • The soil is moister, which softens around the taproot, allowing for easier extraction.
  • During fall, dandelions start storing nutrients in their roots for winter. Removing them now prevents them from bouncing back with full force in spring.

How to Remove Them:

  • Use a narrow weeding tool or dandelion fork to loosen the soil around the root.
  • Gently but firmly pull to get the entire taproot out.
  • If some root breaks off, cover the spot with mulch or compost to discourage regrowth.

Bonus Tip: Dandelion leaves are edible and highly nutritious—consider harvesting young leaves for salads before removing the plant.


2. Plantain (Plantago major)

Broadleaf plantain is a common lawn invader, thriving in compacted soil and areas with poor turf coverage. Its wide leaves smother grass, and its fibrous roots cling tightly to dry summer ground.

Why They’re Easier to Pull in Fall:

  • Fall rains soften compacted soil, loosening plantain’s root grip.
  • Older plants weaken as temperatures drop, making them easier to uproot by hand.

How to Remove Them:

  • Loosen the soil with a trowel or weeding knife before pulling.
  • Try to get the root crown out, as new shoots can regrow from any remnants.
  • After removal, aerate the soil and overseed to discourage new plantain growth.

Bonus Tip: Plantain leaves are also edible and can be used in herbal remedies for minor skin irritations.


3. Crabgrass (Digitaria spp.)

Crabgrass is a summer annual weed that spreads aggressively, thriving in hot weather. By fall, however, this weed starts to decline naturally as temperatures cool.

Why They’re Easier to Pull in Fall:

  • Most crabgrass plants die after their life cycle in fall, leaving behind weak root systems.
  • Pulling them out before they drop seeds prevents an even bigger problem next summer.

How to Remove Them:

  • Simply hand-pull or rake out clumps since their roots loosen as they die back.
  • Dispose of pulled plants away from your compost if seed heads have already formed.
  • Apply mulch or reseed bare patches to prevent spring germination.

Bonus Tip: Fall removal of crabgrass significantly reduces the seed bank in your soil, leading to fewer infestations year after year.


4. Chickweed (Stellaria media)

Chickweed is a low-growing, sprawling weed that thrives in cool, damp conditions. It often sneaks into gardens in fall and early spring. Luckily, autumn gives gardeners the upper hand.

Why They’re Easier to Pull in Fall:

  • Chickweed grows shallow roots, which come out easily in moist fall soil.
  • Removing it before winter prevents it from spreading seeds during the next growing season.

How to Remove Them:

  • Pull chickweed by hand or use a hoe to scrape it out from the soil surface.
  • Because it grows in mats, lift entire clusters instead of individual stems.
  • Mulch the area heavily afterward to discourage re-establishment.

Bonus Tip: Chickweed is edible and often used in salads or as a garnish, making it a bonus harvest for adventurous gardeners.


5. Creeping Charlie (Glechoma hederacea)

Also called ground ivy, creeping Charlie is a stubborn perennial that spreads through runners, forming dense mats in shady areas of the lawn. It’s notoriously difficult to eradicate in summer when it grows vigorously.

Why They’re Easier to Pull in Fall:

  • Cooler weather slows its growth, making it less aggressive.
  • Soil moisture helps loosen the runners and roots, allowing you to lift large sections at once.
  • Removing it in fall prevents it from strengthening its root network over winter.

How to Remove Them:

  • Use a hand rake or cultivator to lift mats of creeping Charlie.
  • Pull steadily to get as many of the runners and roots as possible.
  • Overseed shaded areas with groundcover or shade-tolerant grass to compete against future growth.

Bonus Tip: Creeping Charlie has been used historically in teas and herbal remedies, though it should be consumed cautiously.


Best Practices for Fall Weed Removal

Now that we’ve identified the weeds, here are some general strategies to make fall weeding more effective:

  1. Weed After Rainfall – Moist soil makes pulling much easier.
  2. Use the Right Tools – Hand forks, hoes, or specialized weed pullers help extract roots without breaking them.
  3. Wear Gloves – Many weeds have irritating sap or rough leaves.
  4. Mulch Immediately – Cover bare soil with mulch to prevent dormant seeds from sprouting.
  5. Overseed Your Lawn – A dense, healthy lawn is the best natural defense against weeds.
  6. Dispose Properly – Avoid composting weeds that have gone to seed unless your compost reaches high enough temperatures to kill them.

Final Thoughts

Fall isn’t just about raking leaves or planting spring bulbs—it’s also a golden opportunity to get ahead of weeds. Tackling dandelions, plantain, crabgrass, chickweed, and creeping Charlie during this season makes the job easier and sets your garden up for success in spring. By using the natural conditions of autumn to your advantage, you can pull weeds with less struggle and greater long-term effectiveness.

So, the next time you head outdoors in the crisp fall air, don’t just admire the changing leaves—bring along your gloves and weeding tools. A little effort now means fewer headaches (and weeds) when the growing season returns.

5 Potted Plant Ideas For Small Balconies

5 Potted Plant Ideas For Small Balconies

Living in cities often means making do with compact spaces. If you’re fortunate enough to have a balcony, even a small one, you hold a golden opportunity to transform it into a green retreat. With the right potted plants, your balcony can be more than just a storage spot—it can become a serene garden, a splash of nature in the middle of urban life.

The best part? You don’t need a sprawling outdoor space to enjoy lush greenery. A few carefully chosen potted plants can maximize the beauty and utility of your small balcony. This guide will walk you through five inspiring potted plant ideas for small balconies, along with practical tips on arrangement, care, and design.


Why Choose Potted Plants For Small Balconies?

  • Space-efficient: Containers allow you to grow plants vertically, on railings, or in corners.
  • Portable: You can move pots around to chase the sun or redesign your space seasonally.
  • Customizable: A wide variety of shapes, sizes, and materials means pots can double as décor.
  • Low-maintenance: Many potted plants thrive with minimal effort, making them perfect for busy lifestyles.

With these benefits in mind, let’s explore the best plant ideas for maximizing your balcony garden.


1. Herb Pots for Fresh Flavors Year-Round

If you love cooking, start your balcony transformation with herbs in small pots. They take up little room, grow fast, and reward you with fresh, aromatic leaves.

Best herbs for small balcony pots:

  • Basil – Thrives in warm weather and adds fragrance.
  • Mint – Perfect for teas and cocktails, but keep it in its own pot to prevent spreading.
  • Parsley – Compact and versatile for everyday dishes.
  • Rosemary – Hardy, drought-tolerant, and evergreen.
  • Chives – Adds onion-like flavor and grows back quickly after trimming.

Tips for herb pots:

  • Use small to medium terracotta pots or railing planters.
  • Place them where they receive at least 4–6 hours of sunlight daily.
  • Snip leaves regularly to encourage bushier growth.

Design idea: Create a small herb corner with pots stacked on a tiered stand. This way, you save ground space while keeping all your herbs in easy reach.


2. Flowering Plants for Color and Cheer

Flowers instantly brighten any balcony and give it a welcoming feel. Even if your balcony is tiny, a few colorful flowering pots can add life and energy.

Best flowering plants for pots:

  • Geraniums – Hardy, long-lasting blooms in red, pink, or white.
  • Petunias – Spill over the edges of pots for a cascading effect.
  • Marigolds – Easy to grow and pest-repelling.
  • Begonias – Perfect for shaded balconies.
  • Lavender – Adds fragrance along with purple beauty.

Tips for flowering pots:

  • Pick self-watering containers to keep soil evenly moist.
  • Deadhead (remove faded blooms) regularly to encourage continuous flowering.
  • Choose flowers based on your balcony’s sunlight availability—shade lovers for low light, sun-lovers for bright spots.

Design idea: Hang pots of trailing petunias or fuchsias from balcony railings to create a colorful curtain effect without using up floor space.


3. Leafy Green Pots for Fresh Salads

Small balconies can double as a mini farm with pots full of leafy greens. They are quick-growing, compact, and can provide you with homegrown salads almost year-round.

Best leafy greens for balcony pots:

  • Spinach – Fast-growing and nutrient-rich.
  • Lettuce varieties – Loose-leaf, romaine, and butterhead adapt well to containers.
  • Kale – Hardy and continues growing even in cooler months.
  • Arugula – Peppery leaves that regrow after cutting.
  • Swiss chard – Colorful stems that also add ornamental value.

Tips for leafy green pots:

  • Choose wide, shallow pots since greens don’t require deep roots.
  • Water consistently to prevent leaves from turning bitter.
  • Harvest outer leaves and let inner ones keep growing for continuous supply.

Design idea: Arrange a row of rectangular balcony planters filled with mixed greens—creating both a food source and a decorative border.


4. Compact Fruit Plants for Urban Harvests

Yes, you can grow fruits on a small balcony! Certain dwarf fruit plants thrive in pots and bring both beauty and productivity to your space.

Best fruit plants for balcony containers:

  • Strawberries – Perfect for hanging baskets or small pots.
  • Dwarf citrus trees (lemon, orange) – Evergreen, fragrant, and rewarding.
  • Blueberries – Grow well in large pots with acidic soil.
  • Cherry tomatoes (technically fruit) – Compact and high-yielding.

Tips for fruit pots:

  • Use larger pots (12–18 inches deep) for root space.
  • Provide at least 6–8 hours of sunlight daily.
  • Fertilize regularly with organic compost or slow-release fertilizers.

Design idea: Hang strawberry pots or create a vertical fruit garden using stackable planters to save floor space while maximizing harvest.


5. Low-Maintenance Succulent and Cactus Pots

If you have little time for plant care, succulents and cacti are ideal. They thrive in small pots, require minimal water, and add sculptural beauty to your balcony.

Best succulents and cacti for pots:

  • Aloe vera – Useful for skincare and hardy.
  • Jade plant – Brings greenery with minimal fuss.
  • Echeveria – Rosette-shaped, compact, and decorative.
  • Barrel cactus – Striking form and low water needs.
  • Haworthia – Small, hardy, and thrives in partial shade.

Tips for succulent pots:

  • Use well-draining pots with cactus soil mix.
  • Water sparingly—only when the soil is fully dry.
  • Mix different varieties in one pot for a miniature desert garden look.

Design idea: Arrange a cluster of small succulent pots on a tray or shelf for a stylish, low-maintenance focal point.


Extra Tips for Designing Small Balcony Gardens

  • Go vertical: Use railing planters, wall-mounted pots, or tiered shelves.
  • Choose multipurpose plants: Edibles like herbs and greens double as food and decoration.
  • Pick lightweight containers: Plastic, resin, or fabric grow bags are easier to move.
  • Mix textures: Combine leafy, flowering, and trailing plants for visual depth.
  • Add furniture sparingly: A small chair or foldable table can turn your balcony garden into a cozy retreat.

Final Thoughts

Small balconies may come with space constraints, but with smart plant choices and thoughtful arrangements, they can become lush, productive, and inviting green corners. Whether you prefer fresh herbs, colorful flowers, nutritious greens, compact fruits, or low-maintenance succulents, there’s a perfect potted plant idea waiting for you.

The secret lies in balancing functionality and beauty—plants that not only thrive in containers but also make your balcony a refreshing escape. With these five potted plant ideas, your balcony can bloom into a miniature oasis, no matter its size.

How To Build a Vertical Container Garden at Home

How To Build a Vertical Container Garden at Home

Urban living and limited outdoor space have inspired gardeners to think creatively about how to grow more in less area. One of the most effective and attractive solutions is the vertical container garden. Instead of spreading plants across the ground, you grow upward, using walls, trellises, stacked containers, or modular systems. This technique not only maximizes space but also transforms plain walls and balconies into lush, productive, and visually striking gardens.

Whether you want fresh herbs in your kitchen, vibrant flowers on your balcony, or compact vegetable gardens on your patio, vertical gardening makes it possible. In this guide, we’ll walk through the benefits, materials, design options, step-by-step building instructions, and maintenance tips for creating your own vertical container garden at home.


Why Choose a Vertical Container Garden?

Before diving into construction, let’s explore why vertical gardening is such a smart choice:

  • Space Efficiency: Perfect for small balconies, patios, or apartments where ground space is limited.
  • Aesthetic Appeal: Creates a living wall of greenery that enhances any indoor or outdoor space.
  • Improved Airflow and Light: Elevating plants improves circulation and ensures better exposure to sunlight.
  • Easy Maintenance: No bending or kneeling required—plants are at eye level, making watering and harvesting more comfortable.
  • Versatility: Suitable for vegetables, herbs, flowers, and even decorative foliage.
  • Pest and Disease Reduction: Raising plants off the ground minimizes exposure to soil-borne pests and fungal infections.

Planning Your Vertical Container Garden

1. Choose the Right Location

  • Look for a spot with 4–8 hours of sunlight daily, depending on plant type.
  • Balconies, patios, fences, kitchen walls, or even sunny indoor areas can work.
  • Ensure easy access to water for regular maintenance.

2. Decide What to Grow

Not all plants thrive vertically. Compact, lightweight, and shallow-rooted species work best.

  • Herbs: Basil, parsley, thyme, mint, oregano.
  • Leafy Greens: Lettuce, spinach, kale, arugula.
  • Vegetables: Cherry tomatoes, peppers, bush beans, cucumbers (with support).
  • Flowers: Petunias, nasturtiums, pansies, marigolds.
  • Succulents: Excellent for decorative vertical walls.

3. Select Your Structure Style

There are multiple design approaches, each suited to different spaces:

  • Wall-mounted planters: Attach containers or pockets to a wall or wooden frame.
  • Stacked containers: Place pots on top of each other in a pyramid or tiered arrangement.
  • Hanging gardens: Suspend containers with ropes, hooks, or recycled materials.
  • Pallet gardens: Upcycle wooden pallets into vertical planting walls.
  • Tower gardens: Cylindrical containers with multiple planting holes.

Materials You’ll Need

Building a vertical garden doesn’t require expensive supplies. Here’s a basic checklist:

  • Containers: Plastic pots, fabric grow bags, recycled bottles, wooden boxes, or vertical planters.
  • Frame or Support: Wooden pallets, metal trellis, shelving unit, or wall hooks.
  • Potting Mix: Lightweight, well-draining soil enriched with compost.
  • Fertilizer: Balanced organic fertilizer or slow-release pellets.
  • Irrigation System: Watering can, drip irrigation, or self-watering setup.
  • Tools: Drill, screws, brackets, hammer, gardening gloves, and scissors (for DIY projects).

Step-by-Step Guide to Building a Vertical Container Garden

Step 1: Design Your Layout

Sketch out the structure and decide how many containers you’ll need. Consider spacing for airflow and sunlight.

Step 2: Prepare the Frame

  • For wall-mounted systems, attach shelves, racks, or planter hooks securely.
  • For pallet gardens, sand the pallet, add landscape fabric to the back and bottom, and create planting pockets.
  • For stacked containers, drill drainage holes and ensure stability by using larger pots at the base.

Step 3: Select and Prepare Containers

  • Ensure each container has drainage holes to prevent root rot.
  • Use lightweight materials (plastic, fabric) if attaching to walls to avoid excess weight.

Step 4: Add Soil and Fertilizer

  • Fill containers with high-quality potting mix rather than garden soil.
  • Mix in slow-release fertilizer or compost to provide nutrients.

Step 5: Plant Your Crops

  • Position taller or trailing plants at the top and smaller, shallow-rooted plants lower down.
  • Avoid overcrowding; leave enough space for root and leaf expansion.

Step 6: Install Watering System

  • Watering is critical in vertical gardens since containers dry out quickly.
  • Options include:
    • Manual watering with a can or hose.
    • Drip irrigation lines installed along rows of containers.
    • Self-watering planters with reservoirs.

Step 7: Secure and Stabilize

  • Anchor the frame to a wall or railing to prevent tipping.
  • Regularly check containers for stability, especially in windy areas.

Plant Care and Maintenance

A vertical container garden requires consistent care, especially during seasonal transitions.

Watering

  • Vertical gardens dry out faster due to exposure.
  • Check soil moisture daily; water when the top inch feels dry.
  • Water from top to bottom to ensure lower containers benefit from runoff.

Fertilizing

  • Nutrients leach faster in containers. Apply liquid fertilizer every 2–3 weeks or use slow-release granules.
  • Adjust feeding based on plant type (leafy greens need nitrogen, flowering plants need more potassium).

Pruning and Harvesting

  • Trim herbs and leafy greens regularly to promote fresh growth.
  • Harvest vegetables promptly to encourage continued production.
  • Prune dead leaves and flowers to prevent disease spread.

Pest and Disease Control

  • Common pests: aphids, spider mites, whiteflies. Use neem oil or insecticidal soap.
  • Ensure good airflow to prevent fungal diseases.
  • Rotate crops seasonally to maintain soil health.

Creative Vertical Garden Ideas

  • Herb wall in the kitchen: Mason jars or fabric pockets filled with herbs mounted near a sunny window.
  • Balcony flower wall: Colorful annuals cascading from stacked containers.
  • Vegetable tower: PVC pipes or barrel towers with multiple planting holes.
  • Recycled verticals: Hanging old shoe organizers, tin cans, or plastic bottles repurposed into planters.
  • Succulent art frame: Create a living picture frame with drought-tolerant succulents.

Common Mistakes to Avoid

  1. Overcrowding plants → restricts airflow and leads to disease.
  2. Ignoring drainage → causes root rot; always drill holes.
  3. Using garden soil → too heavy and compact; opt for potting mix.
  4. Uneven sunlight → rotate or reposition containers for balanced light exposure.
  5. Neglecting water needs → vertical systems dry out quicker than ground-level gardens.

Benefits Beyond Gardening

A vertical container garden isn’t just practical—it offers psychological and environmental benefits too:

  • Stress relief: Caring for plants lowers anxiety and improves mood.
  • Sustainability: Growing your own herbs and vegetables reduces reliance on store-bought produce.
  • Energy efficiency: Outdoor vertical gardens can act as natural insulation, keeping walls cooler in summer.
  • Home décor: Living walls add beauty and personality to your home.

Final Thoughts

Building a vertical container garden at home is an exciting way to combine creativity, sustainability, and productivity. With a bit of planning and the right setup, you can transform even the smallest corner of your home into a thriving green space.

By selecting the right plants, designing a stable structure, using quality soil, and maintaining proper watering and fertilization, you’ll enjoy a bountiful harvest of herbs, vegetables, or flowers throughout the year.

Whether you live in a compact apartment or a spacious house, a vertical garden proves that you don’t need vast land to grow fresh, healthy produce. All you need is vision, effort, and a few containers to bring your walls to life.

So, roll up your sleeves, gather your supplies, and start building your own vertical garden today—because the future of gardening is not just horizontal, but vertical.

The Right Way to Fertilize Container Plants in Fall

The Right Way to Fertilize Container Plants in Fall

Container gardening has become an increasingly popular way to grow vegetables, herbs, flowers, and even small shrubs in limited spaces. From urban balconies to compact patios, containers offer flexibility and mobility, allowing anyone to enjoy the pleasures of gardening. But as fall arrives, your plants face new challenges—shorter days, cooler nights, and changing nutrient needs.

One of the most important steps you can take to keep your container plants healthy through the autumn months is proper fertilization. Fertilizing in fall is not just about feeding plants—it’s about preparing them for the seasonal transition, ensuring continued growth, enhancing resilience, and in some cases, getting them ready for winter dormancy.

This article will guide you through the right way to fertilize container plants in fall, covering why it matters, what types of fertilizers to use, how to apply them, and common mistakes to avoid.


Why Fertilizing Container Plants in Fall Matters

Unlike plants growing in the ground, container plants depend entirely on the nutrients you provide. Over the summer, frequent watering leaches nutrients from the soil. By the time fall arrives, many containers are depleted, and without intervention, plants may struggle.

Here’s why fall fertilization is essential:

  • Restoring nutrients: Summer’s heavy growth and watering leave soil nutrient-poor. Fertilization replenishes what’s lost.
  • Supporting fall growth: Many vegetables, herbs, and flowers thrive in cool weather. Fertilizing keeps them vigorous.
  • Strengthening roots: Fall fertilizers help develop stronger root systems to endure temperature fluctuations.
  • Winter preparation: Perennials and overwintering plants need nutrients to build energy reserves before dormancy.

Understanding Plant Needs in Fall

Plants’ nutrient requirements shift as the seasons change. During spring and summer, they crave nitrogen for leafy growth. In fall, however, the focus shifts to root health, disease resistance, and fruit or flower production.

  • Nitrogen (N): Still needed, but in lower amounts, since excessive nitrogen in fall can lead to tender new shoots that are easily damaged by cold.
  • Phosphorus (P): Supports strong root development—critical for overwintering plants.
  • Potassium (K): Boosts disease resistance and improves cold tolerance.

For fall fertilization, choose products lower in nitrogen and higher in phosphorus and potassium.


Choosing the Right Fertilizer for Fall

There are three main categories of fertilizers suitable for container plants in fall:

1. Slow-Release Fertilizers

  • Provide a steady supply of nutrients over weeks.
  • Ideal for perennials, shrubs, and houseplants transitioning indoors.
  • Example: Coated granular fertilizers with balanced or low-nitrogen formulas.

2. Water-Soluble Fertilizers

  • Quick nutrient boost, absorbed directly by plant roots.
  • Great for cool-season annuals like pansies, lettuce, and spinach.
  • Can be applied every 2–3 weeks.

3. Organic Fertilizers

  • Include compost tea, worm castings, fish emulsion, seaweed extract, and bone meal.
  • Improve soil structure and microbial activity.
  • Gentle and safe for edible crops.

Tip: For container plants in fall, a fertilizer labeled around 5-10-10 (low nitrogen, higher phosphorus and potassium) works best.


How to Fertilize Container Plants in Fall: Step-by-Step

Step 1: Assess Plant Type and Stage

  • Annuals: Fertilize to encourage extended blooming or harvest until frost.
  • Perennials: Fertilize to build root reserves before dormancy.
  • Vegetables: Fall crops like kale, carrots, and radishes still need feeding for productivity.

Step 2: Refresh the Soil

  • Remove dead leaves and spent stems.
  • Gently loosen the top 1–2 inches of soil to aerate.
  • Add fresh compost or potting mix to restore structure.

Step 3: Select the Fertilizer

  • For leafy greens → balanced or slightly higher nitrogen.
  • For root vegetables and perennials → higher phosphorus and potassium.
  • For flowers → bloom-boosting formulas with low nitrogen.

Step 4: Apply Fertilizer Properly

  • Granular slow-release: Mix into the top layer of soil, then water thoroughly.
  • Liquid fertilizer: Dilute according to instructions and apply directly at the base of plants.
  • Compost tea or organic feeds: Pour evenly over the soil to encourage root absorption.

Step 5: Monitor and Adjust

  • Fertilize every 2–4 weeks depending on the product type.
  • Observe plant response—yellowing leaves may indicate nitrogen deficiency, while weak flowering signals low phosphorus.

Fertilizing Different Types of Container Plants in Fall

1. Vegetables

Cool-season vegetables like broccoli, kale, spinach, and carrots thrive in fall. Fertilize them every 2–3 weeks with a water-soluble, balanced fertilizer. Root crops especially benefit from higher phosphorus for development.

2. Herbs

Herbs such as parsley, thyme, and chives continue growing well in fall. Use light, organic fertilization every 3–4 weeks. Avoid overfeeding, as this may dilute flavor.

3. Flowers

Pansies, violas, and chrysanthemums brighten fall gardens. Use bloom-boosting fertilizers with low nitrogen and high potassium to extend flowering.

4. Perennials and Shrubs in Containers

For plants overwintering in pots, apply slow-release fertilizer rich in phosphorus and potassium once in early fall. This helps roots strengthen before dormancy.


Common Mistakes to Avoid

  1. Overfertilizing
    Too much fertilizer, especially nitrogen, encourages soft growth vulnerable to frost. Stick to recommended doses.
  2. Late Fertilization for Perennials
    Feeding perennials too late into fall can trigger new growth that won’t survive winter. Fertilize early to mid-fall only.
  3. Ignoring Soil Health
    Fertilizer alone isn’t enough. Refresh container soil annually with compost or a new potting mix.
  4. Skipping Watering
    Nutrients cannot be absorbed without consistent moisture. Dry soil reduces fertilizer effectiveness.
  5. Using the Wrong Fertilizer
    High-nitrogen fertilizers designed for spring growth are not suitable in fall. Always check the nutrient ratio.

Extra Tips for Fall Container Fertilization

  • Flush salts: If using chemical fertilizers, occasionally flush containers with plain water to prevent salt buildup.
  • Mulch lightly: Add a thin layer of straw or shredded leaves to help conserve moisture and regulate soil temperature.
  • Move containers: Place them where they’ll receive maximum fall sunlight.
  • Plan for winter: For perennials, stop fertilizing about 6 weeks before the first frost to allow natural dormancy.

Final Thoughts

Fertilizing container plants in fall is more than a seasonal chore—it’s a strategy for healthier plants, better yields, and smoother transitions into winter. By providing the right balance of nutrients, particularly phosphorus and potassium, you ensure strong roots, prolonged blooms, and resilient growth.

Whether you’re nurturing cool-season vegetables, keeping fall flowers vibrant, or preparing perennials for dormancy, the right fall fertilization techniques will make your container garden thrive. Avoid common mistakes, adjust to your plant’s needs, and remember: fall is not the end of the gardening season but a bridge to year-round success.

By mastering fall fertilization, you’ll enjoy robust plants that reward you with beauty and harvests—even as the days grow shorter and cooler.

7 Vegetables That Thrive in Small Containers

7 Vegetables That Thrive in Small Containers

Not everyone has access to a large backyard or raised garden beds, but that shouldn’t stop you from growing your own fresh vegetables. With the right choice of crops and some smart gardening techniques, even the smallest balcony, patio, or windowsill can be transformed into a productive mini-vegetable garden. Container gardening has become a popular solution for urban dwellers, apartment owners, and anyone short on space.

The key lies in choosing vegetables that adapt well to compact growing conditions. These plants need shallow root systems, efficient nutrient use, and the ability to produce high yields in limited soil. In this guide, we’ll explore 7 vegetables that thrive in small containers, along with detailed tips on planting, care, and harvesting to help you succeed.


Why Grow Vegetables in Containers?

Before diving into the list, let’s understand why container gardening is such an excellent option:

  • Space efficiency: Ideal for small balconies, patios, rooftops, or windowsills.
  • Mobility: Containers can be moved to catch sunlight or avoid harsh weather.
  • Soil control: You control the soil type, pH, and nutrient quality.
  • Pest and disease management: Elevating plants reduces exposure to soil-borne pests.
  • Year-round growing: With indoor containers and grow lights, you can extend the harvest season.

1. Lettuce and Leafy Greens

Why it thrives in containers:
Lettuce, spinach, arugula, and kale are shallow-rooted plants, making them perfect for compact pots. They grow quickly, can be harvested repeatedly, and don’t demand deep soil.

Container size:
6–8 inches deep, wide bowls or window boxes.

Growing tips:

  • Use a well-draining potting mix rich in organic matter.
  • Place in a spot that gets 4–6 hours of sunlight daily.
  • Water regularly to keep the soil moist but not soggy.
  • Harvest outer leaves first to encourage continual growth.

Harvest time:
3–6 weeks after planting, depending on the variety.


2. Radishes

Why it thrives in containers:
Radishes grow extremely fast, often maturing in less than a month. Their small roots don’t need much depth, making them a great beginner-friendly crop.

Container size:
6–8 inches deep, medium-sized pots.

Growing tips:

  • Sow seeds directly into containers for best results.
  • Thin seedlings to avoid overcrowding.
  • Keep soil consistently moist to prevent woody roots.
  • Best grown in cooler weather (spring or fall).

Harvest time:
20–30 days after sowing.


3. Cherry Tomatoes

Why it thrives in containers:
Cherry tomatoes are compact, highly productive, and adapt well to pots. Unlike larger tomato varieties, they don’t need as much root space and can yield fruit all season long.

Container size:
12–14 inches deep pots or 5-gallon buckets with good drainage.

Growing tips:

  • Choose dwarf or determinate varieties like Tiny Tim or Patio Princess.
  • Provide 6–8 hours of sunlight daily.
  • Support with a small stake or cage.
  • Feed with a tomato-specific fertilizer high in potassium.

Harvest time:
65–80 days after planting, with continual harvests.


4. Peppers (Bell and Chili)

Why it thrives in containers:
Peppers—both sweet and hot—grow well in confined spaces as long as they receive enough warmth and sunlight. Their compact growth habit makes them perfect for patios or balconies.

Container size:
10–12 inches deep pots or grow bags.

Growing tips:

  • Choose smaller varieties such as Mini Bell, Jalapeño, or Cayenne.
  • Provide 6–8 hours of sun and warm temperatures.
  • Water evenly, avoiding soggy soil.
  • Pinch off the first flowers to encourage stronger growth.

Harvest time:
60–90 days depending on the variety.


5. Green Onions (Scallions)

Why it thrives in containers:
Green onions take very little space, grow quickly, and can be harvested multiple times. They’re also perfect for indoor windowsill gardening.

Container size:
6 inches deep, narrow rectangular containers.

Growing tips:

  • Plant seeds or regrow from kitchen scraps by placing roots in water before potting.
  • Grow in partial to full sunlight (4–6 hours daily).
  • Harvest leaves regularly to stimulate regrowth.

Harvest time:
30–45 days after planting.


6. Bush Beans

Why it thrives in containers:
Unlike pole beans, bush beans have a compact form that fits perfectly into small containers. They’re also quick to mature and can produce abundant pods in limited space.

Container size:
12 inches deep, wide pots or window boxes.

Growing tips:

  • Plant seeds directly in the container.
  • Provide at least 6 hours of sunlight daily.
  • Water consistently, especially during flowering.
  • Support with small sticks if needed.

Harvest time:
50–60 days after sowing.


7. Carrots (Short Varieties)

Why it thrives in containers:
While traditional carrots need deep soil, smaller varieties such as Thumbelina, Parisian, or Short ‘n Sweet adapt perfectly to shallow pots.

Container size:
8–10 inches deep pots or troughs.

Growing tips:

  • Use light, loose, sandy soil to prevent misshapen roots.
  • Sow seeds directly and thin seedlings to avoid crowding.
  • Keep soil consistently moist for uniform growth.
  • Best grown in cooler seasons.

Harvest time:
60–75 days depending on the variety.


Additional Tips for Success in Small Containers

  1. Choose the right soil mix
    • Avoid garden soil; use a lightweight potting mix with compost for nutrition and perlite for drainage.
  2. Fertilize regularly
    • Nutrients leach quickly from containers. Use a balanced liquid fertilizer every 2–3 weeks.
  3. Water wisely
    • Container plants dry out faster than in-ground gardens. Check soil daily and water when the top inch feels dry.
  4. Maximize sunlight
    • Place containers in the sunniest spot available. For indoor gardening, consider LED grow lights.
  5. Rotate crops
    • Even in containers, rotating crops prevents nutrient depletion and reduces pest risks.
  6. Prune and manage growth
    • Pinch back excess leaves on tomatoes, peppers, or lettuce to direct energy into producing more vegetables.

Final Thoughts

Container gardening proves that you don’t need sprawling land to enjoy homegrown produce. With the right techniques, even small balconies, patios, or sunny kitchen windows can become productive gardens. Among all the options, lettuce, radishes, cherry tomatoes, peppers, green onions, bush beans, and compact carrots stand out as the best vegetables for small containers.

They are space-efficient, easy to care for, and capable of delivering fresh harvests throughout the growing season. Whether you’re a beginner gardener experimenting with your first pots or a seasoned grower maximizing limited space, these vegetables offer high rewards with minimal effort.

So grab a few pots, some quality soil, and seeds—and transform your small space into a thriving container garden that brings healthy, delicious food right to your table.