How To Grow Strawberries In Containers Year-Round

How To Grow Strawberries In Containers Year-Round

Strawberries are one of the most beloved fruits worldwide, prized for their sweet flavor, vibrant red color, and versatility in the kitchen. Many gardeners, however, believe that strawberries can only be grown in outdoor garden beds during certain seasons. The truth is, with the right techniques, you can enjoy homegrown strawberries in containers all year long. Growing strawberries in pots, hanging baskets, or vertical planters not only saves space but also gives you better control over soil conditions, pests, and climate. Whether you live in a small apartment or a house with limited yard space, container-grown strawberries can provide continuous harvests when managed properly.

This guide will walk you through the step-by-step process of successfully growing strawberries in containers year-round, covering everything from choosing the right varieties to ensuring proper care during each season.


Why Grow Strawberries in Containers?

Container gardening has surged in popularity, and strawberries are among the easiest fruits to adapt to this method. Here are some key benefits:

  • Space-saving: Perfect for small patios, balconies, or even sunny windowsills.
  • Mobility: Containers can be moved indoors during cold winters or to sunnier spots when needed.
  • Pest control: Elevating strawberries off the ground reduces slug, snail, and soil-borne disease problems.
  • Extended harvest: With the right care, strawberries can produce fruit beyond their natural season.

Choosing the Right Strawberry Variety

Not all strawberries are equally suited for year-round container growth. Your choice of variety will greatly influence yield, flavor, and frequency of harvests.

  1. June-bearing strawberries
    • Produce one large harvest in early summer.
    • Less suitable for year-round production, but good if you want a big seasonal crop.
  2. Everbearing strawberries
    • Produce two to three harvests per year, usually in spring and late summer.
    • A good choice for container gardeners who want multiple crops.
  3. Day-neutral strawberries
    • The best option for year-round growing.
    • Continue producing fruit as long as temperatures remain between 35°F–85°F (2°C–29°C).
    • Popular varieties: Seascape, Albion, Tribute, Tristar.

If your goal is year-round harvest, day-neutral varieties are your best bet.


Selecting the Right Containers

Strawberries have shallow root systems, so they don’t require very deep pots, but they do need good drainage and adequate space.

  • Size: Choose a container at least 12 inches wide and 8 inches deep for 2–3 plants. Larger planters can hold multiple plants.
  • Material: Terracotta, ceramic, or food-grade plastic work well. Ensure they have drainage holes.
  • Specialty containers:
    • Strawberry pots (with side pockets) allow vertical planting.
    • Hanging baskets keep fruits off the ground and save space.
    • Tiered planters maximize production in compact spaces.

Preparing the Soil Mix

Strawberries thrive in light, fertile, and well-drained soil. Garden soil alone is too heavy for containers, so prepare a custom potting mix.

  • Base mix: Use a high-quality potting soil.
  • Additives for aeration: Mix in perlite or coconut coir to prevent compaction.
  • Nutrients: Blend in compost or well-rotted manure for organic richness.
  • pH level: Keep soil slightly acidic, around 5.5–6.5.

Planting Strawberries in Containers

Once you have your container and soil ready, follow these steps:

  1. Prepare plants: Buy healthy seedlings or bare-root plants from a reputable nursery.
  2. Spacing: Place plants about 8–10 inches apart. Overcrowding reduces air circulation and increases disease risk.
  3. Planting depth: Position the crown (the central growing point) at soil level. Planting too deep may rot the crown, while planting too shallow may dry it out.
  4. Water thoroughly after planting to help roots settle.

Watering and Fertilizing

Consistent care is essential to keep strawberries thriving year-round.

Watering

  • Keep soil consistently moist but not waterlogged.
  • Water when the top inch of soil feels dry.
  • Use drip irrigation or a watering can with a narrow spout to avoid wetting the leaves, which reduces fungal problems.

Fertilizing

  • Strawberries are heavy feeders, especially in containers.
  • Apply a balanced liquid fertilizer (10-10-10) every 2–3 weeks during the growing season.
  • Switch to a high-potassium fertilizer (like tomato feed) when plants begin flowering for better fruit production.

Light and Temperature Needs

Strawberries need plenty of sunlight to produce fruit.

  • Sunlight: Provide at least 6–8 hours of direct sunlight daily. If indoors, use grow lights.
  • Temperature: Ideal range is 60–80°F (15–27°C).
  • Winter care: Move containers indoors or into a greenhouse when temperatures drop below freezing.

Pollination for Indoor Plants

Outdoor strawberries are pollinated by bees and other insects, but indoor container plants may need manual pollination.

  • Use a small paintbrush or cotton swab to gently transfer pollen from flower to flower.
  • Alternatively, place a small fan near the plants to mimic natural airflow.

Managing Runners

Strawberries naturally produce runners (long stems that form baby plants). While useful for propagation, they can reduce fruit production in containers.

  • Trim runners regularly if your goal is larger, sweeter berries.
  • If you want more plants, allow a few runners to root in small pots of soil.

Protecting Strawberries from Pests and Diseases

Even in containers, strawberries can face challenges.

  • Common pests: Aphids, spider mites, and fruit flies. Use neem oil spray or insecticidal soap.
  • Fungal issues: Powdery mildew and gray mold are common. Avoid overhead watering and ensure good air circulation.
  • Slugs and snails: Less of a problem in containers, but keep pots raised off the ground.

Extending the Harvest Year-Round

The key to enjoying strawberries in every season lies in maintaining optimal growing conditions and using succession planting.

  • Succession planting: Start new seedlings every 3–4 months so that some plants are always producing.
  • Indoor growing: Use LED grow lights and regulate room temperature during winter.
  • Overwintering: If plants slow down in winter, allow them a short rest period, then encourage regrowth with pruning and fresh fertilizer.

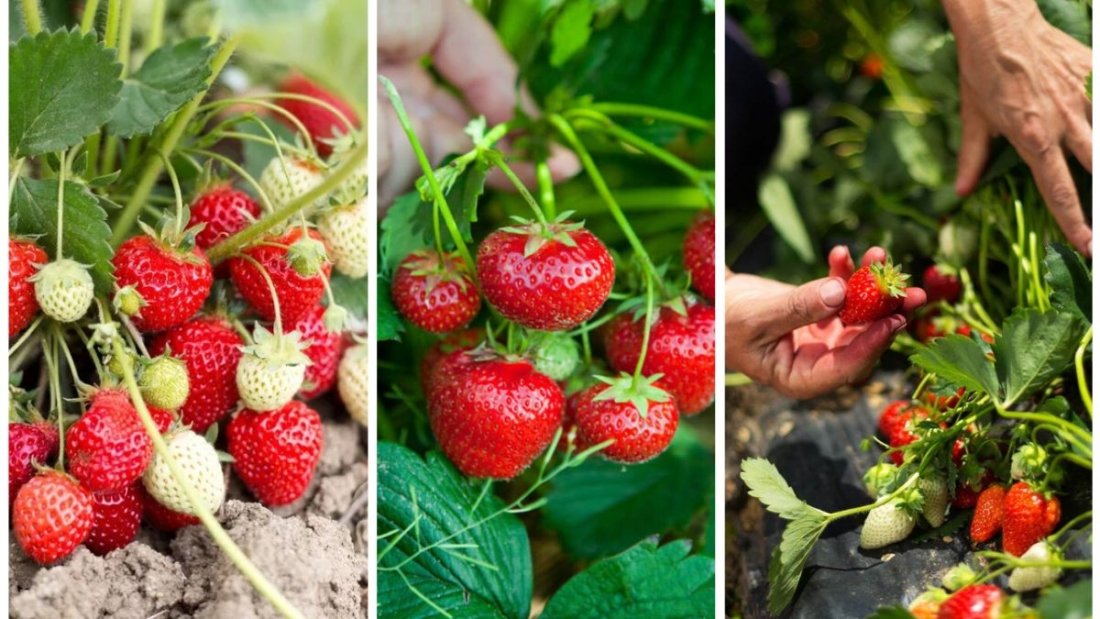
Harvesting and Storing Strawberries

  • Harvest when fruits are fully red and ripe; strawberries do not continue ripening after being picked.
  • Pick carefully to avoid bruising. Hold the stem and gently twist.
  • Consume fresh within 2–3 days, or refrigerate to extend shelf life slightly.
  • Freeze excess berries for smoothies, jams, or desserts.

Common Mistakes to Avoid

  1. Overwatering – leads to root rot.
  2. Planting too deep – causes crown rot.
  3. Using poor soil – compact soil restricts root growth.
  4. Insufficient sunlight – reduces fruit yield.
  5. Not rotating plants – strawberries lose vigor after 2–3 years; replace or refresh them regularly.

Final Thoughts

Growing strawberries in containers year-round is not just possible—it’s rewarding, delicious, and surprisingly simple once you master the basics. By choosing the right variety, providing proper soil and nutrients, managing light and temperature, and giving consistent care, you can enjoy sweet, homegrown strawberries no matter the season.

Whether you’re tending pots on a sunny balcony, hanging baskets on your porch, or grow lights indoors, container strawberries bring freshness and beauty to your home. With a little patience and attention, you’ll have a steady supply of juicy berries to enjoy in smoothies, desserts, salads, or straight from the plant—all year long.

The Easiest Way To Harvest Leafy Greens Without Regrowth Loss

The Easiest Way To Harvest Leafy Greens Without Regrowth Loss

Leafy greens are the backbone of any productive home garden. Whether it’s crisp romaine, tender spinach, nutrient-packed kale, or versatile Swiss chard, these plants provide continuous harvests throughout the growing season. But many gardeners unknowingly shorten the life of their crops by harvesting incorrectly. Pulling whole plants, cutting too close to the crown, or stripping too many leaves at once can prevent regrowth, drastically reducing your yield.

Fortunately, there’s a simple strategy that allows you to enjoy a steady supply of fresh greens for weeks—even months—without harming your plants. By learning the easiest way to harvest leafy greens without regrowth loss, you’ll turn your garden into a self-renewing source of salads, stir-fries, and smoothies.


Why Harvesting Technique Matters

Unlike root crops or fruiting plants, leafy greens rely entirely on their foliage for photosynthesis. Each leaf is a solar panel, capturing sunlight to fuel continued growth. Harvest too aggressively, and the plant lacks the energy to recover. On the other hand, if you harvest properly, the plant can regenerate, often producing more tender and flavorful leaves than before.

The way you harvest determines:

  • Longevity: Proper techniques extend the life of your plants.
  • Yield: You’ll harvest more food overall, even from a small space.
  • Quality: Leaves remain tender, nutritious, and less prone to bolting.
  • Sustainability: Minimal plant loss means less reseeding and replanting.

Think of harvesting as pruning. When done thoughtfully, it encourages vigorous regrowth. When done carelessly, it can end your harvest prematurely.


The Cut-and-Come-Again Method

The most reliable and easiest harvesting technique for leafy greens is the cut-and-come-again method. This approach allows you to remove individual leaves while preserving the plant’s growing crown and central bud.

Here’s how it works:

  1. Start with mature leaves: Wait until leaves are at least 4–6 inches long.
  2. Harvest from the outside in: Take the outer, older leaves first. Leave the tender inner leaves and central crown intact.
  3. Cut above the crown: Snip or pinch the leaf stem about 1 inch above the base. Avoid damaging the growing point in the center.
  4. Leave enough foliage: Always keep at least 1/3 of the plant’s leaves intact to ensure continued photosynthesis.

This method mimics natural grazing patterns and encourages the plant to keep producing. It works perfectly for spinach, kale, lettuce, mustard greens, Swiss chard, and even herbs like cilantro and parsley.


Harvesting Tips for Specific Leafy Greens

Different greens have slightly different preferences, and tailoring your harvest style to the crop ensures the best regrowth.

1. Lettuce

  • For loose-leaf varieties, use the cut-and-come-again method.
  • For head-forming types (like romaine), you can harvest outer leaves or cut the entire head about 2 inches above the crown. Many will regrow smaller secondary heads.

2. Spinach

  • Harvest individual leaves from the outside.
  • Spinach bolts quickly in warm weather, so frequent light harvests encourage tender regrowth.

3. Kale

  • Remove the largest bottom leaves first, working your way up the stem.
  • Kale is highly resilient and can keep producing for months with proper harvesting.

4. Swiss Chard

  • Snip outer leaves just above the soil line.
  • Avoid cutting too close to the crown, as this may stop regrowth.

5. Collard Greens

  • Like kale, harvest from the bottom up.
  • Collards tolerate repeated picking well and often become sweeter after frost.

6. Arugula and Mustard Greens

  • Pinch or cut leaves as soon as they’re big enough to eat.
  • Harvest frequently but lightly to delay bolting.

How Often Can You Harvest?

The frequency of harvesting depends on the growth rate of the plant and environmental conditions.

  • Cool-weather crops like spinach and lettuce regenerate more quickly in spring and fall.
  • Warm-weather crops like chard and kale grow steadily through summer.
  • General rule: Harvest every 5–7 days, removing only what you’ll eat in a week.

This rhythm gives the plant time to replenish energy stores while providing a consistent supply of greens.


Tools and Techniques for Gentle Harvest

While it’s tempting to yank leaves by hand, improper pulling can damage stems or uproot the plant. Instead, use these tools and tricks:

  • Sharp scissors or garden shears: Clean cuts reduce plant stress and prevent disease.
  • Pinching with fingers: Works for tender crops like lettuce or spinach.
  • Harvest in the morning: Leaves are crisper and less stressed before the day’s heat.
  • Avoid wet conditions: Cutting wet leaves can spread fungal diseases.

Mistakes That Shorten Harvest

Even experienced gardeners sometimes sabotage regrowth. Here are common pitfalls to avoid:

  1. Cutting too close to the crown: Damaging the central bud prevents new leaves from forming.
  2. Stripping the plant bare: Always leave some foliage for photosynthesis.
  3. Harvesting too late: Over-mature leaves become tough and trigger bolting.
  4. Neglecting regular harvest: Picking stimulates growth—if you wait too long, plants may flower instead.

Boosting Regrowth After Harvest

Healthy regrowth doesn’t just depend on cutting technique—it also requires good plant care. To maximize recovery:

  • Feed lightly: Apply a balanced fertilizer or compost tea after heavy harvests.
  • Water consistently: Stress from drought slows regrowth and promotes bolting.
  • Mulch: Helps maintain soil moisture and keep roots cool.
  • Provide partial shade: For tender crops like lettuce, shading extends the harvest season.

By combining proper harvesting with supportive care, you’ll create a cycle of continuous production.


Extending the Season for Leafy Greens

If you want leafy greens beyond their natural growing season, there are simple tricks:

  • Succession planting: Sow new seeds every 2–3 weeks for staggered harvests.
  • Row covers or tunnels: Protect greens from frost and pests while encouraging regrowth.
  • Indoor harvesting: Grow small containers of lettuce, spinach, or microgreens on a windowsill for year-round supply.

This way, you’ll always have fresh greens on hand without needing to reseed your entire garden.


Why This Method Saves Time and Effort

The cut-and-come-again method isn’t just beneficial for plants—it’s efficient for gardeners, too.

  • Less replanting: Plants regrow, saving you from sowing new seeds constantly.
  • Steady supply: Instead of feast-and-famine harvests, you enjoy a continuous flow of food.
  • Space saving: Even a small raised bed or container can produce for months.
  • Cost effective: Extending the lifespan of your crops reduces the need for extra seed packets.

Final Thoughts

The secret to harvesting leafy greens without regrowth loss lies in understanding how plants regenerate. By using the cut-and-come-again method, focusing on outer leaves, and leaving the crown intact, you give your plants the chance to thrive long after the first harvest. Combined with proper watering, feeding, and care, this technique turns a one-time harvest into a season-long bounty.

So, the next time you head into your garden with scissors in hand, remember: harvest wisely, and your greens will reward you with endless bowls of freshness.

How To Collect Seeds From Cosmos Without Losing Them

How To Collect Seeds From Cosmos Without Losing Them

Cosmos are among the most delightful flowers you can grow in the garden. With their delicate, daisy-like blooms and feathery foliage, they bring color, charm, and pollinator activity to any space. But cosmos are more than just pretty faces—they are also prolific seed producers, making them an excellent choice for gardeners who enjoy saving seeds for the next growing season.

However, if you’ve ever tried collecting cosmos seeds, you know it’s not always straightforward. The seeds are lightweight, slender, and often scatter easily in the wind or fall unnoticed to the ground. Without the right technique, you can lose a large portion of your harvest.

This article will guide you through the entire process of collecting cosmos seeds without losing them—from identifying mature seeds to harvesting, drying, storing, and even strategies for ensuring minimal waste. By mastering these steps, you’ll have plenty of cosmos seeds to replant, share, or store for future seasons.


Why Save Cosmos Seeds?

Before diving into the how-to, let’s consider the benefits of seed saving:

  • Cost savings: A few cosmos plants can yield hundreds of seeds, saving you money on buying new packets each year.
  • Self-sufficiency: Collecting your own seeds reduces reliance on commercial sources.
  • Local adaptation: Seeds saved from your garden become more resilient over time, adapting to your soil and climate conditions.
  • Biodiversity preservation: By saving seeds from heirloom or open-pollinated cosmos, you help preserve plant diversity.
  • Sharing potential: Extra seeds can be swapped with fellow gardeners or gifted to friends.

Understanding Cosmos Seeds

Cosmos flowers belong to the daisy family (Asteraceae). Once the bloom fades, the center of the flower head develops into a cluster of seeds.

  • Shape: Long, slender, needle-like seeds about 1–1.5 cm in length.
  • Color: Dark brown to black when mature.
  • Quantity: Each flower head can yield dozens of seeds.

Cosmos are open-pollinated, which means seeds will usually produce plants similar to the parent. However, if you grow multiple varieties close together, cross-pollination may result in new color combinations—a fun surprise for adventurous gardeners.


Step 1: Allow Flowers to Mature on the Plant

The first step in successful seed collection is patience. Cosmos seeds must fully mature before they can be harvested.

  • Signs of maturity:
    • Petals dry and fall off.
    • Seed heads turn brown and feel dry.
    • Seeds appear dark and firm, not green or soft.

Leaving flowers on the plant until they dry naturally ensures viable seeds. Deadheading too early (removing blooms while still fresh) prevents seed development.


Step 2: Timing Your Harvest

Cosmos seeds are notorious for scattering if not harvested at the right moment.

  • Too early: Seeds are immature and won’t germinate.
  • Too late: Seeds fall off or blow away with the wind.

Best time to harvest: When seed heads are brown and dry but before they start dropping. The seeds should separate easily from the flower head with a gentle pull.


Step 3: Tools and Materials You’ll Need

Having the right tools prevents seed loss and makes the process easier:

  • Pruning shears or scissors – to snip off seed heads.
  • Paper bags or envelopes – to catch seeds as you harvest.
  • Fine mesh bag (optional) – to cover flower heads before seeds drop.
  • Shallow trays or plates – for drying seeds indoors.
  • Labels and markers – to keep track of varieties.

Step 4: Collecting Seeds Without Losing Them

This is the step where many gardeners struggle—cosmos seeds scatter easily if you’re not careful. Here are effective methods to reduce losses:

Method 1: Bagging Flower Heads

  • Place a fine mesh bag, muslin bag, or even a paper bag over mature flower heads.
  • Secure with a string or twist tie.
  • When seeds mature, they fall into the bag instead of the ground.

Method 2: Hand Harvesting

  • Gently grasp the dried flower head and pluck seeds directly into a container.
  • Do this over a tray or bowl to catch any that fall.

Method 3: Cutting and Collecting

  • Snip off entire dried flower heads.
  • Place them in a paper bag.
  • Once indoors, rub the heads between your fingers to release seeds.

Step 5: Cleaning and Sorting Seeds

Freshly collected seeds often include bits of dried petals, stems, or immature seeds. Cleaning ensures better storage and germination.

  • Manual cleaning: Rub seeds gently between fingers to separate them from chaff.
  • Blowing method: Place seeds in a shallow bowl and gently blow across them to remove lighter debris.
  • Discard weak seeds: Remove small, shriveled, or pale seeds as they are less likely to germinate.

Step 6: Drying Seeds Properly

Drying is essential to prevent mold and preserve seed quality.

  • Spread cleaned seeds in a single layer on a paper towel, plate, or mesh screen.
  • Place in a warm, dry, well-ventilated area out of direct sunlight.
  • Allow them to dry for 1–2 weeks.
  • Test dryness by bending a seed; it should snap, not bend.

Step 7: Storing Cosmos Seeds

Correct storage ensures seeds remain viable for years.

  • Containers: Use paper envelopes, labeled jars, or airtight containers. Paper is ideal because it allows airflow.
  • Labeling: Always mark the variety and collection date.
  • Environment: Store in a cool, dark, and dry location. A temperature of 40–50°F (like a fridge) is ideal.
  • Lifespan: Cosmos seeds remain viable for up to 3 years, though fresher seeds germinate best.

Step 8: Testing Seed Viability

Before sowing next season, test your saved seeds for germination rates:

  1. Place 10 seeds on a damp paper towel.
  2. Fold and seal in a plastic bag.
  3. Leave in a warm place for 7–10 days.
  4. Count how many sprout.

A germination rate of 70% or higher indicates healthy seeds.


Common Mistakes to Avoid

  • Harvesting too early: Immature seeds won’t grow.
  • Storing before drying: Leads to mold and rot.
  • Using plastic bags immediately: Traps moisture.
  • Forgetting to label: Causes confusion between varieties.
  • Handling roughly: Damages seeds and reduces viability.

Bonus Tips to Maximize Seed Collection

  • Choose the best parent plants: Save seeds from strong, disease-free, and vibrant plants.
  • Stagger harvests: Cosmos produce seeds continuously, so check every few days during late summer and fall.
  • Grow open-pollinated varieties: For consistent results, avoid hybrids, as seeds may not come true.
  • Keep some flowers for pollinators: Don’t harvest every bloom; cosmos are important nectar sources for bees and butterflies.

Bringing It All Together

Collecting cosmos seeds is a simple but rewarding practice. The challenge lies in preventing seed loss, as these lightweight seeds are quick to scatter. By letting flowers mature fully, harvesting at the right moment, and using strategies like bagging or careful hand collection, you can gather an abundance of seeds with minimal waste.

Once harvested, proper cleaning, drying, and storage guarantee a supply of viable seeds for future plantings. With just a little care, your garden can bloom with cosmos year after year, without the need to purchase new seed packets.

Not only will you save money and preserve your favorite varieties, but you’ll also strengthen your bond with the natural cycle of gardening—watching plants grow, bloom, seed, and return again. The next time you see a cosmos flower swaying in the breeze, remember: it holds the promise of many more to come, if you know how to collect its seeds without losing them.

6 Herbs That Dry Perfectly For Winter Teas

6 Herbs That Dry Perfectly For Winter Teas

Few things are as comforting on a chilly winter evening as a warm cup of herbal tea. Beyond their soothing flavors, herbal teas carry numerous health benefits, from boosting immunity to calming the mind. While store-bought teas are convenient, there’s a special satisfaction in making your own blends—especially when they come from herbs you’ve grown and dried yourself.

The secret to having a steady supply of flavorful teas all winter long lies in selecting the right herbs to dry. Some herbs retain their aroma, flavor, and medicinal qualities beautifully when dried, making them ideal for winter tea blends. In this article, we’ll look at six herbs that dry perfectly for winter teas, along with tips on harvesting, drying, storing, and blending them into delicious, healthful infusions.


Why Dry Herbs for Winter Teas?

Drying herbs is one of the oldest methods of preservation. By removing moisture, you prevent spoilage while retaining essential oils that provide flavor and medicinal value. The benefits of drying herbs for tea include:

  • Year-round supply – Enjoy summer-grown herbs even during cold months.
  • Cost savings – Reduce dependence on store-bought herbal teas.
  • Quality control – You know exactly how your herbs were grown and processed.
  • Customization – Create blends tailored to your personal taste and wellness needs.

Best Methods for Drying Herbs

Before diving into specific herbs, let’s quickly review the best drying methods:

  1. Air drying – Tie small bundles of herbs and hang them upside down in a dark, well-ventilated room.
  2. Dehydrator drying – Speeds up the process while protecting delicate flavors.
  3. Oven drying – Works for small batches; set the oven to its lowest temperature.
  4. Screen drying – Spread herbs on mesh screens to allow good airflow.

No matter the method, always harvest herbs in the morning after dew has evaporated, when essential oils are at their peak.


1. Peppermint (Mentha × piperita)

Peppermint is a classic choice for herbal teas. Its refreshing, cooling flavor makes it both soothing and invigorating.

  • Flavor profile: Bold, minty, slightly sweet.
  • Health benefits: Aids digestion, eases headaches, and clears nasal passages.
  • Harvesting: Pick leaves just before the plant flowers for maximum oil content.
  • Drying: Remove leaves from stems and spread on a screen or use a dehydrator at low heat.
  • Storage: Store in airtight containers away from light to preserve aroma.

Winter tea idea: Combine dried peppermint with chamomile for a calming bedtime blend, or with green tea for a digestive aid after heavy meals.


2. Chamomile (Matricaria chamomilla)

Chamomile is one of the most beloved herbs for tea, prized for its calming properties.

  • Flavor profile: Light, floral, with a hint of apple-like sweetness.
  • Health benefits: Promotes relaxation, eases anxiety, supports restful sleep, and helps with upset stomach.
  • Harvesting: Collect flower heads when fully open, ideally in the morning.
  • Drying: Spread flowers in a single layer on a screen or dry them in a dehydrator at low temperatures. Avoid high heat, which can damage delicate oils.
  • Storage: Keep dried flowers in glass jars in a cool, dark cupboard.

Winter tea idea: Blend dried chamomile with lavender and lemon balm for a stress-relieving evening tea.


3. Lemon Balm (Melissa officinalis)

Lemon balm, a member of the mint family, retains its bright citrusy flavor well when dried, making it a perfect addition to winter teas.

  • Flavor profile: Refreshing lemon with subtle mint undertones.
  • Health benefits: Reduces stress, aids sleep, supports digestion, and has antiviral properties.
  • Harvesting: Harvest leaves just before the plant flowers, when oils are strongest.
  • Drying: Air dry in small bundles or use a dehydrator; lemon balm dries quickly and should be stored promptly to avoid loss of oils.
  • Storage: Best stored in dark tins or airtight jars to maintain lemony scent.

Winter tea idea: Mix lemon balm with dried ginger root and honey for a soothing tea that combats colds and lifts the mood.


4. Lavender (Lavandula angustifolia)

Lavender is more commonly known for its fragrance, but it also makes a delightful tea ingredient when dried.

  • Flavor profile: Floral, slightly sweet, with a hint of rosemary-like undertone.
  • Health benefits: Calms nerves, reduces insomnia, relieves headaches, and supports relaxation.
  • Harvesting: Pick flower spikes when blooms are just beginning to open.
  • Drying: Hang small bundles upside down in a dry, dark place. Once dry, strip buds from stems.
  • Storage: Store dried buds in airtight jars; avoid crushing until use to retain flavor.

Winter tea idea: Combine dried lavender with chamomile and mint for a relaxing floral blend, perfect before bedtime.


5. Rosemary (Rosmarinus officinalis)

While often used in savory cooking, rosemary also works wonderfully in herbal teas, especially when dried.

  • Flavor profile: Strong, piney, with hints of lemon and pepper.
  • Health benefits: Boosts memory, supports circulation, reduces inflammation, and aids digestion.
  • Harvesting: Cut sprigs before flowering for peak oil content.
  • Drying: Hang sprigs upside down or use a dehydrator; rosemary retains flavor well even when fully dried.
  • Storage: Store whole sprigs or stripped leaves in glass jars.

Winter tea idea: Blend dried rosemary with lemon balm and a slice of dried orange peel for a warming, invigorating tea.


6. Thyme (Thymus vulgaris)

Thyme may be an unexpected tea herb, but it retains both flavor and medicinal qualities beautifully when dried.

  • Flavor profile: Earthy, slightly minty, and subtly peppery.
  • Health benefits: Excellent for respiratory health, supports immunity, relieves coughs, and aids digestion.
  • Harvesting: Harvest sprigs before the plant flowers for the best concentration of oils.
  • Drying: Bundle and hang upside down, or use a dehydrator at low heat. Once dry, strip leaves from stems.
  • Storage: Keep in airtight jars, away from light.

Winter tea idea: Combine dried thyme with honey and lemon for a soothing cold-fighting tea.


Blending Tips for Winter Herbal Teas

Once you’ve dried your herbs, the fun part begins—mixing them into unique blends. Here are some ideas:

  • Relaxation blend: Chamomile + lavender + lemon balm.
  • Digestive blend: Peppermint + chamomile + rosemary.
  • Immune boost blend: Thyme + lemon balm + ginger.
  • Refreshing blend: Peppermint + rosemary + dried citrus peel.

When blending, start with equal parts of each herb and adjust to taste. Remember, stronger herbs like rosemary and thyme should be used sparingly compared to milder ones like chamomile or lemon balm.


Storing Dried Herbs

Proper storage ensures your herbs maintain their flavor and potency all winter:

  • Containers: Glass jars with tight lids, opaque tins, or paper bags.
  • Location: Store in a cool, dark, and dry place.
  • Shelf life: Most dried herbs retain quality for 6–12 months. Crush leaves only when ready to brew for maximum flavor.

Brewing the Perfect Cup

To make a cup of winter herbal tea:

  1. Use 1 teaspoon of dried herbs per cup of water.
  2. Bring water to a boil and pour over herbs.
  3. Cover and steep for 5–10 minutes (longer for stronger flavor).
  4. Strain, sweeten with honey if desired, and enjoy.

Final Thoughts

Drying herbs for winter teas is a rewarding way to preserve the flavors and wellness benefits of summer. Peppermint, chamomile, lemon balm, lavender, rosemary, and thyme all dry beautifully, retaining their taste and medicinal qualities for months. With the right harvesting, drying, and storage methods, you can create a winter pantry full of comforting, healthful teas that warm the body and soul.

So the next time you sip a steaming mug of homemade herbal tea on a frosty evening, you’ll not only enjoy the taste—you’ll also savor the connection to your summer garden and the age-old tradition of herb preservation.

The Right Time To Harvest Pumpkins For Best Storage

The Right Time To Harvest Pumpkins For Best Storage

Pumpkins are more than just a festive decoration for Halloween or Thanksgiving—they are also a versatile crop for cooking, baking, and long-term storage. However, if you want to enjoy their rich flavor and ensure they last through the winter months, knowing the right time to harvest pumpkins is critical. Harvest too early, and they may rot or fail to develop their full flavor. Harvest too late, and frost or decay could ruin them.

This article will guide you through every aspect of harvesting pumpkins at the perfect time for maximum storage life, covering signs of maturity, harvesting techniques, curing, and storage conditions. By following these steps, you’ll not only extend the shelf life of your pumpkins but also preserve their quality and taste.


Why Harvest Timing Matters

The timing of pumpkin harvest has a direct impact on storage:

  • Flavor and sweetness – Pumpkins need time to fully ripen on the vine to develop natural sugars and flavor.
  • Durability – Mature pumpkins have harder rinds, making them resistant to rot and pests.
  • Shelf life – Properly harvested and cured pumpkins can last 3–6 months in storage.
  • Nutrient density – Pumpkins harvested at peak ripeness retain more vitamins, minerals, and antioxidants.

Harvesting too early can result in pumpkins that shrivel, soften, or spoil quickly. Harvesting too late risks frost damage, which shortens storage life significantly.


Signs That Pumpkins Are Ready for Harvest

Unlike some fruits, pumpkins don’t continue to ripen well after being picked. That’s why it’s essential to identify the right harvest stage while they’re still on the vine.

Here are the key signs to look for:

  1. Color Change
    • The skin turns deep orange (or the mature color of the variety).
    • For specialty pumpkins (white, blue, or green varieties), the skin should reach its consistent mature shade.
  2. Hard Rind
    • The rind should be firm and resist puncture when pressed with your fingernail.
    • A soft rind indicates immaturity.
  3. Dying Vines
    • The pumpkin vine begins to wither and turn brown.
    • This is a natural sign the plant has finished feeding the fruit.
  4. Hollow Sound
    • Gently tap the pumpkin—it should sound hollow.
  5. Dry Stem
    • A dry, corky stem is another strong indicator of maturity.
    • A soft, green stem suggests it needs more time on the vine.

The Right Harvest Time

The general harvest season for pumpkins falls between late September and October, depending on your region and planting time. A few factors to consider:

  • Days to maturity – Check the seed packet for maturity dates (usually 90–120 days).
  • Climate – In northern climates, aim to harvest before the first hard frost.
  • Frost warning – A light frost may not kill pumpkins, but a hard freeze will damage skin and shorten storage life.

Rule of thumb: Harvest pumpkins when they are fully colored, the rind is firm, and the vine is starting to die back—but before frost arrives.


How to Harvest Pumpkins Properly

Even if your pumpkins are ready, improper harvesting can damage them and reduce storage life. Follow these steps:

  1. Choose the right tools
    • Use sharp pruning shears, loppers, or a knife instead of pulling the pumpkin off the vine.
  2. Leave a long stem
    • Always cut the stem with at least 3–4 inches attached.
    • Pumpkins without stems rot quickly, while stems act as a natural “lid.”
  3. Handle with care
    • Avoid dropping or carrying pumpkins by the stem (it can snap off).
    • Small bruises may seem minor but often lead to rot in storage.
  4. Harvest on a dry day
    • Wet pumpkins are more prone to mold.
    • Morning harvests are best, when dew has evaporated.

Curing Pumpkins for Long-Term Storage

Curing is the process of hardening the pumpkin’s rind and healing minor cuts or scratches. This step is crucial for extending storage life.

  • Temperature: Place pumpkins in a warm (80–85°F / 27–29°C), dry, well-ventilated area.
  • Duration: Cure for 10–14 days.
  • Sunlight option: If weather permits, pumpkins can cure outdoors in direct sunlight for a week, but bring them inside at night to avoid dew or frost.
  • Purpose: Curing toughens the rind, seals wounds, and helps prevent moisture loss.

Storing Pumpkins for Maximum Shelf Life

Once cured, pumpkins can be moved into long-term storage. The right conditions make all the difference:

  • Temperature: 50–55°F (10–13°C) is ideal.
  • Humidity: 50–70% relative humidity. Too much humidity leads to mold, while too little causes shriveling.
  • Air circulation: Store pumpkins on shelves, slatted crates, or straw—not directly on concrete floors.
  • Spacing: Keep pumpkins from touching each other to reduce the spread of rot.
  • Darkness: Store in a cool, dark place such as a basement, root cellar, or garage (if insulated).

When stored correctly, pumpkins last up to 3 months (sometimes longer for certain varieties like Hubbard or Long Island Cheese).


Monitoring Pumpkins in Storage

Storage doesn’t end after placement—regular monitoring is necessary:

  • Check pumpkins weekly for soft spots or mold.
  • Remove any rotting pumpkins immediately to protect the rest.
  • Handle carefully during inspections to avoid bruising.

Special Tips for Longer Storage

  1. Don’t wash pumpkins before storage – Washing removes the natural protective layer. Instead, gently wipe dirt off with a dry cloth. If disease is a concern, a light 1-part bleach to 10-part water rinse can be used, but dry thoroughly afterward.
  2. Choose the right varieties – Not all pumpkins store equally well. Heirloom and hard-rind pumpkins like ‘Long Island Cheese,’ ‘Cinderella,’ and ‘Jarrahdale’ last longer than thin-skinned varieties.
  3. Avoid cracked or damaged pumpkins – Even small blemishes provide entry points for decay.

Common Mistakes to Avoid

  • Harvesting too early: Immature pumpkins have soft skin and spoil quickly.
  • Leaving pumpkins in frost: Even one hard frost can ruin them.
  • Cutting too short a stem: Pumpkins without a handle deteriorate faster.
  • Stacking pumpkins directly: Trapped moisture encourages mold growth.

Bonus: Using Pumpkins After Storage

Once storage time is up or pumpkins begin showing signs of aging, don’t let them go to waste. Pumpkins are versatile in the kitchen and garden:

  • Cooking: Use in soups, pies, breads, or roasted as a side dish.
  • Seeds: Roast seeds for a healthy snack.
  • Composting: If pumpkins are no longer edible, add them to the compost pile to enrich garden soil.

Bringing It All Together

Harvesting pumpkins at the right time is both an art and a science. The key is to wait until the fruit is fully mature—deeply colored, with a hard rind and drying stem—but before frost can damage it. By harvesting carefully, curing properly, and storing in the right environment, you can extend the life of your pumpkins for several months.

This ensures you’ll have plenty of flavorful, nutrient-rich pumpkins ready for autumn feasts, holiday decorations, or even midwinter meals. With a little care and attention, your pumpkins can last well beyond harvest season, bringing both beauty and nourishment into your home.

How To Save Zinnia Seeds For Next Season’s Blooms

How To Save Zinnia Seeds For Next Season’s Blooms

Zinnias are among the most rewarding flowers a gardener can grow. With their brilliant colors, endless varieties, and long-lasting blooms, they brighten up beds, borders, and containers all summer long. But beyond their beauty, zinnias are also one of the easiest flowers to save seeds from, allowing you to enjoy their charm year after year without spending extra money on new packets. Seed saving is not just economical—it’s also deeply satisfying, connecting you with the natural cycle of life in your garden.

In this guide, we’ll explore step-by-step methods to save zinnia seeds for next season’s blooms, from choosing the right plants to harvesting, drying, and storing seeds properly. Whether you’re a beginner or a seasoned gardener, you’ll find practical tips to ensure your next crop of zinnias is just as vibrant as this year’s.


Why Save Zinnia Seeds?

Before diving into the process, let’s understand why saving zinnia seeds is such a smart gardening practice:

  1. Cost-effective gardening – Instead of buying fresh seeds every spring, you can collect hundreds of seeds from just a few zinnia flowers.
  2. Sustainability – Saving seeds reduces reliance on commercial seed companies and contributes to self-sufficient gardening.
  3. Adaptation – Seeds saved from your garden adapt over time to local soil, pests, and weather conditions, often performing better than store-bought ones.
  4. Sentimental value – Maybe you grew a variety you particularly loved; saving seeds ensures you can grow it again.

Understanding Zinnia Seed Biology

Zinnia seeds are found in the dried flower heads, attached to the base of each petal. They are wedge-shaped, flat, and often brown or grayish when mature. To save seeds successfully, it’s important to know:

  • Zinnias are open-pollinated flowers. This means their seeds will produce plants similar to the parent, but they can also cross-pollinate if you grow multiple varieties close together.
  • Hybrid zinnias may not “come true” from seed. If you planted hybrids, the next season’s blooms might look different from the original. For consistent results, grow and save seeds from heirloom or open-pollinated zinnia varieties.

Step 1: Selecting the Right Plants

Not all flowers in your garden are ideal for seed saving. Choosing the right parent plants increases your chances of strong, healthy seedlings next year. Here’s what to look for:

  • Vigor and health – Select plants that grew strong, resisted pests, and bloomed abundantly.
  • Desired traits – Choose flowers with the size, color, and shape you want to see again.
  • Maturity – Only collect seeds from fully mature flowers. Immature seeds won’t germinate well.

Tip: If you’re growing multiple zinnia varieties and want to avoid cross-pollination, plant them in separate parts of the garden or save seeds from just one variety each season.


Step 2: Allowing Flowers to Mature

Seed saving requires patience. Instead of deadheading zinnias as soon as blooms fade, let some flowers remain on the plant.

  • Timing: Leave the flower heads on until petals dry, turn brown, and fall off naturally.
  • Appearance: A seed-ready head looks papery, brittle, and dark brown.
  • Seed maturity: Seeds inside should feel firm and dry, not soft.

Resist the urge to harvest too early; immature seeds won’t germinate properly.


Step 3: Harvesting Zinnia Seeds

Once the flower heads are completely dry, it’s time to collect seeds.

  1. Cut the heads: Use clean scissors or pruners to snip off the dried seed heads.
  2. Collect carefully: Hold the heads over a bowl or paper bag to catch loose seeds.
  3. Extract seeds: Gently pull apart the dried petals and center disc. Each petal base often has a seed attached.

Tip: Harvest on a dry, sunny day to prevent mold or excess moisture from being trapped in seeds.


Step 4: Cleaning the Seeds

After collecting, separate the seeds from chaff (petal fragments, dried stems, and dust).

  • Manual separation: Rub the seed heads between your fingers to loosen seeds.
  • Sorting: Discard any small, shriveled, or discolored seeds—they’re less likely to sprout.
  • Air cleaning: Gently blow across the seeds in a shallow bowl to remove lighter debris.

Clean seeds store better and have higher germination rates.


Step 5: Drying the Seeds

Moisture is the biggest enemy of saved seeds. Proper drying prevents mold and preserves viability.

  • Spread seeds: Lay them in a single layer on a paper towel, plate, or fine mesh screen.
  • Drying time: Allow 1–2 weeks in a warm, dry, well-ventilated area away from direct sunlight.
  • Check dryness: Seeds should snap cleanly when bent, not feel soft or pliable.

Step 6: Storing Zinnia Seeds

Once completely dry, seeds are ready for storage.

  • Containers: Use paper envelopes, small jars, or airtight plastic containers. Paper is best for preventing moisture buildup.
  • Labeling: Always mark the variety name and collection date. This avoids confusion later.
  • Storage conditions: Keep seeds in a cool, dark, and dry place. Ideal temperature is around 40–50°F (like a refrigerator).

Properly stored, zinnia seeds remain viable for 3–5 years, though fresher seeds tend to germinate best.


Step 7: Testing Seed Viability (Optional)

Before planting next season, you can test your saved seeds:

  1. Place 10 seeds on a damp paper towel.
  2. Roll it up, place in a plastic bag, and keep it in a warm spot.
  3. Check after 7–10 days to see how many sprouted.

If 7 out of 10 seeds germinate, that’s a 70% germination rate—still good for planting.


Common Mistakes to Avoid

  • Harvesting too early: Immature seeds won’t sprout.
  • Skipping drying: Moist seeds develop mold in storage.
  • Using plastic bags without drying: Traps moisture, leading to seed rot.
  • Not labeling seeds: Easy to forget which variety you collected.

Bonus Tip: Saving Seeds for Sharing

One of the joys of gardening is sharing. Saving zinnia seeds means you can:

  • Gift them to friends and neighbors.
  • Swap with other gardeners for different varieties.
  • Start a community seed bank to encourage local biodiversity.

Bringing It All Together

Saving zinnia seeds is a simple, rewarding practice that ensures your garden keeps blooming with vibrant colors season after season. By carefully selecting healthy flowers, allowing them to mature, and properly harvesting, drying, and storing seeds, you can create a self-sustaining cycle of growth in your garden.

It’s not just about saving money or reducing dependency on seed companies—it’s about building a connection with nature, carrying forward the beauty of this year into the next, and preserving your favorite varieties.

So this season, resist cutting every spent bloom. Leave a few to go to seed, follow the steps above, and by next spring, you’ll be ready to sow your very own saved zinnia seeds. The reward? A garden bursting with life, color, and the satisfaction of knowing you nurtured every stage of the process.

The Truth About Dethatching Your Lawn

The Truth About Dethatching Your Lawn

A healthy, vibrant lawn doesn’t just happen on its own. It requires consistent care and a clear understanding of what goes on beneath the blades of grass. One of the most debated lawn care practices is dethatching—the process of removing thatch, a layer of dead grass, roots, and organic material that builds up between the soil and the living turf. While some homeowners swear by dethatching, others dismiss it as unnecessary or even harmful if done incorrectly. So, what’s the real truth about dethatching your lawn? Let’s dig deeper.


What Is Thatch and Why Does It Matter?

Thatch is a naturally occurring layer of organic matter composed of dead stems, roots, rhizomes, and stolons that accumulates between the soil surface and green vegetation. A thin layer of thatch (less than ½ inch) is actually beneficial. It acts as insulation, keeping soil temperatures steady, retaining moisture, and protecting against foot traffic.

However, when thatch becomes thicker than ½ to 1 inch, problems begin to arise:

  • Water, fertilizer, and air can’t penetrate to the roots effectively.
  • Roots may grow within the thatch layer instead of the soil, making grass more vulnerable to drought and heat stress.
  • Pests and diseases thrive in thick thatch, worsening lawn health.
  • Grass may appear spongy underfoot and turn brown despite adequate care.

This is where dethatching comes in.


When Should You Dethatch Your Lawn?

Timing is everything. Dethatching at the wrong time can stress your lawn rather than help it recover. The best time depends on your grass type:

  • Cool-season grasses (like Kentucky bluegrass, ryegrass, and fescues): Early fall or early spring when temperatures are moderate and grass is actively growing.
  • Warm-season grasses (like Bermuda, Zoysia, St. Augustine, and centipede grass): Late spring to early summer during peak growth periods.

Avoid dethatching during extreme heat, drought, or dormant phases, as this can cause significant damage to your lawn.


How to Know If Your Lawn Needs Dethatching

Not every lawn needs dethatching. Here’s how to tell:

  1. Measure the thatch layer – Use a spade or garden knife to cut a small wedge of turf. If the thatch layer measures more than ½ inch, it may need attention.
  2. Look for warning signs – Spongy feel, brown patches, poor water absorption, or shallow root growth are red flags.
  3. Water runoff issues – If water sits on top of the soil or runs off instead of soaking in, excessive thatch could be the culprit.

Methods of Dethatching

There are several ways to dethatch, depending on the severity of buildup and lawn size.

1. Manual Dethatching (Raking)

For small lawns or light thatch, a dethatching rake works well. These rakes have sharp tines designed to cut through thatch and pull it up. While labor-intensive, it’s effective for spot treatment or smaller yards.

2. Power Raking

A power rake is a machine with rotating blades that pull up thatch from the soil surface. This method is suitable for moderate thatch levels but may be too harsh on delicate grass varieties.

3. Verticutting (Vertical Mowing)

A verticutter uses vertical blades to slice into the thatch and soil, loosening compacted thatch layers. It’s more aggressive than power raking and recommended for severe cases of thatch buildup.

4. Core Aeration

Though not technically dethatching, core aeration helps reduce thatch by pulling plugs of soil and thatch from the lawn. This improves air and water movement, promoting microbial activity that naturally breaks down thatch.


Steps to Dethatch Your Lawn

If you decide dethatching is necessary, here’s a step-by-step guide:

  1. Prepare Your Lawn – Mow the grass to about half its normal height. This makes dethatching easier and more effective.
  2. Choose the Right Tool – Select a dethatching rake, power rake, or hire professional equipment depending on your lawn size and thatch thickness.
  3. Dethatch Carefully – Work systematically, moving across the lawn in parallel passes to ensure even coverage.
  4. Remove Debris – Rake up and collect loosened thatch. Leaving it behind can smother the grass.
  5. Overseed if Necessary – Dethatching can leave bare spots. Overseeding ensures thicker regrowth.
  6. Fertilize and Water – Apply a balanced fertilizer and water deeply to help the lawn recover quickly.

Myths and Misconceptions About Dethatching

Like many lawn care practices, dethatching is surrounded by myths. Let’s clear them up.

Myth 1: Thatch is just grass clippings.

  • False. Grass clippings decompose quickly and do not contribute significantly to thatch buildup. The real culprits are dense stems, stolons, and roots.

Myth 2: Dethatching should be done every year.

  • Not true. Most lawns don’t require annual dethatching. Only dethatch when the layer exceeds ½ inch.

Myth 3: Dethatching ruins your lawn.

  • Incorrect. While dethatching stresses the grass temporarily, if done at the right time and followed by proper aftercare, it leads to a healthier, stronger lawn.

Myth 4: Aeration and dethatching are the same.

  • They’re different. Aeration relieves compaction and promotes air/water movement, while dethatching removes the thick organic layer. Often, both practices complement each other.

Preventing Thatch Buildup in the Future

Dethatching shouldn’t become a recurring headache if you maintain your lawn properly. Here are ways to prevent excessive thatch:

  • Avoid over-fertilizing with nitrogen. Too much fertilizer encourages shallow, rapid growth that contributes to thatch.
  • Mow correctly – keep blades sharp and avoid cutting more than one-third of the grass height at once.
  • Water deeply and infrequently – this encourages deeper root growth rather than surface rooting.
  • Aerate regularly – once every 1–2 years to encourage microbial activity and reduce compaction.
  • Encourage soil microbes – Apply compost or soil amendments to promote organisms that naturally decompose organic matter.

Professional vs. DIY Dethatching

For small lawns with light thatch, DIY dethatching with a rake is manageable. However, for large yards or severe buildup, hiring a lawn care professional may be worth it. They have specialized equipment and expertise to dethatch without causing excessive damage.


The Benefits of Proper Dethatching

When done correctly, dethatching yields long-term benefits, including:

  • Improved air, water, and nutrient flow.
  • Stronger, deeper root systems.
  • Reduced pest and disease problems.
  • A greener, thicker, and more resilient lawn.

Final Thoughts

The truth about dethatching your lawn lies in understanding its purpose, timing, and execution. While not every lawn requires dethatching, neglecting thick layers of thatch can choke your grass and compromise its health. By assessing your lawn’s condition, choosing the right method, and following up with proper care, you can transform a struggling yard into a lush, thriving landscape.

Remember, dethatching is not a quick fix but part of a broader lawn care strategy. When paired with good mowing, watering, aeration, and fertilization habits, it ensures your lawn stays healthy, vibrant, and ready to withstand the challenges of each season.