When to Pick Tomatoes for Peak Flavor: A Complete Guide

When to Pick Tomatoes for Peak Flavor: A Complete Guide

Tomatoes (Solanum lycopersicum) are one of the most cherished and widely grown fruits in home gardens around the world. Whether they are sliced for sandwiches, stewed into sauces, or eaten straight from the vine, nothing compares to the taste of a perfectly ripe, homegrown tomato.

However, peak tomato flavor is highly dependent on timing—harvesting too early or too late can result in a tomato that is bland, mealy, mushy, or lacking that signature balance of sweetness and acidity. Knowing exactly when to pick tomatoes is both an art and a science, and it plays a critical role in the quality of your harvest.

This article explores everything you need to know about picking tomatoes at their peak—covering ripening stages, types of tomatoes, color cues, texture, and scientific insights to help you make the most flavorful pick every time.


Why Timing Matters

Harvesting tomatoes at the right moment ensures:

  • Maximum flavor: Sugar levels, acidity, and aroma compounds peak at specific ripening stages.
  • Optimal texture: Too early and they’re hard and bland; too late and they become soft or watery.
  • Nutritional value: Lycopene, the antioxidant responsible for the red color, increases as tomatoes ripen.
  • Shelf life: Properly picked tomatoes store better, especially if harvested at the right maturity stage.

Picking at the correct time also reduces the risk of:

  • Cracking or splitting
  • Sunscald
  • Pest damage or rot

Understanding the Tomato Ripening Process

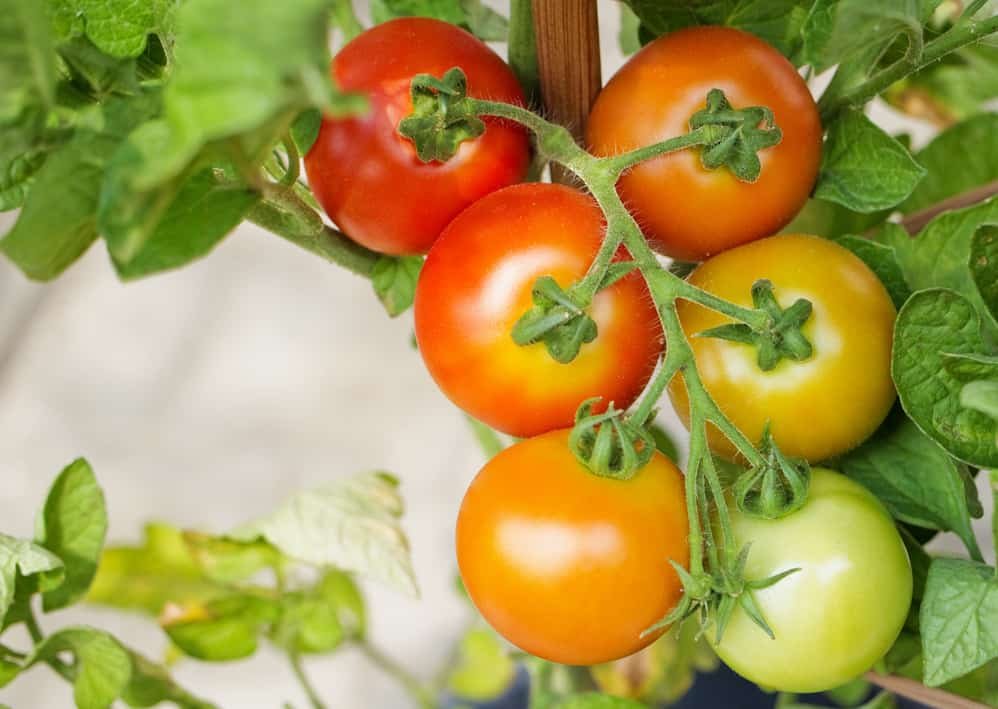
Tomatoes go through a well-defined ripening process, which can be divided into six key stages:

1. Green Stage

  • Fully developed in size but completely green.
  • Seeds are immature.
  • Not ready for picking.

2. Breaker Stage

  • A slight blush of pink, red, or yellow appears on the blossom end.
  • Interior ripening has begun.
  • The earliest stage at which a tomato can be harvested and still ripen off the vine without losing flavor.

3. Turning Stage

  • 10–30% of the tomato has changed color.
  • Texture softens slightly.
  • Can be harvested and ripened indoors with minimal flavor loss.

4. Pink Stage

  • 30–60% of the tomato has turned red (or variety-specific color).
  • Flesh is softening and becoming juicy.
  • Near peak sugar and acid balance.

5. Light Red Stage

  • 60–90% of the fruit is its final color.
  • Aroma develops fully.
  • Excellent time to pick, especially for immediate use.

6. Fully Red (or Mature Color) Stage

  • Over 90% of the tomato has achieved its full color.
  • Flavor, aroma, and texture have fully developed.
  • Ideal for eating fresh, but may be more susceptible to pests or cracking if left on the plant too long.

Vine-Ripened vs. Off-the-Vine Ripening

There is a common belief that tomatoes must ripen on the vine to achieve peak flavor. While there is truth to this, the reality is nuanced.

Vine-Ripened Tomatoes:

  • Have the most intense aroma and full flavor.
  • Higher in sugar and organic acids.
  • Best eaten fresh and immediately after picking.

Off-the-Vine Ripening (Post-Breaker Stage):

  • Scientifically proven to result in nearly identical flavor if picked at the breaker stage or later.
  • Allows for controlled ripening indoors, reducing risks of pests, rain damage, or cracking.

Conclusion: For best flavor and safety, pick tomatoes at breaker to pink stage and let them ripen indoors at room temperature.


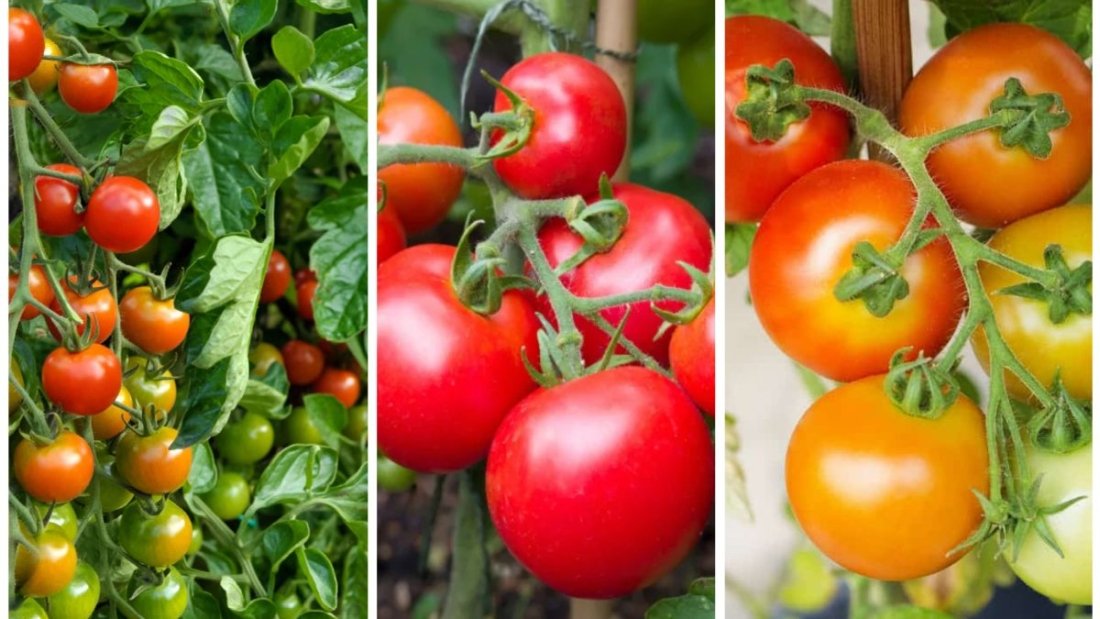
How to Know When to Pick Different Tomato Varieties

Tomatoes come in many shapes, sizes, and colors—each with slightly different harvest indicators. Here’s how to recognize peak flavor time for different types:

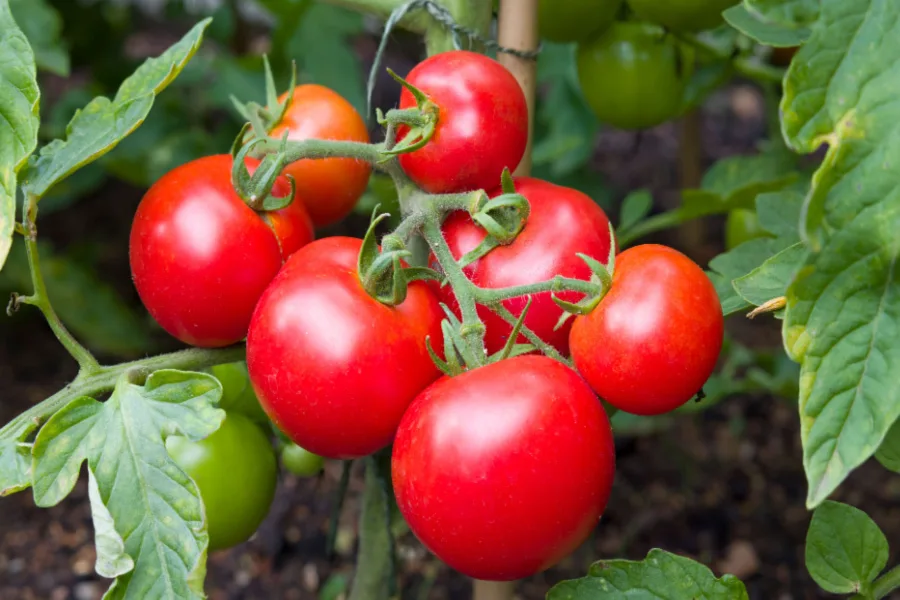
1. Red Slicing Tomatoes

  • Should be 90–100% red.
  • Slight give when gently squeezed.
  • Rich tomato aroma.
  • Pick when the fruit is firm but not hard.

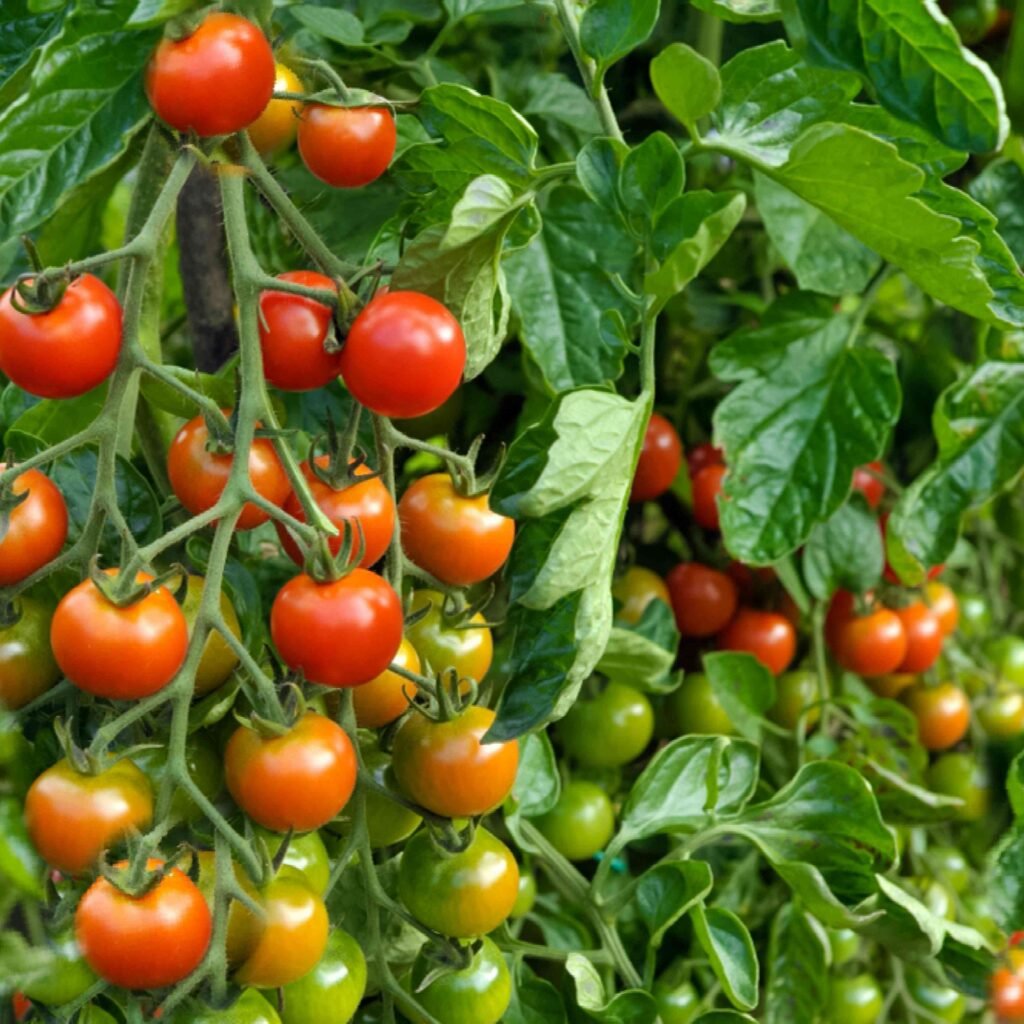
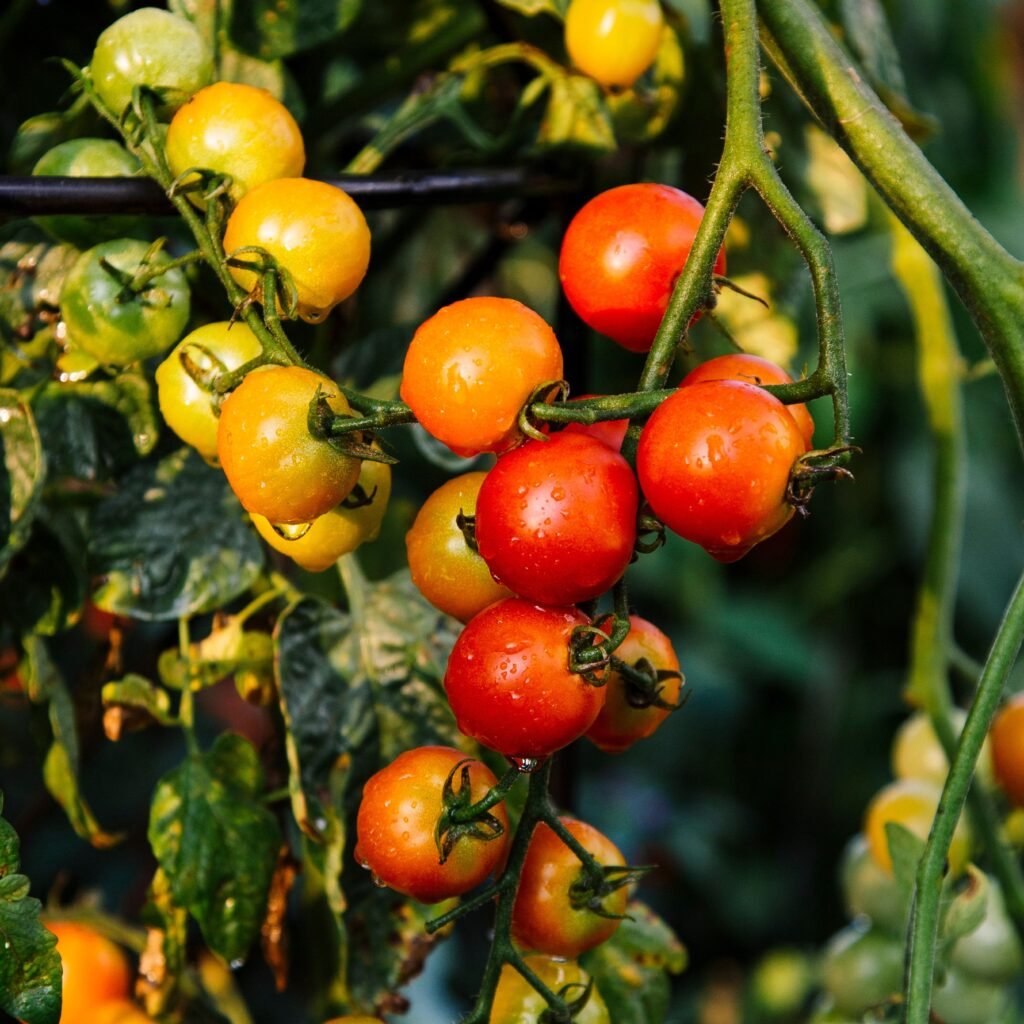
2. Cherry and Grape Tomatoes

  • Fully colored (red, orange, or yellow, depending on the variety).
  • Should detach easily with a light tug.
  • Intense sweetness develops late, so leave them until fully ripe for snacking.

3. Heirloom Tomatoes

  • Color may vary widely—striped, pink, purple, green-when-ripe.
  • Often slightly soft to the touch.
  • Pick when the shoulders begin to give and color is rich and deep.
  • Watch for cracking, as heirlooms are more delicate.

4. Roma or Paste Tomatoes

  • Firm and oval-shaped.
  • Fully red or appropriate variety color.
  • Slight softness indicates ripeness.
  • Less juice, more flesh—ideal for sauces.

5. Green-When-Ripe Varieties (e.g., Green Zebra)

  • Pick based on subtle color changes (from bright green to yellow-green with stripes).
  • Slight softness and developed aroma are indicators.
  • Do not wait for them to turn red—they won’t.

Physical and Sensory Signs of Ripeness

When deciding whether to harvest, rely on the following cues:

Color

  • Rich, deep, and consistent with the variety.
  • No green patches (except near the stem on some types).

Touch

  • Slight softness when gently squeezed.
  • Should not be mushy or rock-hard.

Smell

  • A fragrant, earthy aroma near the stem end.
  • No sour or fermented smell.

Ease of Detachment

  • A ripe tomato will separate from the vine easily with a gentle twist.
  • Avoid forcing it—if it resists, it may need more time.

Weather and Environmental Factors

Environmental conditions play a major role in tomato ripening and flavor development.

Sunlight

  • Full sun accelerates sugar production and lycopene development.
  • Shade-grown tomatoes may take longer to ripen and may be less flavorful.

Temperature

  • Ideal ripening temperature: 68°F to 77°F (20°C to 25°C)
  • Temperatures over 85°F (29°C) can halt ripening and cause sunscald.
  • In very hot weather, harvest early and ripen indoors.

Rain and Humidity

  • Sudden heavy rain can cause ripe tomatoes to split.
  • Pick tomatoes just before a predicted storm to avoid water damage.

How to Ripen Tomatoes Indoors (If Picked Early)

If you pick tomatoes at the breaker or turning stage, follow these tips to ripen them indoors without sacrificing flavor:

1. Room Temperature Storage

  • Place tomatoes in a single layer, stem side down.
  • Store at room temperature (65–75°F / 18–24°C).
  • Keep out of direct sunlight.

2. Paper Bag Method

  • Put tomatoes in a paper bag with a ripe banana or apple.
  • The ethylene gas will speed up ripening.
  • Check daily to avoid over-ripening.

3. Avoid Refrigeration

  • Cold temperatures (below 55°F / 13°C) destroy flavor and texture.
  • Only refrigerate fully ripe tomatoes you can’t eat immediately, and allow them to return to room temperature before consuming.

Common Mistakes to Avoid

MistakeWhy It’s a Problem
Picking too early (green stage)Poor flavor, mealy texture, low sugar
Leaving fruit too long on the vineRisk of cracking, pests, and mushiness
Storing in the fridgeDamages flavor compounds and texture
Picking based on size aloneSize doesn’t always indicate ripeness
Waiting for complete color change in green-when-ripe typesThey never turn red—understanding variety is key

Conclusion

Knowing when to pick tomatoes for peak flavor is a balance of science and observation. While it’s tempting to leave tomatoes on the vine until they look picture-perfect, understanding the ripening stages, variety-specific cues, and environmental influences can help you make the most flavorful choices.

By picking tomatoes at the right time—ideally at the breaker, pink, or light red stage—and allowing them to ripen under the best conditions, you can enjoy the rich, complex, garden-fresh taste that only a perfectly timed harvest can offer.

Remember, a tomato is more than just a fruit—it’s a living culmination of sun, soil, water, and time. With the right knowledge and attention, you can enjoy the full reward of your garden’s bounty—bursting with flavor and picked at just the right moment.

The Right Way to Harvest Basil for Endless Growth

The Right Way to Harvest Basil for Endless Growth

Basil (Ocimum basilicum), with its aromatic leaves and vibrant green foliage, is one of the most beloved herbs in kitchens and gardens around the world. Whether you’re adding it fresh to a Caprese salad, blending it into a rich pesto, or simply enjoying its fragrance, basil is a rewarding herb to grow.

But what many gardeners—especially beginners—don’t realize is that how you harvest basil dramatically affects how long it grows, how bushy it becomes, and how much you can harvest over the season. Done right, harvesting basil can actually promote endless growth, giving you fresh, flavorful leaves from spring through fall.

This article explores the right way to harvest basil to ensure maximum yield, continuous growth, and a healthy, robust plant throughout the season.


Why Harvesting Technique Matters

Basil isn’t just a pick-and-use kind of herb. Unlike some herbs that can tolerate frequent cutting from any part, basil thrives when harvested strategically. Harvesting isn’t just about gathering leaves—it’s a form of pruning that, when done properly, encourages the plant to:

  • Grow bushier with more side shoots
  • Produce more leaves and less stem
  • Delay flowering, which slows leaf production
  • Stay healthier with better airflow and reduced risk of disease

In contrast, incorrect or careless harvesting can result in:

  • A tall, leggy plant with fewer leaves
  • Early flowering (bolting) and bitter flavor
  • Reduced harvest over time
  • Potential plant stress or dieback

Understanding Basil’s Growth Habit

Before we get into the method, it’s important to understand how basil grows.

  • Basil grows from a central stem with pairs of leaves growing opposite each other.
  • At the junction (node) where the leaves meet the stem, new shoots can emerge.
  • Each time you cut above a node, the plant sends out two new branches from that point—leading to a fuller, more productive plant.

Think of it this way: every cut doubles your growth potential—if you do it right.


Step-by-Step Guide to Harvesting Basil for Endless Growth

1. Start Early – But Not Too Early

Start harvesting when the basil plant has:

  • At least 6–8 leaves (about 6–8 inches tall)
  • Two or more sets of mature leaf pairs

Resist the temptation to harvest very young plants. Allow your basil to develop a strong root system and some height first.


2. Use Clean, Sharp Tools (Or Pinch With Fingers)

Use:

  • Sharp scissors or pruning shears, cleaned to prevent disease
  • Or pinch with your fingers if stems are tender

Avoid tearing or crushing the stem—it can damage the plant and invite disease.


3. Cut Above a Leaf Node – The Golden Rule

The most critical step is to cut just above a pair of leaves (leaf node)—about 1/4 inch above it.

Why?

  • Cutting above the node activates two dormant buds below the cut.
  • These buds will grow into new branches, doubling your harvestable stems.

Never cut the main stem at the base unless it’s the end of the season or you’re removing the entire plant.


4. Harvest No More Than One-Third of the Plant

When harvesting, especially early on:

  • Only remove up to 1/3 of the plant’s total foliage.
  • This ensures the plant retains enough leaves for photosynthesis and healthy growth.

As the plant matures and becomes bushier, you can harvest more aggressively.


5. Harvest Frequently

Regular harvesting is the key to continuous growth. Ideally, harvest:

  • Every 1–2 weeks in early summer
  • Every few days in peak growing season

The more you harvest (correctly), the more the plant will respond with vigorous growth.


How to Handle Flowering (Bolting)

Basil naturally wants to flower as part of its reproductive cycle. But once it starts flowering:

  • The leaves become smaller, tougher, and less flavorful
  • Energy is diverted to seed production, not leaf growth

What to Do:

  • Pinch off flower buds as soon as you see them.
  • Look for tight clusters of small white or purple buds at the top of stems.
  • Removing flower buds redirects energy back into foliage.

If you want to collect seeds, allow a few plants to flower at the end of the season, not before.


Bonus Tips for Endless Basil Growth

1. Grow in the Right Conditions

Healthy basil = better harvests. Ensure:

  • 6–8 hours of sunlight daily
  • Well-drained soil with compost
  • Regular watering, but avoid soggy soil

2. Fertilize Sparingly

Basil doesn’t need heavy fertilization. Too much nitrogen can lead to lush leaves with weak flavor.

  • Use a balanced organic fertilizer every 3–4 weeks
  • Alternatively, use compost or compost tea

3. Rotate Your Harvest Locations

Instead of always picking from the same stem, rotate:

  • Harvest from different branches each time
  • This ensures even growth and avoids over-stressing a single area

4. Replant or Propagate Mid-Season

In warm climates or indoor gardens, you can enjoy basil year-round by:

  • Starting new plants from cuttings
  • Or sowing new seeds every 4–6 weeks

Propagation is simple—just place a cut stem in water, and it will root within 7–10 days.


Common Mistakes to Avoid

MistakeWhy It’s Harmful
Harvesting from the bottomLeads to a tall, leggy plant
Removing only leavesSlows regrowth; cut full stems instead
Cutting below a nodePrevents branching and reduces yield
Not harvesting at allLeads to early flowering and poor flavor
Letting it flower too earlyEnds the productive life of the plant

Real-Life Harvesting Example

Let’s say your basil plant is now about 12 inches tall with several branches.

Here’s what to do:

  1. Locate a branch with 2–3 sets of leaves.
  2. Go to the second set from the top.
  3. Make a clean cut just above the node.
  4. Repeat on several branches around the plant.

After a week, you’ll notice two new stems growing where you cut. In 2–3 weeks, each of those stems can be harvested again. Repeat this cycle for endless basil all season long.


Conclusion

Harvesting basil isn’t just about cutting leaves—it’s an art that, when done properly, transforms a single seedling into a lush, flavorful powerhouse that keeps producing for months.

By following the right harvesting techniques—cutting above the node, harvesting regularly, preventing flowering, and rotating your cuts—you can keep your basil plant thriving and productive. Whether you’re a home gardener, culinary enthusiast, or horticulture student, mastering this skill not only ensures a bountiful harvest but also deepens your appreciation for plant care and sustainability.

So next time you reach for those fragrant leaves, remember: the right cut at the right time is the secret to endless basil growth.

How to Save Marigold Seeds for Next Year

How to Save Marigold Seeds for Next Year

Marigolds are among the most beloved flowering plants for gardeners around the world. Known for their vibrant colors, low maintenance, and natural pest-repelling properties, they are a staple in both decorative flower beds and vegetable gardens. But what makes marigolds even more rewarding is how easy it is to save their seeds and replant them the following year—saving both money and effort, while promoting sustainability.

In this article, we will explore everything you need to know about saving marigold seeds—from understanding the marigold life cycle, to the best techniques for harvesting, drying, and storing the seeds for optimal germination success next season.


Why Save Marigold Seeds?

Before diving into the how-to, it’s important to understand why seed saving matters, especially for home gardeners and horticulturists.

  1. Cost-Effective: Buying seeds every year can add up. Saving your own marigold seeds costs nothing and ensures a free source of plants every season.
  2. Preservation of Traits: Saving seeds from the healthiest and most vibrant plants helps preserve desirable traits such as bloom size, color, disease resistance, and overall vigor.
  3. Environmental Sustainability: Seed saving reduces dependency on commercial seed suppliers and contributes to biodiversity by encouraging gardeners to grow and share unique or heirloom varieties.
  4. Educational Value: The process teaches patience, observation, and a deeper understanding of plant biology.

Understanding the Marigold Plant and Its Seeds

Marigolds belong to the Tagetes genus, which includes several popular varieties such as:

  • African marigold (Tagetes erecta): Large, pom-pom-like blooms.
  • French marigold (Tagetes patula): Smaller, bushier plants with bright, bicolor flowers.
  • Signet marigold (Tagetes tenuifolia): Delicate, edible flowers with a citrusy scent.

All marigolds are annuals in most climates, meaning they complete their life cycle in one growing season. However, by saving seeds, gardeners can enjoy the same plants year after year.

What Do Marigold Seeds Look Like?

Marigold seeds are easy to recognize. They are long, slender, and typically two-toned:

  • One end is black (the actual seed), and the other is pale or white (a feather-like tail, which helps with seed dispersal).
  • Each dried flower head can contain dozens of seeds, making marigolds one of the most productive seed producers.

When and How to Harvest Marigold Seeds

1. Let the Flowers Mature

To save seeds successfully, allow some marigold blooms to remain on the plant after they have faded. These flowers will wither, dry out, and eventually turn brown and papery. This drying process is essential, as seeds need to fully mature before they can be harvested.

Pro Tip: Don’t deadhead (remove spent flowers) from all your plants. Designate a few healthy plants as your “seed producers” and let them complete their life cycle naturally.

2. Harvest at the Right Time

Harvest the seed heads when:

  • The flower head is completely dry and brown.
  • The base of the flower is crispy to the touch.
  • Seeds can be pulled out easily and are dark-colored.

If you pick the seed heads too early, the seeds may be immature and less viable.

3. Extracting the Seeds

Steps to extract marigold seeds:

  1. Remove the dried flower head from the stem by gently pinching and twisting it off.
  2. Hold the base of the flower and pull the petals out. The seeds should come out attached to the petal ends.
  3. Separate the seeds from the chaff (petal material) and discard any that are pale, soft, or moldy.

How to Dry Marigold Seeds Properly

Even though the seeds may feel dry upon harvesting, it’s essential to air-dry them further to prevent mold or rot during storage.

Drying Process:

  1. Spread the seeds in a single layer on a paper towel, newspaper, or mesh screen.
  2. Place in a well-ventilated, dry location out of direct sunlight (e.g., a shelf or countertop).
  3. Allow seeds to dry for 5 to 7 days.

Make sure they are completely dry before storing—any residual moisture can ruin an entire batch.


Storing Marigold Seeds for Next Season

Ideal Storage Conditions:

  • Container: Use paper envelopes, small glass jars, or airtight containers. Avoid plastic bags, as they can trap moisture.
  • Label: Always label your containers with the date and marigold variety.
  • Storage Environment: Store in a cool, dark, and dry place, like a pantry, cabinet, or even the fridge (in a sealed jar with silica gel packs).

When stored properly, marigold seeds remain viable for 2 to 3 years, though the highest germination rates occur within the first year.


How to Test Seed Viability Before Planting

A simple test before planting can save time and effort:

  1. Dampen a paper towel and place 10 seeds on it.
  2. Fold and place in a sealed plastic bag.
  3. Keep in a warm spot for 5 to 7 days.
  4. Check how many seeds have sprouted.

If 8 out of 10 seeds germinate, that’s an 80% germination rate, which is excellent. Anything below 50% might require overseeding or replacing with fresh seeds.


Tips for Successful Seed Saving

  • Select only healthy plants: Avoid saving seeds from diseased or weak plants.
  • Avoid hybrids: Seeds from hybrid marigolds (F1 hybrids) may not produce true-to-type offspring. Stick to open-pollinated or heirloom varieties if you want consistent results.
  • Label everything clearly: Especially if you’re saving seeds from multiple varieties. Mixing seeds can lead to surprises next season.

Common Mistakes to Avoid

  1. Harvesting too early: Immature seeds won’t germinate.
  2. Storing wet seeds: Leads to mold and rot.
  3. Using plastic bags: Can trap moisture.
  4. Not labeling seeds: Causes confusion and mistakes during planting.

The Broader Importance of Seed Saving

Beyond the garden, seed saving has social, environmental, and cultural implications:

  • It supports local biodiversity and resilience.
  • Encourages the preservation of heritage varieties.
  • Fosters community sharing through seed exchanges.
  • Promotes self-reliance and connection to nature.

Saving marigold seeds may seem like a small task, but it’s part of a larger, powerful movement toward sustainable gardening and seed sovereignty.


Conclusion

Saving marigold seeds is a simple yet impactful way to keep your garden blooming year after year. With just a bit of patience and care, you can create a personal seed bank that not only brings back your favorite flowers each season but also connects you more deeply with nature’s rhythms. Whether you’re a casual gardener, a student of horticulture, or someone passionate about sustainability, seed saving is a practice worth cultivating.

So the next time your marigolds begin to fade, resist the urge to snip them off too soon. Let them complete their natural cycle, and you’ll be rewarded—not just with beauty today, but with promise for tomorrow.

How Often To Aerate Your Lawn For Healthy Roots

How Often To Aerate Your Lawn For Healthy Roots

A lush, green lawn doesn’t just happen overnight. It’s the result of consistent care, smart seasonal practices, and paying attention to what’s happening beneath the surface. While mowing, watering, and fertilizing often take center stage, aeration is the unsung hero of lawn health. Many homeowners wonder: How often should I aerate my lawn for the best results? The answer depends on soil type, grass variety, and local conditions. In this article, we’ll dive deep into the importance of aeration, how often to do it, and tips for making it a part of your lawn care routine.


What Is Lawn Aeration?

Lawn aeration is the process of creating small holes in the soil to allow air, water, and nutrients to penetrate the grassroots more effectively. Over time, soil becomes compacted from foot traffic, mowing, or natural settling. Compaction prevents roots from accessing what they need to grow deeply and stay strong.

There are two common types of aeration:

  1. Core Aeration – A machine removes plugs (or cores) of soil, leaving holes behind that improve airflow and drainage.
  2. Spike Aeration – Solid spikes push into the soil to create holes but don’t remove soil. This method is less effective long term since it can increase compaction around the hole.

For the healthiest roots, core aeration is the preferred method.


Why Is Aeration Important?

Aeration addresses several hidden issues that can make or break your lawn’s health:

  • Improves Root Growth: Loosening compacted soil gives roots space to expand and grow deeper.
  • Enhances Nutrient Absorption: Fertilizers and organic matter can reach the root zone more effectively.
  • Increases Water Infiltration: Prevents water from running off and reduces puddling.
  • Reduces Thatch Build-Up: Thatch is a layer of dead grass that can suffocate roots; aeration helps break it down.
  • Boosts Drought Resistance: Deeper roots mean your lawn can better withstand dry spells.

Think of aeration as giving your lawn’s root system a deep breath of fresh air—it’s essential for long-term vitality.


How Often Should You Aerate Your Lawn?

The frequency of aeration depends largely on your soil type and how much wear and tear your lawn gets. Here’s a breakdown:

1. Clay Soils (Heavy & Easily Compacted)

Clay soils compact quickly, suffocating roots. If your lawn has clay soil, aerate once or even twice a year—typically in spring and fall.

2. Sandy Soils (Loose & Well-Drained)

Sandy soils don’t compact as much. Aerating once every 2–3 years is usually enough to maintain healthy roots.

3. Loamy Soils (Balanced & Fertile)

Loamy soil sits between clay and sand. Aerate once a year to maintain its structure and root health.

4. High-Traffic Lawns (Kids, Pets, or Sports)

Lawns that experience a lot of foot traffic compact faster. These benefit from annual aeration, regardless of soil type.

5. Low-Traffic or Decorative Lawns

If your lawn is mostly ornamental and rarely used, aerating every 2–3 years may suffice.


Best Time of Year to Aerate

Timing matters when it comes to aeration because you want to give your grass the best chance to recover quickly.

  • Cool-Season Grasses (Fescue, Kentucky Bluegrass, Ryegrass):
    Aerate in early fall or spring. Fall is ideal because grass is actively growing, and cooler temperatures encourage recovery.
  • Warm-Season Grasses (Bermuda, Zoysia, St. Augustine):
    Aerate in late spring to early summer, when warm-season grasses are growing most vigorously.

Never aerate during dormancy—it stresses the grass and can lead to bare patches.


Signs Your Lawn Needs Aeration

Not sure if it’s time to aerate? Look for these signs:

  • Water puddles or runs off instead of soaking in.
  • Grass appears thin, weak, or struggles despite regular care.
  • Soil feels hard when you step on it.
  • Roots are shallow (less than 2 inches deep).
  • Thatch layer is thicker than ½ inch.

If you check several of these boxes, it’s time to get out the aerator.


How To Aerate Your Lawn (Step-by-Step)

  1. Mow the Lawn First – Cut your grass to a shorter height (about 1–1.5 inches) to make aeration easier.
  2. Water Lightly – Moist soil makes it easier to pull plugs. Water your lawn a day before aerating.
  3. Use the Right Equipment – Rent or buy a core aerator for best results. Hand tools work for very small lawns.
  4. Make Multiple Passes – Go over compacted areas more than once, especially high-traffic zones.
  5. Leave Soil Plugs – Let the plugs of soil break down naturally—they add organic matter back to the lawn.
  6. Follow Up With Care – Overseed bare spots and apply fertilizer right after aerating. This maximizes the benefits.

Aftercare: What To Do Post-Aeration

Aeration sets the stage for a healthier lawn, but follow-up is just as important:

  • Overseed: Fill in thin patches for a denser lawn.
  • Fertilize: Apply a balanced fertilizer to take advantage of the open soil.
  • Water Regularly: Keep soil moist to encourage new root growth.
  • Avoid Heavy Traffic: Give your lawn a week or two to recover.

Common Aeration Mistakes to Avoid

  • Aerating Dry Soil – Hard soil makes it difficult to penetrate; water lightly beforehand.
  • Over-Aerating – While beneficial, too much aeration can stress your lawn. Stick to the recommended schedule.
  • Using Spike Aerators on Clay – This can worsen compaction instead of relieving it.
  • Skipping Aftercare – Without overseeding or fertilizing, you’re missing out on the full benefits.

Conclusion

Healthy roots are the foundation of a vibrant lawn, and aeration is the key to unlocking that potential. While there’s no one-size-fits-all answer to how often you should aerate, understanding your soil type, grass variety, and lawn usage will guide your schedule. For most homeowners, once a year—preferably in the growing season—is enough to keep roots thriving.

By incorporating aeration into your lawn care plan, you’ll not only improve grass growth but also set your yard up for resilience against drought, heavy use, and seasonal changes. Think of it as a small effort with big rewards: a green, lush carpet that makes your outdoor space shine.

Should You Fertilize Your Lawn In Late Summer?

Should You Fertilize Your Lawn In Late Summer?

When late summer arrives, many homeowners are unsure how to care for their lawns. The scorching days of July and August often leave grass looking tired, faded, or even patchy. At the same time, the cooler weather of fall is just around the corner, offering the promise of recovery. This leaves many gardeners and homeowners asking the same important question: Should you fertilize your lawn in late summer?

The short answer: Yes—but timing, type of fertilizer, and application method matter. Fertilizing in late summer can give your lawn the boost it needs to recover from heat stress, strengthen root systems, and prepare for fall growth. However, doing it incorrectly can actually harm your lawn instead of helping it.

In this article, we’ll dive into the science of late-summer fertilization, explore its benefits, and walk through the best practices to ensure your grass thrives well into fall and next spring.


Why Fertilization Matters for Lawn Health

Before exploring the timing of late-summer applications, it’s important to understand why fertilization is so critical to lawn health. Grass, like any living plant, requires essential nutrients to grow thick, green, and strong. The three most important nutrients found in lawn fertilizers are:

  1. Nitrogen (N): Promotes lush green growth and dense blades.
  2. Phosphorus (P): Encourages strong root development.
  3. Potassium (K): Improves disease resistance, drought tolerance, and overall hardiness.

During late summer, your grass has likely endured:

  • Heat stress from prolonged sun exposure.
  • Soil nutrient depletion from earlier fertilization cycles.
  • Drought or inconsistent watering.
  • Heavy foot traffic from summer activities.

Fertilizing replenishes these nutrients, giving your lawn the energy it needs to recover and prepare for the fall growing season.


The Benefits of Late-Summer Fertilization

1. Encourages Recovery from Summer Stress

The heat of summer often weakens lawns, leaving them thin and discolored. Fertilization in late summer helps grass recover by replenishing depleted nutrients, improving blade density, and reviving green color.

2. Strengthens Root Systems

Grass roots remain active even when top growth slows down. Fertilizing in late summer fuels root development, ensuring your lawn is better prepared for cooler weather and eventual winter dormancy.

3. Prepares for Fall Growth

Cool-season grasses, such as fescues, ryegrass, and Kentucky bluegrass, experience a growth surge in fall. Fertilizing in late summer primes your lawn for this active growing period, giving it a head start.

4. Reduces Weed Competition

A well-fertilized, dense lawn naturally shades soil and makes it harder for weeds to take root. Late-summer fertilization helps fill in thin areas, crowding out invasive plants like crabgrass and dandelions.

5. Improves Lawn Appearance

Beyond the science, there’s the simple aesthetic benefit: a deep, green, healthy-looking lawn that enhances your home’s curb appeal.


When Exactly Is “Late Summer”?

Late summer fertilization usually falls between mid-August and early September, depending on your climate and grass type. The goal is to fertilize after the worst summer heat has passed but before fall temperatures set in fully.

  • Cool-season grasses (Northern regions): Fertilize in mid-to-late August to prepare for active fall growth.
  • Warm-season grasses (Southern regions): Fertilize in early August, as these grasses begin slowing down by fall.

The exact timing may vary, but the key is to apply fertilizer when daytime highs are consistently below 85°F (29°C) and the grass is actively growing.


Choosing the Right Fertilizer for Late Summer

Not all fertilizers are created equal, and the choice you make in late summer is especially important.

1. Slow-Release Nitrogen Fertilizer

  • Provides steady nutrients over several weeks.
  • Reduces the risk of burning grass.
  • Encourages balanced growth instead of a sudden flush of green blades.

2. Balanced NPK Ratio

Look for fertilizers with a balanced ratio, such as 20-10-10 or 15-5-10, which provide nitrogen for top growth while also supporting root development.

3. Low-Phosphorus Options

In many regions, phosphorus use is restricted due to environmental concerns. Unless a soil test shows deficiency, opt for a low- or no-phosphorus formula.

4. Organic Fertilizers

Compost, manure-based fertilizers, and natural blends improve soil health while feeding grass. They release nutrients more slowly but also enrich soil microorganisms.

Pro Tip: Always perform a soil test before choosing fertilizer. This ensures you provide what your lawn truly needs without over-fertilizing.


How to Fertilize Your Lawn in Late Summer: Step-by-Step

Step 1: Mow the Lawn First

  • Cut the grass to a moderate height (around 3 inches for cool-season lawns).
  • Remove excessive clippings or debris to ensure fertilizer reaches the soil.

Step 2: Water the Lawn Lightly

  • Fertilizer absorbs better when soil is slightly moist.
  • Avoid fertilizing on extremely dry lawns.

Step 3: Spread Fertilizer Evenly

  • Use a broadcast or drop spreader for even distribution.
  • Follow the manufacturer’s recommended rate—too much fertilizer can burn grass.

Step 4: Water Again

  • Water the lawn thoroughly after fertilizing to help nutrients soak in.
  • This also prevents fertilizer granules from burning grass blades.

Step 5: Avoid Heavy Traffic

  • Limit foot traffic on the lawn for a few days to give the fertilizer time to absorb and seedlings (if overseeded) time to establish.

Common Mistakes to Avoid

  1. Over-Fertilizing
    Applying too much fertilizer can burn grass, encourage excessive top growth, and even pollute waterways through runoff.
  2. Fertilizing During Heat Waves
    High temperatures combined with fertilizer can stress or scorch your lawn. Wait for cooler late-summer days.
  3. Skipping Watering
    Fertilizer needs moisture to activate and move into the soil. Dry applications won’t be effective.
  4. Using the Wrong Fertilizer
    A fertilizer high in quick-release nitrogen may make your lawn look green fast, but it won’t provide lasting benefits.
  5. Ignoring Soil Testing
    Without a soil test, you may apply nutrients your lawn doesn’t need while missing the ones it does.

Should You Combine Fertilizing with Other Lawn Tasks?

Late summer is also the perfect time to pair fertilization with other lawn care practices:

  • Aeration: Loosens compacted soil, allowing fertilizer and water to penetrate deeper.
  • Overseeding: Works well with fertilization to thicken thin patches.
  • Weed Control: Fall weeds are easier to control when the lawn is dense and healthy.

Combining these tasks maximizes the benefits of late-summer fertilization.


The Bottom Line: Yes, Fertilize in Late Summer—But Do It Right

So, should you fertilize your lawn in late summer? Absolutely—when done correctly, it is one of the best things you can do for long-term lawn health. Late-summer fertilization helps your grass recover from summer stress, strengthens roots, reduces weed competition, and prepares for the lush growth of fall.

The key is to:

  • Choose the right fertilizer (slow-release, balanced formula).
  • Apply it at the right time (mid-August to early September, depending on grass type).
  • Follow proper application techniques (mow, water, spread evenly, water again).

By avoiding common mistakes and pairing fertilization with aeration or overseeding, you’ll ensure your lawn enters fall stronger, greener, and more resilient than ever.

Your lawn is an investment—and giving it the right nutrients at the right time is the secret to keeping it healthy year after year.

5 Common Lawn Mistakes To Avoid In September

5 Common Lawn Mistakes To Avoid In September

As summer fades and September arrives, many homeowners breathe a sigh of relief. The sweltering heat begins to taper off, and cooler evenings make spending time outdoors much more enjoyable. But while you might think your lawn requires less care at this time of year, September is actually one of the most critical months for lawn maintenance. The way you treat your lawn now sets the stage for how healthy, lush, and green it will look next spring.

Unfortunately, September is also a month when many homeowners unknowingly make mistakes that can harm their grass in the long term. From improper mowing to neglecting soil care, these oversights can undo the hard work you put in during spring and summer.

To help you protect your investment and ensure a healthy lawn year-round, let’s explore five common lawn mistakes to avoid in September, along with practical tips for doing things the right way.


1. Mowing Too Short (Scalping the Lawn)

One of the biggest mistakes people make in September is cutting the grass too short. Many assume that mowing low will reduce the number of times they’ll need to mow, but this approach can severely stress your grass.

Why It’s a Problem:

  • Short grass blades expose the soil to more sunlight, drying it out faster.
  • Scalped grass weakens root systems, making it harder for turf to absorb nutrients before winter.
  • Exposed soil invites weeds to germinate and spread.

What To Do Instead:

  • Raise your mower height to around 2.5–3 inches for cool-season grasses (like fescue, rye, and bluegrass).
  • Leave clippings on the lawn (mulching) to act as natural fertilizer.
  • Avoid cutting more than one-third of the grass blade at a time to minimize stress.

Pro Tip: Taller grass in fall shades the soil, helping retain moisture and protect delicate new seedlings if you’ve overseeded.


2. Ignoring Fall Fertilization

Many homeowners think fertilization is a spring or summer task and skip it once September rolls around. This is a missed opportunity, because fall fertilization is one of the best things you can do for your lawn.

Why It’s a Problem:

  • Grass roots are actively growing in September, even if top growth slows. Without proper nutrition, they won’t store enough energy to survive winter.
  • Skipping fertilizer now often leads to thin, patchy grass and more weeds next spring.

What To Do Instead:

  • Apply a slow-release fertilizer high in nitrogen to encourage root growth and blade density.
  • Consider a “winterizer” fertilizer blend that strengthens grass before dormancy.
  • Time your application for early to mid-September for best results.

Pro Tip: Water your lawn lightly after applying fertilizer to help nutrients soak into the soil.


3. Neglecting Aeration and Overseeding

September is prime time for aerating and overseeding, but many homeowners skip this step entirely, assuming it’s unnecessary. Over time, soil naturally becomes compacted, and overseeding helps fill bare spots before weeds take over.

Why It’s a Problem:

  • Compacted soil prevents water, oxygen, and nutrients from reaching the roots.
  • Thin lawns without overseeding create open spaces where weeds thrive.
  • Waiting until spring to overseed often results in weaker seedlings due to summer heat.

What To Do Instead:

  • Aerate the lawn in early September using a core aerator to loosen compacted soil.
  • Spread high-quality grass seed over the aerated areas, focusing on thin or bare patches.
  • Follow up with light watering to keep the soil consistently moist until seedlings establish.

Pro Tip: Overseeding with improved grass varieties can make your lawn more drought- and disease-resistant in future seasons.


4. Watering Incorrectly

By September, the cooler temperatures and occasional rainfall may lull you into thinking your lawn no longer needs watering. But inconsistent or improper watering at this stage can weaken root systems heading into winter.

Why It’s a Problem:

  • Allowing soil to dry out completely stresses the grass.
  • Overwatering encourages shallow root growth, making grass less resilient in drought.
  • Nighttime watering can promote fungal diseases, especially with cooler evenings.

What To Do Instead:

  • Water deeply and less frequently—about 1 inch of water per week, including rainfall.
  • Water in the early morning hours so moisture penetrates the soil before the sun rises.
  • Use a rain gauge or empty tuna can to track how much water your lawn receives.

Pro Tip: Stick a screwdriver into your soil. If it doesn’t penetrate easily, your lawn needs more water.


5. Leaving Leaves and Debris Untouched

With trees starting to shed leaves in September, many homeowners let them sit on the lawn, assuming they’ll compost naturally. While that may sound eco-friendly, a thick layer of leaves suffocates your lawn.

Why It’s a Problem:

  • Leaves block sunlight, preventing grass from photosynthesizing.
  • Moist, decomposing leaves create a breeding ground for mold and pests.
  • A smothered lawn heading into winter emerges weak and patchy in spring.

What To Do Instead:

  • Rake regularly to keep the lawn clear, especially during peak leaf fall.
  • Better yet, mulch the leaves with your mower and let the small pieces decompose naturally into the soil. This enriches the lawn without suffocating it.
  • Remove sticks, branches, and debris that could damage new grass growth.

Pro Tip: Mulched leaves act like free organic fertilizer, adding nutrients back into your lawn’s ecosystem.


Bonus Mistake: Forgetting Seasonal Adjustments

In addition to the five big mistakes above, another common oversight is failing to adjust your overall lawn care routine for fall conditions.

  • Mower settings: Keep blades sharp and adjust height seasonally.
  • Pest checks: September is a good time to watch for grubs or other lawn pests.
  • Weed control: Broadleaf weeds like dandelions are easier to eliminate in fall, when they’re actively storing energy in their roots.

Making small seasonal adjustments now prevents bigger problems in the months ahead.


Conclusion

September is more than just the start of sweater weather—it’s a pivotal month for lawn care. While it’s easy to assume the hard work of summer is over, avoiding common mistakes during this transition period ensures your lawn remains healthy, resilient, and ready for winter dormancy.

Let’s recap the 5 most common mistakes to avoid:

  1. Mowing too short, which stresses the grass.
  2. Skipping fall fertilization, leaving roots undernourished.
  3. Neglecting aeration and overseeding, allowing weeds to thrive.
  4. Watering incorrectly, either too much or too little.
  5. Ignoring leaf cleanup, which suffocates the lawn.

By addressing these issues head-on, you’ll set your lawn up for success, ensuring it comes back even greener and stronger in spring.

So this September, grab your rake, mower, and watering can—it’s time to give your lawn the care it needs to shine all year long.

The Best Way To Overseed Bare Lawn Spots This Fall

The Best Way To Overseed Bare Lawn Spots This Fall

A thick, lush lawn is one of the hallmarks of a beautiful home landscape. Yet even the most well-maintained lawns can develop bare or thin spots. These patches might appear after a hot, dry summer, from heavy foot traffic, pest infestations, or simply the natural aging of grass. Left untreated, bare spots not only look unattractive but also invite weeds and erosion to take hold.

The good news? Fall is the best time to overseed bare lawn spots. With its mild temperatures, warm soil, and reduced weed competition, autumn offers the perfect conditions for new grass seed to take root and thrive. In this article, we’ll explore why fall overseeding is so effective, the step-by-step process to achieve a smooth, green lawn, and common mistakes to avoid.


Why Overseeding Bare Spots Matters

Overseeding is the process of spreading grass seed over an existing lawn without tearing up the turf. This method works especially well for patching bare spots because:

  1. It restores density – Filling in bare patches prevents weed seeds from finding open soil to germinate.
  2. It improves appearance – Overseeding creates a uniform, carpet-like lawn rather than a patchy one.
  3. It enhances lawn health – New grass varieties often have better resistance to drought, pests, and diseases.
  4. It extends lawn longevity – Adding new seedlings rejuvenates older grass, giving your yard renewed vigor.

If your lawn looks tired or spotty after summer stress, fall overseeding ensures it bounces back beautifully by spring.


Why Fall Is the Best Season for Overseeding

Although overseeding can technically be done in spring or summer, fall is the prime time, especially for cool-season grasses like Kentucky bluegrass, fescue, and ryegrass. Here’s why:

  • Warm soil, cool air: Grass seeds germinate quickly when soil temperatures stay between 50–70°F (10–21°C), conditions common in early fall.
  • Reduced weed competition: Summer weeds like crabgrass begin dying back, leaving less competition for seedlings.
  • Moisture levels: Autumn rains provide natural irrigation, helping seedlings establish strong roots.
  • Extended growing season: Grass roots continue to develop well into late fall, preparing lawns for winter dormancy and a lush spring comeback.

Warm-season lawns in southern regions may benefit from late spring overseeding instead, but for most temperate climates, fall remains the gold standard.


Step-By-Step Guide: How To Overseed Bare Lawn Spots This Fall

Step 1: Identify and Prepare Bare Spots

  • Mark the problem areas: Walk your lawn and note where the turf is sparse or missing.
  • Mow low: Cut the surrounding grass shorter than usual (around 2 inches) to expose more soil.
  • Clear debris: Rake away dead grass, leaves, thatch, or loose soil to create a clean planting area.

Tip: Overseeding directly on compacted soil won’t work. Loosen the top layer with a rake or garden fork so seeds can penetrate.


Step 2: Test and Amend the Soil

  • Check soil pH: Grass grows best in soil with a pH between 6.0 and 7.0. Test kits are inexpensive and easy to use.
  • Add nutrients: Spread compost or a thin layer of enriched topsoil over bare spots to improve fertility and drainage.
  • Correct deficiencies: Apply lime if soil is too acidic, or sulfur if too alkaline.

Healthy soil is the foundation of successful overseeding—don’t skip this step.


Step 3: Choose the Right Grass Seed

Not all grasses are created equal. Choose seed varieties based on:

  • Climate: Cool-season grasses (fescues, ryegrass, bluegrass) thrive in northern climates; warm-season grasses (Bermuda, Zoysia, Bahia) suit southern regions.
  • Sun exposure: Some blends are shade-tolerant, while others need full sun.
  • Durability: High-traffic areas benefit from resilient ryegrass, while ornamental lawns may favor finer fescues.

Opt for high-quality seed blends labeled as “certified” or “premium.” Avoid cheap mixes with weed seeds or fillers.


Step 4: Spread Grass Seed Evenly

  • Hand-seeding for small patches: Scatter seed evenly over bare spots, aiming for recommended coverage (usually 4–8 pounds per 1,000 sq. ft.).
  • Broadcast spreader for larger areas: This tool ensures uniform distribution and avoids clumps.
  • Lightly rake: Gently rake seeded areas to mix seeds into the top ¼ inch of soil for better soil contact.

Step 5: Fertilize for Growth

  • Use a starter fertilizer high in phosphorus to encourage root development.
  • Avoid high-nitrogen fertilizers immediately, as they promote leaf growth over root strength.
  • Apply according to package instructions to prevent over-fertilization.

Step 6: Water Wisely

  • First two weeks: Keep soil consistently moist by watering lightly 2–3 times daily.
  • After germination: Reduce to deeper, less frequent watering (2–3 times weekly) to encourage strong root growth.
  • Avoid puddles: Overwatering can wash away seeds or cause fungal issues.

Tip: Early morning watering is best to reduce evaporation and fungal risks.


Step 7: Protect and Maintain Seedlings

  • Limit foot traffic: Keep kids, pets, and heavy equipment off overseeded spots until grass is established.
  • Mow at the right time: Wait until new grass reaches at least 3–4 inches before mowing. Use sharp blades to avoid pulling seedlings.
  • Feed in late fall: Apply a balanced slow-release fertilizer in late fall to strengthen grass before winter.

Common Mistakes To Avoid

  1. Skipping soil prep – Tossing seed on compacted soil rarely works.
  2. Using the wrong seed – Shade mixes won’t thrive in full sun, and vice versa.
  3. Neglecting watering – Seeds need consistent moisture to sprout.
  4. Mowing too soon – Cutting seedlings before they’re strong enough can uproot them.
  5. Ignoring weeds – Overseeding into a weed-infested lawn reduces germination rates.

The Benefits of Overseeding This Fall

When done correctly, overseeding bare spots in fall leads to:

  • A thicker, greener lawn by spring.
  • Stronger root systems to withstand winter stress.
  • Fewer weeds due to dense turf coverage.
  • Improved soil health from organic amendments and added compost.
  • Long-term savings by reducing the need for weed control and turf replacement.

FAQs About Fall Overseeding

1. How long does it take for overseeded grass to grow?
Most cool-season grasses germinate within 7–14 days, but full establishment can take 6–8 weeks.

2. Should I use straw or mulch to cover seeds?
Yes, a light layer of straw helps retain moisture and protect seeds from birds. Just ensure it’s not too thick to block sunlight.

3. Can I overseed and fertilize at the same time?
Yes, using a starter fertilizer alongside overseeding is recommended.

4. Do I need to aerate before overseeding?
Aeration is helpful for large lawns with compacted soil but may not be necessary for small bare spots.


Final Thoughts

Reseeding bare lawn spots might seem like a small task, but doing it at the right time and with the right approach makes all the difference. Fall provides ideal conditions for new seedlings to germinate, establish strong roots, and prepare for winter dormancy. By following the steps—preparing the soil, choosing the right seed, fertilizing, and maintaining proper watering—you’ll be rewarded with a smooth, lush, and weed-resistant lawn by spring.

Overseeding is truly the secret to reviving tired lawns and keeping your yard vibrant year-round. So grab your rake, spreader, and watering can—this fall, it’s time to bring those bare spots back to life.