When To Reseed Your Lawn For The Greenest Yard

When To Reseed Your Lawn For The Greenest Yard

A lush, green lawn is the dream of every homeowner. Whether you’re hosting backyard barbecues, enjoying quiet evenings outdoors, or simply admiring the curb appeal of your property, the quality of your lawn plays a huge role in the overall look and feel of your outdoor space. However, over time, lawns naturally thin out, develop bare patches, or suffer from weeds, pests, and environmental stresses. Reseeding is the best way to revive your turf and restore that vibrant, carpet-like appearance.

But timing is everything when it comes to reseeding. Planting at the wrong time can waste both effort and money, while reseeding at the right time ensures optimal germination and long-lasting results. In this article, we’ll explore when to reseed your lawn for the greenest yard, the factors to consider, and practical steps to help your grass thrive.


Why Reseeding Matters

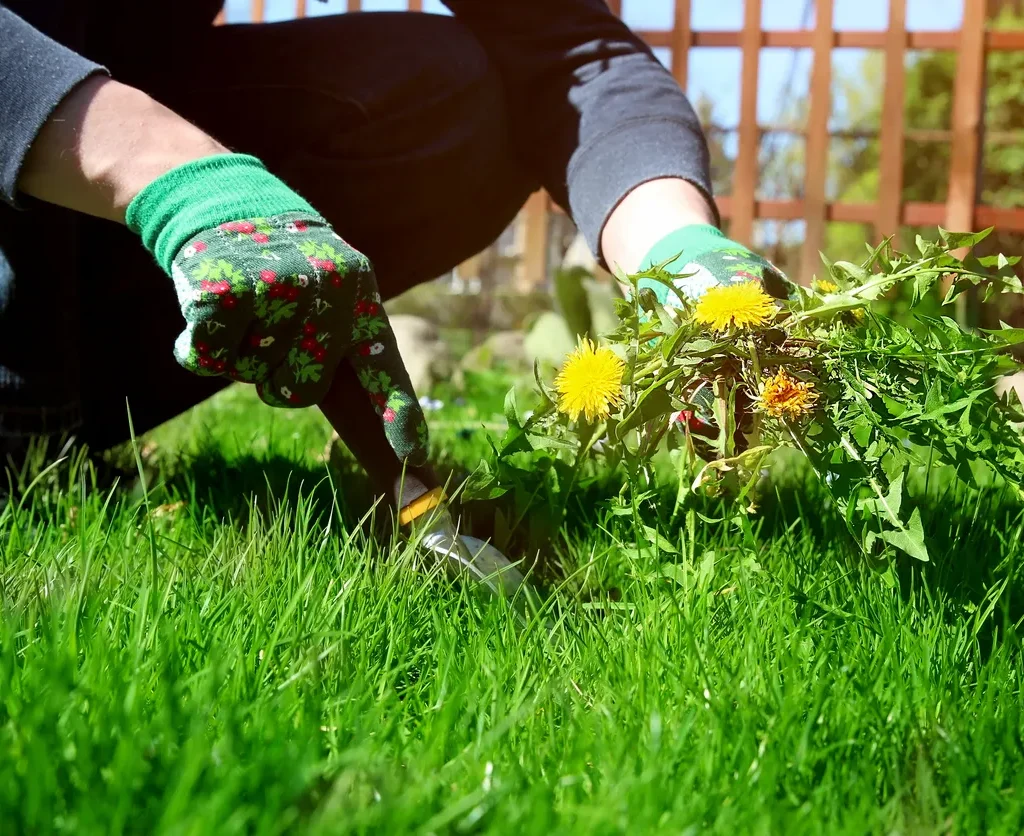
Before diving into timing, it’s important to understand why reseeding is so essential. Even the healthiest lawns can experience wear and tear due to:

  • Foot traffic: Kids, pets, and outdoor activities compact soil and thin the grass.
  • Weather extremes: Hot summers, harsh winters, droughts, or flooding weaken turf.
  • Pests and diseases: Grubs, chinch bugs, or fungal issues damage root systems.
  • Soil conditions: Poor fertility or compacted soil reduces grass growth.

Reseeding fills in bare spots, introduces newer, more resilient grass varieties, and strengthens the lawn’s ability to fight off weeds and pests. Essentially, reseeding is like giving your lawn a fresh new lease on life.


The Best Time To Reseed

1. Cool-Season Grasses: Early Fall (Late August–October)

If you live in regions where cool-season grasses like Kentucky bluegrass, fescue, or perennial ryegrass are common (such as the northern U.S., Canada, or parts of Europe), the best time to reseed is early fall.

Why?

  • Soil temperatures are still warm from summer, encouraging fast germination.
  • Air temperatures are cooler, reducing stress on new seedlings.
  • Fall rains provide consistent moisture without the scorching heat of summer.
  • Weeds like crabgrass die back in cooler weather, giving seedlings less competition.

Reseeding in fall allows grass roots to establish before winter dormancy. Come spring, your lawn will green up quickly and appear thicker and healthier.

2. Cool-Season Grasses: Early Spring (March–April)

If you missed the fall window, early spring is the second-best time to reseed. However, keep in mind:

  • Germination may be slower due to cold soil.
  • Young seedlings may struggle when summer heat arrives.
  • More weed competition in spring can reduce success rates.

Spring reseeding works best when combined with proper watering, soil preparation, and pre-emergent weed control.

3. Warm-Season Grasses: Late Spring–Early Summer (April–June)

In warmer regions where warm-season grasses dominate (like Bermuda, Zoysia, or Bahia in the southern U.S. and tropical climates), the best reseeding time is late spring to early summer.

Why?

  • Warm soil promotes rapid germination.
  • Long days and plenty of sunlight encourage growth.
  • Grass has an entire summer to develop strong roots before winter.

Key Factors To Consider When Reseeding

Timing is important, but there are other factors that determine reseeding success:

1. Soil Temperature

Grass seeds germinate best when soil temperatures range between 50–70°F (10–21°C) for cool-season grasses and 65–85°F (18–29°C) for warm-season grasses. Use a soil thermometer for accuracy.

2. Moisture Levels

Consistent moisture is critical for germination. If your area is experiencing drought or irregular rainfall, plan reseeding during a season when you can reliably water your lawn.
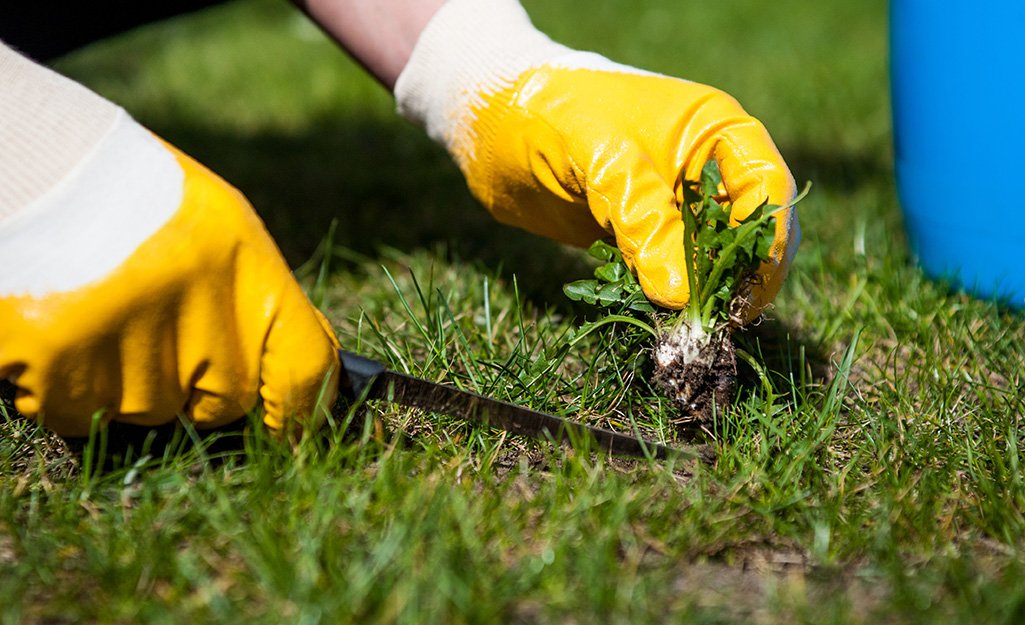
3. Weed Pressure

Fall is naturally less weedy than spring. If your lawn struggles with weeds, reseeding in autumn reduces competition and increases success.

4. Local Climate

Microclimates matter. Coastal areas may have milder falls, while inland areas cool faster. Adjust your timing based on your specific weather conditions.


Step-By-Step Guide To Successful Reseeding

Step 1: Prepare the Lawn

  • Mow low: Cut the grass shorter than usual (around 2 inches) to expose soil.
  • Remove debris: Rake away leaves, dead grass, or thatch.
  • Loosen soil: Use an aerator to reduce compaction and improve seed-to-soil contact.

Step 2: Test and Improve Soil

  • Perform a soil test to check pH and nutrient levels.
  • Add lime if soil is too acidic or sulfur if it’s too alkaline.
  • Apply compost or topsoil to improve fertility and drainage.

Step 3: Choose the Right Grass Seed

  • Select a grass seed blend suited to your region (cool- vs. warm-season).
  • For shady areas, choose shade-tolerant mixes.
  • Look for disease-resistant and drought-tolerant varieties.

Step 4: Spread the Seed

  • Use a broadcast spreader for even coverage.
  • Aim for 4–8 pounds per 1,000 sq. ft., depending on seed type.
  • Lightly rake to cover seeds with a thin layer of soil.

Step 5: Fertilize and Water

  • Apply a starter fertilizer high in phosphorus for root growth.
  • Water lightly but frequently (2–3 times per day) until seedlings sprout.
  • Once grass reaches 2 inches, reduce watering to deeper, less frequent sessions.

Step 6: Maintain New Growth

  • Avoid mowing until grass is at least 3–4 inches tall.
  • Keep foot traffic to a minimum until turf is established.
  • Continue fertilizing in fall or spring to strengthen roots.

Common Mistakes To Avoid

  • Planting at the wrong time: Seeds won’t germinate if soil is too cold or too hot.
  • Overwatering or underwatering: Both extremes can kill seedlings.
  • Skipping soil prep: Seeds on compacted soil won’t take root.
  • Using the wrong grass seed: Not all grasses thrive in all climates.
  • Neglecting follow-up care: Fertilizing and proper mowing are essential.

Benefits of Reseeding at the Right Time

When you reseed at the right time of year, you’ll enjoy:

  • A denser, greener lawn.
  • Fewer weeds due to thick turf coverage.
  • Stronger root systems for drought and heat resistance.
  • Increased property value and curb appeal.
  • A healthier environment for outdoor living.

Final Thoughts

Reseeding your lawn isn’t just about spreading seed randomly—it’s about timing, preparation, and care. For the greenest yard possible, aim to reseed in early fall for cool-season grasses and late spring for warm-season varieties. By considering soil conditions, local climate, and lawn needs, you’ll set your grass up for long-term success.

A little planning now pays off with a thick, vibrant lawn that you’ll enjoy year after year.

How to Choose the Right Containers for Plants

How to Choose the Right Containers for Plants

Container gardening has become a favorite choice for plant enthusiasts, urban dwellers, and home gardeners. Whether you have a sprawling backyard or just a cozy balcony, containers allow you to enjoy gardening in any space. They give you the freedom to grow flowers, herbs, vegetables, or even small trees in creative and manageable ways.

However, one of the most important aspects of container gardening is selecting the right container. The container you choose directly influences plant health, root growth, water retention, and the overall success of your garden. While many gardeners get excited about the plants themselves, choosing the wrong container can lead to poor growth, root rot, or even plant death.

This guide explores everything you need to know about selecting the best containers for plants—covering materials, size, drainage, style, and other practical tips.


Why Container Choice Matters

The container isn’t just a decorative pot—it’s the plant’s entire environment. Unlike garden soil, where roots can expand freely, containers limit root space. The pot must support proper root development, drainage, and aeration. The right container ensures:

  • Healthy root growth
  • Proper water retention and drainage
  • Adequate space for plant size
  • Temperature regulation
  • Aesthetic appeal for your space

A poor choice can lead to waterlogging, root-bound plants, or overheating of roots. This makes container selection as crucial as soil and sunlight in gardening.


Factors to Consider When Choosing Containers

1. Size Matters

The size of your container is the most important factor. A container that is too small will restrict root growth, dry out quickly, and stunt your plant. Conversely, a container that is too large may retain excess moisture, leading to root rot.

  • Small containers (4–6 inches deep): Best for herbs like thyme, parsley, or shallow-rooted flowers like pansies.
  • Medium containers (8–12 inches deep): Ideal for lettuce, peppers, geraniums, and dwarf vegetables.
  • Large containers (12–18+ inches deep): Necessary for tomatoes, roses, shrubs, and small fruit trees.

As a general rule, choose a container at least twice the width of the plant’s root ball. If in doubt, go slightly bigger to allow for growth.


2. Material of the Container

Different materials affect drainage, insulation, weight, and aesthetics. Here are common choices:

Clay or Terracotta Pots

  • Pros: Natural, attractive, porous (good air circulation).
  • Cons: Dry out quickly, heavy, prone to cracking in frost.
  • Best for: Mediterranean herbs (rosemary, oregano, basil) that prefer drier soil.

Plastic Pots

  • Pros: Lightweight, inexpensive, excellent moisture retention, available in many styles.
  • Cons: Less durable, can fade in sunlight, may overheat roots.
  • Best for: Beginners, indoor plants, or balcony gardening.

Ceramic or Glazed Pots

  • Pros: Stylish, retain moisture longer, durable.
  • Cons: Expensive, heavy, often fewer drainage holes.
  • Best for: Decorative displays or statement plants.

Wooden Containers

  • Pros: Rustic look, good insulation, customizable sizes.
  • Cons: Rot over time, heavy when wet, need lining for longevity.
  • Best for: Large vegetable planters, patio displays.

Metal Containers

  • Pros: Modern look, durable.
  • Cons: Heat up quickly in sun, may rust unless treated.
  • Best for: Decorative arrangements, indoor or shaded areas.

Fabric Grow Bags

  • Pros: Lightweight, breathable, encourage air pruning of roots.
  • Cons: Dry out faster, less aesthetic for some gardeners.
  • Best for: Tomatoes, potatoes, leafy greens, balcony gardening.

3. Drainage is Essential

Plants hate sitting in waterlogged soil. Without good drainage, roots suffocate, and fungi thrive.

  • Always choose containers with drainage holes at the bottom.
  • If using decorative pots without holes, insert a plastic liner with drainage inside.
  • For large containers, add gravel or broken pottery at the base to improve drainage.

Tip: Elevate containers slightly off the ground with pot feet to prevent water pooling.


4. Weight and Mobility

Consider how often you’ll need to move your containers. Large ceramic or stone pots may look beautiful but can be impossible to relocate once filled with soil and plants.

  • Balcony or rooftop gardens: Lightweight materials like plastic, resin, or grow bags are more practical.
  • Indoor plants: Use saucers with wheels for easy movement.
  • Outdoor permanent displays: Heavier options like stone or wood can withstand wind and weather.

5. Shape of the Container

The shape impacts both aesthetics and root development.

  • Tall, narrow pots: Best for deep-rooted plants (carrots, roses).
  • Wide, shallow pots: Great for succulents, herbs, and flowers.
  • Rectangular or trough planters: Ideal for balcony railings or multiple plants in one container.

Avoid pots with a narrow top and wide base—they make repotting difficult.


6. Style and Aesthetics

Containers also play a decorative role in your space. Choose colors, textures, and designs that complement your home or garden.

  • Neutral tones blend with greenery.
  • Bold, colorful pots add vibrancy to patios or balconies.
  • Natural finishes (wood, terracotta) create a rustic or earthy feel.

Grouping containers of different sizes and shapes can create dynamic displays.


7. Plant Type and Growing Conditions

Your container should suit the plant’s natural habitat:

  • Moisture-loving plants (ferns, impatiens): Choose non-porous containers like plastic or glazed ceramic.
  • Drought-tolerant plants (succulents, lavender): Use porous clay or terracotta pots.
  • Heavy feeders (tomatoes, peppers): Larger containers with nutrient-rich soil mixes are necessary.

8. Sustainability Considerations

Eco-friendly gardeners may opt for upcycled or biodegradable containers.

  • Recycled options: Old buckets, wooden crates, or barrels can be repurposed.
  • Biodegradable pots: Made of coconut coir, peat, or rice husks, perfect for seedlings that can be planted directly into soil.

Not only do these reduce waste, but they also add creativity to your garden.


Practical Tips for Choosing the Right Container

  1. Match container size to the plant’s expected growth, not just its current size.
  2. Always check for drainage holes before purchasing.
  3. If gardening in hot climates, avoid dark-colored pots as they absorb heat.
  4. For indoor plants, pair functional containers with decorative outer covers.
  5. Invest in quality containers for long-term use—cheaper ones may crack or fade quickly.
  6. Consider self-watering containers for busy gardeners who travel frequently.

Common Mistakes to Avoid

  • Choosing pots too small: Leads to stunted plants and frequent watering.
  • Ignoring drainage: Causes root rot and plant failure.
  • Using unsuitable materials: For example, metal containers in full sun can scorch roots.
  • Overcrowding: Planting too many plants in one container causes competition for nutrients.

Conclusion

The right container can make or break your gardening success. It’s not only about looks—it’s about creating the best possible environment for your plants to thrive. By considering factors such as size, material, drainage, mobility, and plant needs, you can select containers that balance function with beauty.

Whether you’re growing a balcony herb garden, vibrant flowering displays, or a patio vegetable harvest, the perfect container will support healthy roots, lush growth, and a stunning garden.

In the end, think of containers as a home for your plants—the better the home, the healthier and happier your green companions will be.

Best Soil Mixes for Container Gardening Success

Best Soil Mixes for Container Gardening Success

Container gardening has grown into one of the most popular ways to bring plants into homes, patios, balconies, and small outdoor spaces. Whether you’re growing vibrant flowers, lush foliage plants, or fresh vegetables, one factor determines your success more than anything else: the soil mix. Unlike traditional gardens, container plants are confined to limited space. Their roots can’t search far and wide for water or nutrients. That means the soil mix you choose—or create—must meet all their needs.

In this article, we’ll explore why soil mixes are so important for container gardening, what makes an ideal mix, and the best options for different types of plants. With the right foundation, your plants can thrive, bloom, and produce abundantly.


Why Regular Garden Soil Doesn’t Work in Containers

A common mistake new gardeners make is filling pots with regular garden soil. While it may work in the ground, garden soil is too heavy for containers.

Problems with using garden soil in pots:

  • Compaction: Garden soil compresses easily in pots, restricting root growth and oxygen flow.
  • Poor Drainage: Excess water has nowhere to go, leading to soggy soil and root rot.
  • Pest and Disease Risks: Soil from the ground may carry harmful pests, weeds, or fungi.

That’s why container gardening requires a specially designed soil mix that balances drainage, aeration, and nutrition.


Characteristics of the Best Soil Mix

An ideal container gardening soil mix should:

  1. Drain Well: Prevents waterlogging, which suffocates roots.
  2. Retain Moisture: Holds enough water to keep plants hydrated between waterings.
  3. Be Lightweight: Easy to move around, especially for balcony or rooftop containers.
  4. Provide Nutrients: Supplies essential minerals for plant growth.
  5. Allow Aeration: Keeps soil loose so roots can “breathe” and expand.

Balancing these qualities requires combining several ingredients.


Common Ingredients in Container Soil Mixes

  1. Coco Peat or Peat Moss
    • Improves water retention and keeps soil light.
    • Coco peat is eco-friendly, while peat moss is traditional but less sustainable.
  2. Perlite
    • Small white volcanic rocks that improve aeration and drainage.
    • Prevents soil from becoming too compact.
  3. Vermiculite
    • Helps retain both moisture and nutrients.
    • Often used in mixes for seedlings or moisture-loving plants.
  4. Compost or Well-Rotted Manure
    • Provides organic nutrients and beneficial microorganisms.
    • Improves soil structure and fertility.
  5. Sand
    • Adds weight and improves drainage.
    • Best for succulents and cactus mixes.
  6. Garden Lime (Optional)
    • Used to balance acidity in peat-based mixes.
  7. Slow-Release Fertilizer
    • Ensures plants have a steady nutrient supply over time.

Best Soil Mixes for Different Container Plants

Not all plants need the same soil. Tailoring mixes to your plant type ensures better growth and fewer problems.


1. Soil Mix for Flowering Plants

Flowers like petunias, geraniums, and marigolds thrive in well-balanced soil that encourages blooming.

Recipe:

  • 40% coco peat or peat moss
  • 30% compost
  • 20% perlite
  • 10% vermiculite

Why it Works:
This mix retains enough moisture for continuous blooms while staying light and airy. Compost provides essential nutrients to fuel flowering.


2. Soil Mix for Vegetables

Container vegetables like tomatoes, peppers, lettuce, and carrots require nutrient-rich soil.

Recipe:

  • 35% coco peat
  • 35% compost or well-rotted manure
  • 20% perlite
  • 10% garden soil (sterilized)

Why it Works:
This mix balances fertility and drainage. Vegetables are heavy feeders, so the compost ensures steady nutrition, while perlite prevents root rot.

Tip: Add a handful of slow-release organic fertilizer (such as bone meal or neem cake) for long-term nutrient supply.


3. Soil Mix for Herbs

Herbs like basil, mint, parsley, and thyme do best in soil that drains well but doesn’t dry out too quickly.

Recipe:

  • 40% coco peat
  • 30% compost
  • 20% perlite
  • 10% vermiculite

Why it Works:
Herbs require steady moisture but are sensitive to overwatering. This mix ensures balance and keeps flavors strong.


4. Soil Mix for Succulents and Cacti

Succulents like aloe vera, echeveria, and jade plants require fast-draining soil to prevent root rot.

Recipe:

  • 40% coarse sand or pumice
  • 30% coco peat or peat moss
  • 20% perlite
  • 10% compost

Why it Works:
This gritty mix ensures water drains quickly while still providing nutrients. The sand adds weight, stabilizing shallow-rooted succulents in pots.


5. Soil Mix for Indoor Houseplants

Houseplants like pothos, philodendrons, and snake plants need soil that retains some moisture but allows roots to breathe.

Recipe:

  • 40% coco peat
  • 30% compost
  • 20% perlite
  • 10% vermiculite

Why it Works:
This versatile blend mimics a natural forest floor—moist, airy, and nutrient-rich. It suits most decorative indoor plants.


Tips for Mixing and Using Container Soils

  1. Sterilize Ingredients: Bake garden soil or compost at 180°F (82°C) for 30 minutes to kill pests and pathogens before adding to your mix.
  2. Add Mulch: Use bark chips, straw, or moss on top of containers to reduce evaporation.
  3. Refresh Annually: Replace or replenish soil every growing season, as nutrients deplete and soil compacts.
  4. Fertilize Regularly: Even the best mixes need extra feeding, especially for heavy-feeding vegetables and flowers.
  5. Check pH Levels: Most plants prefer slightly acidic to neutral soil (pH 6–7). Test and adjust with lime or sulfur if needed.
  6. Don’t Overfill Pots: Leave 1–2 inches at the top for watering space.

Common Mistakes to Avoid

  • Using Garden Soil Alone: Leads to compaction and poor growth.
  • Skipping Drainage Holes: Causes waterlogging and root rot.
  • Over-Fertilizing: Can burn roots and lead to weak growth.
  • Ignoring Plant-Specific Needs: A “one-size-fits-all” mix doesn’t always work.

Sustainable Alternatives

Container gardening can also be eco-friendly with sustainable soil ingredients:

  • Replace peat moss with coco peat to reduce environmental impact.
  • Use homemade compost from kitchen scraps.
  • Incorporate biochar to improve soil fertility and carbon storage.
  • Reuse old potting soil by refreshing it with compost and perlite.

Conclusion

The success of any container garden begins with what lies beneath the surface—the soil mix. By understanding plant needs and creating tailored mixes, you provide the perfect environment for healthy roots, lush growth, and abundant blooms or harvests.

From nutrient-rich blends for vegetables to fast-draining mixes for succulents, choosing the right soil is the foundation of container gardening success. Combine quality ingredients, refresh your mixes regularly, and adjust based on plant type, and your container garden will thrive season after season.

Remember: a thriving plant isn’t just about what you see above the pot—it’s about the healthy, happy roots below.

Tips for Arranging Beautiful Container Displays

Tips for Arranging Beautiful Container Displays

Container gardening is more than just growing plants in pots—it’s an art form. The right combination of plants, containers, and arrangements can transform patios, balconies, entryways, or even indoor corners into vibrant, eye-catching displays. Unlike traditional gardens, container displays offer flexibility—you can change themes, colors, and styles with the seasons or whenever creativity strikes.

But arranging a stunning container display takes more than simply putting a few plants into soil. It requires thoughtful planning, design principles, and care to keep everything thriving. In this guide, we’ll share practical and creative tips for arranging beautiful container displays that will not only enhance your space but also showcase your personality.


Why Container Displays Matter

Container displays bring several benefits beyond aesthetics:

  • Space Maximization: Perfect for balconies, patios, and small yards.
  • Flexibility: Easily moved, rearranged, or redesigned with new plants.
  • Seasonal Appeal: Quick updates for spring blooms, summer vibrance, autumn hues, or winter greenery.
  • Personal Expression: Reflects creativity through choice of plants, colors, and decorative pots.

1. Start with the Right Container

The container sets the stage for your display. Its size, material, and color influence the overall look.

Key Tips:

  • Size: Larger containers retain moisture longer and provide more root space. Use them for big focal plants like small trees or ornamental grasses. Smaller containers are best for herbs, succulents, or accent flowers.
  • Material:
    • Terracotta: Classic look, good breathability, but dries quickly.
    • Ceramic or Glazed Pots: Stylish, available in many colors, retain moisture well.
    • Plastic or Fiberglass: Lightweight and durable, great for balconies.
    • Wooden Boxes: Rustic and charming, but line them to prevent rotting.
  • Color & Style: Choose containers that complement your home’s architecture and your plant palette. Neutral colors highlight plants, while bold pots can serve as statement pieces.

2. Follow the “Thriller, Filler, Spiller” Rule

One of the most popular design formulas for container displays is the “thriller, filler, spiller” technique.

  • Thriller (Focal Plant): A tall, dramatic plant that creates vertical interest. Examples: canna lilies, ornamental grasses, dwarf trees.
  • Filler (Mid-Height Plants): Medium-sized plants that fill gaps and provide color or texture. Examples: petunias, coleus, marigolds.
  • Spiller (Trailing Plants): Cascading plants that soften edges and add flow. Examples: ivy, sweet potato vine, trailing lobelia.

This simple formula creates balance and ensures your display looks full and visually dynamic.


3. Play with Color Combinations

Color can make or break a container display. Thoughtful palettes add harmony and mood to your garden.

Strategies:

  • Monochromatic Scheme: Use variations of one color (light pink, deep rose, and burgundy petunias) for a sophisticated, calming effect.
  • Complementary Colors: Pair opposite colors on the color wheel (purple and yellow, red and green) for high contrast and vibrancy.
  • Analogous Colors: Choose colors next to each other (orange, yellow, red) for a warm, energetic look.
  • Seasonal Themes:
    • Spring → pastel tones.
    • Summer → bold, tropical hues.
    • Autumn → oranges, golds, and burgundy.
    • Winter → greens, whites, and silvers.

Tip: Include foliage with interesting colors (silver dusty miller, purple coleus, or variegated ivy) to enhance your palette.


4. Mix Textures and Shapes

A visually stunning container display balances different leaf textures, shapes, and plant habits.

  • Leaf Texture: Pair broad-leaved plants (hostas) with fine-textured plants (ferns or grasses).
  • Plant Shapes: Combine upright forms (ornamental millet) with mounding plants (marigolds) and cascading varieties (trailing petunias).
  • Flower Forms: Mix trumpet-shaped blooms with daisy-like flowers or clusters for added interest.

Texture and shape variety prevent monotony and create a layered, three-dimensional effect.


5. Choose the Right Plants for the Right Conditions

No matter how well you design your display, it won’t thrive without considering the growing environment.

  • Sun-Loving Plants: Petunias, geraniums, marigolds, basil, rosemary.
  • Shade-Loving Plants: Begonias, impatiens, ferns, hostas, coleus.
  • Drought-Tolerant Plants: Succulents, lavender, ornamental grasses.

Tip: Group plants with similar water and sunlight needs in the same container to avoid uneven growth or stress.


6. Layer Heights for Visual Impact

Arrange plants so that each one is visible and contributes to the overall design.

  • Tallest plants (thrillers) go in the center or back of the container, depending on whether it’s viewed from all sides or one side.
  • Medium plants fill in around them.
  • Trailing plants spill over the edges, framing the arrangement.

This layering creates balance and ensures your container looks full and lush.


7. Add Seasonal Interest

To keep your displays attractive year-round, plan seasonal updates.

  • Spring: Daffodils, tulips, pansies.
  • Summer: Geraniums, petunias, zinnias.
  • Autumn: Chrysanthemums, ornamental kale, asters.
  • Winter: Evergreen branches, holly, and decorative elements like pinecones.

Using a mix of annuals and perennials ensures a fresh look across the seasons.


8. Incorporate Edible Plants

Who says container displays must be purely ornamental? Mixing in vegetables and herbs adds function without sacrificing beauty.

  • Pair basil with marigolds for fragrance and pest control.
  • Use rainbow chard for its colorful stems.
  • Grow strawberries in hanging baskets for edible spills.
  • Add ornamental peppers for bold color and texture.

Edible plants bring both aesthetic appeal and fresh harvests to your display.


9. Pay Attention to Proportion and Balance

The container, plants, and surrounding space should feel balanced.

  • Container to Plant Ratio: The tallest plant should generally be about 1.5 times the height of the container.
  • Symmetry vs. Asymmetry:
    • Symmetrical arrangements suit formal settings.
    • Asymmetrical, flowing designs work for casual or rustic spaces.
  • Repetition: Repeating certain plants or colors ties the display together.

10. Enhance Displays with Decorative Elements

Containers don’t need to stand alone—small touches can elevate the entire look.

  • Use decorative gravel, moss, or bark mulch as a top layer to hide soil.
  • Add garden ornaments, such as miniature statues or lanterns.
  • Incorporate trellises or supports for climbing plants.
  • Arrange multiple containers at different heights using stands or steps for depth.

These details turn a simple pot of flowers into a curated design.


11. Maintain for Long-Lasting Beauty

Even the most stunning container display requires regular care to stay beautiful.

  • Watering: Containers dry faster than garden beds; check soil daily in summer.
  • Feeding: Fertilize every 2–3 weeks with liquid fertilizer to replace nutrients lost during watering.
  • Pruning & Deadheading: Remove faded flowers and yellowing leaves to encourage new growth.
  • Repotting: Refresh soil and trim roots annually for perennials.
  • Pest Management: Watch for common pests like aphids and treat naturally with neem oil or insecticidal soap.

Conclusion

Arranging beautiful container displays is all about blending creativity with practicality. By selecting the right containers, following design principles like the “thriller, filler, spiller” method, playing with colors and textures, and paying attention to plant needs, you can create displays that are both stunning and sustainable.

Whether your goal is to brighten up a balcony, add elegance to an entryway, or create a lush focal point in your garden, container displays provide endless possibilities. With thoughtful planning and regular care, these living artworks can reflect your personality, enhance your space, and bring joy season after season.

So, grab your pots, pick your plants, and start designing your very own masterpiece!

How to Grow Vegetables in Pots on a Balcony

How to Grow Vegetables in Pots on a Balcony

Urban living often means limited outdoor space, but that doesn’t mean you have to give up the joy of gardening. Balcony gardening has become a rising trend, offering city dwellers a chance to grow their own fresh produce in small spaces. With the right approach, you can transform your balcony into a mini vegetable farm, enjoying everything from crisp lettuce and juicy tomatoes to fresh herbs and peppers—all grown in pots.

In this article, we’ll guide you step by step on how to grow vegetables in pots on a balcony, covering plant selection, soil preparation, care techniques, and practical tips to maximize your harvest.


Why Balcony Vegetable Gardening?

  1. Freshness and Flavor: Nothing compares to the taste of homegrown vegetables.
  2. Space Optimization: Even small balconies can support a surprising amount of greenery.
  3. Sustainability: Growing your own food reduces reliance on store-bought produce.
  4. Stress Relief: Gardening provides a therapeutic break from busy urban life.
  5. Cost-Effective: Once established, a balcony garden can save money on groceries.

Choosing the Right Vegetables for Balcony Pots

Not all vegetables thrive in containers, so picking compact, high-yield, and easy-to-grow varieties is essential. Some of the best choices include:

  • Tomatoes: Cherry or dwarf varieties are excellent for pots.
  • Lettuce & Spinach: Quick-growing, great for continuous harvests.
  • Peppers & Chilies: Thrive in containers with full sun.
  • Cucumbers: Bush or dwarf varieties are ideal for vertical balcony gardens.
  • Carrots & Radishes: Perfect for deeper pots with loose soil.
  • Herbs: Basil, parsley, coriander, and mint add freshness and flavor.

Selecting the Right Containers

The choice of container can make or break your balcony garden. Here’s what to keep in mind:

  • Size Matters:
    • Leafy greens like lettuce → 6–8 inch deep pots.
    • Root vegetables like carrots → 10–12 inch deep pots.
    • Tomatoes and peppers → 12–18 inch deep containers.
  • Material:
    • Terracotta pots breathe well but dry faster.
    • Plastic and fiberglass pots are lightweight and retain moisture.
    • Wooden boxes can add charm but need a liner to prevent rotting.
  • Drainage: Always ensure pots have holes at the bottom to prevent waterlogging.

Tip: Use saucers under pots to protect your balcony floor from water stains.


Preparing the Soil Mix

Balcony plants need a lightweight, nutrient-rich soil that drains well. Regular garden soil is too heavy for containers. Instead, prepare a potting mix using:

  • 40% high-quality potting soil
  • 30% compost or organic manure
  • 20% coco peat (for moisture retention)
  • 10% perlite or sand (for drainage)

For vegetables that need more nutrition, like tomatoes, enrich the mix with slow-release organic fertilizers.


Planting and Sowing

  1. Direct Sowing: Radishes, carrots, and spinach grow best when sown directly into pots.
  2. Transplants: Tomatoes, peppers, and cucumbers benefit from being started indoors or bought as seedlings, then transplanted into containers.
  3. Spacing: Follow packet instructions. Overcrowding leads to poor growth and disease.

Example: In a 12-inch pot, you can plant 2–3 lettuce seedlings but only 1 tomato plant.


Watering Techniques for Balcony Vegetables

Watering is crucial since pots dry out quickly compared to garden soil.

  • Frequency: Water once daily in summer, and every other day in cooler months.
  • Deep Watering: Ensure water reaches the root zone. Shallow watering can stunt growth.
  • Avoid Overwatering: Check the soil with your finger—if it’s moist 1 inch below, hold off.
  • Self-Watering Containers: Great for balconies if you travel often.

Tip: Early morning or late evening watering reduces evaporation and helps plants absorb moisture better.


Sunlight and Placement

Most vegetables need at least 6–8 hours of direct sunlight daily. Since balconies often have limited light:

  • Place pots near railings or walls that get the most sun.
  • Use tiered plant stands to maximize vertical space.
  • Grow shade-tolerant crops (lettuce, spinach, parsley) if your balcony is not very sunny.

If sunlight is very limited, consider supplementing with LED grow lights.


Fertilization and Nutrient Care

Nutrients leach out quickly with frequent watering, so container vegetables need regular feeding.

  • Liquid Fertilizers: Apply every 10–14 days for leafy greens and herbs.
  • Slow-Release Fertilizers: Ideal for fruiting plants like tomatoes and peppers.
  • Organic Options: Compost tea, seaweed extract, or fish emulsion keep plants healthy naturally.

Tip: Avoid over-fertilization—too much nitrogen can cause lush leaves but fewer fruits.


Managing Pests and Diseases

Balcony plants are less prone to pests than ground gardens, but they’re not immune.

  • Common Pests: Aphids, whiteflies, mealybugs, and caterpillars.
  • Natural Solutions:
    • Spray neem oil solution weekly.
    • Use soapy water to wash off soft-bodied insects.
    • Encourage beneficial insects like ladybugs.
  • Diseases: Prevent fungal infections by ensuring good air circulation and avoiding overhead watering.

Vertical Gardening for Small Balconies

If your balcony is tiny, vertical gardening can maximize space:

  • Use hanging baskets for trailing plants like cherry tomatoes or strawberries.
  • Install wall-mounted planters for herbs and leafy greens.
  • Add a trellis for cucumbers, beans, or climbing peas.

This not only saves space but also creates a lush, green wall that doubles as a privacy screen.


Harvesting Tips

  • Leafy Greens: Harvest outer leaves regularly, allowing the inner ones to keep growing.
  • Tomatoes & Peppers: Pick when fully colored but firm to the touch.
  • Root Crops: Check maturity times (usually 30–60 days for radishes and carrots).

Regular harvesting encourages plants to keep producing.


Seasonal Balcony Gardening

  • Spring & Summer: Tomatoes, peppers, cucumbers, beans, basil, and parsley thrive.
  • Autumn & Winter: Spinach, lettuce, radishes, carrots, and coriander do well in cooler weather.

By rotating crops seasonally, you can enjoy year-round balcony harvests.


Practical Tips for Success

  1. Start Small: Begin with 3–4 pots and expand as you gain confidence.
  2. Use Lightweight Pots: Makes moving easier, especially if you live in a high-rise.
  3. Protect from Wind: Balconies at higher floors can be windy—use screens or railings for protection.
  4. Group Plants: Grouping helps retain humidity and makes watering easier.
  5. Experiment with Companion Planting: Grow basil with tomatoes, or lettuce under taller crops to save space and improve yields.

Conclusion

Growing vegetables in pots on a balcony is not only possible but incredibly rewarding. With the right choice of containers, soil, and plants, even a small space can yield a steady supply of fresh produce. From the fragrance of basil to the sweetness of cherry tomatoes, balcony gardening allows you to bring nature into your home and enjoy the satisfaction of eating what you grow.

By following simple steps—choosing the right vegetables, ensuring proper sunlight, watering consistently, and managing pests—you can transform your balcony into a thriving green oasis. Whether you’re a beginner or a seasoned gardener, balcony vegetable gardening is a practical, sustainable, and joyful way to live greener in the city.

5 Best Plants for Container Gardens

5 Best Plants for Container Gardens

Container gardening has become one of the most popular ways to bring greenery, beauty, and even fresh food into small spaces. Whether you live in an apartment with a balcony, have a tiny backyard, or simply want to add some decorative greenery to your porch or indoor spaces, container gardens provide endless opportunities. The beauty of container gardening lies in its flexibility—you can move plants around to catch sunlight, change arrangements seasonally, and even grow a lush garden in limited space.

But not every plant thrives in containers. Choosing the right ones is key to creating a healthy, long-lasting, and visually appealing container garden. In this article, we’ll explore the five best plants for container gardens, along with care tips, design ideas, and practical insights to help your garden flourish.


1. Geraniums (Pelargonium)

Why They’re Great for Containers

Geraniums are classic container plants loved for their vibrant colors, low maintenance, and long blooming season. With shades ranging from red and pink to white and purple, they add instant cheer to any patio, balcony, or window box.

Growing Conditions

  • Light: Full sun (at least 6 hours a day).
  • Soil: Well-drained potting mix with some compost for nutrition.
  • Watering: Moderate; water when the soil feels dry about an inch down.

Care Tips

  • Deadhead (remove spent blooms) regularly to encourage continuous flowering.
  • Fertilize every 2–3 weeks with a balanced liquid fertilizer.
  • In colder climates, bring pots indoors during winter to extend their life.

Design Idea

Pair geraniums with trailing plants like ivy or lobelia in a mixed container for a dramatic cascading effect.


2. Tomatoes (Solanum lycopersicum)

Why They’re Great for Containers

Tomatoes are one of the most rewarding edible plants to grow in containers. With proper care, even a single pot can yield plenty of juicy, fresh fruits for salads, sauces, and snacks. Compact or dwarf varieties like ‘Patio Princess’, ‘Tiny Tim’, or ‘Bush Early Girl’ are particularly suited for container gardening.

Growing Conditions

  • Light: At least 6–8 hours of full sun daily.
  • Soil: Nutrient-rich potting soil with good drainage.
  • Watering: Consistent moisture; avoid letting the soil dry out completely.

Care Tips

  • Use large pots (minimum 12–18 inches deep) to allow root development.
  • Support plants with stakes or cages to prevent branches from breaking.
  • Fertilize every 2 weeks with a tomato-specific fertilizer high in phosphorus and potassium.

Design Idea

Combine dwarf tomatoes with basil in the same container. Not only do they thrive together, but basil also repels pests and enhances tomato flavor—a win-win companion planting strategy.


3. Lavender (Lavandula)

Why They’re Great for Containers

Lavender is a versatile plant known for its calming fragrance, purple-blue flowers, and silvery foliage. It thrives beautifully in containers, making it easy to place on patios, balconies, or even indoors near sunny windows. Beyond aesthetics, lavender attracts pollinators like bees and butterflies while repelling pests like mosquitoes.

Growing Conditions

  • Light: Full sun (6–8 hours daily).
  • Soil: Sandy, well-draining potting mix. Avoid heavy soils that retain too much water.
  • Watering: Low; water sparingly and allow the soil to dry between watering.

Care Tips

  • Trim after flowering to encourage fresh growth.
  • Avoid overwatering, as lavender dislikes soggy soil.
  • Use terracotta containers to enhance drainage and maintain ideal soil conditions.

Design Idea

Group lavender with other Mediterranean herbs such as rosemary and thyme in a large container to create a fragrant, edible herb garden.


4. Petunias (Petunia × hybrida)

Why They’re Great for Containers

Petunias are among the most versatile and colorful flowering plants for containers. Their trumpet-shaped blooms come in countless shades, from pastel pinks and purples to vibrant reds and deep blues. Some varieties trail gracefully over the edges of pots, making them excellent for hanging baskets or railing boxes.

Growing Conditions

  • Light: Full sun to partial shade.
  • Soil: Rich, well-draining potting mix.
  • Watering: Regular; keep soil evenly moist but not soggy.

Care Tips

  • Pinch back stems early in the season to promote bushier growth.
  • Deadhead frequently to extend blooming through summer.
  • Feed with a high-phosphorus fertilizer every 10–14 days for abundant flowers.

Design Idea

Create a “color splash” container by mixing different petunia varieties with trailing vines like sweet potato vine (Ipomoea batatas) for added contrast and texture.


5. Hostas (Hosta spp.)

Why They’re Great for Containers

If you’re looking to add lush greenery and texture to shady spots, hostas are the perfect choice. Known for their large, decorative leaves in shades of green, blue, and variegated patterns, hostas bring elegance to container gardens without demanding much upkeep.

Growing Conditions

  • Light: Partial to full shade.
  • Soil: Rich, well-draining potting mix with organic matter.
  • Watering: Moderate to high; keep soil consistently moist but avoid waterlogging.

Care Tips

  • Protect from snails and slugs, common pests for hostas.
  • Fertilize in spring with a slow-release balanced fertilizer.
  • Divide and repot every few years to maintain healthy growth.

Design Idea

Pair hostas with shade-loving annuals like impatiens or begonias in a large decorative pot to create a layered look.


Additional Tips for Successful Container Gardening

  1. Choose the Right Container: Ensure pots have proper drainage holes. Material matters too—terracotta breathes well but dries faster, while plastic retains more moisture.
  2. Soil Quality Matters: Avoid using garden soil, which compacts easily in pots. Always use a high-quality potting mix.
  3. Watering Strategy: Containers dry out faster than ground soil, so monitor moisture closely, especially during hot weather. Self-watering containers can help.
  4. Fertilization: Since nutrients leach out with frequent watering, regular feeding is essential. Liquid fertilizers work well for most container plants.
  5. Mobility and Placement: One of the biggest advantages of container gardens is mobility. Move pots to catch sunlight, protect from wind, or simply refresh your space’s layout.

Conclusion

Container gardening opens up a world of possibilities, whether you want to brighten a balcony, grow fresh vegetables, or add greenery to a shady corner. Choosing the right plants makes all the difference. Geraniums, tomatoes, lavender, petunias, and hostas stand out as some of the best plants for containers because of their adaptability, beauty, and ease of care.

By combining colorful blooms, fragrant herbs, and lush foliage, you can create a container garden that is both practical and visually stunning. With thoughtful care and creativity, even the smallest space can bloom into a thriving green sanctuary.

How to Create a Butterfly-Friendly Garden

How to Create a Butterfly-Friendly Garden

Butterflies are not only beautiful creatures that bring life and color to your garden but also play a vital role as pollinators, helping plants reproduce and thrive. Creating a butterfly-friendly garden is a rewarding project that benefits the environment while giving you a peaceful, vibrant outdoor space. Whether you have a sprawling backyard or a small urban garden, you can design a habitat that attracts butterflies, provides them with the resources they need, and supports their lifecycle. This guide will walk you through everything you need to know about planning, planting, and maintaining a butterfly-friendly garden.


Why Attract Butterflies to Your Garden?

Before diving into the “how,” it’s important to understand the “why.” Butterflies are more than just colorful garden visitors; they are:

  1. Pollinators – Like bees, butterflies help fertilize plants by transferring pollen from flower to flower.
  2. Indicators of Ecosystem Health – A thriving butterfly population signals a healthy, biodiverse environment.
  3. Natural Pest Controllers – Certain butterfly species in their caterpillar stage feed on invasive weeds and unwanted plants.
  4. Aesthetic Value – Butterflies bring beauty and movement, enhancing your garden’s charm.
  5. Educational – Observing butterflies provides opportunities to learn about lifecycles, ecosystems, and biodiversity.

Step 1: Choose the Right Location

Butterflies are cold-blooded creatures that need sunlight to regulate their body temperature. To make your garden appealing:

  • Select a sunny spot: At least 5–6 hours of direct sunlight daily.
  • Provide shelter: Place plants near hedges, shrubs, or fences where butterflies can rest and hide from wind or predators.
  • Add variety: Design a layered garden with ground covers, shrubs, and small trees to mimic natural habitats.

Step 2: Plant Nectar-Rich Flowers

Nectar is the primary food source for adult butterflies. To attract them, you need to include flowers that provide abundant, accessible nectar. Keep in mind that butterflies prefer flat-topped, clustered blooms where they can easily land and feed.

Popular Nectar Plants:

  • Milkweed (Asclepias spp.) – Essential for monarchs.
  • Butterfly Bush (Buddleja davidii) – A magnet for multiple species.
  • Coneflower (Echinacea purpurea) – Vibrant, drought-tolerant, and nectar-rich.
  • Zinnias – Easy to grow annuals that bloom all summer.
  • Lantana – Bright clusters of nectar that attract a wide range of butterflies.
  • Verbena – Long-lasting blooms with high nectar content.
  • Black-Eyed Susan (Rudbeckia hirta) – Hardy and low-maintenance.

Planting Tips:

  • Opt for native plants, as local butterflies are adapted to them.
  • Plant in clusters rather than scattering, making it easier for butterflies to locate nectar.
  • Choose different bloom times (spring, summer, fall) to provide food year-round.

Step 3: Provide Host Plants for Caterpillars

A true butterfly-friendly garden supports the entire lifecycle, not just the adult stage. Caterpillars need host plants to feed on before metamorphosis.

Common Host Plants:

  • Milkweed – For monarch caterpillars.
  • Parsley, Dill, Fennel, and Carrot – Loved by swallowtail caterpillars.
  • Passionflower vine – Attracts Gulf fritillaries.
  • Clover and Alfalfa – Used by many small butterflies.
  • Nettles – Preferred by red admirals and peacock butterflies.

Planting host species alongside nectar plants ensures butterflies will not only visit but also breed and lay eggs in your garden.


Step 4: Create Resting and Basking Spots

Butterflies need warmth and rest. You can make your garden more inviting by adding:

  • Flat rocks – Placed in sunny areas for basking.
  • Logs and branches – Provide shelter and resting spots.
  • Windbreaks – Shrubs, fences, or hedges protect butterflies from strong winds.

Step 5: Provide Water and Nutrients

Butterflies don’t drink from birdbaths; instead, they rely on mud puddling—sipping water and minerals from damp soil. To mimic this:

  • Create a shallow dish filled with moist sand and water.
  • Add flat stones inside so butterflies can perch while drinking.
  • Keep the soil damp, not flooded.

This simple feature helps them stay hydrated and provides essential nutrients like sodium and minerals.


Step 6: Avoid Pesticides and Chemicals

One of the biggest threats to butterflies is the use of chemical pesticides and herbicides. Even small doses can harm them or their caterpillars. To maintain a butterfly-friendly garden:

  • Use organic pest control methods such as neem oil, insecticidal soap, or companion planting.
  • Encourage natural predators like ladybugs and birds to keep pests in check.
  • Accept that some leaf damage is natural—it means caterpillars are thriving!

Step 7: Add Diversity and Layers

Butterflies are drawn to gardens that mimic natural ecosystems. You can enhance attractiveness by:

  • Mixing plant heights: Include tall shrubs, medium perennials, and low ground covers.
  • Planting vines and climbers: These provide shelter and food sources.
  • Choosing multiple colors: Butterflies are particularly attracted to red, orange, pink, purple, and yellow flowers.

A diverse, layered garden also supports other beneficial insects, making your garden a pollinator hub.


Step 8: Incorporate Seasonal Planning

Butterflies appear at different times of the year, so your garden should provide for them season-long.

  • Spring: Early bloomers like lilacs, violets, and phlox.
  • Summer: Zinnias, coneflowers, and milkweed for peak butterfly season.
  • Fall: Goldenrod and asters support migrating species before winter.
  • Winter Prep: Leave some leaf litter, stems, and logs where butterflies can overwinter as pupae.

Step 9: Add Garden Features for Beauty and Functionality

A butterfly garden can be both functional and visually appealing. Enhance your design by including:

  • Colorful flower beds – Designed in circular or border shapes.
  • Garden paths – Allow you to walk among the flowers without disturbing them.
  • Arbors and trellises – For climbing host plants like passionflower.
  • Seating areas – To enjoy watching butterflies up close.

Step 10: Observe and Enjoy

Once your butterfly-friendly garden is established, it becomes a living classroom. Take time to:

  • Observe the lifecycle: From eggs to caterpillars, chrysalises, and adults.
  • Keep a journal: Note species that visit throughout the year.
  • Take photographs: Capture the beauty and share it with others.
  • Involve kids: Teaching children about butterflies nurtures appreciation for nature.

Maintenance Tips

  • Deadhead spent flowers to encourage new blooms.
  • Weed regularly but leave some wild plants (like clover or nettles) for caterpillars.
  • Water consistently, especially in hot months.
  • Rotate plant varieties every season to keep nectar sources abundant.

Final Thoughts

Creating a butterfly-friendly garden is more than just planting pretty flowers—it’s about building a sustainable habitat that supports these delicate creatures throughout their lifecycle. By choosing nectar-rich and host plants, providing shelter and water, and avoiding harmful chemicals, you can transform your garden into a sanctuary that butterflies will return to year after year.

Not only will you enjoy a lively, colorful garden, but you’ll also be contributing to the preservation of butterfly species and promoting biodiversity. With thoughtful planning and care, your backyard can become a haven where butterflies thrive—and where you can relax, learn, and connect with nature.