How to Use Pebble Trays to Increase Humidity for Plants

How to Use Pebble Trays to Increase Humidity for Plants

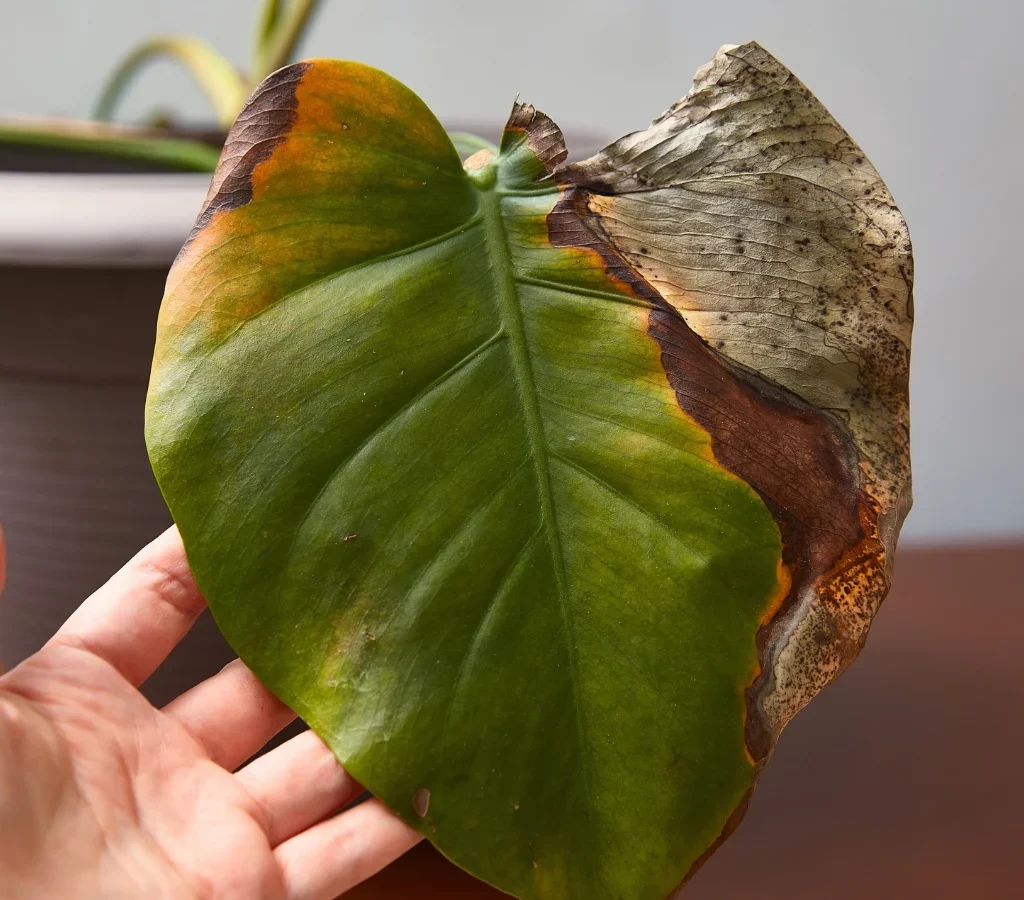
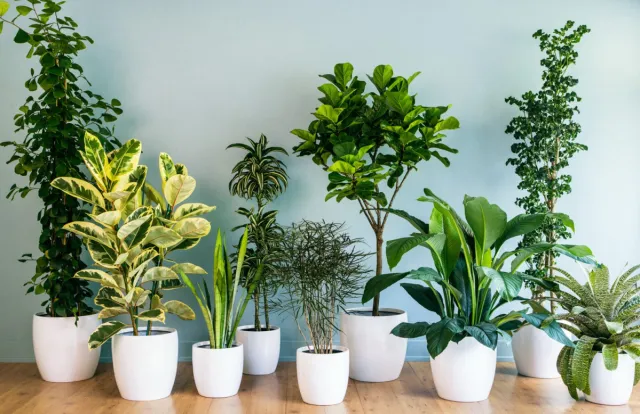
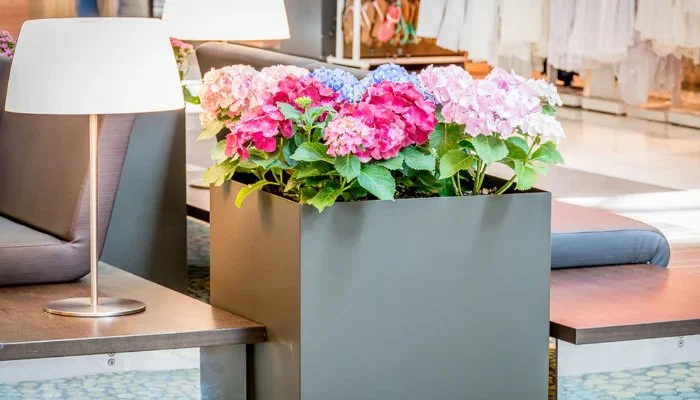
Indoor plants bring life, color, and freshness to any home, but maintaining the right humidity level for them can be tricky—especially in air-conditioned rooms or during dry winters. Many houseplants, particularly tropical ones, thrive in humid environments similar to their natural habitats. When the air inside your home becomes too dry, leaves can brown at the edges, wilt prematurely, or drop altogether.

One of the simplest, most natural, and cost-effective ways to raise humidity around your plants is by using pebble trays. These unassuming trays not only enhance your plant care routine but also serve as a beautiful decorative addition to your indoor garden. This article explores everything you need to know about pebble trays—from how they work to step-by-step setup, benefits, and maintenance tips.


1. Understanding the Role of Humidity in Plant Health

Humidity plays a vital role in plant physiology. It affects transpiration—the process by which plants lose water through their leaves—and influences nutrient absorption and overall growth.

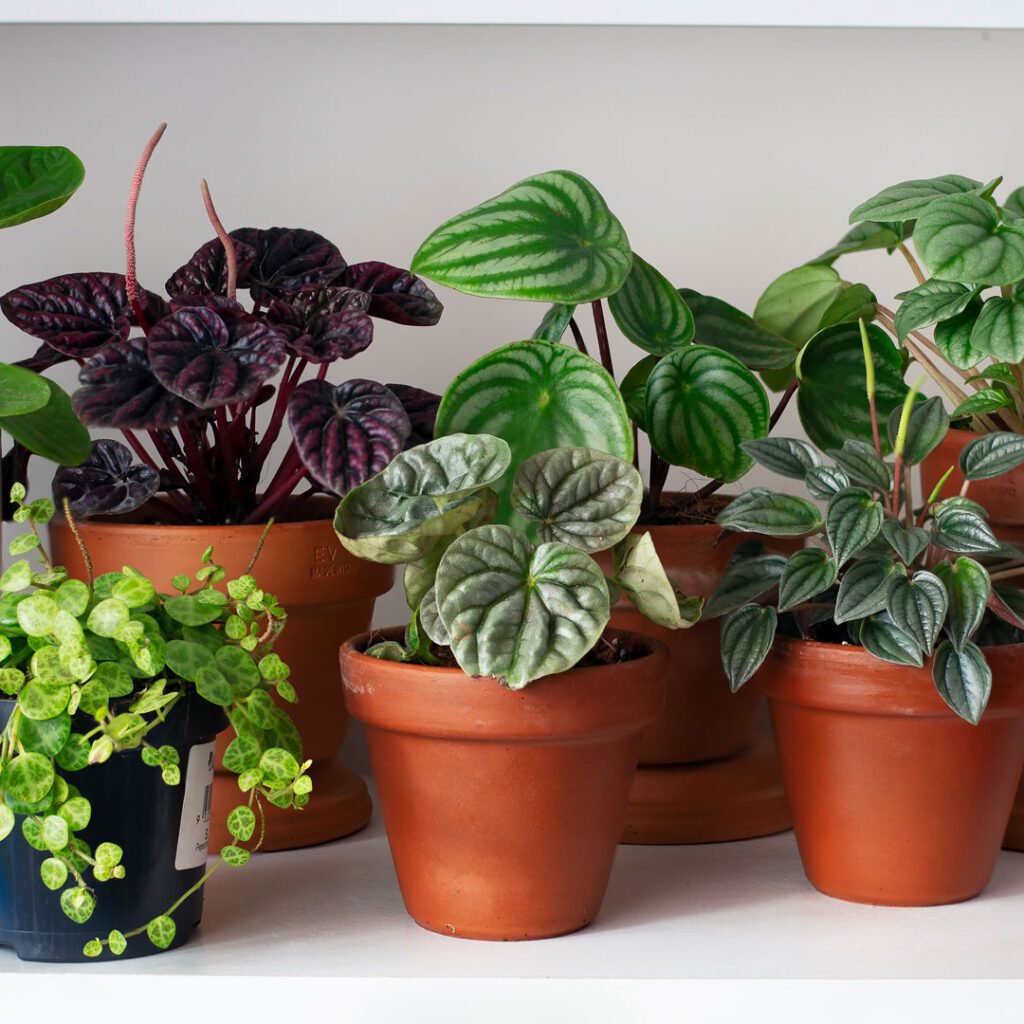
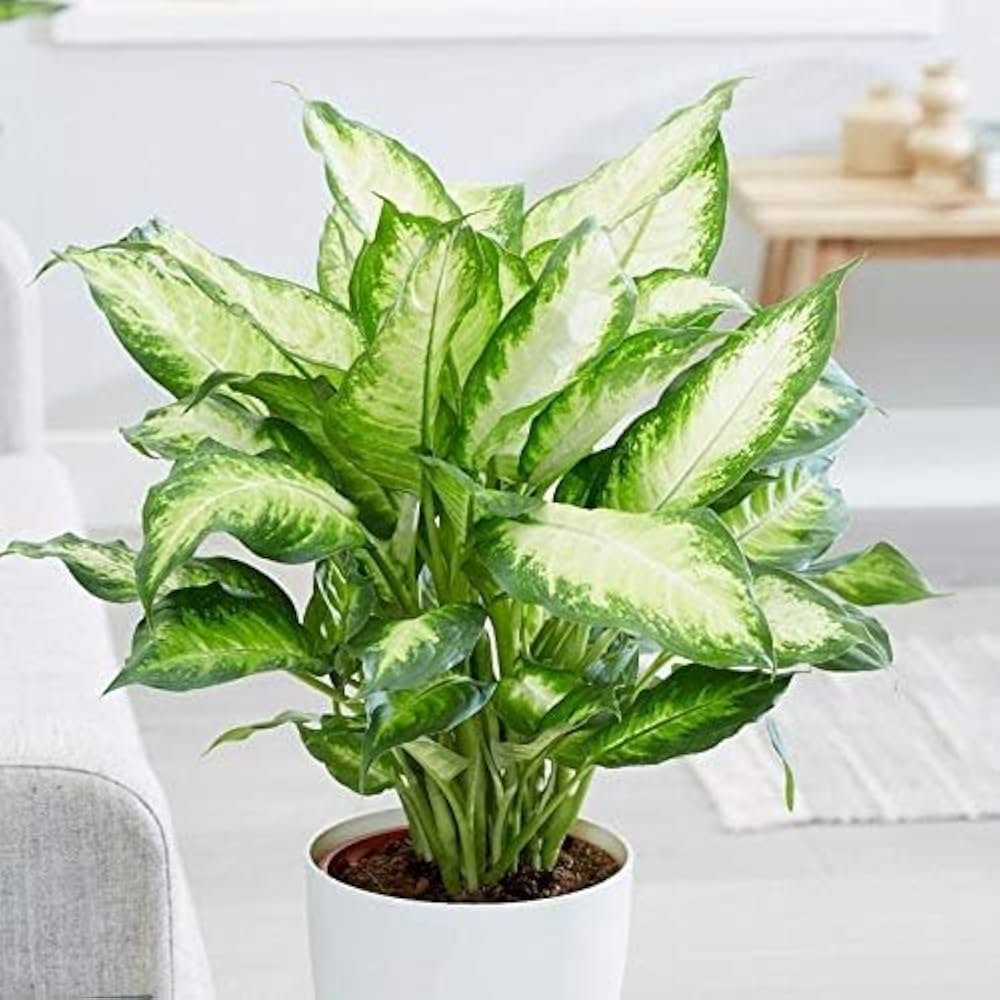
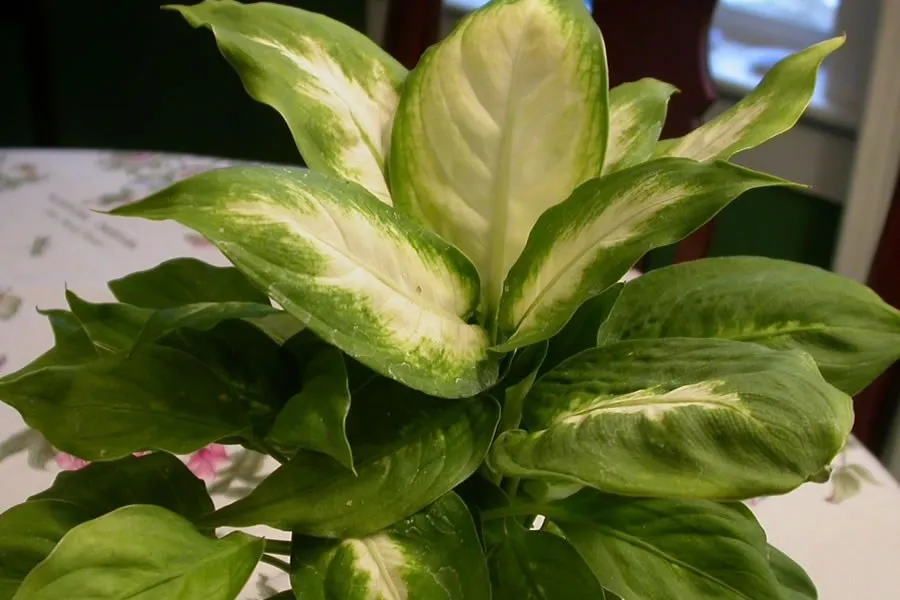
Most tropical and subtropical plants, like ferns, calatheas, orchids, and peace lilies, prefer humidity levels between 50% and 80%. However, most indoor environments, especially those with air conditioning or heaters, have humidity levels around 30% to 40%, which can stress plants over time.

Symptoms of low humidity include:

  • Browning or crispy leaf tips
  • Curling leaves
  • Wilting despite regular watering
  • Slower growth
  • Increased vulnerability to pests

By introducing a pebble tray, you can locally increase the humidity in a controlled, gentle way without creating excess moisture in the entire room.


2. What Is a Pebble Tray and How Does It Work?

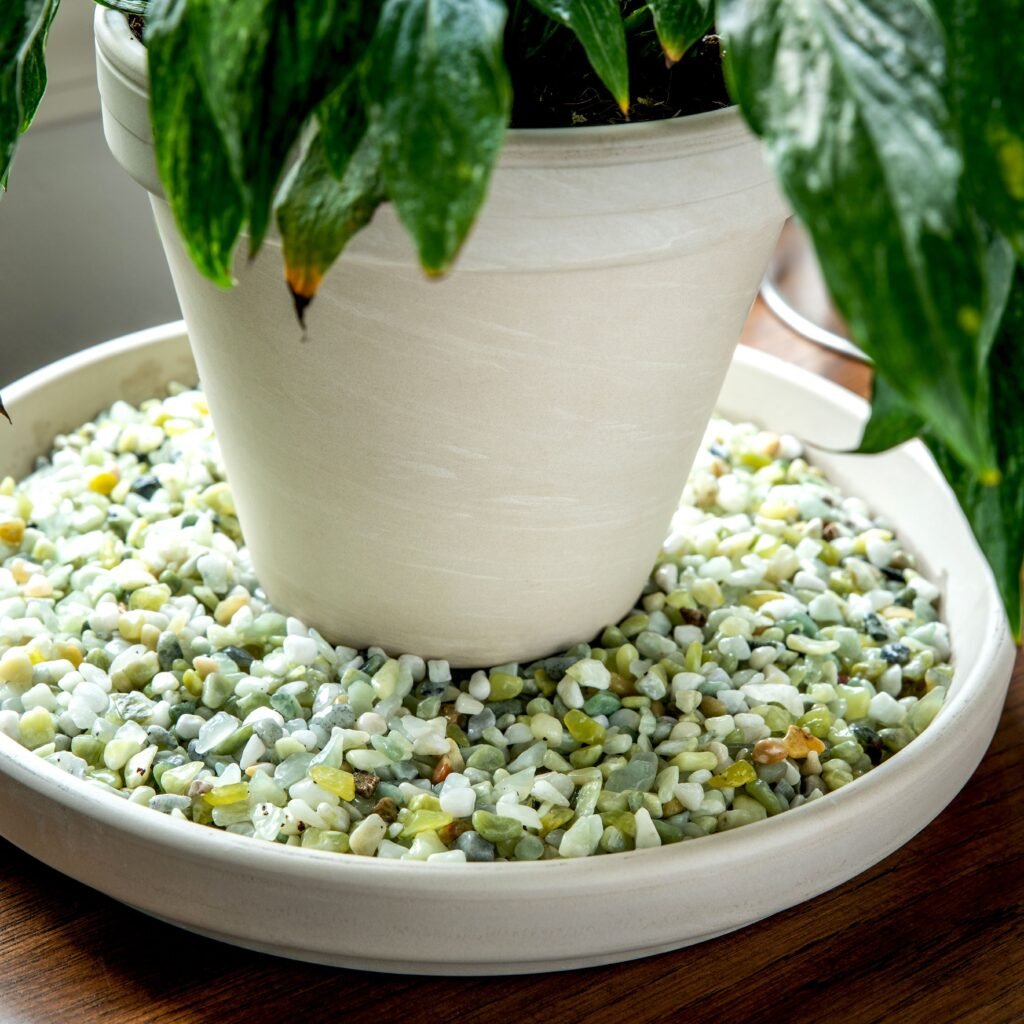
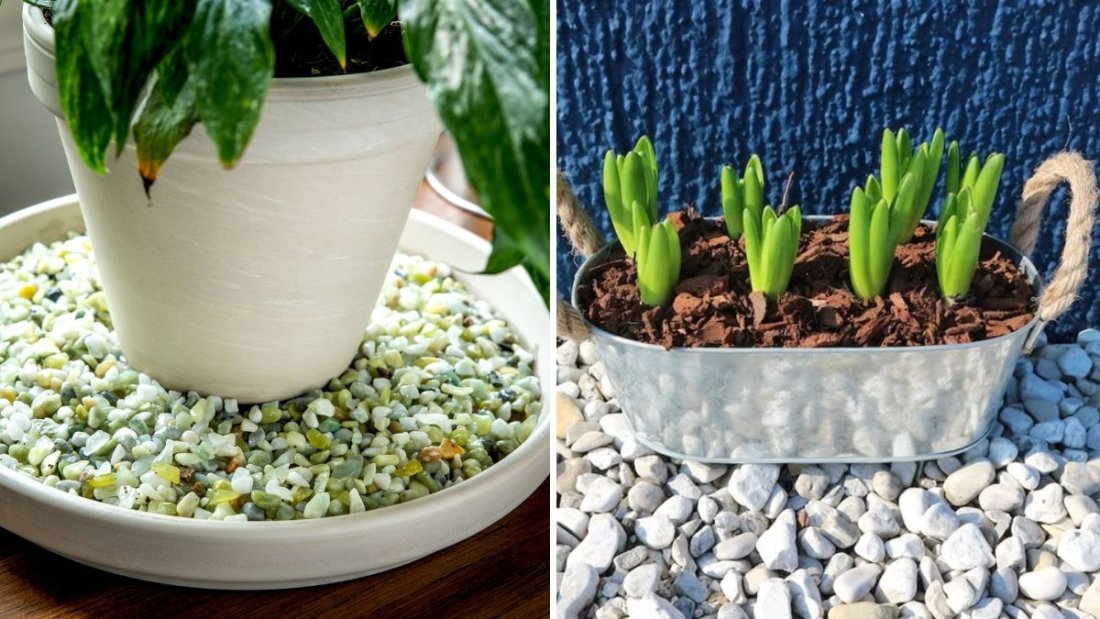
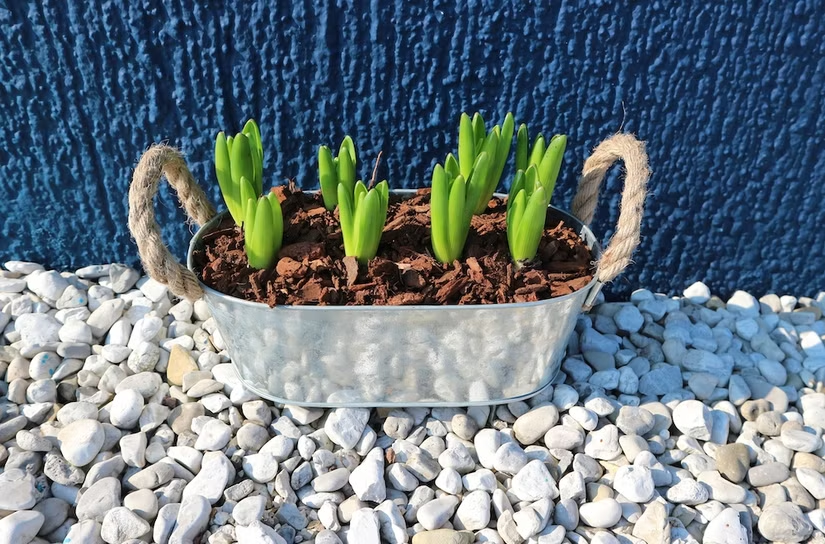
A pebble tray is a shallow dish or tray filled with pebbles and water. The plant pot sits on top of the pebbles, ensuring that the base of the pot does not come into direct contact with the water. As the water evaporates from the tray, it adds moisture to the air around the plant, raising the local humidity.

The concept is simple but effective—similar to the natural process of evaporation that humidifies tropical environments. Unlike misting, which offers a temporary boost in humidity, pebble trays provide consistent, passive humidity without frequent intervention.


3. Materials You’ll Need to Make a Pebble Tray

Creating a pebble tray is straightforward and inexpensive. Here’s what you’ll need:

  • A shallow tray or dish: Choose one slightly larger than the base of your plant pot. It can be ceramic, plastic, metal, or even glass.
  • Pebbles or gravel: Small stones, aquarium pebbles, or decorative river rocks work well.
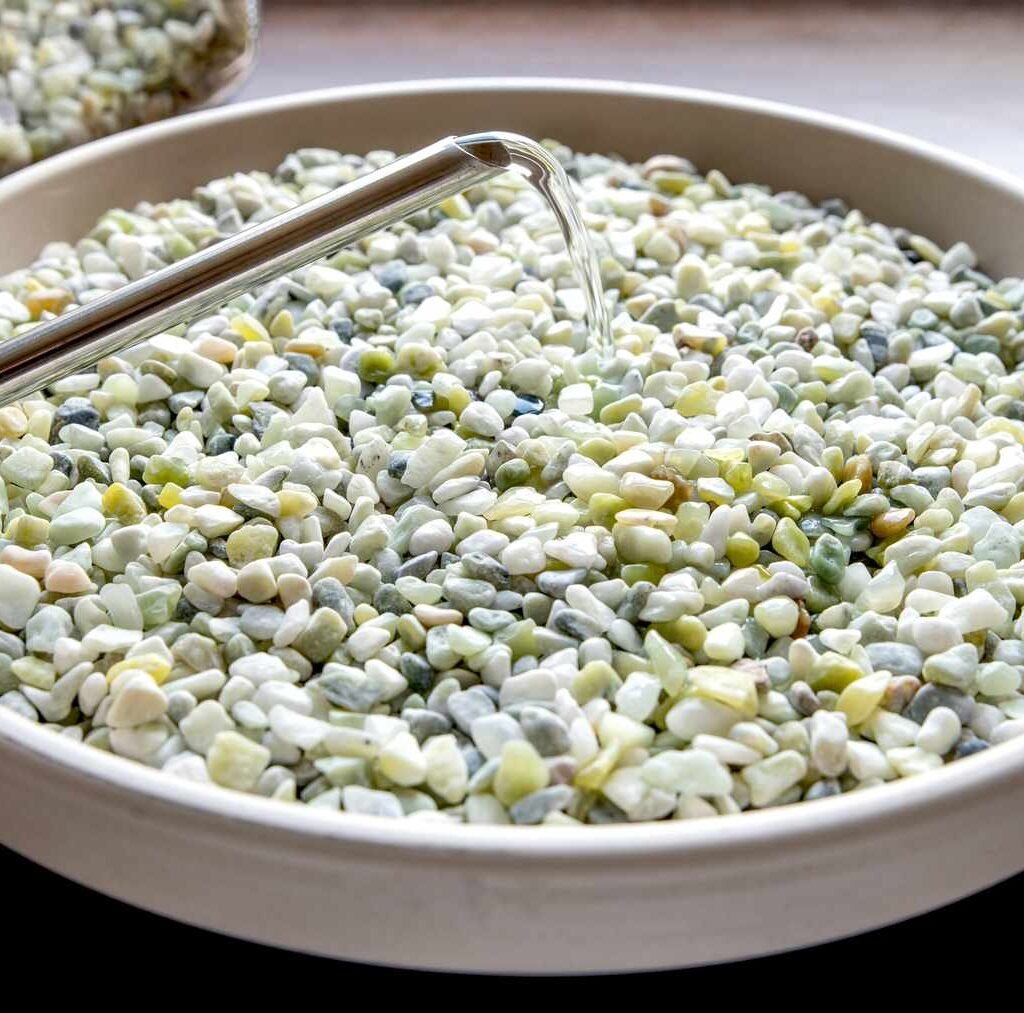
  • Water: Clean, filtered, or distilled water is ideal to prevent mineral buildup.
  • Optional items: Activated charcoal (to prevent odors) and decorative sand or marbles for added aesthetics.

4. Step-by-Step Guide to Setting Up a Pebble Tray

Step 1: Choose the right location
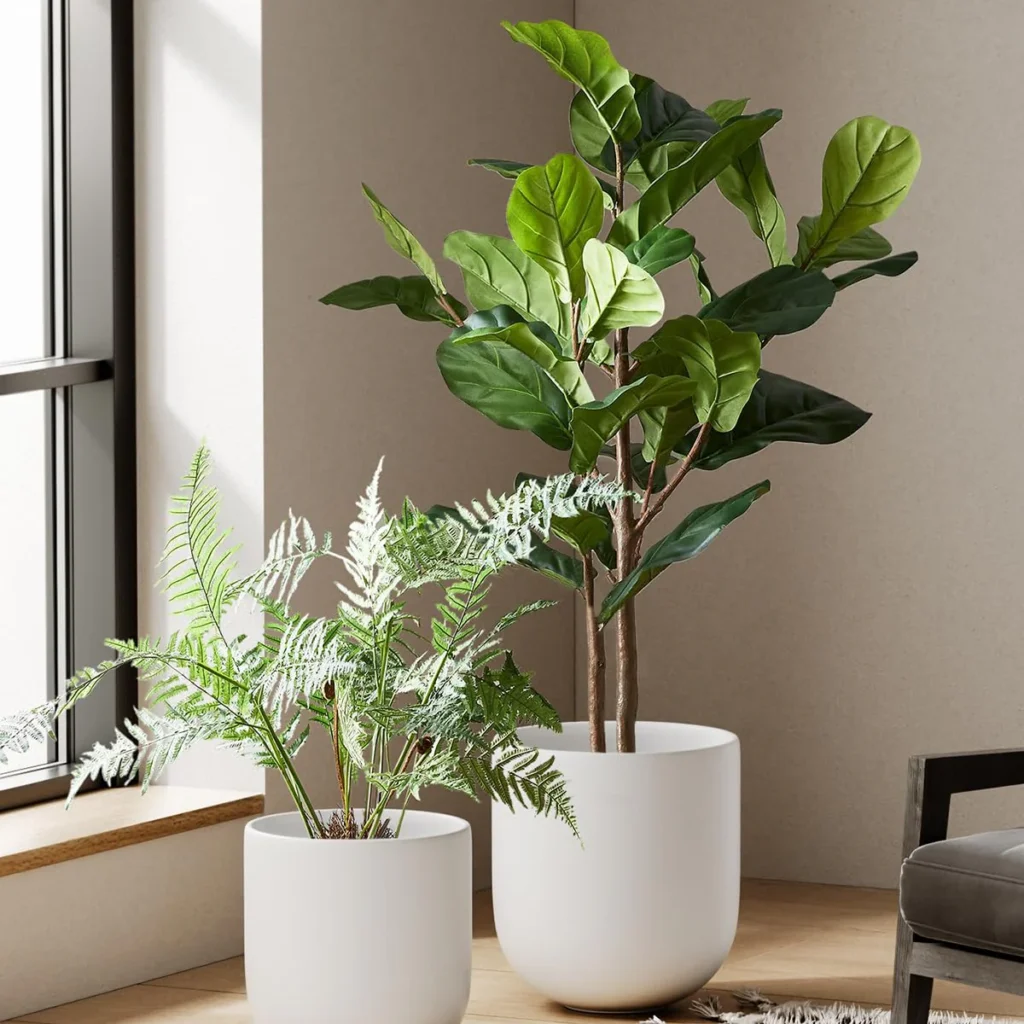
Select a flat, stable surface with good light for your plant. A windowsill, plant shelf, or tabletop works perfectly.

Step 2: Fill the tray with pebbles
Spread an even layer of pebbles across the tray, about 1 to 2 inches deep. This layer forms the foundation and elevates your pot above the water level.

Step 3: Add water carefully
Pour water into the tray until it reaches just below the top of the pebbles. The goal is to keep the plant pot’s base above the water to prevent root rot.

Step 4: Place the plant on top
Set your potted plant on the pebbles. Make sure it sits securely and does not wobble. The pot should never touch the water directly.

Step 5: Maintain water levels
Check the tray regularly and refill it as the water evaporates. During hot or dry seasons, you may need to top it up every few days.

Step 6: Clean the tray occasionally
Once a month, clean the tray and pebbles to prevent algae, mold, or mineral deposits. You can rinse them with mild soapy water and let them dry before reassembling.


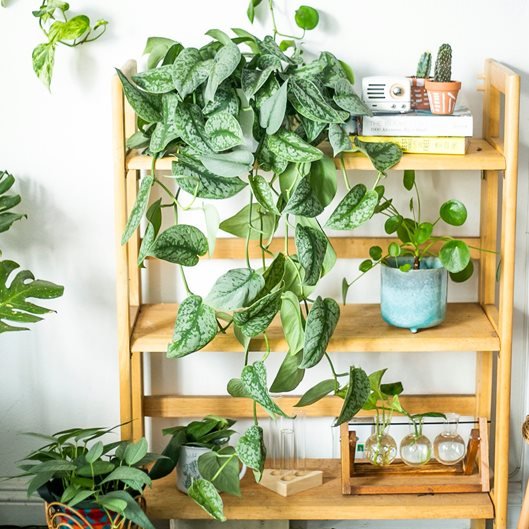
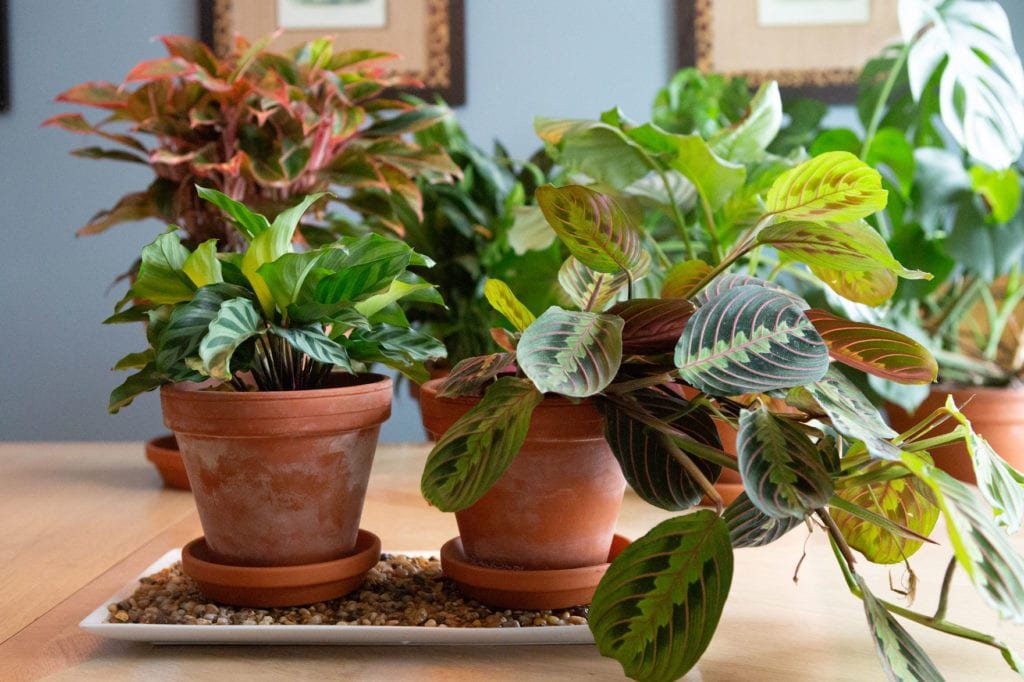
5. Benefits of Using Pebble Trays for Indoor Plants

a. Boosts local humidity naturally
Pebble trays provide a slow, steady release of moisture around your plants, creating a microclimate similar to their native habitat.

b. Reduces stress on tropical plants
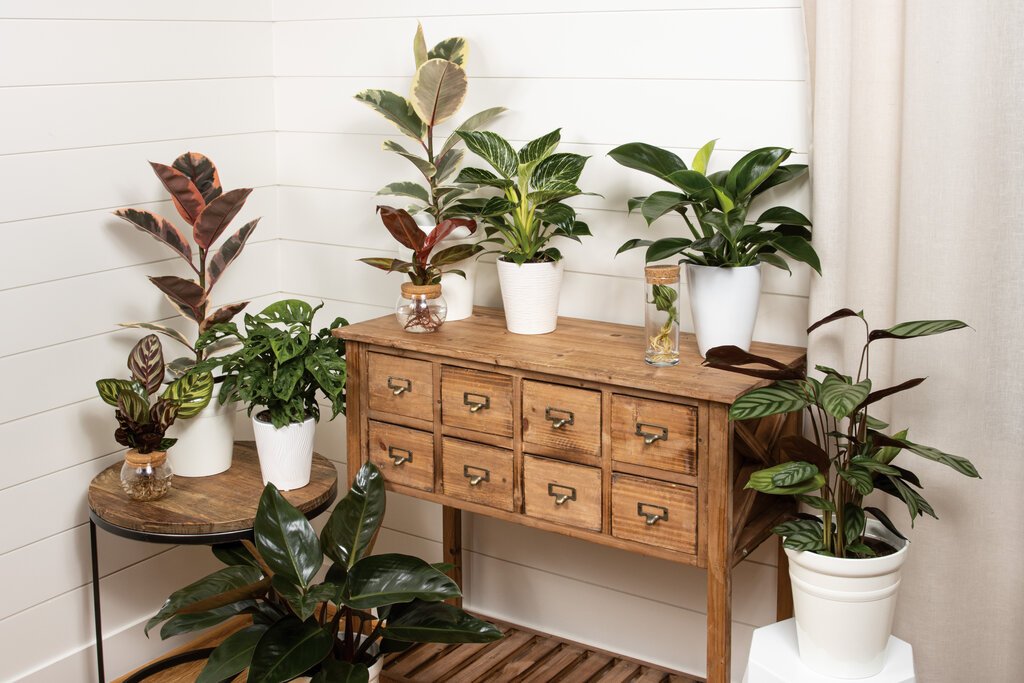
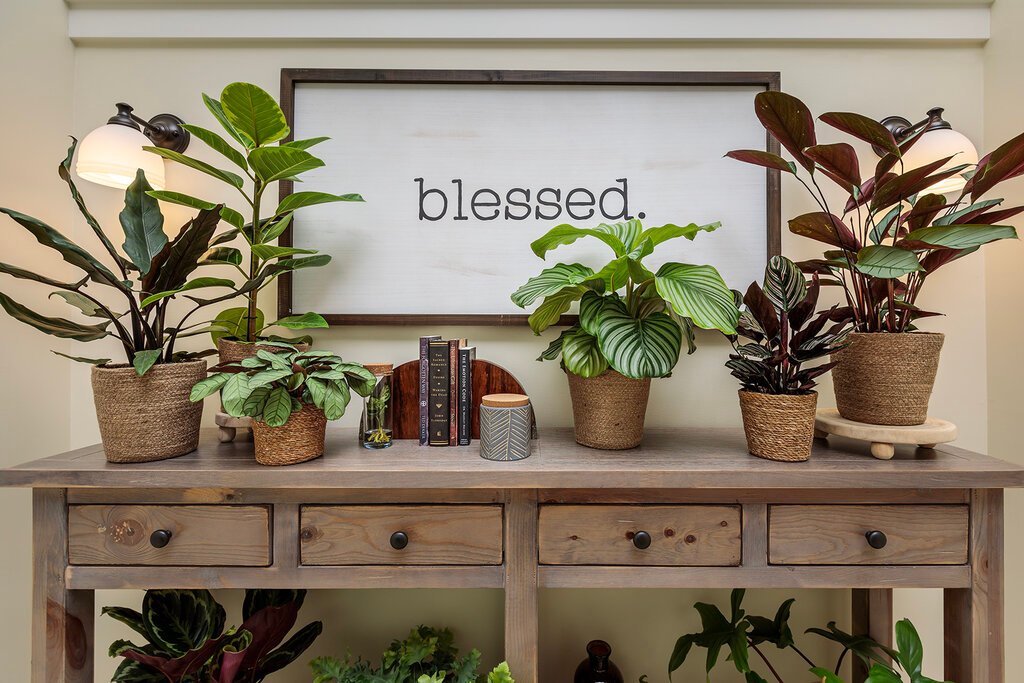
Plants like calatheas, anthuriums, and ferns benefit greatly from the increased humidity, showing healthier leaves and more vibrant color.

c. Prevents overwatering issues
Since the plant pot doesn’t sit directly in water, roots remain aerated, reducing the risk of root rot—a common issue with humidity trays gone wrong.

d. Low maintenance and eco-friendly
Pebble trays require no electricity, unlike humidifiers, making them energy-efficient and environmentally friendly.

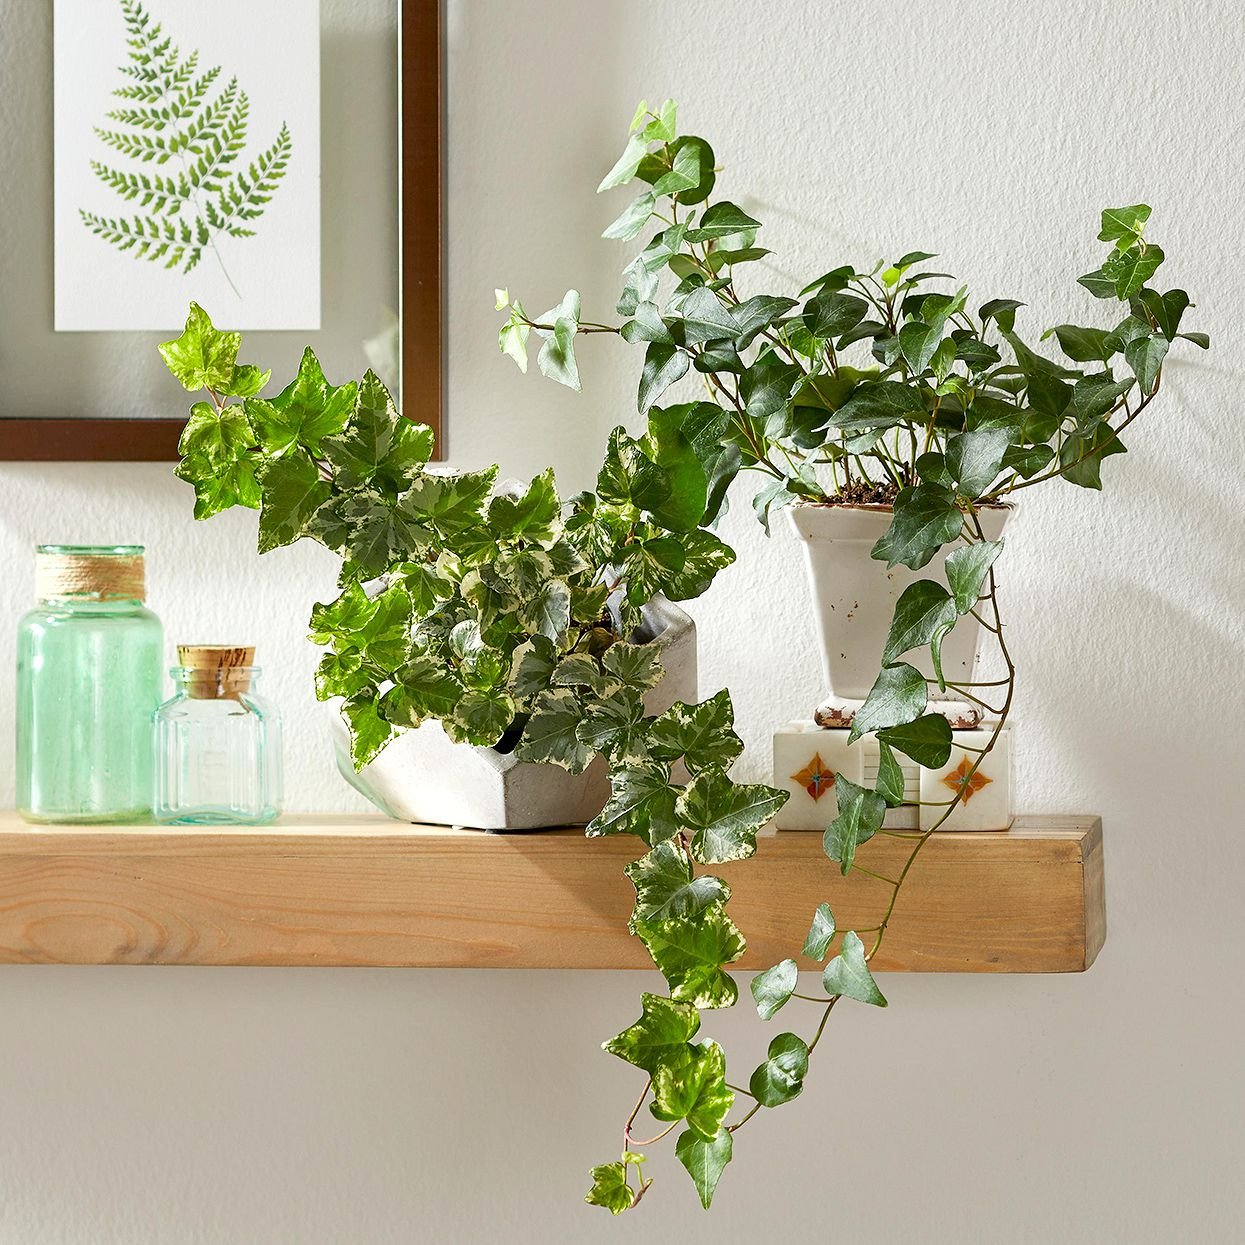
e. Adds aesthetic value
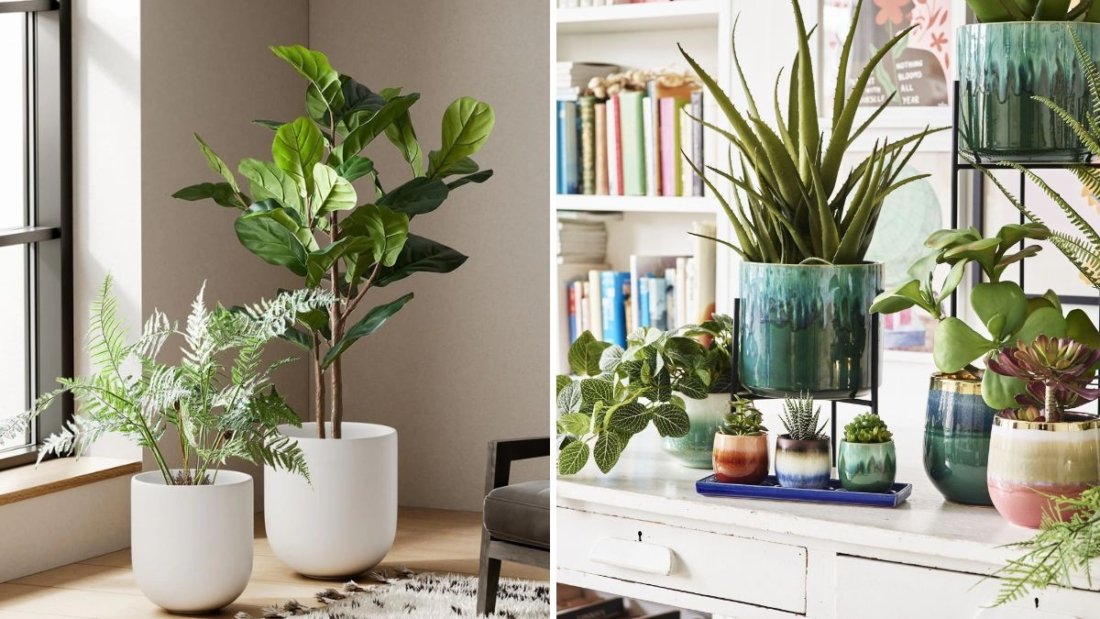
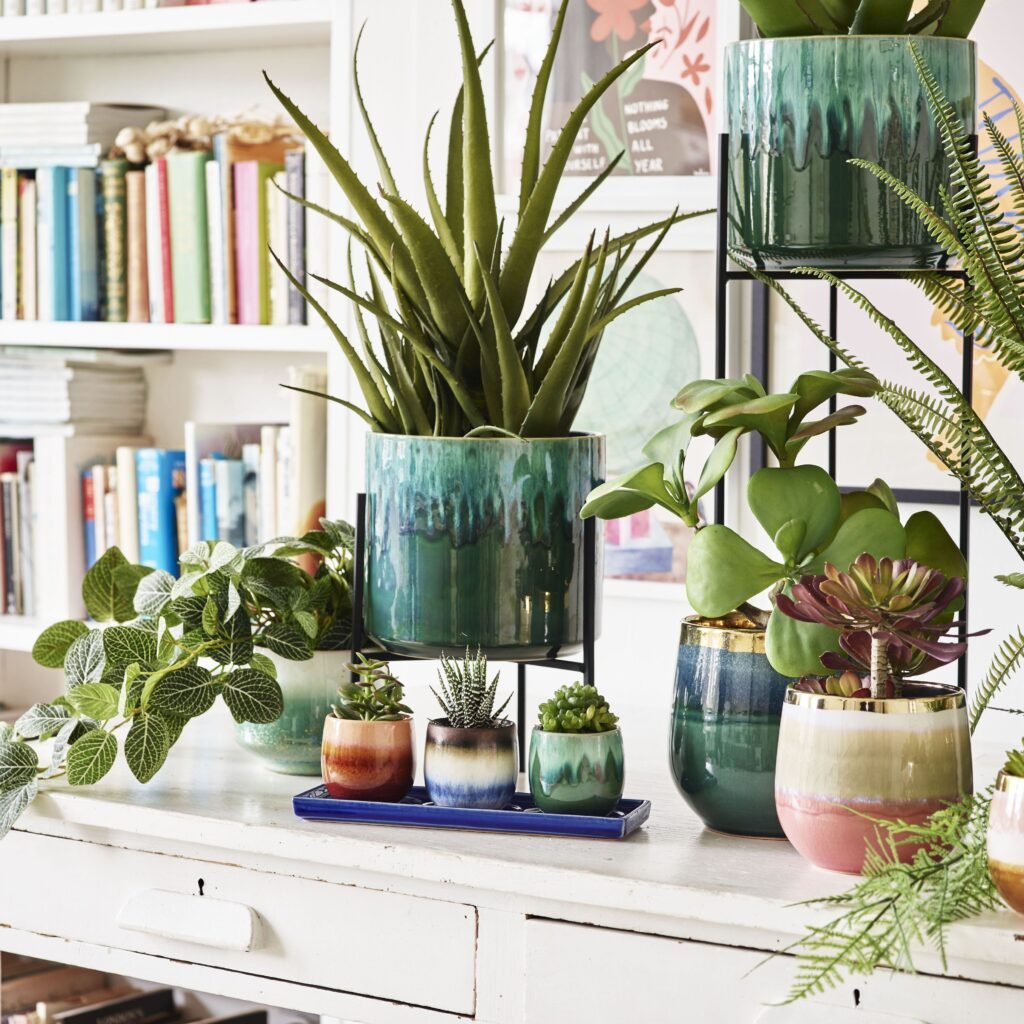
Decorative pebbles and trays can complement your home décor. Whether you prefer sleek minimalism or rustic charm, pebble trays can be styled to match your interior theme.


6. Common Mistakes to Avoid When Using Pebble Trays

While pebble trays are simple, a few errors can limit their effectiveness or even harm your plants:

  • Overfilling the tray: If water touches the pot’s base, roots can become waterlogged and rot.
  • Using hard water: Tap water often contains minerals that can leave white deposits on pebbles. Opt for filtered or distilled water.
  • Neglecting cleaning: Stagnant water can promote algae and attract fungus gnats.
  • Relying solely on pebble trays: While they help, pebble trays alone may not provide sufficient humidity for all plants, especially in extremely dry environments.

If your space is particularly dry, combine pebble trays with other methods such as grouping plants, using humidifiers, or placing bowls of water near heat sources.


7. Enhancing the Effectiveness of Pebble Trays

To maximize the humidity benefits, try these complementary strategies:

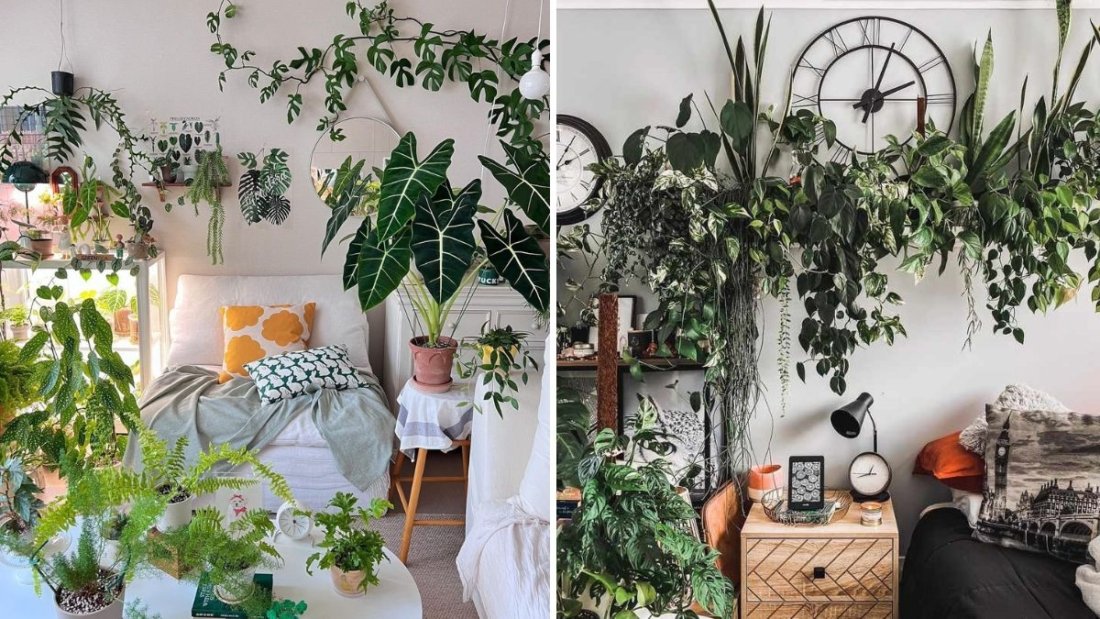
  • Group plants together: Plants naturally release moisture through transpiration. Grouping several around a pebble tray amplifies the humidity effect.
  • Use larger trays: A wider tray allows more surface area for water to evaporate.
  • Add indoor fountains: Small water features increase humidity and create a soothing ambiance.
  • Monitor humidity with a hygrometer: Keep track of your home’s humidity levels to ensure your plants are thriving.

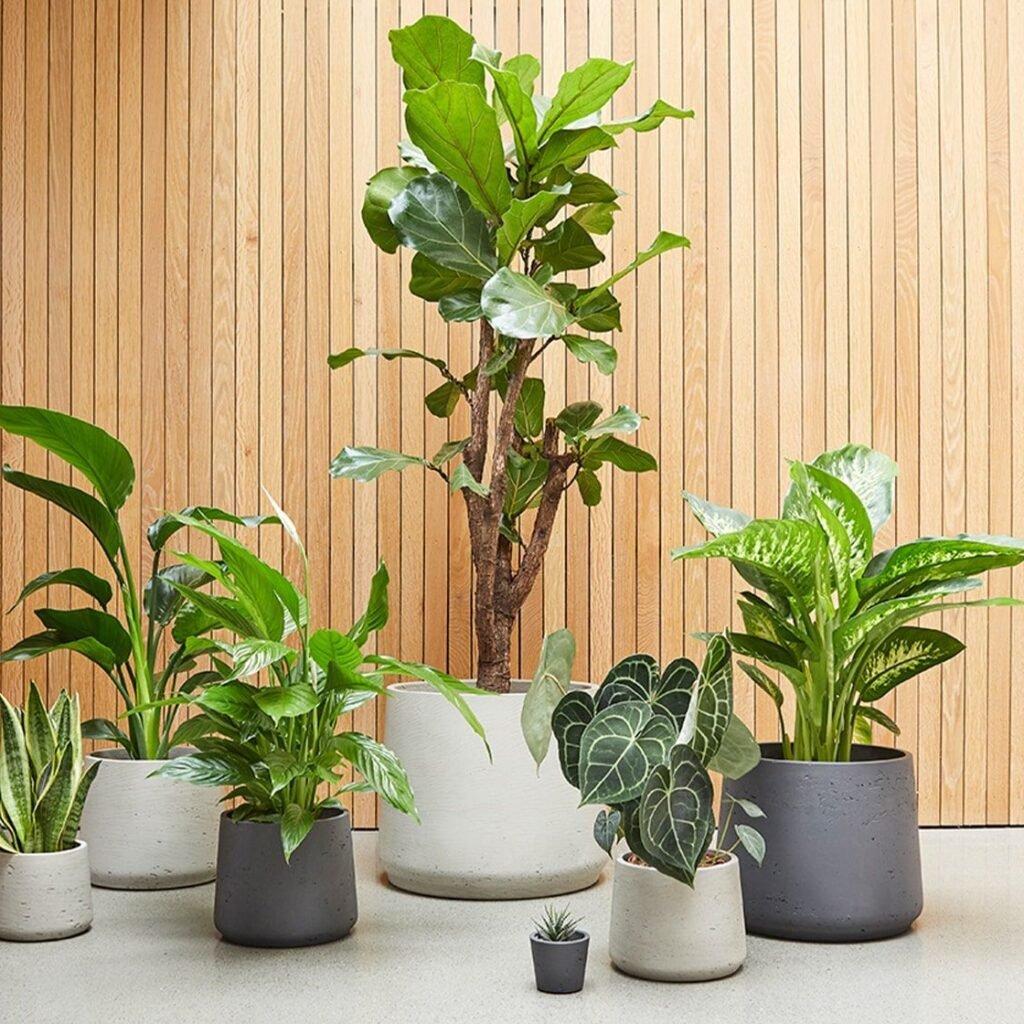
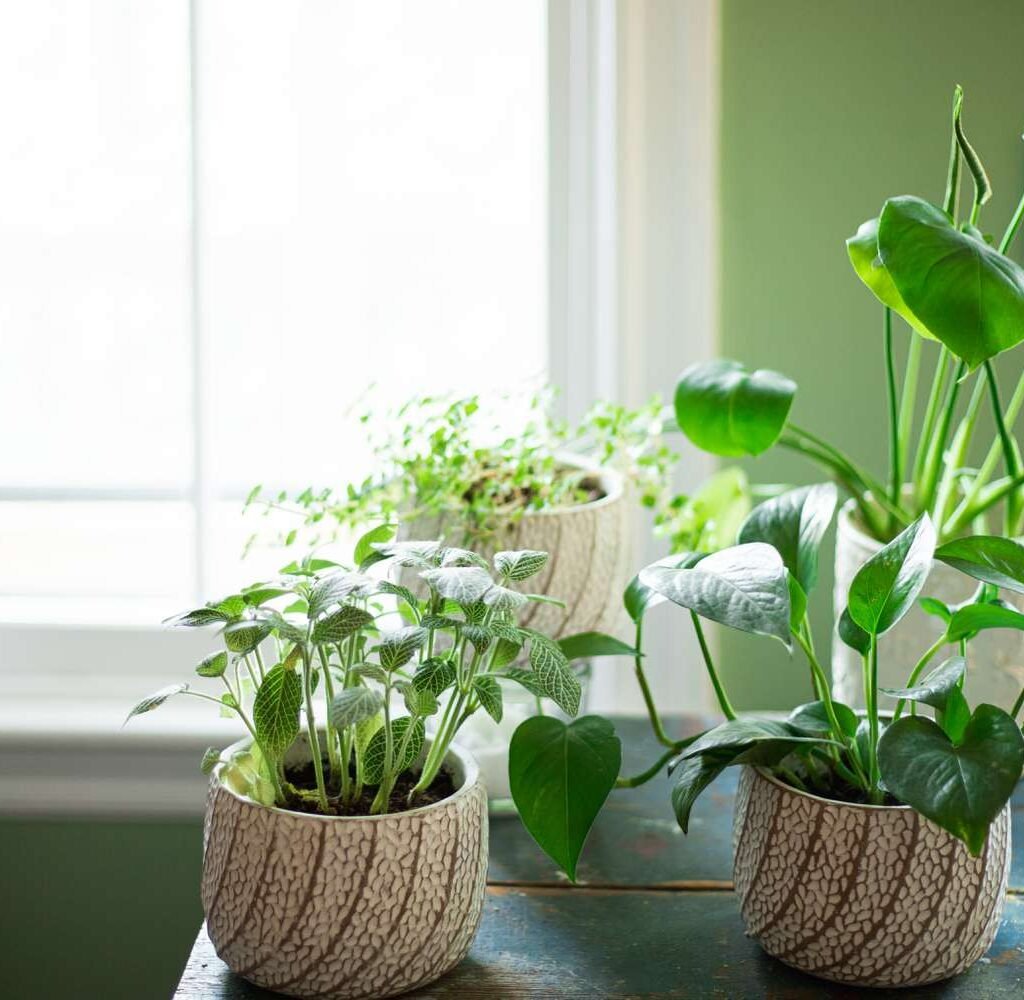
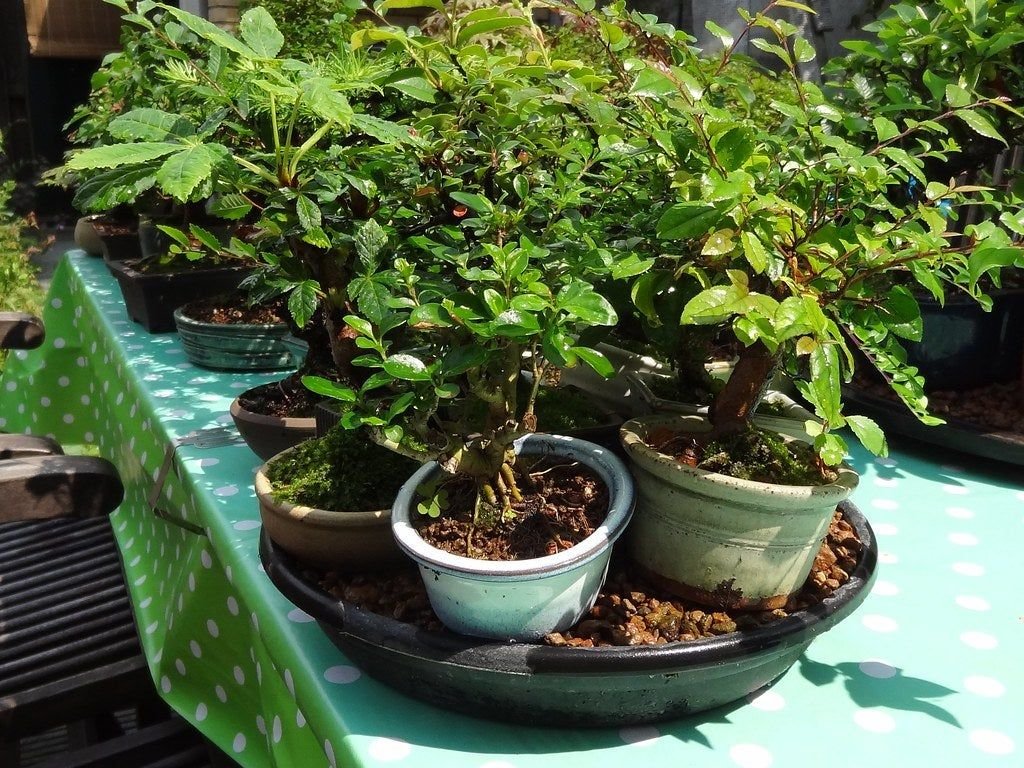
8. Ideal Plants That Benefit from Pebble Trays

Pebble trays are particularly beneficial for humidity-loving plants. Consider using them under:

  • Ferns (Boston Fern, Maidenhair Fern)
  • Calatheas and Marantas
  • Peace Lily (Spathiphyllum)
  • Fittonia (Nerve Plant)
  • Orchids
  • Anthuriums
  • Alocasia and Colocasia
  • Begonias

These plants tend to suffer quickly in dry air, so a pebble tray can make a visible difference in leaf texture and color.


9. Comparing Pebble Trays to Other Humidity Solutions

MethodEffectivenessCostMaintenanceBest For
Pebble TrayModerateLowEasyIndividual plants
HumidifierHighMedium to HighRegular cleaningLarger plant collections
Grouping PlantsModerateFreeMinimalClusters of humidity-loving plants
MistingTemporaryLowFrequentQuick moisture boost

Pebble trays offer a perfect balance for beginners or those who want a low-maintenance, visually pleasing solution.


10. Final Thoughts

Pebble trays may seem simple, but their impact on plant health and home atmosphere is significant. By using them, you mimic the natural humidity tropical plants crave, keeping leaves lush, vibrant, and resilient. They are inexpensive, easy to maintain, and can double as decorative elements that enhance your interior design.

If you’re passionate about indoor gardening but struggle with dry indoor air, start with a few pebble trays. Over time, you’ll notice your plants growing healthier and your home feeling more alive—proof that small changes can make a big difference in your indoor garden ecosystem.


In essence, pebble trays are an elegant blend of science and simplicity—a natural way to nurture your plants while beautifying your living space.

5 Common Indoor Plant Diseases and Their Natural Cures

5 Common Indoor Plant Diseases and Their Natural Cures

Indoor plants bring life, freshness, and natural beauty into our homes. They purify the air, boost mood, and add a calming aesthetic to every space. However, just like outdoor plants, houseplants are not immune to diseases. From yellowing leaves to moldy soil and drooping stems, these symptoms often signal an underlying problem that, if ignored, can spread quickly and destroy your beloved plants.

The good news? You don’t need harsh chemicals to keep your plants healthy. Nature itself provides simple, effective, and eco-friendly solutions. In this comprehensive guide, we’ll discuss five of the most common indoor plant diseases and show you how to cure them naturally, so your indoor jungle can thrive year-round.


1. Powdery Mildew (The White Dusty Fungus)

What It Looks Like

Powdery mildew is one of the most common fungal diseases affecting indoor plants. You’ll recognize it by the white, powder-like coating on leaves, stems, or buds. It looks as if your plant has been dusted with flour.

Over time, infected leaves can turn yellow, curl up, and drop prematurely.

Causes

Powdery mildew thrives in warm, humid, and poorly ventilated environments. Overcrowded plants and low light also encourage fungal growth.

Natural Cures

  1. Neem Oil Spray:
    Neem oil is a natural antifungal and insecticidal solution. Mix 1 teaspoon of neem oil with 1 liter of water and a few drops of mild liquid soap. Spray the mixture on all leaf surfaces every 3–4 days until the mildew disappears.
  2. Baking Soda Solution:
    Combine 1 tablespoon of baking soda, ½ teaspoon of liquid soap, and 1 liter of water. Spray this on affected areas. The alkaline environment it creates prevents fungal spores from multiplying.
  3. Improve Air Circulation:
    Space out plants and avoid clustering them in tight corners. Keep a small fan running or open windows periodically to improve airflow.
  4. Prune and Clean:
    Remove infected leaves and discard them—never compost diseased parts. Clean the pot and surrounding area to prevent reinfection.

Prevention Tip:

Water plants at the base instead of from above to avoid excess leaf moisture, which promotes fungal growth.


2. Root Rot (The Silent Killer)

What It Looks Like

Root rot is often invisible until it’s too late. It starts underground but shows warning signs above the soil: wilting leaves, mushy stems, and a foul smell from the pot. When removed from the container, affected roots appear brown or black and slimy instead of firm and white.

Causes

The main culprit is overwatering and poor drainage. Constantly soggy soil suffocates roots, allowing fungi like Pythium or Rhizoctonia to thrive.

Natural Cures

  1. Repot the Plant:
    Gently remove the plant from its pot and rinse the roots under lukewarm water. Trim off all brown, mushy roots with sterilized scissors. Repot in fresh, well-draining soil, preferably mixed with perlite or sand to improve aeration.
  2. Cinnamon Powder:
    Sprinkle cinnamon powder on the remaining healthy roots before repotting. Cinnamon is a natural antifungal and helps prevent further infection.
  3. Hydrogen Peroxide Solution:
    Mix 1 part hydrogen peroxide (3%) with 2 parts water and pour it gently into the soil. This oxygenates the root zone and kills lingering fungal spores.
  4. Use Terracotta Pots:
    If root rot recurs frequently, switch to clay pots. Their porous surface allows excess moisture to evaporate and keeps the soil drier.

Prevention Tip:

Always let the top inch of soil dry before watering again. Ensure that every pot has drainage holes to prevent stagnant water buildup.


3. Leaf Spot Disease (Yellow, Brown, or Black Spots on Leaves)

What It Looks Like

Leaf spot appears as discolored patches or rings on the foliage. The spots can be brown, black, or yellow with defined edges, and sometimes have a wet or greasy texture. Over time, these lesions merge, causing large areas of the leaf to die.

Causes

This disease is usually caused by fungal or bacterial infections triggered by overhead watering, excess humidity, and poor air circulation.

Natural Cures

  1. Apple Cider Vinegar Spray:
    Mix 1 tablespoon of apple cider vinegar with 1 liter of water and spray the affected leaves. Vinegar’s mild acidity inhibits fungal and bacterial growth.
  2. Neem Oil or Garlic Spray:
    Both are effective antifungals. For a garlic spray, crush 4–5 cloves of garlic, steep them in 1 liter of water overnight, strain, and apply with a spray bottle.
  3. Remove Affected Leaves:
    Immediately cut off and discard all spotted leaves to stop the infection from spreading.
  4. Adjust Watering Habits:
    Water at the base of the plant to keep leaves dry. Avoid misting heavily if humidity is already high indoors.
  5. Wipe Leaves Regularly:
    Dust and grime can trap moisture and harbor fungal spores. Clean leaves gently with a damp cloth once every few weeks.

Prevention Tip:

Maintain consistent air movement and keep plants spaced apart to minimize leaf contact and moisture buildup.


4. Gray Mold (Botrytis Blight)

What It Looks Like

Gray mold, or Botrytis cinerea, appears as fuzzy grayish mold on flowers, leaves, and stems. Affected areas often turn brown or black and develop a decaying texture. It spreads rapidly in humid environments, especially during winter when ventilation is poor.

Causes

High humidity, poor airflow, and dead or decaying plant matter create perfect conditions for gray mold to flourish. It often infects wounded or weak plant tissues.

Natural Cures

  1. Hydrogen Peroxide Mist:
    Mix 1 part hydrogen peroxide (3%) with 4 parts water and spray lightly on affected areas. This kills mold without harming the plant.
  2. Remove Infected Parts:
    Cut away any moldy stems, leaves, or flowers immediately. Dispose of them outside your home.
  3. Cinnamon or Sulfur Dust:
    Dusting the soil surface with cinnamon or elemental sulfur helps inhibit further fungal activity naturally.
  4. Improve Airflow:
    Keep your plants in a well-ventilated space. A small oscillating fan can help prevent stagnant air pockets.

Prevention Tip:

Avoid leaving fallen leaves or decaying flowers on the soil surface. Keep humidity moderate (around 50%) and ensure proper spacing between plants.


5. Sooty Mold (Black Sticky Coating on Leaves)

What It Looks Like

Sooty mold is a black, tar-like coating that covers leaves and stems, making them sticky and dull. It doesn’t directly damage plant tissues but blocks sunlight, reducing photosynthesis and weakening the plant.

Causes

Sooty mold develops on the honeydew secretions of pests such as aphids, mealybugs, or whiteflies. The mold grows on this sugary residue, not on the plant itself.

Natural Cures

  1. Eliminate the Pests:
    Spray the plant with a neem oil solution (1 teaspoon neem oil + 1 liter water + few drops of soap). Neem oil kills aphids, mealybugs, and other pests responsible for the sticky residue.
  2. Wipe the Leaves:
    Clean the mold off gently with a soft cloth dipped in a mixture of mild soap and water. This restores shine and photosynthesis efficiency.
  3. Use a Garlic or Chili Spray:
    These natural insect repellents deter further pest activity. Crush 5 garlic cloves or 2 chilies, steep them overnight in 1 liter of water, strain, and spray weekly.
  4. Introduce Beneficial Insects (if outdoors):
    Ladybugs and lacewings feed on honeydew-producing pests and help prevent mold recurrence.

Prevention Tip:

Inspect new plants before bringing them indoors. Keep pest populations under control with regular neem oil or insecticidal soap sprays.


Bonus Tip: Strengthening Plant Immunity Naturally

Healthy plants are less likely to succumb to disease. Here are a few ways to build their natural resistance:

  • Use well-draining soil: Prevents excess moisture and fungal buildup.
  • Ensure adequate light: Weak, shaded plants are more prone to infections.
  • Feed with compost tea or seaweed extract: Boosts plant immunity naturally.
  • Rotate plants occasionally: Helps prevent disease hotspots caused by stagnant air.

By keeping your indoor ecosystem balanced and hygienic, you can eliminate most problems before they even start.


Conclusion

Caring for indoor plants means understanding their silent signals and responding with patience and natural remedies. Diseases like powdery mildew, root rot, leaf spot, gray mold, and sooty mold may sound intimidating, but they can be managed effectively with simple, eco-friendly solutions.

By improving airflow, adjusting watering habits, and using natural antifungal sprays like neem oil, baking soda, or vinegar, you can restore your plants’ health without relying on synthetic chemicals. Remember: prevention is always easier than cure.

Healthy, vibrant plants are not just a sign of good gardening—they reflect harmony between nature and your living space. With consistent care and natural cures, your indoor garden will thrive, bringing beauty and balance to your home for years to come.

How to Choose Between Plastic and Clay Pots for Houseplants

How to Choose Between Plastic and Clay Pots for Houseplants

When it comes to growing healthy houseplants, one of the most important—and often overlooked—decisions is choosing the right pot. While soil type, watering routine, and lighting conditions play vital roles in plant care, the container you use can make or break your plant’s growth. The most common materials used for indoor pots are plastic and clay (terracotta). Each has its own set of advantages and drawbacks, and understanding them can help you select the perfect home for your green companions.

In this comprehensive guide, we’ll explore how to choose between plastic and clay pots for houseplants, comparing everything from moisture retention and breathability to cost, style, and plant health.


1. Why the Right Pot Matters

Before diving into the details, let’s understand why pot choice is so crucial. Pots are more than decorative containers—they influence the plant’s root health, water balance, and overall vitality. A mismatched pot can lead to common problems such as:

  • Root rot from excess moisture
  • Stunted growth from poor aeration
  • Rapid drying and frequent watering needs
  • Temperature stress on roots

Choosing between plastic and clay pots depends on your home environment, the type of plant you’re growing, and how much time you can dedicate to care.


2. Overview: Plastic vs. Clay Pots

Let’s start with a quick overview of the two materials:

FeaturePlastic PotsClay (Terracotta) Pots
MaterialLightweight, non-porous syntheticNatural, porous baked clay
Moisture retentionRetains water longerDries out quickly
WeightVery lightHeavier and more stable
TemperatureLess breathable, may trap heatNaturally cooling and breathable
DurabilityResistant to breakageCan crack or chip easily
CostUsually inexpensiveSlightly pricier per pot
StyleAvailable in various colors and shapesClassic earthy look
Best forMoisture-loving or fast-growing plantsSucculents, cacti, and plants that prefer drier soil

Both options can grow healthy plants when chosen wisely, but your environmental conditions and plant needs should guide your decision.


3. The Case for Clay Pots: Natural, Breathable, and Beautiful

Clay pots, especially the traditional terracotta type, are made from natural clay and fired in kilns. Their porous walls allow air and moisture to move through, making them ideal for plant roots that need good aeration.

Advantages of Clay Pots

  1. Excellent Breathability:
    Clay pots allow air circulation through their walls, which helps roots “breathe” and prevents soil from staying soggy. This reduces the risk of root rot and fungal growth, especially in plants sensitive to overwatering.
  2. Natural Cooling:
    Terracotta naturally regulates temperature. In hot conditions, the pot cools down as moisture evaporates, protecting roots from overheating.
  3. Classic Aesthetic:
    Clay pots offer a timeless, rustic charm that blends beautifully with all interior styles—from bohemian to minimalist. The warm, earthy tones of terracotta also complement green foliage perfectly.
  4. Weight and Stability:
    The heaviness of clay pots makes them perfect for tall or top-heavy plants. They are less likely to tip over compared to lightweight plastic pots.
  5. Eco-Friendly:
    Clay is a natural and biodegradable material, making it an environmentally friendly choice for sustainable gardeners.

Disadvantages of Clay Pots

  1. Dries Out Quickly:
    The porous nature that benefits roots can also cause soil to dry faster. This means more frequent watering, which may not be ideal for busy plant owners.
  2. Fragile:
    Clay pots can easily crack or chip if dropped or exposed to freezing temperatures.
  3. Weight:
    While stability is a plus, the extra weight can make large pots difficult to move or rearrange.
  4. Salt Build-Up:
    Over time, minerals and salts from water can form white deposits on the surface of clay pots. Though harmless, this can affect aesthetics.

Best for:
Clay pots are ideal for succulents, cacti, herbs, or Mediterranean plants that prefer drier soil and good airflow.


4. The Case for Plastic Pots: Lightweight, Versatile, and Water-Efficient

Plastic pots are made from synthetic polymers and are the most widely available type of plant container. Their main advantage lies in their ability to retain moisture and provide flexibility in design.

Advantages of Plastic Pots

  1. Excellent Water Retention:
    Plastic pots are non-porous, meaning they don’t allow air or moisture to escape through the sides. This helps retain water longer—great for tropical plants and busy gardeners who can’t water frequently.
  2. Lightweight:
    Perfect for shelves, hanging planters, and large indoor plants that may need occasional repositioning.
  3. Durability:
    Unlike clay, plastic doesn’t break easily. It withstands drops, temperature fluctuations, and everyday handling with ease.
  4. Variety in Design:
    Available in endless colors, shapes, and textures, plastic pots can match any home decor style—modern, colorful, minimalist, or playful.
  5. Cost-Effective:
    Plastic pots are generally inexpensive and easy to find in every size.

Disadvantages of Plastic Pots

  1. Poor Air Circulation:
    Because plastic pots don’t “breathe,” they can trap moisture, leading to waterlogged soil if drainage holes are inadequate.
  2. Heat Retention:
    In sunny spots, plastic pots can trap heat, potentially damaging sensitive roots.
  3. Environmental Impact:
    Unless made from recycled materials, plastic pots contribute to environmental pollution and take centuries to decompose.
  4. Aesthetic Limitations:
    Though designs have improved, plastic pots may not have the same organic charm as terracotta or ceramic.

Best for:
Plastic pots suit moisture-loving plants like ferns, calatheas, peace lilies, or philodendrons. They’re also great for beginners or anyone with a busy lifestyle.


5. Considering Plant Type and Care Habits

The key to choosing between plastic and clay lies in understanding your plant’s natural needs and your watering habits.

Plant TypeBest Pot ChoiceReason
Succulents and CactiClayAllows quick drying, prevents root rot
Ferns, Calatheas, and Tropical PlantsPlasticRetains moisture for humidity-loving species
HerbsClayPrefers drier roots and breathable pots
OrchidsPlastic (with good drainage)Retains moisture but needs aeration
Pothos, PhilodendronsPlasticFlexible, low-maintenance, and water-retaining
Aloe VeraClayReduces risk of overwatering

If you tend to overwater, clay pots can help regulate moisture naturally. If you forget to water often, plastic pots will reduce plant stress by keeping the soil moist longer.


6. Aesthetic and Design Considerations

Your choice of pot can also reflect your personal style. Here’s how each material fits into different decor themes:

  • Modern and Minimalist Interiors: Smooth plastic or matte white clay pots create a clean, elegant look.
  • Bohemian or Rustic Spaces: Terracotta and clay pots add warmth and authenticity.
  • Colorful and Playful Homes: Bright plastic pots bring vibrancy and fun.
  • Industrial or Urban Decor: Black, concrete-style plastic pots mimic a sleek, contemporary finish.

Don’t forget to mix and match! Many plant enthusiasts use plastic nursery pots inside decorative clay or ceramic covers, achieving the best of both worlds—function and beauty.


7. Environmental and Practical Factors

Sustainability:

If you’re eco-conscious, clay pots are the greener choice since they are made from natural materials and are biodegradable. However, recycled or upcycled plastic pots can also be a responsible option if disposed of properly.

Maintenance and Cleaning:

Clay pots require occasional scrubbing to remove salt buildup. Plastic pots, on the other hand, are easy to clean with soap and water.

Temperature Sensitivity:

Clay keeps roots cool, making it great for warm climates. Plastic, being less insulating, can warm up quickly—better for colder indoor spaces.


8. The Perfect Balance: Combining Plastic and Clay Pots

Many experienced plant lovers prefer using both materials strategically. For example:

  • Keep plants that need constant moisture in plastic pots.
  • Grow drought-tolerant species in clay pots.
  • Use decorative clay outer pots to hide plastic grow pots—maintaining aesthetics and flexibility.

This hybrid approach ensures you meet the unique water, light, and temperature needs of all your plants without compromising style.


Conclusion

Choosing between plastic and clay pots for your houseplants is not a one-size-fits-all decision. It’s about understanding your plants’ personalities and your own lifestyle. Clay pots are perfect for those who appreciate natural beauty, breathability, and traditional aesthetics, while plastic pots offer convenience, affordability, and design variety.

If you’re a beginner, start with plastic pots to minimize watering worries. As you gain experience and confidence, experiment with clay pots for a more natural, earthy gardening experience.

Ultimately, the “right” pot is the one that supports your plant’s health and complements your home’s style. By choosing thoughtfully, you’ll not only grow thriving houseplants but also create a harmonious living space filled with life, color, and balance.

How to Match Indoor Plants With Your Home’s Color Palette

How to Match Indoor Plants With Your Home’s Color Palette

Indoor plants are more than just living décor — they’re an extension of your home’s personality. The right greenery can complement your interior design, enhance your color palette, and create a cohesive, harmonious atmosphere. But while most people choose houseplants based on care requirements or popularity, few realize how dramatically plants can influence — and be influenced by — the colors around them.

Whether you’re designing a modern minimalist apartment, a rustic bohemian haven, or a cozy cottage-style space, matching your indoor plants with your home’s color palette is both an art and a science. This guide explores how to balance hues, textures, and tones to make your home look effortlessly curated and vibrant.


Why Color Coordination Matters in Plant Styling

Colors shape how we feel in a space. Warm tones (reds, oranges, yellows) evoke energy and passion, while cool tones (blues, greens, purples) bring calm and serenity. Since plants are naturally green — a color that symbolizes growth, renewal, and balance — they already create a grounding visual foundation.

However, not all greens are equal. Foliage comes in various shades — from lime and emerald to deep forest and variegated mixes. When paired thoughtfully with your home’s color palette, plants can:

  • Enhance mood and visual harmony.
  • Accentuate your décor theme.
  • Create contrast or continuity, depending on placement.
  • Highlight architectural features or soften harsh design lines.

In short, choosing plants for color balance is like selecting artwork or furniture — each should play a role in your overall visual story.


Step 1: Identify Your Home’s Color Palette

Before you select plants, assess the color foundation of your interiors. Take note of:

  • Wall colors (paint, wallpaper, or exposed materials like brick or wood).
  • Furniture hues (sofa fabrics, tables, shelving).
  • Accent tones (rugs, cushions, curtains, art pieces).

Your color scheme likely falls into one of these three categories:

  1. Neutral Palette: Whites, creams, grays, taupes, and beige tones.
  2. Cool Palette: Blues, greens, lavenders, silvers, and cool grays.
  3. Warm Palette: Reds, oranges, yellows, browns, and gold tones.

Once you identify your base, you can choose plants that either complement or contrast it for visual balance.


Step 2: Choose Plants That Complement Neutral Interiors

Neutral interiors — think Scandinavian, modern minimalist, or Japandi styles — rely on simplicity, balance, and texture. Here, plants add a burst of life without overwhelming the calm aesthetic.

Best plant choices:

  • Monstera deliciosa: Its glossy, split leaves introduce rich green tones and sculptural shape.
  • Fiddle Leaf Fig: The bold, dark green foliage provides striking contrast against white or beige walls.
  • Snake Plant (Sansevieria): Vertical lines and yellow-edged leaves add height and subtle color definition.
  • ZZ Plant: Deep green leaves complement soft neutrals beautifully, maintaining a serene look.

Design tip:
Use simple, muted pots (white ceramic, light wood, or matte gray) to keep the focus on the plant’s form and greenery. Layer plants at different heights for dimension without clutter.


Step 3: Match Plants to Cool-Toned Interiors

Cool-toned homes — with shades of blue, gray, or mint — benefit from plants that enhance tranquility and freshness. Choose foliage that has blue-green undertones, silvery leaves, or variegation to echo your décor’s cool energy.

Best plant choices:

  • Eucalyptus or Silver Pothos (Scindapsus pictus): Their silvery foliage harmonizes beautifully with blue-gray spaces.
  • Fern varieties (Boston or Maidenhair): Their feathery textures add softness to sleek, cool rooms.
  • Peace Lily: Its dark leaves and white blooms provide balance and a clean, modern look.
  • Calathea Orbifolia: Silvery striped leaves complement light gray and pastel interiors.

Design tip:
Use metallic or glass pots to reflect natural light and enhance cool tones. Group plants in clusters of three for a balanced, contemporary aesthetic.


Step 4: Pair Plants With Warm-Toned Interiors

Warm-toned homes — rich in terracotta, beige, ochre, or golden shades — benefit from plants that add depth and vibrancy. Opt for species with red, burgundy, or dark green foliage to create harmony with the surrounding warmth.

Best plant choices:

  • Rubber Plant (Ficus elastica ‘Burgundy’): The deep maroon leaves echo earthy interiors.
  • Croton: Offers multicolored foliage (yellow, red, orange, green) that complements warm palettes.
  • Philodendron Pink Princess: Touches of pink contrast beautifully with brown or gold tones.
  • Anthurium: Its bright red flowers pop against wooden or terracotta backgrounds.

Design tip:
Choose textured pots in warm materials like clay, rattan, or brass to amplify the cozy atmosphere. Mix plants with varying leaf shapes to create movement and visual warmth.


Step 5: Use Contrasting Colors for Bold Statements

If your interior style leans bold or eclectic, contrasting colors can make a striking statement. A green plant against a vibrant accent wall (like mustard yellow or navy blue) can create a dramatic focal point.

Example combinations:

  • Green foliage + Terracotta wall: Earthy, Mediterranean vibe.
  • Emerald green + Deep navy: Luxurious and modern.
  • Lime green + Charcoal gray: Energetic and contemporary.
  • Variegated plants + Pastel backdrops: Airy and whimsical.

Best plant choices:

  • Variegated Rubber Plant: Adds light contrast with cream streaks.
  • Maranta (Prayer Plant): Features red veins that pop against neutral or blue tones.
  • Chinese Evergreen: Comes in pink, red, or silver varieties that contrast beautifully with darker walls.

Design tip:
Limit the number of contrasting plants to avoid chaos. Focus on a few statement pieces that draw the eye.


Step 6: Match Pots and Planters to Your Palette

Your plant pots play a huge role in how the greenery fits your color scheme.

  • For Neutral Homes: Go for matte white, beige, or soft stone textures.
  • For Cool-Toned Homes: Choose ceramic or metal pots in blue, gray, or silver.
  • For Warm-Toned Homes: Terracotta, woven baskets, or brass planters enhance earthy vibes.
  • For Eclectic Homes: Mix bold patterns, colorful pots, or geometric designs for artistic flair.

Remember: The pot color should complement both the plant and the room, not compete with them.


Step 7: Consider Leaf Color and Texture

Beyond basic green, many indoor plants feature colorful or patterned foliage that can match your décor palette perfectly.

Plants with colorful leaves:

  • Coleus: Available in vibrant red, pink, and purple patterns.
  • Caladium: Heart-shaped leaves with white, pink, and green variations.
  • Aglaonema: Comes in silver, pink, or red varieties, perfect for adding subtle color highlights.

Plants with unique textures:

  • Cactus or succulents: Match modern or desert-toned interiors.
  • Ferns: Soften industrial spaces with their delicate leaves.
  • Philodendrons: Glossy leaves suit contemporary or luxury settings.

Design tip:
Combine plants with different textures and leaf finishes (matte, glossy, fuzzy) to create depth without overwhelming your color palette.


Step 8: Balance Light and Visual Weight

Color matching doesn’t just involve hues — it’s also about balance and visual weight. A dark-leafed rubber plant might anchor a light room, while a delicate fern softens a heavy-toned interior.

Follow these principles:

  • Use darker plants to ground light-colored rooms.
  • Use lighter or variegated plants to lift darker spaces.
  • Group plants in odd numbers (3 or 5) for natural balance.
  • Vary heights with plant stands to draw the eye upward.

This ensures your plants look intentional, not just placed randomly.


Step 9: Use Greenery as a Transition Element

Plants can act as a bridge between two different color zones in your home — for example, connecting a neutral living room with a colorful dining area. Strategic placement of a tall, lush plant like a parlor palm or monstera can visually unify the space.

For open layouts, use large statement plants to anchor corners or entryways. In smaller rooms, go for hanging plants or wall planters that introduce color without crowding the space.


Step 10: Keep It Personal and Evolving

Finally, remember that your color palette — and plant collection — can evolve. The beauty of decorating with plants is flexibility. You can move, repot, or swap species as your style changes.

Don’t be afraid to experiment with combinations — a pop of red bromeliad in a blue room or a trailing pothos against a white brick wall might surprise you with how well it fits.


Conclusion

Matching indoor plants with your home’s color palette goes beyond aesthetics — it’s about creating harmony between nature and design. The right plant not only enhances your décor but also brings balance, freshness, and emotion into every room.

By understanding your home’s color scheme and selecting plants that complement or contrast it beautifully, you can turn your living space into a living canvas — where greenery becomes an integral part of your interior story.

The Best Plant Stands for Maximizing Indoor Light

The Best Plant Stands for Maximizing Indoor Light

Indoor plants bring life, color, and freshness to any home, but their growth depends heavily on one essential factor—light. While many plant lovers focus on watering and soil care, lighting often determines how lush and healthy your plants become. The right plant stand can make a huge difference, helping your green friends get closer to natural light sources while adding style and organization to your space.

In this comprehensive guide, we’ll explore the best plant stands for maximizing indoor light, how to position them effectively, and tips to ensure your plants receive just the right amount of sunshine year-round.


Why Light Positioning Matters for Indoor Plants

Plants need light for photosynthesis, the process that converts light energy into food for growth. However, indoor lighting is rarely uniform. Sunlight angles shift throughout the day, and some areas receive more natural light than others.

A plant stand not only helps elevate your plants toward brighter windows or skylights but also keeps them organized and stylishly displayed. More importantly, it can prevent overcrowding—a common issue when multiple plants compete for the same light source on a single surface.

When you strategically place stands near east-, south-, or west-facing windows, you ensure your plants receive balanced exposure without being scorched by direct sunlight.


1. Tiered Plant Stands – For Maximum Light Distribution

Best for: Multiple plants, small spaces, and corner setups.

Tiered stands are perfect for creating a layered green display while ensuring each plant gets adequate light. Their stepped or cascading design prevents the upper plants from shading the lower ones, making them ideal for bright rooms or near wide windows.

Benefits:

  • Promotes even light exposure across all tiers.
  • Great for mixing plant sizes—tall plants on top, trailing varieties below.
  • Adds vertical interest to any room.

Pro Tip: Choose stands made of metal or bamboo, as they provide sturdiness and a modern look. Rotate your plants weekly to ensure uniform light exposure on all sides.


2. Adjustable or Telescopic Plant Stands – For Dynamic Lighting Conditions

Best for: Homes with changing light angles or movable plants.

Adjustable-height stands are incredibly versatile, letting you raise or lower your plants based on their light needs or the season. During winter, for instance, you can elevate your plants closer to the window when sunlight is weaker.

Benefits:

  • Flexibility to customize height for optimal sunlight.
  • Works well for light-loving plants like succulents and cacti.
  • Perfect for use with grow lights in dimly lit areas.

Pro Tip: Look for stands with locking mechanisms or stable bases to prevent wobbling when adjusting height.


3. Corner Plant Stands – For Making the Most of Limited Light

Best for: Corners near windows or under skylights.

Corners often go unused, but they can be a great place to showcase plants. A corner stand uses vertical space efficiently while catching indirect light reflected from nearby windows.

Benefits:

  • Saves floor space while displaying multiple plants.
  • Helps plants benefit from indirect or filtered light, ideal for species like pothos, peace lilies, and snake plants.
  • Enhances room aesthetics with minimal clutter.

Pro Tip: Place a mirror behind the stand to reflect extra sunlight onto your plants—this is a clever way to amplify brightness naturally.


4. Window-Ledge or Hanging Plant Stands – For Maximum Natural Light

Best for: Small plants and sun-loving species like herbs, jade, or succulents.

If your window ledges are too narrow or crowded, window-mounted plant stands or hanging shelves can make use of vertical glass space. These allow plants to bask directly in natural sunlight throughout the day.

Benefits:

  • Ensures uninterrupted light exposure for plants that crave direct sun.
  • Great for urban apartments with limited floor space.
  • Adds charm and freshness to windows.

Pro Tip: Rotate your plants frequently and use suction-cup shelves or wall brackets rated for your pot’s weight. Avoid placing delicate foliage directly against cold glass in winter.


5. Multi-Level Rolling Plant Stands – For Mobility and Light Chasing

Best for: Large collections and changing light zones.

A mobile plant stand with wheels is ideal for those who like to move plants around the house based on light availability. Whether you want to roll them into a sunny spot in the morning or keep them shaded in the afternoon, these stands make it effortless.

Benefits:

  • Provides maximum flexibility in adjusting to light conditions.
  • Perfect for heavy or large pots that are difficult to move manually.
  • Encourages healthy growth for plants that thrive in shifting light zones.

Pro Tip: Opt for locking caster wheels to keep the stand secure once you’ve positioned it.


6. Ladder-Style Plant Stands – For Vertical Light Exposure

Best for: Narrow spaces or minimalist interiors.

A ladder-style stand allows plants to climb vertically, giving each level exposure to both direct and indirect light. They are ideal for displaying cascading or vining plants, which can trail beautifully over the edges.

Benefits:

  • Excellent for sunny walls or balcony corners.
  • Provides ample air circulation between plants.
  • Blends functionality with artistic display.

Pro Tip: Place light-loving plants like succulents and ferns at the top, while shade-tolerant ones like ZZ plants or philodendrons can go on lower tiers.


7. Wall-Mounted and Floating Stands – For Creative Light Optimization

Best for: Compact rooms and decorative vertical gardens.

Wall-mounted shelves or floating plant stands can transform unused wall areas into a living art piece. They’re especially useful near large windows or under skylights, where light pours in from above.

Benefits:

  • Keeps plants off the floor while maximizing space.
  • Ideal for creating light-filled green walls.
  • Can be arranged aesthetically for a modern interior look.

Pro Tip: Use sturdy wall anchors and lightweight pots to ensure safety and stability.


How to Position Plant Stands for Optimal Light

Even the best stand won’t work effectively without strategic placement. Follow these guidelines:

  1. South-Facing Windows – Brightest and best for tropical or desert plants. Use sheer curtains to diffuse harsh rays.
  2. East-Facing Windows – Gentle morning sunlight, perfect for most indoor plants.
  3. West-Facing Windows – Strong afternoon sun; great for succulents but can burn delicate leaves.
  4. North-Facing Windows – Minimal light; use stands with grow lights to supplement illumination.

You can also rotate stands every few weeks to help plants grow symmetrically and prevent them from leaning toward the light.


Material and Design Considerations

When choosing the right stand, balance aesthetic appeal with functionality.

  • Wooden Stands: Offer a warm, natural look and suit rustic or bohemian interiors.
  • Metal Stands: Durable and modern—ideal for heavy pots and sleek designs.
  • Bamboo Stands: Eco-friendly, lightweight, and perfect for tropical vibes.
  • Glass or Acrylic Stands: Reflect light beautifully, enhancing overall brightness in the room.

Always ensure that your stand can support the pot’s weight and has a waterproof surface to prevent damage from watering.


Final Tips for Maximizing Indoor Light with Plant Stands

  • Clean windows regularly to ensure maximum light penetration.
  • Dust leaves weekly—dirty foliage reduces light absorption.
  • Use mirrors and light-colored walls to reflect light naturally.
  • In winter, move stands closer to the window to make up for reduced sunlight.
  • Supplement with grow lights if your space lacks sufficient natural light.

Conclusion

Investing in the right plant stand is more than just a design choice—it’s a strategy to help your plants flourish. By elevating your greenery and positioning them for optimal light exposure, you ensure steady growth, vibrant foliage, and healthy blooms all year round.

Whether you opt for a tiered display, rolling cart, or hanging shelf, the goal remains the same: to bring your plants closer to the light they love while enhancing your living space’s beauty and harmony.

With the perfect plant stand, your indoor jungle will not only thrive—but truly shine.

How to Keep Large Indoor Plants From Toppling Over

How to Keep Large Indoor Plants From Toppling Over

Large indoor plants bring a dramatic, lush, and tropical charm to your home. Their tall silhouettes, wide leaves, and vibrant greenery can instantly transform a dull corner into a lively focal point. However, one common problem plant lovers often face is keeping these majestic plants upright. Whether it’s a gust of wind from an open window, uneven soil, or an unsteady pot, a falling plant can not only damage your decor but also stress or injure the plant itself.

If you’ve ever had a top-heavy fiddle leaf fig, monstera, or rubber plant lean dangerously to one side, this guide will show you exactly how to keep your large indoor plants stable, healthy, and standing tall — naturally and safely.


1. Choose the Right Pot for Stability

The foundation of your plant’s balance starts with its container.

a. Go for Heavy Pots:
Large indoor plants need sturdy, weighty pots that won’t tip easily. Terra cotta, ceramic, or concrete planters are perfect choices because they’re heavier than plastic and can anchor the plant’s base. If you prefer lighter materials, consider placing decorative stones or bricks at the bottom for added weight.

b. Size Matters:
A pot that’s too small can cause instability, while an overly large one can lead to waterlogging and root rot. Choose a pot that’s 2–3 inches wider than the plant’s root ball. This gives roots room to spread evenly, offering both balance and healthy growth.

c. Drainage is Key:
Even a heavy pot should have proper drainage holes. Excess water can make the soil soggy and heavy on one side, leading to a tilt. Use a saucer underneath to catch extra water and keep your floors safe.


2. Use the Right Soil Mix

Soil composition plays a huge role in how well your plant stays upright.

a. Avoid Loose Soil:
Loose, sandy, or overly light soil can cause the plant to wobble. Instead, use a high-quality indoor potting mix that retains some moisture but also provides structure. Adding perlite or coco coir improves aeration while maintaining firmness.

b. Firm the Base After Repotting:
When repotting large plants, pack the soil gently but firmly around the roots. This helps anchor the plant securely in place. Avoid pressing too tightly, though — roots still need oxygen to breathe.

c. Add Top Layer Support:
Adding decorative stones, pebbles, or bark mulch on top of the soil can provide extra weight and stability while giving your plant a polished look.


3. Stake Your Plants for Extra Support

Some large plants, like fiddle leaf figs, dracaenas, or palms, have tall stems that can bend or lean as they grow. Staking is a simple and effective way to keep them upright.

a. Use a Strong Stake:
You can use bamboo sticks, metal rods, or even moss poles depending on your plant’s needs. Insert the stake deep enough into the soil (close to the root ball) for stability but without damaging the roots.

b. Secure the Plant Gently:
Use soft plant ties, jute twine, or Velcro straps to tie the stem to the stake. Avoid tight knots — they can cut into the plant’s stem as it grows. A loose figure-eight tie works best, allowing for gentle movement while still providing support.

c. Train Upright Growth:
As your plant grows, continue adjusting the ties upward. This helps train it to grow straight and prevents top-heavy leaning.


4. Rotate Plants Regularly

Plants naturally bend toward light, a process called phototropism. If you only get sunlight from one direction — say, a nearby window — your plant may start leaning toward it.

a. Rotate Weekly:
Turn your plant by a quarter turn every week to encourage even light exposure. This helps it grow upright instead of favoring one side.

b. Use Balanced Lighting:
If your space has uneven natural light, supplement with grow lights. Position them directly above or slightly angled to distribute light evenly across all sides.


5. Prune and Trim to Manage Weight

Over time, heavy foliage and uneven growth can make your plant top-heavy. Regular pruning keeps the plant balanced, encourages healthy new growth, and prevents tipping.

a. Remove Excess Foliage:
Cut back overly large leaves or branches that lean heavily to one side. Focus on removing older, lower leaves first to lighten the plant’s upper section.

b. Shape for Symmetry:
Trim your plant to maintain a balanced shape — especially if it grows unevenly toward light. Even distribution of weight across the plant helps keep it upright.

c. Stimulate Stronger Growth:
Pruning also encourages new branches to form lower down the stem, creating a more compact and self-supporting structure.


6. Use a Decorative Plant Stand with Support

If your plant sits in a light container, consider using a sturdy plant stand with built-in braces or side walls. Some plant stands even have adjustable clamps that hold the pot in place. Just make sure the stand’s surface is level, stable, and wider than the base of your pot.

You can also place the pot inside a weighted basket or decorative container with sand or gravel at the bottom for extra stability — blending practicality with aesthetics.


7. Check and Adjust Root Health

A plant’s roots act as its anchor. If they are weak or rootbound, the plant can easily topple.

a. Repot When Rootbound:
If roots are circling the bottom or poking out of drainage holes, your plant needs more space. Repotting into a slightly larger pot gives the roots room to spread and stabilize the plant.

b. Balance Moisture:
Overwatering can cause roots to rot and lose their grip, while underwatering can make the soil too light. Keep a consistent watering schedule and allow the topsoil to dry slightly between sessions.

c. Encourage Deep Root Growth:
When watering, ensure water reaches deep into the pot. Shallow watering encourages surface roots, which provide less support.


8. Consider Environmental Factors

Sometimes, the reason your plant topples isn’t the plant itself — it’s the environment.

a. Avoid Windy or High-Traffic Areas:
Large plants near doors, fans, or air vents can easily be knocked over by strong drafts. Similarly, pets or children can accidentally bump into them. Place your plants in a safe, low-traffic corner.

b. Level Your Flooring:
Uneven floors or rugs can cause pots to lean slightly, increasing the risk of tipping. Use furniture coasters or rubber stabilizers to even things out.

c. Maintain Consistent Humidity and Temperature:
Sudden drops in temperature or humidity can weaken stems, especially for tropical species like monsteras or birds of paradise. Keep them in stable, comfortable indoor conditions.


9. Reinforce with Decorative Weight

You can cleverly disguise added stability by using decorative elements.

  • Pebbles, glass beads, or gravel at the pot’s base look elegant and keep it from shifting.
  • A wide saucer or tray filled with sand can serve as both a moisture reservoir and stabilizing base.
  • Cluster large plants together — their combined mass can help them support each other visually and physically.

10. Know When to Rebalance and Reposition

As plants grow taller, their center of gravity changes. A plant that was stable six months ago may start leaning now. Regularly inspect your large indoor plants for signs of imbalance — a tilted trunk, loose soil, or one-sided leaf growth — and take early corrective action.

Sometimes, simply rotating or repotting the plant is enough to restore perfect balance.


Conclusion

Keeping large indoor plants from toppling over isn’t just about looks — it’s about ensuring their long-term health and growth. A well-balanced plant is less stressed, absorbs nutrients more efficiently, and grows more symmetrically.

By choosing the right pot, staking tall stems, pruning wisely, and paying attention to light and soil balance, you can enjoy your tall, elegant plants safely and beautifully for years. Whether it’s a towering monstera in your living room or a majestic palm near your window, a stable foundation ensures that your greenery remains both a natural masterpiece and a peaceful part of your home decor.

Why Your Indoor Plants Need Occasional Pruning

Why Your Indoor Plants Need Occasional Pruning

Indoor plants are more than just decorative accents — they’re living companions that bring calm, freshness, and a touch of nature into your home. But like all living things, houseplants need care beyond just watering and sunlight. One essential, often-overlooked part of plant maintenance is pruning — the art of cutting back leaves, stems, and sometimes even roots to encourage new growth and maintain plant health.

Many people fear pruning, thinking it might harm their beloved plants. In reality, occasional pruning is one of the best things you can do for your indoor plants. When done properly, it helps them grow stronger, look more beautiful, and stay disease-free. This detailed guide explains why pruning is necessary, when and how to do it, and what benefits it brings to your leafy friends.


1. What Is Pruning and Why It Matters

Pruning is the process of selectively trimming parts of a plant — such as dead leaves, stems, flowers, or overgrown branches — to improve its overall health and shape. For indoor plants, pruning mimics the natural wear-and-tear that would occur outdoors from wind, animals, and natural decay.

Without pruning, indoor plants can quickly become:

  • Leggy and unbalanced,
  • Overcrowded with dead or yellowing leaves,
  • More vulnerable to pests and disease,
  • Less likely to flower or produce new growth.

Pruning helps redirect a plant’s energy from maintaining old or unhealthy growth toward producing fresh leaves and blooms. It’s essentially giving your plant a “reset” — allowing it to rejuvenate and thrive in a confined indoor environment.


2. The Science Behind Pruning: How Plants Respond

When you prune a plant, you remove the apical dominance — the concentration of growth hormones (auxins) in the top part of the plant. This signals the plant to start growing new shoots from dormant buds along the stem, making it bushier and fuller.

At the same time, pruning improves air circulation and light penetration within the plant, preventing fungal problems and encouraging even photosynthesis. It’s like giving your plant a haircut and a breath of fresh air all at once.


3. Benefits of Pruning Indoor Plants

Let’s explore why occasional pruning is vital for every type of houseplant — from trailing vines to tall indoor trees.

A. Promotes Healthy Growth

Removing damaged, diseased, or dying leaves allows your plant to focus its resources on new, vigorous growth. Old foliage can sap energy and block sunlight from reaching younger leaves below.

B. Prevents Pest and Disease Problems

Dead leaves and stems often attract pests like aphids, mealybugs, or spider mites. These areas can also harbor fungal infections. Regular pruning removes potential hiding spots and keeps your plant clean and healthy.

C. Improves Shape and Appearance

Indoor plants can become leggy or uneven as they stretch toward light sources. Pruning helps maintain a balanced, symmetrical shape, making your plant look lush and attractive in your living space.

D. Encourages Flowering and Fruiting

For flowering houseplants like peace lilies or African violets, pruning spent blooms (called deadheading) encourages more flowers to form. The same applies to fruit-bearing indoor plants such as dwarf citrus or tomatoes.

E. Manages Size

Some plants grow rapidly and can outgrow their pots or available space. Occasional pruning controls their size, making them manageable and better suited to your indoor environment.

F. Revives Weak or Neglected Plants

If your plant looks dull, overgrown, or weak, strategic pruning can help rejuvenate it by stimulating new shoots and roots. It’s a great way to revive plants that seem “stuck” or dormant.


4. Knowing When to Prune Your Indoor Plants

Timing is everything when it comes to pruning. While you can remove dead or yellow leaves anytime, major pruning should follow the plant’s natural growth cycle.

  • Best Time:
    Prune during the active growing season, typically in spring and summer. Plants recover quickly and produce new growth faster.
  • Avoid Pruning In:
    Late fall and winter, when most plants enter a resting or semi-dormant phase. Pruning during this time can stress them and delay recovery.
  • Exceptions:
    If a plant is diseased or infested, prune immediately regardless of season to prevent spread.

5. What to Prune (and What Not to)

Understanding what parts to remove is crucial.

Prune:

  • Yellow, brown, or dead leaves – they no longer contribute to photosynthesis.
  • Leggy stems – to encourage branching and fuller growth.
  • Spent flowers – to stimulate new blooms.
  • Crossing or tangled stems – to improve airflow and prevent overcrowding.
  • Damaged or diseased areas – to stop infections from spreading.

Avoid Pruning:

  • New, tender growth – it may still be developing.
  • Too much at once – never remove more than one-third of the plant’s foliage at a time.
  • Healthy leaves at the base – they often help the plant store nutrients.

6. Tools You Need for Pruning

Using the right tools ensures clean cuts and prevents damage or infection.

  • Pruning shears or scissors: Sharp, clean blades prevent crushing stems.
  • Sterilizing alcohol or hydrogen peroxide: Disinfect blades before and after pruning to prevent disease transmission.
  • Gloves: Protects your hands from sap or thorns.
  • Clean cloth or paper towel: To wipe tools and leaves after pruning.

Pro Tip: Always sterilize your tools between plants — pests or fungi can easily transfer from one pot to another.


7. Step-by-Step Guide to Pruning Indoor Plants

Step 1: Observe Your Plant

Take a few minutes to examine your plant from different angles. Identify dead, discolored, or overgrown sections that need trimming.

Step 2: Start Small

Begin by removing yellow or brown leaves and any visibly damaged stems. This alone often improves appearance and health dramatically.

Step 3: Shape the Plant

Trim long, leggy stems just above a node (where a leaf meets the stem). New shoots will emerge from this point, creating a fuller plant.

Step 4: Deadhead Flowers

Snip off faded or dried flowers near the base of the bloom. This encourages new buds and keeps the plant looking tidy.

Step 5: Clean Up

Remove fallen leaves or debris from the soil surface — they can attract pests or mold.

Step 6: Post-Pruning Care

After pruning, water the plant lightly and keep it out of direct sun for a few days to help it recover. You can also mist it occasionally to reduce stress.


8. How Often Should You Prune Indoor Plants?

There’s no strict schedule — it depends on the plant type and growth speed.

  • Fast-growing plants (pothos, philodendrons, spider plants): Every 4–6 weeks during active growth.
  • Slow-growing plants (succulents, snake plants, ZZ plants): Once or twice a year.
  • Flowering plants: After each bloom cycle or when flowers fade.

Tip: Observe your plant’s natural growth pattern. If it looks untidy, top-heavy, or crowded, it’s time for a trim.


9. Common Pruning Mistakes to Avoid

Even with good intentions, beginners sometimes overdo pruning. Here’s what to watch out for:

  1. Over-pruning: Removing too much foliage at once shocks the plant and slows recovery.
  2. Dull or dirty tools: Can crush stems and introduce bacteria or fungi.
  3. Wrong cuts: Cutting too close to the main stem can damage the plant’s growing points.
  4. Ignoring plant type: Some plants, like ferns or palms, react poorly to heavy trimming.
  5. No aftercare: Forgetting to water or mist after pruning may stress your plant further.

To stay safe, prune gradually and monitor how your plant responds before proceeding further.


10. Special Notes for Different Plant Types

Vining Plants (Pothos, Philodendron, Ivy):

Cut just above a leaf node to encourage branching. You can propagate trimmed cuttings in water to create new plants.

Bushy Foliage Plants (Schefflera, Ficus, Rubber Plant):

Prune to maintain shape and remove lower leaves if you prefer a tree-like appearance.

Flowering Plants (Peace Lily, Anthurium, Begonia):

Deadhead regularly and trim yellow leaves to promote blooming.

Succulents and Cacti:

Minimal pruning is needed — only remove dead or rotting leaves.

Herbs (Basil, Mint, Rosemary):

Regular pinching encourages bushier growth and prevents flowering, which can make herbs taste bitter.


11. The Psychological and Aesthetic Value of Pruning

Beyond health benefits, pruning contributes to the aesthetic and emotional connection between you and your plants. Watching new shoots emerge from a freshly pruned plant brings a sense of accomplishment and joy.

Pruning also helps maintain the plant’s balance with your home décor — keeping it tidy, elegant, and harmonized with your interior space. It’s an act of mindfulness that strengthens your bond with nature.


12. Final Thoughts

Pruning might seem like a small task, but it has a profound impact on your indoor plant’s well-being. It’s the secret behind fuller foliage, better blooms, and a cleaner, healthier home garden.

By pruning occasionally, you’re not harming your plant — you’re helping it focus, renew, and flourish. Just like a haircut revitalizes you, a good trim refreshes your plant’s spirit.

So, take out those shears, observe your green companions, and start small. With a little patience and care, your indoor plants will reward you with fresh, vibrant growth — a living reminder that sometimes, growth begins with a gentle cut.