Potatoes are a staple in kitchens worldwide, but what if you could grow giant, healthy potatoes right at home, without the need for expensive fertilizers? The good news is, you can! With a few simple techniques, a plastic tub, and some natural ingredients, you can enjoy a huge yield of potatoes, perfect for your family and friends. This guide will walk you through every step to ensure your potato-growing journey is both productive and fun.
Why Grow Potatoes in a Plastic Tub?
Growing potatoes in a plastic tub is a convenient and space-saving solution, especially for those who don’t have a large garden. Traditional soil-based potato cultivation requires large plots of land and significant effort to manage weeds and pests. A plastic tub provides:
- Portability: Move your tub to follow sunlight or protect it from extreme weather.
- Controlled Growth: You control soil quality, drainage, and moisture levels.
- Ease of Harvesting: No need to dig deep into the ground—you can lift the tub and collect your potatoes easily.
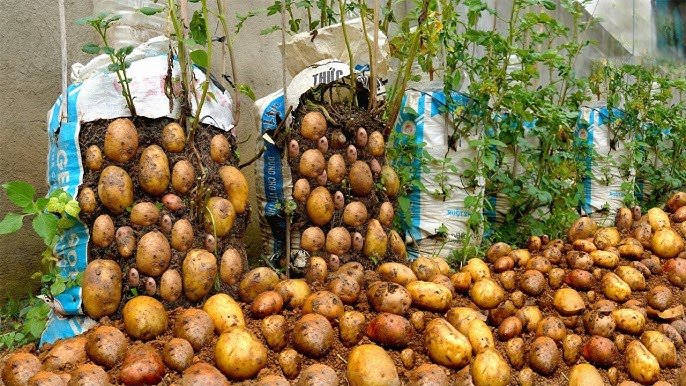
Plus, this method allows you to grow giant potatoes because the tub confines the soil, directing the plant’s energy into producing large tubers instead of sprawling roots.
Materials You Will Need
Before planting, make sure you have the following materials:
- Plastic Tub: A large tub, at least 20–25 gallons, works best. Make sure it has holes at the bottom for drainage.
- Potato Seeds or Seed Potatoes: Choose healthy, certified seed potatoes for better yields.
- Soil: Use a mix of garden soil, compost, and sand for good drainage.
- Organic Waste: Vegetable peels, coffee grounds, and crushed eggshells serve as free fertilizer.
- Watering Can: Regular watering is key to potato growth.
- Mulch: Straw or dried leaves help retain moisture and prevent weeds.
Using natural fertilizer reduces costs and enhances soil fertility over time. Not only is this eco-friendly, but it also ensures your potatoes are chemical-free and safe to eat.
Step 1: Preparing the Tub
Start by cleaning your plastic tub thoroughly. Holes at the bottom are crucial for drainage; without them, water can accumulate and rot your potatoes.

Tip: Elevate the tub slightly by placing it on bricks or small stones to improve water drainage and prevent waterlogging.
Once ready, fill the bottom of the tub with a layer of coarse material such as small stones or broken pottery. This further ensures proper drainage and prevents root rot.
Step 2: Choosing the Right Potato Seeds
Not all potatoes are created equal. For giant potatoes, choose large seed potatoes or tubers with multiple “eyes” (small sprouts). These eyes will grow into healthy stems.
- Cutting: If your seed potato is large, cut it into pieces with 2–3 eyes each.
- Healing: Let the cut pieces dry for a day or two before planting to prevent rotting.
Planting high-quality seed potatoes is critical because healthy tubers will directly impact your yield size.
Step 3: Preparing the Soil
Potatoes thrive in loose, nutrient-rich soil. A good mix includes:
- 50% garden soil
- 30% compost (or organic waste like kitchen scraps)
- 20% sand for drainage
Layer the soil mixture in your tub about 6 inches deep. This provides enough room for the first set of roots to grow.

Tip: Avoid using soil that is too compact or clay-heavy—it can hinder root growth and reduce the size of your potatoes.
Step 4: Planting the Potatoes
Place your seed potato pieces in the soil with the eyes facing upward. Cover them with 4–6 inches of soil. Water gently to settle the soil around the seeds.
- Keep the soil moist but not soggy.
- Place the tub in a sunny location that receives at least 6 hours of sunlight daily.
As the plant grows, continue to add more soil gradually—a technique called “hilling.” This encourages the plant to produce more tubers along its stem.
Step 5: Using Free Fertilizer for Maximum Growth
One of the best parts of this method is using natural, free fertilizers:
- Vegetable Scraps: Carrot peels, potato skins, and other vegetable leftovers break down quickly and enrich the soil.
- Coffee Grounds: Add used coffee grounds for nitrogen, which promotes leafy growth.
- Eggshells: Crushed eggshells add calcium, strengthening potato plants and reducing the risk of disease.
Sprinkle these organic ingredients around your plants and gently mix them into the soil. Over time, they will decompose, feeding your potato plants naturally.
Step 6: Watering and Mulching
Potatoes need consistent moisture, especially during tuber formation. Water your tub regularly to keep the soil evenly moist. Avoid overwatering, as this can cause rot.

Mulching with straw or dry leaves helps:
- Retain soil moisture
- Keep soil temperature consistent
- Prevent weed growth
Mulch also makes your potato harvest cleaner, as the tubers remain covered and protected.
Step 7: Managing Pests and Diseases Naturally
Even in a tub, potato plants can attract pests like aphids or develop fungal infections. Use natural methods to protect your crop:
- Neem Oil Spray: Safe and effective against insects.
- Garlic or Chili Spray: Keeps aphids and other pests away.
- Crop Rotation in Tubs: Avoid planting potatoes in the same soil repeatedly—this reduces disease risk.
Keeping your potato garden organic ensures healthier potatoes and a more sustainable growing practice.
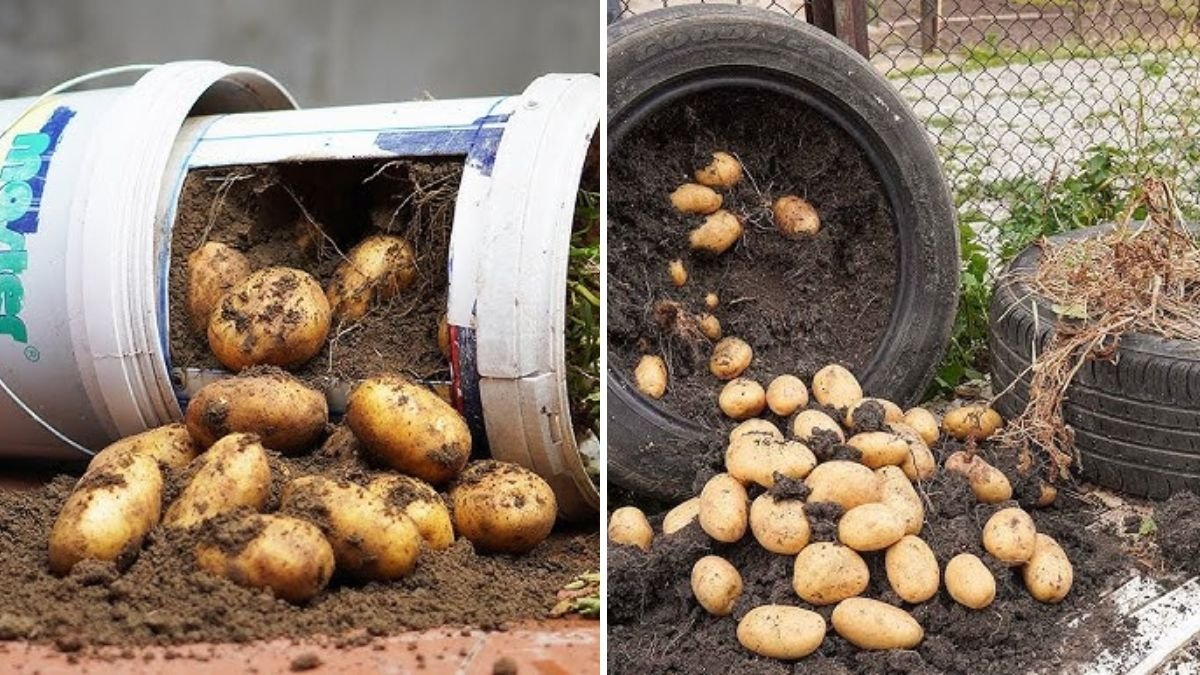
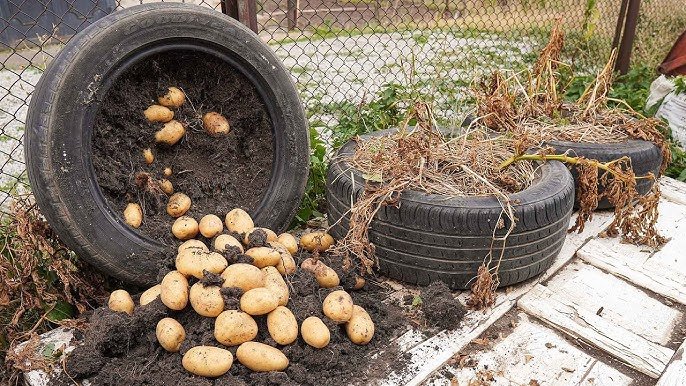
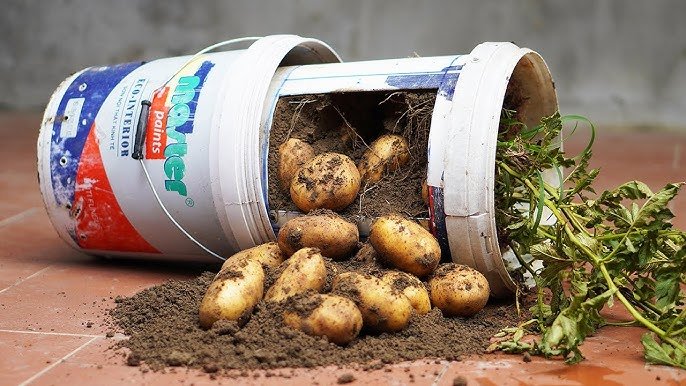
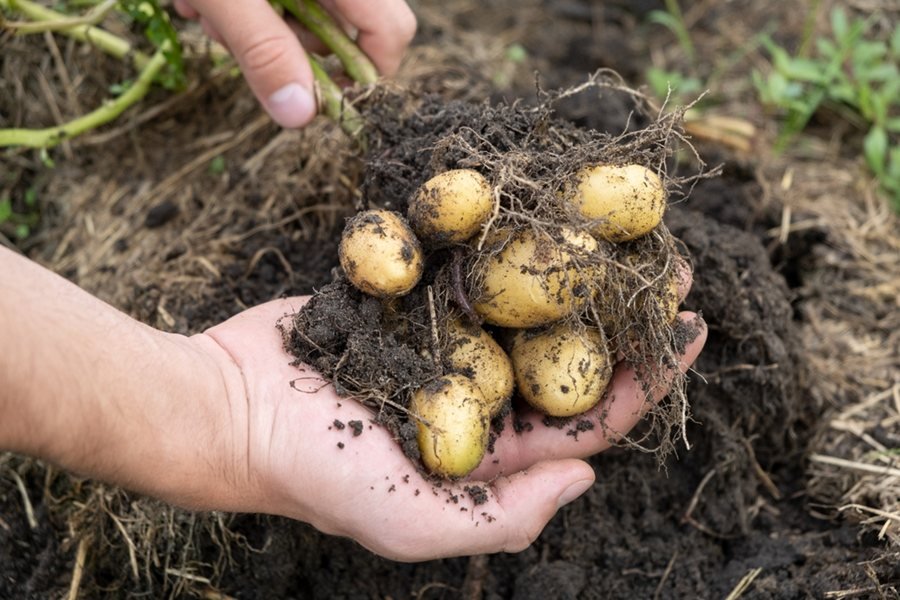
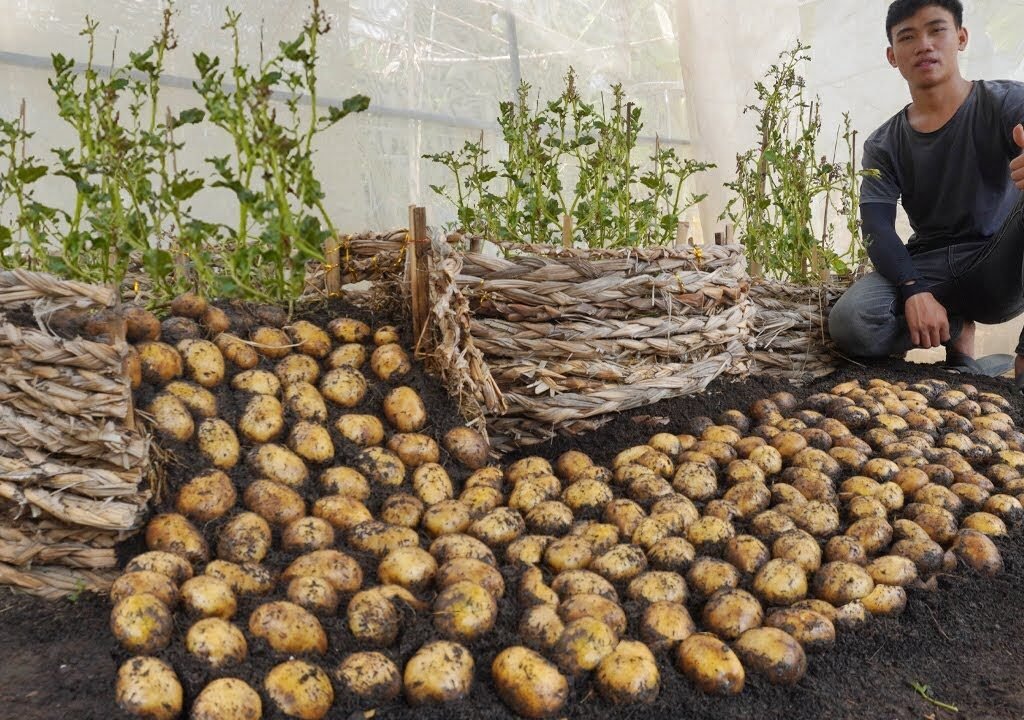
Step 8: Harvesting Giant Potatoes
The most exciting part of growing potatoes is the harvest! Typically, potatoes are ready 10–12 weeks after planting, depending on the variety.
- Stop watering a week or two before harvest to make digging easier.
- Gently lift the tub and tip the soil onto a tarp.
- Collect your giant potatoes carefully—these tub-grown potatoes are often larger than those grown in the ground due to controlled conditions.
Tip: Some gardeners even get multiple harvests from the same tub by leaving smaller tubers in the soil to grow again.

Benefits of Growing Potatoes in a Plastic Tub
- Cost-Effective: No need for expensive fertilizers; organic waste does the job.
- Space-Saving: Perfect for small yards, balconies, or urban gardening.
- High Yield: Hilling and tub confinement often produce larger tubers.
- Pesticide-Free: Organic methods reduce chemical usage.
- Educational and Fun: Great project for kids and gardening enthusiasts.
Tips for Bigger, Healthier Potatoes
- Ensure at least 6 hours of sunlight daily.
- Regularly add organic matter to feed the plants.
- Keep soil loose and well-drained.
- Don’t overcrowd your tub—give each potato enough space.
- Protect plants from extreme heat or frost.
Following these steps consistently will increase your chances of harvesting giant, flavorful potatoes that will impress your friends and family.
Conclusion
Growing giant potatoes in a plastic tub using free fertilizer is a simple, cost-effective, and rewarding method. With proper preparation, care, and patience, anyone can achieve a huge yield of nutrient-rich, chemical-free potatoes. Whether you’re an experienced gardener or just starting, this technique is a fantastic way to enjoy fresh, homegrown produce right from your balcony or backyard.
So, grab a plastic tub, gather your seed potatoes, and start your potato-growing adventure today! Your giant, delicious harvest awaits.
Leave A Comment