How to Adjust Watering Schedules With Seasonal Changes

How to Adjust Watering Schedules With Seasonal Changes

Keeping your plants healthy and thriving throughout the year requires more than just sunlight and soil—it demands an understanding of how to water them correctly. One of the most important yet often overlooked aspects of plant care is adjusting your watering schedule with the changing seasons. Whether you’re growing indoor houseplants, tending to an outdoor garden, or maintaining a lush lawn, understanding seasonal watering needs ensures that your plants stay hydrated without becoming waterlogged.

In this article, we’ll explore how temperature, humidity, and daylight affect water requirements, and how to modify your watering habits throughout the year for healthier, more resilient plants.


Understanding Seasonal Water Needs

Plants’ water needs are closely tied to their growth cycles, which change with the seasons.

  • In spring and summer, most plants enter their active growth phase. This is when they need more water to support new leaves, flowers, and roots.
  • In fall and winter, many plants slow down or go dormant, using less water as their metabolism decreases.

Temperature, sunlight, and humidity levels all influence how quickly soil dries out and how much moisture plants absorb. By tuning into these factors, you can create a flexible watering routine that supports your plants through every seasonal transition.


Spring: Transitioning From Dormancy to Growth

Spring marks the beginning of the active growing season. As days grow longer and temperatures rise, plants wake up from their winter rest, developing new shoots and roots. This is the time to gradually increase watering frequency, but with care.

Tips for Spring Watering:

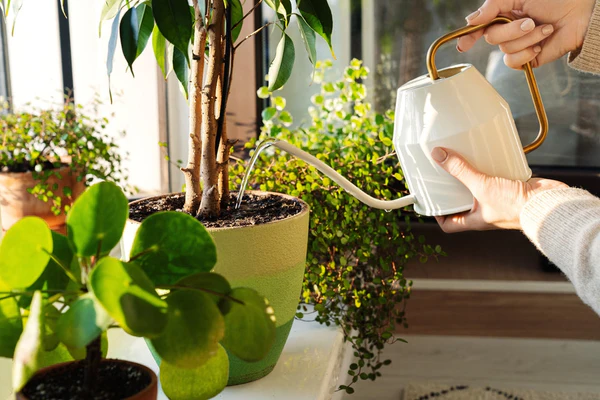
  1. Observe the soil: Start by checking the moisture level before watering. Winter rains or indoor humidity may have kept the soil damp, so water only when the top inch feels dry.
  2. Gradual adjustment: Slowly increase watering as temperatures rise. Avoid shocking the roots by suddenly changing your watering pattern.
  3. Support new growth: Plants in containers or raised beds dry out faster than those in the ground—monitor them closely.
  4. Fertilizer and watering balance: As you reintroduce fertilizers, ensure proper watering so nutrients dissolve evenly and reach the roots effectively.

Pro Tip: Early morning watering is ideal in spring. It allows plants to absorb moisture before the sun gets strong and reduces the risk of fungal issues.


Summer: Meeting Peak Water Demand

Summer is when plants grow rapidly, bloom abundantly, and require the most water. However, high heat can also cause water to evaporate quickly—especially from shallow soils and containers. Managing watering efficiently during this period is crucial to prevent both dehydration and waste.

Tips for Summer Watering:

  1. Water deeply, not frequently: Shallow watering encourages weak root systems. Instead, water deeply once or twice a week to promote deeper root growth.
  2. Time it right: Water early in the morning or late in the evening when temperatures are cooler and evaporation rates are lower.
  3. Mulch for moisture: Apply organic mulch (like straw, compost, or bark) around plants to retain soil moisture and regulate temperature.
  4. Watch for signs of stress: Wilting, yellowing leaves, or dry leaf edges indicate water stress. Adjust your watering schedule immediately if you notice these symptoms.
  5. Container care: Pots heat up and dry out faster than ground soil. Water them daily during extreme heat, but ensure good drainage to prevent root rot.

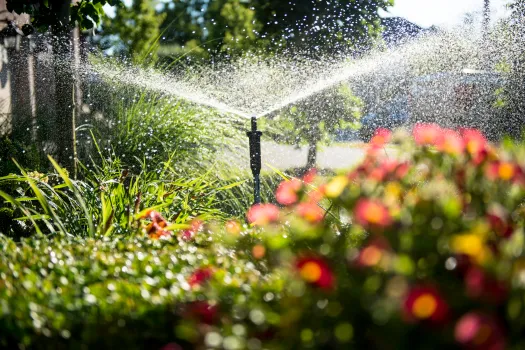
Pro Tip: Drip irrigation systems or soaker hoses are great for summer watering—they deliver moisture directly to roots, minimizing evaporation and conserving water.


Autumn: Reducing Watering as Growth Slows

As autumn arrives, days shorten, and temperatures begin to cool. Plants gradually slow down their growth and prepare for dormancy. This is the time to start reducing watering frequency and helping plants transition naturally.

Tips for Fall Watering:

  1. Monitor the weather: Natural rainfall often increases during fall. Adjust watering based on rainfall amounts to avoid overwatering.
  2. Gradual cutback: Slowly reduce watering sessions instead of stopping abruptly. This helps plants adapt to changing conditions.
  3. Support root development: Deep, infrequent watering helps strengthen root systems before winter dormancy.
  4. Clean up and prepare: Remove fallen leaves and debris from the soil surface to prevent fungal diseases caused by excess moisture.
  5. Consider plant types: Evergreen plants and newly planted trees still need occasional watering through fall since their roots continue to grow until the soil freezes.

Pro Tip: A good deep watering before the ground freezes can help perennials and shrubs store enough moisture for winter survival.


Winter: Conserving Moisture and Preventing Root Rot

Winter brings cold temperatures and reduced sunlight. Most plants enter dormancy, meaning their metabolic activity—and water needs—drop dramatically. Overwatering during this time is one of the most common mistakes gardeners make.

Tips for Winter Watering:

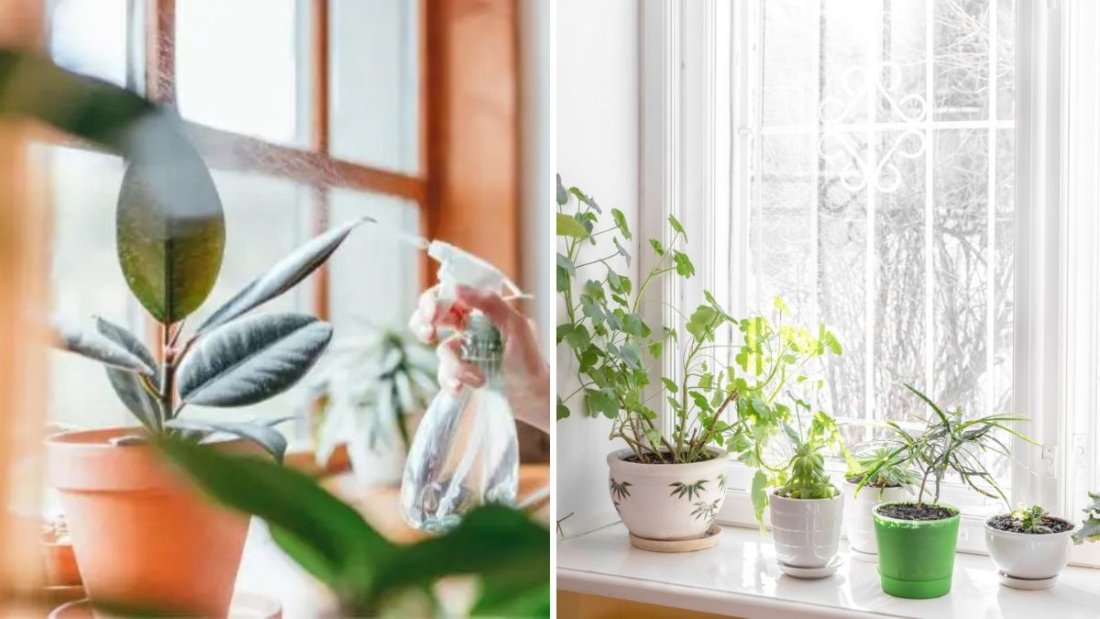
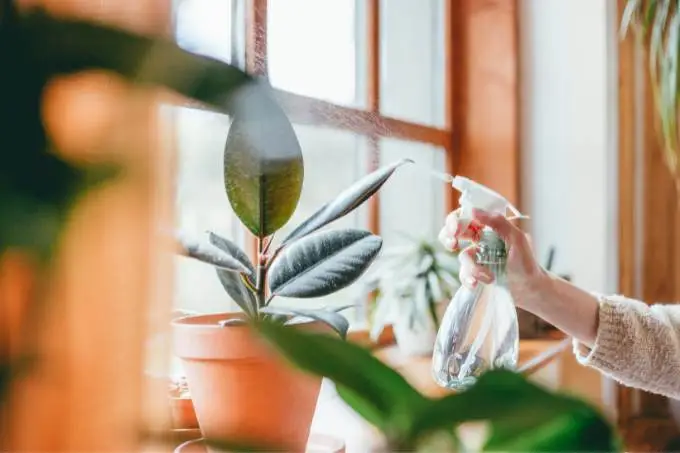
  1. Cut back significantly: Water sparingly and only when the soil is completely dry. Indoor plants, in particular, suffer from root rot if kept too moist during dormancy.
  2. Adjust for indoor heating: Central heating can dry out indoor air, causing faster moisture loss. Mist leaves occasionally or use a humidifier to maintain humidity.
  3. Avoid cold shock: Use room-temperature water for indoor plants to prevent chilling their roots.
  4. Outdoor watering (if applicable): On mild winter days (above freezing), water evergreen plants once a month to prevent dehydration from cold winds.
  5. Drain outdoor systems: Empty hoses, irrigation lines, and watering cans to prevent freezing and cracking.

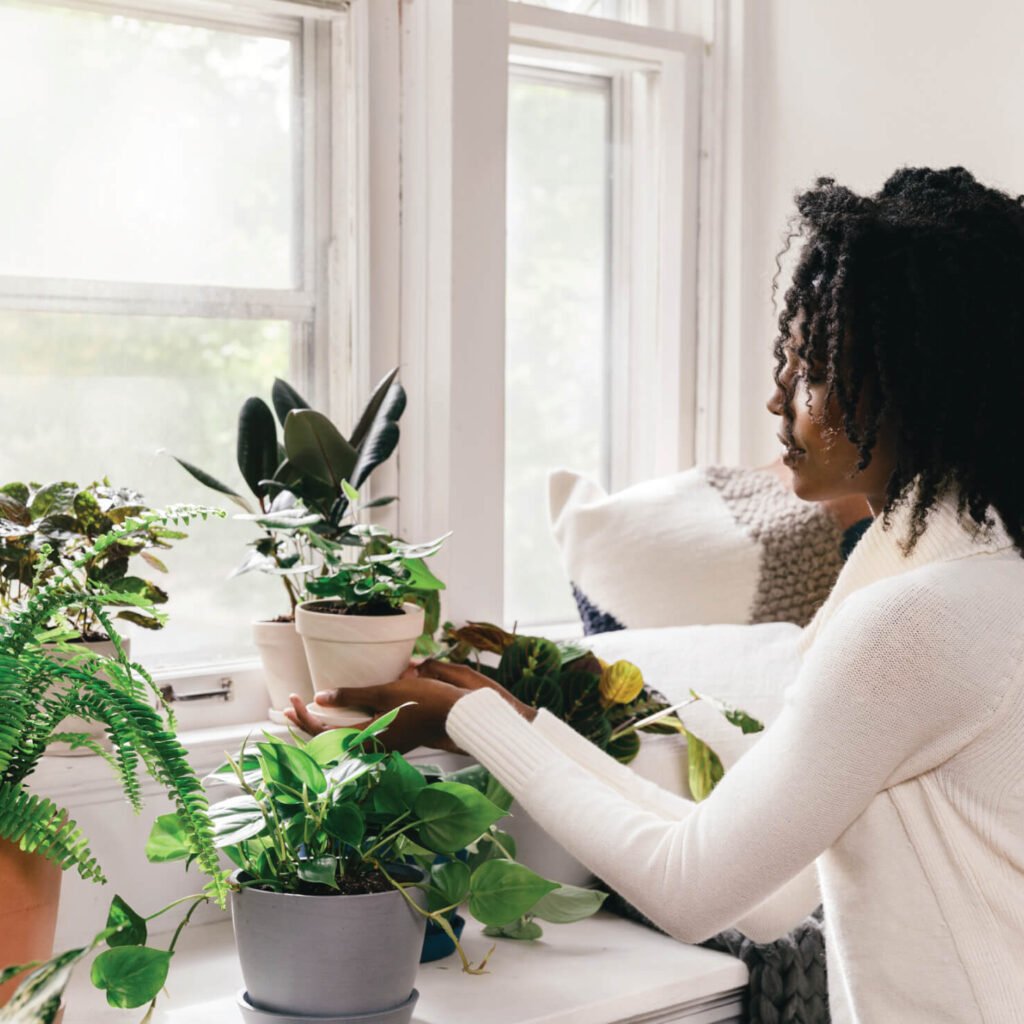
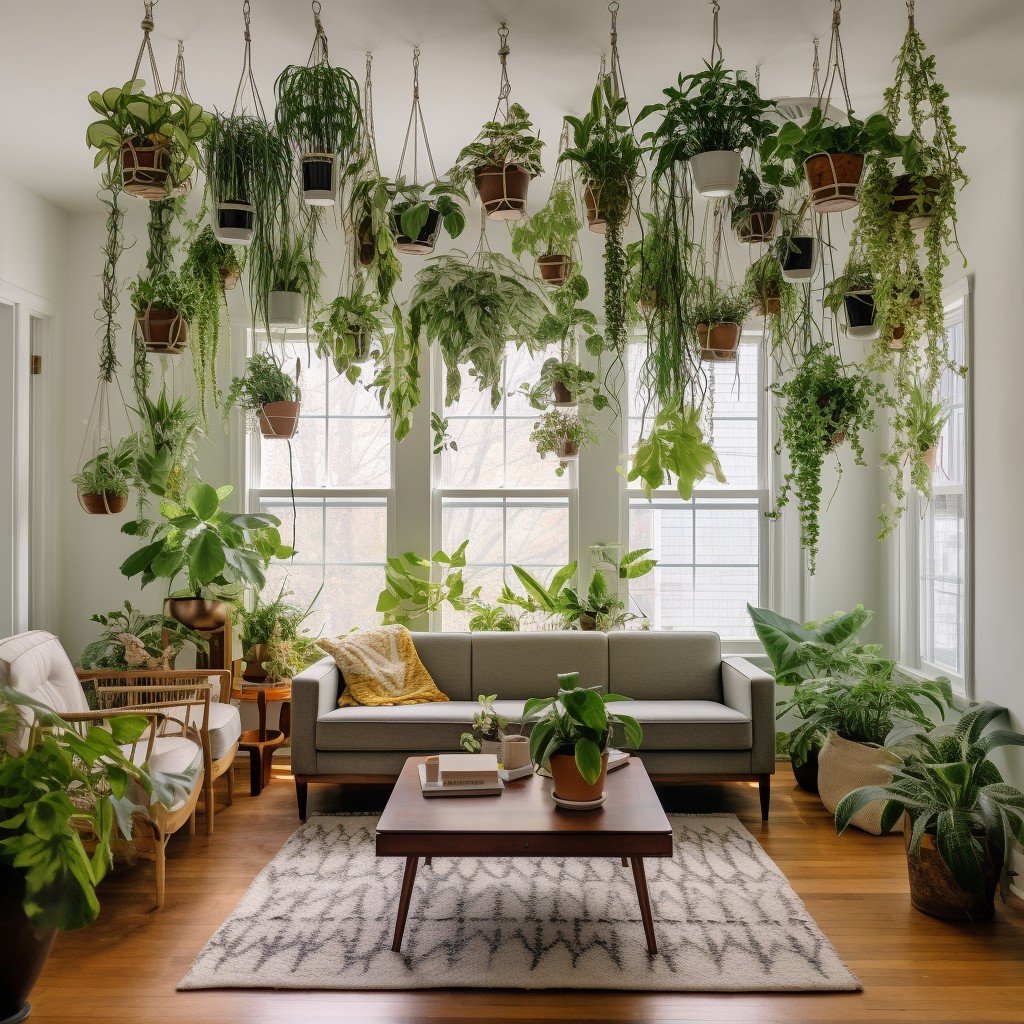
Pro Tip: Grouping indoor plants together creates a mini microclimate that retains moisture and reduces the need for frequent watering.


Key Factors That Influence Seasonal Watering
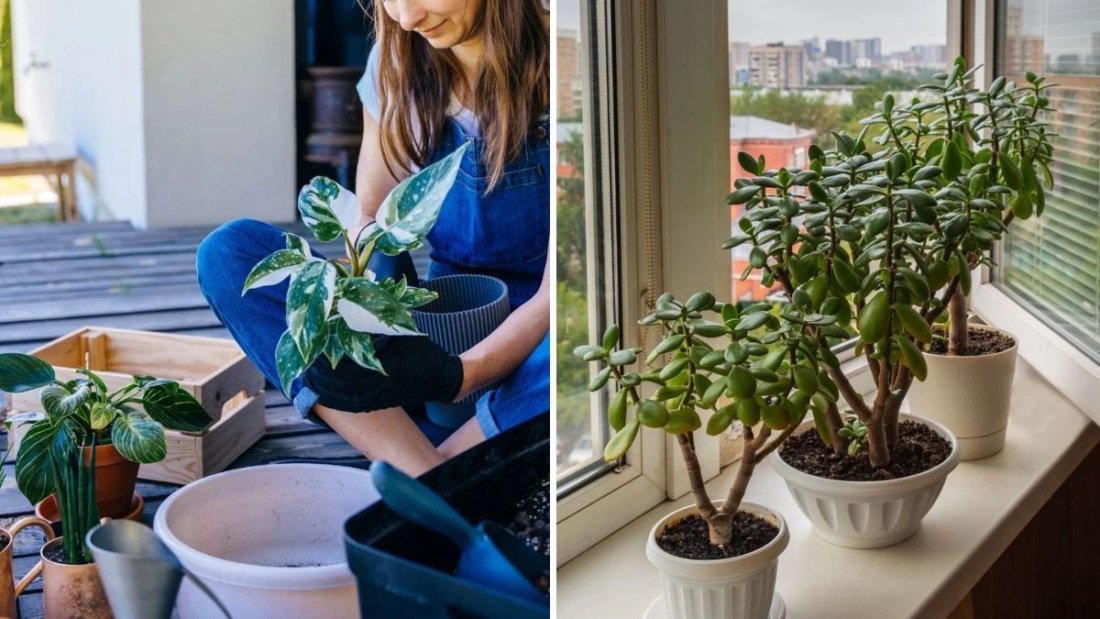
1. Plant Type

Succulents, cacti, and drought-tolerant plants need less frequent watering year-round. Meanwhile, tropicals, ferns, and flowering plants demand consistent moisture—especially in summer.

2. Soil Composition

  • Sandy soil drains quickly and needs more frequent watering.
  • Clay soil retains moisture longer but risks becoming waterlogged.
  • Loamy soil (a mix of sand, silt, and clay) is ideal for balanced moisture retention.

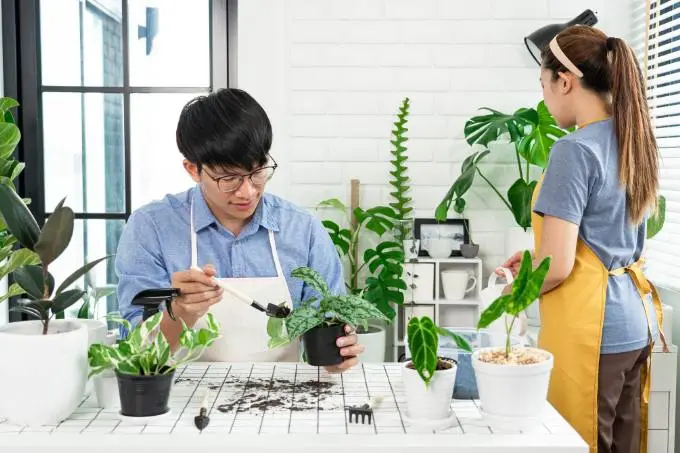
3. Container vs. Ground Planting

Potted plants dry out faster due to restricted soil volume. Outdoor beds, especially those mulched and shaded, retain moisture longer.
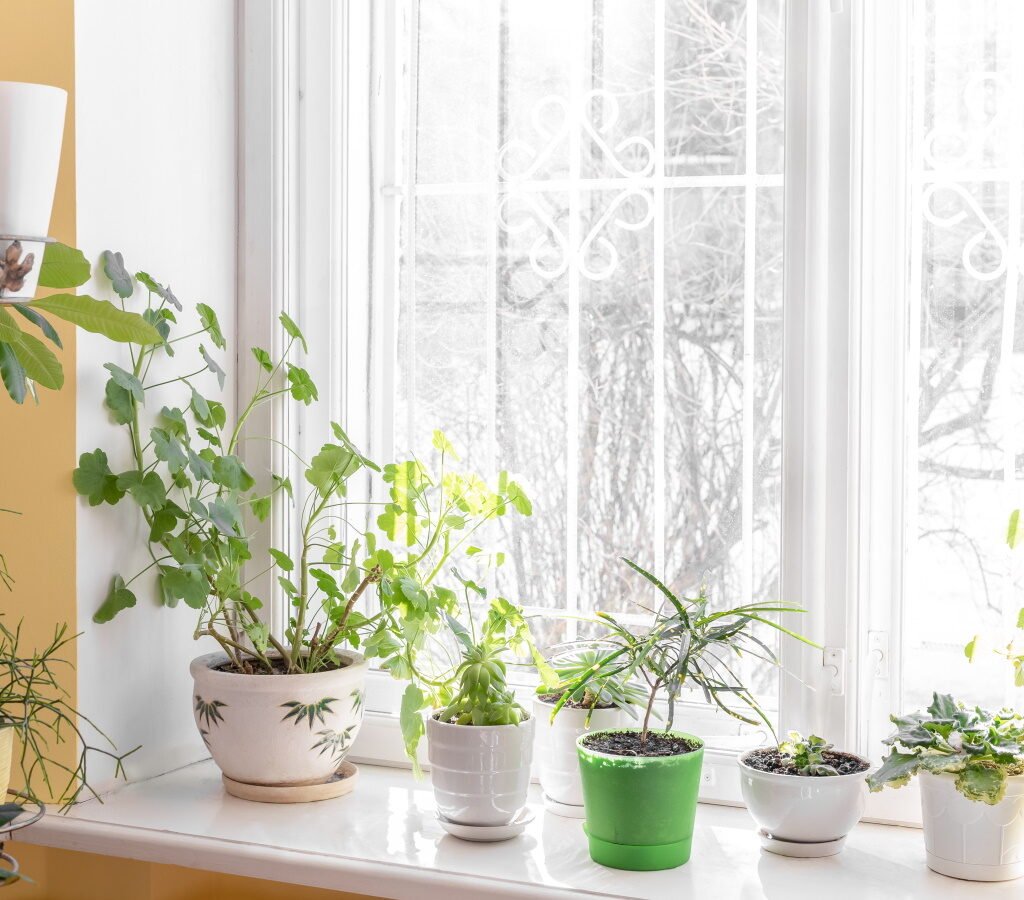
4. Light Exposure

Plants in full sun dry out faster than those in partial shade. Always adjust watering based on exposure level.

5. Humidity and Wind

Dry, windy conditions increase evaporation, while high humidity reduces water loss. Adjust your watering schedule accordingly.


How to Tell When Your Plants Need Water

Even with seasonal guidelines, observation is key. Every plant and environment is unique. Use these indicators to gauge watering needs:

  • Soil test: Stick your finger 1–2 inches into the soil; if it feels dry, it’s time to water.
  • Leaf condition: Droopy, dull, or crispy leaves signal dehydration; yellowing or mushy leaves suggest overwatering.
  • Weight test (for pots): Lift the pot—if it feels light, the soil is likely dry.

Investing in a soil moisture meter can provide accurate readings, helping you water with confidence.


Creating a Year-Round Watering Plan

  1. Spring: Gradually increase watering as plants awaken.
  2. Summer: Maintain deep, consistent watering, especially during heatwaves.
  3. Fall: Reduce frequency as temperatures cool.
  4. Winter: Water minimally, focusing on preventing dryness rather than maintaining lush growth.

Keeping a watering journal can help track what works best for your specific plants and climate. Note weather changes, plant conditions, and watering dates to fine-tune your schedule each year.


Conclusion

Adjusting your watering schedule with seasonal changes is not just about following a calendar—it’s about understanding your plants’ natural rhythms and the environment they grow in. By observing the soil, weather, and plant behavior, you can create a dynamic, responsive watering routine that supports healthy growth year-round.

From the lush vibrancy of summer to the quiet dormancy of winter, plants rely on you to deliver just the right amount of water at the right time. Mastering this balance doesn’t just conserve resources—it builds a thriving, resilient garden that flourishes through every season.

How to Protect Indoor Plants During Hot Summer Months

How to Protect Indoor Plants During Hot Summer Months

When the scorching summer sun hits, humans aren’t the only ones who feel the heat—your indoor plants do too. While most houseplants enjoy warmth and bright light, excessive heat and intense sunlight can quickly turn your lush green oasis into a wilted, stressed jungle. From yellowing leaves to dry soil and scorched foliage, summer can test even the healthiest plants.

Fortunately, with a few simple adjustments, you can help your indoor plants stay vibrant, hydrated, and happy all season long. Here’s your complete guide on how to protect indoor plants during hot summer months, covering everything from temperature control to humidity management and smart watering strategies.


1. Manage Temperature and Air Circulation

Indoor temperatures can rise dramatically during summer—especially in rooms with large windows or poor ventilation. Most houseplants thrive in temperatures between 65°F and 80°F (18°C–27°C), but when the mercury climbs higher, their growth can slow, and leaves may start to curl or brown.

How to keep your plants cool:

  • Avoid direct airflow from AC vents or fans. While good air circulation helps prevent mold and pests, cold or hot drafts can shock plants. Keep them several feet away from vents.
  • Use curtains or blinds during peak sun hours. Sheer curtains can diffuse harsh light and prevent leaf burn without depriving plants of brightness.
  • Open windows strategically. In the early morning or evening, open windows to allow cooler air to circulate. Just ensure there are no sudden cold drafts.
  • Move plants away from heat-trapping areas. Windowsills, metal shelves, or near electronics can get hotter than you think. Place plants a few feet back from these hot zones.

If you notice leaves turning crispy or curling inward, it’s a clear sign your plants are overheating. Relocate them to a slightly cooler, shadier spot.


2. Adjust Your Watering Routine

Summer heat can cause soil to dry out much faster than usual, leading to dehydration. However, overwatering is just as risky—especially when humidity is high. The goal is to maintain consistent moisture without waterlogging the roots.

Smart watering techniques for summer:

  • Check soil moisture daily. Stick your finger one inch into the soil—if it feels dry, water the plant thoroughly until water drains from the bottom.
  • Water early in the morning. This gives plants time to absorb moisture before the midday heat causes rapid evaporation.
  • Avoid watering at night. Cooler nighttime temperatures can leave the soil soggy for too long, increasing the risk of root rot.
  • Use self-watering planters or saucers. They provide steady moisture without over-saturation, perfect for hot days when you’re away.
  • Mist lightly—but carefully. A fine mist in the morning can refresh leaves, but avoid overdoing it, especially on fuzzy or mildew-prone plants like African violets.

Pro tip: Always empty excess water from saucers after 30 minutes to prevent stagnant moisture, which can lead to root rot and attract gnats.


3. Protect from Intense Sunlight

Summer sunlight, especially from south- or west-facing windows, can become too harsh for most indoor plants. Direct sun can scorch leaves, causing faded patches or crispy edges.

How to give your plants the right light:

  • Use sheer curtains or blinds. They filter intense sunlight, creating gentle, diffused light ideal for houseplants.
  • Relocate sensitive plants. Move shade-loving varieties like ferns, calatheas, and peace lilies away from bright windows.
  • Rotate plants weekly. This prevents one side from getting too much light and promotes even growth.
  • Create natural shade. Use taller plants like fiddle-leaf figs or monsteras to shield smaller ones from direct rays.
  • Watch for sunburn. Yellow or bleached patches on leaves indicate light stress—move affected plants immediately.

Remember, even sun-loving plants like succulents or cacti can get sunburned if suddenly exposed to stronger summer rays. Always transition plants gradually when changing their light conditions.


4. Increase Humidity When Air Gets Dry

Even though summer can be humid outdoors, indoor air often becomes dry due to constant air conditioning. Many tropical houseplants—such as pothos, philodendrons, and calatheas—suffer when humidity drops below 40%.

Easy ways to boost humidity indoors:

  • Group plants together. Plants release moisture through transpiration, so clustering them helps create a mini humid microclimate.
  • Use a humidifier. A small cool-mist humidifier near your plant area can maintain optimal humidity levels (45–60%).
  • Add pebble trays. Place a shallow tray of water and pebbles under your plants. As water evaporates, it gently increases humidity around them.
  • Mist gently in the morning. Light misting can help in dry areas, but avoid wetting leaves too often—especially in the evening.
  • Add water bowls near AC units. This can help counteract drying effects caused by constant airflow.

Pro tip: Use a hygrometer to monitor humidity levels. If leaf tips turn brown or edges curl, your air is likely too dry.


5. Choose the Right Containers and Soil

The type of pot and soil you use can make a big difference in how your plants handle summer heat.

Container tips:

  • Use breathable pots. Terracotta pots are great for summer since they allow air circulation and help prevent root rot.
  • Avoid dark-colored pots. They absorb more heat, which can overheat the roots. Choose light-colored or ceramic containers instead.
  • Ensure good drainage. Always use pots with holes, and never let plants sit in standing water.

Soil care:

  • Use well-draining soil mixes. For most houseplants, a blend of potting soil, perlite, and coco coir helps retain moisture without becoming soggy.
  • Mulch the soil surface. Adding a layer of moss, pebbles, or coconut husk on top of the soil can help reduce evaporation.
  • Repot if needed. If roots are circling the pot or water runs straight through the soil, it’s time for a repot—ideally in early summer before the peak heat.

6. Feed Wisely—But Don’t Overdo It

While plants grow faster in warm weather, too much fertilizer can do more harm than good in the heat. Overfeeding during high temperatures can cause root burn or nutrient stress.

Summer fertilizing guide:

  • Use a balanced, water-soluble fertilizer (10-10-10 or 20-20-20) diluted to half strength.
  • Feed every 4–6 weeks during active growth.
  • Avoid fertilizing wilted or heat-stressed plants. Wait until they recover before feeding.
  • For slow-release fertilizers, apply sparingly—heat speeds up nutrient release, which can overwhelm roots.

If leaves start to turn brown or develop crusty white residue on the soil, it may be a sign of fertilizer buildup—flush the soil with clean water to remove excess salts.


7. Keep an Eye Out for Pests

Warm, humid summer conditions are perfect breeding grounds for spider mites, aphids, whiteflies, and fungus gnats. Stressed plants are more vulnerable, so prevention is key.

Pest prevention and control:

  • Inspect leaves weekly, especially undersides.
  • Wipe foliage gently with a damp cloth to remove dust and pests.
  • Use natural repellents like neem oil, insecticidal soap, or diluted dish soap spray (1 teaspoon per liter of water).
  • Avoid overcrowding plants—good airflow keeps pests away.
  • If you bring plants outdoors for summer, isolate them for a few days when bringing them back in to avoid spreading pests indoors.

8. Give Plants a Mid-Summer Refresh

By mid-summer, your plants might look a little tired from the constant heat. Giving them a small refresh can help them bounce back stronger.

How to refresh summer-stressed plants:

  • Trim dead or yellowing leaves. This helps plants focus energy on healthy growth.
  • Clean dusty leaves. Dust buildup reduces photosynthesis—wipe leaves gently with a soft, damp cloth.
  • Reposition plants. Move them to slightly cooler or shadier spots if the heat intensifies.
  • Top up soil. Add a fresh layer of potting mix or compost to replenish nutrients.

Final Thoughts

Summer brings long days and bright light—ideal for growth—but it also challenges indoor plants with heat, dryness, and intense sunlight. With careful observation and a few smart adjustments, you can keep your plants flourishing all season long.

Remember the golden rule: watch your plants closely. Their leaves, soil, and overall posture will tell you what they need. When in doubt, opt for gentler light, moderate water, and stable temperatures.

By managing heat stress, maintaining moisture, and shielding from harsh rays, you’ll ensure your indoor garden not only survives summer—but thrives beautifully until autumn arrives.

5 Tips for Caring for Plants During Winter Heating Season

5 Tips for Caring for Plants During Winter Heating Season

When winter arrives, your indoor plants face one of their toughest challenges of the year—not just from the cold outside, but from the dry, warm air indoors caused by home heating systems. While these systems keep you cozy, they can wreak havoc on your plants by sapping moisture from the air, drying out soil faster, and creating uneven temperature zones.

Fortunately, with the right care, your green companions can thrive even during the harshest winter months. Below, we’ll explore five essential tips for caring for plants during the winter heating season, so you can keep your indoor jungle vibrant, healthy, and stress-free all winter long.


1. Combat Dry Air with Proper Humidity

The biggest threat to indoor plants in winter isn’t the cold—it’s dry air. Most heating systems drastically reduce humidity levels, sometimes dropping them below 30%, while many houseplants—especially tropical species—prefer humidity levels between 40–60%.

How to maintain humidity for your plants:

  • Use a humidifier: The easiest and most effective way to restore moisture in the air. Place a small cool-mist humidifier near your plants and set it to maintain about 45–50% humidity.
  • Group plants together: Plants naturally release moisture through transpiration. Grouping them helps create a mini microclimate with higher local humidity.
  • Pebble trays: Fill shallow trays with water and pebbles, and place pots on top (without letting them sit directly in the water). As the water evaporates, it adds gentle moisture to the surrounding air.
  • Misting (use sparingly): Lightly misting leaves can help temporarily, but avoid overdoing it. Excess moisture on leaves during cool months can lead to fungal issues.

Bonus tip: Use a hygrometer to track indoor humidity levels. If you notice crispy leaf edges or curling leaves, your plants are begging for more moisture.


2. Watch Out for Temperature Fluctuations

While heaters keep rooms warm, they often cause inconsistent temperature zones—warm near vents and cold near windows. Sudden shifts can shock plants, leading to leaf drop or stunted growth.

Ideal indoor temperature range:
Most houseplants thrive between 60–75°F (16–24°C) during the day and can tolerate slightly cooler temperatures (55–60°F or 13–16°C) at night.

How to protect your plants:

  • Keep plants away from heating vents and radiators. The dry, hot air can scorch foliage or dry out the soil too quickly.
  • Avoid cold drafts. Move plants away from windows or doors that are frequently opened during chilly weather.
  • Use insulating curtains or blinds. At night, close them to reduce heat loss near windows where plants are placed.
  • Rotate plants regularly. This ensures all sides get even light and temperature exposure, preventing uneven growth.

If you notice leaves turning brown at the edges or falling off suddenly, it might be due to temperature stress. Moving the plant a few feet away from its current spot can often fix the issue.


3. Adjust Watering Habits for the Season

One of the biggest mistakes plant owners make in winter is overwatering. Since plants grow more slowly during colder months, their water needs drop significantly. Meanwhile, dry indoor air may make it seem like they’re thirsty when they’re not.

Smart watering strategies for winter:

  • Check the soil before watering. Stick your finger about an inch into the soil—if it feels dry at that depth, it’s time to water. If it’s still moist, wait a few more days.
  • Use room-temperature water. Cold tap water can shock plant roots, especially in tropical species. Let it sit for a few hours before watering.
  • Ensure proper drainage. Empty saucers after watering to prevent root rot.
  • Water in the morning. This allows excess moisture to evaporate during the day, reducing the chance of mold or fungus.

Remember: Many plants, such as succulents, cacti, and snake plants, need very little water in winter—sometimes as little as once every 3–4 weeks. On the other hand, ferns and calatheas may need slightly more frequent attention due to their love of humidity.


4. Maximize Winter Light

Winter days are shorter, and sunlight intensity drops dramatically—especially in northern regions. Since plants rely on light for photosynthesis, reduced light can slow their growth and cause legginess or yellowing leaves.

How to boost light levels for your plants:

  • Move plants closer to windows. East- and south-facing windows offer the best light during winter. However, avoid direct exposure to cold glass panes—keep plants about 6–12 inches away.
  • Clean your windows. Dust and grime can block up to 30% of available light. A quick wipe can make a huge difference.
  • Rotate plants weekly. This helps ensure even growth and prevents leaning toward the light source.
  • Supplement with grow lights. If your space doesn’t get much natural light, use full-spectrum LED grow lights for 10–12 hours a day. Position them about 12–18 inches above the plants.

If your plant’s new leaves appear smaller or pale, or if stems start stretching toward the light, it’s a clear sign they need more light exposure.


5. Reduce Fertilizing and Pruning—but Keep an Eye on Pests

During winter, most plants enter a semi-dormant phase where growth slows or pauses altogether. As a result, they don’t need as much fertilizer or pruning as in the growing season.

Fertilizer tips:

  • Stop feeding most plants from late fall through early spring. Over-fertilizing during dormancy can cause salt buildup in the soil, burning the roots.
  • Resume light feeding in late February or March when new growth appears.
  • For plants that continue to grow in winter (like herbs under grow lights), dilute fertilizer to half strength.

Pruning tips:

  • Only remove dead or damaged leaves. Avoid heavy pruning—save that for spring.
  • Use clean, sharp scissors to prevent disease spread.

Watch for winter pests:
Indoor conditions—warm air, dry leaves, and limited airflow—create ideal conditions for pests like spider mites, aphids, and fungus gnats.

To prevent infestations:

  • Wipe leaves weekly with a damp cloth.
  • Inspect new plants carefully before introducing them indoors.
  • If pests appear, spray with neem oil or a mild soap-water mixture (1 teaspoon dish soap per liter of water).

Bonus Tip: Give Plants a Midwinter Refresh

Even with the best care, winter dust and heating residue can build up on leaves, blocking light absorption. Once a month, give your plants a gentle refresh:

  • Shower them lightly: Place them in the shower and rinse with lukewarm water to remove dust.
  • Wipe leaves individually: For large plants, use a soft damp cloth instead.
  • Check roots and repot if necessary: If roots are tightly packed or circling the pot, consider a slightly larger container when spring arrives.

Final Thoughts

The winter heating season doesn’t have to mean trouble for your plants. By managing humidity, temperature, watering, light, and feeding, you can create an indoor environment that keeps them thriving until spring returns.

Remember: plants don’t need pampering—they need balance. Keep the air comfortably humid, provide gentle light, and resist the urge to overwater or overfeed. With a few mindful adjustments, your indoor garden will not only survive the winter—it will emerge even healthier when the growing season begins again.

Healthy plants make for a happier home, especially when they stay green and strong despite the chill outside. Follow these five tips, and your leafy friends will thank you with vibrant growth and lush beauty all year round.

How to Transition Indoor Plants to Outdoor Life in Spring

How to Transition Indoor Plants to Outdoor Life in Spring

As spring arrives and the days grow longer, many gardeners eagerly anticipate giving their houseplants some fresh air and sunshine. Transitioning indoor plants outdoors can greatly boost their growth and overall health—but only if done carefully. Sudden exposure to direct sunlight, wind, or temperature fluctuations can shock or even damage your plants. Learning the right steps for acclimating your indoor plants will ensure they thrive in their new outdoor environment.

Here’s a detailed guide on how to safely transition your indoor plants to outdoor life in spring so they can enjoy the best of both worlds.


1. Why Move Indoor Plants Outdoors in Spring?

Bringing indoor plants outside offers numerous benefits:

  • Increased sunlight: Outdoor light intensity is far greater than indoor lighting, helping plants grow stronger and develop richer colors.
  • Better air circulation: Fresh air reduces mold and mildew risks and encourages sturdier stems.
  • Pollination and natural feeding: Exposure to pollinators and rainwater introduces nutrients that help plants flourish.

However, these advantages only apply if you gradually acclimate your plants to prevent sunburn, stress, or dehydration.


2. Choose the Right Time to Begin

Timing is everything when it comes to moving plants outdoors.

  • Wait until the last frost date has passed. Most houseplants are tropical and can’t handle cold. Check your local frost dates and wait until night temperatures consistently stay above 55°F (13°C).
  • Spring is ideal, usually between late March and early May depending on your climate.
  • Start on a calm, overcast day to reduce sun stress.

If you rush this process, your plants may suffer shock from sudden temperature or humidity changes.


3. Prepare Your Plants Before the Move

Before you bring your plants outside, take a few steps to ensure they’re ready for the transition:

  • Prune and clean: Remove dead or damaged leaves to encourage new growth and prevent pests from hitching a ride.
  • Repot if needed: Spring is the perfect time to refresh soil or move plants into slightly larger pots.
  • Water thoroughly: Hydrated plants handle stress better, but don’t let them sit in soggy soil.
  • Inspect for pests: Check leaves, stems, and soil for insects before taking them outside to avoid infestations.

This prep work ensures your plants start strong and healthy in their outdoor environment.


4. Start Slowly — The Hardening-Off Process

Transitioning plants outdoors requires gradual acclimation, also known as hardening off.

Here’s a simple step-by-step schedule:

Day 1–2: Place plants in a shaded, sheltered area outdoors for 2–3 hours, then bring them back inside.
Day 3–5: Increase exposure to 4–5 hours, still avoiding direct sun.
Day 6–8: Let them stay outside all day in partial sunlight, but bring them indoors at night.
Day 9–10: Leave them outside overnight if temperatures remain above 55°F (13°C).

This gradual exposure helps plants adjust to wind, sunlight, and fluctuating humidity, building their resilience before they stay outdoors full-time.


5. Choose the Perfect Spot Outdoors

Each plant has its own preferences when it comes to sunlight and humidity.

  • Bright, indirect light: Ferns, pothos, philodendrons, and peace lilies thrive under trees, porches, or shaded patios.
  • Partial sun: Succulents, geraniums, and herbs love several hours of gentle morning sun.
  • Full sun: Cacti, hibiscus, and bougainvillea do best in bright, sunny locations—but introduce them gradually to prevent scorching.

Tip: Avoid placing plants near reflective surfaces (like white walls or glass) where heat can intensify and damage foliage.


6. Protect Against Wind and Pests

Outdoor exposure means plants must face elements they’re not used to indoors.

  • Wind: Use fences, trellises, or garden furniture as windbreaks. Strong gusts can snap delicate stems or tip over pots.
  • Pests: Outdoor pests like aphids, spider mites, and snails can find your plants appealing.
    • Spray leaves with neem oil or a mild soap-water solution weekly.
    • Place sticky traps nearby to monitor infestations.
  • Animals: If you have pets or wildlife around, elevate pots or use mesh covers to protect your plants.

7. Adjust Watering and Feeding Habits

Outdoor plants face more variable conditions—sunlight, wind, and rain all affect how quickly soil dries out.

  • Check moisture frequently: Wind and heat can dry pots faster than indoor air. Stick your finger 1–2 inches into the soil; water only when it feels dry.
  • Morning watering is best: It gives plants time to absorb moisture before the heat of the day.
  • Fertilize lightly: Outdoor growth accelerates in sunlight, but overfeeding can burn roots. Use a balanced liquid fertilizer every 2–3 weeks.

Remember that rainwater can help naturally feed your plants, so avoid overwatering after a shower.


8. Watch for Signs of Stress

Even with gradual adjustment, plants might show temporary stress symptoms such as:

  • Drooping or curling leaves (from sun exposure or wind)
  • Yellowing foliage (from overwatering or shock)
  • Leaf burn or bleaching (too much sun, too soon)

If this happens, move the plant back to a shaded spot and reduce outdoor time for a few days. Most will recover quickly once they adapt.


9. Maintain Consistency Once Established

After a week or two of acclimation, your plants should be comfortable outdoors.

To keep them thriving:

  • Rotate pots occasionally to ensure even growth.
  • Continue pest checks weekly.
  • Reapply mulch or topsoil to retain moisture and nutrients.

For climbing or vining plants, provide supports or trellises as they grow.


10. Bringing Them Back Indoors (Later in the Year)

When autumn approaches, reverse the process. Before frost returns:

  • Begin bringing plants in for a few hours daily to re-adjust them to indoor conditions.
  • Prune and clean before moving them back inside.
  • Check thoroughly for bugs or fungus to prevent indoor infestations.

This ensures your plants stay healthy and ready to repeat the cycle next spring.


Final Thoughts

Transitioning indoor plants outdoors in spring is one of the most rewarding gardening routines. With patience, planning, and care, your plants will thrive in natural sunlight and fresh air—rewarding you with vibrant growth, lush foliage, and even blooms you wouldn’t see indoors.

By following a gradual hardening-off process, providing protection, and observing their needs closely, you’ll help your houseplants adapt smoothly to the great outdoors—and return indoors healthier than ever when the seasons change again.

How to Overwinter Houseplants and Keep Them Thriving

How to Overwinter Houseplants and Keep Them Thriving

As the chill of winter sets in, many gardeners face the challenge of protecting their beloved houseplants from the cold, dry air, and limited sunlight. Overwintering — the process of keeping plants alive and healthy through the winter months — is essential for ensuring that your green companions thrive year-round. Whether you’re dealing with tropical plants, succulents, or herbs, learning how to overwinter them properly will help maintain their vigor and prevent common seasonal issues like leaf drop, pest infestations, or dormancy-related stress.

This article provides a complete, step-by-step guide to overwintering houseplants, covering preparation, indoor care, light and humidity management, watering, pest control, and reintroduction to outdoor conditions once spring returns.


Why Overwintering Matters

Overwintering allows your houseplants to:

  1. Survive Harsh Temperatures: Many popular indoor species originate from warm climates and can’t withstand freezing conditions.
  2. Maintain Growth Cycles: Proper care ensures that plants remain healthy and resume active growth in spring.
  3. Reduce Costs: By protecting existing plants, you avoid repurchasing new ones each year.
  4. Preserve Mature Plants: Older plants often bloom better and become more resilient over time.
  5. Encourage Sustainability: Extending the lifespan of plants minimizes waste and supports eco-friendly gardening.

Step 1: Evaluate and Select Plants for Overwintering

Before bringing your plants indoors, assess which ones need protection.

Plants That Require Overwintering:

  • Tropical plants: Like peace lilies, pothos, and philodendrons.
  • Tender perennials: Such as geraniums, coleus, and begonias.
  • Citrus and herb plants: Like lemon trees, basil, and rosemary.
  • Succulents and cacti: Require minimal care but must be kept frost-free.

Plants That Can Stay Outdoors:

  • Hardy perennials, shrubs, or evergreens suited to your local climate.

Tip: Prioritize the healthiest plants, as weak or diseased ones are less likely to survive indoors.


Step 2: Inspect for Pests and Diseases

Bringing plants indoors without inspection can introduce unwanted pests that thrive in warm, enclosed spaces.

Steps for Inspection:

  1. Check Leaves and Stems: Look for aphids, spider mites, mealybugs, and scale insects.
  2. Examine Soil Surface: Fungus gnats or larvae may hide in moist soil.
  3. Rinse Plants: Gently spray foliage with lukewarm water to dislodge pests.
  4. Treat if Needed: Use insecticidal soap or neem oil to remove infestations before moving indoors.

Tip: Quarantine new or treated plants for 7–10 days to ensure pests are gone before joining your main collection.


Step 3: Repot or Prune Before Moving Indoors

Overcrowded roots or excessive foliage can hinder plant health during the low-light winter months.

Repotting Guidelines:

  • When to Repot: Only if roots are tightly packed or protruding from the pot.
  • Soil Mix: Use fresh, well-draining potting mix to prevent compacted soil.
  • Drainage: Ensure pots have drainage holes to avoid root rot.

Pruning Tips:

  • Remove dead, yellowing, or damaged leaves.
  • Trim leggy stems to encourage bushier growth.
  • Avoid heavy pruning just before dormancy — it can stress the plant.

Tip: Light pruning after bringing plants indoors helps maintain shape and reduces pest hiding spots.


Step 4: Adjust Indoor Lighting

Indoor light levels drop dramatically during winter, especially in northern climates. Since most plants rely on 12–16 hours of light, adjusting placement and supplementing light is crucial.

Best Practices:

  • South or West-Facing Windows: Provide the most natural sunlight.
  • Rotate Plants: Turn pots weekly so all sides receive even light.
  • Use Grow Lights: LED or fluorescent grow lights can mimic daylight. Place lights 6–12 inches above plants for 12–14 hours daily.

Tip: Clean window panes regularly to maximize natural light exposure.


Step 5: Regulate Temperature and Humidity

Winter air indoors tends to be dry and fluctuates due to heating systems. Maintaining consistent conditions helps plants avoid stress.

Temperature Guidelines:

  • Ideal range: 60–75°F (15–24°C).
  • Avoid cold drafts near windows or hot air from vents and radiators.
  • Group plants together to create microclimates with slightly higher humidity.

Humidity Management:

  • Use a humidifier: Ideal for tropical plants.
  • Pebble Trays: Place pots on trays filled with pebbles and water; evaporation increases local humidity.
  • Misting: Lightly mist leaves in the morning to add moisture (avoid for fuzzy-leaved plants like African violets).

Tip: Monitor with a hygrometer — aim for 40–60% humidity for most houseplants.


Step 6: Adjust Watering and Fertilizing Routines

During winter, most plants enter a semi-dormant state and require less water and nutrients. Overwatering is one of the most common causes of plant decline during overwintering.

Watering:

  • Check Soil Moisture: Water only when the top 1–2 inches of soil are dry.
  • Reduce Frequency: Water less often but thoroughly when needed.
  • Use Room-Temperature Water: Cold water can shock roots.

Fertilizing:

  • Suspend or reduce feeding during winter dormancy.
  • Resume fertilizing lightly in early spring when new growth appears.

Tip: Always empty excess water from saucers to prevent root rot.


Step 7: Provide Air Circulation

Good air circulation prevents mold, mildew, and pest infestations.

Strategies:

  • Space plants apart to allow airflow between leaves.
  • Use a small fan on a low setting for rooms with stagnant air.
  • Avoid overcrowding plants on one windowsill.

Tip: Never place fans directly blowing onto plants; indirect airflow works best.


Step 8: Monitor for Winter Pests

Even indoors, winter conditions can attract pests that thrive in warm, dry air.

Common Indoor Pests:

  • Spider mites: Fine webbing under leaves.
  • Fungus gnats: Small black flies near soil surface.
  • Mealybugs: Cotton-like clusters on stems or leaves.

Prevention and Treatment:

  • Keep humidity levels balanced to deter spider mites.
  • Allow soil to dry slightly between waterings to prevent fungus gnats.
  • Wipe leaves regularly with a damp cloth or neem oil solution.

Tip: Early detection prevents infestations from spreading across your collection.


Step 9: Prepare for Spring Transition

As days lengthen and temperatures rise, gradually reintroduce houseplants to outdoor conditions.

Hardening Off Process:

  1. Start Slowly: Place plants outside in a shaded, sheltered area for a few hours daily.
  2. Increase Exposure: Extend time outdoors over 1–2 weeks.
  3. Full Sun Placement: Move sun-loving plants to brighter areas once they adapt.

Tip: Avoid moving plants outdoors before the last frost date in your area.


Step 10: Bonus Tips for Thriving Winter Plants

  1. Dust Leaves Regularly: Dust blocks sunlight and clogs pores. Wipe leaves gently with a damp cloth every few weeks.
  2. Avoid Frequent Relocation: Sudden changes in light or temperature can shock plants.
  3. Use Mulch or Decorative Pebbles: Helps retain soil moisture and stabilize temperature.
  4. Observe Regularly: Check leaves weekly for discoloration, pests, or dryness.
  5. Encourage Dormancy: Some plants, like amaryllis or alocasia, need a rest period with minimal water and light.

Common Mistakes to Avoid

  • Overwatering: The most frequent cause of plant death during winter.
  • Ignoring Humidity: Dry air leads to crispy leaf tips and wilting.
  • Sudden Light Changes: Moving plants from full sun to low light too abruptly can trigger leaf drop.
  • Skipping Pest Checks: Even small infestations can multiply quickly indoors.
  • Overfeeding: Fertilizer during dormancy can burn roots and weaken plants.

Conclusion

Overwintering houseplants successfully requires understanding each plant’s natural rhythms and needs. By adjusting light, water, temperature, and humidity, you can create a stable environment that helps plants survive the harsh winter months. With proper pest control, pruning, and gradual reintroduction to outdoor conditions in spring, your houseplants will not only survive but thrive year after year.

Overwintering isn’t just about keeping plants alive — it’s about nurturing resilience, extending the lifespan of your indoor garden, and deepening your connection with nature through all seasons.

How to Choose Indoor Plants That Improve Air Quality

How to Choose Indoor Plants That Improve Air Quality

Creating a home that feels fresh, healthy, and inviting often starts with something simple yet transformative—indoor plants. Beyond their beauty, many houseplants are natural air purifiers that remove toxins and release oxygen, helping you breathe cleaner air every day. With pollution levels rising and indoor air often being more polluted than outdoor air, selecting the right plants can make a world of difference. This guide will help you understand how to choose indoor plants that improve air quality, where to place them, and how to care for them to maximize their benefits.


Why Air-Purifying Plants Matter

Indoor air pollution comes from everyday sources—cleaning products, furniture finishes, paint, synthetic fabrics, and even cooking. These release volatile organic compounds (VOCs) like formaldehyde, benzene, and trichloroethylene into the air. Prolonged exposure can lead to allergies, fatigue, headaches, or respiratory issues.

NASA’s famous Clean Air Study found that certain houseplants naturally absorb these harmful chemicals through their leaves and roots while also increasing humidity and oxygen levels. The result? A cleaner, fresher, and more balanced indoor atmosphere.


What Makes a Plant a Good Air Purifier

When choosing plants that clean the air, look for the following qualities:

  1. Large Leaf Surface Area:
    Plants with broad leaves can absorb more airborne particles and toxins.
  2. Fast Growth Rate:
    Vigorous growers actively process air and moisture, enhancing purification.
  3. Resilient and Low-Maintenance Nature:
    Healthy plants filter air better, so low-maintenance options are ideal for long-term care.
  4. Ability to Thrive Indoors:
    Choose plants that adapt to your lighting, humidity, and temperature levels.

Best Indoor Plants for Air Quality

Here are some of the most effective air-purifying plants, backed by science and loved by design enthusiasts.


1. Snake Plant (Sansevieria trifasciata)

Known as the Mother-in-Law’s Tongue, this resilient beauty filters formaldehyde, xylene, and toluene while converting CO₂ to oxygen even at night—something most plants don’t do.

  • Light: Low to bright indirect light
  • Water: Every 2–3 weeks (let soil dry out)
  • Why It’s Great: Perfect for bedrooms and offices due to its nighttime oxygen production.

2. Peace Lily (Spathiphyllum)

The elegant peace lily is a top choice for removing benzene, ammonia, and formaldehyde. Its lush green leaves and white blooms add both freshness and sophistication to any space.

  • Light: Medium, indirect light
  • Water: Once a week; keep soil moist but not soggy
  • Why It’s Great: Also increases humidity, making it ideal for dry rooms.

3. Spider Plant (Chlorophytum comosum)

One of the easiest plants to grow, spider plants absorb carbon monoxide and formaldehyde while being non-toxic to pets.

  • Light: Bright, indirect light
  • Water: Once a week; allow to dry between waterings
  • Why It’s Great: Propagates easily and thrives in hanging baskets.

4. Boston Fern (Nephrolepis exaltata)

A humidity-loving fern that’s excellent for removing formaldehyde and xylene from the air.

  • Light: Indirect or filtered light
  • Water: Keep soil consistently moist; mist frequently
  • Why It’s Great: Perfect for bathrooms or kitchens where humidity is higher.

5. Aloe Vera

Famous for its healing gel, aloe vera also absorbs benzene and formaldehyde from chemical-based cleaners and paints.

  • Light: Bright, indirect light or sunlight
  • Water: Every 2–3 weeks; let soil dry completely
  • Why It’s Great: Offers both air-cleaning and skin-soothing benefits.

6. Rubber Plant (Ficus elastica)

With its broad, glossy leaves, the rubber plant is a powerhouse for absorbing formaldehyde and carbon dioxide.

  • Light: Bright, indirect light
  • Water: Weekly; reduce in winter
  • Why It’s Great: Its large leaves maximize air filtration while adding a bold, modern look.

7. Areca Palm (Dypsis lutescens)

Nicknamed the “butterfly palm,” this tropical stunner filters toluene and xylene while humidifying the air naturally.

  • Light: Bright, indirect sunlight
  • Water: Twice a week; loves moisture
  • Why It’s Great: A dramatic plant that purifies and cools large spaces.

8. Pothos (Epipremnum aureum)

A hardy, fast-growing vine that cleans benzene, formaldehyde, and xylene, pothos is perfect for hanging baskets or trailing off shelves.

  • Light: Low to medium light
  • Water: Every 1–2 weeks
  • Why It’s Great: Adapts easily to neglect and grows quickly, ideal for beginners.

How to Arrange Air-Purifying Plants for Maximum Effect

  1. Place Plants Strategically:
    Distribute plants throughout your home, especially in areas with poor ventilation like bedrooms, bathrooms, and kitchens.
  2. Mix Plant Heights and Textures:
    Combine tall floor plants like areca palms with tabletop options like snake plants and hanging pothos for a layered, natural look.
  3. Group Plants Together:
    Clustering plants increases local humidity and enhances their collective air-cleaning power.
  4. Add Planters That Complement Décor:
    Use ceramic, woven, or minimalist planters that match your room’s color palette to create a cohesive aesthetic.

Care Tips to Keep Air-Purifying Plants Healthy

Healthy plants = effective purifiers. Here’s how to maintain them:

  • Avoid Overwatering: Too much water leads to root rot, reducing a plant’s ability to filter air.
  • Dust the Leaves: Wipe leaves with a damp cloth to keep pores clear for efficient gas exchange.
  • Rotate Regularly: Turn plants every few weeks to ensure even growth and light exposure.
  • Repot Annually: Fresh soil ensures strong root systems and nutrient absorption.
  • Prune Dead Leaves: Regular pruning keeps the plant looking neat and performing well.

Designing a Healthier Home with Greenery

To make the most of your air-purifying plants, integrate them into your home design thoughtfully:

  • Living Room: Use large statement plants like rubber plants or palms to create focal points.
  • Bedroom: Add snake plants or peace lilies for cleaner air as you sleep.
  • Bathroom: Use humidity-lovers like ferns or pothos to thrive in steamy environments.
  • Office or Study: Incorporate low-maintenance plants like aloe vera or spider plants for focus and freshness.

Final Thoughts

Choosing indoor plants that improve air quality isn’t just about décor—it’s a lifestyle upgrade that enhances your well-being, mood, and productivity. Whether you live in a small apartment or a spacious home, the right combination of greenery can turn your environment into a natural air purifier and peaceful retreat.

How to Blend Houseplants With Modern Décor Seamlessly

How to Blend Houseplants With Modern Décor Seamlessly

Houseplants have become more than just a hobby—they’re an essential element of modern interior design. They bring life, texture, and color to spaces that might otherwise feel cold or sterile. Yet, integrating plants into a modern home requires more than simply placing a few pots around. To achieve a seamless, designer-level look, you need to carefully consider proportions, colors, textures, and placement.

This detailed guide will show you how to blend houseplants with modern décor seamlessly, ensuring your greenery enhances your home’s aesthetic without overwhelming it. Whether you love minimalist interiors, sleek lines, or contemporary comfort, you’ll learn how to use plants as living design features that elevate your modern space beautifully.


1. The Harmony Between Modern Design and Nature

Modern décor is defined by clean lines, simplicity, neutral tones, and open spaces. While this style can feel crisp and sophisticated, it sometimes lacks warmth and personality. That’s where houseplants come in.

Plants add:

  • Softness: Their organic forms break up hard architectural lines.
  • Color: Greenery injects natural vibrancy without clashing with minimalist palettes.
  • Texture: From glossy monstera leaves to fuzzy ferns, they create visual depth.
  • Balance: Plants connect modern interiors to nature, grounding the space with life and energy.

The key is subtlety—modern design favors restraint. Instead of turning your living room into a jungle, think of each plant as a curated piece of living art.


2. Choosing the Right Plants for a Modern Aesthetic

Not all plants suit modern interiors. Some have lush, wild growth patterns that clash with clean modern lines. The best plants for modern décor are those that look structured, sculptural, or minimal.

Top Picks for Modern Spaces:

  • Fiddle Leaf Fig (Ficus lyrata):
    Large, glossy leaves and an upright form make it an instant modern statement. Perfect for corners or beside furniture.
  • Snake Plant (Sansevieria):
    Its tall, sword-like leaves and architectural shape fit effortlessly into minimalist spaces.
  • Monstera Deliciosa:
    Iconic split leaves bring bold structure while maintaining a clean look.
  • ZZ Plant (Zamioculcas zamiifolia):
    Sleek, shiny leaves add polish with minimal upkeep—ideal for modern apartments.
  • Bird of Paradise:
    Tall and elegant, its tropical flair contrasts beautifully with contemporary furniture.
  • Rubber Plant (Ficus elastica):
    Deep green or burgundy leaves work perfectly in monochrome or neutral interiors.
  • Succulents and Cacti:
    Compact and geometric, they thrive in low-maintenance modern environments.

These plants not only complement clean lines and open layouts but also require little maintenance—aligning perfectly with modern living’s emphasis on simplicity.


3. Selecting the Perfect Pots for a Cohesive Look

In modern interiors, the pot is as important as the plant. The right pot acts as a design accessory, reinforcing your color palette and style.

Pot Styles That Work Well in Modern Décor:

  • Minimal Ceramic Planters:
    Smooth, matte finishes in neutral tones like white, gray, or taupe.
  • Geometric or Cylindrical Pots:
    Clean edges and symmetrical shapes emphasize modern simplicity.
  • Metallic Accents:
    Brushed gold, copper, or matte black pots add an elegant, contemporary touch.
  • Concrete Planters:
    Offer an industrial, raw aesthetic that pairs well with modern furniture.
  • Self-Watering Pots:
    Functional and sleek—perfect for low-maintenance, tech-savvy homes.

Design Tip:

Stick to two or three cohesive materials or colors throughout your home for a unified look. For example, matte black and terracotta or white ceramic and light wood tones.


4. Strategic Placement for Maximum Impact

Modern design is all about intention. Every item—including plants—should feel purposefully placed.

Ideas for Seamless Placement:

  • Corners and Entryways:
    Use tall statement plants like fiddle leaf figs or birds of paradise to fill empty corners without clutter.
  • Shelves and Consoles:
    Add trailing plants like pothos or string of pearls to soften hard lines.
  • Coffee Tables and Dining Areas:
    Small succulents or sculptural plants like aloe vera work as elegant centerpieces.
  • Window Sills and Ledges:
    Line up uniform pots for symmetry—perfect for minimalist interiors.
  • Bathrooms:
    Ferns and orchids love humidity and add freshness to sleek bathroom spaces.

Balance Is Key:

For every large statement plant, balance it with smaller companions or decorative items like vases or books to maintain proportion.


5. Use Light as a Design Element

Lighting is critical for both plant health and ambiance in modern décor. Plants naturally draw attention toward light sources—making them ideal tools for highlighting windows and architectural details.

How to Use Light Strategically:

  • Natural Light:
    Place plants where sunlight enhances their texture—like next to glass walls or large windows.
  • Accent Lighting:
    Use spotlights or LED strips to highlight plant silhouettes at night.
  • Backlighting:
    Position plants against softly lit walls to create depth and drama.

Pro Tip:

Choose plants suited to your lighting conditions. Low-light varieties like ZZ plants, peace lilies, and snake plants thrive even in dim rooms, ensuring your décor stays fresh year-round.


6. Play with Scale and Proportion

In modern interiors, proportion is everything. To create harmony, mix plants of varying sizes while keeping the overall arrangement balanced.

How to Style by Scale:

  • Tall Plants: Use one or two large plants as statement pieces.
  • Medium Plants: Group mid-sized plants in clusters of odd numbers for a natural yet intentional look.
  • Small Plants: Use these as accents on shelves, desks, or window sills.

Avoid overcrowding. Empty space is essential in modern design—it lets each element breathe and shine individually.


7. Integrate Plants with Furniture and Architecture

Instead of treating plants as separate decorations, make them part of your home’s structure and furniture.

Creative Integration Ideas:

  • Plant Shelves: Install floating shelves for small plants to mimic an art gallery display.
  • Built-In Planters: Add recessed planters into kitchen islands, countertops, or room dividers.
  • Wall Planters: Mount geometric wall planters for a living art installation.
  • Under Furniture: Tuck low-growing plants under side tables or benches for subtle green accents.
  • Hanging Planters: Use sleek, minimal hangers to save space and create vertical interest.

This integration blurs the line between nature and design, creating a space that feels fresh, intentional, and alive.


8. Keep a Cohesive Color Palette

Modern décor often revolves around neutral tones—white, gray, beige, or black—with occasional accent colors. When adding plants, keep your color choices in harmony.

Color Coordination Tips:

  • Green plants pop against white or monochrome backgrounds.
  • Deep green or burgundy plants add sophistication to neutral spaces.
  • For warm interiors (with wood tones), choose terracotta or olive-green pots for cohesion.
  • Cool-toned interiors (gray or blue) look best with black, white, or metallic planters.

If you crave a bolder statement, pick one contrasting hue (like a single gold planter or a dark pot among light tones) to create intentional drama without chaos.


9. Simplify to Amplify: The Power of Minimalism

In modern spaces, less is more. Rather than crowding your home with plants, focus on quality and composition.

Minimalist Plant Styling Tips:

  • Stick to a few large plants rather than many small ones.
  • Limit your display to one or two plant species per room for a curated feel.
  • Use symmetry in arrangement—two identical pots on either side of a couch or TV stand create visual harmony.
  • Let negative space (the empty areas) work as part of your design—it helps your plants stand out.

Minimalism doesn’t mean bare—it means intentional. Each plant should have a clear purpose and aesthetic role in your design story.


10. Add Texture and Layers Without Clutter

Modern design embraces texture subtly—think polished surfaces, soft fabrics, and layered materials. Plants are an excellent way to introduce organic texture naturally.

Ideas for Textural Balance:

  • Combine broad-leaved plants (monstera) with fine-leaved ones (ferns or asparagus).
  • Mix pot textures: matte ceramics, woven baskets, or stone planters.
  • Place plants near materials like wood, glass, or metal to enhance contrast.

Layering different textures creates depth and sophistication—without sacrificing the clean modern aesthetic.


11. Maintain Clean Lines and Order

One of the hallmarks of modern design is its sense of order and structure. To keep your plant displays from looking messy:

  • Regularly prune and remove dead leaves.
  • Dust leaves to maintain their shine.
  • Group plants symmetrically or linearly instead of scattered placement.
  • Use matching pots or trays to create unity.

Clean, well-maintained greenery feels intentional and effortlessly elegant—hallmarks of true modern design.


12. Final Touches for a Designer-Level Finish

For a polished, professional look, incorporate small but impactful finishing details:

  • Match décor accents: Coordinate pot colors with furniture finishes or art frames.
  • Use plant stands: Elevate plants at varying heights to create layers.
  • Add lighting accents: Warm-toned lights make greenery glow beautifully at night.
  • Mirror reflections: Place plants near mirrors to amplify space and light.
  • Consistency across rooms: Use recurring plant types or pot materials to create flow throughout the home.

Conclusion: A Modern Symphony of Green and Design

Blending houseplants with modern décor isn’t about following rigid rules—it’s about creating balance between nature and architecture. When done right, your plants will feel like a natural extension of your furniture, art, and lighting.

By focusing on shape, color, texture, and placement, you can transform your home into a space that feels both stylish and alive. The minimalist principles of modern design and the organic essence of greenery work together in perfect harmony, creating interiors that are fresh, calming, and timeless.