How to Create a Stunning Indoor Jungle in Any Room

How to Create a Stunning Indoor Jungle in Any Room

If you’ve ever scrolled through Instagram or Pinterest and stopped to admire a lush, green, plant-filled living space, you’re not alone. The indoor jungle trend has taken the world by storm — and for good reason. Beyond the aesthetic appeal, surrounding yourself with greenery boosts mood, purifies air, and brings nature indoors. But creating your own mini rainforest doesn’t require a large space or endless experience with plants. With the right mix of planning, plant choices, and styling, you can turn any room into a stunning indoor jungle.

Here’s a detailed, step-by-step guide on how to create your dream indoor jungle—no matter the size of your home.


1. Start by Assessing Your Space

Before you bring home a single plant, take a close look at your space. Every successful indoor jungle starts with understanding the environment.

  • Light: Observe how much natural light each area of the room receives throughout the day. Is it bright and direct, softly filtered, or low and shaded?
    • Bright light: Great for sun-loving plants like fiddle leaf figs, bird of paradise, and succulents.
    • Medium light: Ideal for philodendrons, pothos, and calatheas.
    • Low light: Perfect for snake plants, ZZ plants, and peace lilies.
  • Temperature & Humidity: Most tropical plants love humidity and consistent warmth. Rooms like bathrooms and kitchens tend to have higher humidity levels, while living rooms and bedrooms may need a boost from a humidifier or a misting routine.
  • Space & Layout: Consider where plants will go — on the floor, shelves, hanging baskets, or window ledges. You don’t need a huge room; vertical space is your best friend in small apartments.

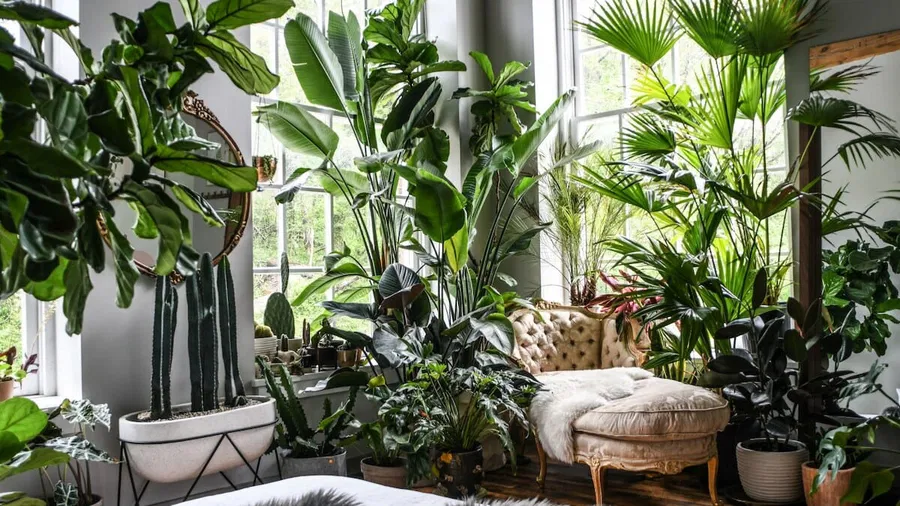
2. Choose the Right Plants for a Jungle Feel

The key to an authentic jungle vibe is variety — in size, shape, and texture. A mix of leafy greens, vining plants, and structural species will make your space feel lush and layered.

Here are some plant types to include:

  • Statement Plants (Tall and Dramatic):
    • Monstera deliciosa (Swiss Cheese Plant) – Iconic large split leaves that instantly evoke a tropical feel.
    • Bird of Paradise – Adds height and dramatic flair with its broad leaves.
    • Fiddle Leaf Fig – A bold plant that thrives in bright spaces.
  • Trailing & Climbing Plants:
    • Pothos – Hardy, fast-growing, and great for hanging planters or shelves.
    • Philodendron scandens – Heart-shaped leaves and trailing vines add softness.
    • English Ivy – Lush and fast-growing, perfect for cascading from high spots.
  • Bushy & Medium-Sized Plants:
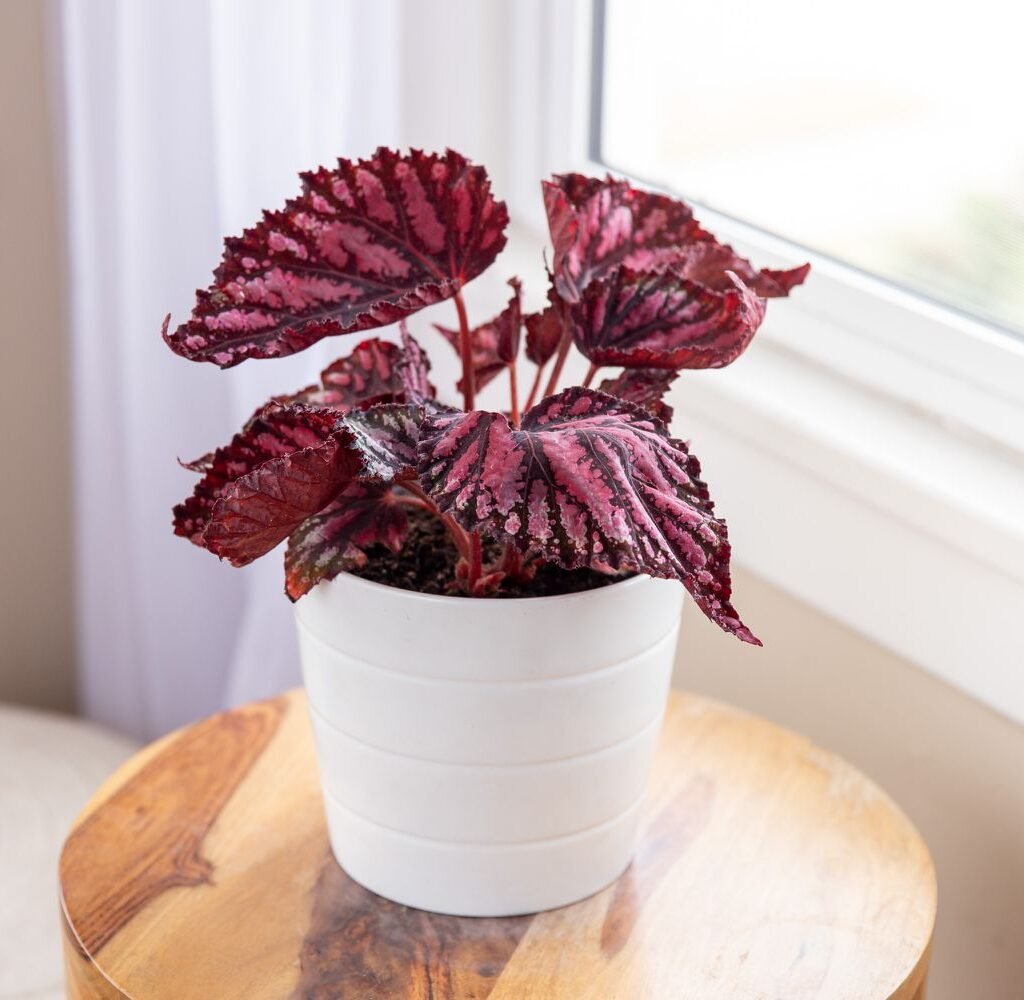
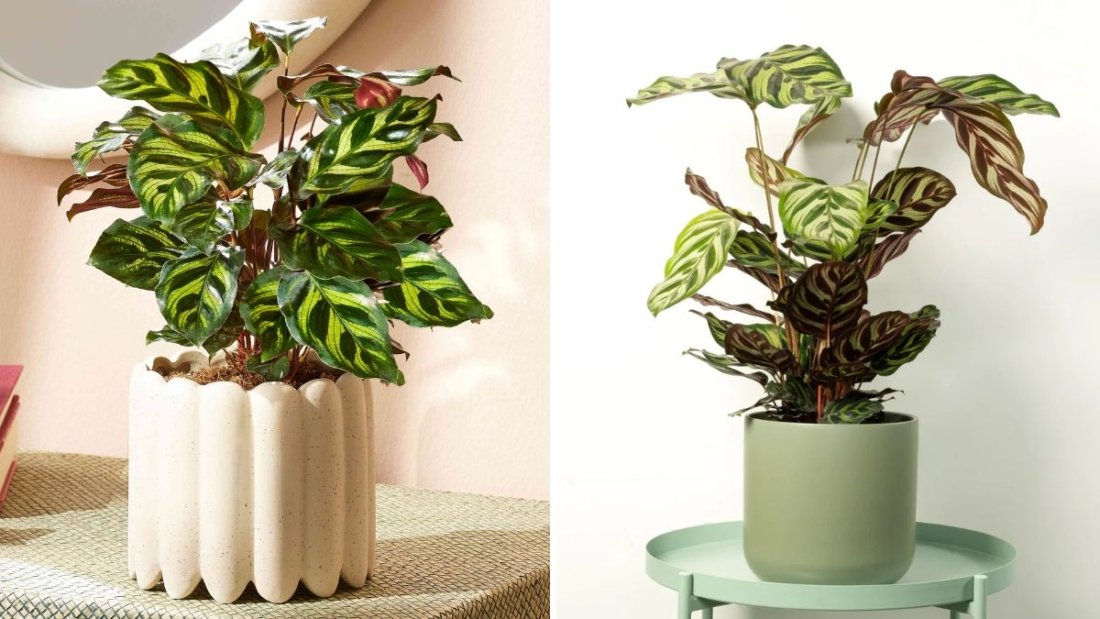
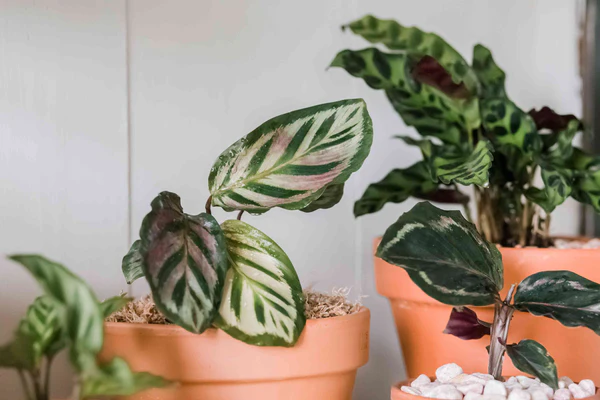
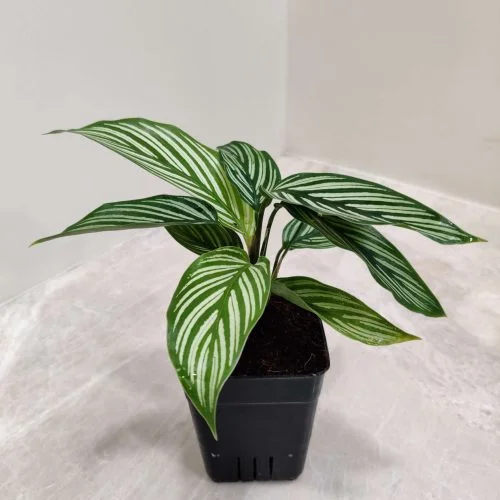
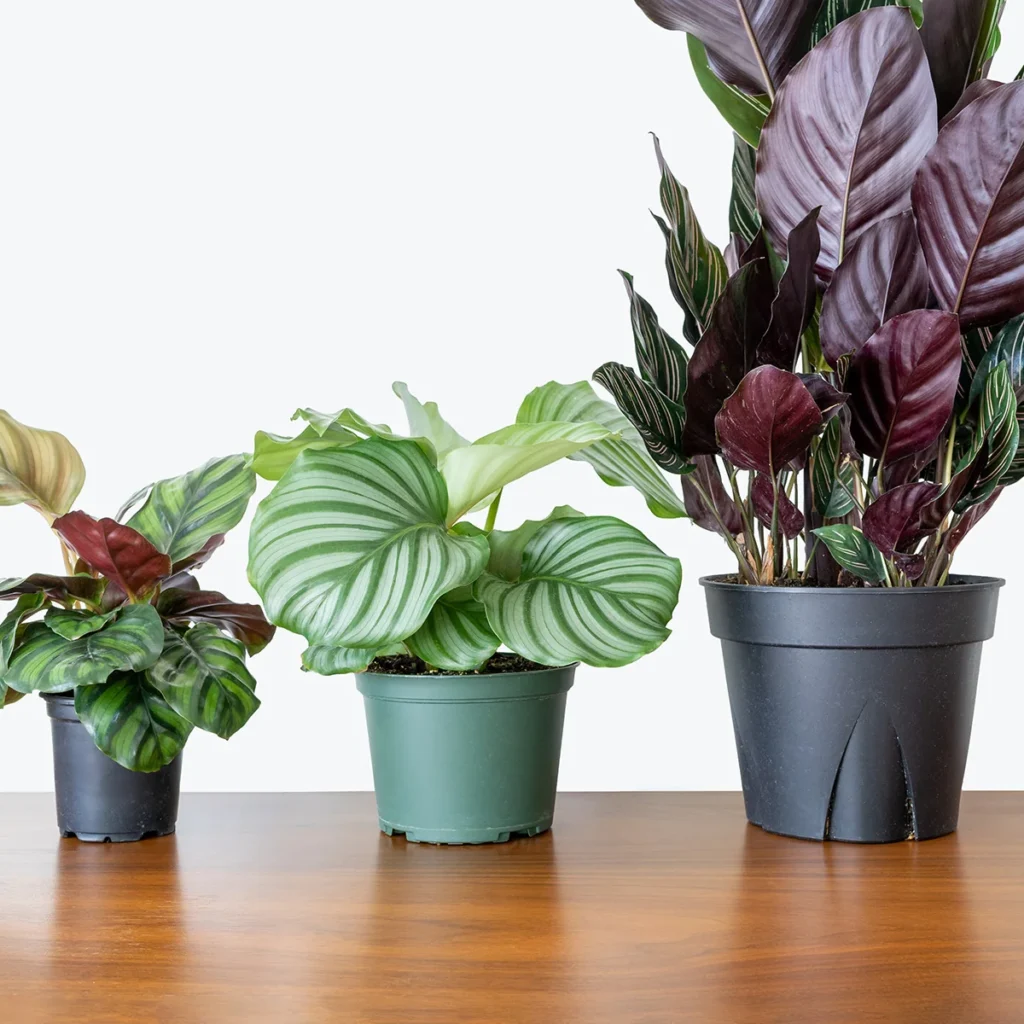
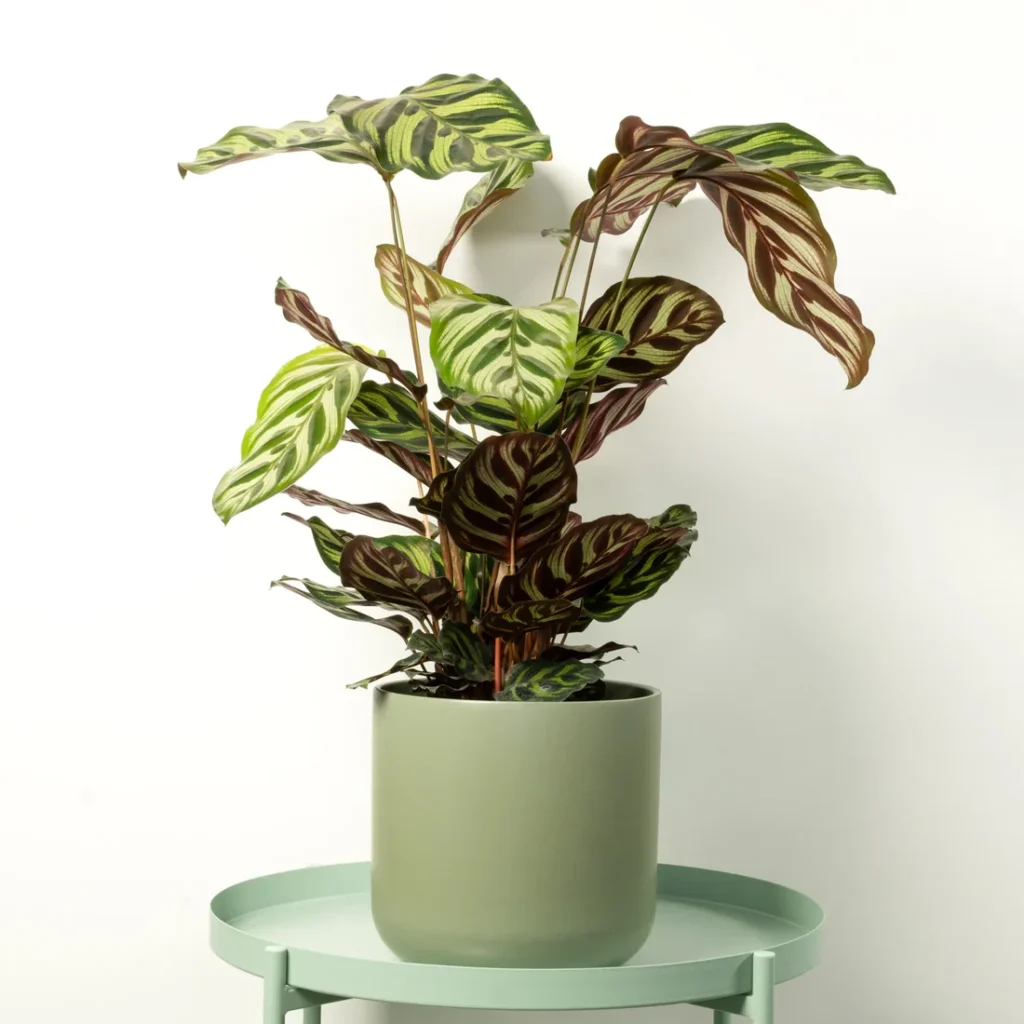
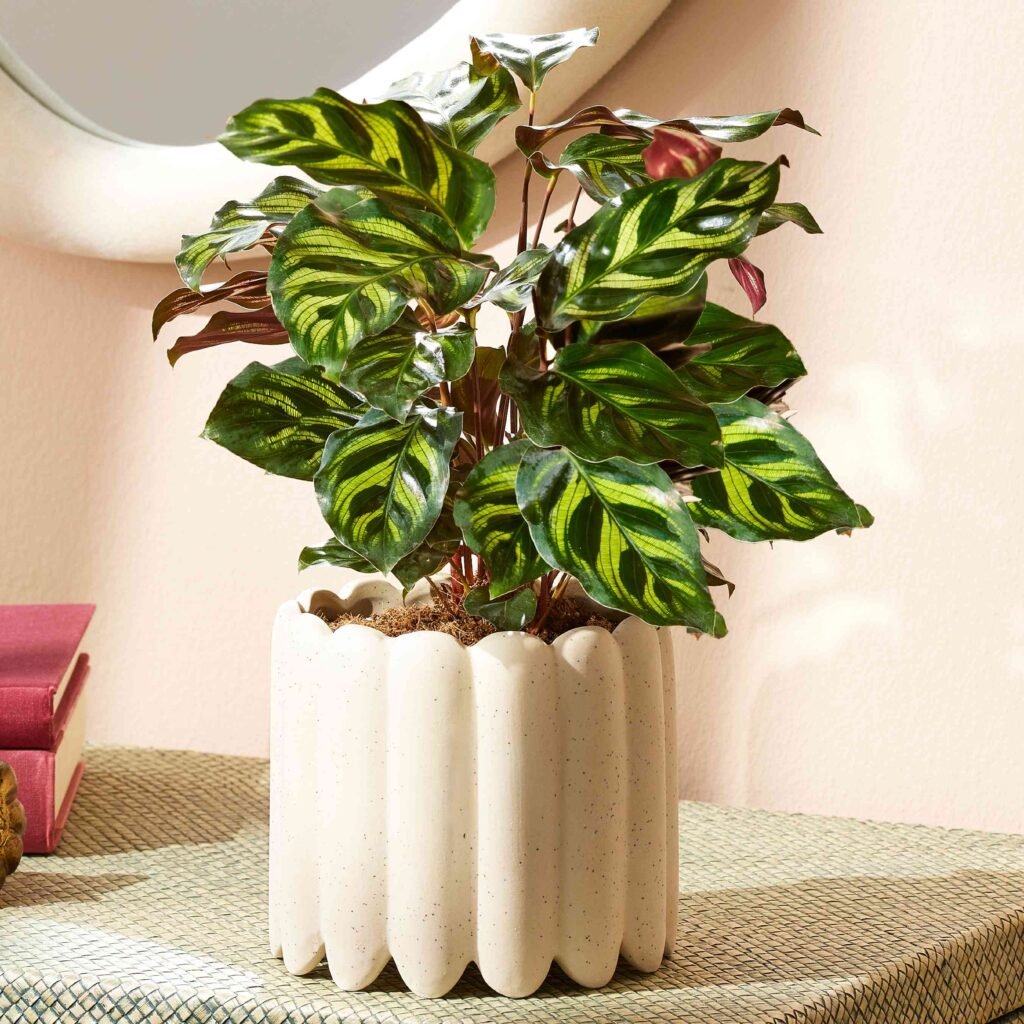
    • Calathea – Known for striking leaf patterns and love for humidity.
    • Peperomia – Compact, easy-care, and available in many textures.
    • Spider Plant – Air-purifying and great for adding volume.
  • Small & Air-Purifying Plants:
    • Snake Plant – Virtually indestructible and great for low light.
    • ZZ Plant – Low maintenance, glossy, and great for beginners.
    • Ferns (like Boston or Maidenhair) – Add a soft, feathery touch.

Aim to mix at least one of each type — tall, trailing, and small — to mimic the layered look of nature.


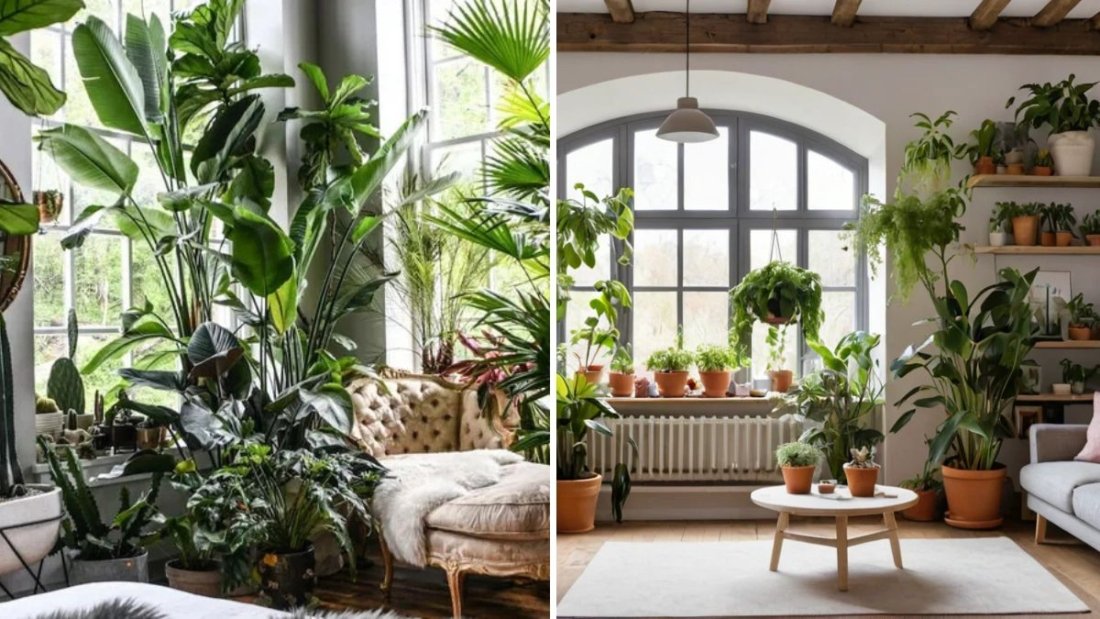
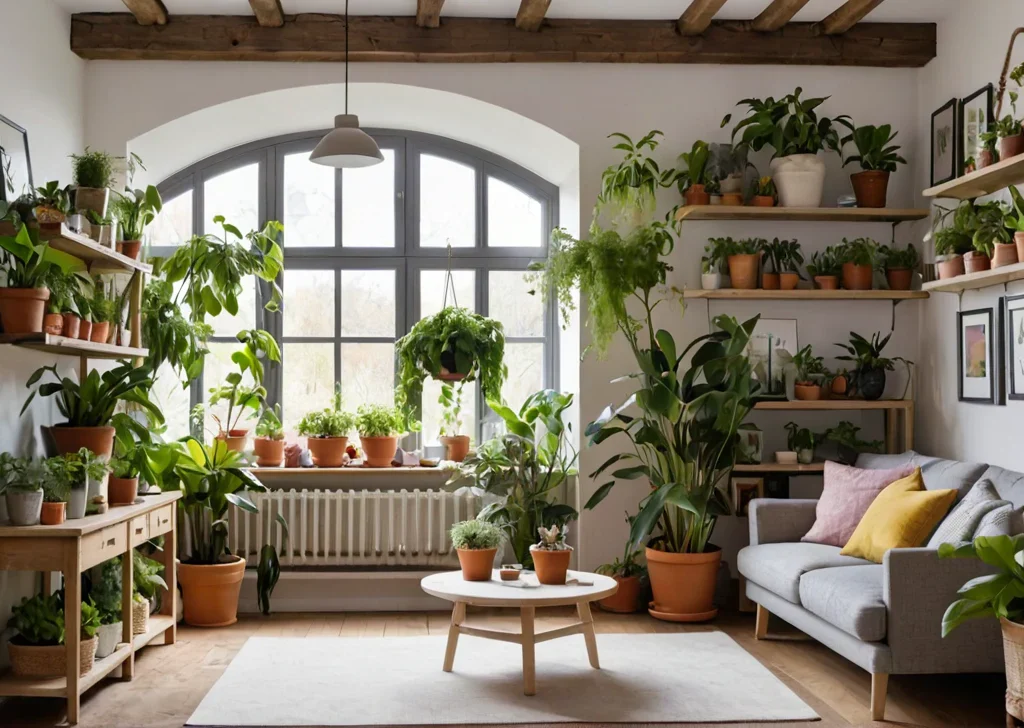
3. Layer Plants for a Natural Look

In a jungle, plants grow in multiple layers — tall trees, mid-level shrubs, and ground cover. Mimic this structure indoors to achieve depth and lushness.

  • Floor level: Use large pots for statement plants like fiddle leaf figs, monsteras, or rubber plants.
  • Mid-level: Place medium plants on stools, plant stands, or low tables.
  • Upper level: Hang trailing plants from the ceiling or high shelves to create a cascading green canopy.

Tip: Group plants in clusters of three or five, varying heights and leaf textures. This arrangement feels organic and balanced.


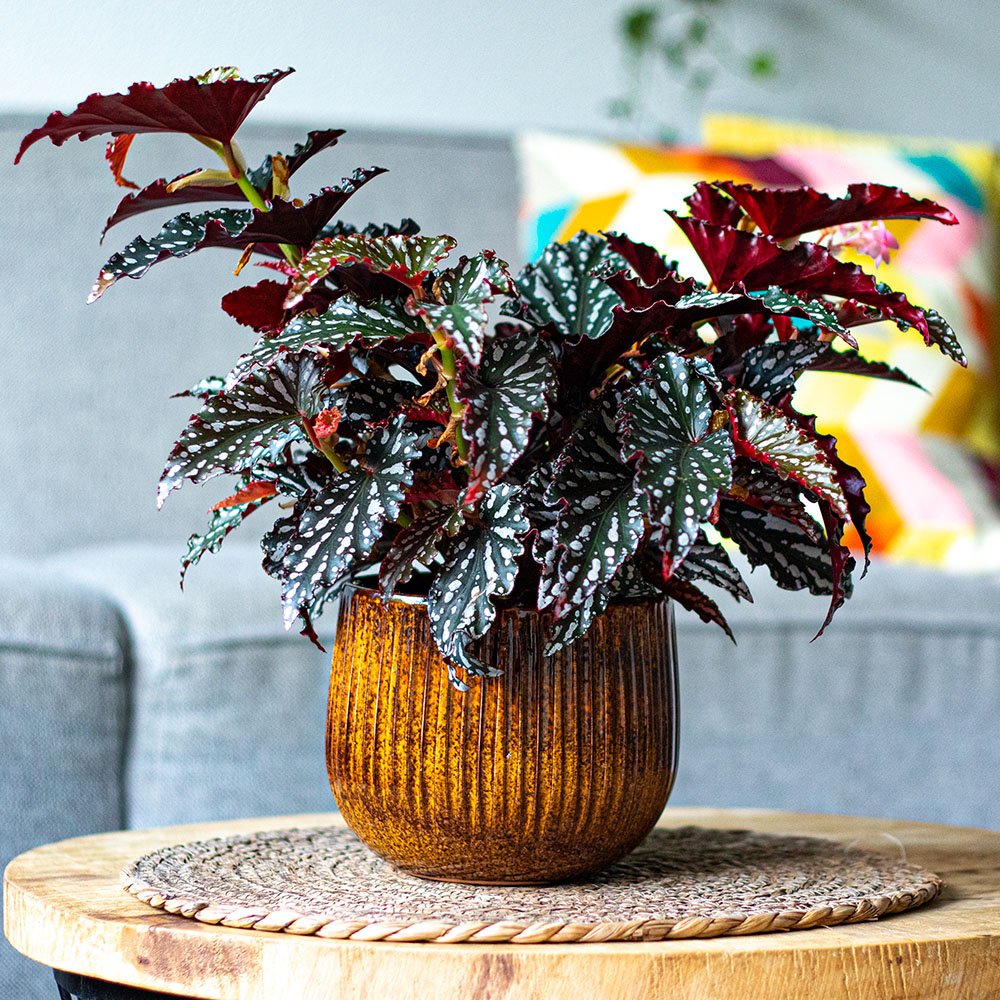
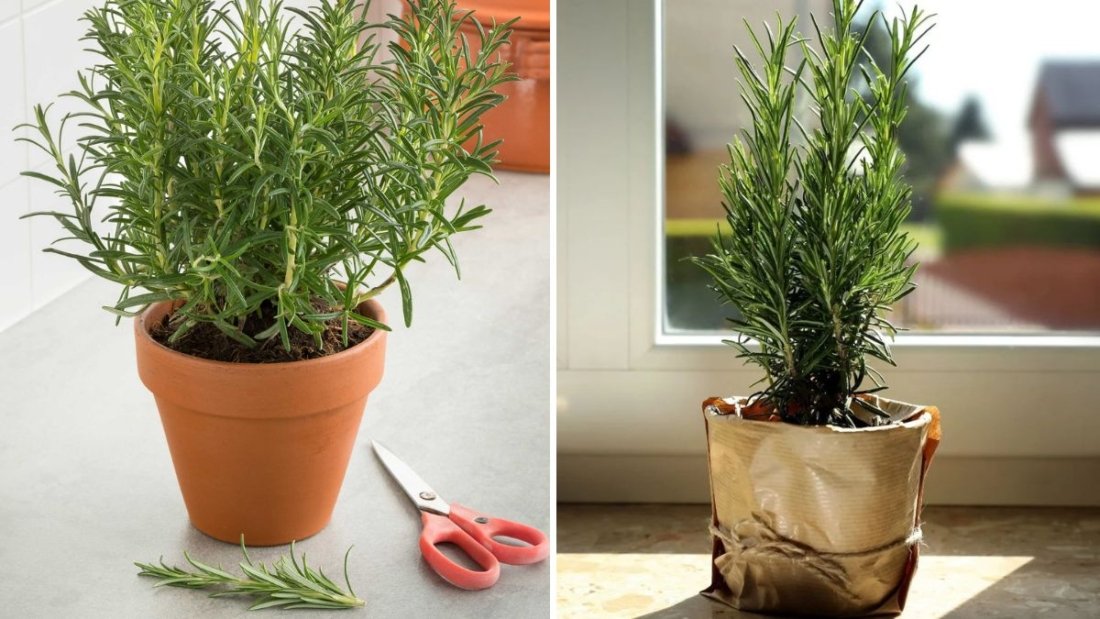
4. Use Creative Containers and Stands

The right pot or stand can elevate your jungle design. Terracotta pots add a rustic, earthy tone, while ceramic and woven baskets bring a modern, cozy touch. Mix and match textures and colors for visual interest.

  • Wicker baskets: Add warmth and a natural touch.
  • Macramé hangers: Perfect for trailing plants and vertical design.
  • Plant stands: Help layer plants and prevent overcrowding on the floor.

Remember to always choose containers with drainage holes to prevent root rot. If your decorative pot doesn’t have one, use a plastic liner or nursery pot inside.


5. Maintain the Jungle: Water, Light, and Humidity

A jungle thrives when plants are healthy — and that means learning the rhythm of care.
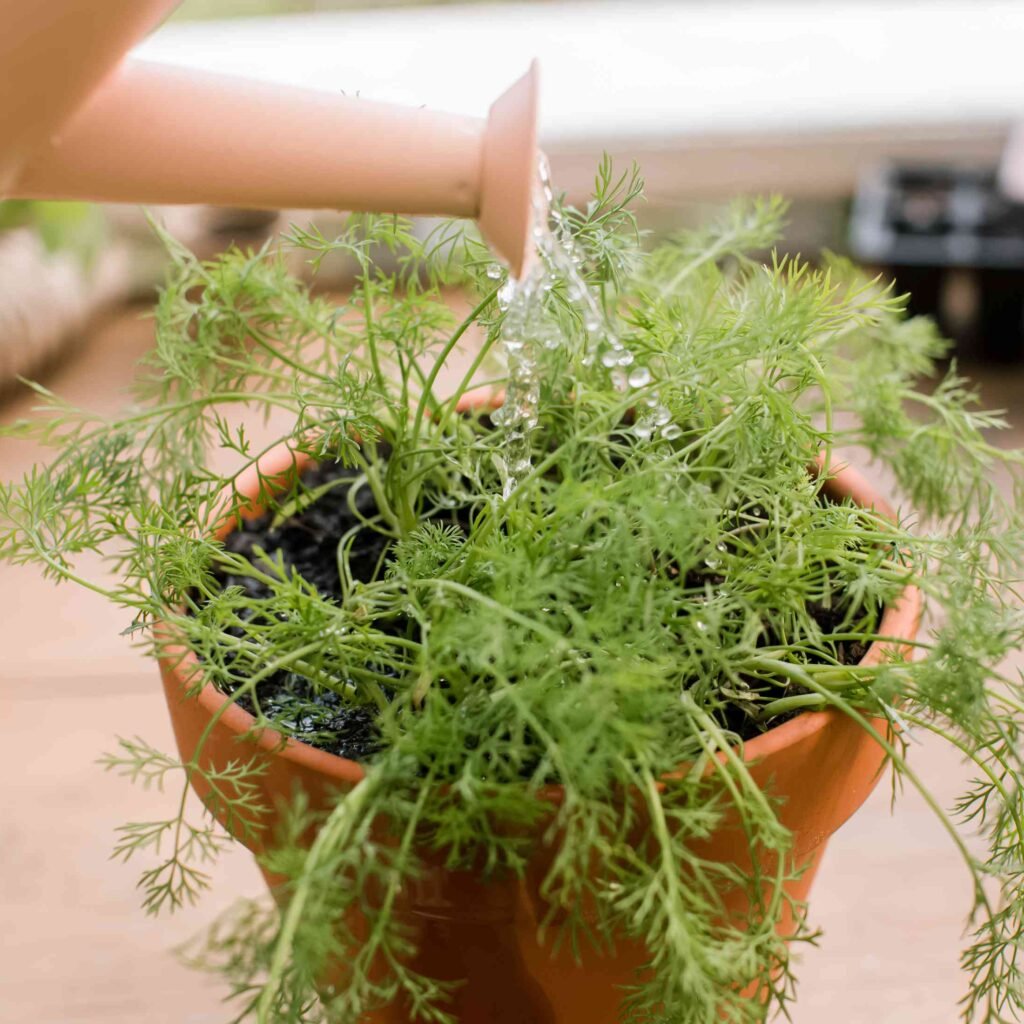
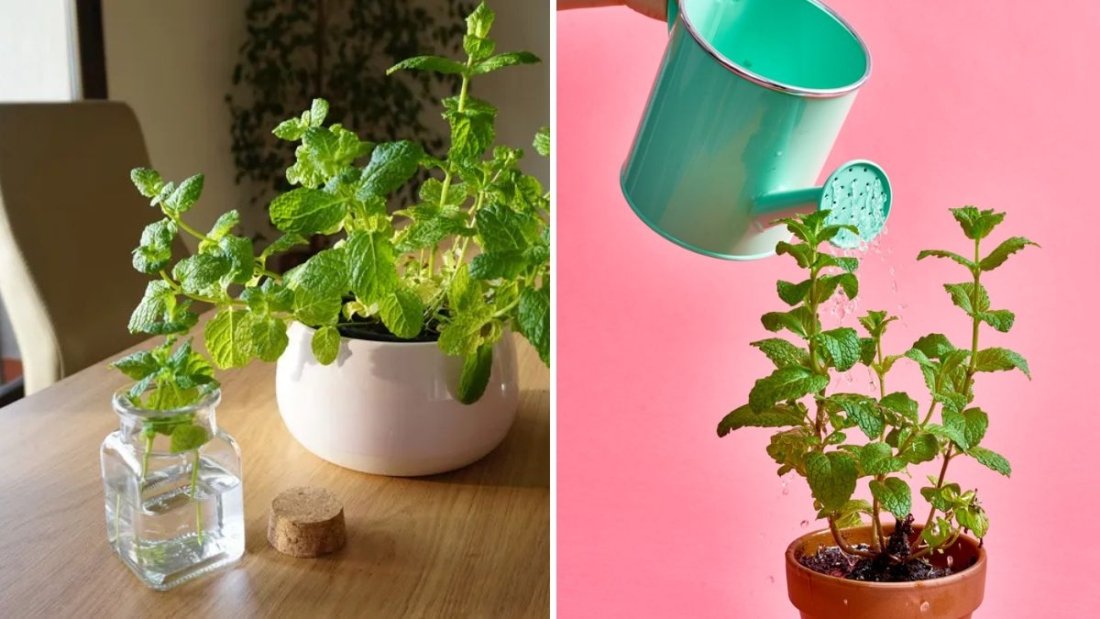
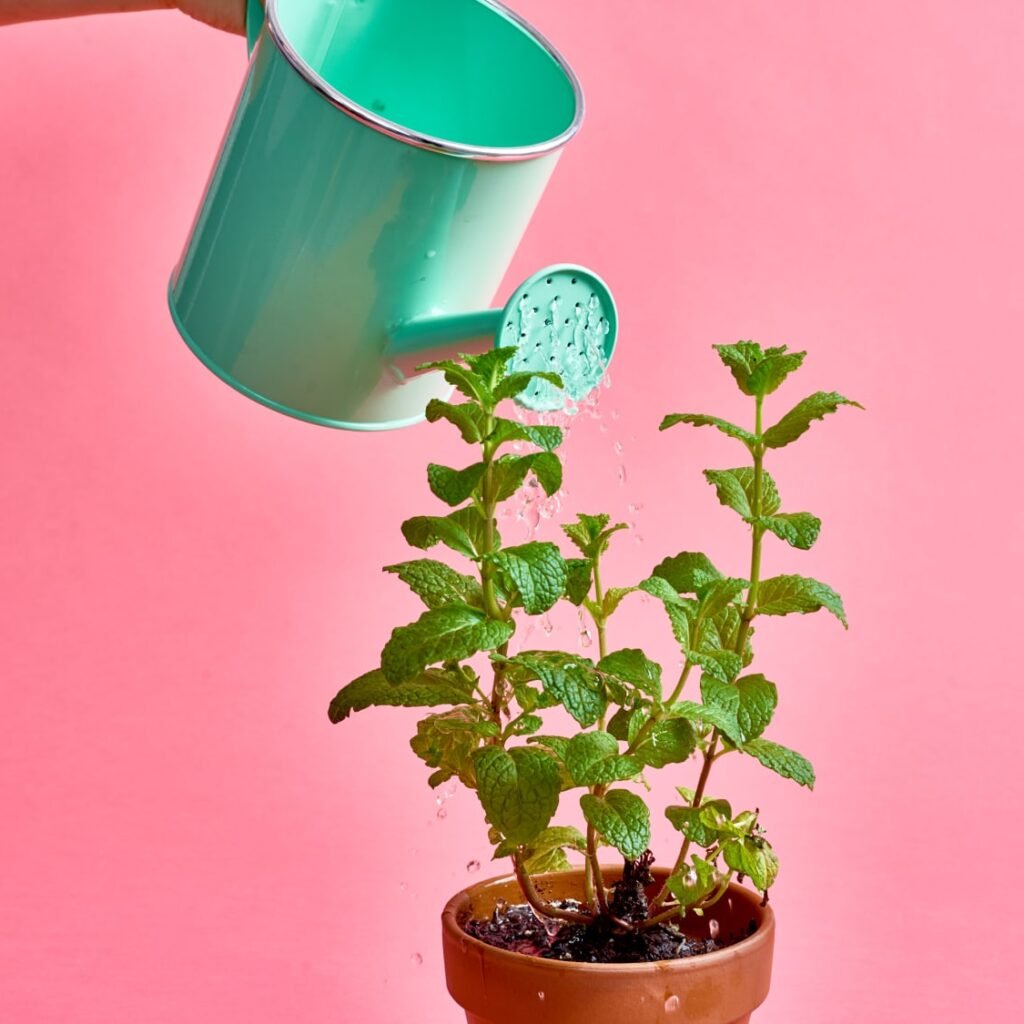
  • Watering:
    Avoid overwatering, which is the most common mistake. Check soil moisture by touching it — if the top inch feels dry, it’s time to water. Plants like calatheas and ferns may need more frequent watering, while succulents and snake plants prefer to dry out between waterings.
  • Light Management:
    Rotate plants every few weeks so all sides receive even light. If your room lacks sunlight, consider grow lights to supplement natural light.
  • Humidity:
    Tropical plants crave humidity. Mist leaves regularly, use a pebble tray with water, or place a small humidifier nearby. Grouping plants together also helps retain moisture in the air.
  • Dusting Leaves:
    Dust can block sunlight and hinder photosynthesis. Gently wipe leaves with a damp cloth once a month to keep them glossy and healthy.

6. Create a Balanced Design

Designing your indoor jungle is like curating art — you want it to feel lush but not cluttered.

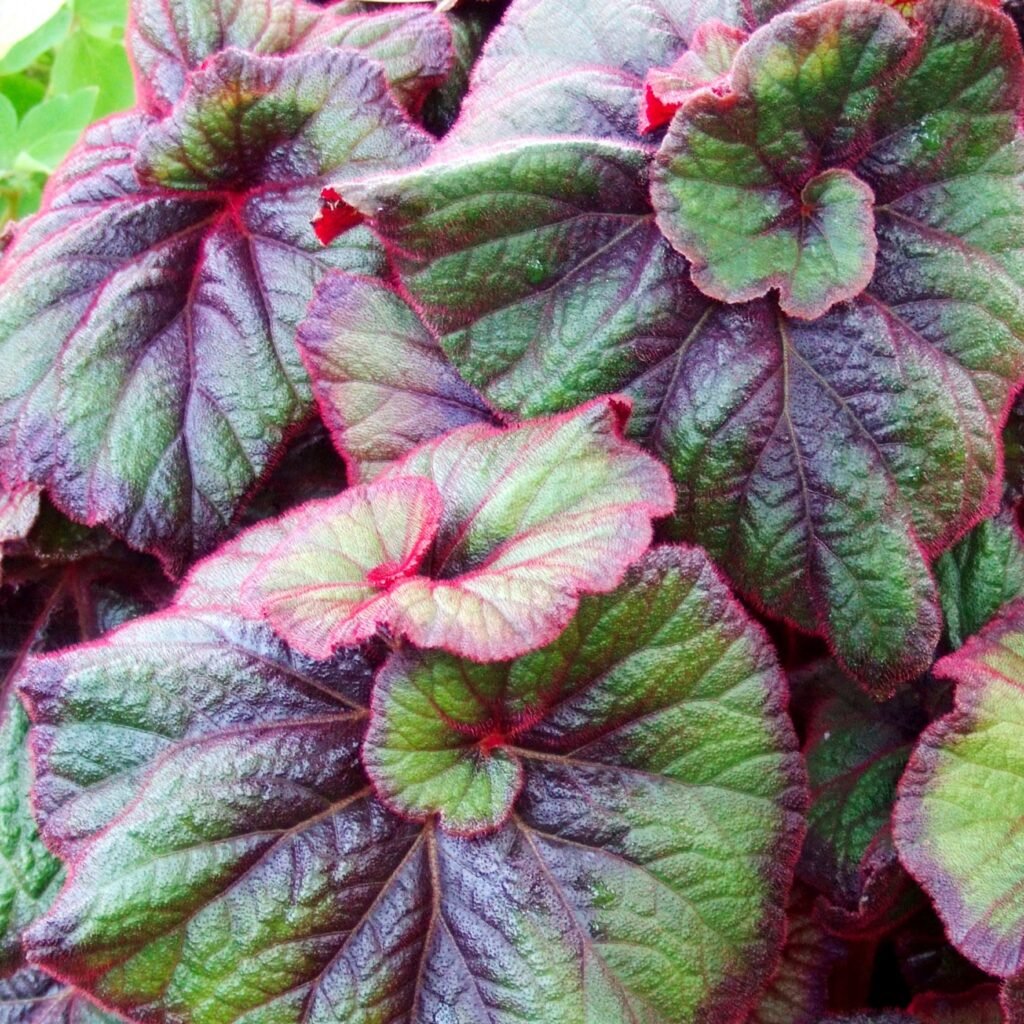
  • Color Variation: Choose plants with different shades of green or variegated patterns. The contrast makes the space more dynamic.
  • Texture Play: Combine smooth leaves (rubber plants) with lacy ones (ferns) for depth.
  • Balance: Keep large plants near corners or focal points, and let trailing plants soften the edges of furniture or shelves.

You can also incorporate natural materials like bamboo furniture, jute rugs, or wooden shelves to complement the greenery.


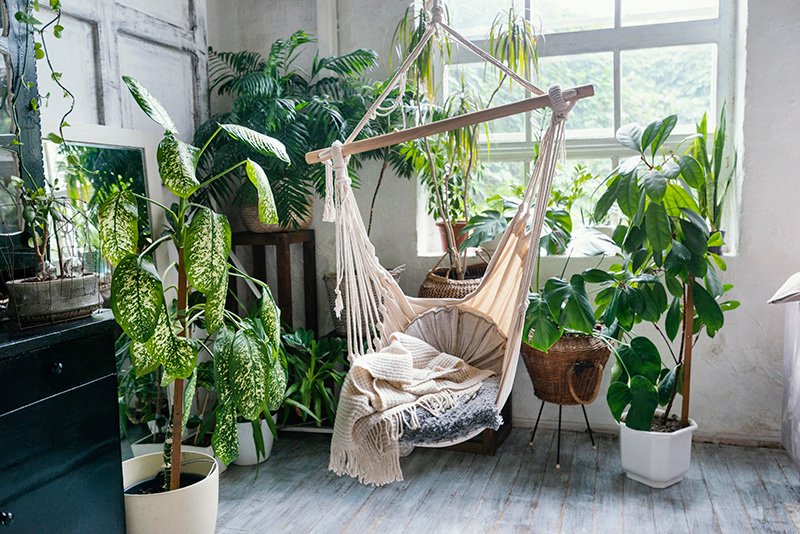
7. Incorporate Vertical and Hanging Elements

If floor space is limited, take your jungle upward! Hanging planters, wall-mounted shelves, and trellises make great use of vertical space.

  • Hang pothos, ivy, or string of hearts from the ceiling.
  • Use ladder shelves or pegboards to display smaller pots.
  • Train climbing plants up trellises or window frames for a wild, natural effect.

This not only saves space but also makes your jungle feel immersive — like you’re walking into a tropical canopy.


8. Add Natural Decor Accents

Enhance the jungle vibe with décor that complements your plants.

  • Textures: Think jute, rattan, linen, and wood.
  • Accessories: Add nature-inspired artwork, botanical prints, or woven baskets.
  • Lighting: Use warm LED lights or fairy lights to highlight your greenery at night. Soft lighting creates a cozy, earthy atmosphere.

You can even place mirrors strategically to reflect plants and make the space appear larger and greener.


9. Keep Growth in Check

A thriving jungle can quickly turn wild. Regular maintenance helps you manage growth and keeps the space harmonious.

  • Prune dead or yellowing leaves regularly.
  • Repot growing plants every 1–2 years to give them space.
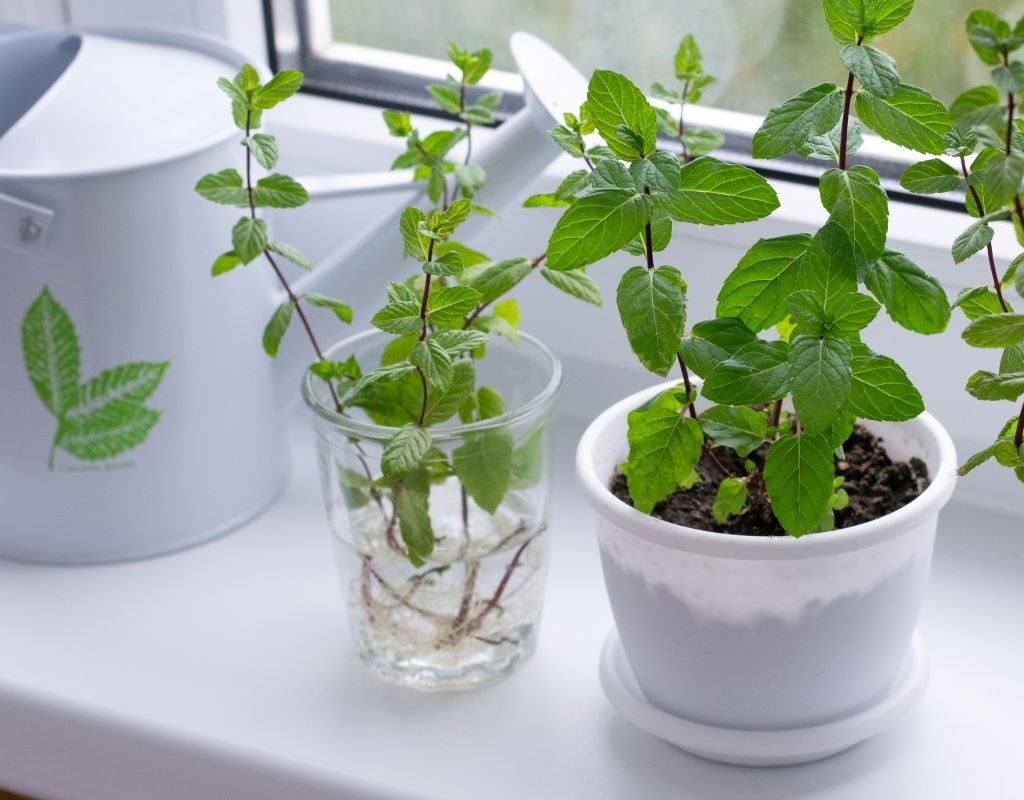
  • Propagate trailing plants like pothos or philodendrons to create new growth or share with friends.

Propagation is a great way to expand your jungle without spending extra money!


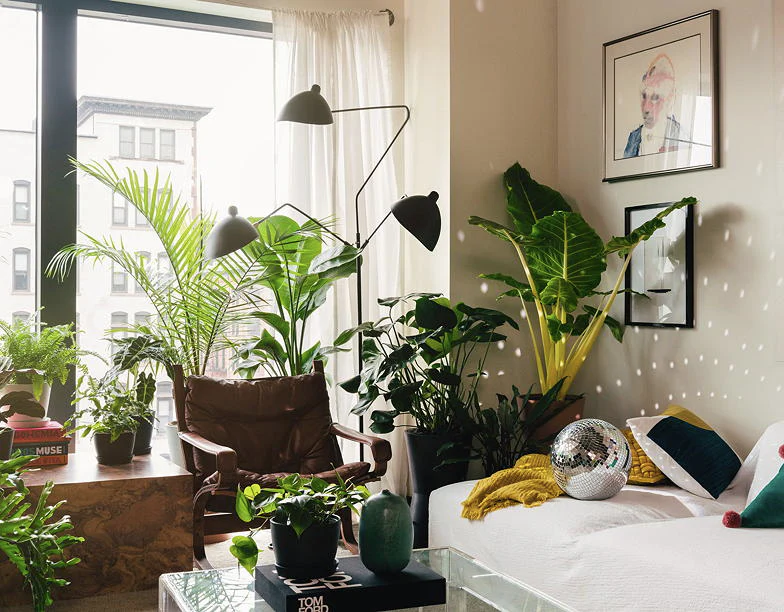
10. Enjoy the Benefits of Your Indoor Oasis

Once your jungle comes to life, you’ll notice a remarkable shift in your environment and mood. Studies show that being surrounded by plants reduces stress, enhances focus, and improves air quality. Your home will feel fresher, calmer, and more connected to nature.

Whether it’s a green corner in your bedroom or an entire living room filled with tropical leaves, your indoor jungle becomes more than décor — it’s a lifestyle.


Final Thoughts

Creating a stunning indoor jungle is about more than just collecting plants. It’s about curating a space that reflects your connection to nature. Start small, learn what each plant needs, and let your collection evolve naturally. Over time, your room will transform into a lush retreat where you can unwind, recharge, and breathe deeply — surrounded by the calming beauty of green life.

No matter how big or small your home, with the right approach and a little care, you can build your very own indoor paradise.

How to Grow Dill Indoors for Cooking and Herbal Remedies

How to Grow Dill Indoors for Cooking and Herbal Remedies

Dill (Anethum graveolens) is a fragrant, feathery herb cherished in kitchens and herbal medicine cabinets around the world. Known for its delicate leaves, zesty seeds, and refreshing flavor, dill is a staple for cooking—whether sprinkled over roasted vegetables, added to pickles, or used to season fish dishes. Beyond its culinary uses, dill has also been valued in traditional medicine for soothing digestion, relieving bloating, and calming the nerves.

The good news? You don’t need a sprawling outdoor garden to enjoy fresh dill. With the right setup, you can successfully grow dill indoors year-round for cooking and herbal remedies. Whether you’re a seasoned indoor gardener or just starting your herb journey, this guide will cover everything you need to know—from choosing containers and soil to harvesting and using your homegrown dill.


1. Why Grow Dill Indoors?

Growing dill indoors offers several advantages:

  • Year-round harvest: No need to wait for summer; you can have fresh leaves at your fingertips in any season.
  • Convenience: Snip leaves right in your kitchen whenever you need them.
  • Pest control: Indoors, dill is less likely to suffer from aphids, caterpillars, or garden pests.
  • Dual purpose: Beyond cooking, dill can be dried or steeped for herbal remedies like teas, tinctures, and soothing oils.

2. Choosing the Right Dill Variety for Indoors

While all dill varieties share a similar flavor, some adapt better to container life indoors. Popular options include:

  • Fernleaf Dill: A compact, slow-bolting variety that stays under 18 inches tall. Perfect for small pots.
  • Bouquet Dill: Common in kitchens, grows up to 2–3 feet but can still be managed indoors with larger containers.
  • Dukat Dill: Known for its sweet flavor and lush foliage, ideal for harvesting leaves frequently.

For beginners, Fernleaf Dill is the best choice, since it grows well in smaller spaces without taking over.


3. Containers and Soil

Choosing a Container

  • Select a pot that’s at least 8–12 inches deep, as dill has long taproots.
  • Wider containers allow multiple plants, but avoid overcrowding since dill doesn’t like competition.
  • Ensure good drainage holes, as waterlogged soil can damage roots.

Soil Requirements

  • Dill thrives in light, well-draining soil rich in organic matter.
  • A mix of standard potting soil with added perlite or sand works well.
  • Soil pH should be slightly acidic to neutral (6.0–7.0).

4. Light Requirements

Dill is a sun-loving herb, so providing sufficient light indoors is crucial.

  • Natural light: Place your dill in a south- or west-facing window where it can get at least 6–8 hours of direct sunlight daily.
  • Grow lights: If your home doesn’t have enough sun, supplement with LED grow lights. Position lights 6–8 inches above the plant and run them for 12–14 hours a day.

Without enough light, dill becomes leggy and produces fewer leaves.


5. Temperature and Humidity

Dill prefers the same climate most homes provide:

  • Temperature: Keep between 65–75°F (18–24°C). Avoid cold drafts near windows in winter.
  • Humidity: Dill tolerates average indoor humidity well and doesn’t require special adjustments.

If your air is extremely dry, a small humidity tray nearby can help keep leaves fresh.


6. Watering Dill Indoors

Watering is all about balance.

  • Keep the soil consistently moist but never soggy.
  • Water deeply when the top inch of soil feels dry.
  • Reduce watering slightly in winter, when growth slows.

Signs of overwatering: yellowing leaves and root rot.
Signs of underwatering: wilted, crispy foliage.


7. Feeding Your Indoor Dill

Since dill grows quickly, it needs nutrients to support leaf production.

  • Use a balanced, water-soluble fertilizer (such as 10-10-10) every 3–4 weeks.
  • For organic options, liquid seaweed or compost tea works well.
  • Avoid over-fertilizing, as this can produce lush leaves with weak flavor.

8. Companion Planting Indoors

Although often discussed in outdoor gardening, companion planting can work indoors too. Dill pairs well with other herbs in the same light conditions, such as:

  • Parsley
  • Basil
  • Chives
  • Cilantro

Avoid growing dill too close to fennel indoors, as they can cross-pollinate and affect flavor.


9. Harvesting Dill for Cooking and Remedies

The beauty of dill is that you can harvest it at multiple stages.

  • Leaves (dill weed): Begin snipping leaves once the plant is 6–8 inches tall. Always harvest from the outside, leaving inner growth to continue.
  • Seeds: After flowering, dill produces seed heads that can be collected when they turn brown and dry. These seeds are flavorful in pickling and also useful in herbal medicine.
  • Flowers: Yellow umbels can be harvested for pickling recipes or as a decorative garnish.

Regular harvesting encourages new leaf growth, so don’t be afraid to snip often.


10. Storing and Preserving Dill

To extend the use of your harvest:

  • Fresh use: Keep stems in a glass of water in the fridge for up to a week.
  • Drying: Hang small bunches upside down in a cool, dry place, then crumble leaves into jars.
  • Freezing: Chop leaves and freeze in ice cube trays with water or olive oil for convenient cooking portions.
  • Seeds: Store in airtight jars once fully dried.

11. Using Dill in Cooking

Fresh dill adds a burst of flavor to countless dishes:

  • Toss chopped leaves into salads, soups, and potato dishes.
  • Use in marinades for fish, especially salmon.
  • Mix into yogurt sauces, dips, and salad dressings.
  • Infuse vinegar with dill for a tangy herbal twist.
  • Add seeds to pickles, bread, or stews for a stronger flavor.

12. Dill in Herbal Remedies

For centuries, dill has been valued for its medicinal properties:

  • Digestive aid: Dill tea, made from leaves or seeds, can ease bloating, gas, and indigestion.
  • Sleep support: Dill has mild calming effects that may help reduce anxiety and promote rest.
  • Immune boost: Its natural compounds contain antioxidants that support general wellness.
  • Breath freshener: Chewing dill seeds is a traditional remedy for freshening breath.

Always consult a healthcare provider before using herbs medicinally, especially for children, pregnant women, or people on medication.


13. Common Indoor Growing Problems

Even indoors, dill can face challenges. Here’s how to troubleshoot:

  • Leggy plants: Not enough sunlight. Move closer to a bright window or add grow lights.
  • Yellowing leaves: Overwatering or poor drainage. Check soil and container holes.
  • Slow growth: Lack of nutrients. Apply diluted fertilizer.
  • Aphids or spider mites: Rare indoors but possible. Treat with insecticidal soap or neem oil if needed.

14. Succession Planting for Year-Round Dill

Since dill is an annual herb, it doesn’t live forever indoors. Typically, a plant lasts about 8–12 weeks before it flowers and sets seed.

To ensure a constant supply:

  • Succession sowing: Plant new seeds every 3–4 weeks.
  • Keep multiple pots going, so as one plant matures, the next is ready to harvest.

This way, you’ll always have fresh dill leaves available for your kitchen and remedies.


Final Thoughts

Dill may be delicate in appearance, but it’s surprisingly easy to grow indoors once you understand its needs. With enough light, consistent watering, and regular harvesting, dill will reward you with fresh, flavorful leaves and seeds throughout the year. Whether you’re adding it to homemade pickles, whipping up a dill-infused dip, or brewing a soothing tea, your indoor dill will prove itself as both a culinary superstar and a gentle herbal remedy.

By growing dill indoors, you’re not just cultivating a plant—you’re cultivating a lifestyle of freshness, wellness, and flavor at your fingertips.

How to Care for Begonias as Indoor Plants

How to Care for Begonias as Indoor Plants

Begonias are some of the most versatile and eye-catching plants you can grow indoors. Known for their vibrant flowers, colorful patterned leaves, and easy adaptability, begonias bring beauty and charm to any room. While many gardeners grow them outdoors in summer gardens or shaded patios, begonias also thrive indoors year-round if given the right care.

Whether you’re drawn to the lush foliage of Rex begonias, the constant blooms of wax begonias, or the trailing beauty of angel wing begonias, these plants can add color and character to your home. However, begonias have specific needs regarding light, humidity, water, and soil. If you want your indoor begonias to stay healthy and continue producing blooms or vibrant leaves, it’s important to understand how to care for them properly.

This detailed guide will walk you through everything you need to know about caring for begonias as indoor plants.


1. Choosing the Right Type of Begonia for Indoors

There are over 1,800 species of begonias, but not all are suited for indoor growing. Here are some of the most popular indoor varieties:

  • Rex Begonias: Known for their stunning, patterned leaves in shades of green, silver, purple, and red. These are primarily foliage plants and rarely bloom indoors.
  • Wax Begonias (Begonia semperflorens): Compact plants that bloom consistently, producing clusters of pink, red, or white flowers.
  • Cane Begonias (Angel Wing and Dragon Wing): Upright plants with bamboo-like stems and large, wing-shaped leaves. They produce seasonal blooms in pink or red.
  • Tuberous Begonias: Grown for their showy flowers, though they can be a bit trickier indoors.

For beginners, wax begonias and Rex begonias are the easiest to care for indoors.


2. Light Requirements

Light is one of the most important factors in keeping begonias happy indoors.

  • Rex and foliage begonias: Prefer bright, indirect light but not direct sun, which can scorch their leaves. Place them near an east- or north-facing window.
  • Flowering begonias: Like wax or cane begonias need a bit more light to bloom. A south- or west-facing window with sheer curtains works well.
  • Artificial lighting: If your home lacks sufficient natural light, begonias adapt well to LED grow lights.

Tip: If leaves fade in color or plants look leggy, they need more light.


3. Temperature and Humidity

Begonias are tropical plants, so they prefer warm, humid conditions.

  • Ideal temperature range: 65–75°F (18–24°C) during the day and slightly cooler at night. Avoid exposing them to temperatures below 55°F (13°C).
  • Humidity: Begonias thrive in 50–60% humidity. Indoor heating often dries the air, especially in winter, so consider these solutions:
    • Place a humidity tray under the plant (a shallow tray with pebbles and water).
    • Run a small humidifier nearby.
    • Group begonias with other humidity-loving plants to create a microclimate.

Avoid misting begonias directly, as water droplets on leaves can encourage mildew and fungal spots.


4. Watering Begonias Indoors

Watering is often the trickiest part of begonia care. Too little water can cause wilting, while too much can lead to root rot.

  • General rule: Water when the top inch of soil feels dry to the touch.
  • Method:
    • Use room-temperature water.
    • Water thoroughly until liquid drains out of the pot’s bottom.
    • Empty saucers so roots never sit in standing water.
  • Seasonal adjustment:
    • Spring/summer: Water more frequently, as plants are actively growing.
    • Fall/winter: Reduce watering, since growth slows.

Signs of overwatering include yellowing leaves, soft stems, and a musty smell. Underwatering causes crispy, curling leaves.


5. The Right Soil and Potting Mix

Begonias need light, well-draining soil to prevent root rot. Standard garden soil is too heavy for indoor begonias.

  • Best mix: A combination of peat moss, perlite, and light potting soil works well.
  • Specialty mixes: You can buy potting soil designed for African violets—this also works perfectly for begonias.
  • Containers: Use pots with drainage holes. Begonias dislike soggy roots.

Repotting every 1–2 years keeps the soil fresh and prevents compaction.


6. Fertilizing for Healthy Growth and Blooms

Begonias are relatively light feeders, but they do benefit from regular fertilizer.

  • Foliage begonias (like Rex): Use a balanced, water-soluble fertilizer (10-10-10 or 20-20-20) diluted to half-strength every 3–4 weeks during spring and summer.
  • Flowering begonias: Use a fertilizer higher in phosphorus (the middle number, e.g., 15-30-15) to encourage more blooms.
  • Winter feeding: Reduce or stop fertilizing during winter dormancy, unless plants are still actively growing under grow lights.

7. Pruning and Maintenance

Begonias respond well to pruning, which keeps them neat and encourages new growth.

  • Pinching back tips: For cane and wax begonias, pinch back leggy stems to promote bushier growth.
  • Removing dead leaves/flowers: Prevents fungal problems and directs energy to new growth.
  • Cleaning leaves: Wipe dust from leaves gently with a damp cloth, especially for large-leafed begonias like angel wings.

8. Propagating Begonias Indoors

One of the joys of begonias is how easy they are to propagate.

  • Stem cuttings: Take a 3–4 inch cutting, dip it in rooting hormone, and place in moist soil or water until roots form.
  • Leaf cuttings (for Rex begonias): Cut a healthy leaf into sections, ensuring each section has a vein, then press them into moist soil. Each piece can grow into a new plant.
  • Division: Some begonias with clumping growth can be divided during repotting.

Propagation not only helps expand your collection but also revives older, leggy plants.


9. Common Problems and Solutions

Even with good care, begonias can face challenges indoors. Here’s how to troubleshoot:

  • Powdery mildew: Appears as white dust on leaves. Improve air circulation, avoid overhead watering, and treat with a mild fungicide.
  • Root rot: Caused by overwatering or poor drainage. Always use well-draining soil and pots with drainage holes.
  • Leaf drop: Often due to sudden temperature changes or drafts. Keep plants away from air vents and cold windows.
  • Pests: Begonias can attract spider mites, mealybugs, and aphids. Inspect plants regularly and treat infestations with insecticidal soap or neem oil.

10. Seasonal Care for Indoor Begonias

Begonias’ needs shift slightly with the seasons:

  • Spring and Summer: Active growing season. Provide more light, regular watering, and fertilizing.
  • Fall: Reduce watering slightly as growth slows.
  • Winter: Many begonias slow down or enter dormancy. Water sparingly, and don’t fertilize unless actively growing. Tuberous begonias may lose all top growth—store the tubers in a cool, dry place until spring.

Final Thoughts

Begonias may have a reputation for being a little finicky, but once you understand their needs, they make excellent and rewarding indoor plants. Their wide variety of foliage colors, shapes, and flowers ensures there’s a begonia for every plant lover—whether you want show-stopping leaves or cheerful, long-lasting blooms.

By providing the right mix of bright indirect light, consistent moisture, humidity, and occasional feeding, you’ll enjoy thriving begonias that bring beauty and freshness to your home year-round. With a little attention, your begonias can become one of your most beloved indoor companions.

How to Keep Orchids Blooming Longer Indoors

How to Keep Orchids Blooming Longer Indoors

Orchids are often seen as the crown jewels of the houseplant world, thanks to their graceful blooms, exotic appearance, and long-lasting flowers. While they may have a reputation for being tricky to care for, orchids—especially Phalaenopsis orchids (moth orchids)—are surprisingly resilient once you understand their needs. The real secret lies not only in keeping them alive but in encouraging them to bloom beautifully year after year.

If you’ve ever wondered how to keep orchids blooming longer indoors, this guide will take you through the essentials—light, water, humidity, feeding, and care routines—to help your orchids thrive and reward you with stunning flowers for months.


1. Choosing the Right Orchid for Indoors

Not all orchids adapt equally well to indoor growing conditions. The most common and beginner-friendly choice is the Phalaenopsis orchid, which blooms for months at a time and is tolerant of average household environments. Other good options include Dendrobium and Oncidium orchids, but these may require slightly more specific conditions.

When purchasing, look for:

  • Healthy green leaves with no spots or yellowing.
  • Firm roots, often visible through clear plastic pots.
  • Blooms that are partially open—so you can enjoy flowers longer at home.

2. Light: The Key to Blooms

Orchids thrive in bright, indirect light. Too much direct sun can scorch the leaves, while too little light prevents blooming.

  • Best placement: An east-facing window is ideal, as it provides gentle morning sunlight. A south- or west-facing window can work too, as long as you filter the light with sheer curtains.
  • Signs of light problems:
    • Dark green leaves = not enough light (orchids should have medium-green leaves).
    • Yellow or reddish leaves = too much light.

If natural light is limited, especially in winter, consider using grow lights to keep your orchids thriving year-round.


3. Temperature and Air Circulation

Orchids prefer a balance between warm days and slightly cooler nights. This day-night difference encourages flower spikes to develop.

  • Ideal temperatures:
    • Day: 70–80°F (21–27°C)
    • Night: 60–65°F (16–18°C)
  • Airflow: Good air circulation helps prevent fungal diseases. Place a small fan nearby on a low setting to keep the air moving without creating drafts.

4. Watering: The Golden Rule

The most common mistake orchid owners make is overwatering. Orchids don’t like “wet feet,” as their roots need both moisture and air circulation.

  • Watering frequency: Typically once a week, but it depends on your home’s humidity and temperature. In warmer, drier environments, you may need to water more often.
  • Method:
    • Water thoroughly until liquid drains from the bottom of the pot.
    • Never let orchids sit in standing water—empty the saucer after watering.
  • Tip: Stick your finger an inch into the potting medium. If it feels dry, it’s time to water.

Avoid watering with ice cubes (a popular internet myth). Orchids prefer room-temperature water, ideally filtered or rainwater, as tap water may contain salts and chemicals that harm roots over time.


5. Humidity: Creating a Tropical Vibe Indoors

Orchids come from tropical climates, so they love humidity. Indoors, especially in winter, the air can get too dry for them.

  • Ideal humidity: 50–70%
  • Ways to increase humidity:
    • Place a humidity tray (a shallow dish filled with pebbles and water) under the orchid pot, ensuring the roots don’t sit directly in water.
    • Use a room humidifier, especially if you have multiple tropical plants.
    • Group orchids with other plants to create a mini-humid microclimate.

6. Feeding Orchids for Healthy Blooms

To keep orchids blooming longer, they need consistent but gentle feeding.

  • Fertilizer: Use a balanced orchid fertilizer (20-20-20) or one slightly higher in phosphorus to promote blooms.
  • Frequency: Every 2 weeks during active growth (spring and summer), and once a month in fall and winter.
  • Rule of thumb: “Weakly, weekly.” Dilute fertilizer to half or quarter strength before applying.

7. Repotting for Continued Health

Orchids need to be repotted every 1–2 years to prevent root rot and refresh the growing medium. They usually grow in a bark-based mix that breaks down over time.

  • When to repot:
    • After the orchid finishes blooming.
    • If the potting mix looks compacted or broken down.
    • When roots are overcrowded and spilling out of the pot.
  • Steps:
    1. Gently remove the orchid from its old pot.
    2. Trim away dead or mushy roots.
    3. Place it in fresh orchid mix (bark, sphagnum moss, or a specialty orchid blend).
    4. Water lightly to settle the plant.

8. Extending Bloom Time

Orchid blooms can last anywhere from 2 to 4 months with proper care. Here’s how to make them last longer:

  • Keep them away from drafts: Avoid placing orchids near heaters, vents, or cold windows.
  • Stable environment: Fluctuating temperatures or moving them frequently can shorten bloom time.
  • Support flower spikes: Use stakes or clips to keep long stems upright and prevent snapping.
  • Avoid ethylene gas: Keep orchids away from ripening fruit, which releases ethylene and can cause blooms to fade faster.

9. Encouraging Reblooming

Once the flowers drop, your orchid can rebloom if given the right care.

  • For Phalaenopsis orchids:
    • If the flower spike is still green, cut it just above a node (a small bump). This can trigger new side shoots and more blooms.
    • If the spike is brown and dry, cut it back completely to the base.
  • Encourage a new spike: A drop in night temperature (about 10°F cooler than daytime) can stimulate orchids to produce a new flower spike.
  • Be patient—reblooming may take several months.

10. Common Problems and Fixes

  • Wrinkled leaves: Usually from underwatering or damaged roots.
  • Yellowing leaves: Normal for older leaves, but if widespread, it may mean overwatering or poor light.
  • Bud blast (buds falling before opening): Caused by sudden changes in environment, low humidity, or ethylene exposure.
  • Root rot: From too much water or poor drainage. Repot and trim unhealthy roots.

Final Thoughts

Orchids may look delicate, but with the right care, they’re one of the most rewarding indoor plants you can grow. Their blooms can last for months, and with patience and attention, they’ll rebloom year after year. By giving them the right balance of light, water, humidity, and nutrients, you’ll enjoy not only long-lasting blooms but also the joy of seeing your orchid thrive in your home.

With these tips, keeping orchids blooming longer indoors doesn’t have to be intimidating—it can be a fulfilling experience that turns your home into a mini tropical paradise.

How to Grow Mint Indoors Without It Taking Over

How to Grow Mint Indoors Without It Taking Over

Few herbs are as refreshing, versatile, and easy to grow as mint (Mentha spp.). Whether you’re adding it to iced tea, cocktails, salads, or desserts, having fresh mint on hand is a game-changer in the kitchen. But if you’ve ever grown mint outdoors, you know it has a reputation for being invasive—spreading rapidly through underground runners until it takes over entire garden beds.

The good news? You can grow mint indoors, where it’s not only convenient but also much easier to keep under control. With the right care and setup, you’ll enjoy a steady supply of fragrant mint leaves without worrying about it overrunning your space.

This guide will walk you through everything you need to know to grow mint indoors successfully—from choosing the right container and soil to managing its growth and keeping your plant healthy year-round.


Why Grow Mint Indoors?

Mint is often considered a beginner-friendly herb, but indoors it offers even more advantages:

  • Convenience: Fresh sprigs are always just a snip away.
  • Controlled growth: Indoors, you can contain mint’s tendency to spread aggressively.
  • Year-round harvest: You’re not limited by outdoor growing seasons.
  • Fragrance: Mint adds a fresh, clean aroma to your kitchen or living room.
  • Pest control: Unlike outdoor mint, which can attract insects, indoor mint faces fewer pest problems.

If you’ve avoided mint in your garden because of its invasive nature, growing it indoors is the perfect solution.


Choosing the Right Mint Variety

There are over 600 varieties of mint, each with subtle differences in flavor and growth. Popular choices for indoor growing include:

  • Spearmint (Mentha spicata): Classic mild mint flavor, great for teas and cooking.
  • Peppermint (Mentha × piperita): Strong, cooling flavor, ideal for desserts and drinks.
  • Chocolate Mint: A sweet, chocolatey undertone that pairs well with desserts.
  • Apple Mint: Mild, fruity flavor with fuzzy leaves.
  • Pineapple Mint: A variegated variety with attractive green and white leaves.

For indoor growing, spearmint and peppermint are the most common, but adventurous gardeners may enjoy experimenting with the flavored varieties.


The Secret to Growing Mint Indoors Without It Taking Over: Containers

The key to controlling mint indoors is container gardening. Mint spreads aggressively when planted in the ground, but in a pot, its growth is contained.

  • Pot size: Start with a container that is at least 8–10 inches deep and wide. Mint grows quickly and needs room for its roots.
  • Material: Terracotta or ceramic pots work well, but plastic containers retain moisture better (important since mint likes consistent moisture).
  • Drainage: Ensure the pot has drainage holes to prevent soggy roots.
  • Placement: Place a saucer under the pot to catch extra water, but don’t let the plant sit in standing water.

If you want to grow multiple mint varieties, keep them in separate pots. Otherwise, they may cross-pollinate and muddle flavors.


Light Requirements

Mint grows best in bright, indirect light, though it can tolerate a bit of direct morning sun.

  • Windows: A south- or west-facing window works well.
  • Grow lights: If your home doesn’t get enough sunlight, use a full-spectrum grow light for 10–12 hours daily.
  • Rotation: Turn the pot every week so the plant grows evenly and doesn’t lean toward the light.

Too little light will make mint leggy, with small, pale leaves.


Soil and Potting Mix

Mint likes soil that retains moisture but still drains well.

  • Best mix: Use a high-quality all-purpose potting mix with added perlite for drainage.
  • pH preference: Mint prefers slightly acidic to neutral soil (pH 6.0–7.0).
  • Repotting: Mint grows quickly, so you may need to repot every year to refresh the soil and give roots more room.

Watering Mint Indoors

Mint loves water but hates soggy conditions—a balance that many growers struggle with.

  • Check moisture: Stick your finger 1 inch into the soil. If it feels dry, water thoroughly.
  • Consistency: Mint prefers consistently moist soil but not waterlogged conditions.
  • Humidity: Mint appreciates average indoor humidity but can tolerate slightly dry air better than fussier herbs like basil.

Tip: During winter, when indoor air is drier, mist your mint occasionally or place it near a humidifier.


Fertilizing Mint

Mint is a relatively fast-growing herb that benefits from regular feeding, especially when grown indoors in containers.

  • Type: Use a balanced, water-soluble fertilizer (like 10-10-10).
  • Frequency: Fertilize once every 4–6 weeks during the growing season.
  • Alternative: Organic options such as compost tea or fish emulsion also work well.

Don’t over-fertilize, as too much nitrogen can make leaves less flavorful.


Pruning and Harvesting Mint

Pruning is one of the best ways to keep mint under control indoors while encouraging lush growth.

  • Harvest often: Regularly pinch or cut stems just above a leaf node. This encourages the plant to branch and grow bushier.
  • Don’t over-harvest: Never remove more than one-third of the plant at once.
  • Revive legginess: If your mint gets too leggy, cut it back by half to encourage fresh growth.

By pruning regularly, you prevent mint from getting unruly indoors while ensuring a constant supply of fresh leaves.


Propagating Mint

One of the joys of growing mint indoors is how easy it is to propagate and share.

  • Stem cuttings: Snip a 4–6 inch cutting just below a node. Remove lower leaves and place the cutting in water until roots form. Then, transfer to soil.
  • Division: When repotting, divide the root ball into smaller sections and pot separately.

Mint propagation ensures you always have backup plants in case one declines.


Common Problems with Indoor Mint

Even indoors, mint can face a few challenges. Here’s how to troubleshoot:

  1. Leggy growth
    • Cause: Not enough light.
    • Fix: Move closer to a sunny window or add a grow light.
  2. Yellowing leaves
    • Cause: Overwatering or poor drainage.
    • Fix: Let soil dry slightly between waterings; ensure drainage holes are clear.
  3. Pests (aphids, spider mites, whiteflies)
    • Cause: Indoor dry air or nearby infested plants.
    • Fix: Rinse leaves, increase humidity, and treat with neem oil if needed.
  4. Brown leaf tips
    • Cause: Underwatering or low humidity.
    • Fix: Water more consistently and mist occasionally.
  5. Weak flavor
    • Cause: Too much fertilizer or lack of sunlight.
    • Fix: Reduce feeding and increase light exposure.

How to Keep Mint from Taking Over Indoors

Unlike outdoors, where mint’s roots and runners can spread unchecked, indoors it’s much easier to manage. Here are some strategies:

  • Containment: Always grow mint in its own pot.
  • Pruning: Harvest regularly to keep it compact and prevent overgrowth.
  • Rotation: Refresh soil yearly and trim back roots during repotting to prevent overcrowding.
  • Hydration balance: Avoid letting mint get too comfortable in constantly soggy soil, which can promote sprawling.

By following these steps, you’ll enjoy controlled, healthy mint without worrying about invasiveness.


Creative Uses for Indoor Mint

Once you’ve mastered growing mint indoors, you’ll never run out of ways to use it:

  • In the kitchen: Add to teas, smoothies, cocktails, salads, sauces, and desserts.
  • Home remedies: Brew mint tea for digestion or use leaves in steam for congestion relief.
  • Freshener: Crush leaves in water for a natural air freshener or place sprigs around your home.
  • DIY projects: Infuse oils, create mint sugar, or craft homemade bath salts.

Final Thoughts

Mint has a reputation for being invasive outdoors, but indoors it’s one of the most rewarding herbs you can grow. With the right container, regular pruning, and balanced care, you’ll have a healthy, fragrant plant that provides fresh leaves year-round—without taking over your space.

Remember the essentials: bright indirect light, consistent moisture, good drainage, and frequent harvesting. Follow these, and your indoor mint will thrive happily in its pot, giving you flavor, fragrance, and beauty whenever you need it.

How to Care for Calatheas and Keep Their Leaves Vibrant

How to Care for Calatheas and Keep Their Leaves Vibrant

Few houseplants are as striking and mesmerizing as calatheas. With their dramatic foliage—patterned in purples, pinks, silvers, and greens—these tropical beauties are often referred to as “prayer plants,” thanks to the way their leaves fold upward at night as if in prayer. While undeniably gorgeous, calatheas are also known for being a little fussy indoors, leading many plant lovers to struggle with crispy edges, drooping leaves, or dull color.

The good news? With the right knowledge, you can keep your calathea not only alive but thriving, showing off its full vibrancy year-round. This guide will walk you through everything you need to know—from light and humidity to soil and troubleshooting—so you can enjoy lush, healthy foliage that truly turns heads.


Why Calatheas Are Worth the Effort

Calatheas (members of the Marantaceae family) are native to tropical rainforests in South America, where they grow under tree canopies in warm, humid, shaded environments. Their natural habitat explains why they demand a little extra care indoors. But they reward that care in unique ways:

  • Show-stopping foliage: From the zebra-striped Calathea zebrina to the pink and green Calathea roseopicta, no two varieties are quite alike.
  • Non-toxic to pets: Unlike many houseplants, calatheas are safe for cats and dogs.
  • Air-purifying: They help filter indoor air and add fresh oxygen.
  • Dynamic beauty: Their rhythmic leaf movement (nyctinasty) adds life and movement to your indoor space.

If you want a houseplant that feels more like living art, calatheas are a perfect choice.


Light: Bright but Indirect

The biggest mistake people make with calatheas is giving them too much sun. These plants evolved under dense canopies, which means they thrive in bright, indirect light—never harsh, direct rays.

  • Best location: Place near an east- or north-facing window. A sheer curtain over a south or west-facing window can also work.
  • Too much sun? Yellowing leaves or faded patterns usually mean it’s getting scorched.
  • Too little light? Leaves may curl, droop, or growth may slow dramatically.

If natural light is limited, a full-spectrum grow light set on a 10–12-hour cycle will keep your calathea healthy.


Temperature and Humidity: Mimic the Tropics

Calatheas are warmth-loving plants that detest drafts, sudden temperature swings, or dry air.

  • Temperature range: Aim for 65–80°F (18–27°C). Avoid anything below 60°F (15°C).
  • Humidity: The number one secret to vibrant leaves is high humidity—50% or more. Indoors, especially in winter, humidity can drop drastically, causing crispy edges.

Ways to boost humidity:

  1. Use a humidifier near your plant.
  2. Place the pot on a pebble tray filled with water.
  3. Group calatheas with other tropical plants to create a microclimate.
  4. Mist occasionally, but avoid leaving water droplets on the leaves, which can encourage fungal issues.

Soil and Potting

Calatheas need soil that holds some moisture but drains well—similar to the forest floor of their native environment.

  • Best soil mix: Combine 2 parts peat or coco coir, 1 part perlite, and 1 part orchid bark. This ensures moisture retention with good aeration.
  • Pot type: Choose a pot with good drainage holes to prevent root rot. Terracotta pots can dry out too quickly, so glazed ceramic or plastic pots often work better.
  • Repotting: Every 1–2 years in spring is ideal, as calatheas don’t like being rootbound. Refreshing the soil also prevents compaction.

Watering: Keep It Consistent

Calatheas are sensitive when it comes to watering. Too little, and leaves curl; too much, and roots suffocate. The key is consistency.

  • When to water: Check the top inch of soil—if it feels slightly dry, it’s time to water. Don’t wait until the soil is bone-dry.
  • Water type matters: Tap water with high chlorine, fluoride, or salts often causes brown leaf tips. Calatheas do best with filtered, rain, or distilled water.
  • Method: Water thoroughly until water drains from the bottom, then empty the saucer. Never let the plant sit in standing water.

Tip: If you see crispy edges despite proper humidity, your water quality may be to blame.


Fertilizing Calatheas

While not heavy feeders, calatheas appreciate occasional nutrients to maintain lush leaves.

  • Type: Use a balanced, water-soluble fertilizer diluted to half-strength.
  • Frequency: Feed once a month during the growing season (spring and summer).
  • Rest period: Stop fertilizing in fall and winter when growth naturally slows.

Over-fertilizing can lead to burned roots and dull leaf colors—less is more here.


Pruning and Grooming

Calatheas aren’t fast growers, but routine grooming keeps them looking vibrant.

  • Trim off yellowed or brown leaves with clean scissors at the base.
  • Wipe leaves regularly with a damp cloth to remove dust and allow them to “breathe.”
  • Rotate the pot every couple of weeks to encourage even growth.

Pruning encourages energy to go into new, healthy foliage.


Common Calathea Problems and Fixes

Even with good care, calatheas sometimes signal distress through their leaves. Here’s how to troubleshoot:

  1. Crispy brown edges
    • Likely cause: Low humidity or poor-quality water.
    • Fix: Increase humidity and switch to filtered or distilled water.
  2. Curling leaves
    • Likely cause: Underwatering or too much direct sun.
    • Fix: Adjust watering schedule and move to a shadier spot.
  3. Yellowing leaves
    • Likely cause: Overwatering or poor drainage.
    • Fix: Allow soil to dry slightly and check for root rot.
  4. Drooping leaves
    • Likely cause: Stress from temperature changes or underwatering.
    • Fix: Stabilize environment and water consistently.
  5. Pest infestations (spider mites, aphids, thrips)
    • Calatheas can attract pests in dry conditions.
    • Fix: Increase humidity and treat with neem oil or insecticidal soap.

Propagating Calatheas

Unlike some plants, calatheas aren’t easily propagated from cuttings. Instead, they spread by rhizomes, which can be divided.

  • Best time: During repotting in spring.
  • Method: Gently separate the root ball into smaller clumps, ensuring each section has roots and leaves.
  • Pot each division into fresh soil and keep in a warm, humid environment until established.

Popular Calathea Varieties for Indoors

If you’re starting or expanding your collection, here are some of the most loved varieties:

  • Calathea orbifolia: Large, round leaves with silver stripes.
  • Calathea zebrina: Striking zebra-like striping.
  • Calathea roseopicta: Green leaves with pink or white patterns.
  • Calathea lancifolia (Rattlesnake Plant): Long, narrow leaves with wavy edges and dark spots.
  • Calathea makoyana (Peacock Plant): Stunning feather-like leaf patterns.

Each variety has similar care requirements but brings unique beauty to your indoor jungle.


Seasonal Care Adjustments

Calatheas’ needs shift slightly with the seasons:

  • Spring & Summer: Active growth phase. Water more often, fertilize monthly, and keep humidity high.
  • Fall & Winter: Growth slows. Reduce watering frequency and stop fertilizing. Watch out for dry air from indoor heating.

Maintaining consistency is key during seasonal changes.


Final Thoughts

Calatheas may be labeled “divas” of the plant world, but with the right care, they reward you with some of the most spectacular foliage you’ll ever see indoors. The secret lies in mimicking their natural rainforest habitat: bright but indirect light, consistent moisture, warm temperatures, and above all—high humidity.

If you’ve struggled with calatheas before, don’t be discouraged. Start fresh with the right soil, water, and environment, and you’ll soon see why these plants are such beloved indoor favorites. Their lush, patterned leaves not only bring vibrancy to your home but also a daily reminder of the beauty of nature’s design.

How to Grow Rosemary Indoors for Fresh Flavor Anytime

How to Grow Rosemary Indoors for Fresh Flavor Anytime

Few herbs are as versatile and aromatic as rosemary (Rosmarinus officinalis). This evergreen perennial, with its needle-like leaves and distinctive piney scent, has been treasured for centuries in cooking, medicine, and even spiritual traditions. While rosemary thrives outdoors in warm, Mediterranean-like climates, many gardeners want the convenience of having this flavorful herb within arm’s reach—right on their windowsill or kitchen counter.

The good news? Rosemary can indeed be grown indoors successfully, provided you understand its unique needs. Unlike some herbs that adapt easily to indoor life, rosemary is a bit finicky. However, with the right approach, you can enjoy fresh sprigs of rosemary year-round, no matter the season.

This guide covers everything you need to know—from choosing the right variety to providing the right light, soil, and care—so you can enjoy lush rosemary plants and fresh flavor anytime.


Why Grow Rosemary Indoors?

Growing rosemary indoors comes with several benefits beyond having easy access to a culinary staple.

  • Convenience: Fresh rosemary at your fingertips for roasting, seasoning, or making herbal teas.
  • Year-Round Growth: Outdoor rosemary may slow down or die back in cold climates, but indoor growing keeps it alive year-round.
  • Air Quality: Like many houseplants, rosemary helps purify indoor air.
  • Aesthetic Appeal: With its upright, evergreen form, rosemary doubles as a beautiful ornamental plant indoors.
  • Fragrance: The pleasant, woodsy aroma of rosemary freshens up your home naturally.

Choosing the Right Rosemary Variety for Indoors

Not all rosemary varieties adapt equally well indoors. While most types can be grown in containers, compact and upright varieties are easier to manage in limited space.

  • ‘Arp’ – Hardy and tolerant of cooler indoor conditions.
  • ‘Blue Boy’ – A dwarf variety, perfect for windowsills.
  • ‘Tuscan Blue’ – Tall and upright with strong flavor; needs more space.
  • ‘Salem’ – Semi-trailing, making it attractive in hanging pots or decorative containers.

For indoor growing, ‘Blue Boy’ and ‘Arp’ are among the best choices, especially for beginners.


The Essentials of Growing Rosemary Indoors

1. Light: The Most Important Factor

Rosemary is a sun-loving Mediterranean plant, which means it requires a lot of direct light to thrive. Indoors, insufficient light is the most common cause of weak, leggy, or dying rosemary.

  • Place rosemary in the sunniest window you have—ideally a south-facing window where it gets 6–8 hours of direct sunlight daily.
  • If natural light is limited, use a full-spectrum grow light to supplement. Position the light 6–12 inches above the plant and keep it on for about 12–14 hours daily.
  • Rotate the plant every week to ensure even growth and prevent leaning.

Tip: If you notice spindly stems or yellowing leaves, it’s likely not getting enough light.


2. Temperature and Humidity

Rosemary loves warmth and fresh air but dislikes extremes.

  • Temperature range: Keep between 60–75°F (15–24°C). Avoid placing the plant near cold drafts, radiators, or heat vents.
  • Humidity: Rosemary prefers slightly higher humidity than most indoor environments provide. Dry air indoors, especially during winter, can stress the plant.
    • Use a humidity tray (a shallow tray filled with water and pebbles under the pot).
    • Mist the plant occasionally, but avoid over-wetting the leaves.
    • A small humidifier near your rosemary can work wonders.

3. Soil and Potting

Rosemary requires well-draining soil to prevent root rot, its number one enemy indoors.

  • Use a high-quality potting mix with added perlite, sand, or cactus mix to ensure drainage.
  • Avoid heavy garden soil, which holds too much water.
  • Choose a pot with drainage holes. Terra cotta pots are ideal because they allow soil to dry out more quickly than plastic or ceramic containers.
  • Repot every 1–2 years to refresh the soil and prevent root binding.

4. Watering Rosemary Indoors

Watering is often where most rosemary growers go wrong.

  • Rule of thumb: Water when the top 1–2 inches of soil feel dry.
  • Do not let rosemary sit in soggy soil. Overwatering quickly leads to root rot.
  • On the other hand, don’t let the soil completely dry out for too long, or the plant may drop leaves.
  • Use the soak-and-drain method: water thoroughly until water drains from the bottom, then allow excess moisture to escape.

Winter watering tip: Rosemary grows more slowly in winter, so reduce watering frequency but maintain consistent moisture.


5. Fertilizing Rosemary Indoors

Rosemary doesn’t require heavy feeding, but it benefits from a little boost.

  • Use a balanced liquid fertilizer (10-10-10 or 20-20-20) once a month during the active growing season (spring and summer).
  • During fall and winter, cut back fertilization to once every 6–8 weeks.
  • Organic options like fish emulsion or seaweed extract work well too.

6. Pruning and Harvesting

Pruning rosemary is essential for keeping it healthy and bushy indoors.

  • Pruning: Trim back stems regularly to encourage branching and airflow. Always cut just above a leaf node.
  • Harvesting: Snip sprigs as needed, but avoid removing more than one-third of the plant at a time.
  • Frequent harvesting actually helps rosemary stay lush and prevents legginess.

Common Problems with Indoor Rosemary

Even with proper care, rosemary can sometimes struggle indoors. Here are the most common issues and how to fix them:

  1. Powdery Mildew
    • Appears as white, powdery spots on leaves.
    • Solution: Improve air circulation, avoid misting directly onto leaves, and reduce humidity around the foliage.
  2. Yellowing Leaves
    • Usually caused by overwatering or poor drainage.
    • Solution: Check soil moisture and repot in well-draining soil if necessary.
  3. Leggy Growth
    • Caused by insufficient light.
    • Solution: Move to a sunnier window or add a grow light.
  4. Drooping or Dry Leaves
    • Often due to underwatering or very low humidity.
    • Solution: Increase watering frequency slightly and boost humidity.
  5. Pests (Spider Mites, Aphids, Whiteflies)
    • Check regularly for pests, especially under leaves.
    • Solution: Spray with insecticidal soap or neem oil, and keep leaves clean with a damp cloth.

Overwintering Rosemary Indoors

If you normally grow rosemary outdoors but live in a region with cold winters, you can overwinter it indoors.

  • Before bringing it inside, check for pests and prune lightly.
  • Place it in a bright window or under grow lights.
  • Adjust watering and humidity as described above.
  • Expect some adjustment period—it may drop a few leaves but should stabilize with consistent care.

Creative Ways to Use Fresh Rosemary

Once your rosemary is thriving indoors, the possibilities are endless:

  • Cooking: Add to roasted meats, potatoes, soups, stews, and bread.
  • Herbal Tea: Steep fresh sprigs for a soothing, aromatic tea.
  • DIY Projects: Use rosemary in homemade candles, potpourri, or infused oils.
  • Natural Air Freshener: A few sprigs in a vase can freshen up a room naturally.

Final Thoughts

Growing rosemary indoors may be more challenging than some other herbs, but it is absolutely worth the effort. With plenty of sunlight, the right soil, careful watering, and a bit of pruning, your rosemary plant can thrive indoors, giving you fresh flavor anytime you need it.

Remember, the keys to success are light, drainage, and moderation. Once you master these basics, you’ll never need to rely on store-bought rosemary again—and you’ll enjoy the satisfaction of nurturing a plant that brings both beauty and flavor to your home.