How to Keep Ferns Alive Indoors (Even if You’ve Killed Them Before)

How to Keep Ferns Alive Indoors (Even if You’ve Killed Them Before)

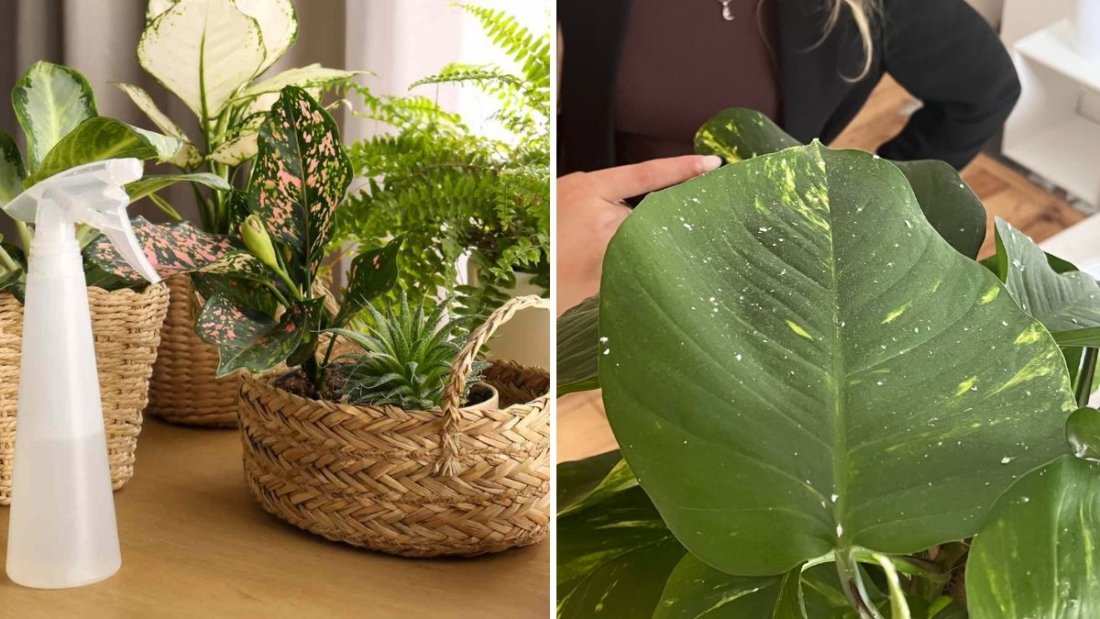
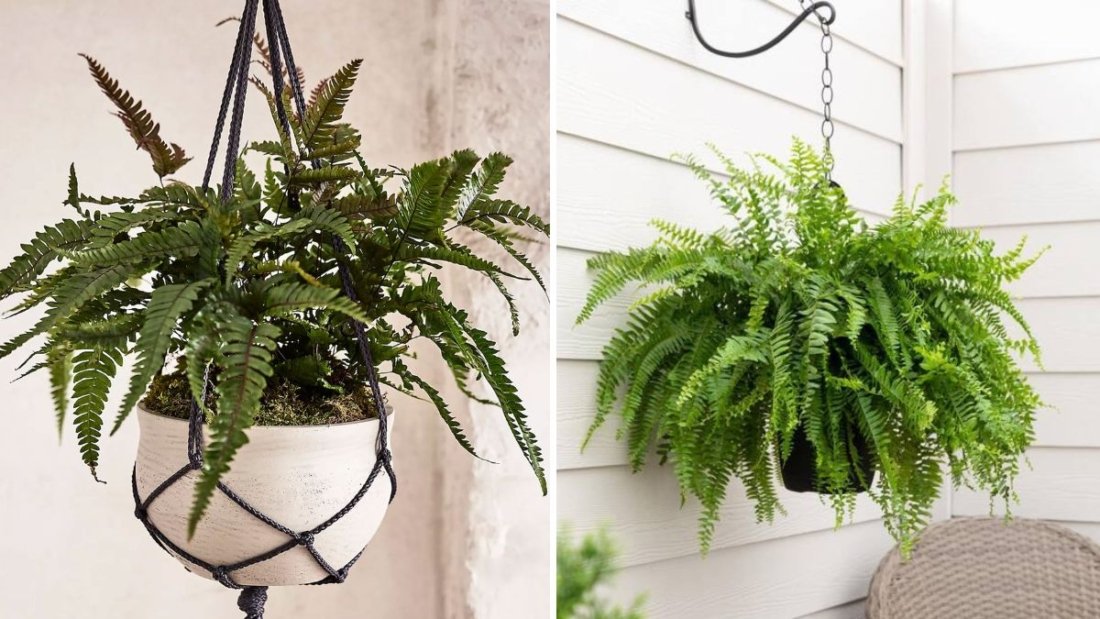
Ferns are timeless houseplants that bring lush, feathery greenery and a sense of natural calm into any indoor space. Their delicate fronds soften corners, brighten shelves, and make rooms feel alive. Yet, despite their beauty, ferns are notorious for being “diva” plants—finicky about light, water, and humidity. Many plant parents give up after watching their ferns shrivel, crisp, or drop leaves.

The good news? Ferns aren’t impossible to grow indoors. They simply require you to mimic the conditions of their natural habitat: moist, shaded forest floors with high humidity. Once you understand what they need—and develop a routine—you can keep ferns alive and thriving, even if you’ve struggled before.

This detailed guide will walk you through everything you need to know, from selecting the right fern to providing the perfect indoor environment, troubleshooting common problems, and finally enjoying those lush, graceful fronds year-round.


1. Understanding Ferns

Ferns are one of the oldest plant groups on Earth, with fossil records dating back over 300 million years. Unlike flowering plants, they reproduce by spores rather than seeds.

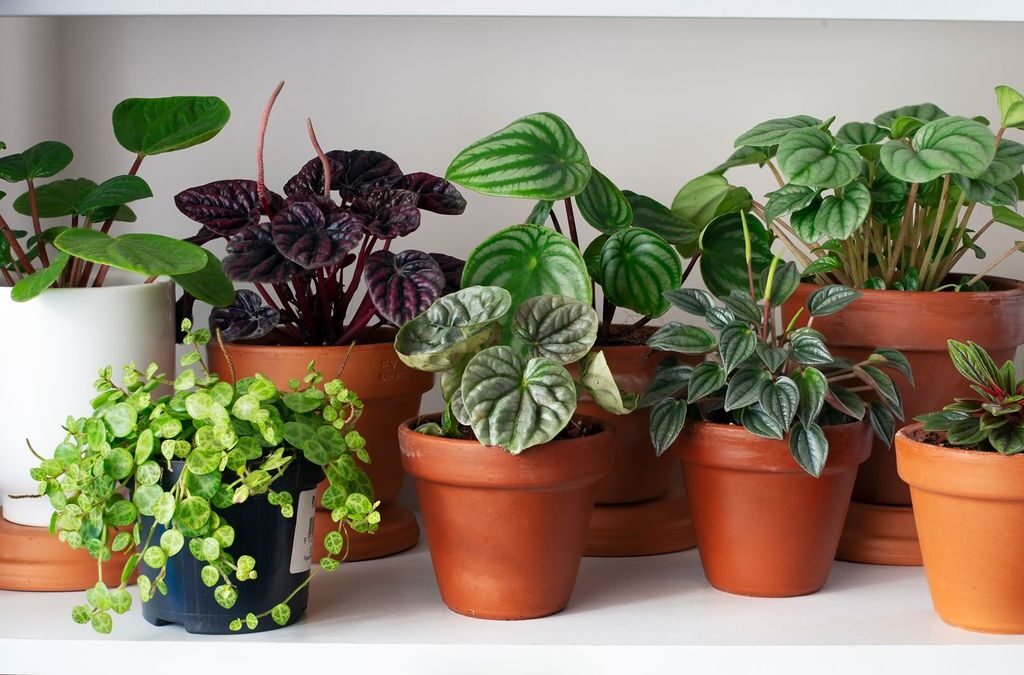
  • Native Habitat: Most indoor ferns originate from tropical and subtropical forests where they grow under tree canopies in shaded, humid environments.
  • Fronds: Their leaves (fronds) are finely divided and sensitive to changes in moisture and light.
  • Varieties: There are thousands of fern species, but only some adapt well to indoor conditions.

Knowing this background helps explain why ferns thrive indoors when given humidity, indirect light, and consistent moisture.


2. Choosing the Right Fern for Indoors

Not all ferns are equally forgiving. If you’ve struggled before, start with varieties known to be easier indoors:

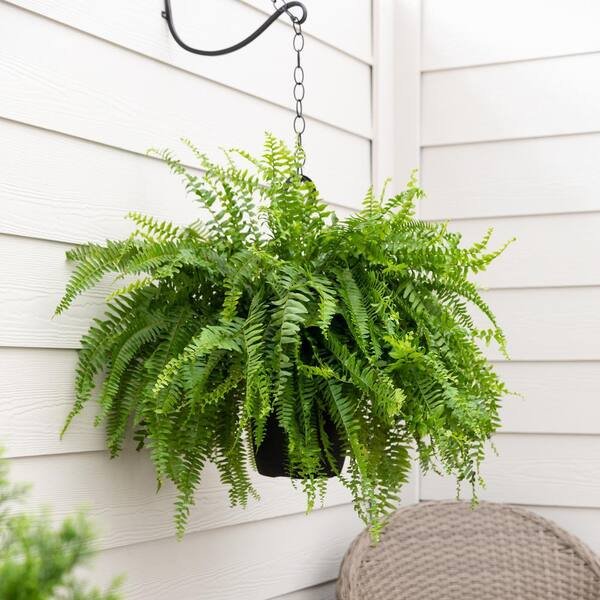
  • Boston Fern (Nephrolepis exaltata): Classic and popular, with arching fronds.
  • Maidenhair Fern (Adiantum): Beautiful but delicate, suited for attentive caregivers.
  • Bird’s Nest Fern (Asplenium nidus): Sturdier, with wide, wavy fronds—less fussy about humidity.
  • Button Fern (Pellaea rotundifolia): Compact and resilient with small round leaves.
  • Kimberly Queen Fern (Nephrolepis obliterata): More upright and tolerant of lower humidity.

Tip: If you’re a beginner, try a bird’s nest or Kimberly queen fern. For a challenge, maidenhair fern tests your consistency.


3. Light Requirements

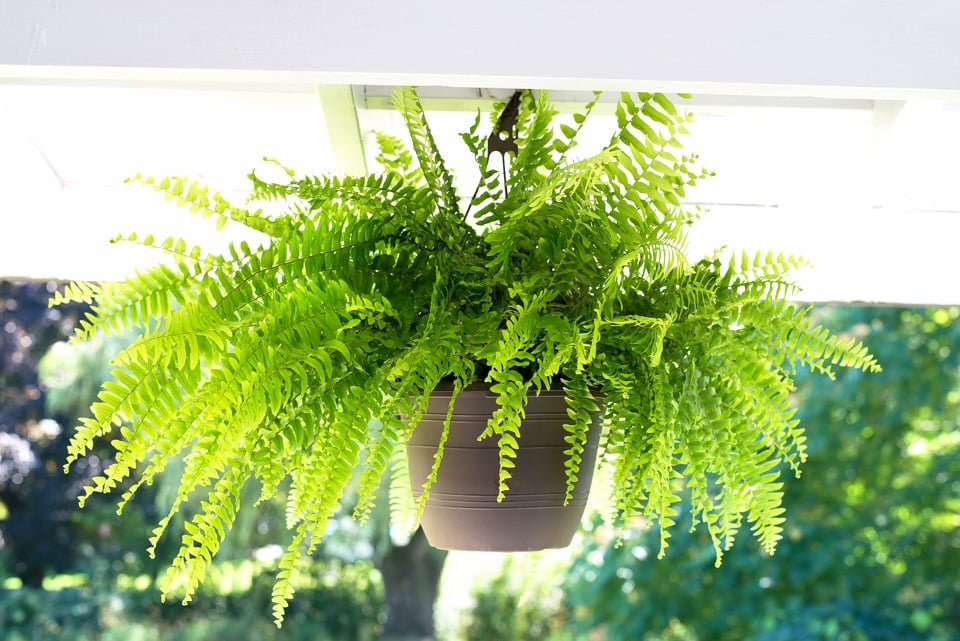
Ferns evolved under tree canopies, so they prefer filtered light rather than direct sun.

  • Ideal Light: Bright, indirect light. Place them near north- or east-facing windows, or a few feet back from a south or west window with sheer curtains.
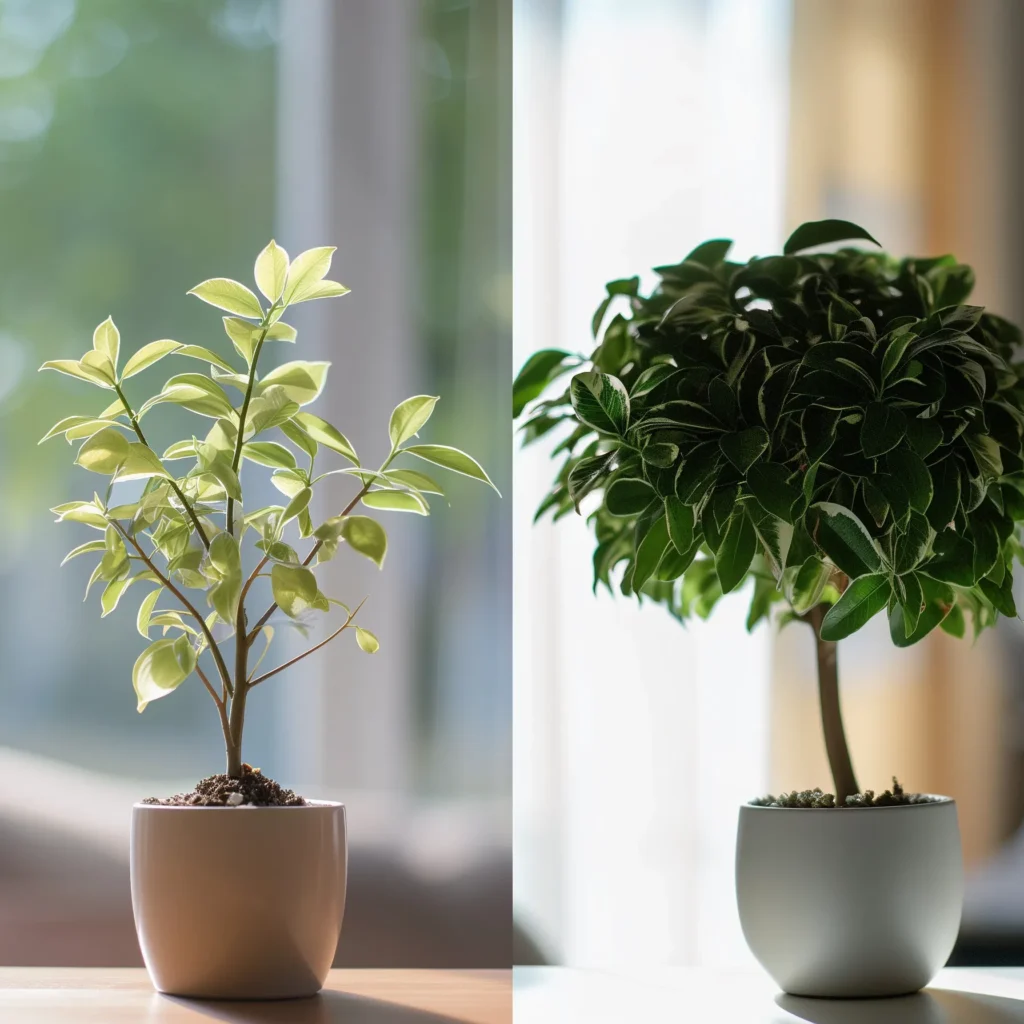
  • Too Much Light: Direct sun burns their fronds, leaving brown edges.
  • Too Little Light: Weak, sparse growth and yellowing fronds.

Pro Tip: If you don’t have enough natural light, supplement with fluorescent or LED grow lights for 10–12 hours a day.


4. Temperature and Humidity

This is where most people fail with ferns.

  • Temperature: They thrive between 60–75°F (15–24°C). Avoid sudden drafts, heaters, or AC vents.
  • Humidity: Ferns need 50–80% humidity. Indoor air, especially in winter, often drops to 20–30%.

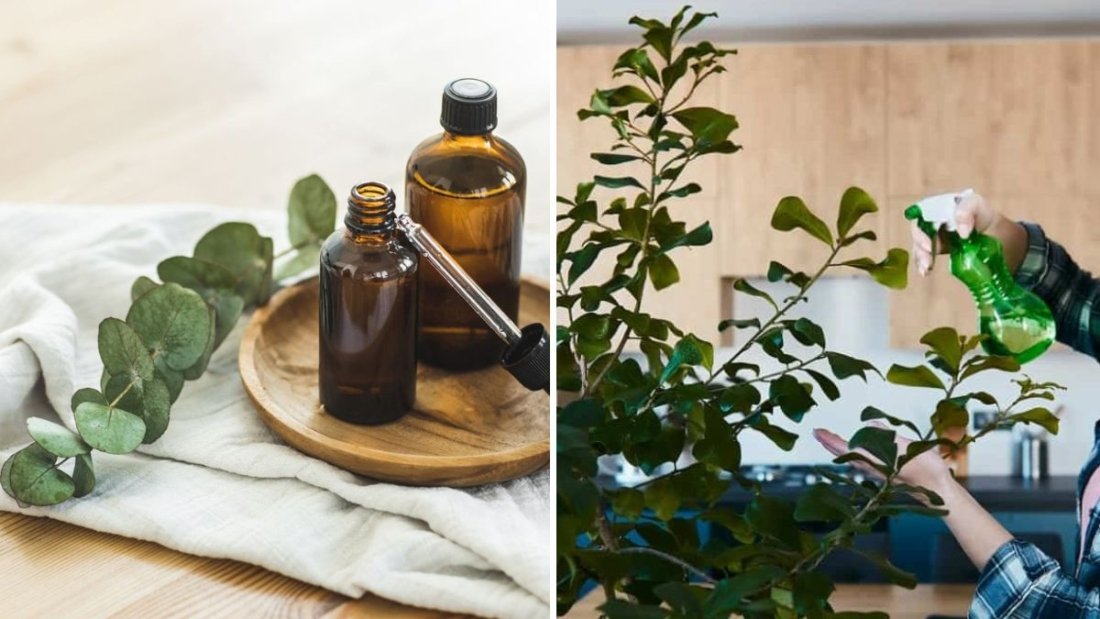
Ways to increase humidity:

  1. Use a humidifier near your plants.
  2. Place pots on a humidity tray filled with pebbles and water.
  3. Group plants together to create a microclimate.
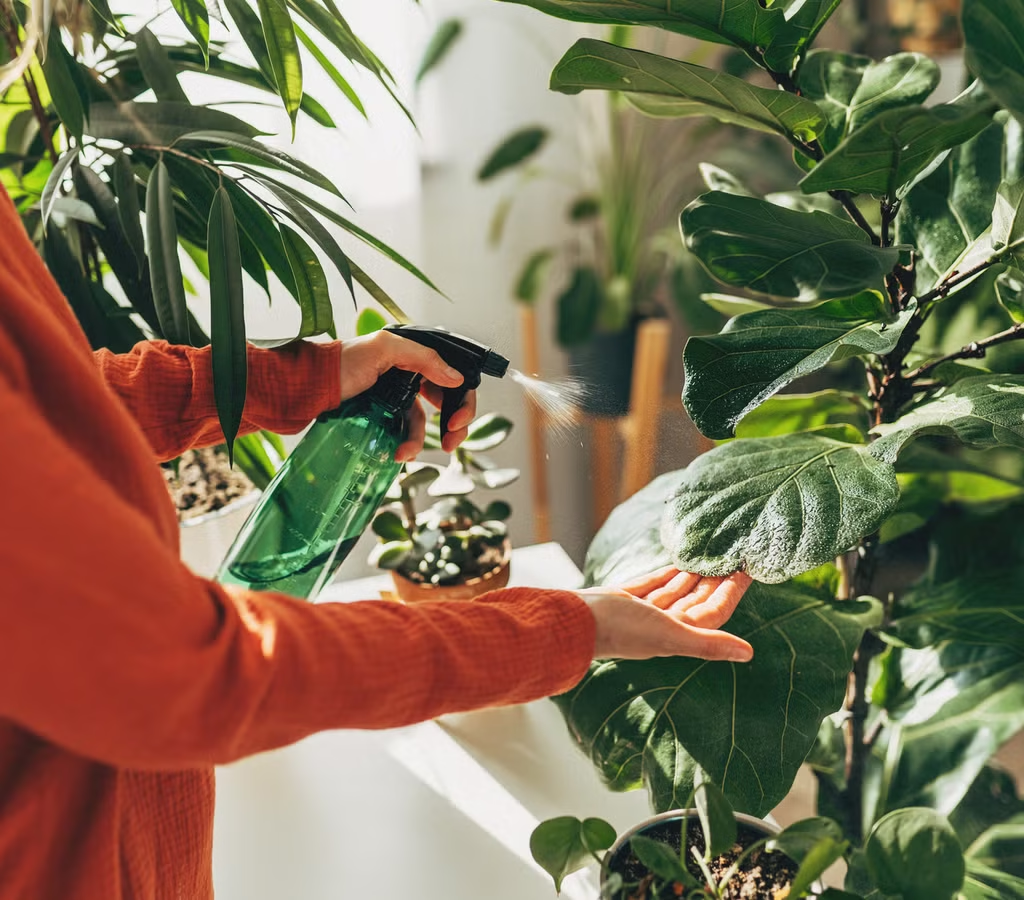
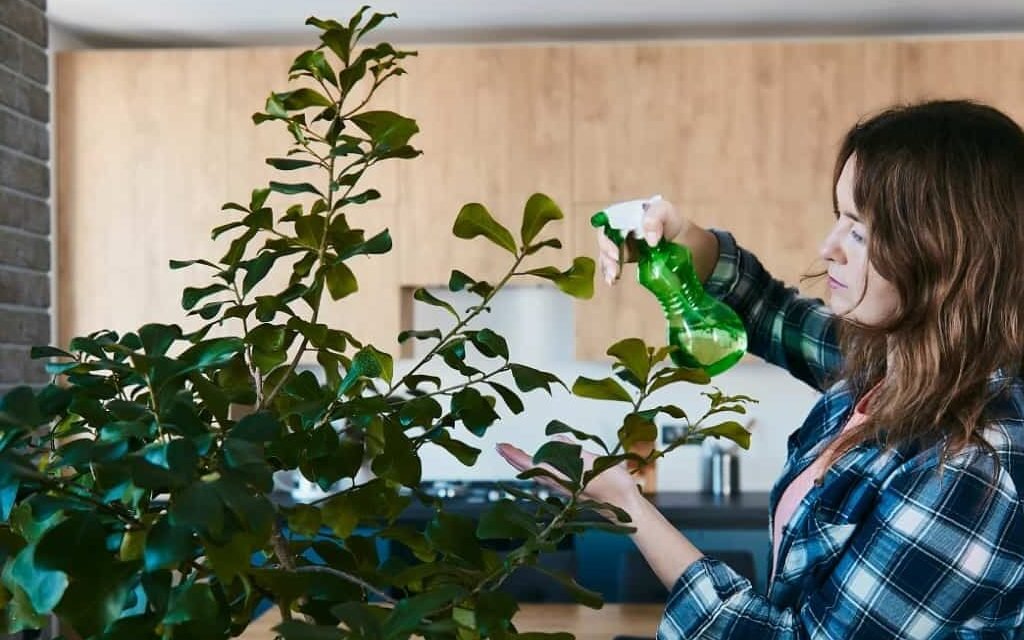
  4. Misting: Light misting can help, but don’t rely on it alone—it evaporates quickly.

Pro Tip: Maidenhair and Boston ferns especially demand high humidity. Bird’s nest ferns are more tolerant of dry air.


5. Watering Correctly

Improper watering is the number one fern killer.

  • Moisture Needs: Ferns love consistently moist soil but not waterlogged roots.
  • Check Soil: Insert your finger about an inch into the soil. If it feels dry, water. If damp, wait a day or two.
  • Water Type: Use room-temperature, filtered, or rainwater. Tap water with fluoride or chlorine can damage delicate fronds.
  • Method: Water thoroughly until water drains out the bottom, then empty the saucer to prevent root rot.

Warning Signs:

  • Crispy, brown fronds → underwatering or low humidity.
  • Yellow, mushy fronds → overwatering or poor drainage.

6. The Best Soil and Pots

  • Soil: Ferns need a light, well-draining but moisture-retentive mix. A combination of peat moss, perlite, and pine bark works well.
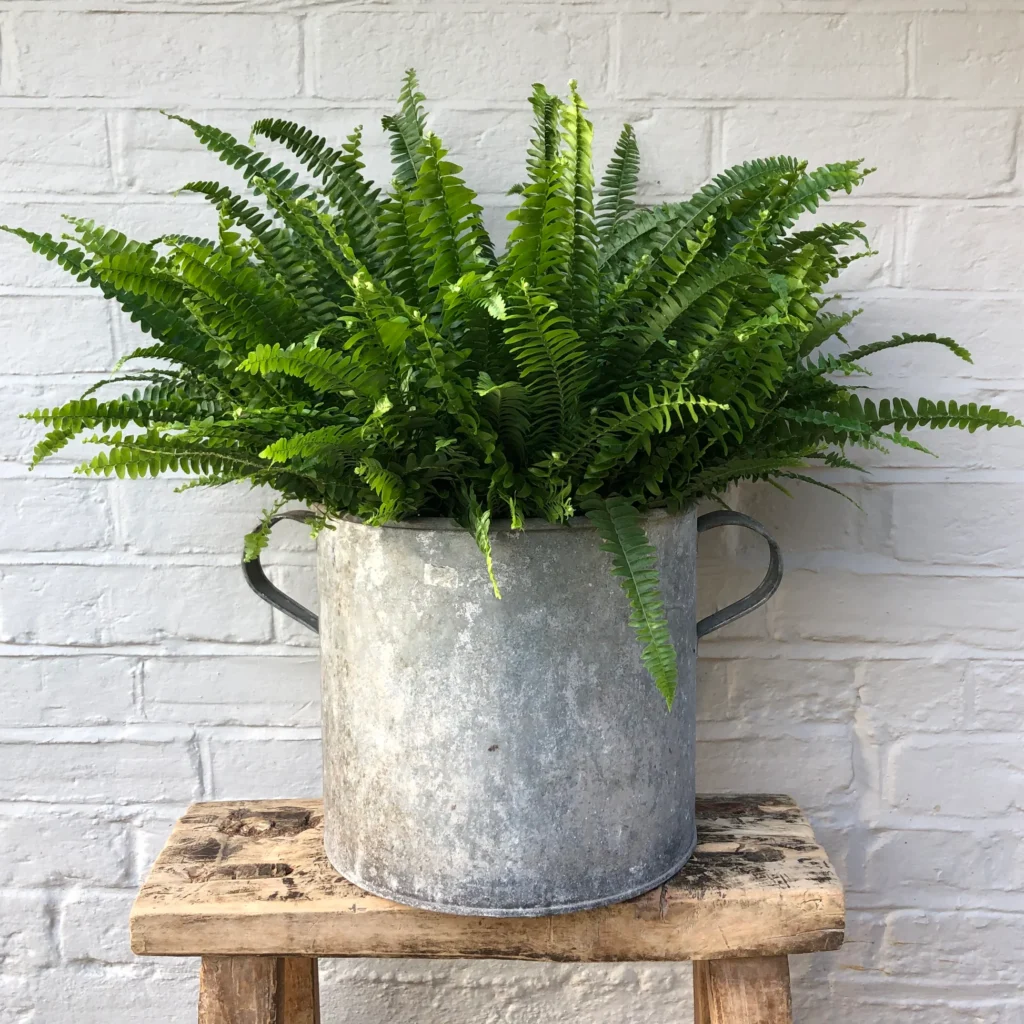
  • Drainage: Always use pots with drainage holes.
  • Pot Choice: Plastic or ceramic pots retain moisture better than terracotta, which dries out quickly.

Pro Tip: Repot every 1–2 years in spring, when roots fill the pot. Refreshing soil prevents compaction and nutrient depletion.


7. Fertilizing for Healthy Growth

Ferns are light feeders compared to flowering plants.

  • Type of Fertilizer: Use a diluted, balanced liquid houseplant fertilizer (e.g., 20-20-20).
  • Frequency: Feed monthly during spring and summer. Stop in winter when growth slows.
  • Caution: Too much fertilizer scorches delicate fronds. Always dilute to half or quarter strength.

8. Grooming and Maintenance

Keeping your fern tidy encourages new growth and prevents disease.

  • Remove Dead Fronds: Cut away yellowed, brown, or crispy leaves at the base.
  • Clean Fronds: Dust can block photosynthesis. Rinse fronds gently in the shower or wipe with a damp cloth.
  • Rotate the Pot: Ensures even growth on all sides.

9. Pruning and Propagation

  • Pruning: Light pruning keeps ferns bushy. Avoid cutting too much at once.
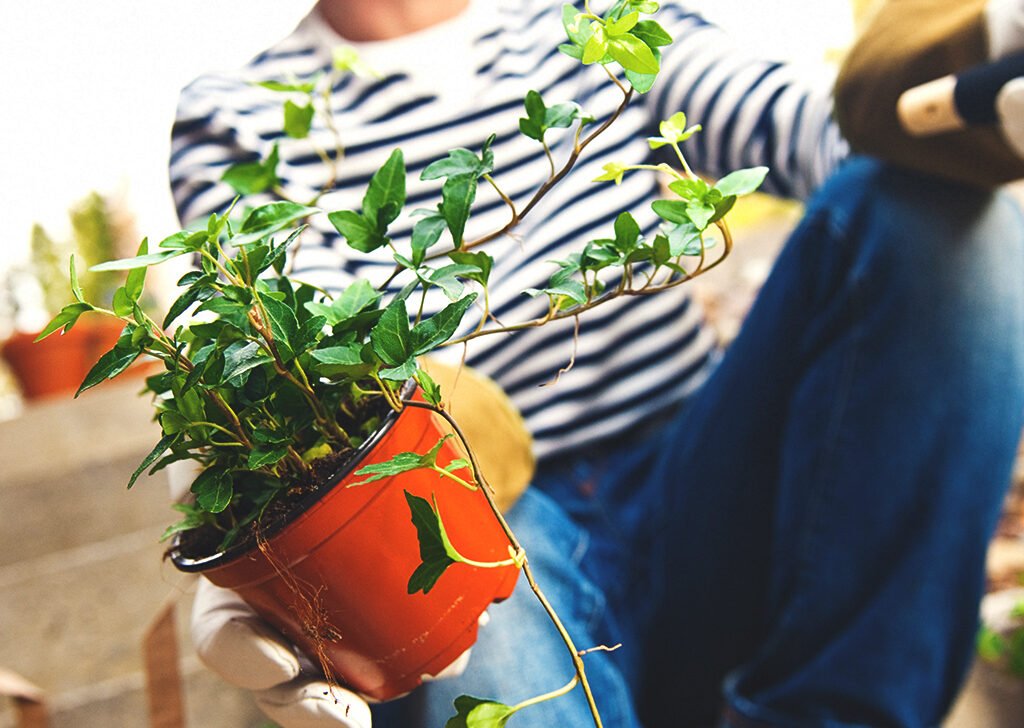
  • Propagation: Ferns can be divided during repotting. Carefully separate root clumps into smaller sections and pot them individually.

10. Common Indoor Fern Problems

Even with care, ferns can develop issues. Here’s how to troubleshoot:

  • Brown, crispy edges: Low humidity or underwatering.
  • Yellow leaves: Overwatering or poor drainage.
  • Sparse growth: Too little light or nutrients.
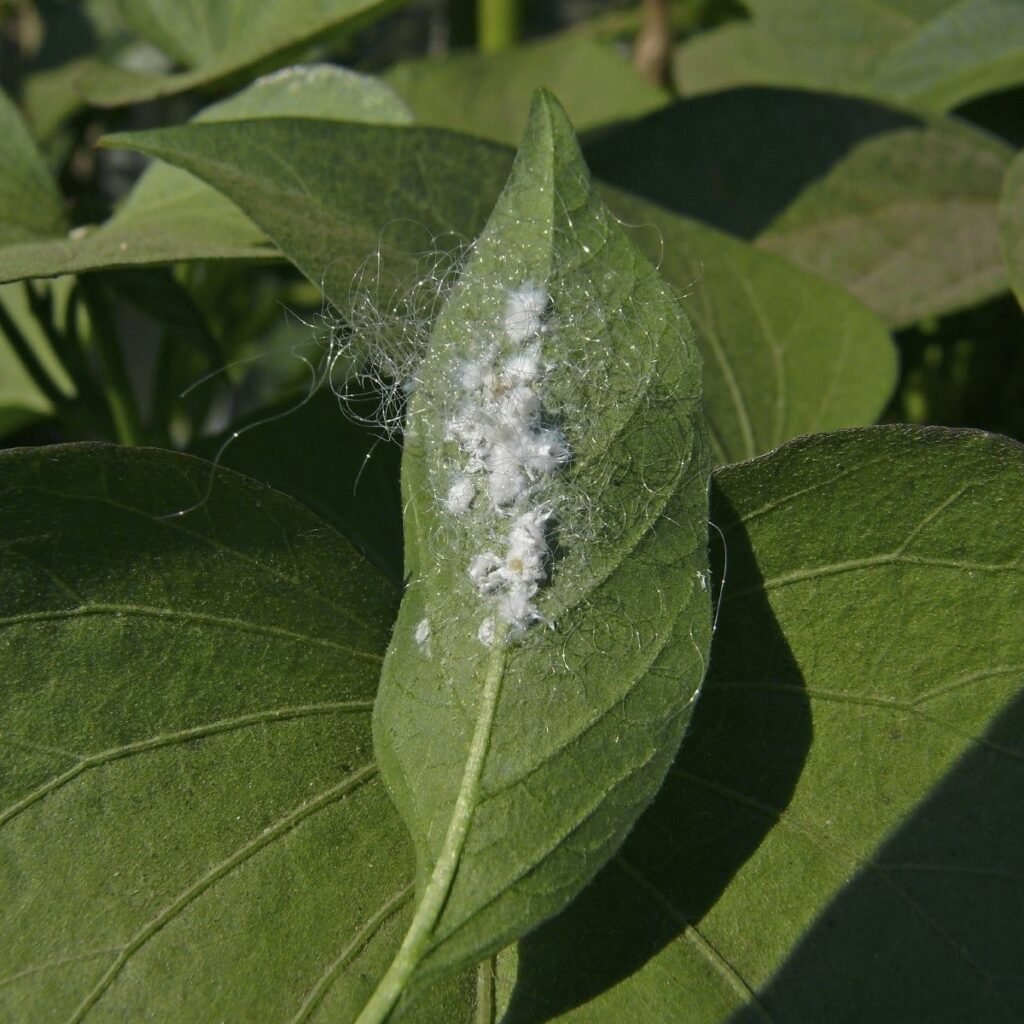
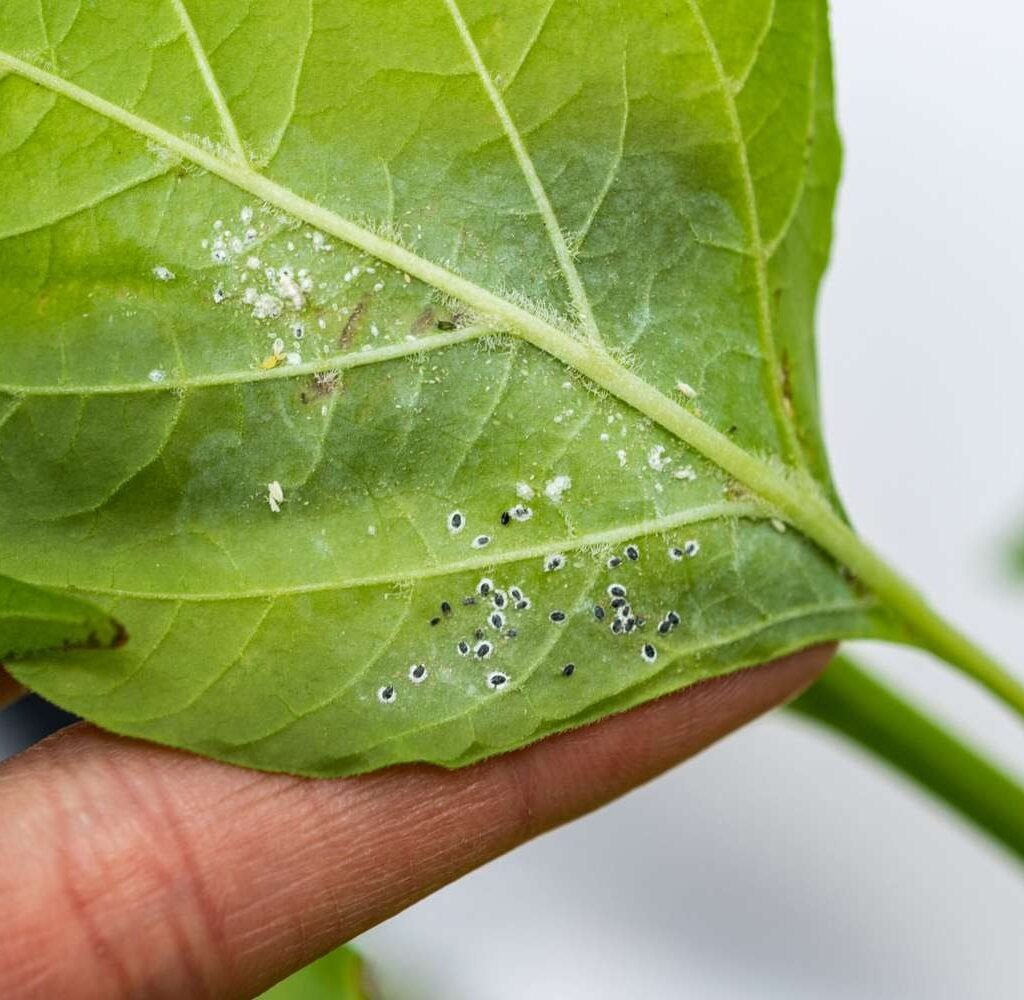
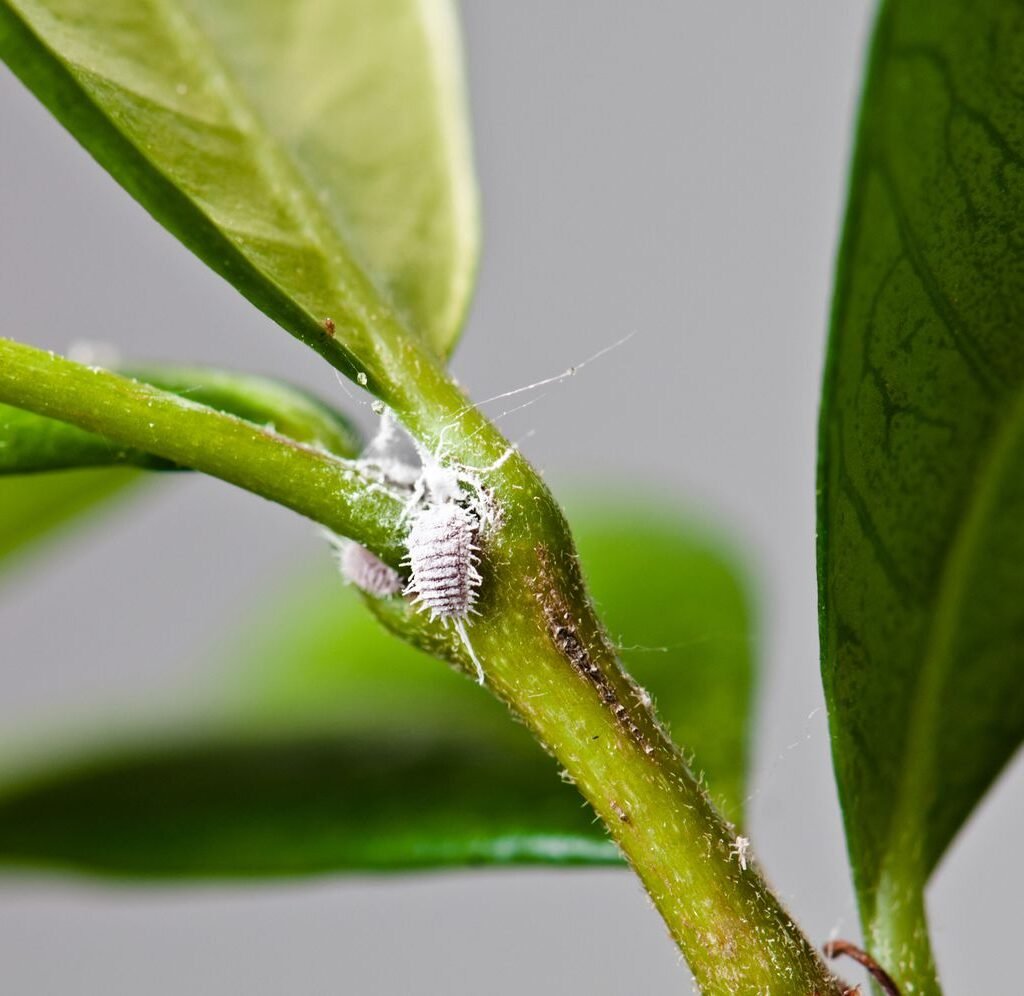
  • Pests: Watch for spider mites, mealybugs, or scale. Treat with neem oil or insecticidal soap.
  • Frond drop: Stress from sudden environmental changes.

11. Seasonal Care

Ferns’ needs shift with the seasons:

  • Spring/Summer: Active growth—more water, light feeding, higher humidity.
  • Fall/Winter: Growth slows—reduce watering slightly, stop fertilizing, and move away from heaters or cold drafts.

12. The Best Indoor Fern Care Routine

Here’s a simple routine to follow:

  1. Place in bright, indirect light.
  2. Keep soil consistently moist but not soggy.
  3. Maintain high humidity with a humidifier or tray.
  4. Fertilize monthly in growing season at half strength.
  5. Groom and prune regularly.

13. Why Ferns Are Worth the Effort

Though ferns require attention, the rewards are worth it:

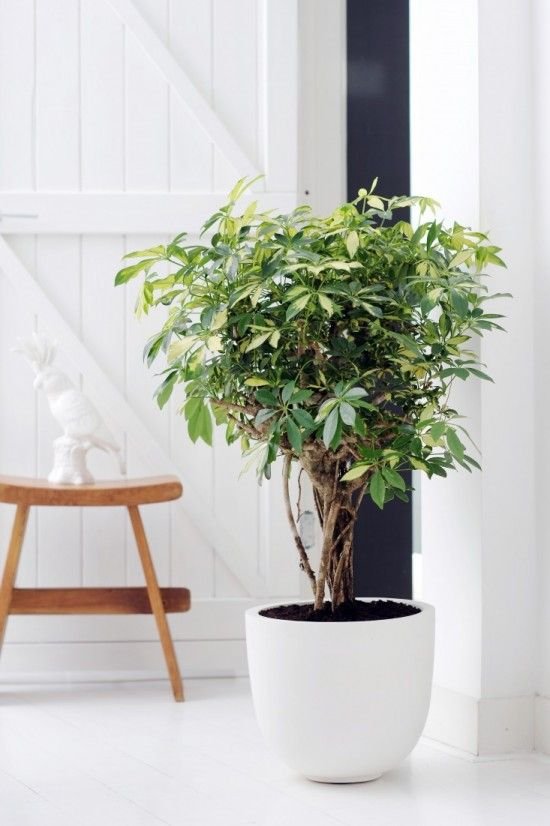
  • Aesthetic Value: Their lush, feathery fronds add softness and elegance to interiors.
  • Air Purification: Some ferns, like Boston fern, are known to filter indoor pollutants.
  • Stress Relief: Studies show that greenery indoors improves mood and reduces stress.
  • Timeless Appeal: Ferns have decorated homes for centuries, from Victorian parlors to modern apartments.

Conclusion

Keeping ferns alive indoors isn’t about luck—it’s about creating the right conditions. If you’ve struggled before, chances are your fern lacked humidity, consistent moisture, or adequate light. By paying attention to these key needs, you can transform ferns from “impossible divas” into thriving, resilient houseplants.

Start with an easier variety like a bird’s nest fern if you’re new, or challenge yourself with a maidenhair fern once you’re confident. With patience and routine, your ferns will reward you with lush, graceful greenery that enlivens your home year-round.


Final Takeaway: The secret to thriving indoor ferns lies in three essentials: moisture, humidity, and filtered light. Master these, and you’ll never “kill” a fern again.

How to Care for Rubber Plant—A Sturdy Indoor Favorite

How to Care for Rubber Plant—A Sturdy Indoor Favorite

The rubber plant (Ficus elastica) has long been admired as one of the most reliable and attractive indoor plants. With its thick, glossy leaves and upright growth habit, it adds a touch of elegance to any interior space. Beyond its good looks, the rubber plant is also known for being hardy, adaptable, and relatively easy to care for, making it a favorite among both beginners and seasoned plant lovers.

If you’re looking to enjoy the beauty of this sturdy houseplant for years to come, proper care is essential. In this comprehensive guide, we’ll cover everything you need to know about rubber plant care—from light and watering requirements to pruning, repotting, and troubleshooting common issues.


1. Getting to Know the Rubber Plant

Before diving into care, it helps to understand the plant’s natural background.

  • Origin: Native to South and Southeast Asia, where it grows into massive trees in tropical forests.
  • Appearance: Large, oval-shaped leaves with a leathery texture. Depending on the variety, leaves may be dark green, burgundy, or even variegated with cream and pink.
  • Growth Habit: Indoors, rubber plants can grow 6–10 feet tall, though regular pruning can keep them compact and bushy.

Rubber plants are members of the fig family (Moraceae), related to the fiddle leaf fig (Ficus lyrata), but they are generally more forgiving and resilient.


2. Light Requirements

Light is one of the most important factors in keeping a rubber plant healthy and vibrant.

  • Ideal Light: Bright, indirect light is best. A spot near an east- or south-facing window with filtered sunlight works perfectly.
  • Variegated Types: Varieties like ‘Tineke’ or ‘Ruby’ need brighter light to maintain their colorful variegation.
  • Low Light Tolerance: Rubber plants can tolerate lower light, but growth will be slower, and leaves may lose their glossy sheen.
  • Avoid Direct Sun: Harsh afternoon sun can scorch leaves, leaving brown patches.

Pro Tip: If your rubber plant is leaning toward the light, rotate it every couple of weeks for even growth.


3. Watering Your Rubber Plant

Watering mistakes are among the most common causes of rubber plant problems.

  • Moderate Water Needs: Rubber plants prefer soil that is slightly moist but never soggy.
  • When to Water: Allow the top 1–2 inches of soil to dry before watering again. Overwatering can lead to root rot.
  • Winter Dormancy: During winter, rubber plants need less water as their growth slows.
  • Water Quality: They prefer room-temperature water. If your tap water is high in chlorine, let it sit out overnight before using.

Signs of Trouble:

  • Drooping leaves → Often underwatering.
  • Yellow leaves → Usually overwatering.
  • Brown tips → Can indicate inconsistent watering or low humidity.

4. The Best Soil and Potting Mix

The right soil ensures your rubber plant’s roots stay healthy.

  • Soil Type: Use a well-draining potting mix. A combination of peat moss, pine bark, and perlite works well.
  • Drainage: Always use a pot with drainage holes to prevent water from pooling.
  • Container Choice: Rubber plants can grow tall, so choose a sturdy pot to support them.

Pro Tip: Adding a layer of pebbles at the bottom of the pot can further improve drainage.


5. Temperature and Humidity

Rubber plants come from tropical environments, so they thrive in warm, humid conditions.

  • Temperature Range: Keep between 60–85°F (16–29°C). They dislike sudden drops in temperature below 55°F (13°C).
  • Humidity: Prefer moderate to high humidity. If your indoor air is dry, increase humidity by misting the leaves, using a pebble tray, or running a humidifier.
  • Avoid Drafts: Keep away from air conditioners, heaters, and drafty windows.

Pro Tip: Brown, crispy edges on leaves often signal low humidity.


6. Fertilizing for Healthy Growth

Feeding your rubber plant gives it the nutrients it needs to produce lush leaves.

  • Type of Fertilizer: Use a balanced, water-soluble fertilizer (e.g., 10-10-10) or one formulated for foliage plants.
  • Frequency: Feed monthly during spring and summer when growth is most active. Stop fertilizing in fall and winter.
  • Caution: Too much fertilizer can burn the roots and cause leaf damage. Always dilute to half strength.

Pro Tip: A healthy, well-fed rubber plant produces larger, glossier leaves.


7. Pruning and Shaping

Pruning not only helps maintain the plant’s size but also encourages bushier growth.

  • When to Prune: Best done in spring or early summer.
  • How to Prune: Use clean, sharp scissors to cut just above a node (where a leaf joins the stem). This encourages branching.
  • Controlling Height: If your plant grows too tall, trim the main stem. New shoots will emerge lower down.
  • Removing Damaged Leaves: Trim away yellowed or damaged leaves to keep the plant looking fresh.

Pro Tip: Rubber plants release a milky sap when cut. Wear gloves, as the sap can irritate skin.


8. Repotting Rubber Plants

Rubber plants grow steadily and may eventually outgrow their pots.

  • When to Repot: Every 1–2 years, or when roots are circling the pot or poking out of the drainage holes.
  • Best Season: Repot in spring or summer, when the plant is actively growing.
  • Pot Size: Choose a pot 1–2 inches larger in diameter than the current one.

Pro Tip: If you want to limit size, keep your rubber plant slightly root-bound.


9. Propagating Rubber Plants

If you’d like more rubber plants, propagation is simple.

  • Stem Cuttings:
    1. Take a 4–6 inch cutting with at least one leaf.
    2. Dip the cut end in rooting hormone.
    3. Place in water or a moist potting mix until roots develop.
  • Air Layering: Wrap a section of stem with damp sphagnum moss and plastic wrap until roots grow, then cut and pot separately.

Propagation not only gives you new plants but also makes wonderful gifts.


10. Common Problems and Solutions

Even though rubber plants are sturdy, they can run into a few issues indoors:

  • Yellow Leaves: Overwatering or poor drainage.
  • Drooping Leaves: Underwatering or sudden changes in light/temperature.
  • Brown Spots: Fungal infection, often from too much humidity without airflow.
  • Pests: Watch for spider mites, mealybugs, and scale. Wipe leaves with neem oil or insecticidal soap.
  • Leaf Drop: Stress from relocation, drafts, or improper watering.

Pro Tip: Regularly dusting the leaves not only keeps them glossy but also helps prevent pests.


11. Rubber Plant Varieties for Indoors

Several varieties make stunning additions to indoor collections:

  • Ficus elastica ‘Robusta’: Classic, deep green leaves—very sturdy and forgiving.
  • Ficus elastica ‘Burgundy’: Dark, almost black leaves with a dramatic look.
  • Ficus elastica ‘Ruby’: Variegated pink, cream, and green leaves.
  • Ficus elastica ‘Tineke’: Striking cream-and-green variegation.

Pro Tip: Variegated varieties need more light to keep their colors vivid.


12. Benefits of Growing Rubber Plants Indoors

Rubber plants are not just beautiful; they bring many advantages:

  • Air Purification: Studies show they help remove toxins like formaldehyde from indoor air.
  • Low Maintenance: Compared to fussier houseplants, they adapt easily.
  • Longevity: With proper care, they can thrive indoors for decades.
  • Aesthetic Appeal: Their bold, shiny leaves add a statement to modern and traditional interiors alike.

Conclusion

The rubber plant is more than just a houseplant—it’s a symbol of strength, resilience, and timeless style. With its broad glossy leaves and sturdy growth, it’s no wonder this plant has remained a favorite for decades. Caring for a rubber plant is straightforward: provide it with bright, indirect light, moderate watering, and occasional feeding, and it will reward you with years of steady, lush growth.

Whether you choose the classic green variety or a colorful variegated type, the rubber plant is sure to add beauty and freshness to your home. With the guidance in this article, you now have all the tools you need to help your rubber plant thrive and stand tall as a reliable indoor favorite.


Final Takeaway: Rubber plants flourish when you give them bright light, balanced watering, and occasional pruning. Treat them well, and they’ll remain a sturdy, elegant presence in your home for years to come.

How to Grow Basil Indoors for Fresh Herbs Year-Round

How to Grow Basil Indoors for Fresh Herbs Year-Round

Basil (Ocimum basilicum) is one of the most beloved herbs in the culinary world, celebrated for its fresh aroma, vibrant flavor, and versatility in dishes ranging from pesto to pasta and salads. While many gardeners enjoy growing basil outdoors during the warm months, this herb can also thrive indoors—providing you with a continuous supply of fresh, homegrown leaves throughout the year.

Growing basil indoors requires some adjustments, since it isn’t naturally adapted to indoor environments. However, with the right setup and consistent care, you can enjoy lush basil plants on your kitchen windowsill or under grow lights, no matter the season.

This comprehensive guide will walk you through everything you need to know about growing basil indoors successfully, from choosing the right variety to troubleshooting common problems.


1. Choosing the Right Basil Variety

Not all basil varieties are equally suited for indoor growing. Compact and fast-growing types tend to perform best indoors. Some popular choices include:

  • Sweet Basil (Genovese Basil): The classic variety with large, fragrant leaves, ideal for pesto and Italian cuisine.
  • Greek Basil: A smaller, bushier variety that thrives in pots and grows well indoors.
  • Lemon Basil: Offers a refreshing citrus flavor, great for teas, seafood, and summer dishes.
  • Spicy Globe Basil: Compact and tidy, making it perfect for small containers and windowsills.
  • Purple Basil: Striking in appearance and excellent for both culinary and ornamental use.

Tip: Choose a variety based on your cooking style, but if you’re a beginner, start with Sweet or Greek basil for easy care.


2. Starting Basil Indoors: Seeds vs. Transplants

There are two main ways to start basil indoors:

  • Seeds: Starting from seed is economical and allows you to grow multiple plants. Basil seeds germinate quickly (in 5–10 days) when kept warm.
  • Transplants: You can purchase young basil plants from nurseries or even propagate basil from grocery-store cuttings by rooting them in water.

Seed Starting Steps:

  1. Fill small pots or seed trays with a light, well-draining seed-starting mix.
  2. Sow seeds ¼ inch deep and cover lightly with soil.
  3. Keep the soil moist but not waterlogged.
  4. Place the tray in a warm spot (70–75°F) or use a seed-heating mat for faster germination.

3. Light Requirements

Light is the most important factor in growing basil indoors. Basil is a sun-loving herb that needs plenty of light to produce lush growth.

  • Natural Light: Place your basil in a south-facing window where it can get 6–8 hours of direct sunlight daily. East- or west-facing windows can also work but may produce leggier growth.
  • Artificial Light: If natural light is insufficient, use full-spectrum grow lights. Position the lights 6–12 inches above the plant and keep them on for 12–14 hours daily.
  • Rotating the Plant: Rotate pots regularly to ensure even growth and prevent leaning toward the light source.

Tip: A leggy basil plant with pale leaves is a sign of inadequate light.


4. The Best Soil and Containers

The right growing medium and container setup ensure healthy roots and strong plants.

  • Soil: Use a high-quality potting mix that drains well. Avoid garden soil, which compacts easily and can harbor pests.
  • Drainage: Ensure the container has drainage holes to prevent root rot.
  • Container Size: A pot 6–8 inches deep is sufficient for a single basil plant. Larger pots (10–12 inches) can accommodate multiple plants for bigger harvests.

Tip: Basil appreciates soil rich in organic matter. Adding compost to the mix can provide extra nutrients.


5. Watering Basil Indoors

Watering basil properly is essential for healthy growth.

  • Moisture Needs: Basil prefers consistently moist (but not soggy) soil. Check soil moisture by inserting your finger 1 inch deep—if it feels dry, water the plant.
  • Watering Technique: Water at the base of the plant to avoid wetting the leaves, which can lead to fungal diseases.
  • Drainage Matters: Empty the saucer beneath the pot after watering to prevent root rot.

Tip: Basil is sensitive to both overwatering and underwatering, so aim for balance.


6. Temperature and Humidity

Since basil is a tropical plant, it thrives in warm and humid conditions.

  • Temperature Range: Keep basil in a room that stays between 65–80°F. Avoid drafts, cold windows, or exposure to air conditioning.
  • Humidity: Basil prefers higher humidity levels (40–60%). If your indoor air is dry, especially in winter, increase humidity by:
    • Using a humidity tray (a shallow tray filled with water and pebbles).
    • Grouping basil with other plants to create a microclimate.
    • Running a small humidifier nearby.

Tip: Basil dislikes sudden cold shocks. Even brief exposure to temperatures below 50°F can stunt growth.


7. Fertilizing Basil Indoors

Basil is a fast grower and needs regular feeding to stay lush and productive indoors.

  • Type of Fertilizer: Use a balanced, water-soluble fertilizer (e.g., 10-10-10 or 20-20-20).
  • Frequency: Feed basil every 3–4 weeks during active growth. If using organic fertilizer, such as fish emulsion or liquid seaweed, apply more frequently at half strength.
  • Signs of Deficiency: Pale leaves may indicate a lack of nitrogen, while slow growth can signal nutrient deficiency.

Tip: Overfertilizing can make basil less flavorful. Stick to moderate feeding for best taste.


8. Pruning and Harvesting Basil

Regular pruning is the secret to bushy plants and a continuous supply of fresh leaves.

  • When to Start: Begin pruning when the plant has at least 6–8 sets of true leaves.
  • How to Prune: Cut stems just above a pair of leaves, which encourages branching.
  • Harvesting Leaves: Harvest from the top, not the bottom, to maintain healthy growth.
  • Flower Prevention: Pinch off flower buds as soon as they appear. Once basil flowers, the leaves can turn bitter.

Tip: Never remove more than one-third of the plant at a time to avoid stressing it.


9. Companion Herbs Indoors

Basil grows well alongside other herbs indoors, provided they have similar needs. Great companions include:

  • Parsley – Shares similar watering and light needs.
  • Cilantro – Pairs well in the kitchen and thrives under the same conditions.
  • Chives – Compact and easy to grow near basil.
  • Oregano & Thyme – Mediterranean herbs that also prefer warm, sunny conditions.

Avoid pairing basil with rosemary indoors, as rosemary prefers drier soil conditions.


10. Common Problems and Solutions

Even with good care, basil can face challenges indoors. Here’s how to fix them:

  • Leggy Growth: Caused by insufficient light—move closer to a sunny window or use grow lights.
  • Yellow Leaves: Overwatering or nutrient deficiency. Adjust watering schedule or fertilize.
  • Brown Leaf Tips: Low humidity or inconsistent watering. Increase humidity.
  • Pests: Indoor basil may attract aphids, spider mites, or fungus gnats. Treat with neem oil or insecticidal soap.
  • Fungal Issues: Avoid wetting leaves and ensure good airflow to prevent powdery mildew and damping off.

11. Preserving Basil Harvests

If your basil produces more than you can use, you can preserve it for later.

  • Freezing: Chop basil and freeze in ice cube trays with olive oil or water.
  • Drying: Air-dry or use a dehydrator, though drying can reduce flavor intensity.
  • Pesto Storage: Make pesto and freeze it in small portions for easy use.

Tip: Freezing preserves basil’s bright green color and fresh flavor better than drying.


12. Benefits of Growing Basil Indoors

Beyond having a steady supply of fresh herbs, indoor basil offers several benefits:

  • Convenience: Fresh basil at your fingertips, no matter the season.
  • Health Benefits: Basil contains antioxidants, vitamins A and K, and has anti-inflammatory properties.
  • Air Purification: Like many houseplants, basil helps improve indoor air quality.
  • Aesthetic Value: Adds a touch of greenery and freshness to your kitchen or windowsill.

Conclusion

Growing basil indoors year-round is not only possible but also incredibly rewarding. By providing the right light, soil, water, and temperature, you can enjoy vibrant basil plants that supply you with flavorful leaves whenever you need them. Regular pruning, proper feeding, and attention to humidity will keep your basil bushy, healthy, and productive.

Whether you are a cooking enthusiast looking to elevate your dishes or a plant lover seeking an easy herb to grow, basil is the perfect choice. With just a little effort and consistency, you’ll always have fresh herbs ready to harvest—no matter the season.


Final Takeaway: Indoor basil thrives with bright light, consistent watering, and regular pruning. Master these three essentials, and you’ll enjoy fresh, fragrant herbs year-round.

How to Care for Peace Lily for Long-Lasting Blooms

How to Care for Peace Lily for Long-Lasting Blooms

The peace lily (Spathiphyllum), with its glossy green leaves and elegant white blooms, is one of the most popular indoor plants around the world. Not only is it admired for its beauty, but it is also prized for its ability to purify indoor air. Despite its reputation as an easy-care houseplant, many people struggle to keep their peace lily blooming consistently. With the right care, however, this plant can thrive and reward you with long-lasting blooms several times a year.

This article provides a complete guide on how to care for peace lilies to ensure healthy growth and long-lasting flowers.


Understanding the Peace Lily

Before diving into care tips, it’s important to understand the nature of peace lilies.

  • Native Habitat: Peace lilies are tropical plants native to Central and South America, where they grow in warm, humid understories of rainforests.
  • Flowers vs. Spathes: The white “flowers” are not true flowers but modified leaves called spathes, which surround a spike-like structure called a spadix that holds the actual tiny flowers.
  • Growth Habit: They are perennial, evergreen plants that can live for many years when properly cared for.

Knowing this background helps explain why peace lilies need consistent moisture, indirect light, and humidity to flourish.


1. Light Requirements

Peace lilies are famous for their ability to survive in low light, but blooming requires more than just survival conditions.

  • Ideal Light: Bright, indirect light is best. Place your peace lily near an east- or north-facing window, or several feet away from a south- or west-facing one where sunlight is filtered through curtains.
  • Avoid Direct Sun: Too much direct sunlight scorches the leaves, turning them yellow or brown at the tips.
  • Low Light Tolerance: While they can survive in low light, the plant will produce fewer or no blooms.

Pro Tip: If your peace lily hasn’t flowered for a while, try moving it to a brighter spot without exposing it to harsh sun.


2. Watering Correctly

Watering is perhaps the most critical aspect of peace lily care.

  • Consistency: Peace lilies prefer evenly moist soil but not soggy conditions.
  • When to Water: Check the top 1 inch of soil; if it feels dry, it’s time to water. These plants will sometimes “communicate” by wilting dramatically, then springing back to life after watering. However, frequent wilting weakens the plant over time.
  • Water Quality: They are sensitive to chemicals like chlorine and fluoride in tap water. Use distilled water, rainwater, or let tap water sit overnight before using.
  • Drainage: Ensure the pot has good drainage holes. Never let the plant sit in standing water.

Pro Tip: Yellow leaves can indicate overwatering, while drooping leaves usually suggest underwatering.


3. Soil and Potting Mix

A healthy root system is the foundation of blooming peace lilies.

  • Soil Type: Use a well-draining potting mix rich in organic matter. A blend of regular houseplant soil with perlite, peat moss, or coconut coir works well.
  • Repotting: Peace lilies grow quickly and can become root-bound, which restricts growth and blooming. Repot every 1–2 years into a pot 1–2 inches larger.
  • Pot Choice: A breathable container like terracotta can help prevent soggy soil.

Pro Tip: If roots are circling tightly inside the pot or pushing above the soil surface, it’s time to repot.


4. Temperature and Humidity

Peace lilies thrive in conditions that mimic their tropical origins.

  • Temperature: Keep them in a range of 65–80°F (18–27°C). Avoid cold drafts, sudden temperature drops, or placement near heating vents.
  • Humidity: They prefer 50% or higher humidity. In dry climates or during winter, consider misting the leaves, placing the plant on a humidity tray, or using a humidifier.

Pro Tip: Brown leaf tips often indicate low humidity or fluoride sensitivity from water.


5. Fertilizing for Blooms

Nutrients play a big role in producing vibrant flowers.

  • Type of Fertilizer: Use a balanced, water-soluble houseplant fertilizer (e.g., 20-20-20) diluted to half strength.
  • Frequency: Feed every 4–6 weeks during the growing season (spring and summer). Reduce feeding in fall and winter when growth slows.
  • Caution: Overfertilizing causes leaf burn and prevents blooming.

Pro Tip: To encourage flowering, some growers switch to a bloom-boosting fertilizer with higher phosphorus content during spring.


6. Pruning and Grooming

Regular maintenance helps your peace lily stay healthy and presentable.

  • Deadheading Blooms: Cut spent flowers at the base of the stalk. This prevents energy waste and encourages new blooms.
  • Removing Yellow Leaves: Trim yellow or brown leaves with sterilized scissors.
  • Cleaning Leaves: Wipe leaves with a damp cloth to remove dust, which can block photosynthesis and attract pests.

Pro Tip: Occasional showers with lukewarm water help wash away dust and keep foliage glossy.


7. Encouraging Long-Lasting Blooms

Getting your peace lily to bloom isn’t just about good care—it’s about timing and stimulation.

  • Seasonal Blooming: Peace lilies naturally bloom in spring and sometimes again in fall.
  • Maturity: Young plants may not bloom until they are 1–2 years old.
  • Light & Fertilizer: Adequate light and phosphorus-rich feeding are key triggers for blooming.
  • Rest Periods: Allowing the plant to rest (less water and no fertilizer in winter) can help it gather energy for spring blooms.

Pro Tip: If your peace lily is healthy but not blooming, try moving it to a brighter spot and giving it a gentle fertilizer boost in early spring.


8. Common Problems and Solutions

Even with the best care, peace lilies may encounter issues. Here’s how to troubleshoot:

  • Yellow Leaves: Overwatering, nutrient deficiency, or natural aging of leaves.
  • Brown Tips: Low humidity, fluoride in water, or too much fertilizer.
  • No Blooms: Insufficient light or lack of nutrients.
  • Drooping Leaves: Usually underwatering, but persistent drooping could indicate root rot.
  • Pests: Occasionally, spider mites, aphids, or mealybugs may appear. Wipe with insecticidal soap or neem oil.

9. Propagation for More Plants

Peace lilies are easy to propagate by division.

  • Best Time: During repotting in spring or early summer.
  • Method: Gently separate clumps with at least 2–3 leaves and some roots attached.
  • Potting: Plant divisions in small pots with fresh soil and water well.

This method gives you new peace lilies to enjoy or gift to friends.


10. Peace Lily Benefits Beyond Blooms

While blooms are the highlight, peace lilies offer more than beauty.

  • Air Purification: NASA research lists peace lilies among top indoor plants for removing toxins like formaldehyde and benzene.
  • Stress Relief: Their lush greenery and graceful flowers add calmness to indoor spaces.
  • Symbolism: Peace lilies symbolize peace, healing, and purity, making them popular as gifts.

Conclusion

Caring for a peace lily is about striking the right balance: bright, indirect light, consistent moisture, good humidity, and proper feeding. With attention to these needs, your plant will reward you with glossy foliage and elegant white blooms that last for weeks at a time.

Whether you are a beginner plant parent or an experienced gardener, the peace lily is a plant that not only beautifies your home but also connects you with the tranquility of nature. By following these detailed care tips, you can enjoy long-lasting blooms year after year, transforming your indoor space into a peaceful sanctuary.


Final Takeaway: For long-lasting blooms, focus on three essentials—light, water, and nutrition. Respect the peace lily’s tropical heritage, and it will thrive beautifully in your home.

Why Good Airflow Matters for Healthy Indoor Plants

Why Good Airflow Matters for Healthy Indoor Plants

Indoor plants are more than just decorative accents; they are living, breathing organisms that require the right balance of light, water, nutrients, and air circulation to thrive. While most plant enthusiasts focus heavily on watering schedules or lighting conditions, one often-overlooked factor plays a vital role in plant health: airflow.

Good airflow can mean the difference between a lush, vibrant indoor jungle and one plagued with pests, diseases, and stunted growth. Just as humans need fresh air to stay healthy, plants rely on circulation to maintain strong growth and prevent problems caused by stagnant conditions.

In this article, we’ll explore why airflow is so important for indoor plants, how poor air circulation can harm them, and practical ways to improve airflow in your home for a thriving indoor garden.


The Role of Airflow in Plant Health

Air circulation affects plants in multiple ways—physically, chemically, and biologically. Here are the key reasons why good airflow matters:

1. Prevents Fungal and Bacterial Diseases

Poor air circulation creates pockets of high humidity where moisture lingers on leaves and soil. This environment encourages the growth of harmful fungi and bacteria, leading to common houseplant problems such as:

  • Powdery mildew – A white, powdery coating on leaves.
  • Root rot – Often caused by fungal pathogens thriving in wet soil.
  • Leaf spot diseases – Dark or yellow spots caused by fungi and bacteria.

By moving air around your plants, you reduce the risk of these pathogens settling and multiplying.


2. Discourages Pests

Stagnant, humid environments attract pests like fungus gnats, spider mites, and mealybugs. These insects thrive when the air is still and damp. Good airflow disrupts their habitat, making it harder for them to establish infestations.


3. Strengthens Plant Structure

Plants grown in still, closed-off environments often develop weak stems. In nature, plants sway in the breeze, which stimulates stronger, sturdier growth. Indoor airflow can mimic this effect, helping houseplants build resilience and structural strength.


4. Regulates Temperature and Humidity

Air circulation helps moderate microclimates around your plants. Without airflow, heat and moisture can build up around leaves, creating stress for your plants. With circulation, temperature and humidity stay more balanced, reducing the risk of shock and disease.


5. Improves Gas Exchange and Photosynthesis

Plants absorb carbon dioxide (CO₂) from the air and release oxygen through photosynthesis. Proper airflow ensures a steady supply of fresh CO₂ around the leaves while preventing buildup of excess oxygen or moisture. This keeps photosynthesis efficient and supports healthier growth.


Signs Your Plants Need Better Airflow

Not sure if poor airflow is affecting your indoor garden? Look for these signs:

  • Leaves that frequently develop powdery mildew or fungal spots.
  • Yellowing, wilting, or drooping despite proper watering and lighting.
  • Persistent fungus gnat infestations.
  • Soil that stays damp for long periods.
  • Stems that appear weak, spindly, or unable to support foliage.
  • Rooms where the air feels heavy, stuffy, or overly humid.

If you notice two or more of these symptoms, chances are your plants need improved air circulation.


How to Improve Airflow for Indoor Plants

Creating the right airflow doesn’t have to be complicated. Here are some effective strategies:

1. Space Plants Properly

  • Avoid crowding plants too closely together. Leaves should not constantly touch.
  • Proper spacing allows air to circulate freely around each plant, reducing humidity buildup and limiting the spread of disease.

2. Rotate Plants Regularly

Rotating plants not only ensures even light exposure but also exposes all sides of the plant to circulating air. This prevents stagnant, humid zones from forming in shaded areas.


3. Use Fans for Gentle Circulation

A simple household fan can significantly improve airflow.

  • Place a small oscillating fan in the room with your plants.
  • Ensure the air is moving gently—plants should rustle slightly, not bend or dry out.
  • Run fans for a few hours daily, especially in humid or poorly ventilated spaces.

4. Open Windows and Doors

Whenever weather permits, open windows and doors to allow natural breezes inside. This brings in fresh air, lowers humidity, and improves oxygen and CO₂ exchange.


5. Control Humidity Levels

  • Use a dehumidifier in areas with high moisture (like bathrooms or kitchens).
  • Place plants on pebble trays or use a humidifier if your space is too dry, but balance it with airflow to prevent mold and fungus.

6. Prune and Clean Plants

  • Trim excess foliage to improve airflow between leaves.
  • Remove dead or yellowing leaves that block circulation and attract pests.
  • Wipe leaves regularly to remove dust, which improves photosynthesis and airflow around the plant.

7. Choose the Right Location

  • Avoid placing plants in corners or enclosed spaces with no air movement.
  • Group plants in areas with natural ventilation, like near windows or open spaces.

Airflow and Different Types of Plants

Different houseplants have varying needs when it comes to airflow:

  • Tropical Plants (e.g., Monstera, Philodendron, Ferns) – Enjoy higher humidity but still need airflow to prevent fungal issues. Balance moisture with circulation.
  • Succulents and Cacti – Thrive in dry environments. Too much humidity without airflow can cause rot. Place them in well-ventilated areas.
  • Flowering Plants (e.g., Orchids, African Violets) – Require both fresh air and humidity. Gentle airflow prevents bud drop and fungal infections.

Understanding the natural habitat of your plant helps you adjust airflow to mimic its preferred environment.


Common Mistakes to Avoid

When improving airflow, it’s possible to overdo it. Keep these tips in mind:

  • Avoid direct blasts – Strong airflow from a fan can dry out leaves and soil too quickly. Gentle circulation is best.
  • Don’t sacrifice humidity – Some plants require both humidity and airflow. Balance both rather than eliminating one.
  • Don’t ignore root zones – Air circulation around soil is just as important as leaf-level airflow to prevent root rot.

Practical Airflow Setup for Indoor Gardens

Here’s a step-by-step example of how to create the perfect airflow system for your houseplants:

  1. Arrange plants with 4–6 inches of space between them.
  2. Place a small oscillating fan in the room, set on low. Position it so that plants sway gently.
  3. Open a window for 30–60 minutes daily, weather permitting, to bring in fresh air.
  4. Prune plants monthly to remove excess foliage and dead leaves.
  5. Clean leaves weekly with a damp cloth to improve air absorption.
  6. Check humidity with a hygrometer and adjust with a humidifier or dehumidifier, depending on the plant type.

By combining these steps, you’ll create a healthier microclimate for your plants.


Final Thoughts

Good airflow is one of the most underrated factors in indoor plant care. While water, light, and nutrients often take center stage, air circulation quietly supports nearly every aspect of plant health—from preventing disease and pests to strengthening growth and balancing humidity.

By making simple changes like spacing plants correctly, using fans, or opening windows, you can transform your indoor garden into a thriving, resilient ecosystem.

Remember: plants may not breathe the way we do, but they still depend on fresh air to flourish. If you want strong, beautiful, and pest-free houseplants, airflow is not optional—it’s essential.

How to Safely Remove Mealybugs From Houseplants

How to Safely Remove Mealybugs From Houseplants

Houseplants bring life and beauty into our homes, but sometimes they also bring uninvited guests. Among the most troublesome are mealybugs—tiny, white, cottony pests that seem harmless at first but can quickly overwhelm a plant if not addressed. These soft-bodied insects suck sap from plant tissues, weaken growth, and make leaves sticky with honeydew (a sugary substance they excrete), which often leads to sooty mold.

For indoor gardeners, the question becomes: how do you get rid of mealybugs safely, without harming your plants or exposing your home to harsh chemicals? The good news is that with the right techniques, patience, and consistency, you can remove mealybugs naturally and keep your houseplants thriving.

This guide will walk you through everything you need to know about identifying, treating, and preventing mealybug infestations—safely and effectively.


What Are Mealybugs?

Mealybugs are small, soft-bodied insects from the Pseudococcidae family. They are usually less than ¼ inch long and are easily recognized by their white, fluffy, cotton-like appearance. They thrive in warm, humid environments, which is why they often appear on houseplants.

  • Where they hide: Mealybugs gather in leaf joints, under leaves, in leaf axils, and sometimes in the soil around roots.
  • What they do: They feed by piercing plant tissues and sucking out sap, depriving the plant of essential nutrients.
  • Why they’re dangerous: A single mealybug may not harm much, but large infestations can cause leaf yellowing, stunted growth, premature leaf drop, and even plant death if left untreated.

Early Signs of a Mealybug Infestation

Catching mealybugs early makes them much easier to control. Look out for these warning signs:

  1. White, Cottony Clumps – Especially on stems, leaf joints, and undersides of leaves.
  2. Sticky Leaves or Surfaces – Caused by honeydew secreted by mealybugs.
  3. Black Mold on Leaves – Honeydew attracts fungi that cause sooty mold.
  4. Yellowing or Wilting Leaves – Due to loss of nutrients.
  5. Ants on Your Plants – Ants are often drawn to the sweet honeydew and may even protect mealybugs from predators.

How to Safely Remove Mealybugs

1. Isolate the Affected Plant

As soon as you spot mealybugs, move the infested plant away from other houseplants. These pests spread quickly, so quarantine prevents them from hopping to nearby greenery.


2. Manual Removal

  • Use a cotton swab dipped in rubbing alcohol (70% isopropyl alcohol) to dab directly onto visible mealybugs. The alcohol dissolves their waxy coating, killing them on contact.
  • Alternatively, use a soft cloth or paper towel dipped in alcohol to wipe leaves and stems.
  • For larger infestations, use a gentle spray of water to wash them off the plant, then follow up with alcohol treatment.

3. Prune Heavily Infested Areas

If certain stems or leaves are badly infested, prune and discard them. Be sure to dispose of the cuttings in a sealed bag—never compost them, as mealybugs can survive and spread.


4. Soap and Water Spray

Mild liquid soap works by breaking down the protective coating of mealybugs.

  • Recipe: Mix 1–2 teaspoons of mild liquid soap (such as Castile soap) in 1 quart of water.
  • Application: Spray the entire plant, especially the undersides of leaves and stem joints. Let it sit for 10–15 minutes, then rinse the plant with lukewarm water to avoid soap buildup.
  • Frequency: Repeat every 5–7 days until the infestation is gone.

5. Neem Oil Spray

Neem oil is a natural insecticide that not only kills mealybugs but also disrupts their life cycle.

  • Recipe: Mix 1 teaspoon of neem oil with 1 teaspoon of mild liquid soap in 1 quart of water. Shake well before use.
  • Application: Spray thoroughly on leaves, stems, and soil surface.
  • Benefit: Neem oil is safe for most houseplants and doubles as a preventive treatment against other pests.

6. Essential Oil Sprays

Certain essential oils have natural insecticidal properties.

  • Best options: Peppermint oil, lavender oil, tea tree oil, and rosemary oil.
  • Recipe: Add 8–10 drops of essential oil to 1 cup of water with a few drops of mild soap. Spray onto affected areas.
  • Caution: Test on a small area of the plant first to make sure the oil doesn’t burn sensitive leaves.

7. Systemic Root Drench (for severe infestations)

Sometimes mealybugs hide in the soil and feed on roots (known as root mealybugs). In this case, surface treatments won’t be enough.

  • Mix neem oil or an insecticidal soap solution and pour it into the soil to target root-dwelling mealybugs.
  • Repot the plant if the infestation is heavy, removing as much infested soil as possible and rinsing roots before replanting in fresh soil.

Long-Term Prevention of Mealybugs

Treating mealybugs is only half the battle—prevention ensures they don’t come back. Here’s how to keep your houseplants pest-free:

  1. Inspect New Plants Before Bringing Them Indoors
    Always check for pests before introducing new plants to your collection. Quarantine them for 1–2 weeks if possible.
  2. Avoid Overwatering and Overfertilizing
    Mealybugs thrive on lush, tender new growth. Too much fertilizer or excessive watering encourages the soft plant tissue they love.
  3. Regular Plant Cleaning
    Dust leaves regularly with a damp cloth to keep them clean and make it harder for pests to settle.
  4. Improve Air Circulation
    Poor airflow can create humid, stagnant conditions where mealybugs thrive. Place plants with enough space between them and use a fan if needed.
  5. Introduce Natural Predators (Optional for Greenhouses or Outdoor Transitions)
    Ladybugs and lacewings feed on mealybugs. While not always practical indoors, they can be effective in greenhouse settings.
  6. Routine Monitoring
    Make a habit of inspecting the undersides of leaves, stems, and soil surface once a week. Catching pests early is the best form of control.

Common Mistakes to Avoid

  • Overusing Alcohol or Oils – While effective, too much can burn plant leaves. Always dilute and test first.
  • Spraying in Direct Sunlight – Treatments can cause leaf burn if applied under strong light. Apply in the evening or in shaded areas.
  • Ignoring Root Mealybugs – Sometimes pests hide in the soil. If the infestation persists despite surface treatments, consider repotting.
  • Stopping Treatment Too Soon – Even after mealybugs disappear, continue treatment for 1–2 more weeks to kill any eggs that may hatch.

Final Thoughts

Mealybugs may be stubborn pests, but they’re not unbeatable. With a combination of manual removal, safe sprays (alcohol, soap, neem oil, or essential oils), and preventive care, you can restore your houseplants to health without resorting to harsh chemicals.

The key is consistency. Mealybug infestations often require repeated treatments, but with patience and diligence, your plants will recover and thrive.

By adopting a proactive approach—regularly inspecting, cleaning, and caring for your houseplants—you can keep mealybugs away and enjoy a vibrant, pest-free indoor garden.

The Best Essential Oils for Repelling Houseplant Pests

The Best Essential Oils for Repelling Houseplant Pests

Houseplants bring life, beauty, and fresh air to our homes. But as every indoor gardener knows, they also attract unwanted guests—tiny pests that suck the life out of leaves, damage roots, and spread diseases. Common culprits include spider mites, aphids, mealybugs, fungus gnats, and whiteflies. While chemical pesticides may seem like a quick fix, they’re not ideal for indoor environments where you, your family, and even pets spend most of your time.

The good news? Nature provides safe, effective alternatives in the form of essential oils. These concentrated plant extracts not only smell wonderful but also contain compounds that repel or even kill common houseplant pests without harming your plants or indoor air quality.

In this article, we’ll explore the best essential oils for repelling houseplant pests, how they work, and safe ways to use them in your home.


Why Use Essential Oils for Houseplant Pest Control?

Before diving into the oils, it’s important to understand why they’re such a great natural alternative:

  1. Non-toxic for Indoor Use – Essential oils are safer for humans and pets than synthetic pesticides when used properly.
  2. Eco-friendly – They biodegrade quickly and don’t linger in the soil or air.
  3. Effective Against Pests – Many essential oils contain compounds like eucalyptol, citronellal, and thymol, which are natural insect deterrents.
  4. Pleasant Fragrance – Unlike chemical sprays, essential oils leave your home smelling fresh.

The 7 Best Essential Oils for Houseplant Pests

1. Peppermint Oil

  • Pests Repelled: Aphids, spider mites, ants, and fungus gnats.
  • How It Works: Peppermint contains menthol and pulegone, compounds that interfere with insect nervous systems and act as strong repellents.
  • How to Use: Mix 10–15 drops of peppermint essential oil in 1 cup of water with a few drops of mild liquid soap (to help it stick). Spray directly on leaves, stems, and soil where pests are active.

2. Lavender Oil

  • Pests Repelled: Whiteflies, aphids, moths, and fleas.
  • How It Works: Lavender contains linalool and linalyl acetate, which disrupt pest behavior and repel flying insects.
  • How to Use: Add 8–10 drops to a spray bottle with 1 cup of water. Mist leaves weekly as a preventive measure.

3. Eucalyptus Oil

  • Pests Repelled: Whiteflies, aphids, and spider mites.
  • How It Works: The active compound eucalyptol (cineole) has fumigant and insecticidal properties.
  • How to Use: Mix 5–10 drops with water and spray lightly around infected areas. Avoid over-spraying on tender young leaves, as it may be too strong.

4. Lemongrass Oil

  • Pests Repelled: Fungus gnats, mosquitoes, and mealybugs.
  • How It Works: Rich in citral and citronellal, lemongrass oil disrupts pest feeding and breeding cycles.
  • How to Use: Add 10 drops to 2 cups of water and spray the top layer of soil to deter fungus gnats.

5. Tea Tree Oil

  • Pests Repelled: Fungus gnats, mealybugs, and scale insects.
  • How It Works: Contains terpinen-4-ol and cineole, which have antifungal and insect-repellent qualities.
  • How to Use: Mix 5–7 drops in 1 cup of water with mild soap. Spray directly on visible pests or soil. Avoid overuse, as tea tree oil can be strong.

6. Rosemary Oil

  • Pests Repelled: Spider mites, aphids, and thrips.
  • How It Works: The compound camphor in rosemary oil acts as both a repellent and mild insecticide.
  • How to Use: Combine 10 drops with 1 cup of water. Mist plant leaves weekly, especially under leaves where mites hide.

7. Cedarwood Oil

  • Pests Repelled: Ants, beetles, and fungus gnats.
  • How It Works: Cedarwood contains sesquiterpenes, which interfere with insect pheromone signals, making it hard for them to breed.
  • How to Use: Mix 8–10 drops with water and spray in and around soil to prevent gnats from laying eggs.

How to Safely Use Essential Oils on Houseplants

Essential oils are powerful, so they must be used correctly to avoid damaging your plants:

  1. Always Dilute – Never apply essential oils directly to leaves. They can burn plant tissue. Always dilute with water and mild soap or carrier oil.
  2. Test First – Spray a small section of the plant and wait 24 hours to ensure it doesn’t cause leaf damage.
  3. Apply in the Evening – Essential oil sprays may cause leaf burn under direct sunlight. Apply in the evening or when plants are out of direct light.
  4. Reapply Weekly – Essential oils evaporate quickly, so reapplication is necessary for consistent results.
  5. Target Problem Areas – Focus on leaf undersides, stems, and soil surface where pests typically hide.

DIY Essential Oil Pest Spray Recipe

Here’s a general all-purpose spray you can make at home:

  • Ingredients:
    • 2 cups distilled water
    • 10 drops peppermint essential oil
    • 8 drops rosemary essential oil
    • 8 drops lavender essential oil
    • 1 teaspoon mild liquid soap (like Castile soap)
  • Instructions:
    1. Combine all ingredients in a spray bottle.
    2. Shake well before each use.
    3. Mist plants once a week, targeting leaves and soil.

This blend works against most common indoor pests and leaves a refreshing fragrance.


Additional Natural Pest Control Tips

While essential oils are powerful allies, combining them with good plant care practices will give you the best results:

  • Keep Plants Healthy: Strong plants are less prone to pest infestations. Provide proper light, water, and nutrients.
  • Wipe Leaves: Regularly clean plant leaves with a damp cloth to remove dust and pests.
  • Quarantine New Plants: Always isolate new plants for at least a week before placing them with others to prevent spreading pests.
  • Improve Air Circulation: Good airflow discourages pests like spider mites.
  • Avoid Overwatering: Damp soil attracts fungus gnats.

Final Thoughts

Essential oils are more than just pleasant fragrances—they’re natural pest repellents that can protect your beloved houseplants without resorting to harsh chemicals. Oils like peppermint, lavender, rosemary, tea tree, and eucalyptus not only deter pests but also make your home smell fresh and inviting.

By combining essential oil sprays with proper plant care, you can enjoy a thriving indoor garden that’s free from unwelcome bugs.

Your houseplants deserve the best care, and sometimes, the gentlest solutions are the most effective.