How to Transition Water Propagations Into Soil Safely

How to Transition Water Propagations Into Soil Safely

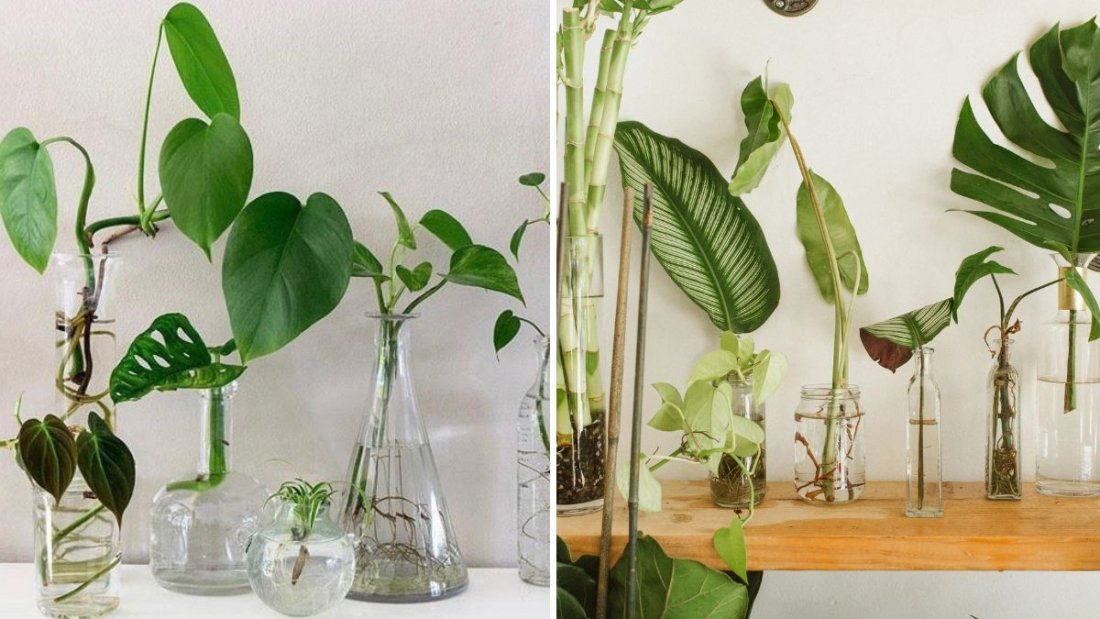
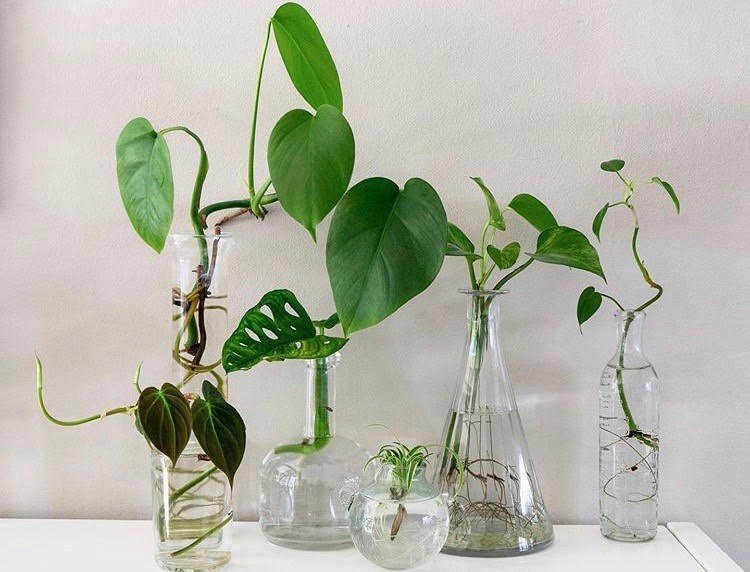
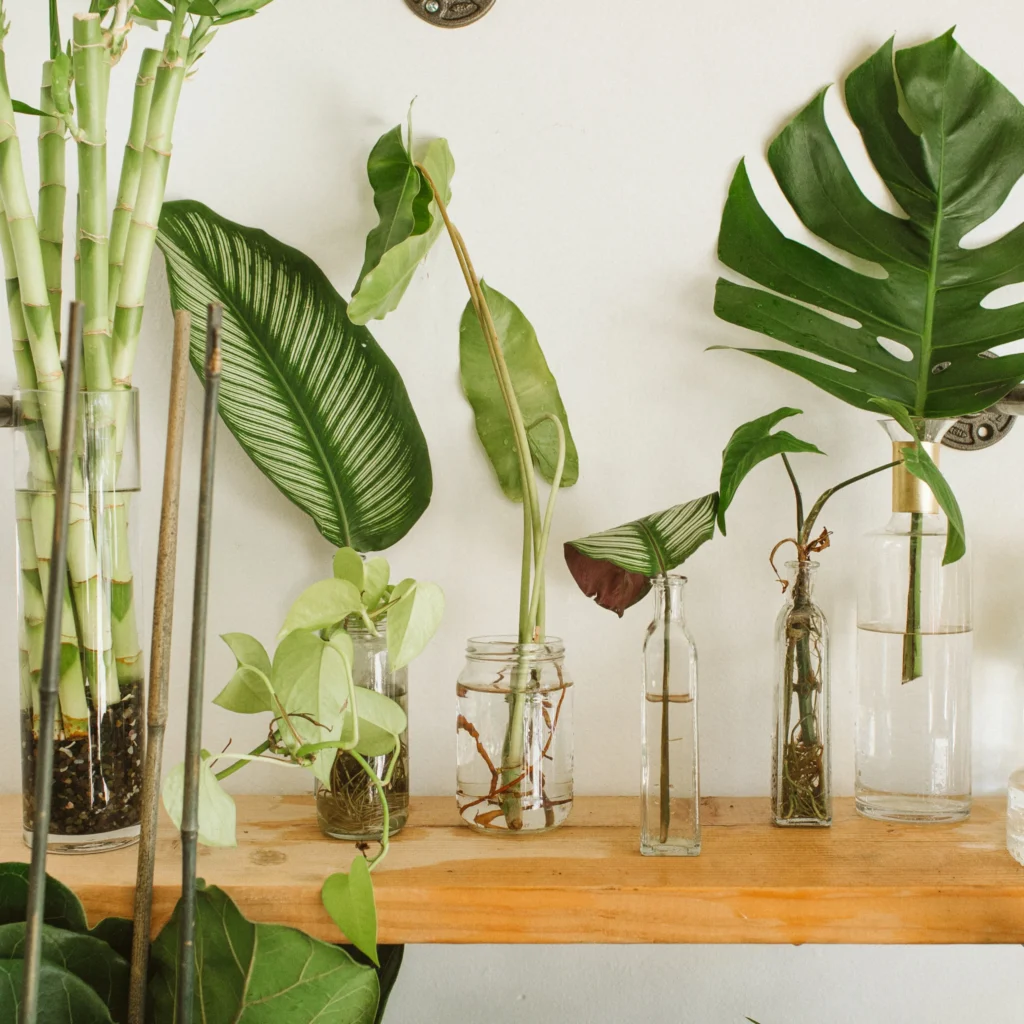
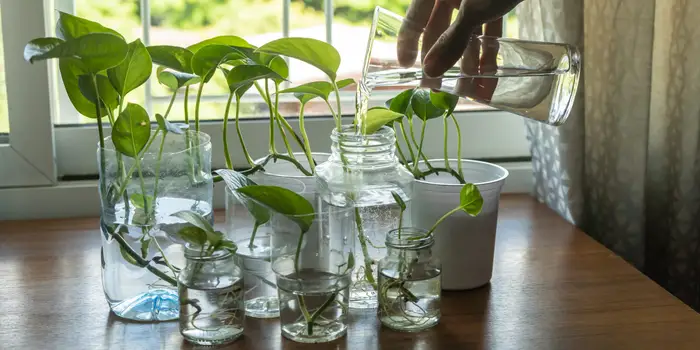
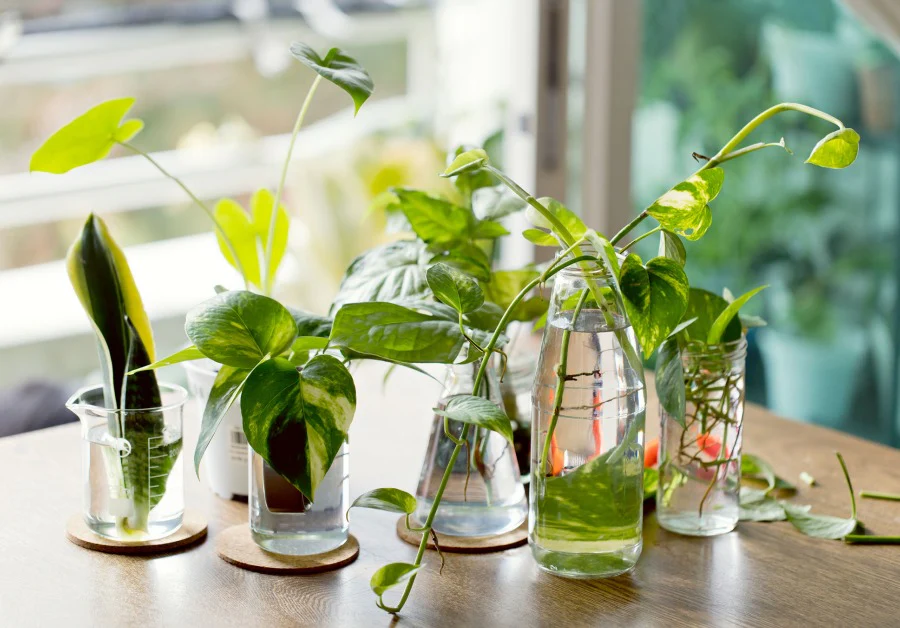
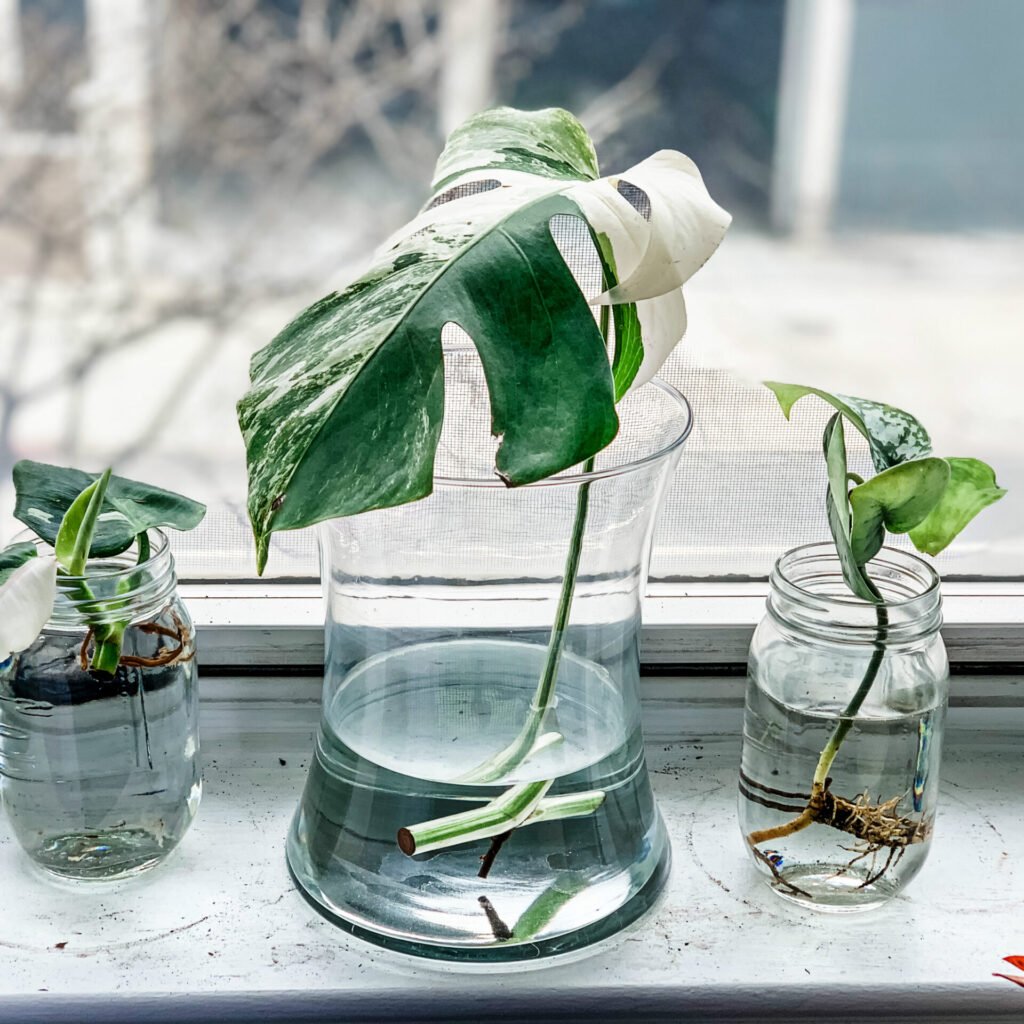
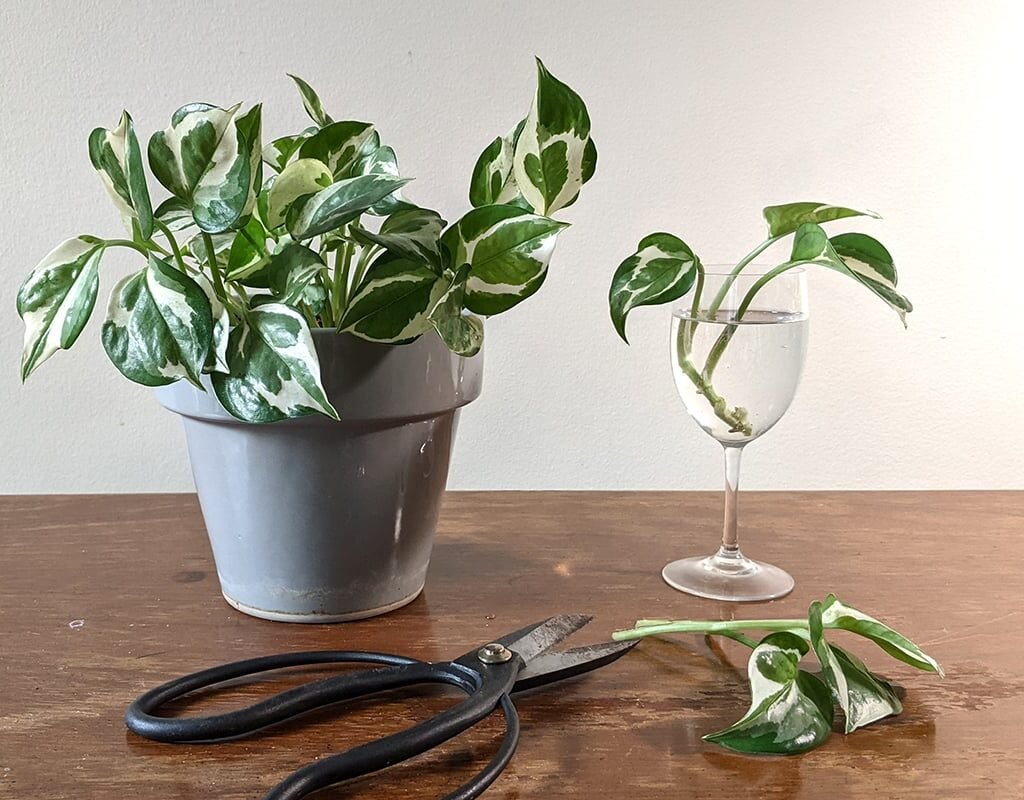
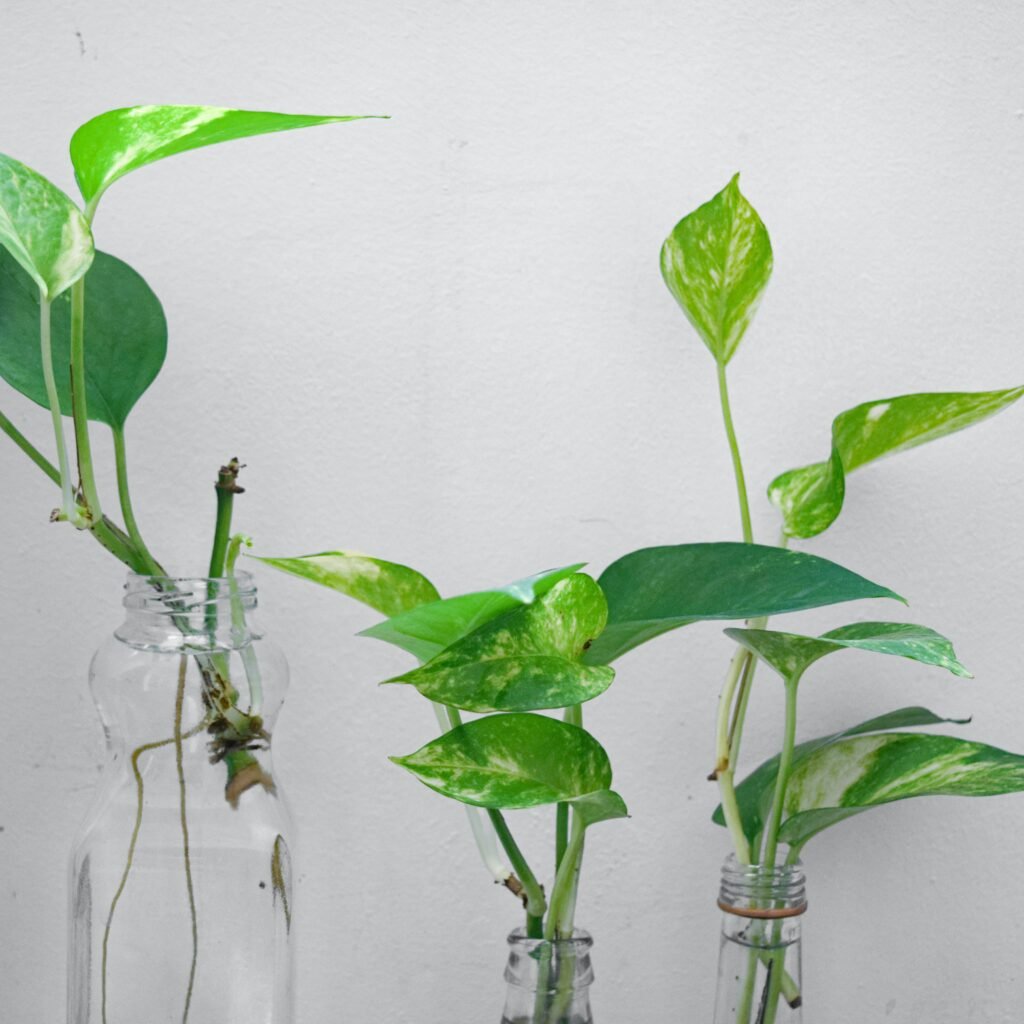
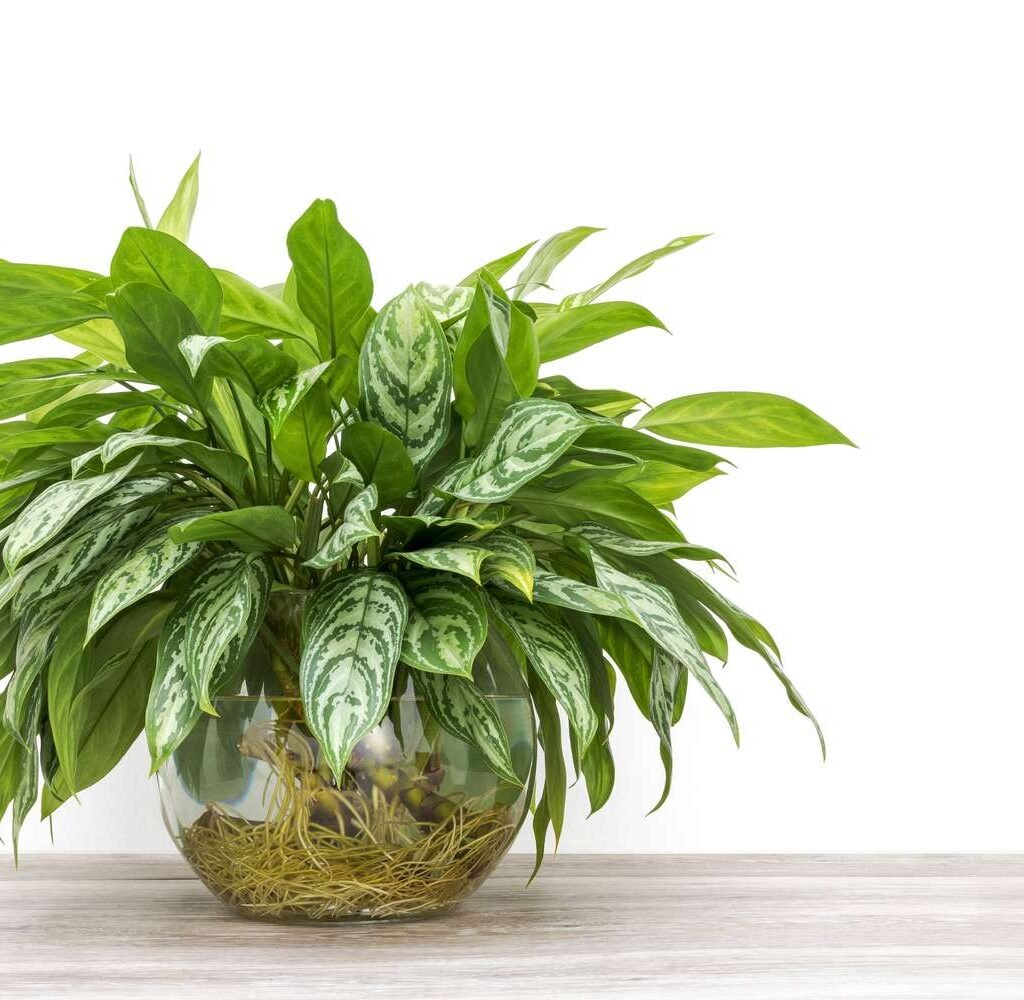
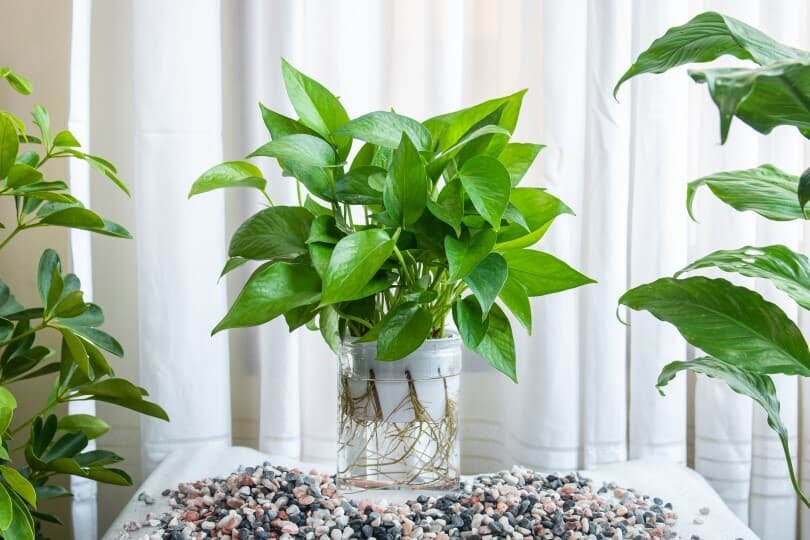
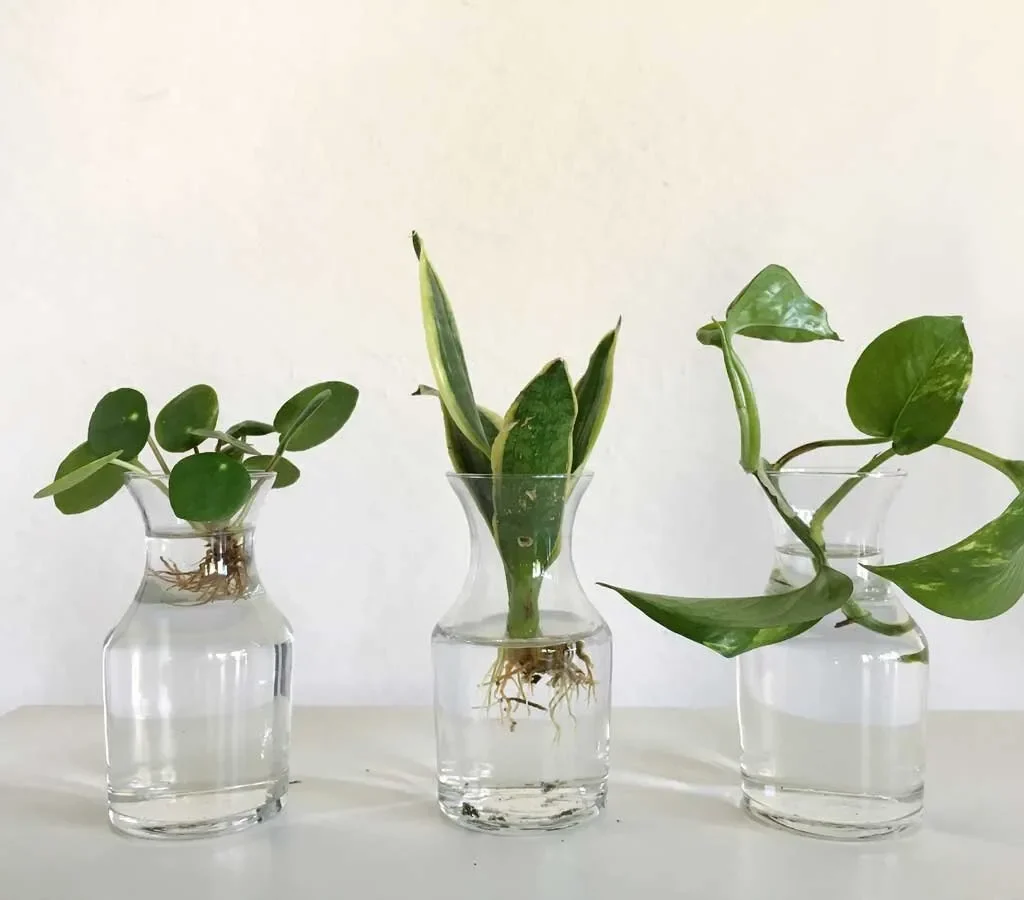
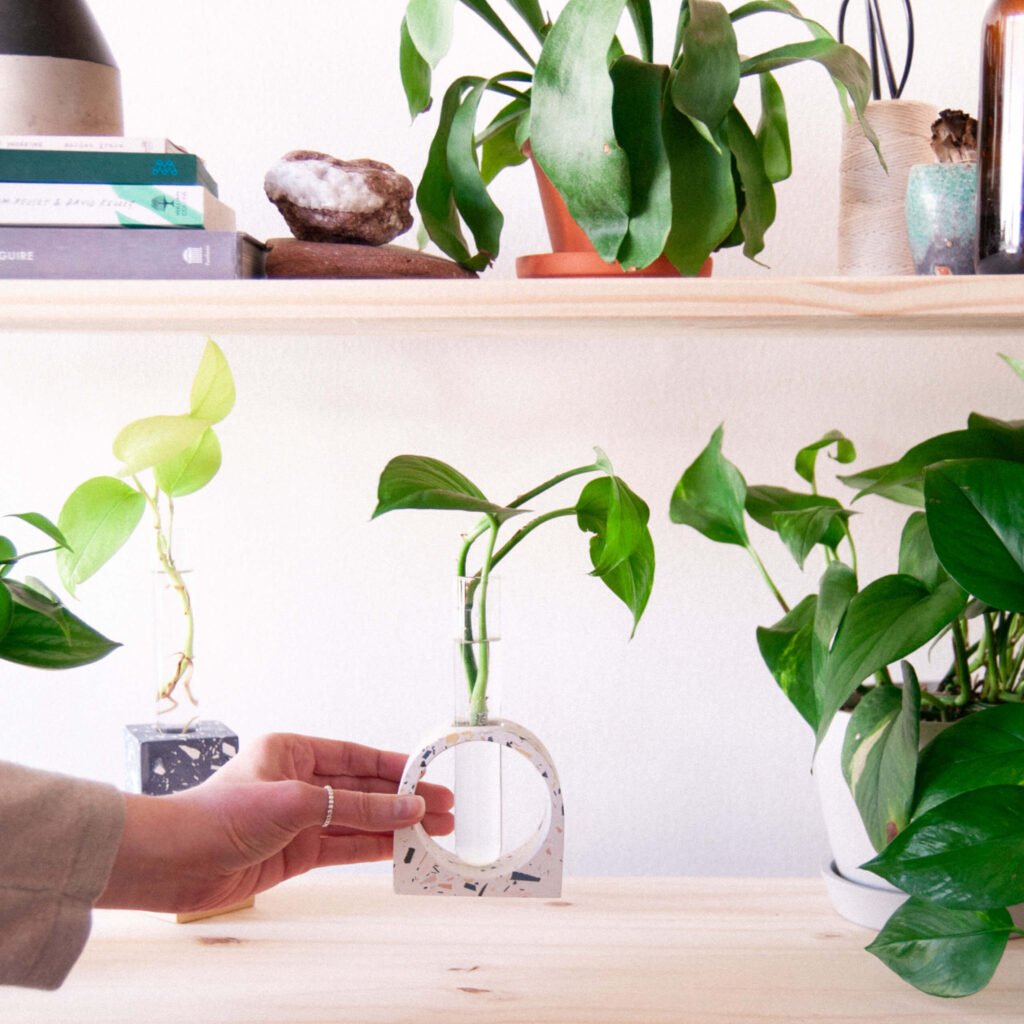
Propagating plants in water is one of the most rewarding experiences for plant lovers. There’s nothing quite like watching roots develop through a clear glass jar—it feels like magic in slow motion. However, the real challenge begins when it’s time to move those fragile water roots into soil. This transition phase is where many plant parents lose their new cuttings, as the sudden shift from a water-based environment to a soil-based one can shock the plant.

The good news? With the right knowledge and techniques, you can successfully transition your water propagations into soil and grow healthy, thriving plants. In this article, we’ll cover why the transition is tricky, when to move your cuttings, step-by-step instructions, and tips to reduce transplant shock.


Why Transitioning Water Propagations Can Be Tricky

When roots develop in water, they adapt to a very different environment compared to soil:

  • Water roots are delicate and thin. They’re designed to absorb oxygen and nutrients directly from liquid.
  • Soil requires tougher roots. These must push through particles and access water in pockets between soil grains.
  • Sudden change = stress. If the shift is too abrupt, the plant may wilt, stop growing, or even die.

This is why transitioning cuttings carefully is crucial. It gives the plant time to adjust and encourages the development of stronger, soil-ready roots.


When Is the Right Time to Transfer?

Timing is everything. Moving cuttings too soon can set them back, while waiting too long can make them overly dependent on water.

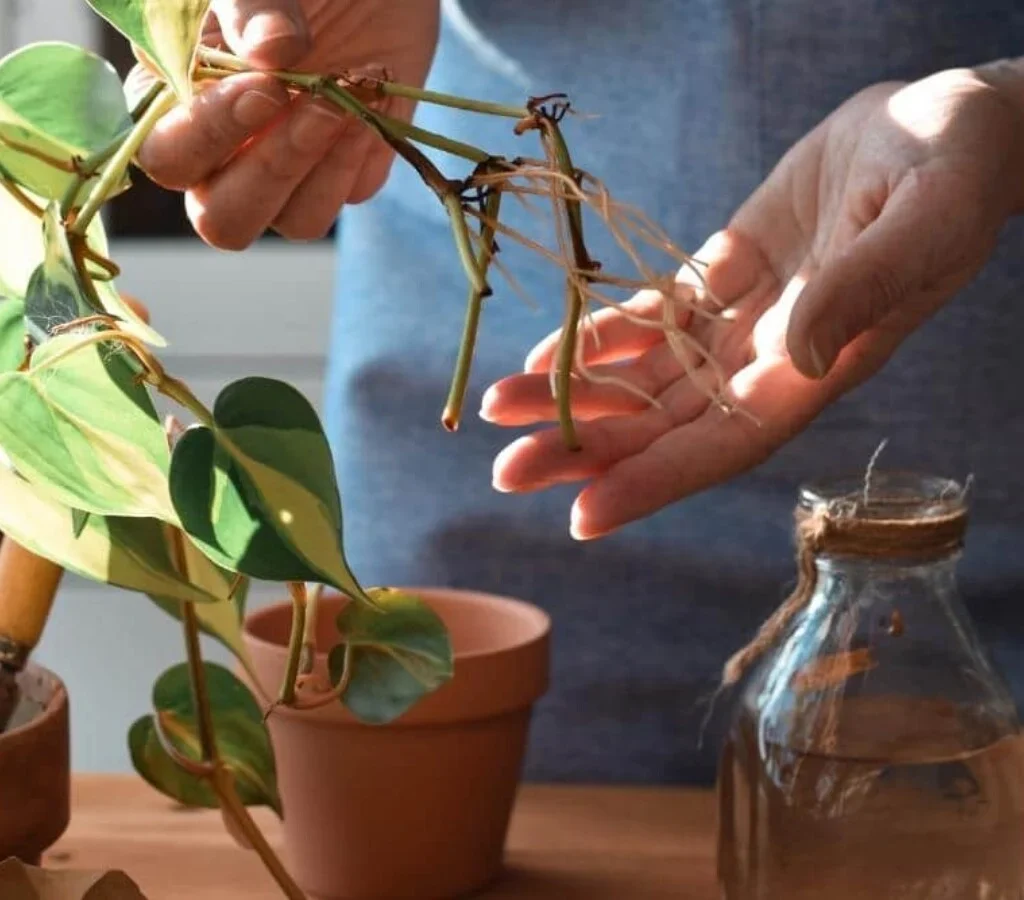
Signs Your Cutting Is Ready for Soil:

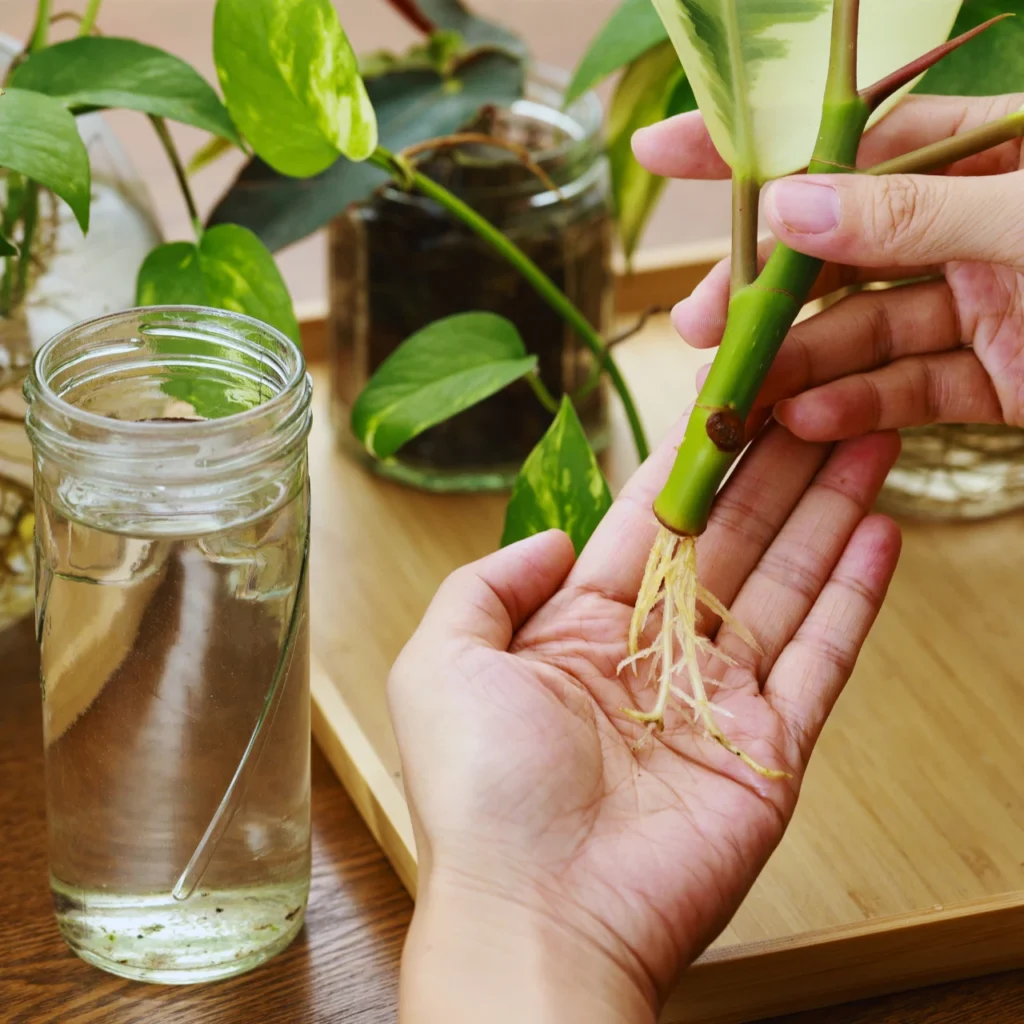
  • Roots are at least 2–3 inches long. Short roots struggle to anchor in soil.
  • Multiple roots are present, not just a single strand.
  • Roots look white, healthy, and firm, not mushy or brown.
  • The cutting has started developing new leaves or growth, showing it’s strong enough to handle change.

As a rule of thumb, transfer cuttings once they’ve developed a healthy root system that looks capable of surviving in soil.


Step-by-Step Guide: Moving Water Propagations Into Soil

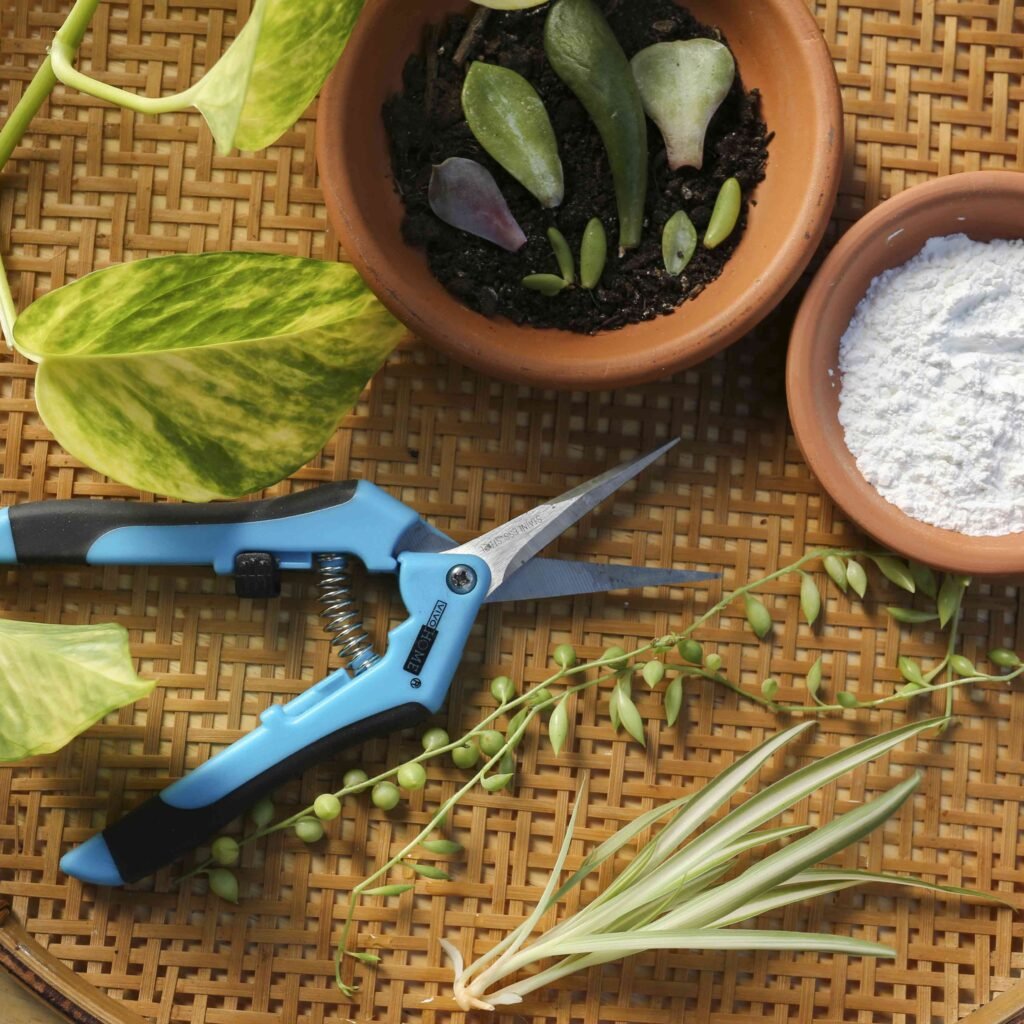
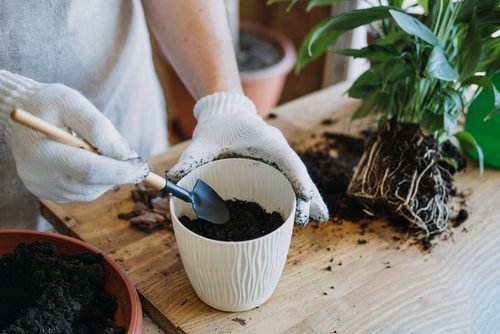
Step 1: Prepare the Right Pot and Soil

  • Choose a small pot with drainage holes. Large pots retain excess water, increasing rot risk.
  • Use a light, well-draining mix such as potting soil blended with perlite or coco coir.
  • Avoid heavy garden soil, which compacts easily and suffocates new roots.

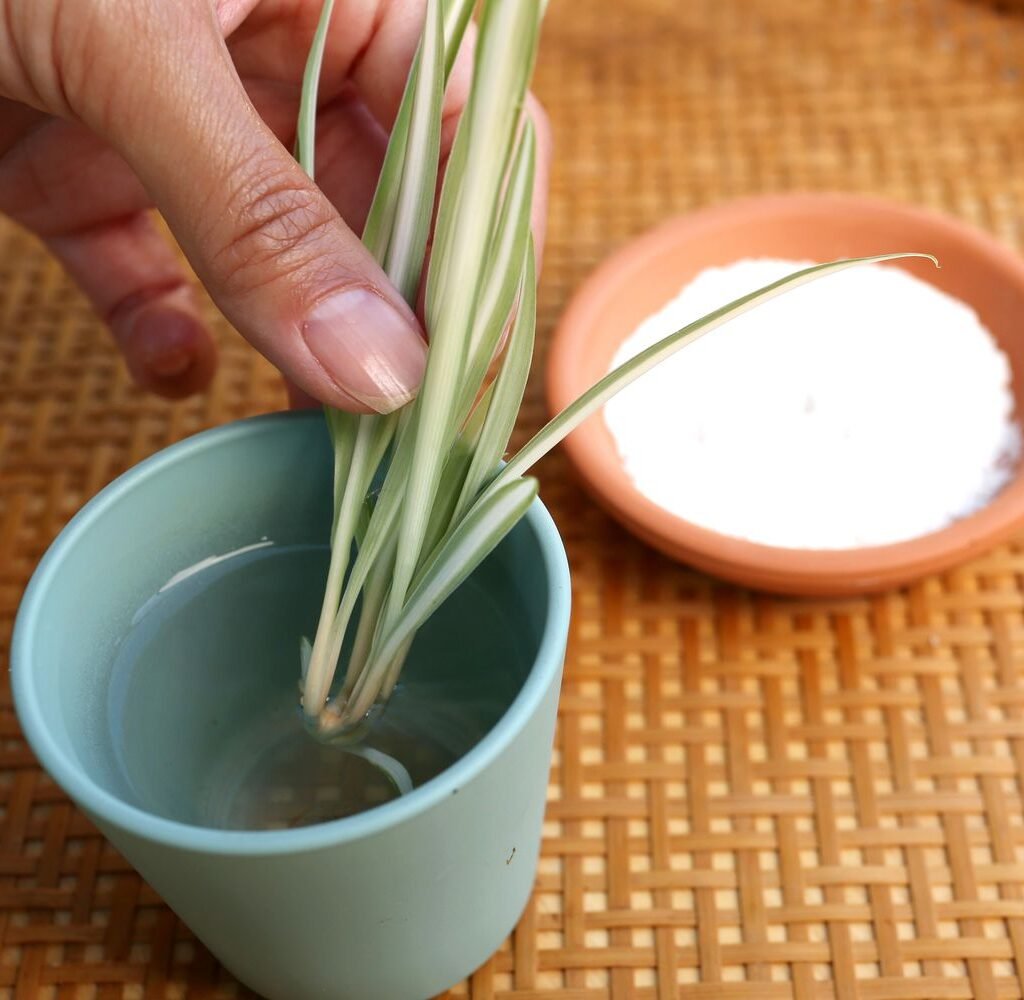
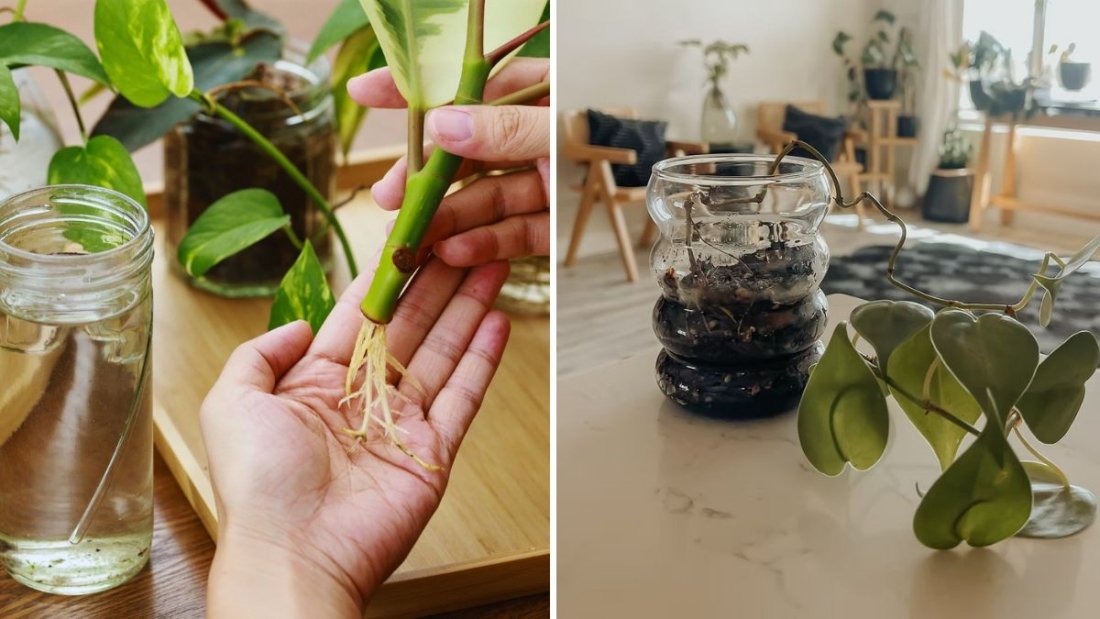
Step 2: Acclimate the Roots

Before planting directly, consider a gentle acclimation method:

  • Mix 50% water + 50% soil in the pot to create a mud-like texture.
  • Plant the cutting in this mix for 1–2 weeks.
  • Gradually reduce watering so roots adjust to extracting moisture from soil rather than sitting in water.

This “halfway house” makes the transition smoother.

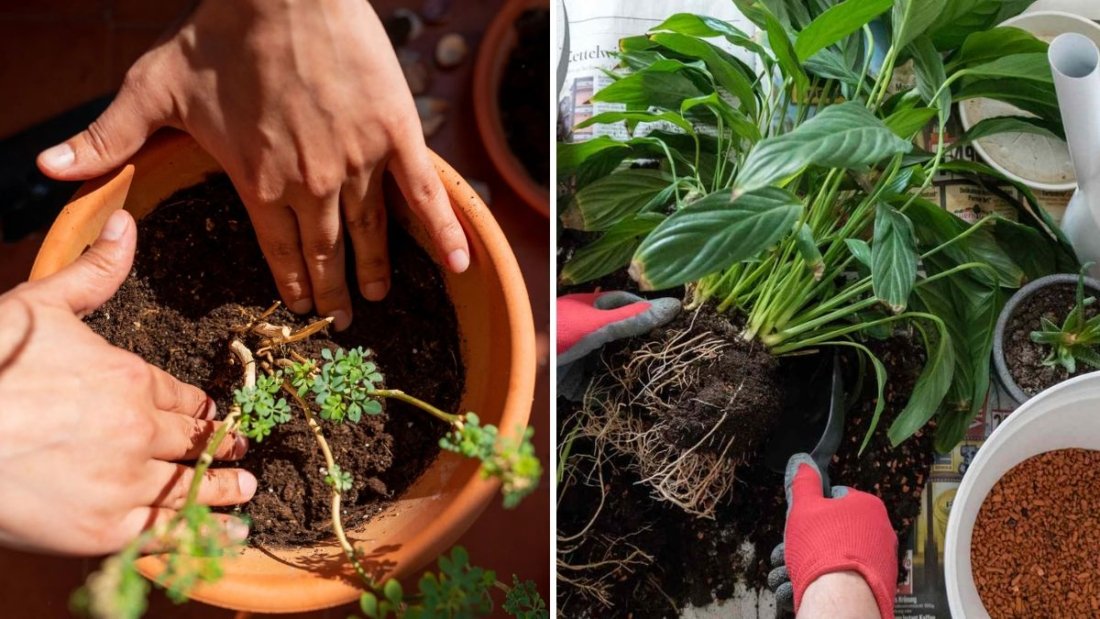
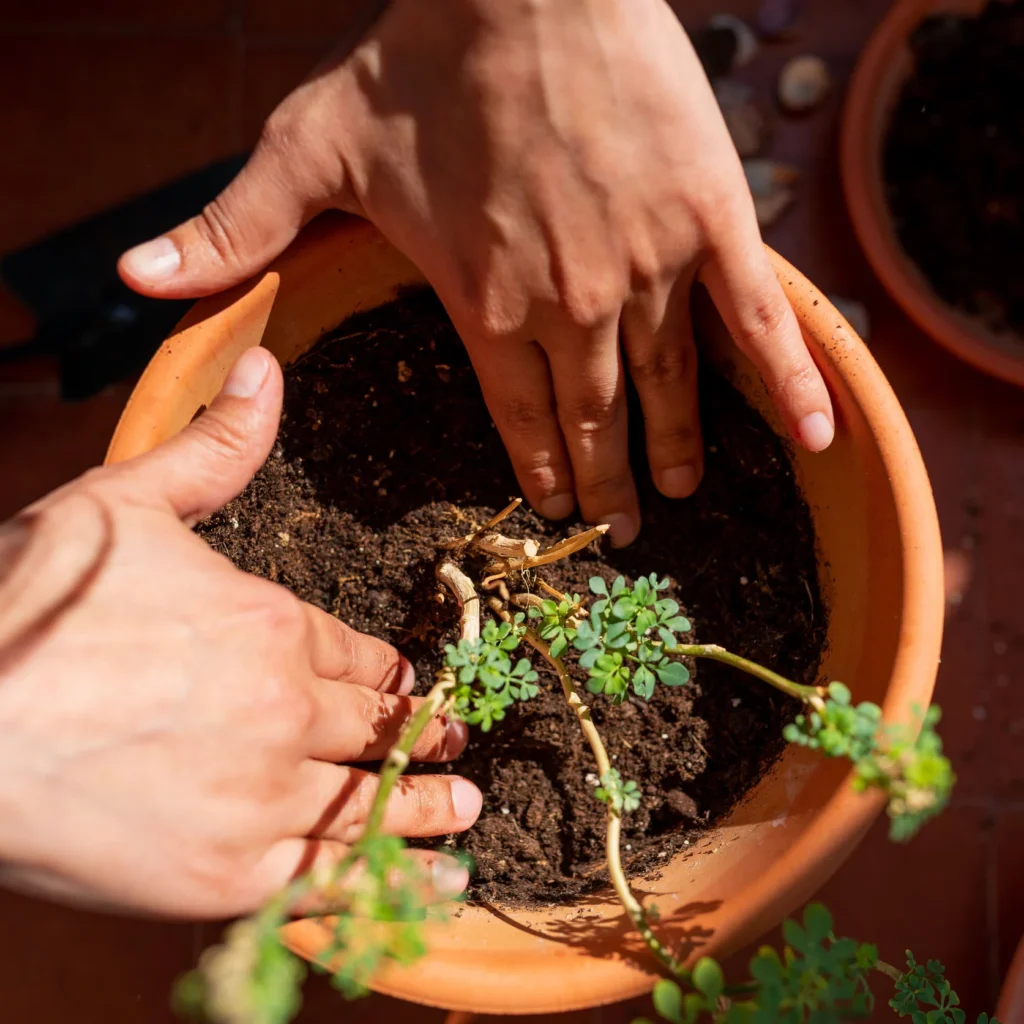
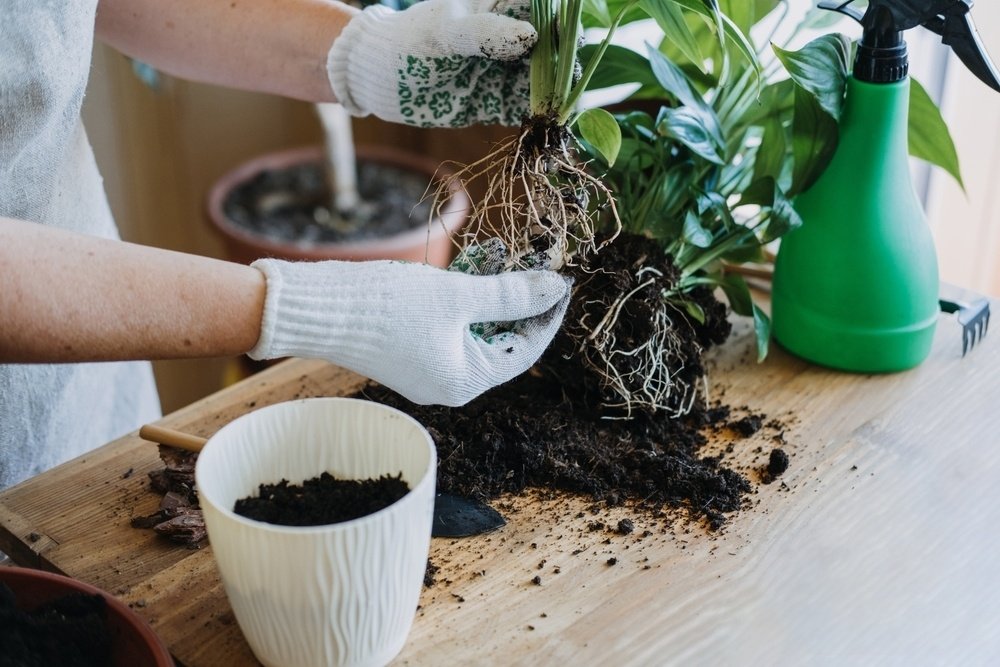
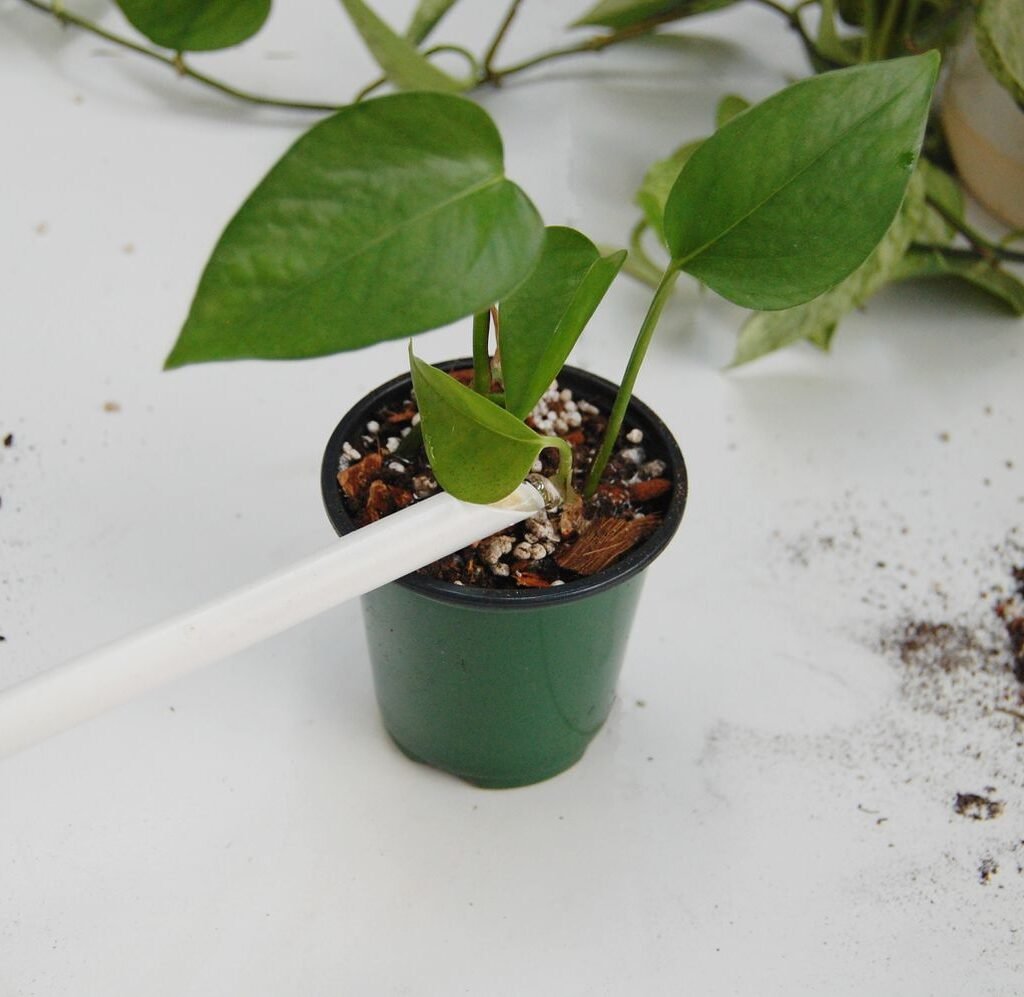
Step 3: Plant the Cutting Carefully

  • Make a small hole in the soil using your finger or a stick.
  • Place the cutting’s roots inside gently, avoiding bending or breaking them.
  • Fill in soil lightly around the stem without compacting it too tightly.

Step 4: Water Thoroughly

  • After planting, water generously to help the soil settle around the roots.
  • Allow excess water to drain completely.
  • Keep soil consistently moist (but not soggy) for the first 2–3 weeks to ease adaptation.

Step 5: Create a Humid Environment

  • Cover the plant with a clear plastic bag or place it inside a propagation dome.
  • Humidity reduces water stress while roots adjust.
  • Remove the cover daily for airflow to prevent mold.

Step 6: Provide Gentle Light

  • Place the pot in bright, indirect light.
  • Avoid harsh direct sunlight, which can scorch fragile leaves and dry out the soil too quickly.

Step 7: Monitor and Adjust

  • Watch for signs of stress like drooping, yellowing, or leaf drop.
  • New leaf growth is the best indicator that the plant is settling well.

Common Mistakes to Avoid

  1. Transferring too early. Small, weak roots may not survive the transition.
  2. Using dense soil. This suffocates delicate roots and increases rot risk.
  3. Overwatering. New roots are prone to rot in soggy conditions.
  4. Neglecting humidity. Without enough moisture in the air, the plant may wilt.
  5. Skipping acclimation. Directly moving from water to dry soil shocks the roots.

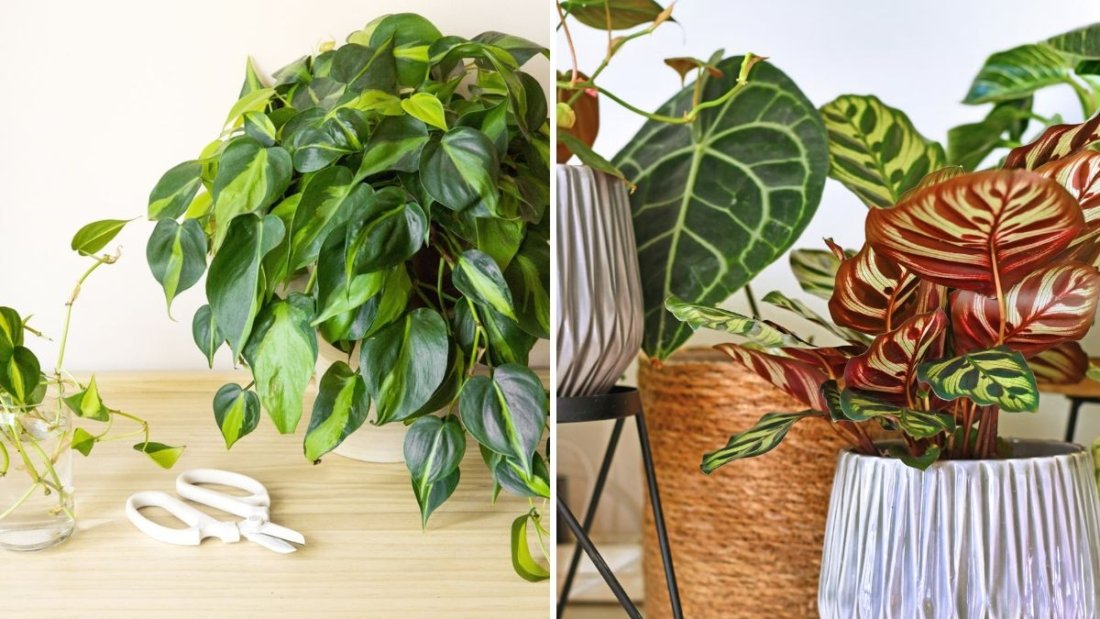
Plants That Transition Easily vs. Plants That Struggle

Easy-to-Transfer Plants:

  • Pothos
  • Philodendron
  • Spider Plant
  • Coleus
  • Tradescantia (Wandering Dude)

These plants root quickly in water and adapt to soil with minimal fuss.

Plants That Need Extra Care:

  • Fiddle Leaf Fig
  • String of Pearls
  • African Violet
  • Hibiscus
  • Rosemary

These may require longer acclimation or a rooting hormone boost for better survival.


Tips to Reduce Transplant Shock

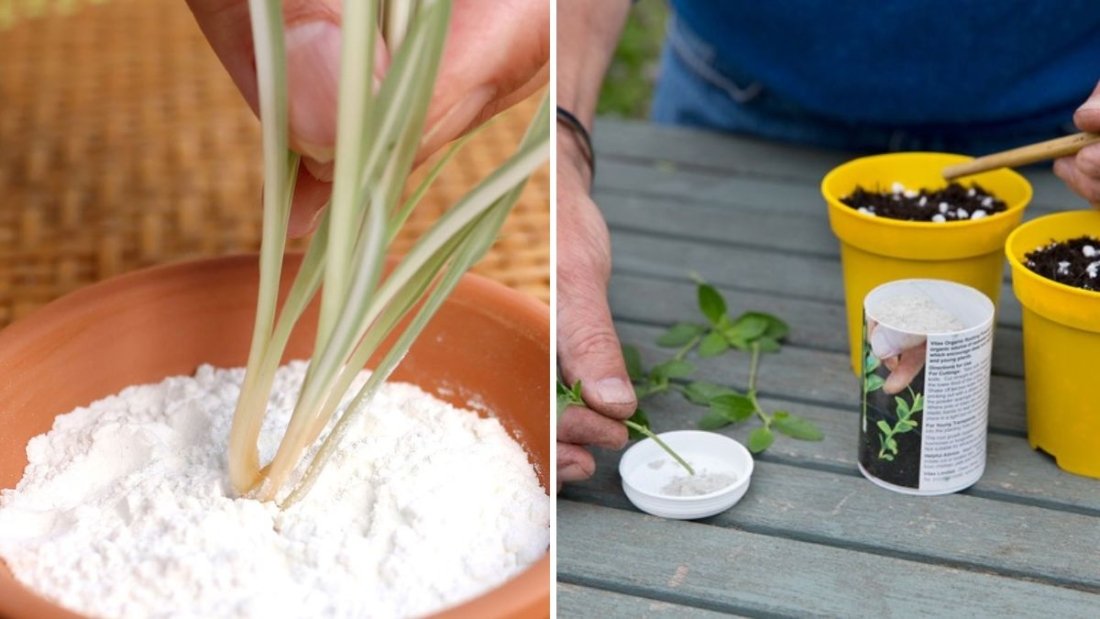
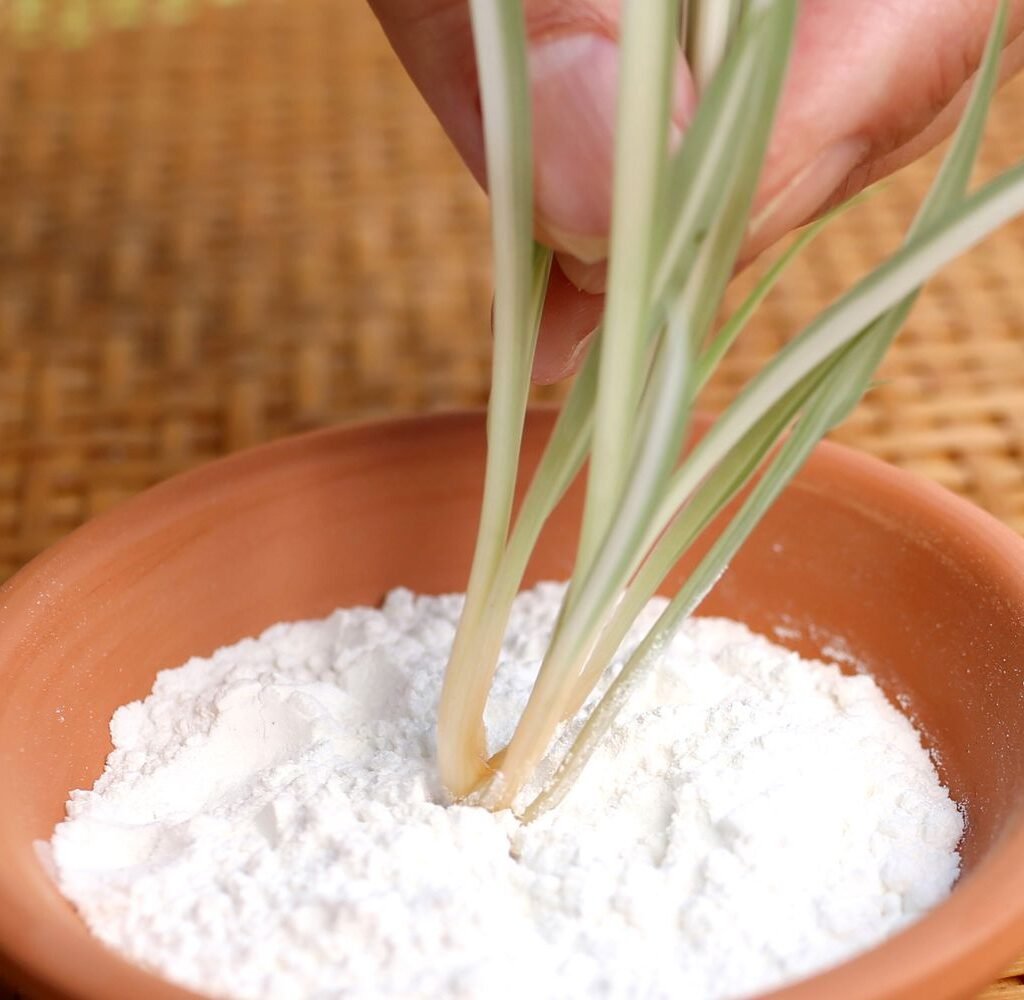
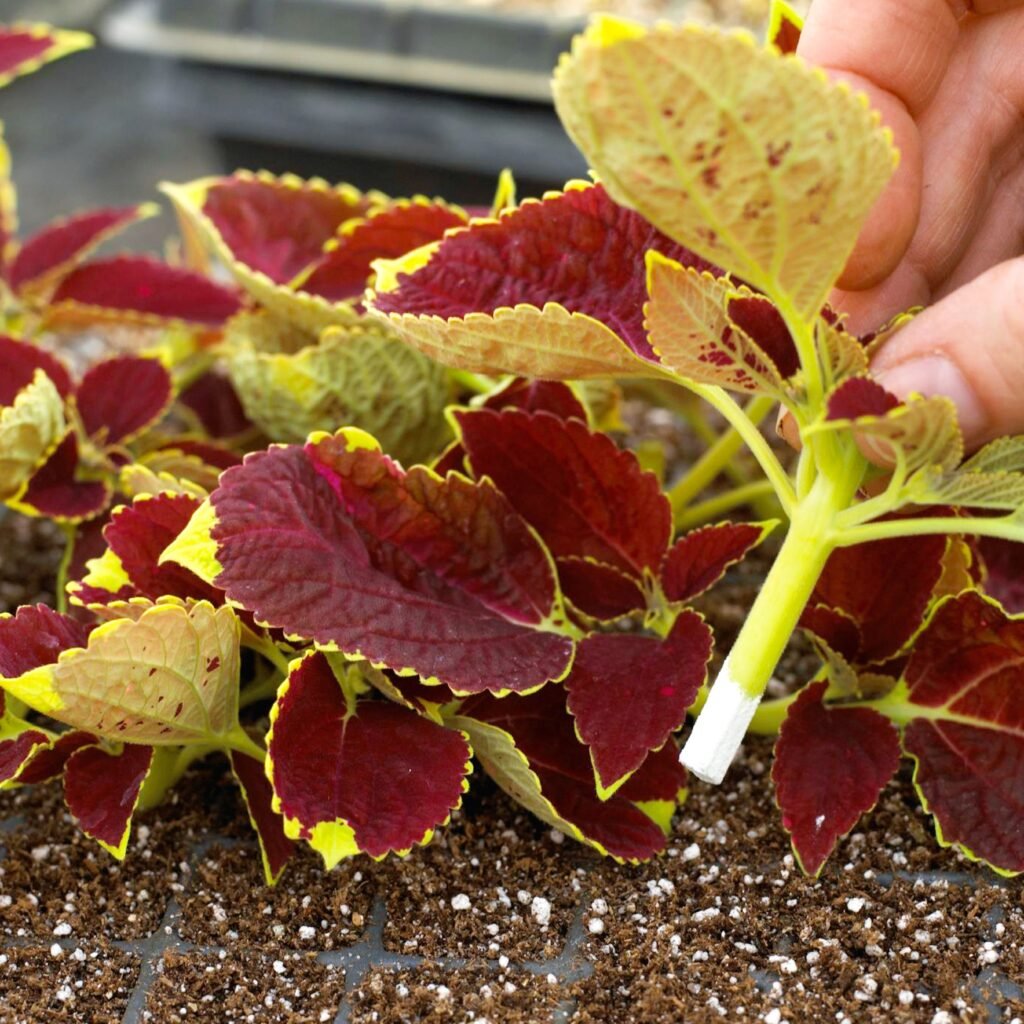
  • Use Rooting Hormone: Dip cuttings before planting to encourage stronger soil roots.
  • Trim Excess Leaves: Reduces water loss through transpiration while roots adjust.
  • Start Small: Move cuttings into small pots first, then repot as they outgrow.
  • Be Patient: Some plants take weeks before showing new growth after the move.

Alternative Transition Methods

If you’ve struggled with direct transfers, try these methods:

  1. Soil-Water Mix Method – As mentioned earlier, use a half-water, half-soil mix for smoother adaptation.
  2. Semi-Hydroponics – Transition plants to a medium like LECA (lightweight expanded clay aggregate) instead of traditional soil. This bridges the gap between water and soil growth.
  3. Perlite Propagation – Root cuttings in moist perlite, then move them to soil once stronger roots form.

Long-Term Care After Transition

Once your plant has settled in soil, adjust your care routine:

  • Water less frequently than during water propagation. Check soil moisture before watering.
  • Fertilize lightly after 4–6 weeks to support new growth.
  • Repot only when needed—avoid disturbing the roots too soon.

Conclusion

Transitioning water propagations into soil is often the most nerve-wracking stage of plant propagation, but it doesn’t have to be. By recognizing the right time to transfer, preparing well-draining soil, acclimating roots gradually, and maintaining proper moisture and light, you can dramatically improve your success rate.

Think of this process as guiding your plant through a new chapter—moving from the safety of water to the independence of soil. With patience and care, your cuttings will not only survive but thrive, eventually growing into strong, lush houseplants that bring life to your home.

How to Use Rooting Hormone for Faster Plant Growth

How to Use Rooting Hormone for Faster Plant Growth

Propagation is one of the most exciting and rewarding aspects of plant care. Whether you’re multiplying your favorite houseplants, starting cuttings from the garden, or simply experimenting, propagation allows you to expand your collection without buying new plants. However, one of the most common challenges gardeners face is slow or unsuccessful rooting. This is where rooting hormone comes in—it acts as a booster that encourages stronger and faster root development.

In this guide, you’ll learn what rooting hormone is, the different types available, how to use it properly, and best practices to ensure healthy plant growth.


What Is Rooting Hormone?

Rooting hormone is a growth enhancer used during plant propagation. It contains auxins, which are naturally occurring plant hormones responsible for stimulating root development. While plants produce auxins naturally, cuttings often struggle because they no longer receive nutrients and hormones from the parent plant. Rooting hormone supplements this deficiency, giving the cutting the extra push it needs to establish roots quickly.

Benefits of Using Rooting Hormone

  • Faster root development – cuttings root more quickly than they would naturally.
  • Higher success rate – reduces the chances of cuttings rotting or failing.
  • Stronger root systems – promotes thick, fibrous roots that anchor the plant better.
  • Wider propagation options – helps root species that are typically difficult to propagate.

Types of Rooting Hormones

Before using rooting hormone, it’s important to understand the different forms available.

1. Rooting Powder

  • The most common type.
  • Easy to use—dip the cutting into the powder before planting.
  • Often includes fungicides to prevent rot.
  • Great for beginners and works on most houseplants and garden cuttings.

2. Rooting Gel

  • Provides an even coating that seals the cutting tip.
  • Ensures better absorption and protection from diseases.
  • Preferred for soft-stemmed cuttings and more delicate plants.

3. Rooting Liquid

  • Can be used as-is or diluted depending on plant type.
  • Allows soaking cuttings for deeper absorption.
  • Useful for commercial or large-scale propagation.

When Should You Use Rooting Hormone?

Not every plant requires rooting hormone, but it’s particularly useful when:

  • Propagating woody cuttings (like roses or hibiscus).
  • Working with plants that are slow to root naturally (like fiddle leaf fig or gardenia).
  • Growing cuttings in conditions that aren’t ideal (low humidity, cooler temperatures).
  • Propagating expensive or rare plants where you want to maximize success.

Step-by-Step Guide: How to Use Rooting Hormone

Using rooting hormone is simple, but following the correct method ensures the best results.

Step 1: Prepare the Cutting

  • Select a healthy, disease-free stem from the parent plant.
  • Cut just below a leaf node using sterilized scissors or pruning shears.
  • Remove any lower leaves to expose the node (where roots will grow).

Step 2: Moisten the Cutting

  • Lightly moisten the end of the cutting with clean water.
  • This helps the hormone adhere better.

Step 3: Apply the Rooting Hormone

  • For powder: Dip the cutting into the powder, then gently tap off the excess.
  • For gel: Dip the cutting directly into the gel for full coverage.
  • For liquid: Soak the cutting as directed (usually a few seconds to minutes).

Tip: Never dip cuttings directly into the main container of hormone. Instead, pour a small amount onto a separate dish to avoid contamination.

Step 4: Plant the Cutting

  • Place the treated cutting into a pot filled with a well-draining propagation mix (peat moss, perlite, or coco coir).
  • Gently press the soil around the stem for stability.

Step 5: Create the Right Environment

  • Keep the soil moist but not soggy.
  • Provide bright, indirect light.
  • Maintain high humidity by covering with a plastic dome or bag.

Step 6: Monitor and Wait

  • Depending on the plant, roots can form in 2–6 weeks.
  • Check gently for resistance when tugging on the cutting—that’s a sign roots have developed.

Common Mistakes to Avoid When Using Rooting Hormone

Even though rooting hormone is easy to use, some common errors can reduce its effectiveness:

  1. Overusing the hormone – Applying too much can actually hinder growth. A light coating is enough.
  2. Skipping sterilization – Dirty tools can introduce infections that kill the cutting.
  3. Poor soil choice – Using heavy soil instead of a light propagation mix can suffocate new roots.
  4. Low humidity – Rootless cuttings dry out quickly without consistent moisture.
  5. Using expired product – Rooting hormones lose potency over time. Always check expiration dates.

Best Plants to Propagate with Rooting Hormone

While many houseplants root easily without help, others benefit greatly from rooting hormone:

  • Pothos – Usually easy, but rooting hormone speeds up the process.
  • Philodendron – Especially for thicker stems.
  • Fiddle Leaf Fig – A challenging plant that benefits from hormone use.
  • Rose – Improves success rates for woody cuttings.
  • Snake Plant – Faster root development compared to water propagation.
  • Gardenia, Camellia, Hibiscus – Woody ornamentals that need extra rooting help.

Safety Tips When Handling Rooting Hormone

Rooting hormone is generally safe, but it’s best to handle it carefully:

  • Wear gloves to avoid skin irritation.
  • Avoid inhaling powders.
  • Wash hands thoroughly after use.
  • Store in a cool, dry place away from children and pets.

Alternatives to Commercial Rooting Hormones

If you prefer natural methods, several household items can mimic rooting hormone properties:

  • Cinnamon – Acts as a natural antifungal and mild stimulant.
  • Honey – Protects cuttings from bacterial infections.
  • Aloe Vera Gel – Contains natural compounds that encourage rooting.
  • Willow Water – Soaking willow branches in water releases natural auxins.

While these aren’t always as effective as commercial rooting hormones, they are good eco-friendly alternatives for easy-to-root plants.


Conclusion

Rooting hormone is an invaluable tool for gardeners who want to increase their propagation success and grow healthy plants faster. By selecting the right type (powder, gel, or liquid), preparing your cuttings properly, and providing the right environment, you can turn even tricky cuttings into thriving new plants.

Whether you’re expanding your indoor jungle, sharing plants with friends, or experimenting with difficult-to-root species, rooting hormone can be the secret ingredient that transforms your propagation results.

The Best Containers for Successful Propagation

The Best Containers for Successful Propagation

Propagation is one of the most rewarding parts of plant care. With a few simple steps, you can turn a single plant into many, expanding your collection or sharing with friends—all at little to no cost. But while many plant lovers focus on cuttings, soil, and light, one crucial factor often gets overlooked: the container.

The right container can make the difference between thriving new roots and failed propagation attempts. Whether you’re rooting in water, soil, or specialized mediums, choosing the right vessel will help your cuttings develop strong, healthy root systems.

In this article, we’ll explore the best containers for successful propagation, the pros and cons of each, and tips to maximize your success.


Why Containers Matter in Propagation

Before diving into the options, it’s important to understand why containers play such a vital role in propagation. They:

  1. Support Root Development – A good container allows enough room for roots to grow without overcrowding.
  2. Provide Proper Drainage or Aeration – Roots need both moisture and oxygen. The wrong container can lead to rot.
  3. Maintain Stability – Containers keep delicate cuttings upright while roots establish.
  4. Affect Light Exposure – Clear containers help monitor root growth, while opaque ones prevent algae buildup.
  5. Influence Microclimate – Certain containers help regulate humidity and temperature, critical for fragile cuttings.

The Best Containers for Different Propagation Methods

There’s no single “best” container—it depends on whether you’re propagating in water, soil, or specialized mediums. Below, we’ll cover the most effective types.


1. Glass Jars and Bottles (Water Propagation)

Best for: Pothos, philodendron, coleus, spider plant, tradescantia

Clear glass jars are a classic choice for water propagation. They let you watch roots grow while keeping cuttings hydrated.

Pros:

  • Transparent—easy to track root development
  • Wide range of shapes and sizes
  • Recyclable and inexpensive

Cons:

  • Light exposure encourages algae growth
  • No drainage (not suitable for soil propagation)
  • Can be heavy and breakable

Tips:

  • Use narrow-neck bottles to support upright stems.
  • Change water every 5–7 days to prevent bacterial growth.
  • Place in bright, indirect light for best results.

2. Clear Plastic Cups

Best for: General cuttings, seedlings

Plastic cups are lightweight, disposable, and versatile. When used for soil propagation, poking drainage holes at the bottom prevents waterlogging.

Pros:

  • Inexpensive and widely available
  • Easy to customize with drainage holes
  • Lightweight and transparent

Cons:

  • Not very durable (can crack or warp)
  • Less attractive than glass or ceramic options
  • Clear plastic can heat soil quickly in direct sun

Tips:

  • Use double-cup method (inner cup with holes inside a solid outer cup) to catch excess water.
  • Label cuttings directly on the cup to stay organized.

3. Terracotta Pots

Best for: Succulents, cacti, and other soil-based propagation

Terracotta pots are ideal for plants that prefer drier conditions. Their porous material allows air circulation and prevents root rot.

Pros:

  • Excellent breathability for roots
  • Classic aesthetic for indoor displays
  • Naturally wicks away excess moisture

Cons:

  • Soil dries out quickly—needs regular monitoring
  • Heavy and breakable
  • Not transparent (can’t see root progress)

Tips:

  • Best for hardy cuttings that don’t require constant moisture.
  • Choose smaller pots to avoid overwatering.

4. Propagation Stations (Glass Tubes in Wooden or Metal Holders)

Best for: Decorative water propagation of vining plants

Propagation stations have gained popularity on social media thanks to their aesthetic appeal. They typically feature test tube-style containers held in a wooden or metal frame.

Pros:

  • Stylish and decorative—looks great in any room
  • Perfect for multiple cuttings at once
  • Easy to change water

Cons:

  • Limited size for larger cuttings
  • Still prone to algae buildup
  • More expensive than DIY options

Tips:

  • Place in a well-lit spot, but not in direct sun.
  • Rotate cuttings regularly to encourage even root growth.

5. Plastic Nursery Trays and Cells

Best for: Seedlings, herb cuttings, bulk propagation

Nursery trays are designed for efficient propagation, allowing you to grow multiple cuttings at once. They’re widely used in greenhouses and by professionals.

Pros:

  • Great for large-scale propagation
  • Uniform drainage across cells
  • Easy to handle and transport

Cons:

  • Requires space and good organization
  • May dry out faster in shallow cells
  • Less decorative for indoor displays

Tips:

  • Use a humidity dome to retain moisture.
  • Keep trays on a heat mat for faster root development.

6. Mason Jars with Net Pots (Hydroponic Propagation)

Best for: Hydroponic setups, herbs, leafy greens

Combining mason jars with net pots allows for semi-hydro propagation, where cuttings develop roots in water while being stabilized by clay pebbles or perlite.

Pros:

  • Supports hydroponic growth long-term
  • Reduces algae with opaque jar covers
  • Provides aeration to roots

Cons:

  • Requires extra setup and materials
  • Not as simple as traditional water propagation

Tips:

  • Cover the jar with foil or tape to block light and prevent algae.
  • Change water every 1–2 weeks.

7. Upcycled Containers

Best for: Budget-friendly propagation of most plants

Household items like yogurt cups, glass bottles, and food containers can be repurposed into propagation vessels.

Pros:

  • Eco-friendly and cost-effective
  • Wide variety of shapes and sizes
  • Perfect for experimenting

Cons:

  • Not always durable or decorative
  • May require extra effort to add drainage

Tips:

  • Sanitize containers thoroughly before use.
  • Drill or poke drainage holes for soil-based propagation.

Choosing the Right Container: Factors to Consider

When selecting a container for propagation, ask yourself:

  1. What plant am I propagating?
    • Vining plants do well in glass jars.
    • Succulents prefer terracotta or plastic pots with soil.
  2. What medium am I using?
    • Water → clear glass or plastic
    • Soil → terracotta, plastic pots, or nursery trays
    • Hydroponics → mason jars with net pots
  3. Do I need visibility?
    • Clear containers let you track roots, but can grow algae.
  4. How many plants am I propagating?
    • One or two? A jar or tube is fine.
    • Many? Use trays or multiple cups.
  5. Do I want it decorative or practical?
    • Propagation stations double as home décor.
    • Plastic cups and trays are more functional for bulk growth.

Tips for Propagation Success

No matter what container you choose, follow these best practices:

  • Keep it clean – Always sterilize containers before use.
  • Maintain proper moisture – Avoid overwatering or letting cuttings dry out.
  • Provide the right light – Bright, indirect light works best for most cuttings.
  • Change water regularly – If using water, refresh weekly to prevent bacteria.
  • Label your cuttings – Especially important if you’re propagating multiple species.
  • Be patient – Some plants root in a week, while others take months.

Final Thoughts

The container you choose for propagation isn’t just a vessel—it’s a crucial part of the rooting process. Whether you prefer the elegance of glass jars, the practicality of nursery trays, or the rustic charm of terracotta pots, the right choice will depend on your plant type, medium, and goals.

For casual indoor propagation, glass jars and propagation stations combine beauty with functionality. For larger projects, nursery trays or plastic cups are cost-effective and efficient. And for specialized needs, mason jars with net pots or terracotta planters provide the perfect environment.

By matching your container to your plant’s needs, you’ll give your cuttings the best chance at success—ensuring your home fills with healthy, thriving new plants.

How to Tell If Your Plant Has Outgrown Its Pot

How to Tell If Your Plant Has Outgrown Its Pot

One of the most common challenges plant owners face is knowing when a houseplant needs a bigger home. While plants are generally adaptable, keeping them in a pot that’s too small for too long can limit their growth, cause stress, and even lead to decline. On the other hand, repotting too frequently can also disrupt their root systems. The key is to recognize the signs that your plant has truly outgrown its pot—and act at the right time.

In this article, we’ll explore the telltale signs your plant needs a new pot, why it happens, how to check root health, and tips for repotting successfully without stressing your green companion.


Why Plants Outgrow Their Pots

Every plant starts small, but as it matures, so do its roots. While foliage growth is easy to see, root growth happens beneath the soil and often goes unnoticed until problems surface. A plant outgrows its pot when:

  1. Roots run out of space – They circle around the pot, tangle, or push through drainage holes.
  2. Soil compacts and depletes – Roots displace soil over time, reducing nutrients and water retention.
  3. Top growth exceeds root capacity – A small pot can’t support a large plant’s water and nutrient needs.

If left unaddressed, an overgrown plant becomes stressed, leading to stunted growth, yellowing leaves, or even death.


10 Signs Your Plant Has Outgrown Its Pot

1. Roots Emerging from Drainage Holes

The most obvious sign is roots poking out of the bottom of the pot. This means they’re searching for more space and resources.

2. Roots Circling the Top or Sides of Soil

If you see roots on the surface of the soil or wrapped tightly inside the pot when you remove it, your plant is rootbound.

3. Water Drains Too Quickly

When soil is mostly replaced by roots, water rushes straight through the pot. This leaves little moisture available for the plant.

4. Soil Dries Out Faster Than Usual

If you find yourself watering far more often, it’s a clue that the roots have outgrown the soil’s ability to retain water.

5. Stunted or Slowed Growth

If your plant has stopped producing new leaves or flowers despite proper care, its roots may be restricted.

6. Yellowing or Dropping Leaves

Nutrient deficiencies caused by depleted soil often show up as yellow, limp, or falling leaves.

7. Wilting Despite Regular Watering

A rootbound plant can’t take up enough water, leaving it thirsty even when you water consistently.

8. Top-Heavy Plant or Tipping Pot

If your plant leans, topples easily, or seems unstable, the pot is too small to anchor it.

9. Cracked or Warped Pots

In extreme cases, especially with plastic pots, expanding roots can warp or crack the container.

10. Poor Overall Health

Frequent pest problems, lackluster foliage, and failure to thrive may all point to a pot that no longer meets your plant’s needs.


How to Check If Your Plant Is Rootbound

If you’re still unsure, the best way to confirm is by gently inspecting the roots:

  1. Water lightly a day before for easier removal.
  2. Tilt the pot sideways and carefully slide out the plant.
  3. Examine the root system:
    • Healthy fit – Roots and soil are balanced, with roots not overly circling.
    • Rootbound – Roots densely packed, circling the edges, or replacing most of the soil.

If your plant looks rootbound, it’s time to repot.


When Is the Best Time to Repot?

Timing matters when repotting, as stressed plants can struggle to recover. Here’s when you should—and shouldn’t—repot:

  • Best time: Spring and early summer, when plants are actively growing.
  • Acceptable: Early fall for hardy plants, though recovery may be slower.
  • Avoid: Late fall and winter, as plants are dormant and won’t rebound quickly.

Choosing the Right New Pot

When upgrading your plant’s container, consider the following:

  1. Size – Choose a pot only 1–2 inches larger in diameter than the current one. Oversized pots can hold excess water, leading to root rot.
  2. Material – Terracotta allows airflow but dries faster, while ceramic and plastic retain moisture longer. Pick based on your plant’s needs.
  3. Drainage – Always select pots with drainage holes to prevent soggy soil.

Step-by-Step Guide to Repotting

Once you’ve identified that your plant has outgrown its pot, here’s how to repot successfully:

Step 1: Gather Supplies

You’ll need fresh potting soil, a slightly larger pot, gloves, and clean scissors or pruners.

Step 2: Remove the Plant

Turn the pot on its side and gently slide out the plant. Loosen the sides with a knife or squeeze the pot if needed.

Step 3: Inspect the Roots

Trim away any dead, mushy, or excessively long roots. If roots are tightly circling, gently tease them apart.

Step 4: Prepare the New Pot

Add a layer of fresh potting soil at the bottom.

Step 5: Position the Plant

Place the plant in the center, making sure it sits at the same depth it was in the old pot.

Step 6: Fill with Soil

Backfill with fresh soil, pressing gently to eliminate air pockets. Leave about an inch at the top for watering space.

Step 7: Water Thoroughly

Give the plant a deep watering to help roots settle into the new soil.


Aftercare: Helping Your Plant Adjust

Repotting can temporarily shock your plant, so proper aftercare is essential:

  • Place in indirect light for a week, avoiding harsh sun.
  • Water sparingly until new growth appears—overwatering is a common mistake after repotting.
  • Skip fertilizer for 4–6 weeks, as fresh soil contains nutrients.
  • Prune lightly to reduce stress on the plant.

Within a few weeks, your plant should perk up and resume healthy growth.


Common Mistakes to Avoid

  • Going too big with the pot – Leads to soggy soil and root rot.
  • Repotting at the wrong time – Dormant plants recover poorly.
  • Neglecting to loosen rootbound roots – Roots may continue circling instead of spreading.
  • Overwatering right after repotting – Roots need oxygen as well as moisture.
  • Skipping drainage holes – A guaranteed recipe for waterlogged roots.

Final Thoughts

Learning how to tell if your plant has outgrown its pot is a key skill for every plant parent. From roots peeking out of drainage holes to stunted growth and frequent wilting, the signs are easy to spot once you know what to look for. Repotting at the right time with the right pot size and soil can give your plant a fresh start, ensuring healthier roots, vibrant foliage, and continued growth.

With a little observation and care, you can keep your plants thriving for years—and enjoy the satisfaction of watching them flourish in their new, roomier homes.

How to Divide Houseplants to Multiply Your Collection

How to Divide Houseplants to Multiply Your Collection

Houseplants not only make your home look beautiful but also bring a touch of calm, fresh air, and natural charm indoors. As your plants grow over time, some begin to crowd their pots or spread so vigorously that they can easily be divided into multiple smaller plants. This process, known as plant division, is one of the easiest and most rewarding ways to expand your indoor jungle—without spending a dime.

If you’ve ever wanted to multiply your plant collection, gift plants to friends, or keep your houseplants thriving and healthy, dividing them is the perfect solution. In this guide, we’ll cover everything you need to know about dividing houseplants, from why and when to do it to a step-by-step breakdown of the process.


Why Divide Houseplants?

Plant division isn’t just about multiplying your collection—it’s also about ensuring your plants stay happy and healthy. Here are some key reasons to divide your houseplants:

  1. Prevent Overcrowding
    Over time, some plants outgrow their pots and become rootbound. Division helps reduce crowding, giving roots more room to spread.
  2. Rejuvenate Growth
    Older plants often become tired or less productive. Division encourages fresh growth by stimulating new root systems.
  3. Pest and Disease Management
    Dense, crowded plants are more vulnerable to pests and fungal diseases. Separating them can minimize risks.
  4. Expand Your Collection for Free
    Who doesn’t love getting new plants without spending extra money? Division allows you to create more plants from one mature specimen.
  5. Gift-Giving Opportunity
    Divided plants make thoughtful, low-cost, and eco-friendly gifts for friends and family.

The Best Time to Divide Houseplants

Timing matters when it comes to division. Doing it at the wrong time can stress your plants and slow their recovery. Here’s when you should divide:

  • Spring or Early Summer – This is the ideal time, as most houseplants are actively growing and can quickly recover.
  • After Repotting Signs Appear – If roots are circling the pot, emerging from drainage holes, or soil dries out too quickly, it may be time to divide.
  • When Plant Health Declines – Yellowing leaves, reduced growth, or overcrowded foliage often signal the need for division.

Avoid dividing during the plant’s dormant season (usually late fall and winter), as plants are less capable of bouncing back from the shock.


Which Houseplants Can Be Divided?

Not all plants are good candidates for division. Plants that grow in clumps or produce multiple offshoots are the best choices. Some of the easiest houseplants to divide include:

  • Spider Plant (Chlorophytum comosum) – Produces numerous baby plantlets.
  • Snake Plant (Sansevieria) – Grows in clusters that can be separated.
  • Peace Lily (Spathiphyllum) – Forms natural clumps, easy to split.
  • Pothos (Epipremnum aureum) – While usually propagated via cuttings, mature plants can also be divided.
  • ZZ Plant (Zamioculcas zamiifolia) – Grows from rhizomes that can be split into multiple plants.
  • Boston Fern (Nephrolepis exaltata) – Produces dense clumps perfect for division.
  • Calathea and Prayer Plants – Form clusters of stems and roots that can be separated.

Tools and Materials You’ll Need

Before you start, gather the right tools to make the process smoother:

  • Clean, sharp scissors or a knife (sterilized to prevent disease)
  • Fresh potting mix appropriate for your plant type
  • New pots with drainage holes
  • Gloves (especially for plants with irritating sap, like peace lilies)
  • A small trowel or spoon for loosening soil

Step-by-Step Guide to Dividing Houseplants

Step 1: Prepare Your Plant

Water the plant thoroughly a day before dividing. Moist soil makes it easier to loosen roots and reduces stress on the plant.

Step 2: Remove the Plant from Its Pot

Gently tip the plant out of its container. If the plant is stuck, squeeze the sides of the pot or carefully run a knife around the edge.

Step 3: Loosen and Inspect the Roots

Shake off excess soil to expose the root system. Look for natural separations or clumps where the plant can be split.

Step 4: Separate the Plant

Using your hands or a sharp, clean knife, gently pull apart the clumps or cut through thicker root sections. Each division should have a healthy root system and several stems or leaves.

Step 5: Pot Each Division

Place each new plant in a separate pot filled with fresh potting soil. Position the plant at the same depth it was previously growing. Gently firm the soil around the roots.

Step 6: Water and Settle

Water each new pot thoroughly, allowing water to drain out of the bottom. This helps settle the soil around the roots and ensures good contact.

Step 7: Provide Post-Division Care

Keep your new plants in a warm, bright, but indirect light location. Avoid direct sunlight for the first week, as the plants recover from stress. Mist lightly if humidity is low.


Aftercare Tips for Healthy Divisions

Your work doesn’t end after repotting. Proper aftercare ensures your divided plants thrive:

  • Monitor Watering – Newly divided plants are vulnerable to overwatering. Keep the soil lightly moist but not soggy.
  • Adjust Lighting – Place them in bright, indirect light to encourage growth.
  • Avoid Fertilizing Immediately – Wait 4–6 weeks before feeding, as fresh divisions need time to establish roots.
  • Prune Damaged Leaves – Remove any yellow or wilted leaves to help the plant redirect energy to root recovery.
  • Maintain Humidity – Some plants, like ferns or calatheas, benefit from extra humidity after division.

Common Mistakes to Avoid

Even though dividing plants is simple, beginners often make mistakes. Here are some to avoid:

  • Dividing During Dormancy – Plants recover best when actively growing.
  • Cutting Too Small – Each section should have enough roots and foliage to survive. Tiny divisions may struggle.
  • Skipping Sterilization – Dirty tools can introduce bacteria and fungi. Always clean your scissors or knife.
  • Overwatering – Freshly divided plants need careful watering, not soggy soil.
  • Placing in Harsh Sun – Avoid direct sunlight, which can scorch stressed plants.

The Joy of Plant Division

Dividing houseplants is not just a practical way to manage growth—it’s also deeply rewarding. With each division, you’re not only creating new plants but also cultivating resilience, patience, and a deeper connection with nature. Whether you’re expanding your collection, sharing with friends, or rejuvenating a beloved houseplant, the process is simple, sustainable, and endlessly satisfying.

So the next time your peace lily looks crowded or your spider plant sends out dozens of baby shoots, remember: you have an opportunity to multiply the greenery in your home without spending a penny.


Final Thoughts

Learning how to divide houseplants is a valuable skill for any plant lover. It keeps your plants healthy, saves money, and helps you build an ever-growing indoor garden. By choosing the right time, following the correct steps, and giving your new plants the care they need, you’ll enjoy thriving greenery that continues to multiply.

Whether you’re a beginner or a seasoned gardener, division is one of the simplest, most satisfying methods of plant propagation. So grab your gardening gloves, sharpen your scissors, and get ready to double—or even triple—your plant collection.

How to Propagate Pothos in Just a Few Simple Steps

How to Propagate Pothos in Just a Few Simple Steps

Few houseplants are as beloved as pothos (Epipremnum aureum). Known for their trailing vines and heart-shaped leaves, these hardy plants thrive in a wide range of conditions, making them perfect for beginners and seasoned plant parents alike. But one of the best things about pothos is how easy they are to propagate. With just a few simple steps, you can turn a single vine into multiple thriving plants—without needing special equipment or advanced skills.

Whether you want to expand your own collection, create fuller pots, or share cuttings with friends, propagating pothos is both fun and rewarding. In this guide, we’ll explore everything you need to know: why propagation works so well with pothos, the tools you’ll need, step-by-step instructions, and aftercare tips to ensure your new plants thrive.


Why Propagate Pothos?

Propagation is the process of growing a new plant from a cutting or division of an existing one. For pothos, propagation offers several benefits:

  • Affordability: Instead of buying new plants, you can multiply your existing ones for free.
  • Home décor: Create trailing displays in hanging baskets, shelves, or even water-filled vases.
  • Fuller growth: Adding propagated cuttings back into the same pot makes the plant bushier.
  • Sharing: Pothos cuttings make thoughtful, low-maintenance gifts.
  • Sustainability: Propagation reduces waste and promotes eco-friendly plant care.

Because pothos are resilient and root easily, they’re among the most popular plants for beginners learning propagation.


The Best Time to Propagate Pothos

Timing matters for successful propagation. The best seasons are spring and summer, when the plant is actively growing. During this phase, cuttings root faster and adapt more easily to new environments.

Avoid propagation in late fall and winter, when growth slows. While you can still take cuttings during these months, they may take longer to develop roots and require more patience.


Tools and Materials You’ll Need

Propagation doesn’t require expensive equipment, but having the right tools ensures success:

  • Sharp, sterilized scissors or pruning shears.
  • A clean glass jar, vase, or cup (if propagating in water).
  • Fresh potting soil (if propagating directly in soil).
  • A small nursery pot with drainage holes.
  • Optional: rooting hormone (for faster root development).
  • Fresh water (room temperature, chlorine-free if possible).

Anatomy of a Pothos Cutting

Before you start, it’s important to understand the parts of a pothos vine:

  • Node: The small bump along the stem where roots and leaves emerge. This is where new roots will form.
  • Internode: The space between two nodes.
  • Leaf: The green, heart-shaped foliage that provides energy through photosynthesis.

For successful propagation, your cutting must include at least one node. Without it, roots cannot form.


Step-by-Step Guide to Propagating Pothos

Step 1: Select a Healthy Vine

Choose a strong, mature vine with several leaves and nodes. Avoid weak or diseased stems, as these may not root well.

Step 2: Make the Cut

  • Using clean, sharp scissors, snip just below a node.
  • Each cutting should ideally have 2–4 leaves and at least one node.
  • Remove any leaves near the bottom node to prevent rotting in water or soil.

Step 3: Decide Between Water or Soil Propagation

Water Propagation

  • Place the cutting in a clear jar filled with water, ensuring at least one node is submerged.
  • Keep leaves above the waterline to avoid decay.
  • Position the jar in bright, indirect light.
  • Change the water every 3–5 days to keep it fresh and oxygenated.

Roots typically appear within 2–4 weeks, and once they are 2–3 inches long, you can pot them in soil.

Soil Propagation

  • Dip the cut end into rooting hormone (optional).
  • Plant the cutting directly into a pot filled with fresh, well-draining soil.
  • Water lightly, keeping the soil moist but not soggy.
  • Covering the pot loosely with a clear plastic bag can increase humidity and speed up rooting.

Roots may take longer to appear in soil compared to water, but the plant doesn’t have to transition later—it’s already accustomed to soil.


Aftercare for New Pothos Cuttings

Once your cuttings develop roots or have been transferred to soil, proper aftercare is essential for long-term success.

1. Light

Place new plants in bright, indirect sunlight. Avoid harsh direct light, which can scorch delicate leaves.

2. Watering

Keep the soil consistently moist but not waterlogged during the first few weeks. Once established, pothos can tolerate some drying out between waterings.

3. Humidity

Pothos adapt to average household humidity, but higher humidity encourages faster growth. You can mist occasionally or group plants together.

4. Feeding

Wait at least 4–6 weeks before fertilizing newly propagated pothos. Then, use a diluted, balanced houseplant fertilizer during the growing season.

5. Pruning and Training

To encourage bushier growth, pinch back long vines. You can also train pothos to climb moss poles or trellises for a dramatic effect.


Troubleshooting Common Problems

Even though pothos are forgiving, you may encounter issues during propagation. Here’s how to fix them:

  • Yellowing leaves: Usually caused by too much water on the leaves or poor water quality. Remove affected leaves and replace water.
  • No roots forming: Ensure at least one node is submerged. Move the jar to a brighter spot.
  • Roots turning brown/mushy: Indicates rot. Cut back to healthy tissue and restart in fresh water.
  • Cuttings wilting in soil: The soil may be too dry or compacted. Lightly water and ensure good aeration.

Creative Ways to Use Propagated Pothos

Propagating pothos doesn’t just create more plants—it opens up new design possibilities:

  • Create a fuller pot: Plant multiple cuttings together for a bushier look.
  • Grow in water long-term: Keep cuttings in decorative jars as a minimalist, soil-free display (just add occasional liquid fertilizer).
  • Gift plants: Share rooted cuttings in small pots or jars with friends.
  • Wall displays: Use propagated vines to train along walls or shelves for a natural, cascading effect.
  • Mixed arrangements: Combine pothos with other water-propagated plants like philodendron or monstera for an eye-catching display.

Why Pothos Are Ideal for Beginners

Among all houseplants, pothos stand out as the ultimate starter plant for propagation because:

  • They root quickly and reliably.
  • They tolerate a wide range of conditions.
  • They thrive in both water and soil.
  • They require minimal aftercare.

This adaptability makes them perfect for experimenting with different propagation methods and building confidence in plant care.


Conclusion

Propagating pothos is one of the easiest and most satisfying ways to grow your plant collection. With just a few simple steps—snipping a healthy cutting, placing it in water or soil, and providing a little aftercare—you can turn one plant into many.

Whether you keep your cuttings in stylish jars of water, pot them to create fuller plants, or gift them to others, propagation is a rewarding practice that deepens your connection to your plants. Pothos are not only resilient but also generous—ready to multiply and flourish with even the simplest care.

So next time you notice your pothos trailing across your bookshelf or window, grab a pair of scissors. With a quick snip, you’ll have the start of a brand-new plant, and the joy of watching life grow right before your eyes.

5 Easy Houseplants to Propagate in Water

5 Easy Houseplants to Propagate in Water

One of the most rewarding parts of caring for houseplants is learning how to propagate them. Propagation is the process of creating new plants from cuttings, leaves, or divisions of existing plants. While there are many methods—such as propagating in soil, sphagnum moss, or through division—water propagation is the simplest and most beginner-friendly.

Placing a plant cutting in water and watching roots emerge feels almost magical. It’s also a cost-effective way to multiply your collection or share plants with friends and family. Best of all, many common houseplants thrive with this method.

In this article, we’ll cover five of the easiest houseplants to propagate in water, along with step-by-step instructions, care tips, and troubleshooting advice to ensure your cuttings grow into healthy new plants.


Why Choose Water Propagation?

Before diving into specific plants, let’s look at why water propagation is such a popular technique:

  • Beginner-friendly: No special equipment needed—just a glass of water.
  • Transparent process: You can watch roots form, which makes it educational and satisfying.
  • Lower risk: Water provides constant moisture, reducing the chance of cuttings drying out.
  • Faster results: Many plants root more quickly in water than in soil.
  • Aesthetic appeal: Cuttings in glass jars or vases can double as stylish home décor.

The Basics of Water Propagation

  1. Choose the right cutting: Select a healthy stem or leaf with at least one node (the point where leaves or roots grow).
  2. Cut with clean tools: Use sterilized scissors or pruners to avoid spreading disease.
  3. Place in water: Submerge the node in water but keep leaves above the surface.
  4. Change water regularly: Replace every 3–5 days to prevent stagnation and bacteria growth.
  5. Provide light: Place the container in bright, indirect sunlight.
  6. Wait for roots: Once roots reach 2–3 inches, you can transplant to soil—or keep the plant in water for a while.

5 Easy Houseplants to Propagate in Water

1. Pothos (Epipremnum aureum)

Why it’s easy: Pothos, also called “Devil’s Ivy,” is practically indestructible and one of the fastest-rooting plants in water.

How to propagate:

  • Cut a vine just below a node, ensuring each cutting has 3–4 leaves.
  • Place the node under water while keeping the leaves dry.
  • Change the water weekly and wait 2–4 weeks for roots to appear.

Tips:

  • Pothos roots can grow rapidly; once roots are 2 inches long, you can transfer them to soil.
  • They can also live permanently in water if you add occasional liquid fertilizer.

Why you’ll love it: Watching pothos grow roots in a jar makes a striking centerpiece on desks or shelves.


2. Philodendron (Heartleaf Philodendron)

Why it’s easy: Like pothos, heartleaf philodendrons are vining plants with strong rooting abilities. They’re often confused with pothos but are equally beginner-friendly.

How to propagate:

  • Snip a stem just below a node, making sure each cutting has at least 2–3 leaves.
  • Place the node in water with indirect light.
  • Within 2–3 weeks, you’ll see small roots forming.

Tips:

  • Avoid letting too many leaves sit below water; this encourages rot.
  • Once transferred to soil, philodendrons adapt quickly and continue trailing.

Why you’ll love it: Heartleaf philodendrons add lush, trailing greenery to any home, and propagation makes it easy to create fuller pots or new hanging baskets.


3. Spider Plant (Chlorophytum comosum)

Why it’s easy: Spider plants naturally produce “pups” or baby plantlets on long arching stems, making propagation effortless.

How to propagate:

  • Snip off a baby spider plant with small root nubs at its base.
  • Place the pup in a jar of water, ensuring the root end is submerged.
  • Roots typically develop within 1–2 weeks.

Tips:

  • Spider plant babies root so fast that many people skip the water stage and pot them directly into soil—but water propagation lets you watch the process unfold.
  • Avoid overcrowding too many pups in one container, as roots can tangle.

Why you’ll love it: Propagating spider plants in water is quick and fun, especially since one mature plant can produce dozens of babies each year.


4. Monstera deliciosa (Swiss Cheese Plant)

Why it’s easy: Monsteras are popular for their dramatic leaves and aerial roots, which make them especially suited for water propagation.

How to propagate:

  • Cut a stem below a node that includes at least one aerial root and a healthy leaf.
  • Place the node and aerial root in water, keeping the leaf above.
  • Change water weekly, and in 3–6 weeks, roots will start branching out.

Tips:

  • Monsteras can take a little longer to root than pothos or spider plants, so patience is key.
  • Use a tall, narrow vase to support large cuttings.

Why you’ll love it: Propagating monstera cuttings not only expands your collection but also creates gorgeous water displays with their iconic split leaves.


5. English Ivy (Hedera helix)

Why it’s easy: Ivy is known for its vigorous growth and roots easily in water.

How to propagate:

  • Cut a vine with several leaves and at least one node.
  • Submerge the node in water and place the cutting in bright, indirect light.
  • Roots typically emerge in 2–3 weeks.

Tips:

  • Ivy cuttings can be transplanted into soil once roots are 1–2 inches long.
  • Keep ivy cuttings away from direct sunlight, which may scorch the delicate leaves.

Why you’ll love it: Ivy makes a beautiful, fast-growing plant to trail from shelves or baskets, and water propagation makes it simple to multiply.


Caring for Water Propagations

Once your cuttings have roots, you have two choices:

  1. Keep them in water: Some plants, like pothos, can live long-term in water if you add liquid fertilizer occasionally.
  2. Transfer to soil: For stronger, longer-lived plants, it’s best to pot them in soil once roots reach 2–3 inches.

Key aftercare tips:

  • Gradual transition: When moving to soil, keep it consistently moist at first so roots can adjust.
  • Light: Provide bright, indirect sunlight to encourage new growth.
  • Patience: Some cuttings take time to adapt; don’t worry if growth slows briefly after transplanting.

Common Problems and How to Fix Them

  • Leaves turning yellow: Often caused by too much water submerging the leaf; trim damaged leaves.
  • Water smells bad: Change water more frequently and clean the container to prevent bacteria.
  • Roots not forming: Ensure the cutting has at least one node submerged. Move it to a brighter (but not sunny) location.
  • Roots turning brown or mushy: Indicates rot—trim back to healthy tissue and restart in clean water.

Conclusion

Water propagation is one of the most rewarding ways to grow your plant collection. It requires minimal tools, offers quick results, and allows you to watch the fascinating process of root development up close.

Whether you’re growing the speedy pothos, the lush philodendron, the pup-producing spider plant, the dramatic monstera, or the vigorous ivy, these five houseplants are guaranteed to bring success to your water propagation journey.

So grab a clean jar, take a healthy cutting, and start your own indoor propagation station—you’ll be surprised at how quickly your plant family multiplies.