Best Ground Covers to Replace Traditional Lawns

Best Ground Covers to Replace Traditional Lawns

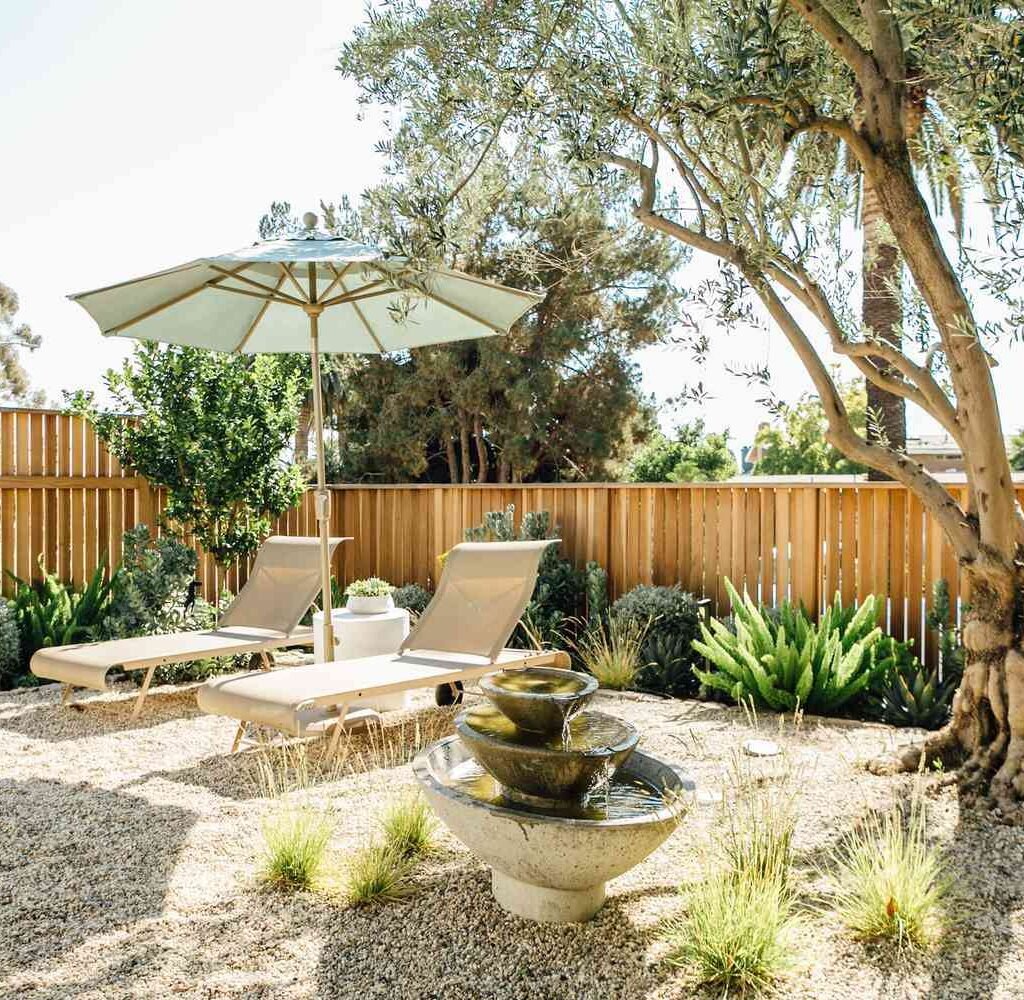
For decades, the traditional grass lawn has been the hallmark of a beautiful home landscape. However, maintaining lush green grass requires constant mowing, fertilizing, and watering, making it time-consuming, costly, and environmentally demanding. With growing concerns about water conservation, sustainability, and low-maintenance gardening, homeowners are increasingly turning to ground covers as practical and stylish alternatives to traditional turf.

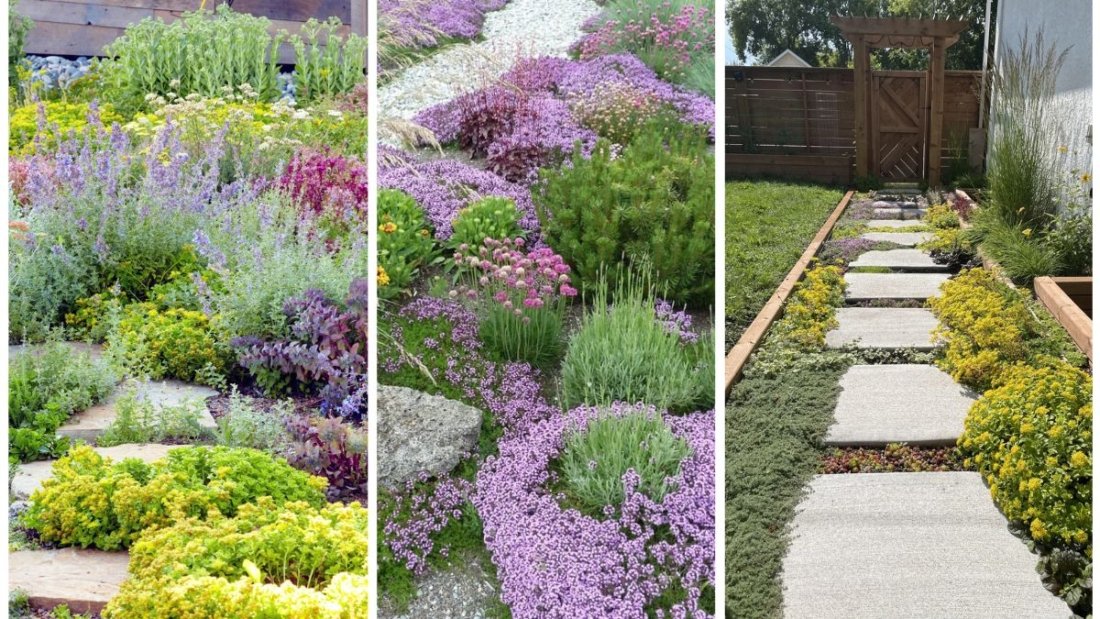
Ground covers not only save time and resources but also add unique textures, colors, and patterns to your outdoor space. Whether you want a soft, walkable surface or a vibrant, pollinator-friendly patch, there’s a ground cover plant to fit your needs.

In this article, we’ll explore the best ground covers to replace traditional lawns, their benefits, and tips for successful installation and care.


Why Replace Lawns with Ground Covers?

Before diving into specific plants, let’s look at why ground covers make such great lawn alternatives:

  1. Low Maintenance – No weekly mowing, edging, or reseeding.
  2. Water Efficiency – Many ground covers thrive with minimal irrigation.
  3. Eco-Friendly – Reduced need for fertilizers, herbicides, and pesticides.
  4. Biodiversity – Certain ground covers attract pollinators like bees and butterflies.
  5. Soil Health – Dense ground covers prevent erosion and improve soil structure.
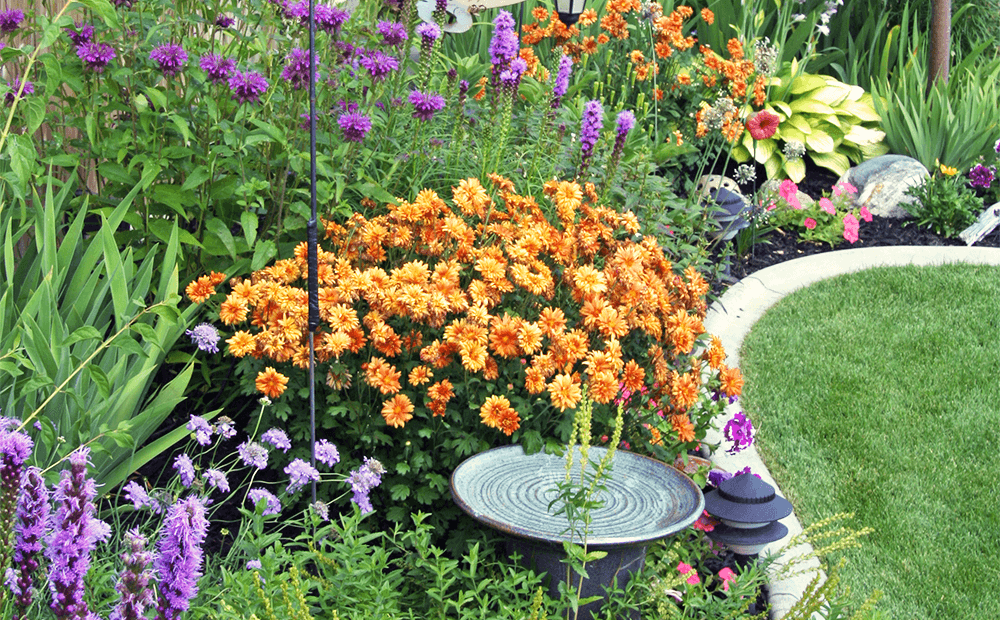
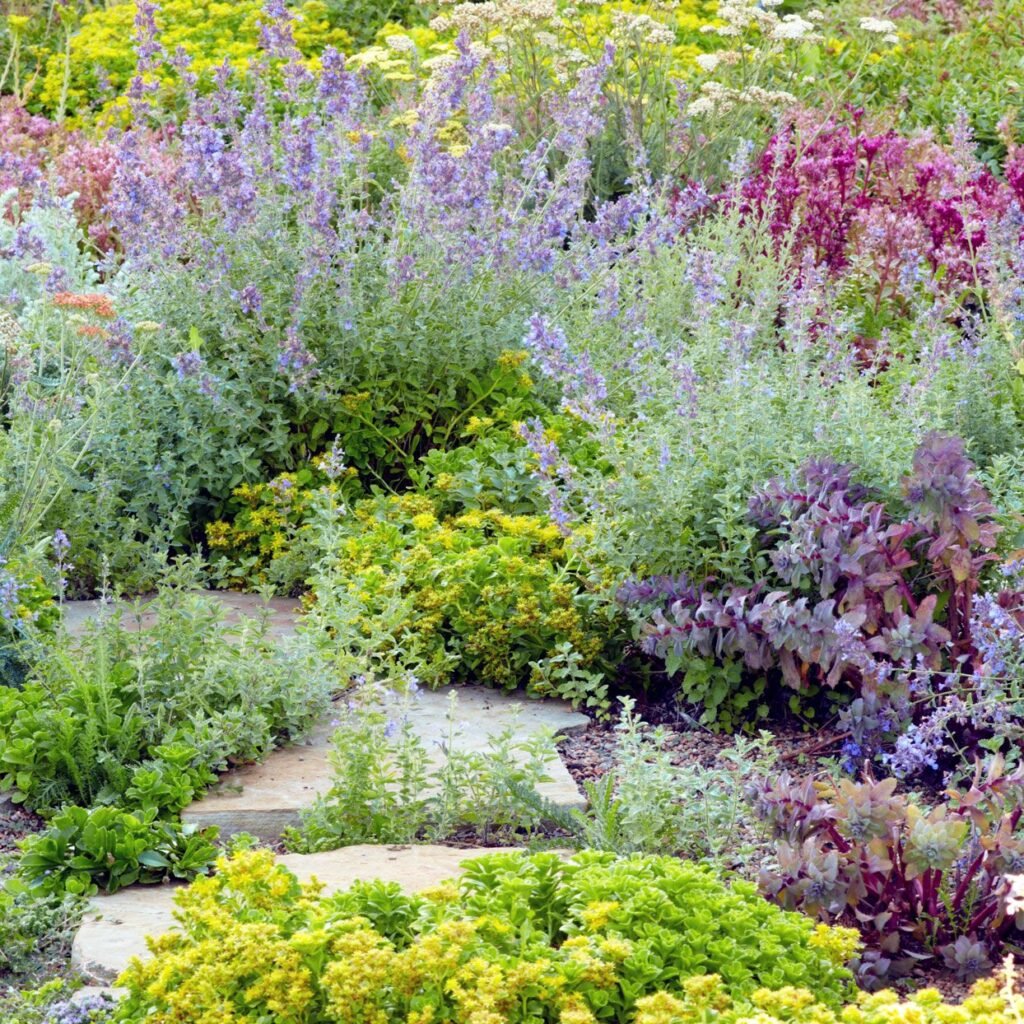
  6. Aesthetic Appeal – Adds variation in texture, foliage, and seasonal flowers that lawns lack.

For homeowners seeking a more sustainable, cost-effective, and attractive option, ground covers are a win-win.


1. Clover (Trifolium repens)

Clover is one of the most popular alternatives to grass, and for good reason. It’s hardy, low-maintenance, and naturally fertilizes itself by fixing nitrogen into the soil.

Benefits:

  • Soft and walkable: Comfortable underfoot, perfect for children and pets.
  • Self-sustaining: Requires little to no fertilizer.
  • Drought-tolerant: Needs less water than grass.
  • Pollinator-friendly: Its small white or pink flowers attract bees and butterflies.

Growing Tips:

  • Best in sunny to partially shaded areas.
  • Can be sown directly into existing lawns to create a clover-grass blend.
  • Requires occasional trimming for a neat look.

Why It Works: Clover lawns stay green even during dry spells, making them an eco-friendly and budget-conscious choice.


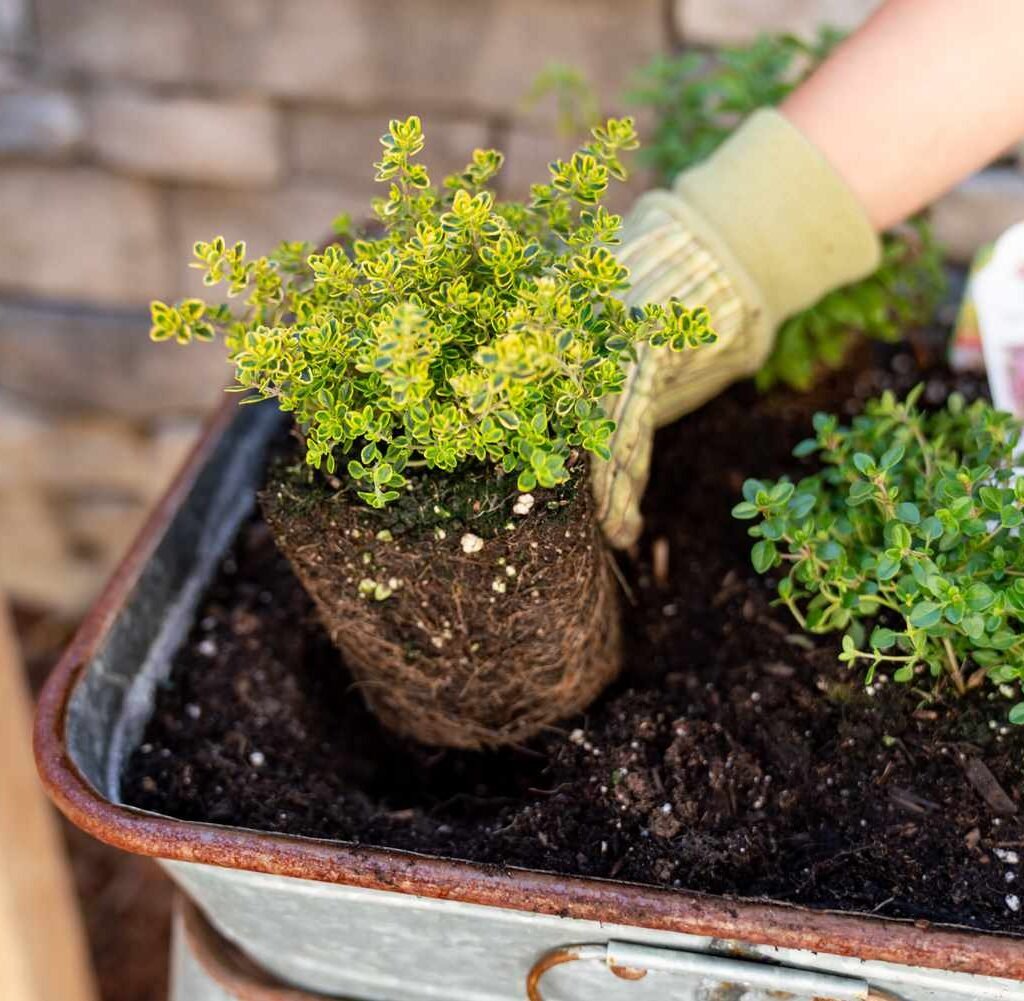
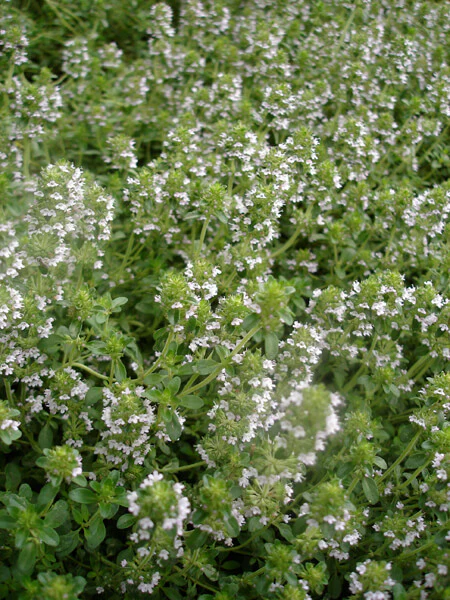
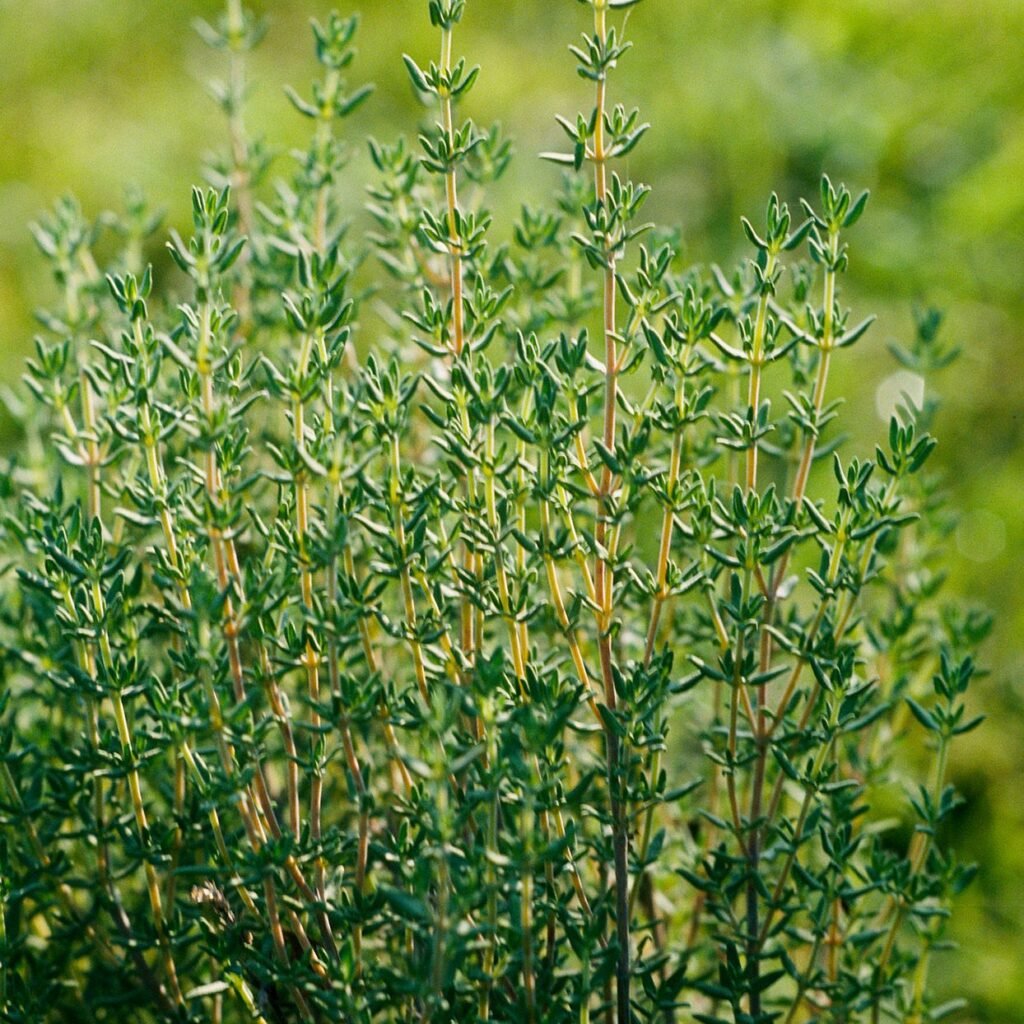
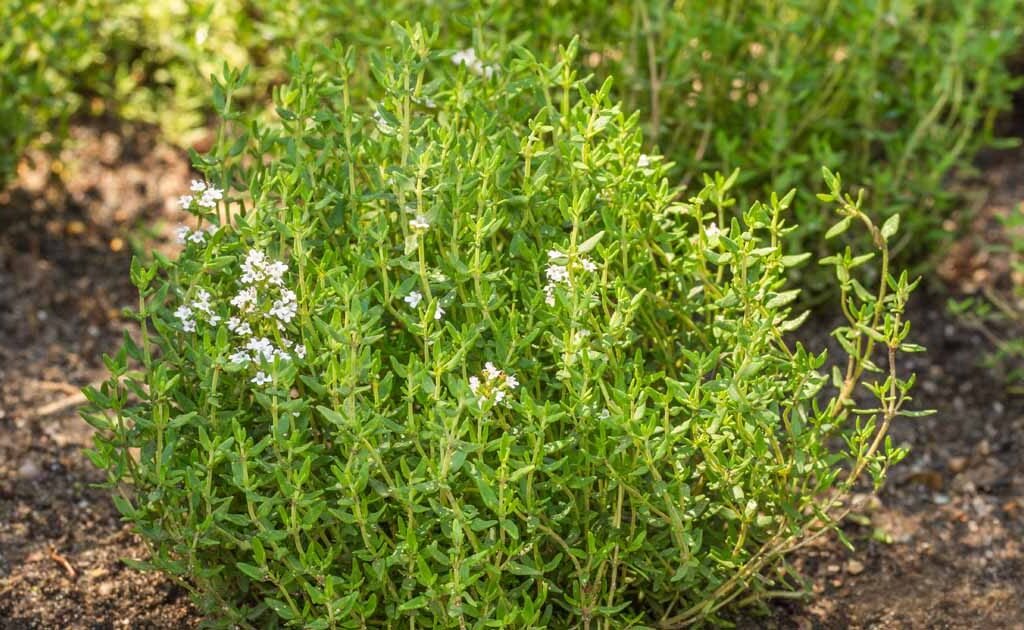
2. Creeping Thyme (Thymus serpyllum)

For a fragrant and colorful alternative, creeping thyme is unbeatable. This hardy perennial forms a dense mat and produces vibrant pink or purple blooms in summer.

Benefits:

  • Fragrant foliage: Releases a pleasant scent when walked on.
  • Drought-resistant: Thrives in poor, rocky soils with minimal water.
  • Low height: Stays close to the ground, eliminating the need for mowing.
  • Pollinator magnet: Bees love its summer flowers.

Growing Tips:

  • Prefers full sun but tolerates light shade.
  • Plant plugs or small plants rather than seeds for faster coverage.
  • Works well between stepping stones or in small garden patches.

Why It Works: Creeping thyme combines beauty with resilience, creating a colorful, aromatic lawn alternative that’s functional and attractive.


3. Moss (Various species)

If you have a shaded, damp yard where grass refuses to grow, moss is an excellent solution. Moss forms a lush, soft carpet that remains green year-round.

Benefits:

  • Shade-loving: Thrives in areas grass struggles with.
  • No mowing required: Maintains a low, velvety surface.
  • Low maintenance: Requires little fertilization and few inputs.
  • Soil stabilizer: Prevents erosion on slopes or uneven terrain.

Growing Tips:

  • Best in shaded, moist environments.
  • Prepare the soil by clearing debris and compacting it slightly.
  • Mist regularly during establishment.

Why It Works: Moss transforms difficult shady areas into enchanting, low-maintenance green spaces.


4. Sedum (Stonecrop)

Sedum, a succulent ground cover, is ideal for hot, dry climates. It comes in various forms—creeping, mat-forming, or trailing—making it versatile for different landscapes.

Benefits:

  • Drought-tolerant: Requires little water once established.
  • Variety of colors: Offers green, red, yellow, or purple foliage.
  • Flowering beauty: Produces star-shaped flowers in summer.
  • Low growth habit: Stays compact and weed-resistant.

Growing Tips:

  • Plant in sunny, well-drained soil.
  • Perfect for rocky gardens, slopes, or xeriscaping.
  • Minimal care needed after establishment.

Why It Works: Sedum provides vibrant, low-water ground cover that adds year-round interest.


5. Creeping Jenny (Lysimachia nummularia)

Known for its bright chartreuse leaves, Creeping Jenny spreads quickly, forming a dense ground cover that glows in sunlight.

Benefits:

  • Fast-growing: Quickly fills bare patches.
  • Colorful foliage: Adds golden-green brightness to gardens.
  • Versatile: Works in sun or partial shade.
  • Low maintenance: Tolerates a wide range of soil conditions.

Growing Tips:

  • Can be invasive—use garden edging to contain growth.
  • Prefers moist soil but tolerates drier conditions once established.
  • Prune occasionally to maintain neatness.

Why It Works: Creeping Jenny adds color and vibrancy, making it perfect for homeowners who want a striking alternative to plain grass.


6. Blue Star Creeper (Isotoma fluviatilis)

This low-growing ground cover produces tiny blue star-shaped flowers, creating a charming, meadow-like effect.

Benefits:

  • Walkable surface: Tolerates light foot traffic.
  • Flowering ground cover: Blooms throughout spring and summer.
  • Evergreen in mild climates: Maintains year-round beauty.
  • Dense coverage: Suppresses weeds effectively.

Growing Tips:

  • Plant in sunny to partially shaded areas.
  • Requires regular watering during establishment.
  • Works well between pavers, stepping stones, or pathways.

Why It Works: Blue Star Creeper provides both visual charm and practical weed control.


7. Liriope (Lilyturf)

Liriope is a grass-like perennial with purple flower spikes, perfect for those who still want the appearance of grass without the upkeep.

Benefits:

  • Durable: Withstands heat, drought, and some foot traffic.
  • Seasonal blooms: Produces purple or white flowers in summer.
  • Evergreen foliage: Provides year-round interest.
  • Low maintenance: Minimal trimming required.

Growing Tips:

  • Plant in well-drained soil with sun to partial shade.
  • Works well as borders, edging, or full lawn replacement.
  • Divide clumps every few years to encourage growth.

Why It Works: Liriope mimics the look of a lawn while being much easier to maintain.


Tips for Transitioning from Grass to Ground Covers

  1. Remove existing turf: Clear old grass before planting.
  2. Prepare the soil: Loosen and enrich soil for better root establishment.
  3. Start small: Replace a portion of your lawn first, then expand.
  4. Water during establishment: Even drought-tolerant plants need extra care at the start.
  5. Mulch in between plantings: Helps retain moisture and suppress weeds until plants spread.

Conclusion

Replacing traditional lawns with ground covers is not just a cost-saving and eco-friendly choice—it’s an opportunity to reimagine your outdoor space with color, texture, and character. Whether you opt for the hardy clover, the fragrant creeping thyme, the lush moss, the succulent sedum, or vibrant options like Creeping Jenny and Blue Star Creeper, each alternative offers unique benefits that outperform traditional grass in beauty, maintenance, and sustainability.

Ground covers are more than just a trend—they’re the future of landscaping. By making the switch, you’ll enjoy a beautiful, low-maintenance yard that’s kinder to the environment and more enjoyable year-round.

5 Budget-Friendly Landscaping Tips

5 Budget-Friendly Landscaping Tips

A beautiful landscape doesn’t have to come with a hefty price tag. Many homeowners assume that creating a visually appealing and functional garden requires a large budget, but with the right strategies, you can achieve stunning results without overspending. Landscaping is more about creativity, planning, and resourcefulness than it is about money. By making smart choices and using what you already have, you can design an outdoor space that is both affordable and breathtaking.

In this article, we’ll explore five budget-friendly landscaping tips that can transform your yard into a stylish and inviting oasis—without draining your wallet.


Why Budget-Friendly Landscaping Matters

Landscaping not only improves your home’s curb appeal but also increases property value, provides a relaxing retreat, and creates a welcoming atmosphere for gatherings. However, professional landscaping projects can quickly become expensive. Choosing budget-friendly methods allows you to:

  • Save money while still improving your outdoor space.
  • Take pride in DIY projects that add personal touches.
  • Reuse and recycle materials for sustainability.
  • Achieve long-term beauty without high maintenance costs.

1. Use Native Plants for Low-Cost, Low-Maintenance Beauty

One of the smartest ways to save money on landscaping is by choosing native plants. These are plants that naturally grow in your region, meaning they are already adapted to local soil, weather, and water conditions.

Benefits of Native Plants:

  • Low maintenance: They require less watering, fertilizing, and pest control.
  • Cost-effective: Reduced need for chemicals and care lowers overall costs.
  • Eco-friendly: Attract pollinators like bees and butterflies, supporting biodiversity.
  • Durable: More resistant to local pests and diseases.

Examples of Budget-Friendly Native Plants:

  • In the U.S. Midwest: Coneflowers, Black-eyed Susans, and Prairie grasses.
  • In the Southwest: Agave, Yucca, and Desert Marigold.
  • In coastal areas: Sea lavender, Beach grass, and Coastal rosemary.

Pro Tip: Start small by planting a few native perennials. Over time, they spread and fill out, saving you from buying more plants.


2. Repurpose and Reuse Materials

Why buy new when you can reuse what you already have—or source materials for free? Repurposing materials is not only budget-friendly but also adds a unique, rustic charm to your landscape.

Repurposing Ideas:

  • Old bricks or pavers: Create garden borders, pathways, or raised beds.
  • Wood pallets: Convert into vertical gardens, compost bins, or rustic fencing.
  • Broken pots: Use as plant markers or small decorative accents.
  • Gravel or stones: Repurpose leftover construction materials for pathways or ground cover.

Where to Source Free or Cheap Materials:

  • Local community “freecycle” groups.
  • Construction sites (with permission).
  • Thrift stores or garage sales for inexpensive garden furniture or décor.

Pro Tip: Combining repurposed materials with plants adds character and reduces waste—making your garden both affordable and eco-friendly.


3. DIY Garden Features Instead of Buying New

Store-bought fountains, raised beds, and pergolas can be costly, but you can often make your own versions at a fraction of the price. With a little creativity and some basic tools, you can build garden features that look custom-made.

DIY Ideas to Try:

  • Raised Beds: Build with recycled wood, cinder blocks, or stone.
  • Water Feature: Use an old ceramic pot, a small pump, and some stones to create a simple fountain.
  • Fire Pit: Arrange bricks or stones in a circle, add gravel inside, and you have a cozy gathering spot.
  • Garden Seating: Turn tree stumps into rustic stools or repurpose old benches with a fresh coat of paint.

DIY not only cuts costs but also gives your landscape a personal, handmade touch. Plus, many of these projects are simple enough for beginners.

Pro Tip: Start with small DIY features and gradually add more. Even one handmade element can transform the look of your garden.


4. Focus on Smart Design and Low-Cost Layouts

Good landscaping doesn’t always mean buying more plants or decorations—it’s about smart design. By strategically planning your layout, you can maximize visual impact while minimizing expenses.

Design Tips for Budget Landscaping:

  • Layering: Place tall plants in the back, medium-height in the middle, and low ground covers in the front for a full look with fewer plants.
  • Mulching: Spread mulch around plants to retain moisture, reduce weeds, and cut down watering costs. Organic mulch like shredded leaves or wood chips is often free or very cheap.
  • Edging with Plants: Instead of expensive stone or plastic edging, use small shrubs or ornamental grasses to define borders.
  • Grouping Plants: Plant in clusters for a bold statement—cheaper than scattering plants everywhere.

Pro Tip: Draw a simple plan on paper before planting. A well-thought-out design reduces mistakes and saves money in the long run.


5. Choose Cost-Effective Ground Covers and Alternatives to Grass

Maintaining a lush lawn can be expensive and water-intensive. Instead of pouring money into constant mowing, watering, and fertilizing, consider affordable alternatives that are easier on the wallet.

Low-Cost Ground Cover Options:

  • Clover: Stays green, requires little mowing, and attracts pollinators.
  • Creeping Thyme: Fragrant, hardy, and beautiful with small flowers.
  • Gravel or Mulch Beds: Stylish, modern, and virtually maintenance-free.
  • Moss: Perfect for shady, damp areas with little sunlight.

Benefits of Alternatives:

  • Lower water bills.
  • Reduced need for fertilizers and pesticides.
  • Adds variety and texture to your landscape.

Pro Tip: Mix grass with clover (a clover-grass blend) to reduce costs while still keeping a traditional lawn look.


Extra Budget-Saving Hacks for Landscaping

Along with the five main tips, here are a few more quick tricks to stretch your landscaping budget further:

  1. Start from seeds or cuttings: Buying mature plants is costly—grow your own instead.
  2. Plant perennials: They return every year, saving you from replanting annually.
  3. Share with neighbors: Swap seeds, plants, or tools to save money.
  4. Use rain barrels: Collect rainwater to reduce irrigation costs.
  5. Shop end-of-season sales: Nurseries often discount plants and supplies at the end of summer.

Conclusion

Landscaping doesn’t have to break the bank. With smart choices and a little creativity, you can design a beautiful outdoor space that reflects your personality and style—all while staying on budget.

By incorporating native plants, repurposing materials, creating DIY garden features, focusing on smart layouts, and using low-cost ground covers, you can achieve an impressive landscape at a fraction of the price. Add in a few budget-saving hacks, and you’ll find that the process is not only affordable but also deeply rewarding.

Your dream garden is within reach—no professional team or big budget required. With these five budget-friendly landscaping tips, you’ll be able to enjoy a beautiful, functional, and welcoming garden space that adds value to your home and joy to your life.

5 Beautiful Outdoor Lighting Ideas for Gardens

5 Beautiful Outdoor Lighting Ideas for Gardens

A well-designed garden is not just for the daytime. With the right lighting, your outdoor space can be transformed into a magical retreat, perfect for relaxation, entertaining, or simply enjoying a quiet evening under the stars. Garden lighting is more than functionality—it’s about atmosphere, mood, and highlighting your landscape’s best features.

If you want to create a stunning evening ambiance, this guide explores five beautiful outdoor lighting ideas that will not only brighten your garden but also elevate its overall charm. Each idea blends practicality with aesthetics, giving you inspiration to design your own glowing oasis.


Why Outdoor Lighting Matters

Before diving into the ideas, it’s important to understand why outdoor lighting is such a powerful garden feature:

  • Enhances beauty: Lighting highlights plants, pathways, and focal points.
  • Creates ambiance: Soft glows and warm tones set the mood for evening gatherings.
  • Improves safety: Path and step lighting prevent accidents in the dark.
  • Increases usability: Extends the time you can spend in your garden after sunset.
  • Boosts property value: A well-lit garden adds sophistication and curb appeal.

With the right placement and style, lighting can make even a simple garden look enchanting at night.


1. Pathway Lighting – Guiding the Way with Elegance

Pathway lights are one of the most common yet effective outdoor lighting solutions. They not only illuminate walkways but also create a welcoming glow for guests.

How to Use Pathway Lighting:

  • Install low-level lights along garden paths, driveways, or stepping-stone walkways.
  • Space them evenly for balance but avoid placing them in a straight, rigid line—slight staggering creates a more natural look.
  • Choose warm LED lights for a cozy effect rather than harsh, bright white.

Design Tips:

  • Solar-powered pathway lights are eco-friendly and easy to install since they don’t require wiring.
  • Use downward-facing fixtures to prevent glare and focus light on the ground.
  • Combine with decorative stakes, lanterns, or rustic wood posts for added charm.

Why It Works: Pathway lighting creates both safety and style, turning an ordinary walkway into a beautifully lit garden journey.


2. Uplighting Trees and Plants – Creating Dramatic Shadows

If you want to highlight the natural beauty of your garden, uplighting is the perfect choice. This technique involves placing lights at the base of trees, shrubs, or large plants to shine upward, creating dramatic effects.

How to Use Uplighting:

  • Position spotlights at the base of tall trees to accentuate their height and structure.
  • Use soft uplighting on flowering shrubs to showcase seasonal blooms.
  • Angle lights slightly to cast elegant shadows against walls or fences.

Design Tips:

  • For a subtle effect, use warm white lights with dimming options.
  • For drama, consider color-changing LED uplights to create seasonal moods.
  • Avoid over-lighting—select just a few focal plants or trees to make the effect more powerful.

Why It Works: Uplighting adds depth and dimension to your garden, making plants look majestic while creating a magical nighttime landscape.


3. String and Fairy Lights – Adding a Touch of Whimsy

Nothing transforms a garden into a cozy, enchanting retreat like string or fairy lights. They bring a playful, magical ambiance perfect for gatherings, dinner parties, or simply relaxing outdoors.

How to Use String and Fairy Lights:

  • Drape them across fences, trellises, or pergolas for a glowing backdrop.
  • Wrap them around tree trunks or branches for a festive effect.
  • Hang them above seating areas to mimic a starry-night canopy.

Design Tips:

  • Warm white bulbs create a soft, romantic glow.
  • For a festive garden, choose multi-colored string lights.
  • Opt for weatherproof, solar-powered options for year-round outdoor use.

Why It Works: String and fairy lights are inexpensive yet instantly charming, turning your garden into a whimsical evening paradise.


4. Lanterns and Candle Lighting – Creating a Cozy Atmosphere

For a more traditional and romantic lighting style, lanterns and candles bring warmth and intimacy to garden spaces. Unlike fixed lighting, lanterns are portable and versatile, letting you change your garden’s look effortlessly.

How to Use Lanterns and Candle Lighting:

  • Place lanterns along pathways, steps, or beside seating areas.
  • Use hanging lanterns on hooks, tree branches, or pergolas for overhead glow.
  • Scatter candles (or LED flameless candles) on tables, stone walls, or garden corners.

Design Tips:

  • Choose lanterns made of metal, wood, or glass to match your garden’s theme.
  • For safety, consider battery-powered LED candles instead of real flames.
  • Group lanterns in clusters of varying sizes for a layered effect.

Why It Works: Lanterns and candles add a rustic, cozy charm and are perfect for special occasions or quiet evenings when you want a gentle, flickering light.


5. Water Feature Lighting – Bringing Reflections to Life

If your garden includes a pond, fountain, or waterfall, lighting these water features can create stunning effects. The play of light and reflection enhances the soothing qualities of water, making your garden truly magical after dark.

How to Use Water Feature Lighting:

  • Submerge waterproof LED lights in ponds or fountains for a glowing effect.
  • Use spotlights angled toward waterfalls to highlight the cascading movement.
  • Install soft lights around the edges of ponds to illuminate surrounding plants.

Design Tips:

  • Cool white lights create a crisp, shimmering effect on moving water.
  • Colored underwater lights can make ponds or fountains look dramatic.
  • Use lights sparingly—too much can overwhelm the natural serenity of water.

Why It Works: Water feature lighting captures movement, reflection, and sparkle, adding elegance and tranquility to your garden.


Additional Tips for Garden Lighting Success

  1. Layer your lighting: Mix pathway lights, uplights, and string lights for depth and variation.
  2. Use timers and smart controls: Save energy and automate lighting schedules.
  3. Choose warm tones: Harsh white lights can feel industrial; warm glows create comfort.
  4. Focus on focal points: Illuminate your best features—trees, sculptures, seating areas—rather than trying to light the entire garden.
  5. Go solar: Modern solar lights are energy-efficient, affordable, and eco-friendly.

Maintenance of Outdoor Lighting

To keep your lighting effective and safe:

  • Clean fixtures regularly to prevent dirt and debris from dimming the light.
  • Check wiring and bulbs—replace damaged parts quickly.
  • Adjust angles seasonally as plants grow or garden layouts change.
  • Store portable lanterns indoors during harsh weather.

Conclusion

Garden lighting is more than a practical addition—it’s a design tool that enhances beauty, safety, and ambiance. From guiding pathways with soft lights to creating dramatic shadows with uplighting, adding whimsical charm with fairy lights, cozy warmth with lanterns, or reflective elegance with water feature lighting, there are endless ways to transform your outdoor space.

By thoughtfully choosing and arranging your lighting, you can turn your garden into a serene retreat that shines just as beautifully at night as it does during the day. Whether you’re hosting friends, enjoying family time, or seeking a quiet moment of peace, the right lighting makes your garden an enchanting extension of your home.

How to Create a Zen Garden in Your Backyard

How to Create a Zen Garden in Your Backyard

If you’ve ever walked through a Japanese Zen garden, you know the feeling—calmness, clarity, and a deep sense of peace that comes from simplicity and balance. A Zen garden, also known as a Karesansui or dry landscape garden, has been used for centuries as a tool for meditation and reflection. It combines natural elements such as rocks, gravel, sand, and carefully placed plants to symbolize harmony and tranquility.

The good news? You don’t need a temple or acres of space to create one. With some planning and creativity, you can design a Zen garden right in your backyard. Let’s explore the history, principles, and step-by-step process of building your own peaceful retreat.


The Essence of a Zen Garden

Zen gardens originated in Japan during the 14th century, inspired by Buddhist monks who sought a serene place for meditation. Unlike traditional gardens full of vibrant colors and lush greenery, Zen gardens emphasize minimalism and symbolism.

  • Gravel or sand represents water or waves.
  • Rocks symbolize mountains or islands.
  • Plants and moss reflect the passage of time and resilience.
  • Empty spaces are equally important, allowing the mind to rest.

A Zen garden isn’t just about decoration; it’s about creating a meditative space where you can step away from daily stress and reconnect with stillness.


Benefits of Having a Zen Garden

Creating a Zen garden offers more than beauty. It transforms your backyard into a sanctuary.

  1. Stress relief – Raking gravel or simply sitting in the space calms the mind.
  2. Mindfulness practice – Every element invites you to slow down and observe.
  3. Low maintenance – Unlike flower-heavy gardens, Zen gardens require minimal upkeep.
  4. Year-round appeal – Gravel, rocks, and evergreens remain attractive in all seasons.
  5. Aesthetic elegance – The minimalist design enhances the natural beauty of your backyard.

Planning Your Zen Garden

Before you pick up tools, take some time to plan. A Zen garden is about intention, so every design choice should be thoughtful.

1. Choose the Right Location

Select a quiet, private corner of your backyard. Ideally, it should be visible from your home so you can enjoy the view even indoors. Shaded areas work well, but if you prefer full sunlight, choose hardy plants that won’t require too much care.

2. Decide on the Size and Shape

A Zen garden can be large or small—some are no bigger than a tabletop, while others fill an entire yard. The key is proportion. Work with the natural layout of your space. Rectangular or oval shapes often work best, but you can adapt depending on your yard.

3. Establish a Theme or Concept

Traditional Zen gardens focus on simplicity and balance. You can design:

  • Dry landscape garden (Karesansui): Mostly sand, gravel, and rocks.
  • Moss garden: Minimal rocks with moss as the main plant feature.
  • Courtyard Zen garden: A compact design for smaller spaces.

Essential Elements of a Zen Garden

Every Zen garden includes certain features. Balancing them correctly is key to achieving harmony.

1. Sand or Gravel

The base of your Zen garden is usually white sand or fine gravel. This represents water, rivers, or waves. Raking it into circular or ripple patterns creates a soothing texture.

Tip: Choose crushed granite or pea gravel for durability.

2. Rocks and Stones

Rocks symbolize mountains, islands, or animals. Their arrangement is the most important part of design. Use both large and small stones to create balance. Odd numbers (3, 5, 7) are preferred, as they look more natural than even groupings.

3. Plants

While not essential, carefully chosen plants add softness. Use evergreens, moss, ferns, or dwarf pines. Bamboo and ornamental grasses can also enhance the natural feel. Keep plant choices minimal to maintain simplicity.

4. Water Features (Optional)

Though dry gardens are traditional, adding a small water feature like a bamboo fountain can introduce sound and movement, enhancing relaxation.

5. Pathways and Bridges

A stepping-stone path or small wooden bridge can symbolize a journey. These elements guide movement while keeping the design contemplative.

6. Ornaments

Japanese lanterns, Buddha statues, or bamboo fences can complement the space, but use sparingly to avoid clutter.


Step-by-Step Guide to Creating Your Zen Garden

Step 1: Prepare the Area

  • Clear the space of weeds, grass, and debris.
  • Level the soil to create an even surface.
  • Consider adding a border with wooden beams, bamboo fencing, or stone edging.

Step 2: Lay the Base

  • Spread a layer of landscaping fabric to prevent weeds.
  • Add a few inches of sand or gravel evenly across the space.

Step 3: Arrange the Rocks

  • Place large stones first, then add smaller ones.
  • Follow the principle of “shizen” (naturalness)—avoid symmetry, and instead mimic nature.
  • Tilt rocks slightly rather than standing them upright to make them look weathered.

Step 4: Add Plants and Moss

  • Position plants in small clusters rather than scattered evenly.
  • Choose slow-growing, hardy varieties to minimize care.
  • Use moss around rocks to create a sense of age and permanence.

Step 5: Create Patterns in Sand or Gravel

  • Use a wooden rake to draw ripples or lines around rocks.
  • Change the patterns occasionally—it’s a meditative act.
  • Leave some areas smooth to represent stillness.

Step 6: Incorporate Extra Features

  • Add a bamboo water spout for sound.
  • Place a lantern near a corner to balance the layout.
  • Install a simple bench for sitting and reflecting.

Maintaining Your Zen Garden

Though low-maintenance, a Zen garden does require some care.

  • Rake regularly to keep gravel neat and patterns visible.
  • Weed occasionally—a landscape fabric base helps reduce growth.
  • Trim plants to maintain minimalism.
  • Rearrange patterns when you feel the need for fresh energy.

Unlike traditional gardens, the maintenance itself is part of the Zen practice. Each action becomes a mindful ritual.


Tips for Enhancing Tranquility

  1. Keep it minimal: Less is more in Zen gardens. Avoid overcrowding.
  2. Use natural materials: Wood, stone, and bamboo enhance authenticity.
  3. Balance contrasts: Mix textures (rough rocks with smooth gravel, soft moss with hard stone).
  4. Include seating: A bench, low stool, or flat rock invites meditation.
  5. Consider lighting: Soft garden lanterns or solar lights extend usability at night.

Adapting Zen Gardens for Small Spaces

Even if you don’t have a large backyard, you can create a mini Zen garden on a patio, balcony, or tabletop. Use a shallow wooden box, fill it with sand or gravel, add a few stones, and use a miniature rake. These portable gardens offer the same calming benefits in a compact form.


Conclusion

A Zen garden is more than just a backyard project—it’s an invitation to slow down, breathe, and find peace in simplicity. By combining natural elements, thoughtful design, and mindful maintenance, you create not just a garden, but a living work of art.

Whether you have a sprawling yard or a small corner, your Zen garden will serve as a sanctuary where you can step away from daily chaos and reconnect with inner calm. With patience, intention, and creativity, your backyard can become a place of beauty and meditation—a true reflection of harmony with nature.

How to Grow Strawberries in Containers

How to Grow Strawberries in Containers

Few fruits are as universally loved as strawberries. Sweet, juicy, and bursting with flavor, these red gems can be enjoyed fresh, in smoothies, on desserts, or even preserved as jams. The great news is that you don’t need a sprawling backyard or a large garden to grow them. With the right approach, strawberries can thrive beautifully in containers, making them perfect for patios, balconies, rooftops, and even small indoor spaces.

This guide will take you step by step through the process of growing strawberries in containers—covering everything from choosing the right varieties and containers to planting, care, and harvesting. By the end, you’ll be equipped with all the knowledge you need to grow your own sweet harvest.


Why Grow Strawberries in Containers?

Growing strawberries in containers offers several advantages over traditional garden planting:

  • Space-saving: Perfect for people with limited space like balconies, patios, or small yards.
  • Better control: You can control soil quality, watering, and drainage more effectively.
  • Reduced pests and diseases: Containers elevate plants, protecting them from soil-borne diseases, slugs, and weeds.
  • Mobility: You can move containers to follow the sun or bring them indoors during harsh weather.
  • Aesthetic value: Hanging baskets, tiered planters, and decorative pots filled with strawberry plants add beauty to your space.

Choosing the Right Strawberry Variety

Not all strawberries are equally suited for container growing. Here are the main types:

  1. June-bearing strawberries
    • Produce a large harvest once a year (late spring to early summer).
    • Best if you want a big seasonal crop.
  2. Everbearing strawberries
    • Produce two to three smaller harvests throughout the growing season.
    • Great choice for a continuous supply of fruit.
  3. Day-neutral strawberries
    • Produce consistently throughout the season, regardless of day length.
    • Ideal for container growing as they provide fruit almost all season long.

Best varieties for containers: ‘Tristar,’ ‘Albion,’ and ‘Seascape’ are popular container-friendly options.


Choosing the Right Container

The container you choose plays a huge role in how well your strawberries grow.

  • Size: A container should be at least 12–14 inches wide and 8–10 inches deep. Each plant needs about 8–12 inches of space.
  • Material: Terracotta, plastic, fabric grow bags, and ceramic pots all work, as long as they have good drainage.
  • Drainage: Proper drainage holes are crucial to prevent root rot.
  • Specialty containers:
    • Hanging baskets – Great for saving space and creating decorative displays.
    • Strawberry jars – Pots with side openings designed specifically for strawberries.
    • Tiered planters – Allow you to grow multiple plants vertically.

Preparing the Soil

Strawberries need rich, well-draining soil to thrive.

  • Soil mix: Use a mix of high-quality potting soil, compost, and perlite or sand for good aeration.
  • pH level: Strawberries prefer slightly acidic soil with a pH between 5.5 and 6.5.
  • Fertilization: Mix in a slow-release organic fertilizer before planting to give plants a nutrient boost.

How to Plant Strawberries in Containers

  1. Choose healthy plants
    • Purchase certified disease-free seedlings or bare-root plants from a trusted nursery.
  2. Prepare the container
    • Fill with your potting mix, leaving about 2 inches of space at the top.
  3. Plant correctly
    • Place the strawberry plant so that the crown (where leaves meet roots) is level with the soil surface.
    • Do not bury the crown, as this can cause rotting.
  4. Spacing
    • Plant 1–3 plants per 12-inch container.
    • In larger containers, space plants 8–12 inches apart.
  5. Water thoroughly
    • After planting, water well to settle the soil around the roots.

Caring for Strawberries in Containers

1. Sunlight

Strawberries need at least 6–8 hours of direct sunlight daily. Place containers in the sunniest spot available. If growing indoors, consider supplementing with grow lights.

2. Watering

  • Strawberries like consistent moisture but dislike soggy soil.
  • Water when the top inch of soil feels dry.
  • Use drip irrigation or a watering can to avoid wetting the leaves, which can cause fungal diseases.

3. Fertilizing

  • Feed plants with a balanced liquid fertilizer every 3–4 weeks during the growing season.
  • Avoid over-fertilizing, as this promotes leafy growth at the expense of fruit.

4. Mulching

  • Add straw, pine needles, or shredded leaves around plants to keep soil moist and protect fruit from touching the soil.

5. Pruning and Runners

  • Remove yellow or dead leaves to maintain plant health.
  • Pinch off runners (long stems with baby plants) unless you want to propagate more plants. Runners can drain energy from fruit production.

Pests and Diseases

While container-grown strawberries face fewer problems than ground-grown ones, they can still attract pests:

  • Pests: Aphids, spider mites, and slugs may appear. Use neem oil or insecticidal soap for control.
  • Birds: Birds love strawberries—use netting or row covers to protect your fruit.
  • Diseases: Powdery mildew and gray mold can occur. Ensure good airflow and avoid overhead watering.

Overwintering Strawberries in Containers

Strawberries are perennial plants, but container-grown ones need extra care in winter.

  • In cold climates, move containers to an unheated garage, shed, or basement where temperatures stay just above freezing.
  • Mulch heavily with straw to insulate roots.
  • In warmer climates, strawberries can often remain outside year-round.

Harvesting Strawberries

Harvesting strawberries is one of the most rewarding steps.

  • When to harvest: Pick berries when they are fully red, firm, and shiny.
  • How to harvest: Gently twist or snip the stem just above the berry to avoid damaging the plant.
  • Frequency: Check plants every 2–3 days during peak season, as berries ripen quickly.

Storing and Using Strawberries

  • Fresh use: Eat immediately for the best flavor.
  • Refrigeration: Store unwashed berries in the fridge for 2–3 days.
  • Freezing: Wash, hull, and freeze strawberries on a baking sheet before transferring to freezer bags.
  • Preserving: Make jams, jellies, or syrups to enjoy year-round.

Common Mistakes to Avoid

  • Overcrowding plants – Leads to poor airflow and disease.
  • Overwatering – Causes root rot.
  • Using garden soil – Too heavy and compact for containers. Always use potting mix.
  • Ignoring runners – They sap energy from fruit production if not removed.
  • Lack of sunlight – Plants won’t produce well without 6–8 hours of sun.

Benefits of Container-Grown Strawberries

Growing strawberries in containers isn’t just practical—it’s fun and rewarding. Benefits include:

  • Fresh, organic fruit at your fingertips.
  • Ability to grow strawberries in any space, no matter how small.
  • Fewer weeds and easier maintenance compared to in-ground beds.
  • A beautiful decorative element for your home or garden.

Final Thoughts

Strawberries are one of the easiest and most rewarding fruits to grow in containers. With the right variety, container, soil mix, and care routine, you can enjoy a steady supply of sweet, juicy berries right outside your door. Whether you’re a beginner gardener or an experienced grower looking for space-saving options, container strawberries make an excellent choice.

Not only will you enjoy delicious harvests, but you’ll also add beauty and greenery to your living space. Start with just a few plants, give them the care they need, and before long, you’ll be savoring homegrown strawberries that taste better than anything from the store.

Growing Thyme: Everything You Need to Know

Growing Thyme: Everything You Need to Know

Thyme is one of the most versatile and beloved herbs in the culinary and gardening world. Known for its earthy, slightly minty flavor and its fragrant aroma, thyme has been used for centuries not only in cooking but also for medicinal and ornamental purposes. Whether sprinkled over roasted vegetables, used to season meats, or grown as a decorative ground cover in the garden, thyme is a plant that offers endless rewards. The best part? It’s one of the easiest herbs to grow and requires very little maintenance once established.

If you’ve been wanting to add thyme to your garden or kitchen windowsill, this guide will walk you through everything you need to know—from planting and care to harvesting and storage.


Why Grow Thyme?

Before diving into the “how,” let’s explore the “why.” Thyme is not just another kitchen herb; it’s a true multitasker:

  • Culinary uses: Thyme pairs beautifully with meats, poultry, vegetables, soups, and sauces. It’s a staple in Mediterranean cuisine.
  • Medicinal properties: Traditionally used for coughs, colds, and digestive issues, thyme is rich in antioxidants and has antibacterial qualities.
  • Aromatic benefits: Its fragrant leaves can freshen your home, repel certain pests, and even be used in homemade cleaning solutions.
  • Ornamental value: With its low, spreading growth, thyme works well as a ground cover, in rock gardens, or between stepping stones.

Choosing the Right Thyme Variety

There are over 300 varieties of thyme, each with its own unique flavor, aroma, and growing habit. Some popular types include:

  1. Common Thyme (Thymus vulgaris) – Classic culinary thyme with strong flavor.
  2. Lemon Thyme (Thymus × citriodorus) – Offers a citrusy aroma perfect for fish and chicken dishes.
  3. Creeping Thyme (Thymus serpyllum) – A low-growing ornamental variety, great as ground cover.
  4. Caraway Thyme (Thymus herba-barona) – Has a caraway-like scent, often used in breads and savory dishes.

Choose your variety based on whether your focus is culinary or ornamental.


Where and When to Plant Thyme

Thyme thrives in warm, sunny conditions. Here are some key tips:

  • Location: Plant thyme in a spot that receives at least 6–8 hours of full sunlight daily. Indoors, a south-facing window works best.
  • Soil: Thyme loves well-draining, sandy, or loamy soil with a pH between 6.0 and 8.0. Avoid heavy clay soils.
  • Timing:
    • Start seeds indoors 6–10 weeks before the last frost.
    • Transplant seedlings outside once temperatures are consistently above 60°F (15°C).
    • In warmer regions, thyme can be planted almost year-round.

How to Plant Thyme

1. Planting from Seeds

  • Sow thyme seeds in seed trays or small pots filled with light potting mix.
  • Press seeds lightly into the soil but don’t bury them too deep (they need light to germinate).
  • Mist with water and keep in a warm spot (70°F / 21°C).
  • Seeds usually germinate within 1–3 weeks.

2. Planting from Cuttings or Divisions

If you want faster results, plant thyme from cuttings or root divisions.

  • Take a 4–6 inch cutting from a healthy plant.
  • Remove lower leaves and place the cutting in damp soil or water until roots develop.
  • Once rooted, transplant into your garden or container.

3. Spacing

Thyme is a compact herb but needs room to breathe. Space plants 12–18 inches apart to allow good airflow and prevent disease.


Caring for Thyme

Once planted, thyme is relatively low-maintenance, but a little care goes a long way in keeping it healthy and productive.

1. Watering

  • Thyme is drought-tolerant and prefers slightly dry conditions.
  • Water deeply but infrequently, allowing soil to dry between waterings.
  • Avoid overwatering, which can lead to root rot.

2. Fertilizing

  • Thyme doesn’t need much fertilizer. Too much nitrogen can weaken flavor.
  • Apply a light feeding of compost or diluted liquid fertilizer once or twice a season.

3. Pruning and Maintenance

  • Regularly trim thyme to encourage bushy growth.
  • After flowering, cut back the plant by about one-third to prevent woody stems.
  • Remove any dead or yellowing leaves.

4. Pests and Diseases

Thyme is generally pest-resistant, but watch out for:

  • Aphids and spider mites – Spray with neem oil or soapy water if infestations occur.
  • Root rot – Avoid poorly drained soil and overwatering.
  • Powdery mildew – Ensure plants get enough airflow.

Growing Thyme in Containers

If you don’t have garden space, thyme grows beautifully in pots.

  • Use a container with drainage holes.
  • Fill with a well-draining potting mix.
  • Place in a sunny spot (balcony, windowsill, or patio).
  • Water sparingly but consistently.

Container-grown thyme may need more frequent pruning and occasional repotting as it spreads.


Companion Planting with Thyme

Thyme is an excellent companion plant, helping repel pests and improve the growth of nearby crops. Pair thyme with:

  • Cabbage and brassicas – Repels cabbage worms.
  • Tomatoes – Enhances flavor and attracts pollinators.
  • Strawberries – Acts as ground cover, reducing weeds.

Avoid planting thyme next to crops that prefer moist soil, like basil.


Harvesting Thyme

Harvesting thyme is simple and rewarding:

  • When to harvest: You can begin once the plant is about 6 inches tall. The best flavor comes just before flowering.
  • How to harvest: Snip sprigs with scissors, leaving at least 5 inches of growth to allow regrowth.
  • Frequency: Regular harvesting encourages new growth, so don’t be shy!

Preserving and Storing Thyme

If you have an abundance of thyme, you can preserve it for later use:

  1. Drying
    • Hang small bundles upside down in a dry, dark place.
    • Once dried, crumble leaves and store in an airtight container.
  2. Freezing
    • Place washed thyme sprigs in freezer bags.
    • Alternatively, freeze thyme in ice cube trays with olive oil or water.
  3. Fresh storage
    • Wrap sprigs in a damp paper towel and store in the refrigerator for up to a week.

Common Mistakes to Avoid

  • Overwatering: Thyme hates soggy soil.
  • Neglecting pruning: Without trimming, thyme becomes woody and less flavorful.
  • Too much fertilizer: This reduces essential oil concentration and flavor.
  • Not enough sunlight: Thyme grown in shade becomes leggy and weak.

Final Thoughts

Growing thyme is an incredibly rewarding experience for gardeners of all levels. With minimal care, this hardy herb will provide you with aromatic sprigs for cooking, natural remedies, and beautiful garden greenery for years to come. Whether you grow it in your backyard, on a balcony, or indoors by a sunny window, thyme adapts well and continues to thrive.

By understanding its basic needs—sunlight, well-draining soil, occasional watering, and light pruning—you’ll enjoy an abundant supply of this versatile herb. Start small, experiment with different varieties, and soon thyme will become one of the most treasured plants in your home garden.

How to Plant and Care for Dill in Your Garden

How to Plant and Care for Dill in Your Garden

Dill (Anethum graveolens) is a fragrant, feathery herb loved by gardeners and cooks alike. Known for its delicate leaves and unique flavor, dill enhances soups, salads, seafood dishes, and of course, pickles. But dill isn’t just a culinary star—it also attracts pollinators, repels harmful pests, and adds ornamental value to your garden with its airy foliage and umbrella-like flowers.

The best part? Dill is relatively easy to grow, making it an excellent choice for both beginners and experienced gardeners. In this guide, you’ll learn everything about planting dill, caring for it, harvesting, and ensuring a thriving crop in your garden.


Why Grow Dill in Your Garden?

Before diving into the planting process, let’s highlight the reasons dill is worth growing:

  • Culinary uses – Its leaves (dill weed) and seeds are both edible and widely used.
  • Attracts beneficial insects – Flowers draw pollinators like bees and butterflies.
  • Repels pests – Helps deter aphids, spider mites, and cabbage worms.
  • Low maintenance – Requires minimal care once established.
  • Fast-growing – Ready to harvest just a few weeks after planting.

Choosing the Right Dill Variety

Several dill varieties are available, and choosing the right one depends on your gardening needs:

  1. Bouquet Dill – Early flowering, great for seeds and pickling.
  2. Fernleaf Dill – Compact variety, perfect for container gardening.
  3. Mammoth Dill – Grows tall (up to 4 feet), excellent for leaves and seeds.
  4. Dukat Dill – Sweet, aromatic leaves, slow to bolt, ideal for leaf harvest.

For beginners, Fernleaf and Dukat are excellent choices because they produce lots of flavorful foliage before bolting.


Best Growing Conditions for Dill

Dill thrives in the right conditions, so set your garden up for success:

  • Sunlight: Dill prefers full sun—at least 6–8 hours of direct light daily.
  • Soil: Light, well-draining soil enriched with compost. A pH between 5.5 and 6.5 is ideal.
  • Temperature: Best grown in cooler weather, between 60–75°F (15–24°C). It struggles in extreme heat.
  • Watering: Keep the soil consistently moist but not soggy.

Planting Dill

1. Starting from Seeds

Dill is best grown directly from seeds, as it has a delicate taproot and does not transplant well.

  • Timing: Sow seeds in early spring after the last frost, or in late summer for a fall crop.
  • Planting depth: Sow seeds about ¼ inch deep in soil.
  • Spacing: Space seeds 12–18 inches apart to allow proper airflow.
  • Germination: Seeds sprout in 7–14 days under optimal conditions.

2. Growing in Containers

If space is limited, dill grows well in pots:

  • Choose a container at least 12 inches deep to accommodate its taproot.
  • Use a lightweight potting mix with good drainage.
  • Place the container in a sunny location.

Caring for Dill

Once your dill seedlings are established, proper care ensures healthy, productive plants.

Watering

  • Water regularly to keep soil moist, especially during dry spells.
  • Avoid overwatering—soggy soil can cause root problems.

Fertilizing

  • Dill doesn’t need heavy feeding.
  • Mix compost into the soil before planting.
  • Apply a diluted balanced fertilizer once or twice during the growing season if needed.

Mulching

  • Add a light layer of mulch around plants to conserve moisture and suppress weeds.

Staking

  • Taller dill varieties may require staking to prevent them from falling over in wind or rain.

Pruning

  • Pinch off flower buds if you want prolonged leaf production. Once dill flowers, leaf quality declines.

Harvesting Dill

Harvesting Leaves (Dill Weed)

  • Begin harvesting leaves once plants are 8 inches tall (about 6–8 weeks after planting).
  • Cut outer leaves first, leaving the inner growth to continue producing.
  • Regular harvesting encourages bushier growth.

Harvesting Seeds

  • Allow plants to flower and develop seed heads if you want dill seeds.
  • When seed heads turn brown and dry, cut them and place them upside down in a paper bag.
  • Shake gently to collect seeds, then dry them completely before storing.

How to Keep Dill Thriving

Dill has a short life cycle (about 70 days), but with a few tricks, you can enjoy it longer:

  1. Succession Planting – Sow seeds every 2–3 weeks for continuous harvest throughout the season.
  2. Partial Shade in Hot Weather – Provide light shade during summer to prevent bolting.
  3. Companion Planting – Grow dill near cabbage, cucumbers, onions, and lettuce. Avoid planting near carrots or tomatoes, as it can stunt their growth.

Common Pests and Diseases

Although dill is hardy, it can still face some challenges.

Pests

  • Aphids – Cluster on leaves; spray with water or neem oil.
  • Caterpillars (Swallowtail larvae) – They love dill, but they’re also beneficial butterflies in the making. Hand-pick if infestations are heavy.
  • Spider Mites – Thrive in hot, dry conditions. Mist plants or use insecticidal soap.

Diseases

  • Powdery Mildew – Appears as a white coating on leaves; avoid overcrowding and ensure good airflow.
  • Root Rot – Caused by overwatering or poor drainage.
  • Leaf Spot – Brown or yellow patches on leaves; remove infected foliage.

Culinary and Medicinal Uses of Dill

In the Kitchen

  • Leaves: Use fresh in salads, soups, dips, and seafood dishes.
  • Seeds: Perfect for pickling, spice mixes, and bread.
  • Flowers: Can be used in pickling for flavor.

Health Benefits

  • Rich in vitamins A and C.
  • Contains antioxidants that support immunity.
  • Traditionally used to ease digestion and bloating.
  • May help reduce inflammation.

Troubleshooting Common Dill Problems

  • Bolting too quickly – Plant slow-bolting varieties like Dukat, provide partial shade, and harvest frequently.
  • Sparse growth – Ensure enough sunlight and avoid overcrowding.
  • Yellowing leaves – Often a sign of overwatering, poor drainage, or nutrient deficiency.
  • Flimsy stems – Tall dill varieties need staking or protection from strong winds.

Final Thoughts

Dill is one of the easiest and most rewarding herbs you can grow in your garden. With its feathery leaves, delicate yellow blooms, and unique flavor, dill brings both beauty and functionality to your space. By sowing directly from seed, watering consistently, and practicing succession planting, you’ll enjoy a continuous harvest of fresh dill leaves and seeds throughout the season.

Whether you’re using it in your kitchen, attracting pollinators to your garden, or enjoying its health benefits, dill is a true multipurpose plant. By following this guide, even a beginner gardener can confidently plant, care for, and keep dill thriving year after year.