5 Garden Seating Ideas for Relaxation and Comfort

5 Garden Seating Ideas for Relaxation and Comfort

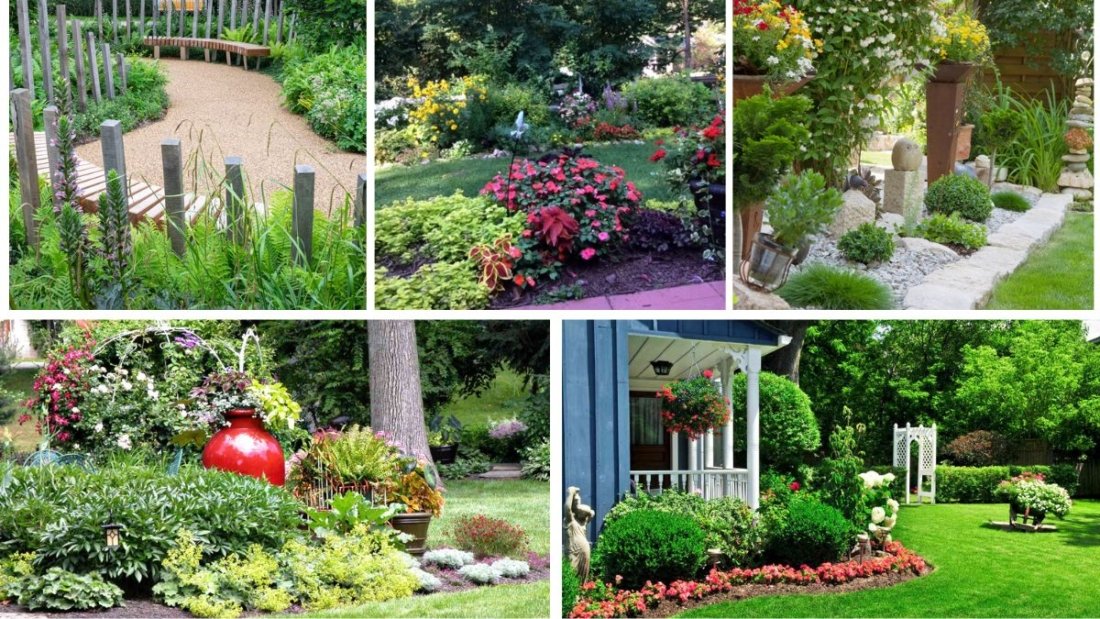
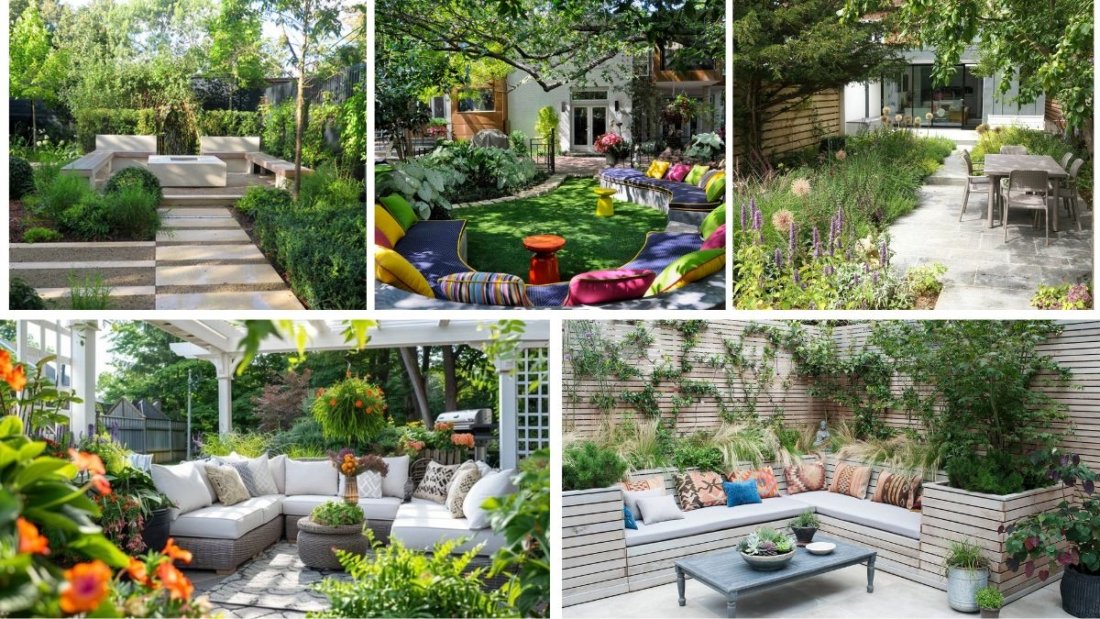
A well-designed garden is not only about plants, pathways, or water features—it’s also about creating spaces to sit, relax, and enjoy your outdoor sanctuary. Comfortable and stylish seating transforms a garden into a place for reading, meditating, socializing, or simply soaking in nature. Whether your backyard is spacious or compact, the right seating arrangements can enhance your garden’s functionality and aesthetic appeal. This guide explores five garden seating ideas that combine relaxation, comfort, and style, helping you create your ideal outdoor retreat.


Why Garden Seating Matters

Before exploring specific seating ideas, it’s essential to understand the benefits of well-planned garden seating:

  1. Encourages Outdoor Living: Comfortable seating invites you to spend more time in your garden.
  2. Enhances Aesthetics: Stylish furniture can complement the garden design and serve as decorative elements.
  3. Supports Social Interaction: Provides a space for family and friends to gather.
  4. Promotes Relaxation: Outdoor seating encourages mindfulness, reduces stress, and connects you with nature.
  5. Versatile Functionality: Seating can be decorative, functional, or a combination of both.

Integrating seating into your garden ensures it becomes a space that’s as enjoyable as it is visually appealing.


1. Classic Wooden Benches

Wooden benches are timeless, versatile, and blend seamlessly with any garden style, from rustic to contemporary. They offer durability, comfort, and a natural aesthetic.

Tips for Choosing and Placing Wooden Benches:

  • Material Selection: Opt for teak, cedar, or oak, which are weather-resistant and durable.
  • Style: Traditional slatted designs, backless benches, or curved benches can be chosen based on space and preference.
  • Placement: Position under trees, near flower beds, or by water features for a tranquil view.
  • Comfort: Add cushions or outdoor pillows for enhanced relaxation.

Benefits: Wooden benches provide a classic charm, are easy to maintain, and integrate naturally with greenery.

Design Tip: Pair a bench with small planters or side tables to create a cozy reading nook.


2. Hammocks and Hanging Chairs

Hammocks and hanging chairs offer a fun, relaxing seating option, perfect for lounging in the shade or enjoying gentle breezes.

How to Use Hammocks and Hanging Chairs:

  • Placement: Attach hammocks between trees, posts, or specially designed stands. Hanging chairs can be suspended from sturdy beams or pergolas.
  • Material: Choose weather-resistant fabrics or rattan for durability.
  • Comfort: Include cushions, pillows, or blankets for added coziness.
  • Safety: Ensure strong, secure anchor points and check weight limits.

Benefits: Provides a sense of gentle swaying comfort, ideal for reading, napping, or meditating outdoors.

Design Tip: Use neutral or soft-colored fabrics to maintain a peaceful, minimalist look.


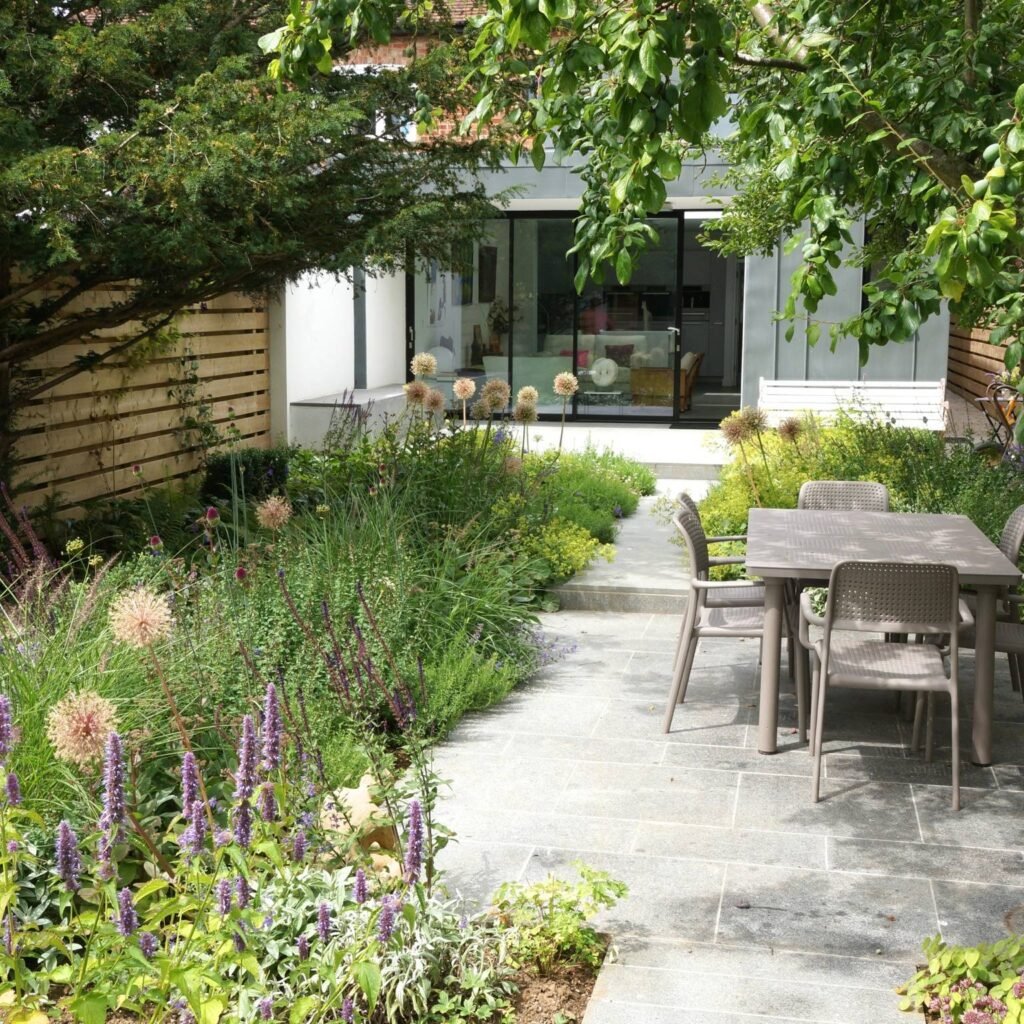
3. Patio Dining Sets

For those who enjoy meals or gatherings outdoors, a patio dining set doubles as functional seating and a social hub.

Tips for Choosing Patio Dining Sets:

  • Material: Aluminum, teak, wrought iron, or resin furniture are durable for outdoor use.
  • Size: Match the set to your garden space, ensuring there’s room to move comfortably.
  • Style: Modern, rustic, or classic designs to match your garden aesthetic.
  • Accessories: Add cushions, tablecloths, or an umbrella for comfort and sun protection.

Benefits: Dining sets make outdoor entertaining easy, allowing you to enjoy meals surrounded by nature.

Design Tip: Position the dining area near flowering plants or a water feature for ambiance.


4. Garden Swing Seats

Garden swings add charm, comfort, and gentle motion, creating a relaxing focal point. They work well in both large and small gardens.

How to Incorporate a Garden Swing:

  • Types: Choose freestanding swings, bench swings, or hanging porch-style swings.
  • Material: Opt for durable wood, metal, or weather-resistant wicker.
  • Placement: Place under trees or pergolas for shade and comfort.
  • Cushions & Throws: Add thick cushions and soft throws to enhance coziness.

Benefits: Swings create a playful yet relaxing element and are perfect for both adults and children.

Design Tip: Add fairy lights or lanterns nearby to enhance the swing’s charm during evening hours.


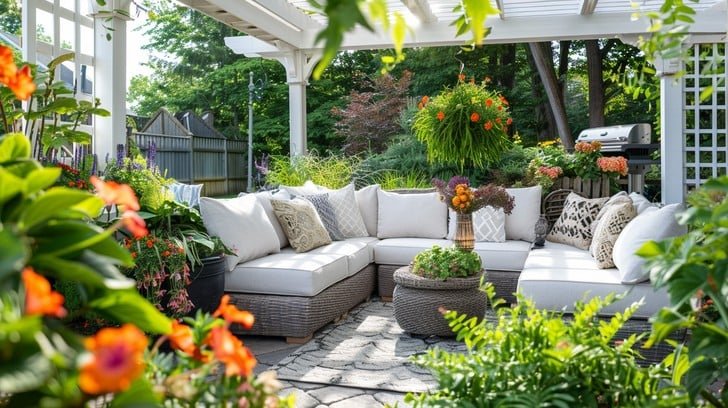
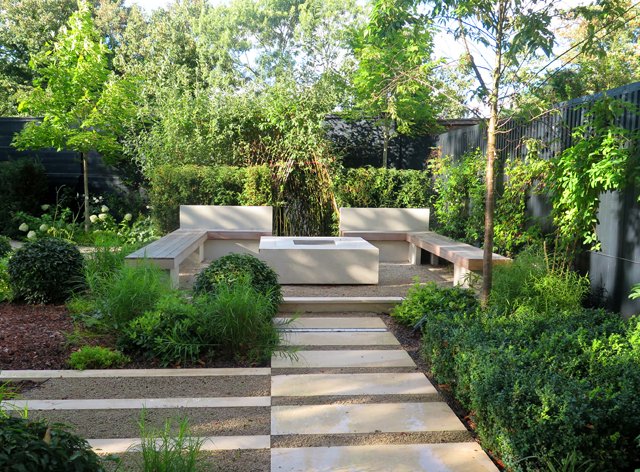
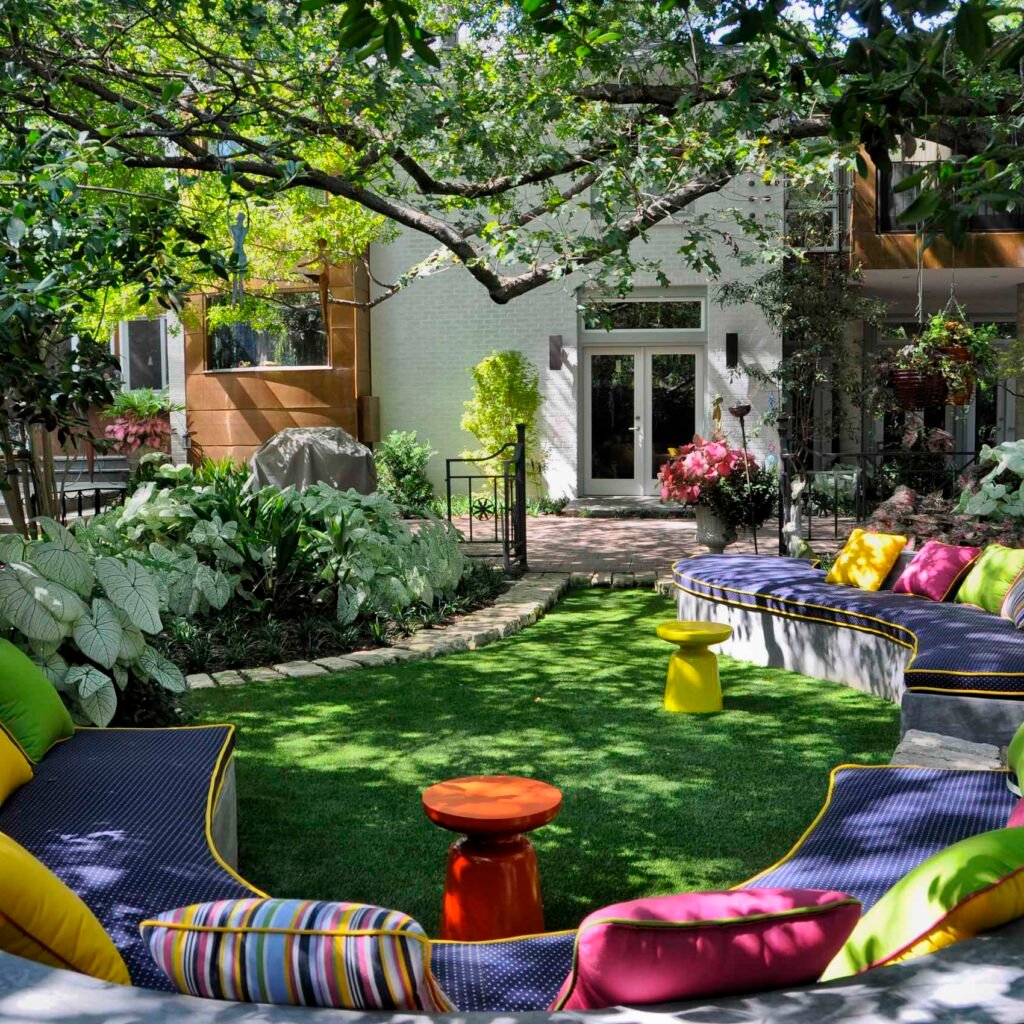
5. Built-In Seating Solutions

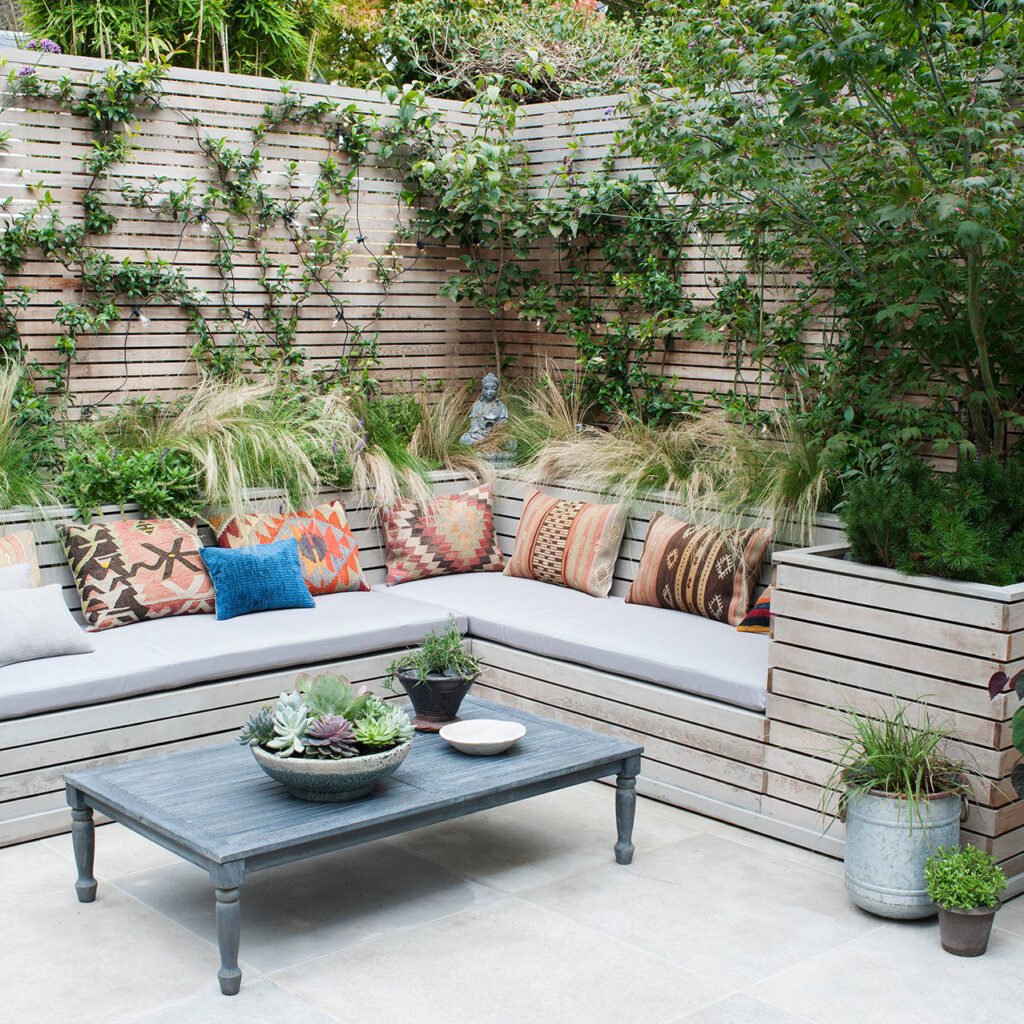
Built-in seating is a practical and stylish way to maximize garden space. Made from stone, brick, or wood, it blends seamlessly with the landscape and offers durability.

Tips for Built-In Garden Seating:

  • Material Choices: Stone, brick, concrete, or wooden platforms can be customized to match your garden.
  • Design: L-shaped benches, circular seating around fire pits, or integrated planters with seating are popular options.
  • Comfort: Add cushions, mats, or removable padding for a cozy feel.
  • Integration: Build seating around trees, ponds, or walls to utilize space efficiently.

Benefits: Built-in seating is durable, space-saving, and creates a cohesive garden design.

Design Tip: Incorporate storage under the seating to keep cushions, blankets, or garden tools handy.


Additional Tips for Comfortable Garden Seating

  1. Cushions and Fabrics: Use weather-resistant fabrics for durability and comfort.
  2. Shade Options: Pergolas, umbrellas, or tree cover protect from sun exposure.
  3. Placement Matters: Arrange seating to offer the best views of plants, water features, or pathways.
  4. Lighting: Outdoor lights, lanterns, or fairy lights enhance evening relaxation.
  5. Mix and Match: Combine different seating types for flexibility and aesthetic appeal.
  6. Incorporate Side Tables: Convenient for placing drinks, books, or garden tools.
  7. Privacy: Use plants, trellises, or screens to create secluded, cozy seating areas.
  8. Consider Maintenance: Materials like metal, treated wood, or weatherproof wicker reduce upkeep.
  9. Seasonal Comfort: Add blankets, waterproof cushions, or heaters for year-round use.
  10. Personal Touch: Include decorative elements like outdoor rugs, planters, or art to reflect your style.

By combining comfort, style, and practicality, your garden seating areas will encourage you and your guests to spend more time outdoors.


Benefits of Well-Designed Garden Seating

  • Enhanced Outdoor Living: Encourages spending time in nature, reading, or socializing.
  • Functional and Stylish: Adds beauty to the garden while serving a practical purpose.
  • Promotes Relaxation: Sitting outdoors reduces stress and improves mood.
  • Versatility: Supports multiple activities, from dining to lounging to meditating.
  • Increased Garden Value: Thoughtful seating design enhances overall property appeal.

Well-chosen seating transforms a garden into a multi-functional oasis for relaxation, entertainment, and reflection.


Conclusion

Creating comfortable and attractive garden seating is essential for a garden that’s both functional and inviting. From classic wooden benches to hammocks, patio dining sets, swings, and built-in seating solutions, there are plenty of options to suit your space, style, and lifestyle.

Consider the size of your garden, the materials you prefer, and the type of activities you want to enjoy. Incorporating cushions, shade, lighting, and decorative elements enhances both comfort and aesthetics. Thoughtful seating arrangements encourage outdoor living, offer relaxation, and make your garden a true sanctuary.

By applying these five garden seating ideas for relaxation and comfort, you can create inviting outdoor spaces where you can unwind, socialize, and fully enjoy the beauty of your garden all year round.

5 Minimalist Garden Design Tips You’ll Love

5 Minimalist Garden Design Tips You’ll Love

In today’s fast-paced world, minimalist gardens offer a peaceful retreat where simplicity meets beauty. Characterized by clean lines, uncluttered layouts, and thoughtful plant selection, minimalist garden design emphasizes quality over quantity. It’s not just about reducing elements—it’s about creating a serene, functional, and visually appealing outdoor space. Whether you have a small backyard, patio, or rooftop garden, minimalist principles can transform your space into a stylish, calming sanctuary. This guide explores five minimalist garden design tips to help you create a chic and harmonious garden you’ll love.


Why Minimalist Garden Design?

Minimalist gardens have become increasingly popular due to their simplicity, elegance, and ease of maintenance. Here’s why you might consider a minimalist approach:

  1. Visual Clarity: Fewer elements create a clean, uncluttered look.
  2. Low Maintenance: Minimal plants, furniture, and décor reduce upkeep.
  3. Enhanced Focus: Highlights key plants, structures, or focal points.
  4. Timeless Style: Clean designs remain elegant over time without looking dated.
  5. Stress Reduction: Open, calm spaces promote relaxation and mental clarity.
  6. Versatility: Works in any outdoor space, from small balconies to spacious yards.

By focusing on essential elements and maintaining balance, minimalist gardens create a sense of harmony and order.


1. Embrace Clean Lines and Geometric Shapes

Minimalist gardens thrive on structure and simplicity, which often involves geometric shapes and clean lines. This approach helps define spaces while keeping the overall design uncluttered.

How to Implement:

  • Pathways: Use straight, rectangular, or gently curved paths made of concrete, gravel, or stone.
  • Plant Beds: Arrange beds in clear geometric shapes like squares, rectangles, or circles.
  • Furniture & Structures: Choose simple, modern benches, pergolas, or planters with clean silhouettes.
  • Water Features: Opt for linear or box-shaped fountains that complement the structured layout.

Benefits: Clean lines create a sense of order and sophistication while guiding the eye naturally through the garden.

Design Tip: Limit decorative elements to a few statement pieces to maintain a minimalist aesthetic.


2. Choose a Limited Plant Palette

Minimalist gardens rely on simplicity, so selecting a limited variety of plants is key. Fewer plant species create a cohesive, harmonious look that is easy to maintain.

Plant Selection Tips:

  • Focus on Foliage: Use plants with interesting leaf textures and colors instead of relying solely on flowers.
  • Monochromatic or Complementary Colors: Stick to one or two main colors to avoid visual clutter.
  • Structural Plants: Incorporate shrubs, grasses, and evergreens with clean shapes for year-round appeal.
  • Layering: Plant in odd numbers and varying heights for depth without overcrowding.

Examples of Minimalist Plants: Boxwood, lavender, ornamental grasses, succulents, Japanese maple, and ferns.

Benefits: A limited plant palette reduces maintenance while emphasizing textures, shapes, and focal points.

Design Tip: Use repetition to create rhythm and continuity across the garden.


3. Incorporate Negative Space

In minimalist design, empty space—often called “negative space”—is just as important as the elements you include. Negative space provides breathing room, highlights focal points, and makes the garden feel larger.

How to Use Negative Space:

  • Spacing Between Plants: Avoid overcrowding; leave gaps to accentuate each plant.
  • Open Lawns: Use simple lawn areas or gravel beds to provide calm, open spaces.
  • Pathways and Seating Areas: Allow ample room around benches or patios for easy movement.
  • Visual Balance: Place focal points like sculptures, water features, or plants strategically within open areas.

Benefits: Negative space reduces visual noise, making the garden feel serene and airy.

Design Tip: Think of your garden as a canvas—what you leave empty is as powerful as what you fill in.


4. Use Natural Materials and Neutral Colors

Material choice is critical in minimalist gardens. Natural materials and neutral colors create a harmonious, understated look while adding texture and warmth.

Material Tips:

  • Paths & Paving: Concrete, stone, gravel, or wood for clean, modern lines.
  • Planters & Containers: Simple ceramic, metal, or wooden planters without excessive decoration.
  • Fencing & Screens: Minimalist metal or wood panels in neutral tones.
  • Furniture: Sleek, modern outdoor furniture in muted shades like gray, white, or earth tones.

Benefits: Natural materials blend with plants seamlessly, while neutral colors create a calming atmosphere and allow the greenery to shine.

Design Tip: Mix textures like smooth stone with rough wood to add visual interest without clutter.


5. Add a Focal Point or Statement Feature

Minimalist gardens are most effective when they include one or two focal points that draw the eye. This could be a plant, sculpture, water feature, or piece of furniture.

Ideas for Focal Points:

  • Sculpture or Art Piece: Choose a modern, abstract sculpture that complements the garden’s lines.
  • Water Feature: A small fountain or reflecting pool adds sound and visual interest.
  • Specimen Plant: A single tree, large shrub, or unique plant becomes the garden’s centerpiece.
  • Lighting: Spotlighting or LED strips can highlight key areas or features at night.

Benefits: A focal point provides structure and purpose, anchoring the minimalist design and preventing it from feeling empty.

Design Tip: Ensure the focal point contrasts subtly with surrounding elements to stand out without overwhelming the space.


Additional Minimalist Garden Design Tips

  1. Keep Accessories Minimal: Avoid excessive décor—use a few high-quality pieces instead.
  2. Layer Textures: Combine plants with different leaf shapes, stones, and materials to create subtle interest.
  3. Integrate Seating: Choose simple, functional furniture that blends with the garden style.
  4. Maintain Order: Regular pruning and cleaning are essential to preserve the minimalist look.
  5. Consider Seasonal Interest: Select plants that look good year-round to maintain visual appeal.
  6. Lighting: Soft, unobtrusive lighting enhances the space at night and highlights key features.
  7. Balance Vertical and Horizontal Elements: Use trellises, vertical planters, or wall features sparingly.
  8. Sustainability: Incorporate drought-tolerant plants and low-maintenance materials to reduce resource use.
  9. Reflect Personal Style: Minimalist does not mean boring—choose elements that reflect your taste and personality.
  10. Focus on Experience: Think about walking through the garden—simplicity and flow should enhance the user experience.

Following these principles ensures that your minimalist garden remains functional, visually appealing, and stress-free.


Benefits of Minimalist Garden Design

  • Low Maintenance: Fewer plants and decorative elements make upkeep simple.
  • Timeless Appeal: Clean, simple lines remain elegant across changing design trends.
  • Relaxation: Open, uncluttered spaces promote calmness and mental clarity.
  • Enhanced Outdoor Living: Minimalist gardens integrate seamlessly with patios, decks, or indoor spaces.
  • Versatility: Works well in urban settings, rooftop terraces, or traditional yards.

Minimalist gardens emphasize quality over quantity, creating elegant spaces that feel peaceful and organized.


Conclusion

Creating a minimalist garden is about balancing simplicity, function, and aesthetic appeal. By embracing clean lines, a limited plant palette, negative space, natural materials, and a focal point, you can transform any outdoor space into a serene and stylish retreat.

Minimalist design is not just about reducing elements; it’s about thoughtful placement, intentional choices, and creating a garden that provides both beauty and relaxation. Whether you have a small backyard, patio, or rooftop garden, these five minimalist garden design tips will help you craft an outdoor space that is modern, elegant, and easy to maintain.

By keeping it simple and focusing on essential elements, you can create a garden that feels spacious, harmonious, and inviting—an outdoor sanctuary that you’ll love for years to come.

Best Plants for a Beautiful Cottage Garden Look

Best Plants for a Beautiful Cottage Garden Look

A cottage garden evokes charm, nostalgia, and a sense of timeless beauty. Characterized by informal layouts, layers of colorful blooms, and a mix of perennials, shrubs, and climbers, this style has captivated gardeners for generations. The key to creating a stunning cottage garden lies in plant selection. Choosing the right mix of flowers, foliage, and scents ensures year-round interest and a natural, romantic atmosphere. Here’s a comprehensive guide to the best plants for achieving that quintessential cottage garden look.

1. Roses – The Quintessential Cottage Garden Flower

No cottage garden is complete without roses. Known for their timeless elegance and delightful fragrance, roses can serve as the centerpiece of your garden. For a classic look, choose old-fashioned varieties like David Austin roses or Damask roses, which have a soft, romantic appearance. Plant climbing roses along trellises or fences to create vertical interest, while bush roses can fill borders and pathways. Pair roses with complementary flowers such as lavender or foxgloves for a harmonious color palette.

Tips:

  • Plant roses in well-drained soil enriched with compost.
  • Water regularly but avoid wetting foliage to prevent disease.
  • Deadhead spent blooms to encourage continuous flowering.

2. Lavender – Fragrant and Versatile

Lavender is a staple in cottage gardens, prized for its soothing fragrance and beautiful purple blooms. It works well as a border plant, along pathways, or even in pots near doorways. Beyond its aesthetic appeal, lavender attracts pollinators like bees and butterflies, enhancing the garden’s biodiversity.

Popular Varieties: English Lavender, Hidcote, Munstead.

Tips:

  • Prefers full sun and well-drained soil.
  • Prune lightly after flowering to maintain shape and encourage regrowth.
  • Combine with roses, catmint, or geraniums for a classic cottage feel.

3. Foxgloves – Tall and Elegant

Foxgloves (Digitalis purpurea) are iconic in cottage gardens. These towering plants bring vertical height and drama, with their bell-shaped blooms cascading down tall spikes. They thrive in partially shaded areas and pair beautifully with roses, delphiniums, and hollyhocks.

Tips:

  • Foxgloves are biennials, so stagger planting to ensure continuous blooms.
  • Handle with care—plants are toxic if ingested.
  • Water regularly and mulch to retain soil moisture.

4. Hollyhocks – Vintage Charm

Hollyhocks are another classic cottage garden favorite. Their tall, colorful spikes evoke a sense of old-world charm, perfect for planting against walls or fences. Available in shades of pink, red, yellow, and white, hollyhocks bloom in summer, attracting bees and butterflies.

Tips:

  • Plant in sunny locations with fertile, well-drained soil.
  • Support tall stems with stakes to prevent them from toppling.
  • Regularly remove spent flowers to prolong the blooming season.

5. Delphiniums – Graceful Vertical Accents

Delphiniums add elegance and a splash of vibrant color to cottage gardens. With their tall spires of blue, purple, or white flowers, they create a striking contrast against softer, rounded blooms. They pair well with roses, foxgloves, and peonies.

Tips:

  • Require full sun and fertile soil.
  • Provide strong stakes for support.
  • Deadhead after flowering to encourage a second bloom.

6. Peonies – Lush and Romantic

Peonies are beloved for their large, lush blooms and sweet fragrance. They thrive in sunny spots with well-drained soil and add a luxurious touch to cottage gardens. With colors ranging from soft pastels to vibrant pinks and reds, peonies are perfect for mass planting in borders or as focal points.

Tips:

  • Plant in spring or fall for best results.
  • Avoid cutting flowers back too early—allow foliage to nourish the roots.
  • Mulch in winter to protect roots from frost.

7. Sweet Peas – Climbing Delights

Sweet peas (Lathyrus odoratus) are climbing annuals with delicate flowers and a heavenly fragrance. They work beautifully on trellises, fences, and arches, adding height and softness to your cottage garden. Their pastel shades of pink, purple, and white complement almost any planting scheme.

Tips:

  • Sow seeds in early spring for summer blooms.
  • Provide support for climbing.
  • Pinch back early growth to encourage bushier plants and more flowers.

8. Catmint – Long-Lasting Blooms

Catmint (Nepeta) is a hardy perennial with blue or purple flowers that bloom from spring through autumn. Its gray-green foliage adds texture, while the flowers attract pollinators. Catmint works well as a border plant, under roses, or in mixed beds, providing a soft, flowing look.

Tips:

  • Thrives in full sun with well-drained soil.
  • Prune after flowering to encourage new growth.
  • Drought-tolerant once established.

9. Phlox – Colorful Clusters

Phlox adds vibrant color and a sweet scent to cottage gardens. Available in tall and creeping varieties, it can be used in borders, rock gardens, or as ground cover. Tall garden phlox creates vertical interest, while creeping phlox spreads across pathways and rocks, adding charm and color.

Tips:

  • Plant in sunny locations with rich soil.
  • Deadhead spent flowers to prolong blooming.
  • Ensure good air circulation to prevent mildew.

10. Lily of the Valley – Delicate and Scented

Lily of the valley (Convallaria majalis) is perfect for shaded corners of the cottage garden. Its small, bell-shaped white flowers are highly fragrant and bloom in spring. It spreads easily, making it an excellent groundcover.

Tips:

  • Prefers partial shade and moist, well-drained soil.
  • Avoid planting in areas where pets or children may ingest it—it’s toxic if eaten.
  • Divide clumps every few years to maintain vigor.

11. Lavender-Blue Salvias – Pollinator Magnets

Salvia, with its spikes of blue, purple, or pink flowers, adds both height and a splash of color. It thrives in sunny spots and attracts butterflies, bees, and hummingbirds. It complements roses and lavender, enhancing the classic cottage garden aesthetic.

Tips:

  • Requires full sun and well-drained soil.
  • Cut back after flowering to encourage a second bloom.
  • Pair with catmint, phlox, or daisies for a colorful display.

12. Cottage Garden Accessories – The Finishing Touch

Beyond plant selection, adding elements like wooden trellises, rustic pathways, birdbaths, and wrought-iron arches enhances the cottage garden vibe. These accents provide structure and charm while letting your plants shine. Climbing plants like roses, clematis, and sweet peas can twine around trellises or arches, creating picturesque corners.


Final Tips for a Stunning Cottage Garden Look

  1. Mix Heights and Textures: Combine tall flowers like delphiniums and foxgloves with medium-height roses and low-growing groundcovers for visual depth.
  2. Plant in Layers: Layering perennials, annuals, and climbers gives the garden its characteristic “full and abundant” look.
  3. Embrace Naturalistic Planting: Let plants mingle rather than creating strict rows. Cottage gardens look best when slightly informal.
  4. Include Fragrant Plants: Lavender, roses, sweet peas, and lily of the valley add an aromatic dimension.
  5. Succession Planting: Choose a mix of plants that bloom at different times to ensure year-round beauty.

By carefully selecting a mix of roses, perennials, climbers, and fragrant blooms, anyone can create a cottage garden that exudes charm, color, and character. Whether you have a small yard or a large space, the right combination of plants and a touch of creativity will result in a garden that feels timeless, welcoming, and truly magical.

5 Stunning Backyard Water Feature Ideas

5 Stunning Backyard Water Feature Ideas

A backyard water feature can transform an ordinary outdoor space into a serene oasis. The soothing sound of flowing water, combined with visually appealing designs, adds tranquility, elegance, and a touch of luxury to your garden. Whether you have a large backyard or a small patio, water features can enhance ambiance, attract wildlife, and create a focal point for relaxation and entertainment. This guide explores five stunning backyard water feature ideas, complete with practical tips, design inspiration, and maintenance advice to help you create a peaceful and visually stunning outdoor retreat.


Why Add a Water Feature to Your Backyard?

Before exploring specific ideas, it’s important to understand the benefits of backyard water features:

  1. Relaxation: Flowing water has a calming effect, reducing stress and promoting tranquility.
  2. Aesthetic Appeal: Water features create a focal point and enhance the visual beauty of your garden.
  3. Wildlife Attraction: Birds, butterflies, and beneficial insects are drawn to water features.
  4. Ambient Sound: The soothing sound of water masks urban noise, creating a peaceful atmosphere.
  5. Value Addition: Well-designed water features can increase the property value of your home.
  6. Versatility: Water features come in a range of styles, sizes, and budgets, suitable for any garden.

Adding a water feature is not only decorative but also functional, making your backyard more enjoyable and inviting.


1. Modern Fountain

Modern fountains are sleek, stylish, and easy to incorporate into contemporary garden designs. They can range from simple, minimalist structures to elaborate multi-tiered designs.

How to Design a Modern Fountain:

  • Material Choice: Use stone, concrete, metal, or ceramic for durability and style.
  • Style Options: Wall-mounted fountains, tiered fountains, or free-standing sculptural fountains.
  • Water Flow: Adjust the pump to create gentle trickles or stronger cascades.
  • Lighting: Install LED or solar lights to highlight water movement at night.

Benefits: Modern fountains create a sophisticated focal point, provide ambient sound, and fit well into small or large yards.

Design Tip: Pair the fountain with minimalistic landscaping or potted plants to enhance its modern aesthetic.


2. Backyard Pond

A backyard pond brings a natural element into your outdoor space, perfect for larger gardens or yards with enough space. Ponds can host aquatic plants, fish, and other wildlife, creating a dynamic ecosystem.

Steps to Build a Backyard Pond:

  • Location: Choose a flat area with some sunlight for plant growth.
  • Excavation: Dig a hole according to your desired pond size and shape.
  • Liner Installation: Use a pond liner to retain water and prevent leaks.
  • Planting: Include aquatic plants like water lilies, lotuses, or marginal plants.
  • Fish and Wildlife: Add fish such as koi or goldfish and encourage birds with a water bath area.
  • Maintenance: Regularly remove debris, clean the pump, and monitor water quality.

Benefits: Backyard ponds create a peaceful environment, attract wildlife, and provide natural beauty year-round.

Design Tip: Surround the pond with stones, gravel, or native plants for a natural, harmonious look.


3. Waterfall Feature

Waterfalls add movement, sound, and drama to any backyard. They can be integrated into ponds, rock gardens, or standalone installations, creating a powerful visual and auditory impact.

How to Create a Waterfall Feature:

  • Structure: Use rocks, stones, or pre-formed kits to construct the waterfall base.
  • Water Flow: Install a submersible pump to circulate water from the bottom to the top.
  • Plant Integration: Incorporate ferns, moss, or flowering plants around the waterfall for a natural look.
  • Lighting: Use underwater or spotlights to illuminate cascading water in the evening.

Benefits: Waterfalls enhance the ambiance, produce relaxing water sounds, and serve as striking garden focal points.

Design Tip: Consider a tiered waterfall design for smaller spaces to create the illusion of depth and movement.


4. Wall-Mounted Water Feature

Wall-mounted water features are ideal for small yards, patios, or urban gardens where floor space is limited. These features can be modern or traditional in design and are perfect for vertical garden setups.

Installation Steps:

  • Choose a Wall: Ensure the wall is sturdy enough to hold water and a pump.
  • Select a Feature: Options include cascading panels, sculptural designs, or framed water fountains.
  • Water Circulation: Install a pump to keep water flowing consistently.
  • Decorative Touches: Add LED lighting, climbing plants, or decorative stones to enhance appeal.

Benefits: Wall-mounted water features save space, add vertical interest, and create a soothing environment without occupying the yard floor.

Design Tip: Integrate the feature with a seating area for a relaxing corner in your garden.


5. DIY Container Water Garden

For those seeking a simple, budget-friendly option, a DIY container water garden is perfect for small yards, patios, or balconies. Container water gardens are versatile and customizable.

How to Make a Container Water Garden:

  • Container Selection: Use large pots, barrels, or ceramic containers.
  • Water Plants: Choose aquatic plants like water lettuce, water lilies, or floating plants.
  • Add Features: Incorporate a small fountain pump for movement, or decorative stones for visual appeal.
  • Maintenance: Refresh water regularly, remove debris, and monitor plant health.

Benefits: Container water gardens are compact, flexible, and provide all the sensory benefits of a traditional water feature.

Design Tip: Use multiple containers of varying heights for a layered, modern look.


Tips for Maintaining Backyard Water Features

Garden with garden room, water feature patio paths and flower beds of shrubs and grasses. Pub Orig Karen Howden and Tom Gandey’s ground floor flat’s garden in North London.

Maintaining water features ensures they remain beautiful, functional, and safe:

  1. Keep Water Clean: Remove debris, fallen leaves, and algae regularly.
  2. Pump Maintenance: Check and clean pumps periodically to ensure smooth water flow.
  3. Seasonal Care: Winterize outdoor water features in cold climates by draining or insulating.
  4. Plant Care: Trim aquatic plants, remove dead foliage, and avoid overcrowding.
  5. Monitor Water Levels: Top up water to compensate for evaporation.
  6. Use Safe Treatments: Avoid harmful chemicals that can affect plants, fish, or wildlife.
  7. Inspect for Leaks: Repair any cracks or leaks promptly to prevent water loss.
  8. Lighting Maintenance: Ensure underwater lights are safe, functional, and waterproof.
  9. Pest Management: Prevent mosquitoes by circulating water or using natural repellents.
  10. Regular Aesthetic Updates: Refresh decorative stones, gravel, or plants to maintain a modern, clean look.

Following these tips ensures your water feature remains a stunning centerpiece for years to come.


Creative Ideas to Enhance Water Features

  • Incorporate Lighting: Solar-powered or LED lights highlight water movement and create a magical nighttime effect.
  • Add Seating: Surround the water feature with benches, hammocks, or outdoor sofas.
  • Integrate Rocks and Stones: Use natural stones to blend the feature with garden surroundings.
  • Introduce Wildlife: Include birdbaths, fish, or frog habitats for an interactive garden.
  • Seasonal Plants: Combine aquatic plants with seasonal flowers to create changing color displays.

Creative touches enhance the sensory experience and make your backyard water feature a true retreat.


Benefits of Adding Water Features

  • Stress Relief: The sound of flowing water promotes relaxation and mental well-being.
  • Enhanced Aesthetics: Water features elevate garden design, creating a luxurious feel.
  • Wildlife Habitat: Birds, insects, and small animals are attracted, increasing biodiversity.
  • Ambient Sound: Masks unwanted urban noise, creating a peaceful backyard oasis.
  • Versatile Options: Suitable for any garden size, style, or budget.

A water feature can completely transform your backyard, providing visual beauty, calming sounds, and a natural focal point.


Conclusion

Backyard water features are a timeless way to add elegance, serenity, and charm to your outdoor space. Whether you choose a modern fountain, a backyard pond, a cascading waterfall, a wall-mounted feature, or a DIY container water garden, each option brings unique benefits and visual appeal.

Careful planning, proper installation, and regular maintenance are key to ensuring your water feature remains a centerpiece of beauty and tranquility. By selecting the right materials, plants, and design, you can create a backyard retreat that invites relaxation, attracts wildlife, and impresses visitors.

With these five stunning backyard water feature ideas, you can turn any yard into a peaceful sanctuary, complete with flowing water, lush greenery, and captivating visual interest. Whether your space is large or small, simple or elaborate, a well-designed water feature adds both functionality and charm, making your backyard an inviting oasis all year round.

5 Modern Garden Pathway Designs to Try

5 Modern Garden Pathway Designs to Try

A well-designed garden pathway does more than provide a functional route through your yard—it sets the tone for your garden, guiding visitors while enhancing the overall aesthetic. Modern garden pathways combine style, creativity, and functionality, transforming ordinary gardens into visually striking spaces. Whether your outdoor area is small or expansive, pathways can be designed to reflect contemporary trends while complementing plants, lighting, and outdoor décor. This guide explores five modern garden pathway designs you can try, offering inspiration, design tips, and practical advice for creating a stunning garden walkway.


Why a Modern Garden Pathway Matters

Before diving into specific designs, it’s important to understand the benefits of a modern garden pathway:

  1. Enhances Visual Appeal: Pathways create a structured, polished look in your garden.
  2. Guides Movement: Directs visitors naturally and safely through different garden areas.
  3. Protects Plants: Prevents foot traffic from damaging flower beds or lawns.
  4. Adds Dimension: Different shapes, textures, and materials can add depth and interest.
  5. Boosts Property Value: Well-designed pathways elevate the overall curb appeal of your home.
  6. Integrates Functionality and Style: Pathways can double as seating areas, decorative features, or outdoor lighting displays.

With careful planning, modern pathways can merge functionality and artistry, making your garden an inviting retreat.


1. Stepping Stone Pathways

Stepping stones are a classic choice that can be modernized with creative layouts, materials, and spacing.

How to Create a Stepping Stone Pathway:

  • Materials: Concrete, natural stone, slate, or large tiles can be used.
  • Layout: Place stones in straight lines for a minimalistic look, or stagger them for a natural, flowing design.
  • Spacing: Leave enough space between stones for grass or low ground cover to grow.
  • Ground Cover Options: Moss, thyme, or creeping sedum creates a soft, green contrast around the stones.

Benefits: Stepping stone pathways are versatile, easy to install, and ideal for gardens with small spaces or irregular shapes.

Design Tip: Use geometric-shaped stones like hexagons or rectangles for a modern aesthetic.


2. Gravel and Pebble Pathways

Gravel pathways are durable, low-maintenance, and offer a contemporary, textured look. They are perfect for minimalist or Japanese-inspired gardens.

How to Build a Gravel Pathway:

  • Base Layer: Lay a weed barrier or landscape fabric to prevent weed growth.
  • Gravel Layer: Add a 2–3 inch layer of crushed stone or gravel.
  • Borders: Use metal, wood, or stone edging to define the pathway and prevent gravel migration.
  • Decorative Touch: Mix different colored pebbles or stones for a visually appealing pattern.

Benefits: Gravel paths are cost-effective, drain well, and can be installed in curved or linear designs.

Design Tip: Combine gravel with large stepping stones for added dimension and a contemporary feel.


3. Wooden Boardwalk or Decking Pathways

Wooden pathways or boardwalks bring warmth and elegance to modern gardens. They are particularly suitable for areas near ponds, water features, or sloped terrain.

Steps to Create a Wooden Pathway:

  • Material Choice: Use weather-resistant woods like teak, cedar, or composite decking.
  • Support: Install a stable base with gravel or concrete piers for durability.
  • Spacing: Leave small gaps between boards for water drainage and expansion.
  • Finishing Touches: Apply sealant or wood stain to enhance longevity and aesthetics.

Benefits: Wooden pathways create a natural, warm feel while providing a smooth, modern surface.

Design Tip: Mix horizontal and vertical plank orientations for a contemporary, patterned look.


4. Geometric or Mosaic Pathways

Geometric and mosaic pathways make a bold statement and are perfect for modern or artistic garden designs.

How to Design a Geometric Pathway:

  • Materials: Use tiles, pavers, concrete slabs, or stones in varied shapes like hexagons, triangles, or squares.
  • Pattern Options: Try herringbone, chevron, or interlocking geometric patterns.
  • Colors: Incorporate contrasting colors for a striking visual effect, or neutral tones for a sleek minimalist look.
  • Installation: Lay tiles or pavers on a compacted sand base, and fill gaps with sand or mortar.

Benefits: Geometric pathways are eye-catching, customizable, and complement contemporary garden décor.

Design Tip: Combine small mosaic tiles with larger pavers to create texture and depth.


5. Green or Grass Pathways

Grass pathways are a simple yet modern approach, blending functionality with a lush, natural aesthetic.

How to Create a Grass Pathway:

  • Design: Outline the path with edging to define the space and prevent grass from spreading.
  • Hardscape Integration: Combine grass with stone, gravel, or wood to create a hybrid modern look.
  • Plant Choice: Use hardy turfgrass or low-growing ground cover for a soft walking surface.
  • Maintenance: Mow regularly and trim edges to keep the path neat.

Benefits: Grass pathways provide a soft, eco-friendly surface and blend seamlessly with the surrounding landscape.

Design Tip: Curved grass pathways with irregular stepping stones create a natural, flowing design.


Tips for Designing a Modern Garden Pathway

  1. Plan Your Route: Consider the natural flow of your yard and traffic patterns.
  2. Choose Complementary Materials: Match pathway materials with garden style, plants, and furniture.
  3. Incorporate Lighting: Add solar lights, lanterns, or LED strips for nighttime visibility and ambiance.
  4. Add Borders: Edging with stones, metal, or plants keeps pathways defined and neat.
  5. Mix Textures: Combine wood, stone, gravel, or greenery to create depth and interest.
  6. Consider Drainage: Ensure pathways are slightly raised or sloped for water runoff.
  7. Include Rest Spots: Integrate benches or small seating areas along longer pathways.
  8. Seasonal Appeal: Use perennial plants or ground covers that look attractive year-round.
  9. Keep It Safe: Smooth surfaces for walking and non-slip finishes for wet areas.
  10. Personalize: Add sculptures, planters, or decorative stones to make the pathway unique.

These design tips ensure that your modern garden pathway is both functional and visually appealing.


Benefits of Modern Garden Pathways

  • Enhances Curb Appeal: Pathways make gardens look more organized, stylish, and inviting.
  • Defines Space: Creates clear divisions between flower beds, lawns, and functional areas.
  • Increases Property Value: Well-designed pathways are attractive to potential buyers.
  • Encourages Exploration: Guides visitors and family members through different garden features.
  • Supports Sustainable Gardening: Gravel, permeable pavers, and green pathways help manage water runoff.

Modern garden pathways balance aesthetics and practicality, elevating the overall design of your outdoor space.


Conclusion

Creating a modern garden pathway is a rewarding way to transform your outdoor space. From stepping stones and gravel pathways to wooden boardwalks, geometric designs, and lush grass paths, each option provides a unique combination of style, functionality, and charm.

When planning your pathway, consider your garden layout, the materials you prefer, and the type of plants you want to integrate. Combining texture, color, and creativity ensures that your pathway becomes a striking feature that enhances both movement and aesthetics.

Whether you want a minimalist stepping stone trail, a geometric mosaic walkway, or a soft green path through your yard, modern garden pathways allow you to make a lasting impression while optimizing your outdoor space. With careful planning and design, your garden pathway can become a central element of your landscape, guiding visitors and creating a serene, visually stunning environment for all seasons.

5 Backyard Garden Layouts That Maximize Space

5 Backyard Garden Layouts That Maximize Space

Creating a backyard garden is a wonderful way to bring beauty, food, and tranquility into your outdoor space. But if your yard is small or oddly shaped, making the most of every square foot can be a challenge. The key to a productive and attractive backyard garden lies in smart planning and space-maximizing layouts.

In this guide, we’ll explore five backyard garden layouts that help you grow more in less space, enhance aesthetics, and create an organized, efficient garden that suits your lifestyle.


1. Raised Bed Garden Layout

Raised beds are a classic and highly effective layout for maximizing space in your backyard garden. They allow you to grow more plants in a smaller footprint and improve soil quality.

Key Features:

  • Beds are usually 3–4 feet wide and any length desired.
  • Soil depth is sufficient for root vegetables, herbs, and flowers.
  • Pathways between beds provide easy access without compacting soil.

Benefits:

  • Better drainage and soil quality: Raised beds prevent waterlogging and are easier to amend.
  • Efficient planting: You can plant densely without crowding roots.
  • Easy maintenance: Less bending, weeding, and pest control is easier.

Tips for Maximum Space:

  • Use square-foot gardening: Plant a grid of 1-foot squares to maximize yield.
  • Stack companion plants: Plant tall crops like tomatoes with low-growing herbs beneath.
  • Include vertical supports for vining plants like cucumbers or beans.

Visual Idea: Think of raised beds as mini-gardens within your garden, each with its own ecosystem.


2. Vertical Garden Layout

Vertical gardening is perfect for small yards or urban spaces. By using walls, trellises, and vertical planters, you can grow more without needing extra ground space.

Key Features:

  • Wall-mounted planters, hanging baskets, or vertical towers.
  • Trellises for climbing plants like peas, beans, or tomatoes.
  • Multi-tiered shelving or pallet gardens for herbs and small vegetables.

Benefits:

  • Maximizes vertical space while keeping pathways clear.
  • Adds visual interest with layers and height variations.
  • Improves air circulation, reducing fungal issues.

Tips for Maximum Space:

  • Rotate plants to ensure sunlight reaches each layer.
  • Use lightweight soil mixes in containers to reduce strain on vertical structures.
  • Combine decorative plants with edible ones for a functional and aesthetic wall.

Visual Idea: Imagine a living wall with cascading herbs and vegetables that are easy to harvest and care for.


3. Raised Circle or Keyhole Garden Layout

For a unique and highly efficient layout, consider a circular or keyhole garden. This layout is ideal for maximizing planting area while minimizing pathways.

Key Features:

  • Plants grow in a circular pattern around a central point, such as a compost bin or small fountain.
  • A keyhole path allows access to all parts of the garden without stepping on soil.
  • Raised edges or mounds create better drainage.

Benefits:

  • Efficient space use: Every inch is within easy reach.
  • Supports diverse planting: Mix vegetables, herbs, and flowers.
  • Encourages compost recycling: Central compost nourishes surrounding plants.

Tips for Maximum Space:

  • Place taller plants in the center and shorter plants around the edge.
  • Incorporate companion planting to boost productivity and pest resistance.
  • Water efficiently with drip irrigation to reach all areas evenly.

Visual Idea: Picture a spiral or round garden that’s both decorative and productive, perfect for small backyard corners.


4. Raised Bed with Vertical Trellis Layout

This layout combines raised beds and vertical structures for maximum output in limited space. It’s especially useful for backyard vegetable gardens.

Key Features:

  • Rectangular raised beds with vertical trellises along one side.
  • Climbing plants (like cucumbers, squash, or beans) grow upward, saving ground space.
  • Companion plants occupy the lower bed area.

Benefits:

  • Dual-level growing: Ground-level crops and vertical vines maximize planting area.
  • Easy access and maintenance along one side of the bed.
  • Attractive, organized layout that enhances backyard aesthetics.

Tips for Maximum Space:

  • Orient trellises north-south to minimize shading of lower crops.
  • Use sturdy materials like bamboo or metal for vertical supports.
  • Include fast-growing leafy greens beneath slower-growing vines.

Visual Idea: Think of a layered garden with cucumbers climbing trellis towers and lettuce, carrots, or herbs thriving below.


5. Container and Portable Garden Layout

Container gardening is highly flexible and allows you to maximize space on patios, decks, or compact backyard areas. Portable containers can also be rearranged for optimal sunlight or aesthetics.

Key Features:

  • Use pots, planters, or grow bags of varying sizes.
  • Group containers by plant type or water requirements.
  • Stack containers on shelves or pallets to create vertical layers.

Benefits:

  • Ideal for small or irregularly shaped spaces.
  • Easier to control soil quality and drainage.
  • Can move plants indoors during harsh weather or pests outbreaks.

Tips for Maximum Space:

  • Combine tall and trailing plants in the same container for layered growth.
  • Choose self-watering containers to reduce maintenance.
  • Rotate containers to ensure all plants receive adequate sunlight.

Visual Idea: A backyard patio filled with colorful containers, vertical planters, and hanging baskets, creating a lush, productive mini-garden.


Additional Tips to Maximize Backyard Garden Space

  1. Succession Planting: Replace harvested crops quickly with new seeds to keep beds productive.
  2. Companion Planting: Mix plants that benefit each other to save space and boost yield.
  3. Intercropping: Plant fast-growing crops like radishes alongside slower-growing plants like tomatoes.
  4. Prune Regularly: Keep plants healthy and prevent overcrowding.
  5. Use Pathways Wisely: Narrow, functional paths free up more planting space without limiting access.

Tip: Planning your garden on paper first helps you visualize the most efficient layout for your backyard.


Conclusion

Maximizing space in your backyard garden is all about smart planning, vertical utilization, and efficient layouts. Whether you choose:

  • Raised beds,
  • Vertical walls,
  • Circular or keyhole gardens,
  • Layered trellis layouts, or
  • Portable container setups,

…each method allows you to grow more plants, improve aesthetics, and maintain a healthy garden even in limited space.

By combining these layouts with succession planting, companion planting, and careful maintenance, you can turn your backyard into a productive, beautiful, and highly functional garden.

How to Identify and Treat Root Rot Fast

How to Identify and Treat Root Rot Fast

Root rot is one of the most devastating issues a gardener can face. It silently attacks the roots of your plants, reducing their ability to absorb water and nutrients, eventually leading to wilting, stunted growth, and even plant death. Whether you’re growing vegetables, houseplants, or ornamentals, early identification and prompt treatment are crucial to save your plants from root rot.

In this guide, we’ll cover how to recognize root rot, understand its causes, and take fast, effective measures to treat and prevent it.


What is Root Rot?

Root rot is a disease that affects the root system of plants, primarily caused by soil-borne fungi such as Phytophthora, Pythium, and Fusarium. These pathogens thrive in overly wet soil conditions, often developing when drainage is poor or watering is excessive.

Key Characteristics of Root Rot:

  • Roots become brown, mushy, and foul-smelling.
  • Plant growth slows or stops, even with adequate sunlight and nutrients.
  • Leaves may yellow, wilt, or drop prematurely.
  • Stems near the soil line may appear discolored or soft.

Understanding the early signs of root rot allows you to take immediate action before the disease spreads too far.


Causes of Root Rot

Root rot is primarily linked to environmental and cultural factors. Knowing the causes helps gardeners prevent future infections.

Common Causes Include:

  1. Overwatering: Excess water saturates the soil, depriving roots of oxygen and creating a breeding ground for fungi.
  2. Poor drainage: Heavy clay soils or compacted pots prevent water from flowing away.
  3. Infected soil or tools: Fungal spores can spread through contaminated soil, pots, or pruning tools.
  4. Crowded planting: Lack of space reduces airflow and traps moisture around roots.
  5. Low temperatures: Cold, wet conditions slow plant metabolism, making roots more vulnerable.

Tip: Even healthy plants can develop root rot if environmental conditions are favorable for fungal growth.


How to Identify Root Rot Early

Early detection is key to saving affected plants. Watch for these warning signs:

Above-Ground Symptoms:

  • Yellowing or wilting leaves despite adequate watering
  • Drooping stems and poor growth
  • Leaf drop or discoloration, often starting from lower leaves

Below-Ground Symptoms:

  • Discolored roots: Healthy roots are white or light tan; rotting roots turn brown or black.
  • Soft or mushy texture: Gently squeeze roots; mushiness indicates rot.
  • Foul smell: A sour or decaying odor signals fungal infection.

Tip: Always inspect the root system if your plant shows unexplained wilting or yellowing. Catching root rot early gives you a better chance to save the plant.


Fast Treatment Options for Root Rot

Once root rot is identified, immediate action is crucial. The following steps can help you treat affected plants:

1. Remove the Plant from Soil

Carefully take the plant out of its pot or ground to inspect the roots. Shake off excess soil to see the full extent of the damage.

2. Trim Affected Roots

  • Use clean, sharp scissors or pruning shears to remove all brown, black, or mushy roots.
  • Cut back to healthy, firm roots that are white or light tan.
  • Sterilize your tools before and after use to prevent spreading the fungus.

3. Treat with Fungicide or Natural Remedies

  • Fungicides: Apply a suitable fungicide labeled for root rot to protect remaining roots.
  • Natural alternatives: Cinnamon powder can act as a natural antifungal; dip roots lightly before replanting.

4. Repot in Fresh, Well-Draining Soil

  • Choose a clean pot with proper drainage holes.
  • Use a fresh, sterile potting mix or soil amended with perlite or sand to improve drainage.
  • Avoid planting in the same contaminated soil to prevent reinfection.

5. Adjust Watering Practices

  • Water only when the top inch of soil feels dry.
  • Avoid letting water pool at the bottom of pots or beds.
  • Use pots with drainage holes or raised beds to improve soil aeration.

6. Improve Environmental Conditions

  • Provide good airflow around plants.
  • Keep plants in a location with appropriate light and temperature.
  • Avoid overcrowding, which can trap moisture around roots.

Prevention is Better Than Cure

Preventing root rot is far easier than treating it. Here are key strategies:

1. Choose Well-Draining Soil

  • Mix perlite, sand, or coarse compost into garden beds or pots to improve drainage.
  • Avoid heavy clay soils that retain water.

2. Proper Watering

  • Water deeply but infrequently, allowing the soil to dry between watering.
  • Avoid overhead watering on leaves that may drip to roots.

3. Use Clean Pots and Tools

  • Sterilize pots, trays, and tools before planting.
  • Avoid reusing contaminated soil without proper sterilization.

4. Select Resistant Plants

  • Some plants are naturally resistant to root rot pathogens. Research varieties suited for your climate and soil.

5. Monitor Plants Regularly

  • Inspect roots and leaves frequently.
  • Early detection allows for quick action, preventing widespread damage.

Signs Your Treatment is Working

After treating root rot, monitor your plant carefully. Positive indicators include:

  • New growth on leaves or stems
  • Firm, healthy roots developing at the base
  • Leaves remaining green and upright
  • No foul odor from the soil

Tip: Recovery may take several weeks. Be patient and maintain proper care during this period.


Conclusion

Root rot is a serious but manageable plant disease. By understanding its causes, recognizing early symptoms, and taking immediate action, you can save many plants from permanent damage.

Key Takeaways:

  • Early detection is essential—inspect roots when leaves yellow or wilt unexpectedly.
  • Remove infected roots and repot in fresh, well-draining soil.
  • Adjust watering and environmental conditions to prevent recurrence.
  • Use fungicides or natural remedies to protect remaining roots.
  • Preventive care, including proper soil, spacing, and hygiene, is the best long-term strategy.

With vigilance, proper care, and fast intervention, you can protect your plants from root rot and enjoy a healthy, thriving garden year-round.