नई तकनीक: प्लास्टिक बैग में आलू उगाने का आसान तरीका – घर पर पाएं बड़े, गोल और स्वादिष्ट आलू

नई तकनीक: प्लास्टिक बैग में आलू उगाने का आसान तरीका – घर पर पाएं बड़े, गोल और स्वादिष्ट आलू

आलू (Potato) एक ऐसी सब्ज़ी है जो हर भारतीय रसोई की जान है। इसे आप सब्ज़ियों, पराठों, स्नैक्स, या किसी भी व्यंजन में आसानी से इस्तेमाल कर सकते हैं। लेकिन क्या आपने कभी सोचा है कि आप घर पर ही अपने आलू उगा सकते हैं — वो भी प्लास्टिक बैग में?
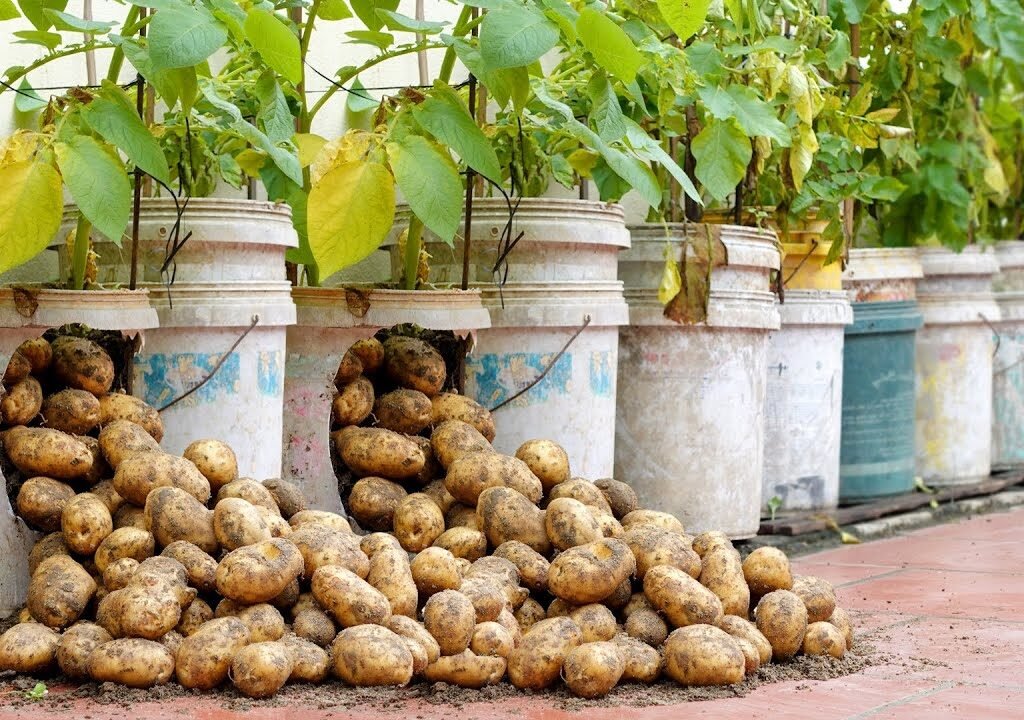
जी हाँ! आज हम आपको बताएंगे प्लास्टिक बैग में आलू उगाने की नई तकनीक (New Technique), जिससे आप बिना खेत या बड़े गार्डन के भी घर पर बड़ी और गोल आलू की फसल उगा सकते हैं।

यह तरीका न केवल आसान है, बल्कि कम जगह और मेहनत में ज्यादा उपज देता है। तो चलिए जानते हैं स्टेप बाय स्टेप कि आप कैसे घर पर आलू उगा सकते हैं और पूरे साल ताज़ा आलू का आनंद ले सकते हैं।


चरण 1: सही आलू का चुनाव करें (Choose the Right Potato Variety)

आलू की कई किस्में होती हैं, लेकिन घर पर उगाने के लिए आपको बीज आलू (seed potatoes) या अंकुरित आलू (sprouted potatoes) की आवश्यकता होगी।
आप ये किसी नर्सरी या स्थानीय बाजार से ले सकते हैं।

कुछ बेहतरीन किस्में हैं:

  • कुफरी ज्योति (Kufri Jyoti) – जल्दी बढ़ने वाली किस्म
  • कुफरी बहार (Kufri Bahar) – हर मौसम में उपयुक्त
  • कुफरी आलंक (Kufri Alank) – बड़े और गोल आलू के लिए
  • रेड पोंटीएक (Red Pontiac) – कंटेनर या बैग में उगाने के लिए बढ़िया

ध्यान दें कि जो आलू आप चुनें, उनमें कम से कम 2–3 “eyes” (अंकुर बिंदु) हों, क्योंकि इन्हीं से नए पौधे निकलते हैं।


चरण 2: आलू की तैयारी करें (Prepare the Seed Potatoes)

आलू लगाने से पहले उन्हें तैयार करना जरूरी है ताकि अंकुर तेजी से निकलें और पौधे मजबूत बनें।

  • आलू को छोटे-छोटे टुकड़ों में काटें (हर टुकड़े में 2–3 आंखें हों)।
  • कटे हुए हिस्सों को 1–2 दिन तक सूखने दें ताकि कटिंग्स सड़ें नहीं।
  • चाहें तो आप उन्हें हल्के फफूंदनाशक (fungicide) या नीम पाउडर में डुबो सकते हैं।

यह प्रक्रिया आलू को रोगों से बचाती है और अंकुरण को तेज करती है।


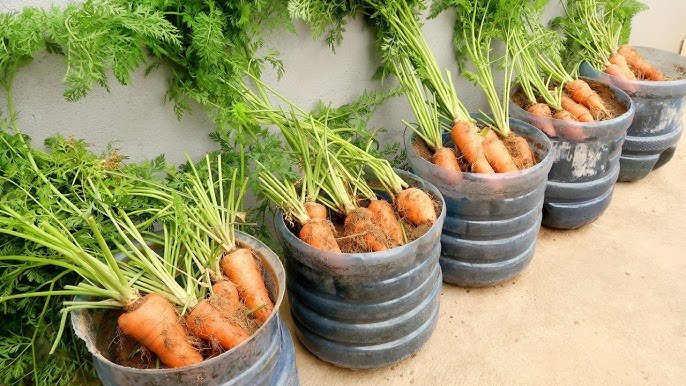
चरण 3: सही प्लास्टिक बैग का चयन करें (Choose the Right Plastic Bag)

अब आती है सबसे महत्वपूर्ण चीज़ — बैग का चुनाव
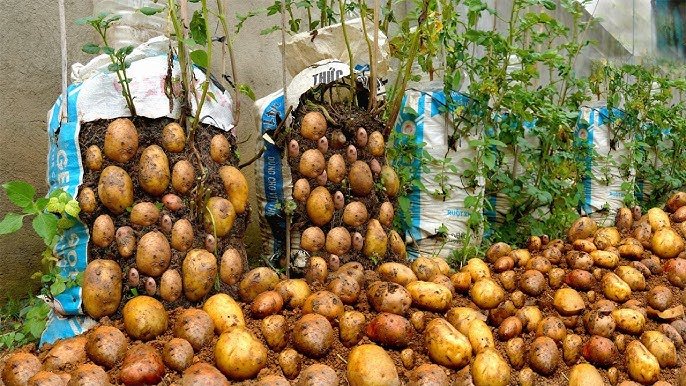
आप चाहें तो बाजार से विशेष “grow bags” खरीद सकते हैं या फिर पुराने प्लास्टिक फीड बैग (चावल, गेहूं या सीमेंट के खाली बैग) का इस्तेमाल कर सकते हैं।

बैग का चयन करते समय ध्यान दें:

  • बैग कम से कम 40–50 सेमी गहरा हो।
  • नीचे की ओर 4–5 छोटे छेद बना लें ताकि अतिरिक्त पानी निकल सके।
  • यदि संभव हो तो बैग के अंदर थोड़ी नारियल की भूसी (coco peat) डालें ताकि मिट्टी हल्की और हवादार बने।

चरण 4: मिट्टी तैयार करें (Prepare the Soil Mix)

आलू को हल्की, जलनिकासी वाली और जैविक मिट्टी पसंद है।
प्लास्टिक बैग में मिट्टी का मिश्रण इस प्रकार तैयार करें:

  • 50% गार्डन सॉइल (garden soil)
  • 30% जैविक खाद (compost या वर्मी कंपोस्ट)
  • 20% रेत या कोकोपीट (coco peat)

इस मिश्रण को अच्छी तरह मिलाएं और बैग में भरें — परंतु केवल आधा ही भरें।
बाकी जगह बाद में पौधे के बढ़ने के साथ मिट्टी भरने के लिए खाली छोड़ दें।


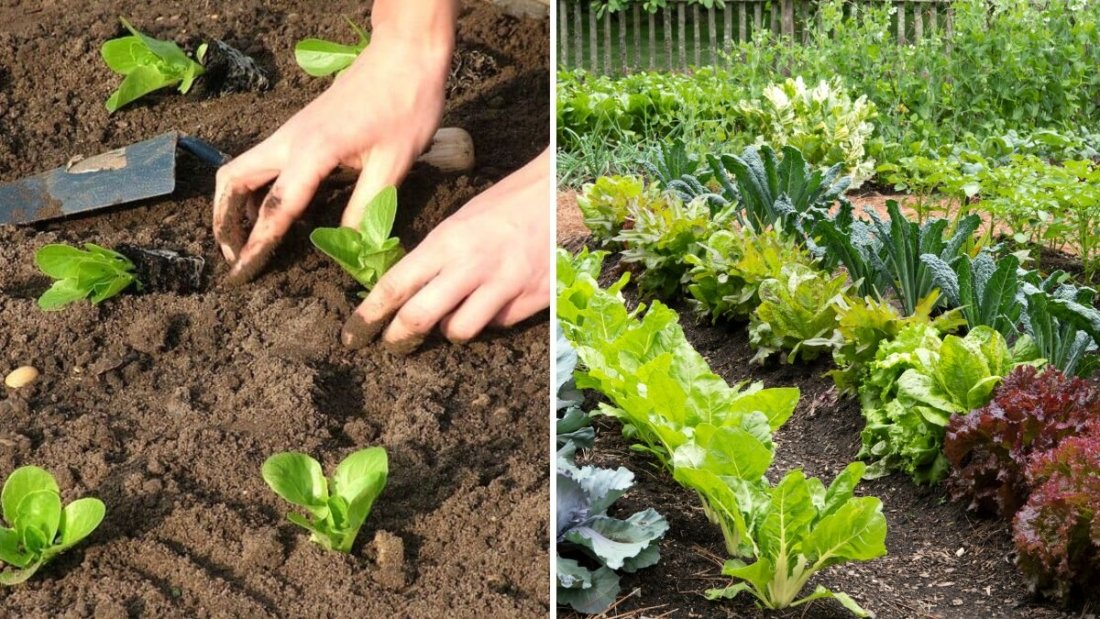
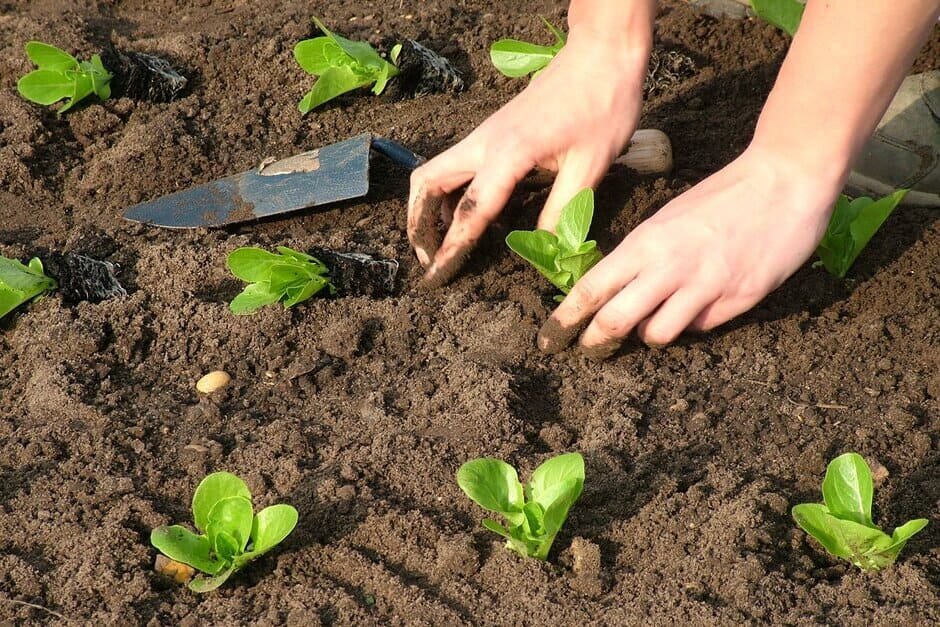
चरण 5: बीज आलू लगाना (Planting the Potatoes)

अब समय है बीज आलू लगाने का।

  • तैयार आलू के टुकड़ों को मिट्टी की सतह पर रखें (अंकुर ऊपर की ओर रहें)।
  • हर टुकड़े के बीच लगभग 15 सेंटीमीटर की दूरी रखें।
  • ऊपर से लगभग 5–7 सेमी मिट्टी की परत डालें।
  • हल्के हाथों से दबाकर मिट्टी को समतल कर दें और पानी छिड़क दें।

अब आपका आलू का बैग तैयार है। इसे ऐसी जगह रखें जहाँ प्रतिदिन 5–6 घंटे धूप आती हो।


चरण 6: सिंचाई और देखभाल (Watering and Care)

आलू को नमी पसंद है, लेकिन पानी का ठहराव बिल्कुल नहीं।

  • जब मिट्टी की ऊपरी परत सूखी लगे, तभी पानी दें।
  • ध्यान रखें कि बैग में पानी जमा न हो, वरना जड़ें सड़ जाएंगी।
  • आप चाहें तो पानी देने के लिए स्प्रे बोतल या पाइप का हल्का प्रेशर इस्तेमाल करें।

साथ ही, हर 15 दिन में थोड़ा जैविक खाद या तरल गोबर खाद डालें ताकि पौधों को पोषण मिलता रहे।


चरण 7: मिट्टी बढ़ाते रहें (Hilling Process)

जब आलू के पौधे लगभग 15–20 सेंटीमीटर ऊँचे हो जाएं, तो उनके आसपास थोड़ा और मिट्टी भर दें — इसे “हिलिंग (Hilling)” कहते हैं।

इस प्रक्रिया के फायदे:

  • नई जड़ें बनने में मदद मिलती है।
  • आलू मिट्टी के नीचे ही विकसित होते हैं और हरे नहीं पड़ते।
  • पौधे ज्यादा मजबूत बनते हैं।

हर 2–3 हफ्ते में यह प्रक्रिया दोहराएं, जब तक बैग पूरी तरह मिट्टी से भर न जाए।


चरण 8: धूप और तापमान का ध्यान रखें (Sunlight and Temperature)

आलू को ठंडा और मध्यम तापमान (15–25°C) पसंद है।

  • सर्दी या शुरुआती बसंत (विंटर-एंड, स्प्रिंग) आलू लगाने का सबसे अच्छा समय है।
  • गर्मी में उगाते समय बैग को छाया जाल (shade net) के नीचे रखें ताकि पौधे झुलसें नहीं।
  • आलू के पौधों को रोजाना कम से कम 5 घंटे सीधी धूप मिलनी चाहिए।

चरण 9: कीट और रोग नियंत्रण (Pest and Disease Management)

आलू के पौधों पर कभी-कभी कीट और फफूंदी का हमला हो सकता है।
रासायनिक दवाइयों की बजाय ये प्राकृतिक उपाय अपनाएं:

  • नीम तेल (neem oil) का स्प्रे हर 10 दिन में करें।
  • लहसुन-पानी या अदरक के छिलके का अर्क कीटों को भगाने में मदद करता है।
  • पत्तियों पर यदि पीले धब्बे दिखें, तो तुरंत रोगग्रस्त पत्तियाँ काट दें।

यह सब प्राकृतिक तरीके पौधों को स्वस्थ और कीटनाशक-मुक्त रखते हैं।


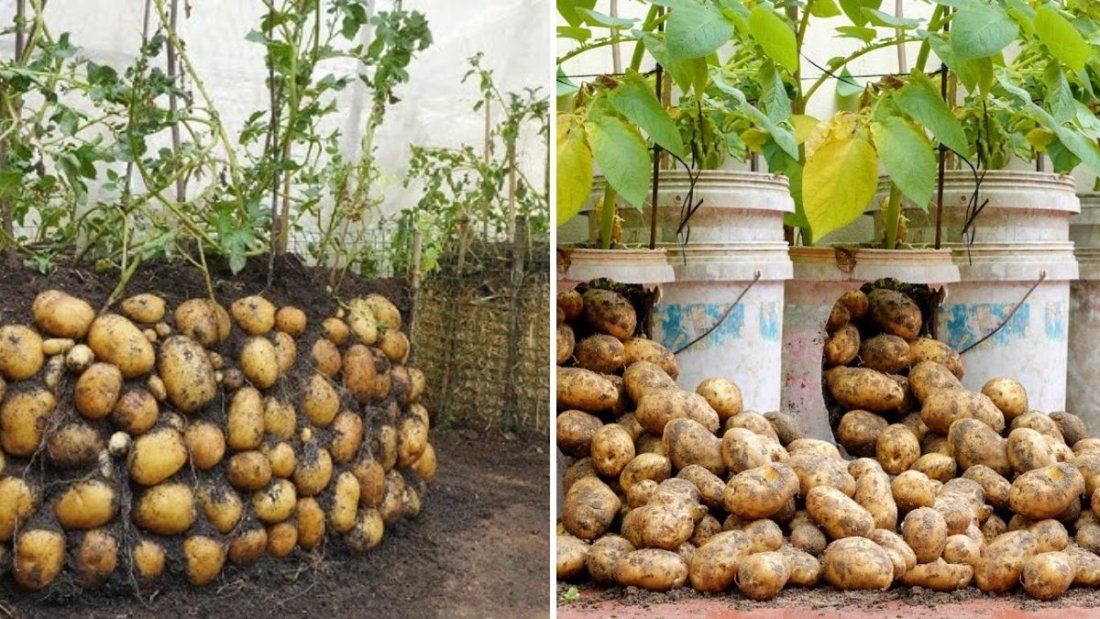
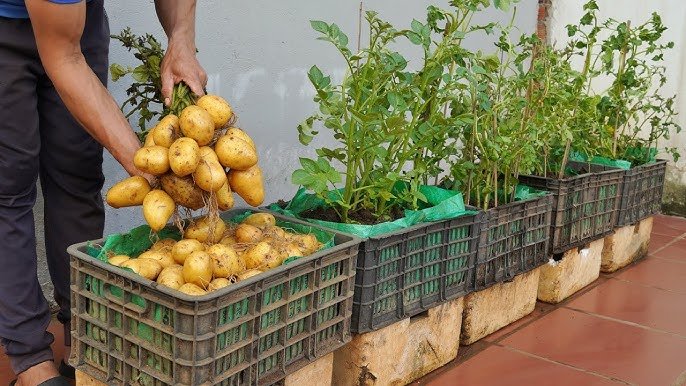
चरण 10: फसल की कटाई (Harvesting the Potatoes)

आलू की फसल आमतौर पर 70–90 दिनों में तैयार होती है।
जब पौधों की पत्तियाँ पीली पड़ने लगें और सूखने लगें, तो समझिए आलू तैयार हैं।

कटाई के लिए:

  1. पहले पानी देना बंद करें ताकि मिट्टी सूख जाए।
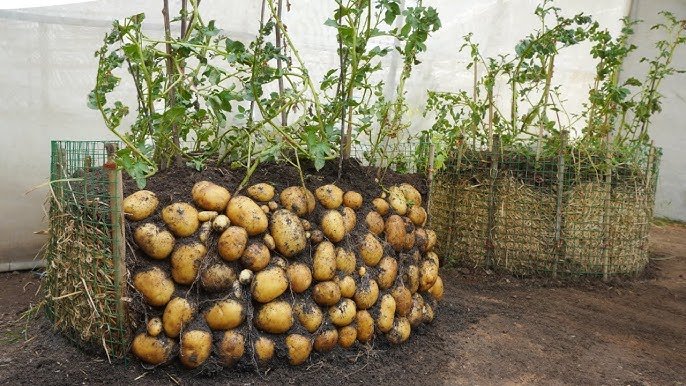
  2. बैग को उल्टा करें या धीरे-धीरे मिट्टी निकालें।
  3. हाथ से मिट्टी हटाते हुए आलू निकालें।

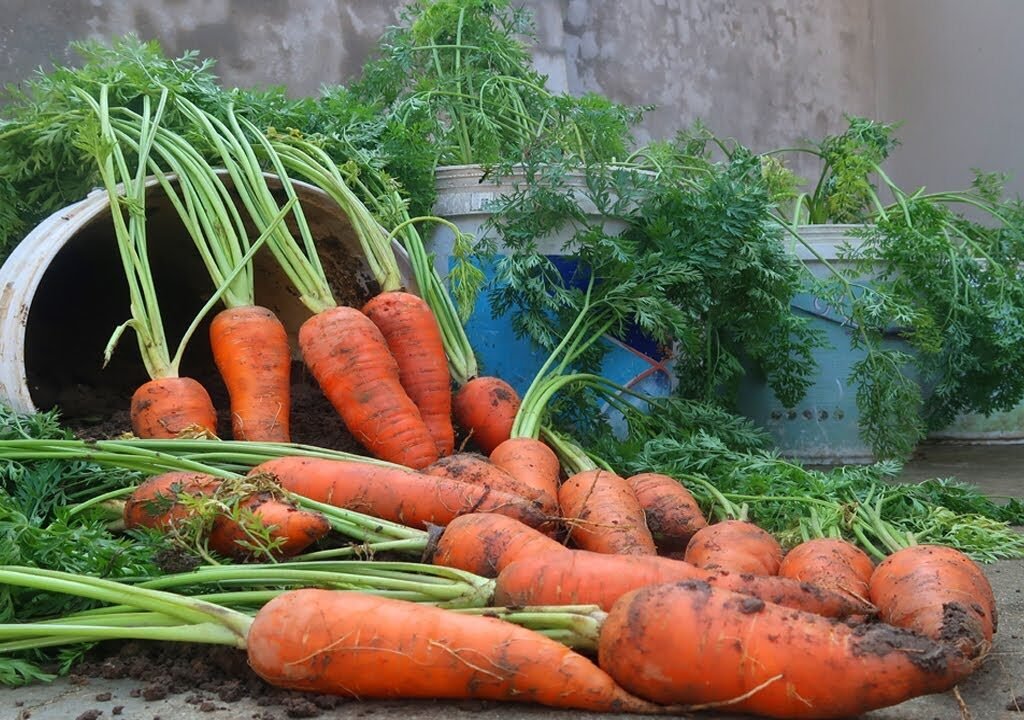
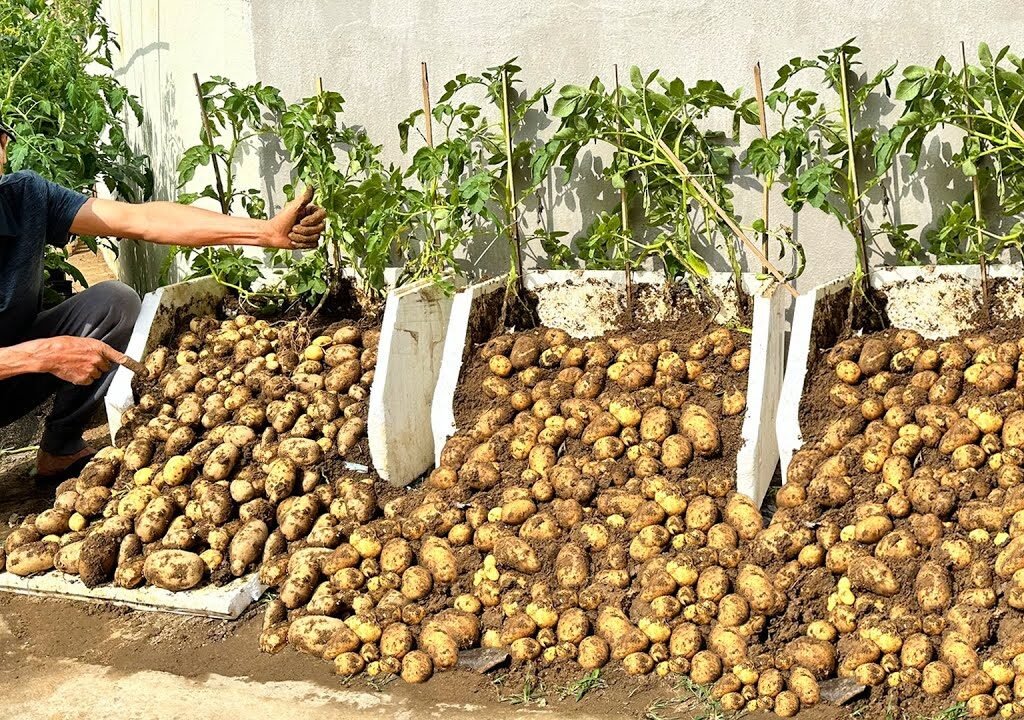
आपको आश्चर्य होगा कि इतने छोटे बैग से बड़े, गोल और ताजे आलू कितनी आसानी से निकल आते हैं।


चरण 11: आलू का भंडारण (Storage Tips)

  • आलू को धोने से पहले छाया में 2–3 घंटे सूखने दें
  • सूखने के बाद ठंडी, अंधेरी जगह या जूट बैग में रखें।
  • फ्रिज में आलू रखने से बचें, क्योंकि इससे उनका स्वाद बदल जाता है।

अगर आप उन्हें लंबे समय तक रखना चाहते हैं, तो सूखे आलू को रेत में दबाकर ठंडी जगह पर रख सकते हैं।


अतिरिक्त सुझाव (Extra Tips for Success)

  1. हर मौसम में आलू उगाने के लिए:
    अगर आप पूरे साल आलू उगाना चाहते हैं, तो बरसात और गर्मी में बैग को छाया वाली जगह रखें और नियमित सिंचाई करें।
    सर्दियों में सीधी धूप सबसे ज़रूरी होती है।
  2. जैविक खाद का उपयोग करें:
    गोबर की खाद, कम्पोस्ट, या वर्मी कम्पोस्ट मिट्टी की उर्वरता बढ़ाते हैं और आलू को मीठा स्वाद देते हैं।
  3. छोटे स्थानों के लिए उपयुक्त:
    यदि आपके पास जगह कम है — जैसे बालकनी, छत या छोटी गैलरी — तो यह तरीका आपके लिए सबसे उपयुक्त है।
  4. मिट्टी पुनः उपयोग न करें:
    फसल के बाद मिट्टी को दोबारा उपयोग में न लाएं, क्योंकि उसमें कीट या रोगाणु रह सकते हैं।

निष्कर्ष

प्लास्टिक बैग में आलू उगाना न केवल एक नवीन और उपयोगी तकनीक है, बल्कि यह कम लागत और अधिक उत्पादन देने वाला तरीका भी है।
आपको सिर्फ थोड़ी सी जगह, अच्छी मिट्टी, धूप और धैर्य की जरूरत होती है।

घर पर उगाए गए आलू बाजार के आलू से कहीं ज़्यादा स्वादिष्ट, रसायन-मुक्त और सेहतमंद होते हैं।
तो अब देर मत कीजिए —
एक पुराना प्लास्टिक बैग लें, बीज आलू लगाएं और कुछ ही हफ्तों में अपने हाथों से उगाई ताज़ी, बड़ी और गोल आलू की फसल का आनंद उठाइए!

create 1200 words blog post & title in hindi from english youtube video title " "

घर पर गाजर उगाने का आसान तरीका: हर मौसम में ताज़ी और साफ़ गाजर पाने की सम्पूर्ण गाइड

गाजर एक ऐसी जड़ वाली सब्ज़ी है जो न केवल स्वादिष्ट होती है बल्कि पोषक तत्वों से भरपूर भी होती है। इसमें विटामिन A, बीटा-कैरोटीन, फाइबर और कई अन्य आवश्यक पोषक तत्व पाए जाते हैं जो हमारी आंखों, त्वचा और समग्र स्वास्थ्य के लिए बेहद फायदेमंद हैं।
अगर आप सोचते हैं कि गाजर केवल खेतों या बड़े बगीचों में ही उगाई जा सकती है, तो ऐसा बिल्कुल नहीं है। थोड़ी सी देखभाल और सही तरीके से अगर आप घर पर गाजर उगाते हैं, तो हर मौसम में ताज़ी, साफ़ और ऑर्गेनिक गाजर आसानी से खा सकते हैं।

आज हम आपको बताएंगे घर पर गाजर उगाने के 6 आसान कदम, जिनसे आप बिना किसी कठिनाई के अपने गार्डन या बालकनी में गाजर की भरपूर फसल ले सकते हैं।


चरण 1: सही किस्म (Variety) का चयन करें

गाजर की कई किस्में होती हैं — कुछ लम्बी, कुछ छोटी और गोल आकार की।
अगर आप घर या गमले में उगाना चाहते हैं, तो छोटी और मध्यम आकार की किस्में सबसे बेहतर रहती हैं, जैसे:

  • नांतेस (Nantes Carrots) – मीठी और सीधी गाजर
  • शॉर्ट एंड स्वीट (Short and Sweet) – छोटे कंटेनर के लिए उपयुक्त
  • इम्परेटर (Imperator) – थोड़ी लंबी परन्तु मुलायम गाजर
  • डैनवर्स (Danvers) – कठोर मिट्टी में भी उग जाती है

घर पर उगाने के लिए नांतेस या शॉर्ट एंड स्वीट सबसे अच्छे विकल्प हैं क्योंकि इनकी जड़ें गहरी नहीं जातीं और गमले में आराम से बढ़ती हैं।


चरण 2: मिट्टी की तैयारी करें (Soil Preparation)

गाजर की अच्छी फसल के लिए ढीली, भुरभुरी और जैविक पदार्थों से भरपूर मिट्टी की आवश्यकता होती है।
मिट्टी अगर सख्त या चिकनी है, तो गाजर टेढ़ी-मेढ़ी बन जाती है। इसलिए मिट्टी को तैयार करते समय निम्न बातों का ध्यान रखें:

  • बगीचे की मिट्टी में रेत और जैविक खाद (compost) मिलाएं ताकि यह मुलायम और हवादार बने।
  • मिट्टी का pH 6 से 6.8 के बीच होना चाहिए।
  • यदि आप गमले में उगा रहे हैं, तो मिट्टी का मिश्रण इस तरह बनाएं:
    • 40% गार्डन सॉइल
    • 40% रेत
    • 20% कंपोस्ट

मिट्टी को बुवाई से पहले अच्छी तरह गीला कर लें और बड़े पत्थर या लकड़ी के टुकड़े निकाल दें ताकि जड़ों को बढ़ने में कोई रुकावट न हो।


चरण 3: बीज बोना (Sowing Seeds)

गाजर के बीज बहुत बारीक होते हैं, इसलिए उन्हें ध्यान से बोना पड़ता है।
इन बातों का ध्यान रखें:

  • बीजों को हल्का-सा पानी में 3–4 घंटे भिगोकर रखें ताकि अंकुरण जल्दी हो।
  • बीजों को लगभग 1 सेंटीमीटर गहराई पर बोएं।
  • दो बीजों के बीच 2–3 सेंटीमीटर की दूरी रखें ताकि पौधों को फैलने की जगह मिले।
  • ऊपर से हल्की मिट्टी की परत डालें और स्प्रे बोतल से पानी छिड़कें

गमले या ट्रे को ऐसी जगह रखें जहाँ धूप 5–6 घंटे तक आती हो। लगभग 7–10 दिनों में छोटे पौधे दिखाई देने लगेंगे।


चरण 4: सिंचाई और धूप का ध्यान रखें (Watering and Sunlight)

गाजर को नियमित नमी की ज़रूरत होती है, लेकिन अत्यधिक पानी जड़ों को सड़ा सकता है। इसलिए सिंचाई करते समय सावधानी बरतें।

  • जब मिट्टी की ऊपरी सतह सूखी लगे, तभी पानी दें।
  • पानी हमेशा स्प्रे के रूप में दें ताकि मिट्टी धुल न जाए।
  • पौधों को रोजाना कम से कम 5–6 घंटे धूप मिलनी चाहिए।
  • गर्मी के मौसम में हल्की छाया में रखें ताकि पौधों को जलन न हो।

अगर आप हर रोज़ थोड़ा ध्यान रखेंगे, तो पौधे जल्दी मजबूत होंगे और गाजर की जड़ें सीधी और मोटी बनेंगी।


चरण 5: पौधों की देखभाल और खाद देना (Care and Feeding)

जैसे-जैसे पौधे बढ़ते हैं, कुछ खास देखभाल जरूरी होती है:

  • जब पौधे 5–6 सेंटीमीटर के हो जाएं, तो बहुत पास-पास उगे पौधों को पतला (thinning) कर दें।
    यानी एक पौधे के बीच लगभग 5 सेंटीमीटर की दूरी रखें।
  • हर 15–20 दिन में जैविक खाद (जैसे वर्मी कंपोस्ट या गोबर की खाद) डालें।
  • किसी भी प्रकार के रासायनिक उर्वरक या कीटनाशक का उपयोग न करें।
  • अगर कीट लग जाएं, तो नीम तेल का स्प्रे करें — यह प्राकृतिक और सुरक्षित तरीका है।

गाजर को कीटों से बचाने के लिए आप गाजर के पास प्याज या लहसुन भी लगा सकते हैं; ये प्राकृतिक रूप से कीटों को दूर रखते हैं।


चरण 6: फसल की कटाई (Harvesting)

गाजर की फसल आमतौर पर 70–90 दिनों में तैयार हो जाती है, लेकिन यह किस्म और मौसम पर निर्भर करता है।

जब गाजर की पत्तियाँ घनी हरी हो जाएं और मिट्टी से ऊपर थोड़ी गाजर दिखने लगे, तो यह संकेत है कि फसल तैयार है

कटाई के तरीके:

  • पहले मिट्टी को हल्का गीला करें।
  • फिर गाजर की पत्तियों को धीरे से पकड़कर हल्के हाथों से बाहर खींचें।
  • गाजर निकालने के बाद मिट्टी झाड़ दें और धोकर सूखने दें।

अगर आप एक साथ सारी गाजर नहीं निकालना चाहते, तो ज़रूरत के अनुसार हर कुछ दिनों में निकाल सकते हैं। इससे बाकी गाजरें और भी बड़ी हो जाएंगी।


अतिरिक्त सुझाव (Extra Tips for Success)

  1. हर मौसम में गाजर उगाने के लिए:
    गाजर ठंडे मौसम में तेजी से बढ़ती है, पर अगर आप हर सीजन में उगाना चाहते हैं, तो गर्मियों में छाया जाल (shade net) का उपयोग करें और मिट्टी को हमेशा नम रखें।
  2. गाजर के साथ अन्य पौधे लगाना:
    गाजर के साथ टमाटर, प्याज, लहसुन या सलाद पत्ता उगाना अच्छा रहता है। इससे मिट्टी की उर्वरता भी बनी रहती है।
  3. कीट और रोग नियंत्रण:
    • नीम का तेल या घर का बना लहसुन-पानी का स्प्रे उपयोग करें।
    • बहुत अधिक नमी से बचें ताकि जड़ें सड़ें नहीं।
  4. गाजर का भंडारण:
    फसल काटने के बाद गाजर को ठंडी, सूखी जगह या फ्रिज में रखें।
    अगर लंबे समय तक रखना है, तो उन्हें रेत में दबाकर ठंडी जगह पर रख सकते हैं।

निष्कर्ष

घर पर गाजर उगाना वास्तव में आसान और आनंददायक प्रक्रिया है। आपको बस सही मिट्टी, नियमित पानी और थोड़ी सी धूप की जरूरत होती है।
जब आप अपनी मेहनत से उगाई हुई गाजर खाते हैं, तो उसका स्वाद और भी बढ़ जाता है क्योंकि उसमें आपकी लगन और प्यार मिला होता है।

तो अब देर न करें —
एक छोटा सा गमला लें, बीज डालें और हर मौसम में ताज़ी, ऑर्गेनिक गाजर का आनंद लें!

7-Step Guide to Preparing Soil for Vegetable Gardens

7-Step Guide to Preparing Soil for Vegetable Gardens

A thriving vegetable garden starts from the ground up — quite literally. No matter how carefully you choose your plants, water them, or care for them, your vegetables will never reach their full potential if the soil isn’t properly prepared. Healthy soil is the foundation of a productive garden, teeming with nutrients, organic matter, and beneficial organisms that help your vegetables grow strong and delicious.

Whether you’re starting a brand-new garden bed or rejuvenating an old one, this 7-step guide to preparing soil for vegetable gardens will help you create the perfect growing environment for your plants — rich, well-draining, and full of life.


Step 1: Assess Your Soil Type and Condition

Before you add anything to your garden, you need to know what you’re working with. Different soil types hold water, nutrients, and air differently — and understanding yours is the first step to improving it.

Common Soil Types:

  • Clay Soil: Dense and sticky when wet, hard when dry. It holds water well but drains poorly. Great for moisture retention, but roots may struggle to breathe.
  • Sandy Soil: Gritty and loose; drains quickly but doesn’t retain nutrients well.
  • Silty Soil: Smooth and soft; holds water better than sandy soil and contains more nutrients.
  • Loamy Soil: The ideal mix — a balance of clay, sand, and silt. It retains moisture yet drains well and supports healthy microbial activity.

Simple Soil Tests You Can Do at Home:

  1. The Squeeze Test: Grab a handful of moist soil and squeeze it.
    • If it crumbles easily, it’s loamy.
    • If it sticks together like clay, it’s clay-heavy.
    • If it falls apart quickly, it’s sandy.
  2. The Jar Test: Mix a cup of soil with water in a clear jar, shake it, and let it settle overnight. The layers (sand, silt, and clay) will separate, showing your soil composition.

Once you know your soil type, you can plan how to improve its structure for vegetable growth.


Step 2: Clear and Clean the Planting Area

Vegetable garden

Healthy soil needs a clean, clutter-free base. Begin by clearing your garden area of weeds, old roots, rocks, and debris.

  • Pull out weeds completely, including roots, to prevent regrowth.
  • Remove dead plant material from previous crops that might harbor pests or disease.
  • Loosen the soil using a garden fork or tiller — this helps air and water move freely.

If you’re working with raised beds or containers, clean them thoroughly before adding new soil or compost to eliminate lingering pathogens.


Step 3: Test and Adjust Soil pH

The pH level of your soil determines how well your plants can absorb nutrients. Most vegetables prefer a slightly acidic to neutral pH — between 6.0 and 7.0.

How to Test Soil pH:

  • Use an inexpensive home pH test kit or digital pH meter.
  • Alternatively, collect a soil sample and send it to a local agricultural extension or garden center for a professional test.

Adjusting pH Levels:

  • If your soil is too acidic (below 6.0), add garden lime or crushed eggshells to raise the pH.
  • If your soil is too alkaline (above 7.5), mix in elemental sulfur, pine needles, or peat moss to lower the pH.

Maintaining the right pH ensures that essential nutrients like nitrogen, phosphorus, and potassium remain available to your vegetables.


Step 4: Enrich the Soil with Organic Matter

Organic matter is the heart of healthy soil — it improves texture, water retention, drainage, and fertility.

Best Organic Additives for Vegetable Soil:

  • Compost: The gold standard for soil improvement. It adds nutrients and beneficial microbes.
  • Aged Manure: Cow, horse, or chicken manure (well-composted) boosts nitrogen levels.
  • Leaf Mold: Decomposed leaves enhance soil structure and water retention.
  • Coconut Coir or Peat Moss: Improves aeration and moisture balance, especially in sandy or clay-heavy soils.

Spread a 2–3 inch layer of compost or organic matter on top of your soil and mix it in about 6–8 inches deep using a garden fork or tiller. This step transforms lifeless dirt into nutrient-rich, living soil.


Step 5: Improve Soil Structure and Drainage

Even nutrient-rich soil can fail if it doesn’t have proper drainage or structure. Vegetables need soil that’s both moist and airy, allowing roots to expand easily.

For Clay Soil:

  • Add coarse sand, gypsum, or compost to break up compacted particles.
  • Create raised beds to improve drainage and prevent waterlogging.

For Sandy Soil:

  • Add compost, leaf mold, or aged manure to retain nutrients and moisture.
  • Use mulch to slow down evaporation.

For Poorly Draining Soil:

  • Consider installing a French drain or raised bed system.
  • Avoid stepping on wet soil — this compacts it and reduces air spaces needed for root health.

By improving soil texture and drainage, you’ll create a welcoming environment for your vegetables to establish strong roots and grow vigorously.


Step 6: Add Nutrients and Natural Fertilizers

Vegetables are heavy feeders — they extract lots of nutrients from the soil as they grow. Replenishing these nutrients is essential for sustained productivity.

Key Nutrients for Vegetable Growth:

  • Nitrogen (N): Promotes leafy green growth. Found in blood meal, fish emulsion, or compost.
  • Phosphorus (P): Supports root development and flowering. Found in bone meal or rock phosphate.
  • Potassium (K): Strengthens plant structure and boosts disease resistance. Found in wood ash, kelp meal, or greensand.

Fertilizing Tips:

  1. Mix slow-release organic fertilizer into the soil before planting.
  2. During the growing season, feed your plants every 3–4 weeks with a balanced liquid fertilizer.
  3. Always follow the recommended dosage — too much fertilizer can burn roots or upset soil balance.

For best results, alternate between compost-based feeds and liquid fertilizers to maintain both short-term and long-term soil fertility.


Step 7: Mulch and Maintain Your Soil

After preparing your soil, it’s crucial to protect all the hard work you’ve done. Mulching locks in moisture, suppresses weeds, and regulates soil temperature — creating a stable growing environment for your vegetables.

Best Mulching Materials:

  • Straw or Hay: Great for vegetable beds — keeps soil cool and moist.
  • Compost or Leaf Mold: Adds nutrients as it breaks down.
  • Grass Clippings: Use a thin layer to avoid compacting.
  • Wood Chips or Bark: Ideal for pathways or perennial beds but less suited for root crops.

Spread a 2–3 inch layer of mulch around your plants, leaving a few inches of space near the stems to prevent rot.

Ongoing Soil Maintenance:

  • Rotate crops each season to prevent nutrient depletion and pest buildup.
  • Top-dress with compost each spring to refresh organic content.
  • Avoid over-tilling, as it can disrupt beneficial soil organisms.
  • Keep soil moist but not waterlogged — consistency is key for vegetable roots.

By maintaining your soil year-round, you’ll ensure every planting season starts off strong.


Final Thoughts

Preparing your soil for a vegetable garden is more than a one-time task — it’s an ongoing process of nurturing the living ecosystem beneath your feet. When you invest time in creating nutrient-rich, well-structured soil, your plants will reward you with faster growth, higher yields, and superior flavor.

This 7-step guide simplifies the process:

  1. Understand your soil.
  2. Clear and clean the area.
  3. Balance the pH.
  4. Add organic matter.
  5. Improve drainage.
  6. Feed your plants.
  7. Protect your soil with mulch.

With each step, you’re building the foundation for a thriving vegetable garden — one that will continue to produce healthy, vibrant crops season after season.

So grab your shovel, test your soil, and start preparing — because great gardens always begin with great soil!

5 Easy Steps to Grow Spinach at Home

5 Easy Steps to Grow Spinach at Home

Fresh, vibrant, and packed with nutrients — spinach is one of the easiest and most rewarding leafy greens to grow right at home. Whether you live in an apartment, have a small balcony, or a backyard garden, spinach thrives in containers and garden beds alike. It grows quickly, takes up very little space, and rewards you with a constant supply of tender, delicious leaves for salads, smoothies, and cooking.

In this detailed guide, we’ll take you through five easy steps to grow spinach at home, from choosing the right variety to harvesting your lush green crop — even if you’re a complete beginner!


Step 1: Choose the Right Spinach Variety

The first step in growing healthy spinach is selecting the right variety for your climate and growing setup. Spinach comes in several types, each with unique characteristics that suit different conditions.

Main Types of Spinach

  1. Savoy Spinach
    • Features curly, dark green leaves with a crisp texture.
    • Best for cooler climates and outdoor gardens.
    • Popular varieties: Bloomsdale Long Standing, Regiment.
  2. Semi-Savoy Spinach
    • Slightly crinkled leaves that are easier to wash.
    • Good resistance to diseases and bolting.
    • Examples: Tyee, Indian Summer.
  3. Smooth-Leaf Spinach (Flat-leaf)
    • Smooth, tender leaves perfect for salads and cooking.
    • Grows well in containers and indoor setups.
    • Examples: Space, Red Kitten.
  4. Baby Spinach
    • Harvested early for delicate, young leaves.
    • Ideal for small gardens or containers with quick turnaround.

If you live in a warm region, look for heat-tolerant varieties like Malabar spinach (Basella alba) or New Zealand spinach, which thrive even when temperatures rise.


Step 2: Prepare the Ideal Growing Environment

Spinach prefers cool weather and rich, well-draining soil. It can be grown easily both in containers and garden beds, as long as the conditions are right.

Best Time to Plant

  • Cool Season Crop: Spinach grows best in temperatures between 50°F–75°F (10°C–24°C).
  • In cooler regions, plant in early spring or fall.
  • In warm climates, grow during winter months to prevent bolting (premature flowering).

Soil Preparation

  • Use loamy, fertile soil rich in organic matter.
  • Ideal pH: 6.0–7.0 (slightly acidic to neutral).
  • Mix in compost or well-rotted manure before planting to enrich the soil.
  • Avoid heavy clay soil; it holds too much moisture and can cause root rot.

For containers:

  • Use a pot that’s at least 8–10 inches deep.
  • Ensure good drainage holes at the bottom.
  • Fill with a potting mix that’s light and rich in nutrients — ideally, 60% soil, 30% compost, and 10% perlite or coco peat.

Step 3: Plant Your Spinach Seeds Correctly

Spinach is easy to start from seeds and germinates quickly under the right conditions.

How to Sow Spinach Seeds

  1. Soak the seeds in water overnight to speed up germination.
  2. Sow seeds ½ inch deep and about 2 inches apart in rows.
  3. Keep 10–12 inches between rows if planting multiple rows.
  4. Gently cover with soil and water lightly.

If growing in containers, sow 4–6 seeds per pot and thin them later once they sprout.

Germination

  • Seeds typically germinate in 5–10 days, depending on temperature.
  • Keep soil moist but not soggy during this period.
  • Spinach prefers cool, moist conditions for sprouting, so avoid high heat during germination.

Thinning Seedlings

Once seedlings are about 2–3 inches tall, thin them to leave 4–6 inches between each plant. This gives them enough room to develop healthy leaves.

Tip: Don’t throw away the thinned seedlings — you can use them as baby spinach in salads!


Step 4: Watering, Feeding, and Care

Spinach grows fast and requires regular care to stay lush, tender, and flavorful.

Watering

  • Spinach loves consistent moisture but dislikes soggy roots.
  • Water deeply two to three times a week, depending on weather and soil type.
  • Keep soil evenly moist, especially during dry or windy days.
  • In containers, check soil daily — containers dry out faster than garden beds.
  • Use mulch (like straw, dried leaves, or coco husk) around plants to retain moisture and keep the soil cool.

Fertilizing

Spinach is a heavy feeder, especially of nitrogen, which promotes leafy growth.

  • Before planting, mix organic compost or well-rotted manure into the soil.
  • Every 2–3 weeks, apply a liquid fertilizer high in nitrogen (like compost tea or fish emulsion).
  • Avoid over-fertilizing, as it can make leaves taste bitter.

Sunlight and Temperature

  • Spinach grows best in full sun (4–6 hours), but in hot climates, partial shade helps prevent bolting.
  • For summer planting, provide shade nets or plant near taller crops for natural protection.

Weeding and Maintenance

  • Remove weeds regularly — they compete for nutrients and water.
  • Loosen soil around the plants occasionally to improve aeration.
  • Keep an eye out for pests like aphids, leaf miners, and slugs. Use neem oil spray or natural predators like ladybugs to control infestations.

Step 5: Harvest and Enjoy Your Homegrown Spinach

The best part of growing spinach at home is enjoying your harvest — fresh, tender, and free from chemicals.

When to Harvest

  • Spinach is ready to harvest in 30–45 days after sowing.
  • For baby spinach, start harvesting when leaves are 3–4 inches long.
  • For mature spinach, wait until leaves reach 6–8 inches, but harvest before they turn tough or start to bolt.

How to Harvest

  • Use scissors or a sharp knife to snip outer leaves about 1 inch above the base, leaving the inner leaves intact to regrow.
  • Alternatively, cut the entire plant just above the crown if you want to replant soon after.
  • Avoid pulling the plant out from the roots; this allows continuous regrowth.

Pro Tip:
Harvest in the early morning when leaves are crisp and full of moisture. Avoid harvesting during the heat of the day to prevent wilting.

Storage Tips

  • Rinse leaves gently and pat dry.
  • Store in a perforated bag or airtight container in the refrigerator for up to 5 days.
  • For long-term storage, blanch and freeze the leaves for soups or smoothies later.

Bonus Tips for Thriving Spinach Plants

  1. Succession Planting: Sow a new batch every 2–3 weeks for a continuous harvest throughout the season.
  2. Companion Planting: Grow spinach alongside radishes, carrots, or strawberries — they help repel pests naturally.
  3. Avoid Heat Stress: During hot months, choose bolt-resistant varieties like Tyee or Bloomsdale Long Standing.
  4. Rejuvenate Soil: After every harvest, mix compost into the soil to keep it fertile.
  5. Use Raised Beds or Vertical Planters: Great for maximizing space in small homes or balconies.

Common Problems and Easy Fixes

ProblemCauseSolution
Leaves turning yellowOverwatering or poor drainageCheck drainage holes; water less often
Bolting (flowering early)Too much heat or long daylightProvide shade; grow in cooler months
Pest damage (holes in leaves)Leaf miners, aphids, slugsSpray neem oil or use insecticidal soap
Poor growthNutrient deficiencyAdd nitrogen-rich compost or organic fertilizer

Health Benefits of Homegrown Spinach

Aside from being easy to grow, spinach is one of the healthiest greens you can add to your diet. It’s rich in iron, calcium, vitamins A, C, and K, and antioxidants that boost immunity and heart health. Eating freshly harvested spinach ensures maximum nutrient content, unlike store-bought greens that lose vitamins during transport.


Final Thoughts

Growing spinach at home is one of the most satisfying and practical gardening experiences you can try. With just a few seeds, some pots, and a little care, you can enjoy a steady supply of fresh, organic greens right from your kitchen garden.

By following these five easy steps — choosing the right variety, preparing ideal soil, planting correctly, watering and feeding well, and harvesting at the right time — you’ll soon have a thriving spinach patch that keeps giving you fresh leaves week after week.

So, whether you’re growing in a sunny backyard or a cozy apartment balcony, get your hands dirty, plant those seeds, and watch your spinach garden flourish. There’s nothing quite as rewarding as harvesting your own food — fresh, green, and full of life!

6-Step Guide to Planting Strawberries in Containers

6-Step Guide to Planting Strawberries in Containers

There’s nothing quite like the sweet, sun-ripened taste of freshly picked strawberries. Imagine stepping onto your balcony, patio, or porch and plucking juicy red berries straight from the plant — no garden bed required! The good news is that strawberries are incredibly easy to grow in containers, making them perfect for anyone with limited space.

Whether you’re a beginner gardener or an experienced grower looking to maximize your harvest, this 6-step guide to planting strawberries in containers will walk you through everything you need to know — from choosing the right varieties to ensuring a bountiful, continuous crop.


Step 1: Choose the Right Strawberry Variety

Before you start planting, it’s crucial to select the right type of strawberry for your container garden. Not all strawberries perform the same way — some produce one big crop, while others give you berries all season long.

Types of Strawberries

  1. June-bearing Strawberries
    • Produce one large harvest in early summer.
    • Ideal if you prefer a big batch of berries for freezing or making jams.
    • Examples: Honeoye, Allstar, Earliglow.
  2. Everbearing Strawberries
    • Produce two to three smaller harvests — one in spring, another in late summer or fall.
    • Great for steady snacking throughout the season.
    • Examples: Ozark Beauty, Seascape, Quinault.
  3. Day-neutral Strawberries
    • Produce fruit continuously throughout the growing season (as long as temperatures stay between 35°F–85°F or 2°C–29°C).
    • Perfect for containers because of their compact growth and reliable yield.
    • Examples: Albion, Tristar, Mara des Bois.

For containers, day-neutral and everbearing varieties are your best choice because they keep producing berries without needing a large garden bed.


Step 2: Select the Best Container and Location

Strawberries have shallow roots, so they don’t need deep containers — but they do need plenty of room to spread their runners and receive sunlight.

Choosing Containers

  • Size: Each strawberry plant needs about 8–12 inches of space and a container at least 6–8 inches deep.
  • Material: Plastic, ceramic, fabric grow bags, or hanging baskets all work well.
  • Drainage: The container must have drainage holes to prevent waterlogging, which causes root rot.

Container Ideas

  • Strawberry pots: Tall containers with multiple side holes designed specifically for strawberries — they allow plants to cascade down beautifully.
  • Hanging baskets: Perfect for saving space and protecting fruit from pests.
  • Window boxes: Great for balconies or ledges, keeping the berries within easy reach.

Best Location

Strawberries thrive in full sunlight (at least 6–8 hours per day).
Place your containers in a south-facing area if possible, or move them around to chase the sun. If you live in a very hot climate, a bit of afternoon shade helps prevent leaf scorch.


Step 3: Prepare the Right Soil Mix

The foundation of a healthy strawberry plant is good soil. Strawberries prefer slightly acidic, well-draining soil rich in organic matter.

Ideal Soil Mix

Create your own mix with:

  • 40% potting soil
  • 30% compost or well-rotted manure
  • 20% coco peat or perlite for drainage
  • 10% sand (optional) for extra aeration

The ideal pH range is between 5.5 and 6.5 — slightly acidic but not extreme. You can test this with a simple pH testing kit available at garden stores.

Tip:

Avoid using garden soil directly — it can be too heavy and harbor pests or diseases. Instead, use a high-quality container mix designed for fruits and vegetables.


Step 4: Plant Your Strawberries Correctly

Now that your containers and soil are ready, it’s time to plant your strawberries! Proper planting technique ensures strong roots and healthy growth.

How to Plant Strawberries in Containers

  1. Fill your container with soil mix, leaving about 2 inches of space from the rim.
  2. Create a small mound in the center of the container.
  3. Spread the strawberry plant’s roots gently over the mound.
  4. Cover the roots with soil — but keep the crown (the central growing point) just above the soil line. Burying it too deep can cause rot.
  5. Firm the soil lightly and water thoroughly.

If you’re planting multiple strawberries, space them 8–10 inches apart to give each plant enough room to grow and spread runners.

Starting from Bare Roots vs. Seedlings

  • Bare-root plants: Cheaper and easy to handle, but require careful planting and patience for initial growth.
  • Seedlings or potted plants: Quicker results and easier for beginners.

If you’re using hanging baskets, make sure to let the runners drape over the sides — this not only saves space but also looks beautiful when the berries start to appear.


Step 5: Watering, Feeding, and Maintenance

Container-grown strawberries need more attention to watering and feeding than garden ones since containers dry out faster.

Watering Tips

  • Water consistently — strawberries prefer moist but not soggy soil.
  • Check daily; if the top inch of soil feels dry, water thoroughly until it drains from the bottom.
  • Avoid watering directly on the crown to prevent rot.
  • During hot summer days, you may need to water twice — morning and evening.

Fertilizing Your Plants

Strawberries are moderate feeders. A balanced feeding routine keeps them productive:

  • Use a slow-release organic fertilizer at planting time.
  • Every 2–3 weeks, feed with a liquid fertilizer high in potassium and phosphorus (for fruiting).
  • Stop fertilizing after mid-summer to allow plants to prepare for dormancy.

You can also apply compost tea or fish emulsion for natural nutrient boosts.

Mulching

Add a thin layer of straw, pine needles, or shredded leaves over the soil surface. Mulching helps:

  • Retain moisture
  • Keep berries clean
  • Prevent weeds
  • Maintain even soil temperature

Step 6: Care, Harvest, and Overwintering

Proper care after planting ensures your strawberry plants keep producing sweet fruit year after year.

Pruning and Runner Management

  • Remove the first flowers that appear on new plants to encourage root establishment.
  • Trim runners (long stems that form baby plants) unless you want to propagate new plants. Too many runners reduce fruit production.
  • You can root a few runners in separate pots to expand your strawberry patch later!

Pest and Disease Control

Even in containers, pests can strike. Look out for:

  • Aphids and spider mites – Spray with neem oil or insecticidal soap.
  • Slugs – Use copper tape around pot edges or natural traps.
  • Gray mold (botrytis) – Avoid overhead watering and ensure good airflow.

Harvesting Your Strawberries

  • Berries are ready to pick when they’re fully red and firm.
  • Gently twist or snip the stem, leaving a bit of it attached to the fruit.
  • Harvest every couple of days during peak season to encourage continuous production.

Fresh strawberries are best eaten right away, but you can refrigerate them for 2–3 days or freeze for later use in smoothies and desserts.

Overwintering Your Plants

Strawberries are perennial, meaning they can regrow each year with the right care:

  • In cold regions, move pots to a sheltered spot or cover them with burlap or straw mulch during winter.
  • In warmer climates, just trim dead leaves and keep soil slightly moist.
  • In early spring, remove mulch and start fertilizing again to awaken growth.

Bonus Tips for Container Strawberry Success

  1. Rotate your containers every few days for even sunlight exposure.
  2. Replace soil every two years to prevent disease buildup.
  3. Label your containers with variety names and planting dates.
  4. Don’t over-fertilize — too much nitrogen results in leafy plants with fewer berries.
  5. Mix varieties (like day-neutral and everbearing) for a longer harvest season.
  6. Hand-pollinate indoors by gently brushing flowers with a soft brush if pollinators can’t reach them.

Final Thoughts

Growing strawberries in containers is one of the most rewarding gardening experiences — especially for small-space gardeners. With a few pots, good soil, and plenty of sunshine, you can enjoy baskets of juicy, homegrown strawberries right outside your door.

By following this 6-step guide, you’ll have everything you need to plant, nurture, and harvest strawberries successfully — from choosing the right variety to caring for them year after year. The joy of seeing those first flowers turn into bright red berries makes every bit of effort worthwhile.

So grab your pots, pick your favorite strawberry plants, and start your container strawberry garden today — because nothing beats the taste of freshly picked fruit you’ve grown yourself!

7 Easy Steps to Start a Balcony Herb Garden

7 Easy Steps to Start a Balcony Herb Garden

Imagine stepping out onto your balcony to snip fresh basil for your pasta, mint for your tea, or rosemary for your roasted vegetables. Sounds wonderful, right? The good news is — you don’t need a big backyard or fancy greenhouse to make it happen. With just a few pots, some sunlight, and a bit of care, you can grow a lush, fragrant balcony herb garden that provides fresh ingredients all year long.

Whether you’re a gardening beginner or an urban dweller looking to add greenery to your small space, this guide will walk you through seven easy steps to start your very own balcony herb garden — from choosing the right herbs to harvesting your flavorful bounty.


Step 1: Assess Your Balcony’s Sunlight and Space

Before you start planting, take a few days to observe your balcony. Herbs are sun lovers, and knowing how much sunlight your space gets is key to success.

Understand Your Light Conditions

  • Full sun (6-8 hours): Perfect for Mediterranean herbs like basil, thyme, rosemary, oregano, and sage.
  • Partial sun (4-6 hours): Ideal for parsley, cilantro, chives, mint, and lemon balm.
  • Low light (less than 4 hours): Choose shade-tolerant herbs such as mint, chervil, and certain varieties of parsley.

If your balcony faces north or gets limited sunlight, don’t worry — reflective surfaces like white walls or mirrors can help bounce extra light onto your plants. You can also use LED grow lights to supplement natural sunlight during cloudy or winter days.

Evaluate Your Space

  • Even a small balcony or railing can hold several herbs if you get creative with vertical or hanging planters.
  • Railing planters, tiered stands, or wall-mounted pots help maximize space while keeping your balcony organized and stylish.

Step 2: Choose the Right Herbs to Grow

When starting out, it’s best to pick herbs that are easy to grow, low-maintenance, and useful in your kitchen.

Best Herbs for Balcony Gardens

  1. Basil: Loves warmth and sunshine; perfect for pasta, salads, and pesto.
  2. Mint: Grows vigorously even in partial shade; great for teas and desserts.
  3. Rosemary: Hardy and aromatic; thrives in sunny, well-drained conditions.
  4. Parsley: Tolerates moderate sunlight and grows well in containers.
  5. Cilantro (Coriander): Prefers cooler weather and partial sun.
  6. Thyme: Drought-tolerant and ideal for sunny balconies.
  7. Chives: Adds mild onion flavor to dishes; perfect for borders or small pots.

Tip: Start with 4–6 types of herbs you use frequently. Mixing too many varieties in limited space can make watering and light management tricky.


Step 3: Select the Right Containers and Soil

Container choice can make or break your herb garden. The key is good drainage and the right soil mix to keep roots healthy.

Choosing Containers

  • Herbs don’t need huge pots, but they do need adequate depth for roots — around 6–12 inches.
  • Use clay, ceramic, plastic, or fabric pots with drainage holes.
  • For tight spaces, try:
    • Tiered plant stands
    • Hanging baskets
    • Vertical planters
    • Recycled containers like old buckets or tins (ensure proper drainage holes).

Soil Mix

Herbs prefer light, well-draining soil that isn’t too rich in nutrients. You can create a perfect mix with:

  • 50% good-quality potting soil
  • 30% coco peat or perlite (for aeration)
  • 20% compost or organic matter (for nutrients)

Avoid using garden soil alone — it compacts easily in pots and can suffocate roots.

Tip: Add a thin layer of pebbles at the bottom of each pot to improve drainage and prevent waterlogging.


Step 4: Planting Your Herbs

Now comes the fun part — planting! You can start from seeds or small nursery plants depending on your patience and experience.

Starting from Seeds

  • Fill your pot with the prepared soil mix.
  • Moisten the soil lightly before sowing.
  • Sprinkle seeds evenly and cover them with a thin layer (¼ inch) of soil.
  • Keep the soil moist but not soggy until seeds germinate.
  • Place the pot in a sunny spot and mist regularly.

Using Transplants

If you want a quicker start, buy young herb plants from a nursery:

  • Gently remove the plant from its container.
  • Loosen the roots slightly before planting.
  • Place it in the new pot and press soil around it firmly.
  • Water thoroughly after planting.

Spacing Tip: If growing multiple herbs in one container, ensure at least 6 inches between plants to avoid overcrowding.


Step 5: Watering and Feeding Your Herbs

Proper watering is crucial in container gardening. Since pots dry out faster than garden beds, you need to strike a balance between not too dry and not too soggy.

Watering Tips

  • Water when the top inch of soil feels dry to the touch.
  • Early morning is the best time to water, allowing plants to absorb moisture before the heat of the day.
  • Herbs like rosemary and thyme prefer drier soil, while mint and basil enjoy slightly moist conditions.
  • Use self-watering containers or drip trays to maintain consistent moisture levels.

Feeding Your Herbs

Herbs don’t need heavy fertilization — too much fertilizer can make them lose their aroma and flavor.

  • Every 3–4 weeks, feed with a diluted organic liquid fertilizer or compost tea.
  • Alternatively, mix a small amount of slow-release organic fertilizer into the soil every two months.

Tip: Once your herbs are established, pinch off growing tips occasionally. This encourages bushier growth and prevents early flowering, which can make herbs taste bitter.


Step 6: Maintain, Prune, and Protect Your Herbs

Regular maintenance keeps your balcony garden healthy, productive, and visually appealing.

Pruning and Harvesting

  • Pinch back herbs like basil, mint, and parsley regularly to promote fuller growth.
  • Harvest early in the morning when essential oils are most concentrated.
  • Always leave at least one-third of the plant intact to ensure continuous growth.

Pest and Disease Control

Even balcony gardens can attract pests like aphids or whiteflies.

  • Use neem oil spray or homemade insecticidal soap as natural deterrents.
  • Check the underside of leaves weekly and remove any damaged parts.
  • Good air circulation and proper spacing help prevent fungal diseases.

Seasonal Care

  • Bring pots indoors during heavy rain or extreme cold.
  • Rotate pots occasionally for even sunlight exposure.
  • Replace tired soil annually and prune back perennials like thyme or rosemary to encourage new growth.

Step 7: Harvest and Enjoy Your Balcony Bounty

The best part of growing herbs is harvesting and using them fresh in your cooking.

Harvesting Guidelines

  • Start harvesting when the plant is about 6 inches tall.
  • Use sharp scissors to snip leaves or stems cleanly.
  • Avoid overharvesting; always leave enough foliage for the plant to regrow.
  • Regular harvesting actually stimulates growth, keeping your herbs productive for months.

Storing Herbs

  • Short-term: Keep fresh herbs in a glass of water like a bouquet, or wrap them in a damp paper towel and refrigerate.
  • Long-term: Air-dry or oven-dry herbs and store them in airtight containers.
  • You can also freeze herbs in ice cube trays with a bit of water or olive oil — perfect for cooking later.

Creative Ways to Use Your Herbs

  • Add fresh basil to salads, sandwiches, or pasta dishes.
  • Brew mint leaves in tea for a refreshing drink.
  • Use rosemary sprigs for roasted potatoes or meats.
  • Blend parsley and garlic for a quick herb sauce or dip.

Soon, your balcony will not only look and smell amazing but also become your personal kitchen companion!


Bonus Tips for Balcony Herb Gardening Success

  1. Label each pot with the herb’s name and planting date.
  2. Group herbs by sunlight needs — sun-loving ones together, shade-lovers in another corner.
  3. Avoid overwatering — it’s the most common mistake for container herbs.
  4. Rotate plants every few days for even growth.
  5. Keep pruning regularly to prevent leggy growth and encourage lush foliage.
  6. Try companion planting — herbs like basil and parsley grow well together, but avoid pairing mint with other herbs (it tends to take over).

Final Thoughts

Starting a balcony herb garden is one of the easiest and most rewarding ways to bring freshness, flavor, and beauty into your home. With just a little sunlight, care, and creativity, you can transform even the smallest balcony into a green oasis filled with aromatic herbs.

Whether you’re growing basil for Italian nights, mint for refreshing drinks, or rosemary for hearty dishes, these seven easy steps will guide you from setup to harvest. Beyond the culinary benefits, tending to your herbs brings calm, satisfaction, and a daily dose of nature — right outside your door.

So grab some pots, pick your favorite herbs, and let your balcony garden bloom with life, fragrance, and flavor all year long!

5-Step Guide to Growing Tomatoes in Small Spaces

5-Step Guide to Growing Tomatoes in Small Spaces

If you love the taste of fresh, juicy tomatoes but think you don’t have enough space to grow them — think again! Whether you live in an apartment, have a small balcony, or just a few square feet of garden, tomatoes can thrive beautifully in compact areas with the right care. With clever container choices, proper sunlight, and efficient watering, you can enjoy a bountiful harvest of homegrown tomatoes right from your patio or windowsill.

Here’s your simple 5-step guide to growing tomatoes in small spaces — even if you’re short on room but big on flavor.


Step 1: Choose the Right Tomato Variety

Not all tomato plants are created equal — especially when you’re gardening in tight quarters. The first step to success is selecting varieties that are naturally compact, fast-growing, and high-yielding.

Best Tomato Varieties for Small Spaces

  • ‘Tiny Tim’ – A dwarf variety that reaches only about 12 inches in height. Perfect for pots or windowsills.
  • ‘Patio Princess’ – Produces medium-sized fruits on compact plants ideal for containers.
  • ‘Tumbling Tom’ – A trailing variety perfect for hanging baskets or tall containers.
  • ‘Bush Early Girl’ – A determinate type that grows around 2-3 feet tall and produces early, flavorful fruit.
  • ‘Balcony Cherry’ – Designed specifically for small urban gardens with a prolific yield of bite-sized tomatoes.

Determinate vs. Indeterminate

  • Determinate (Bush-type): Grow to a fixed size, produce fruit all at once, and are easier to manage in containers.
  • Indeterminate (Vining-type): Continue growing and producing fruit until frost; need more space and staking.

For small gardens, go with determinate or dwarf varieties that stay manageable and don’t overwhelm your limited space.


Step 2: Pick the Perfect Container and Soil

Tomatoes can grow almost anywhere — as long as their roots have room to breathe and the soil drains well.

Container Size and Material

  • Choose a container that’s at least 14–18 inches deep and 16–20 inches wide.
  • Ensure the pot has drainage holes at the bottom to prevent soggy roots.
  • Materials like plastic, ceramic, or fabric grow bags work well because they retain moisture but allow airflow.
  • For trailing or cherry tomatoes, hanging baskets or vertical planters can save space while keeping plants off the ground.

Soil Mix

Tomatoes love nutrient-rich, well-draining soil. A good mix includes:

  • 60% potting soil
  • 20% compost or aged manure
  • 20% perlite or coco peat for aeration and moisture retention

Mix in a slow-release organic fertilizer before planting to provide steady nutrients throughout the growing season.


Step 3: Planting and Sunlight Tips

Now that your container and soil are ready, it’s time to plant! Tomatoes are sun lovers, and in small spaces, making the most of available light is crucial.

Planting Technique

  • Bury two-thirds of the tomato plant below the soil surface.
    This encourages the stem to grow additional roots, giving the plant more strength and access to nutrients.
  • Space plants at least 18 inches apart if using multiple containers to ensure good air circulation.

Sunlight Requirements

Tomatoes need at least 6–8 hours of direct sunlight daily.
If you’re short on natural light:

  • Move containers throughout the day to follow the sun.
  • Use reflective surfaces like mirrors or white walls to amplify sunlight.
  • Consider using grow lights indoors — LED grow lamps can mimic natural light effectively.

Temperature Considerations

Tomatoes thrive in warm weather — 65°F to 85°F (18°C to 29°C). If it gets too cold, bring your pots indoors or use row covers or mini greenhouses to protect them.


Step 4: Watering, Feeding, and Support

Small-space tomatoes depend heavily on consistent care. Because containers dry out faster than garden beds, proper watering and feeding are essential for healthy plants and juicy fruit.

Watering Tips

  • Water deeply but less often. Aim to moisten the entire root zone, not just the top.
  • Check the soil daily; if the top inch feels dry, it’s time to water.
  • Use self-watering containers or mulch the top of the soil with straw or coconut coir to retain moisture.
  • Avoid splashing water on leaves — wet foliage can lead to fungal diseases like blight.

Feeding Schedule

Tomatoes are heavy feeders. Use a balanced, organic fertilizer or tomato-specific liquid feed.

  • Every 10–14 days, apply a diluted fertilizer high in phosphorus and potassium for healthy fruiting.
  • Add compost tea or seaweed extract monthly for a nutrient boost.

Support Structures

Even compact varieties can benefit from some support.

  • Use small cages, bamboo stakes, or trellises to keep stems upright.
  • Hanging or trailing varieties can be trained to cascade beautifully from planters or baskets.

Step 5: Pruning, Pollination, and Harvesting

Your plants are growing, but a few maintenance tricks can make a huge difference in yield and quality.

Pruning and Maintenance

  • Remove lower leaves that touch the soil to prevent disease.
  • Pinch off suckers — small shoots that form between the main stem and branches. This focuses energy on producing fruit instead of excess foliage.
  • Regularly inspect plants for aphids, whiteflies, or fungal spots. Treat early with neem oil or insecticidal soap.

Pollination in Small Spaces

If you’re growing indoors or in an area with little wind or pollinator activity:

  • Gently shake or tap the flowers every few days to distribute pollen.
  • Use a small soft brush or cotton swab to transfer pollen between blooms.

Harvesting Tips

  • Tomatoes are ready to harvest when they are fully colored (red, yellow, orange, or pink depending on the variety) and slightly soft to the touch.
  • Twist gently or use scissors to avoid damaging the vine.
  • Don’t refrigerate freshly picked tomatoes — it dulls their flavor. Instead, keep them at room temperature and enjoy their full sweetness.

Bonus Tips for Thriving Tomato Plants in Small Spaces

  1. Rotate your containers every few days to ensure even sunlight exposure.
  2. Companion plant with herbs like basil, chives, or parsley — they deter pests and improve tomato flavor.
  3. Avoid overcrowding your space. Airflow reduces the risk of mold and disease.
  4. If your balcony or patio gets windy, use a wind barrier like a screen or railing planter to protect delicate stems.
  5. At the end of the season, refresh your soil before planting again — tomatoes can deplete nutrients quickly.

Common Mistakes to Avoid

  • Overwatering: Leads to root rot and yellowing leaves. Always check soil moisture first.
  • Too much fertilizer: Causes leafy growth but few fruits.
  • Insufficient sunlight: Results in leggy plants and poor fruiting.
  • Ignoring pruning: Leads to tangled vines and reduced airflow.
  • Planting too early: Cold soil can stunt growth — wait until temperatures are consistently warm.

Final Thoughts

Growing tomatoes in small spaces is easier than it looks — and incredibly rewarding. With just a few pots, quality soil, and plenty of sunshine, you can transform your balcony or patio into a mini tomato farm. Each bite of a homegrown tomato will remind you that even limited space can produce limitless flavor.

Whether you’re a beginner gardener or an urban dweller dreaming of fresh produce, this 5-step guide proves that anyone can grow vibrant, healthy tomatoes — no backyard required.

So grab your pots, plant those seeds, and enjoy the satisfaction of harvesting your own delicious tomatoes right from your small-space garden!