Imagine stepping out to your balcony or backyard and picking handfuls of sweet, juicy cherry tomatoes straight from repurposed plastic bottles. Sounds too good to be true? Not anymore!
You don’t need a big garden, expensive planters, or special equipment to grow your own cherry tomatoes. With just a few plastic bottles, some potting soil, and a little care, you can grow many cherry tomato plants even in the smallest spaces.
This sustainable, budget-friendly method not only saves space but also helps the environment by recycling plastic bottles into mini garden pots. In this guide, we’ll show you step-by-step how to grow an abundant harvest of cherry tomatoes in plastic bottles—from setup to harvest—no matter where you live.
Why Grow Cherry Tomatoes in Plastic Bottles?
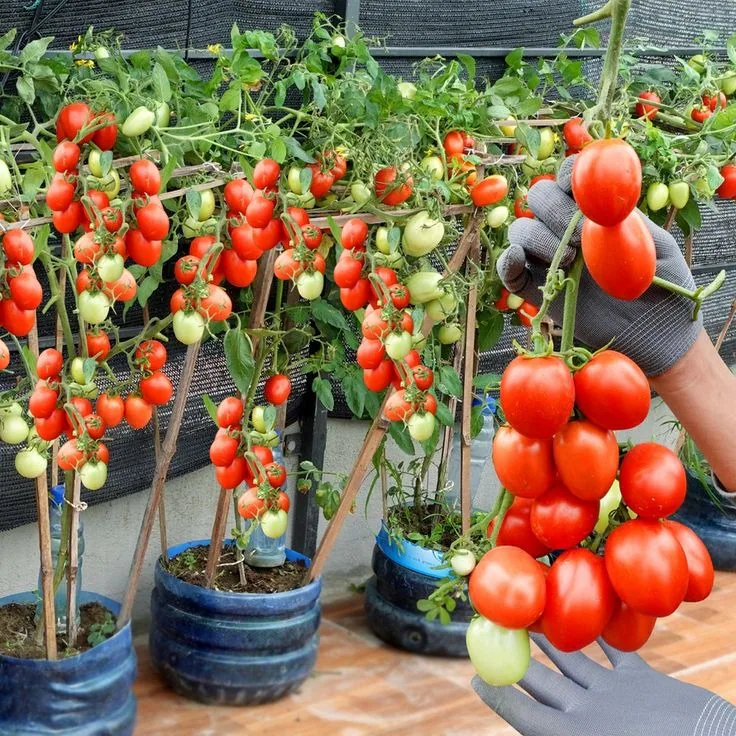
Cherry tomatoes are among the easiest vegetables to grow, even for beginners. They’re fast-growing, productive, and adaptable to container gardening. But what makes plastic bottles such a great option?
Here are the top reasons:
- Recycling for a Purpose: Instead of throwing away used plastic bottles, turn them into eco-friendly planters.
- Cost-Effective: No need to buy fancy pots or containers—use what you already have.
- Space-Saving: Perfect for balconies, patios, windowsills, or rooftops.
- Portable: Lightweight and easy to move for optimal sunlight exposure.
- Water Efficient: Plastic bottles retain moisture well, reducing the need for constant watering.
- Fun DIY Project: Great for kids and families who love hands-on gardening activities.
Whether you’re living in an apartment or just want to start small, this method makes it easy to grow lots of cherry tomatoes with very little space.
What You’ll Need
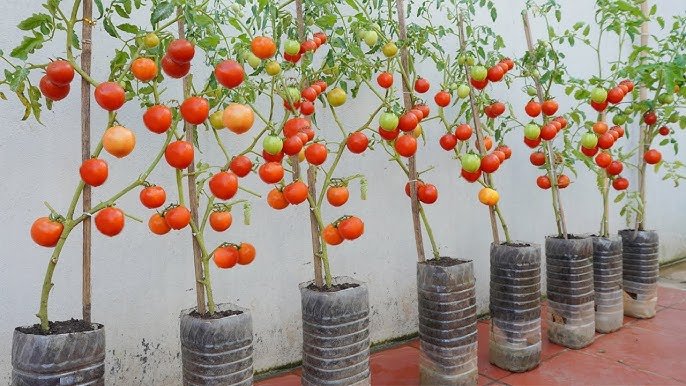
Before you begin, gather these simple materials:
- Plastic bottles: Choose 2-liter or 5-liter bottles (depending on how big you want your plant to grow).
- Sharp knife or scissors: For cutting the bottles.
- Potting mix: A mix of garden soil, compost, and coco peat or perlite for drainage.
- Cherry tomato seeds or seedlings: Choose a compact or dwarf variety suitable for container gardening.
- Fertilizer: Organic compost, liquid fertilizer, or tomato-specific feed.
- Watering can or spray bottle: To keep the soil moist.
- Small stick or stake: For plant support as it grows.
Optional:
- Twine or hanging wires if you want to hang your bottles vertically.
- Mulch or dry leaves to retain soil moisture.
Step-by-Step Guide: How to Grow Cherry Tomatoes in Plastic Bottles
1. Choose and Prepare Your Bottles
Start with clean, empty plastic bottles. Remove any labels and rinse them thoroughly to eliminate residue.
You can use bottles in two main ways:
- Top-Open Planters: Cut off the top portion of the bottle, keeping the bottom 6–8 inches as your planting container.
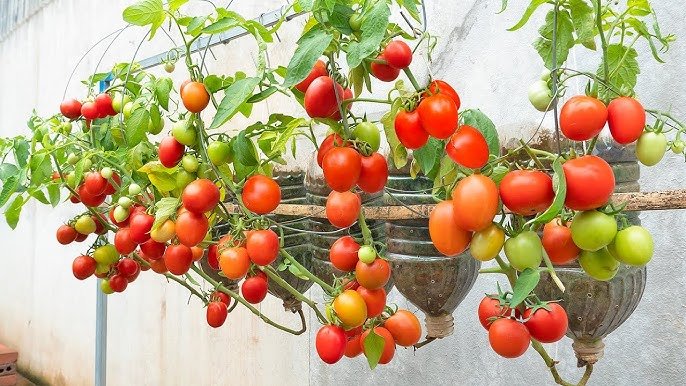
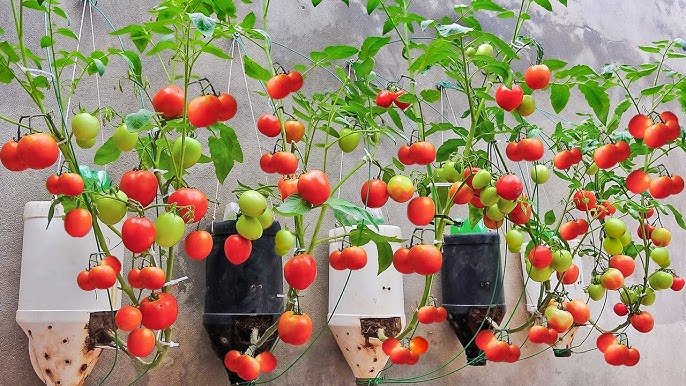
- Upside-Down Hanging Planters: Cut the bottom off and hang the bottle upside-down, letting the plant grow through the opening (perfect for vertical gardens).
Whichever method you choose, make drainage holes at the bottom (or cap area for inverted setups) to prevent waterlogging.
2. Add the Soil Mix
Cherry tomatoes thrive in rich, well-draining soil. Create a mix using:
- 50% garden soil or potting mix
- 30% organic compost or manure
- 20% coco peat or perlite
Fill the bottle about three-quarters full, leaving space at the top for watering. The compost provides nutrients, while coco peat helps retain moisture.
3. Plant Your Cherry Tomato Seeds or Seedlings
If using seeds, plant 2–3 seeds about half an inch deep in the center of the bottle.
If using seedlings, gently transplant one healthy plant into each bottle.
Water lightly and place the bottles in a sunny location—cherry tomatoes love warmth and light. Aim for 6–8 hours of sunlight daily.
4. Watering and Drainage
Tomatoes need consistent moisture, but soggy soil can cause root rot. Here’s how to manage watering effectively:
- Water once daily during hot weather, or every 2–3 days in cooler conditions.
- Check by touching the soil—if the top inch feels dry, it’s time to water.
- Ensure that excess water drains out freely through the holes.
Pro Tip: To make watering easier, insert a small piece of cloth or wick from the bottom hole into a shallow tray of water. This creates a self-watering system, keeping the soil consistently moist.
5. Add Support for the Growing Plant
As your tomato plant grows, it will need support to hold the weight of its branches and fruit. Insert a small stick or bamboo skewer into the soil and gently tie the main stem using twine.
For taller plants, tie the stems to nearby walls or railings using soft plant ties or strings.
6. Fertilize Regularly
Cherry tomatoes are heavy feeders and will produce better with regular feeding. Every 10–14 days, apply:
- Liquid compost tea or diluted organic fertilizer
- Tomato-specific fertilizer (if available)
Avoid over-fertilizing—too much nitrogen leads to leafy plants with fewer fruits. Focus on balanced nutrients rich in phosphorus and potassium for flowering and fruiting.
7. Pruning and Maintenance
Keep your plants healthy and productive by pruning regularly:
- Remove the lower yellowing leaves to improve airflow.
- Pinch off suckers (small shoots that grow between the main stem and branches).
- Trim off overcrowded leaves to direct energy toward fruit production.
This helps prevent fungal diseases and promotes faster ripening.
8. Pollination and Flowering
If you’re growing cherry tomatoes outdoors, natural wind and pollinators will do the job.
For indoor setups, gently shake the flowers or use a small paintbrush to transfer pollen between blooms. This ensures good fruit set and bigger yields.
9. Pest Control
Tomatoes are sometimes attacked by aphids, whiteflies, or mites. Keep pests away naturally with:
- A neem oil spray (mix 1 teaspoon neem oil with 1 liter of water and a few drops of mild soap).
- Spraying garlic or chili extract as a natural deterrent.
- Keeping your plants clean and checking the undersides of leaves weekly.
Healthy plants in well-drained soil are far less likely to attract pests.
10. Harvesting Time
After about 60–75 days, your cherry tomato plants will start producing clusters of small green fruits that soon turn bright red or yellow (depending on the variety).
Harvest when they’re fully colored but still firm. Pick regularly to encourage more flowering and fruiting.
Each plastic bottle plant can yield 20–50 cherry tomatoes under the right conditions!
Creative Ways to Arrange Your Plastic Bottle Garden
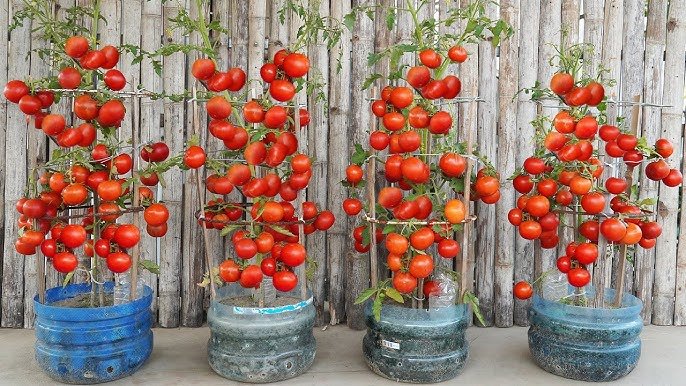
Once your tomato plants are growing well, you can arrange your bottles in fun and space-saving ways:
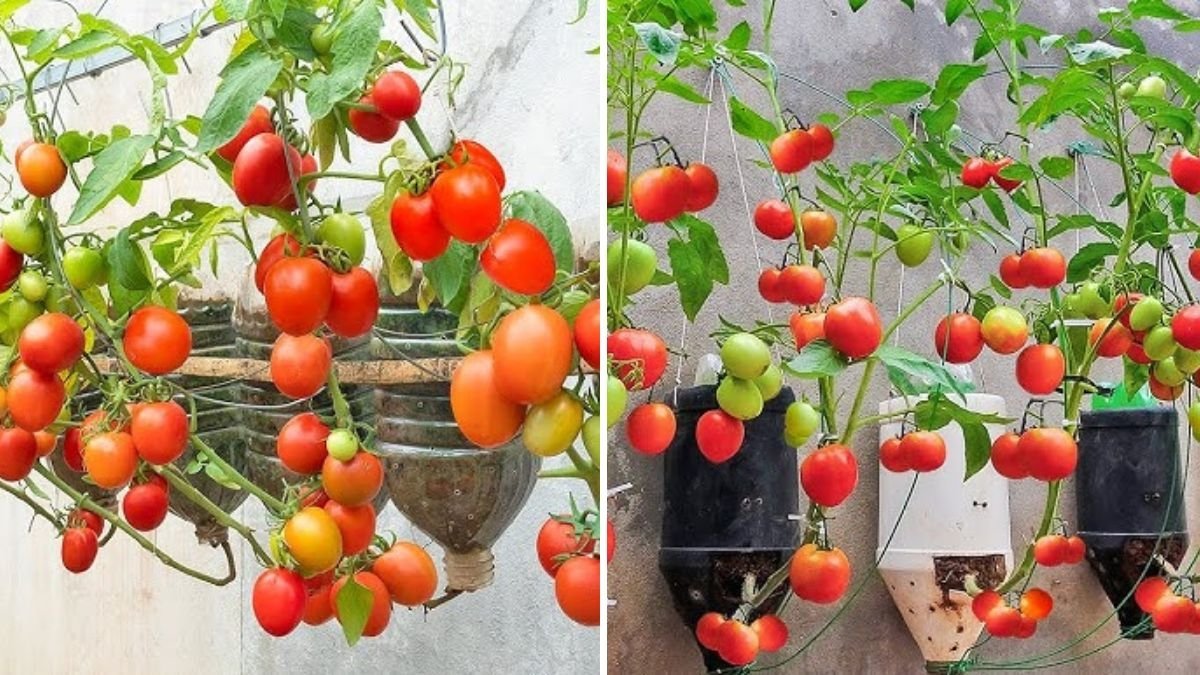
- Vertical Hanging Garden: Hang bottles upside down along a wall or balcony railing.
- Tiered Rack Setup: Stack bottles on shelves or stands for easy access.
- Fence Garden: Attach cut bottles horizontally to a fence or wall.
- Recycled Stand System: Use wooden frames or metal rods to hold multiple bottles vertically.
These setups make your space look green, lively, and eco-friendly.
Benefits of Growing Cherry Tomatoes in Plastic Bottles
This simple method offers a surprising number of benefits beyond saving space:
- Reuses Waste Materials: Reduces plastic pollution and supports sustainability.
- Easy for Beginners: No complex gardening tools required.
- Highly Productive: Even one small balcony can produce dozens of tomatoes.
- Portable and Flexible: Move bottles to sunny spots or indoors during rain.
- Educational: Great learning activity for kids about plant growth and recycling.
Plus, nothing beats the taste of freshly picked, sun-ripened cherry tomatoes!
Common Mistakes to Avoid
To ensure success, avoid these common beginner mistakes:
- Overwatering: Leads to root rot. Always ensure drainage holes work properly.
- Insufficient Sunlight: Without at least 6 hours of light, plants may grow tall but weak.
- Neglecting Fertilizer: Tomatoes need regular feeding to produce fruits.
- Crowded Plants: Give each plant its own bottle to prevent competition.
- Ignoring Pests: Check leaves regularly and treat early if you spot trouble.
Final Thoughts: A Simple Way to Grow Fresh Food at Home
Growing cherry tomatoes in plastic bottles is more than just a gardening hack—it’s a sustainable lifestyle choice. You’re recycling waste, saving money, and enjoying the satisfaction of harvesting your own food.
Whether you have a big garden or just a sunny balcony, this method lets you grow plenty of fresh, flavorful cherry tomatoes right at home.
So don’t throw away those empty plastic bottles—turn them into tiny, thriving gardens that bring color, flavor, and freshness to your life. With just a little care and creativity, you can enjoy homegrown cherry tomatoes all year round!
SEO Keywords:
grow cherry tomatoes in plastic bottles, DIY tomato garden, plastic bottle gardening, vertical gardening ideas, grow tomatoes at home, container gardening tips, sustainable gardening, cherry tomato care, urban gardening ideas, recycle bottles for plants.


Leave A Comment