How to Create a Consistent Fertilizing Routine for Houseplants

How to Create a Consistent Fertilizing Routine for Houseplants

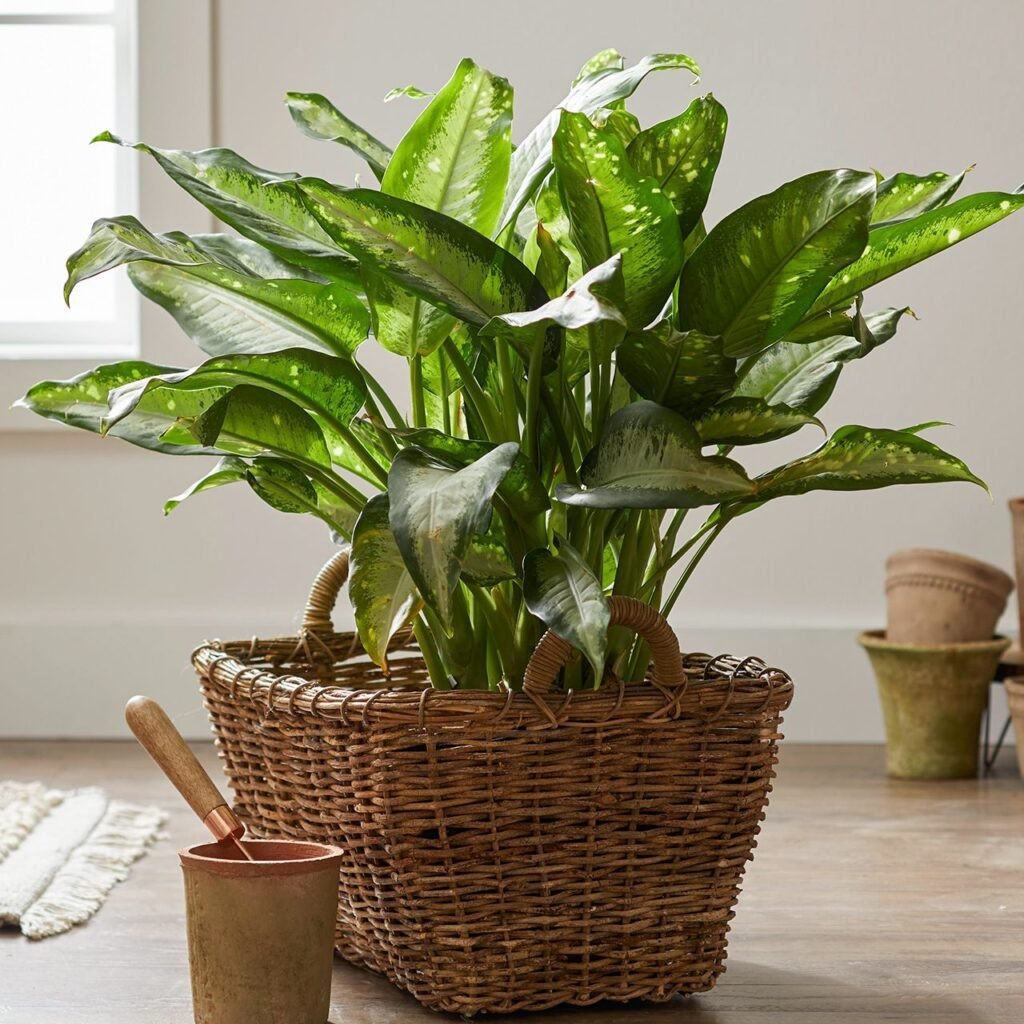
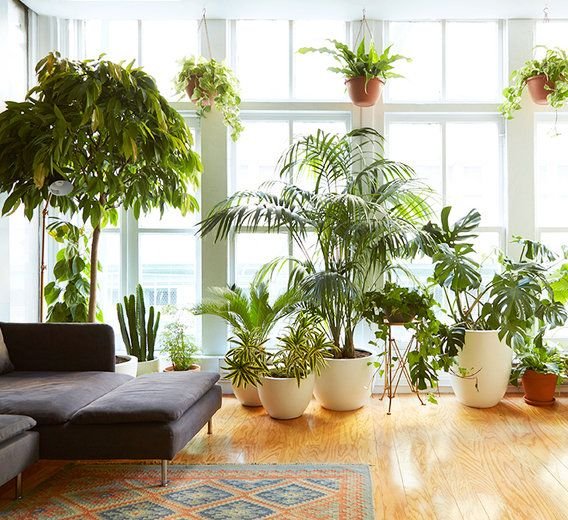
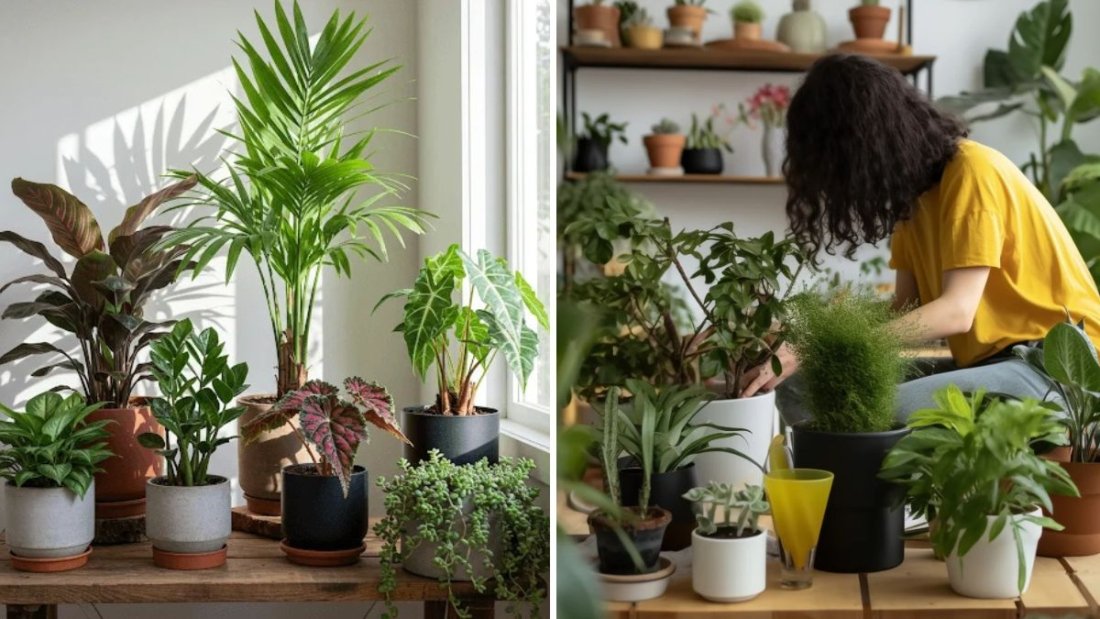
Houseplants bring life, freshness, and beauty into your home, but to keep them lush and thriving, regular fertilizing is essential. Just like humans need a balanced diet, plants rely on nutrients to grow strong, vibrant, and healthy. However, many plant owners either overfeed or neglect fertilizing altogether, leading to weak growth, yellow leaves, or poor blooming.

Creating a consistent fertilizing routine ensures your plants receive the right nutrients at the right time, helping them stay resilient and beautiful year-round. In this detailed guide, you’ll learn everything about building a fertilizing schedule, choosing the right fertilizers, and avoiding common mistakes — naturally and effectively.


1. Understanding Why Fertilizing Is Essential for Houseplants

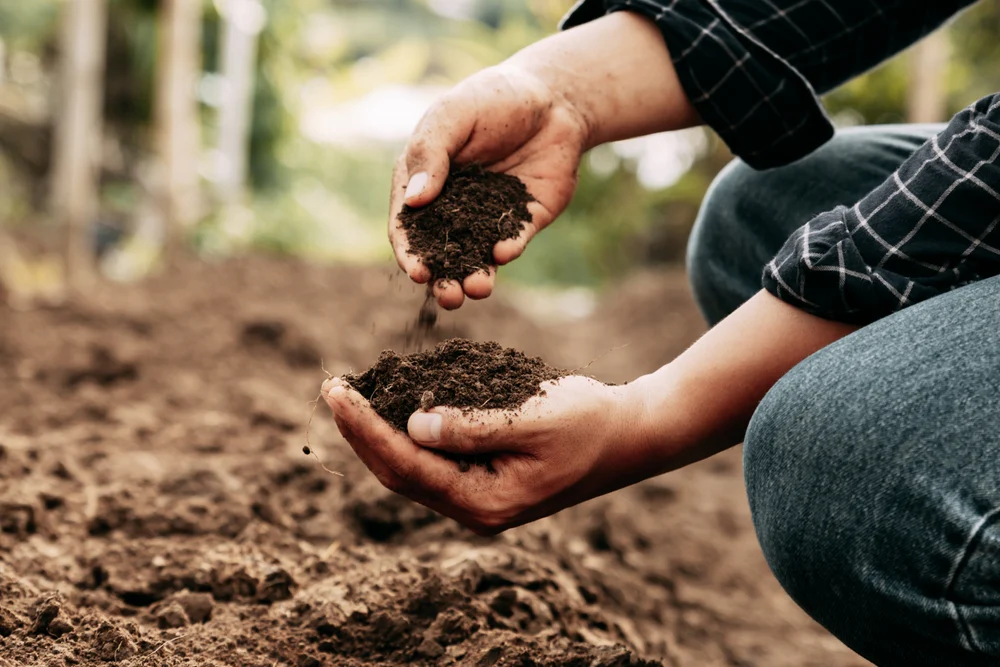
Indoor plants live in containers, which means they rely entirely on you for nutrients. Unlike outdoor plants, they cannot draw minerals from deep soil layers or benefit from natural compost. Over time, the nutrients in potting soil deplete through watering and root absorption.

Fertilizing replaces these lost nutrients, providing the three major elements essential for healthy plant growth:

  • Nitrogen (N): Promotes leafy green growth.
  • Phosphorus (P): Encourages strong roots and blooming.
  • Potassium (K): Improves overall plant health and disease resistance.

In addition, micronutrients like calcium, magnesium, iron, and zinc also support overall plant vitality. Without proper fertilization, plants become pale, stunted, and more prone to diseases.


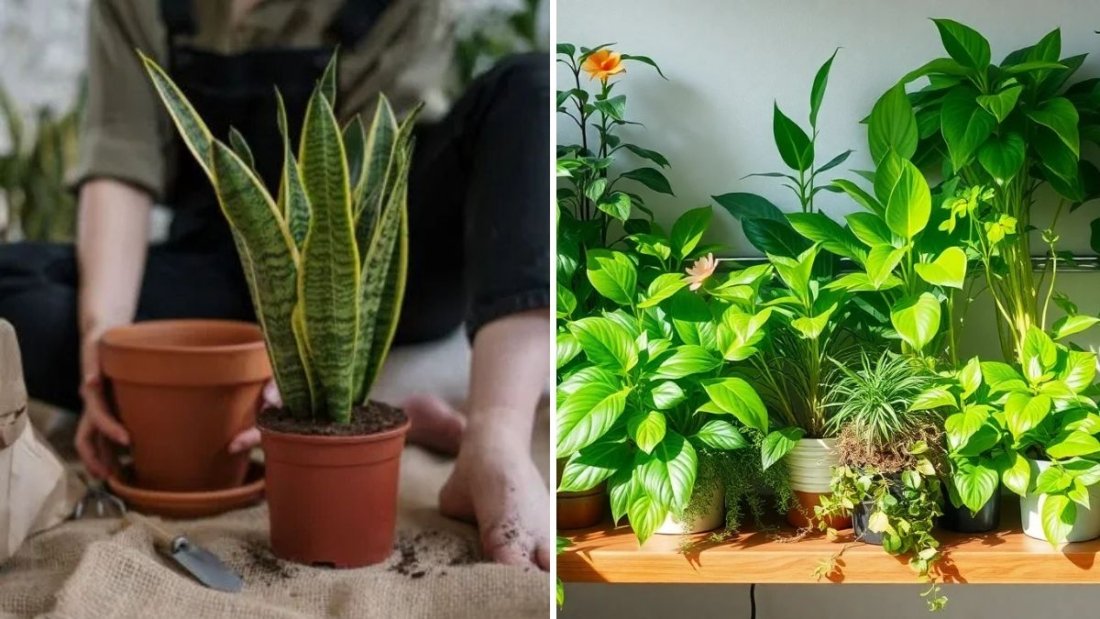
2. Know Your Plant’s Nutrient Needs

Not all houseplants need the same amount or frequency of fertilization. Some species are heavy feeders, while others are light feeders.

Here’s a quick breakdown:

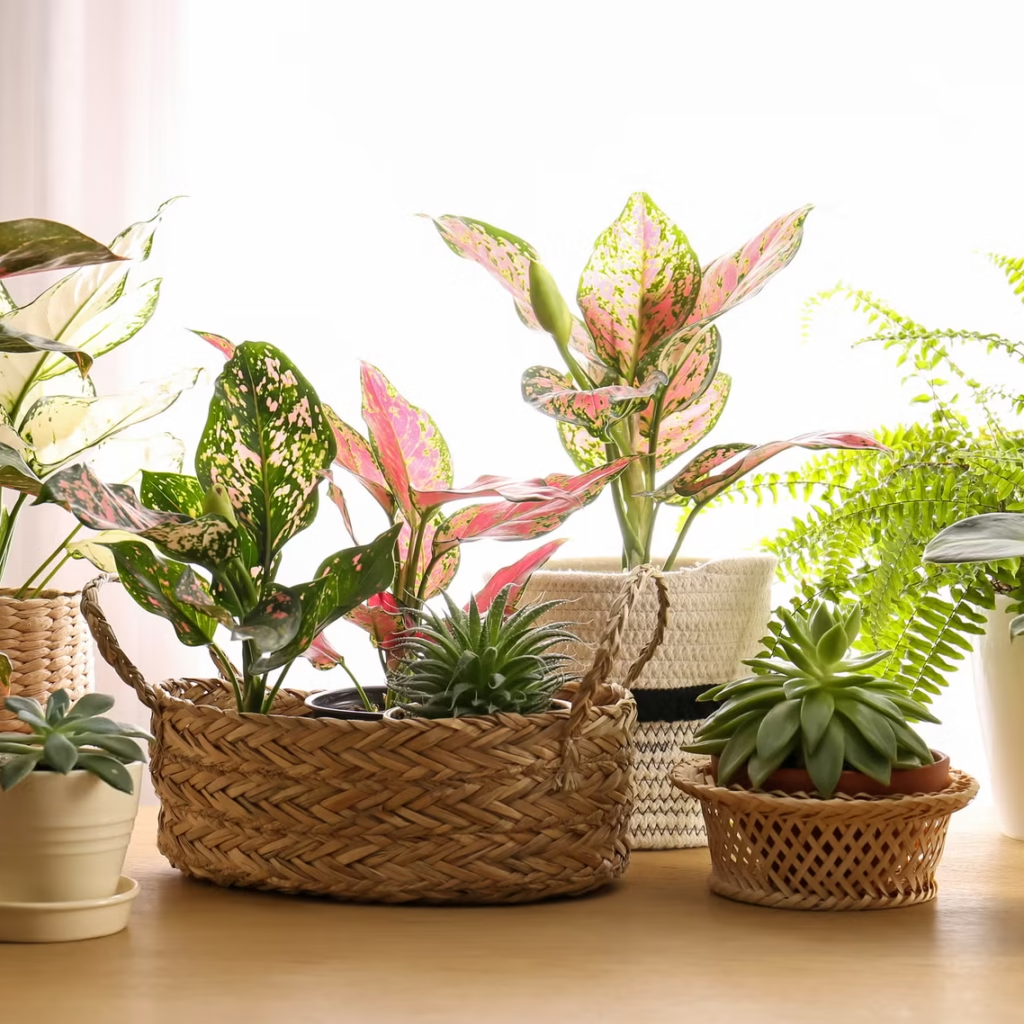
  • Heavy feeders: Flowering plants like hibiscus, begonias, and African violets; fast-growing foliage plants like pothos, philodendrons, and monsteras.
  • Moderate feeders: Peace lilies, spider plants, and ferns.
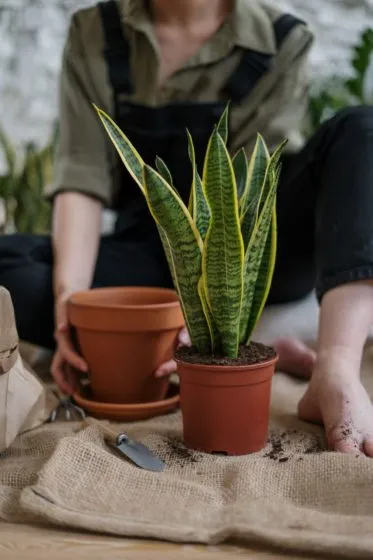
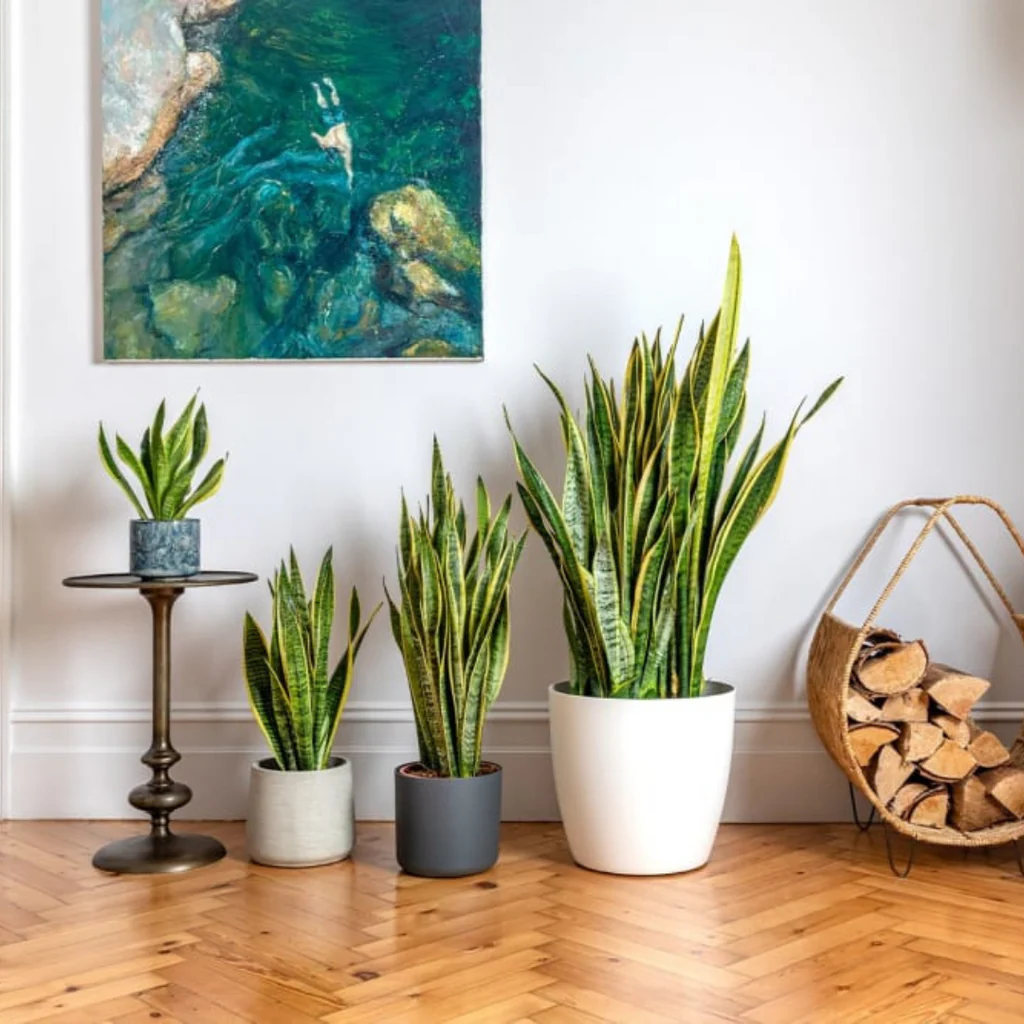
  • Light feeders: Succulents, cacti, and slow-growing plants like snake plants and ZZ plants.

Knowing your plant’s growth rate and nutrient needs helps you design a routine that avoids both overfeeding and deficiency.


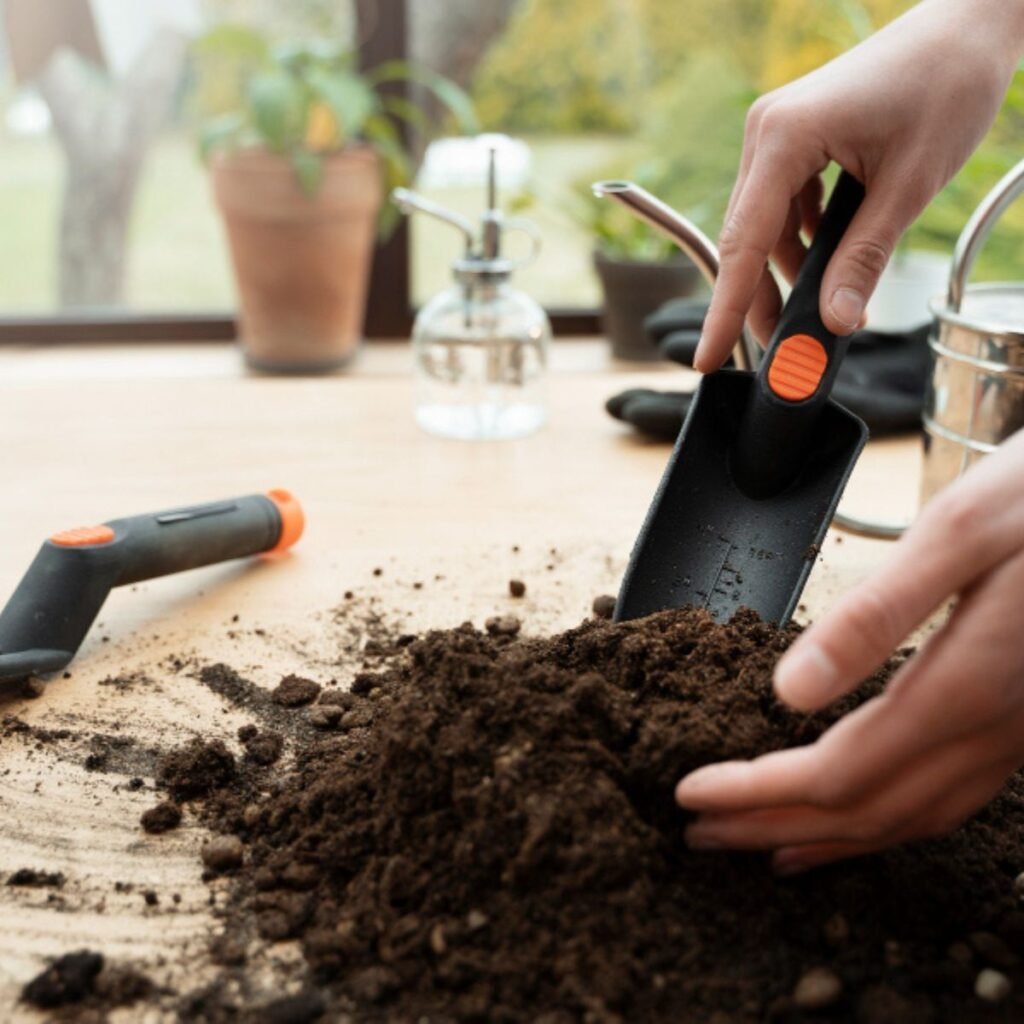
3. Choosing the Right Type of Fertilizer

Houseplant fertilizers come in different forms, and understanding them helps you pick what fits your lifestyle best.

Liquid Fertilizers

  • Best for: Frequent feeders and fast-growing plants.
  • Advantages: Easy to mix with water and apply during regular watering.
  • Routine: Use every 2–4 weeks during the growing season (spring and summer).

Slow-Release Fertilizers

  • Best for: Busy plant owners.
  • Advantages: Nutrients release gradually over time, reducing maintenance.
  • Routine: Apply every 2–3 months.

Organic Fertilizers

  • Examples: Compost tea, seaweed extract, worm castings, or banana peel water.
  • Advantages: Natural, safe for pets and children, improves soil structure.
  • Routine: Can be used every 3–4 weeks in diluted form.

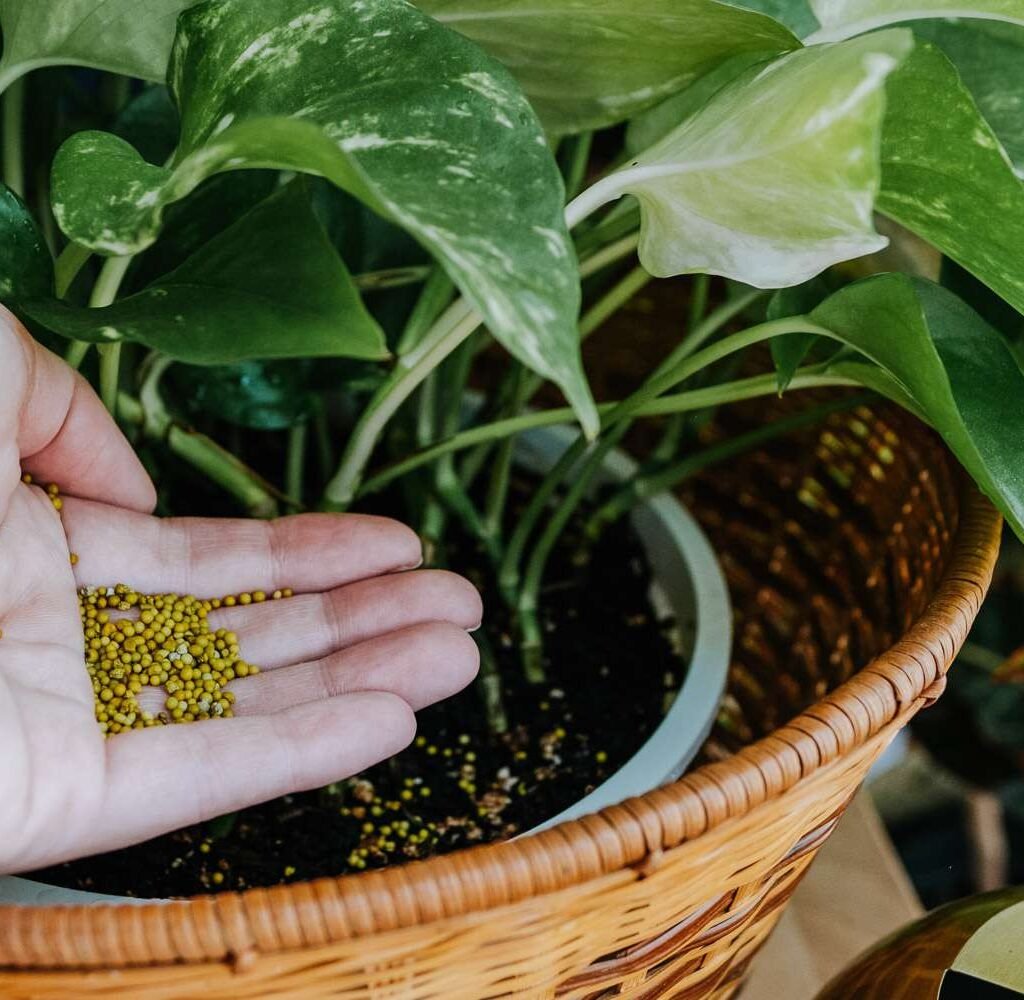
Granular Fertilizers

  • Best for: Large pots and outdoor containers.
  • Routine: Apply every 2–3 months and water thoroughly after application.

When choosing, always check the N-P-K ratio on the label. A balanced fertilizer (10-10-10 or 20-20-20) is suitable for most plants, while flowering plants benefit from higher phosphorus (e.g., 10-20-10).


4. Understanding the Fertilizing Seasons

Houseplants go through growth cycles depending on the time of year:

  • Spring and Summer (Active Growth): Plants grow new leaves and roots. This is the best time to fertilize regularly — every 2 to 4 weeks.
  • Autumn (Slowing Down): Growth slows; reduce frequency to once a month.
  • Winter (Dormancy): Most plants rest; stop fertilizing entirely until spring returns.

Succulents and cacti, which thrive in dry climates, often have different cycles — fertilize them lightly during their active growing months (usually spring and early summer).


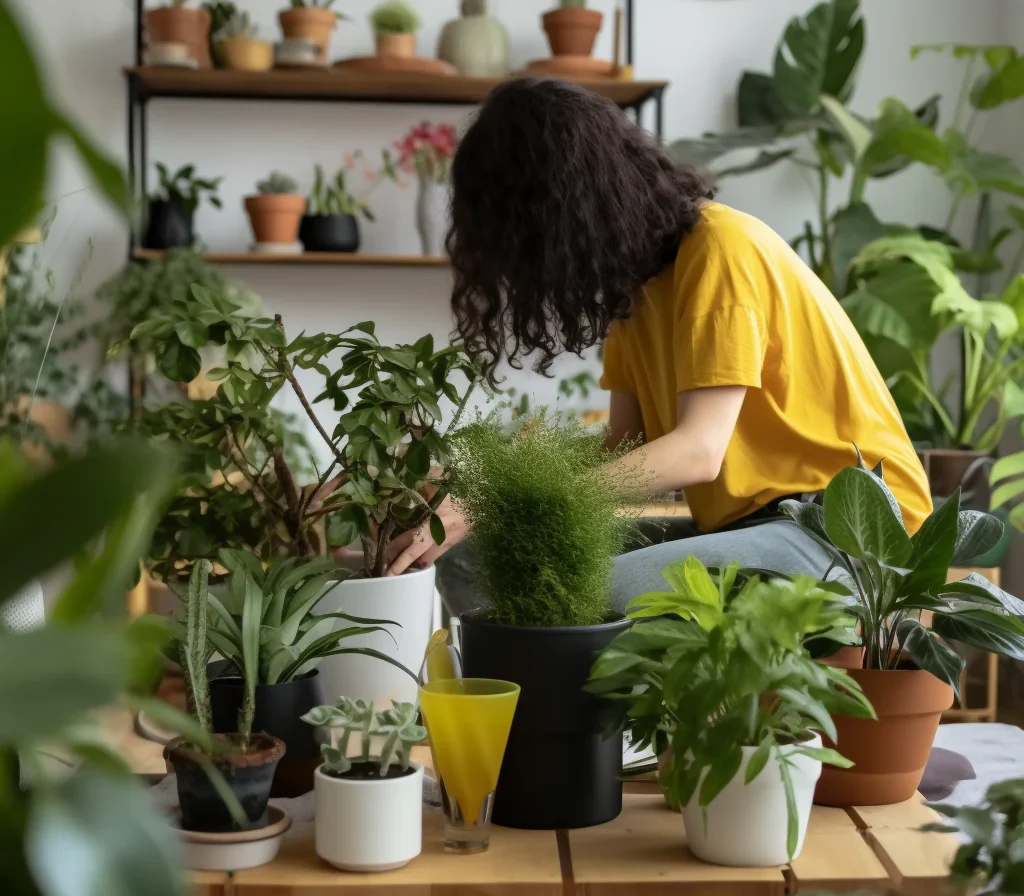
5. Step-by-Step Guide to Building a Consistent Fertilizing Routine

Creating a fertilizing schedule helps you maintain healthy growth without confusion. Here’s how to set one up:

Step 1: List All Your Houseplants

Start by writing down all the plants you have, their types (foliage, flowering, succulent, etc.), and their feeding needs. This helps tailor your approach instead of using a one-size-fits-all routine.

Step 2: Group Plants by Feeding Type

  • Group A: Heavy feeders (fertilize every 2 weeks)
  • Group B: Moderate feeders (every 3–4 weeks)
  • Group C: Light feeders (every 6–8 weeks)

Label them with tags or note it in your plant journal.

Step 3: Choose Fertilizer Type

Decide between liquid, slow-release, or organic options depending on your schedule and preference.

Step 4: Create a Fertilizer Calendar

Use a monthly planner or phone reminder app to mark fertilizing days. For instance:

  • 1st & 15th of each month: Heavy feeders.
  • 15th of every month: Moderate feeders.
  • 1st of every 2nd month: Light feeders.

Consistency helps avoid overfeeding and ensures balanced nutrient supply.

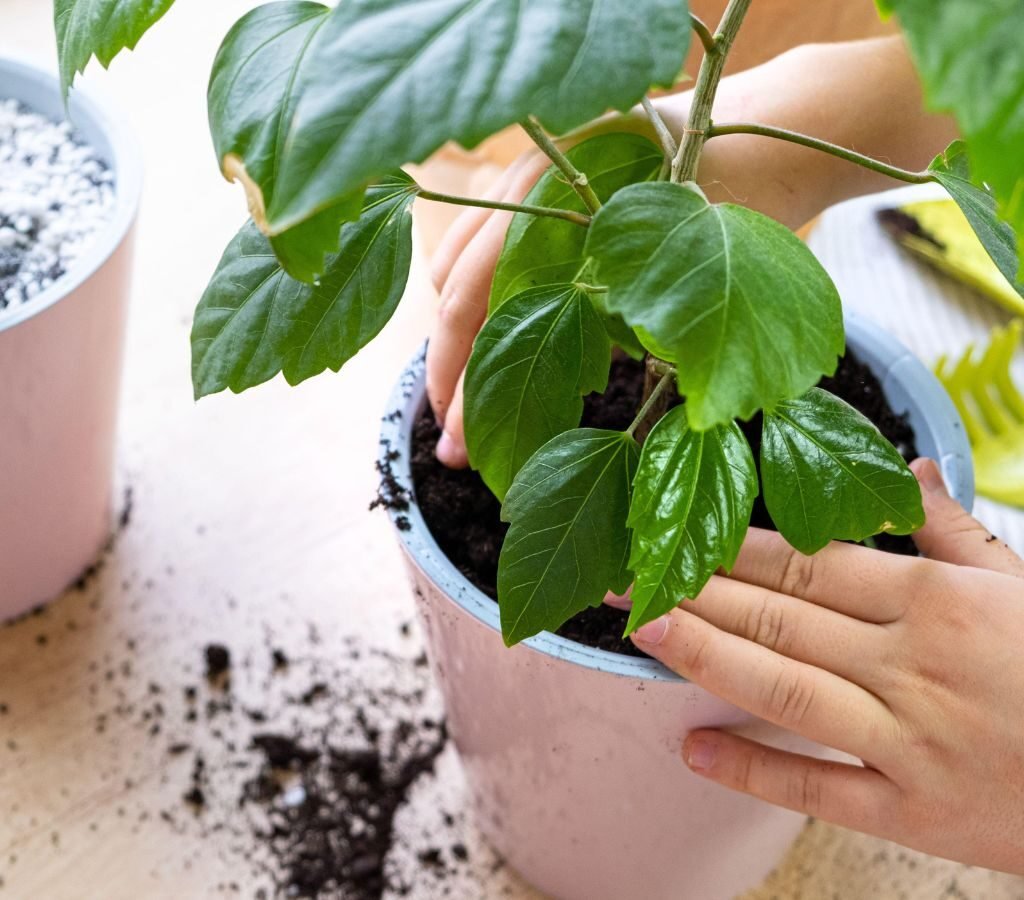
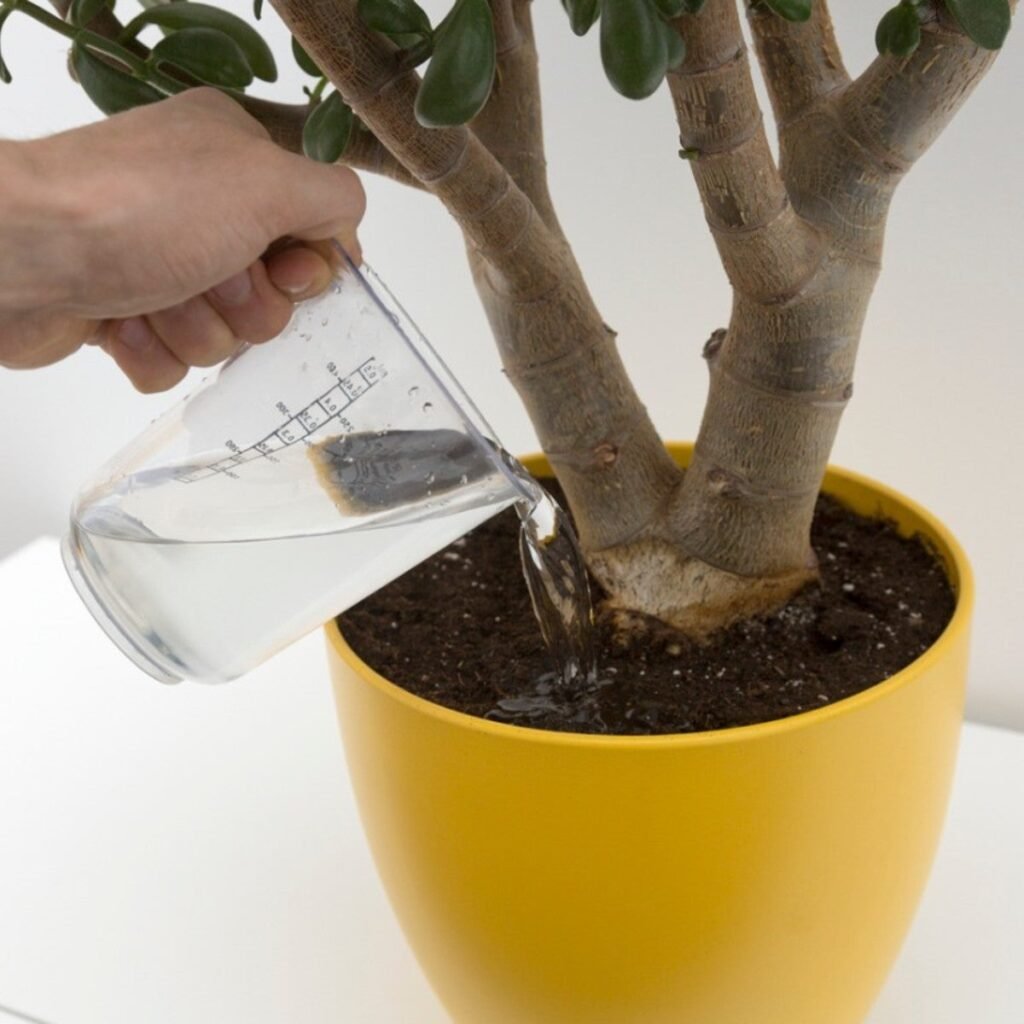
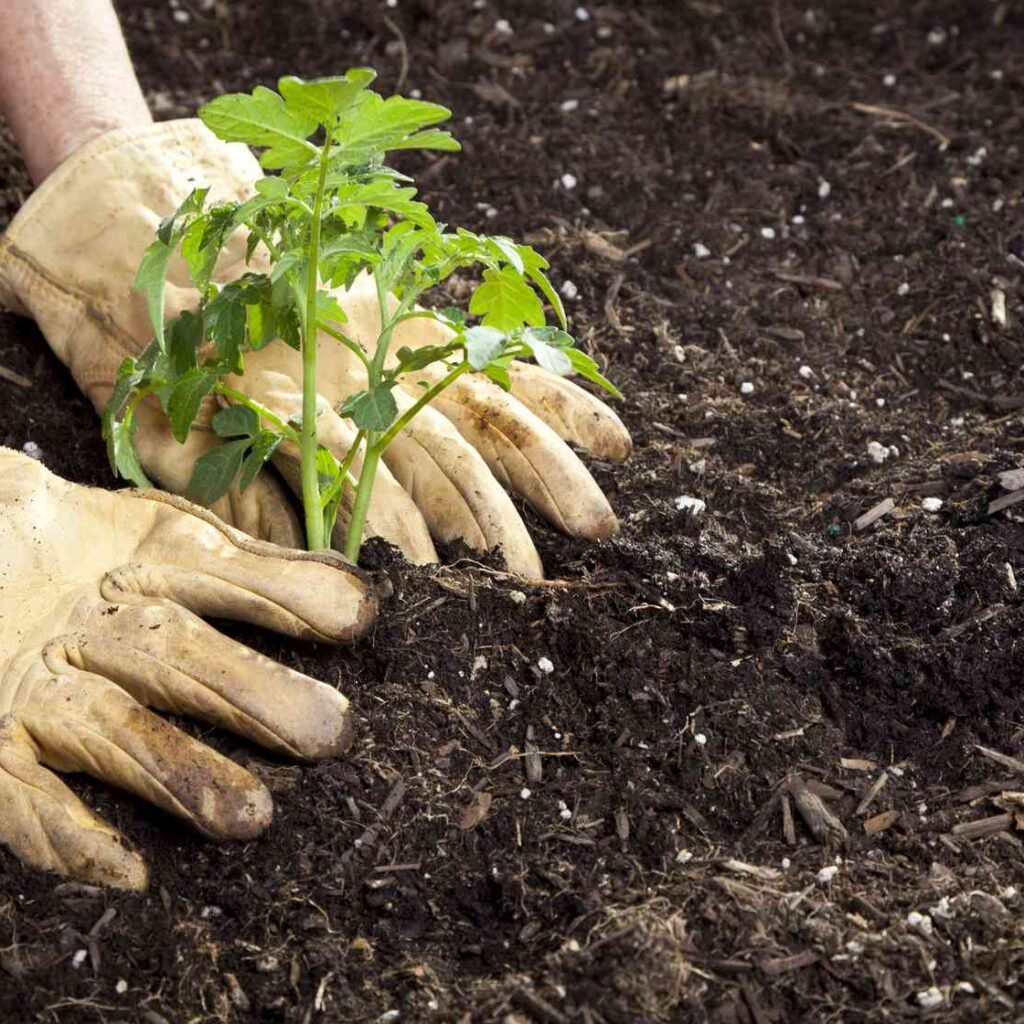
Step 5: Combine With Your Watering Routine

For most houseplants, fertilizing works best when the soil is slightly moist. Apply fertilizer right after watering or mix it with water to prevent root burn.


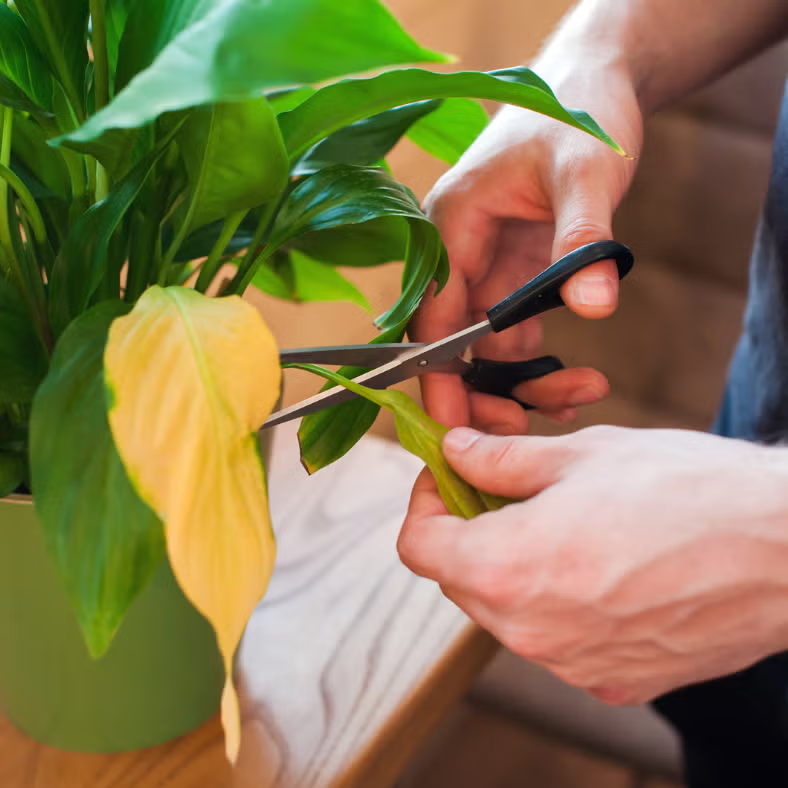
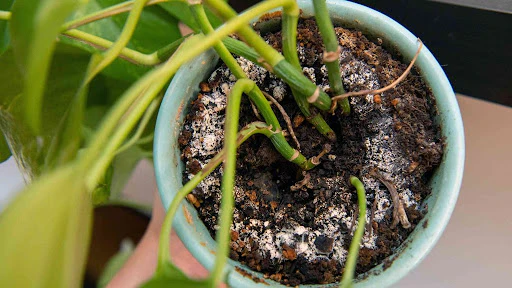
6. Signs of Overfertilization and How to Fix It

Even with a routine, it’s easy to overdo it. Look for these warning signs:

  • White crust on soil surface (salt buildup).
  • Yellow or brown leaf tips.
  • Droopy leaves despite adequate watering.
  • Slow growth or wilting.

How to Fix:

  • Flush the soil with clean water 2–3 times to remove excess fertilizer salts.
  • Let the soil drain completely.
  • Avoid feeding for 4–6 weeks.

A balanced routine should always focus on moderation — it’s better to underfeed than overfeed.


7. Natural Fertilizer Alternatives You Can Make at Home

If you prefer organic or DIY methods, there are several effective options that can fit perfectly into your fertilizing schedule.

1. Banana Peel Fertilizer

Rich in potassium and phosphorus — ideal for flowering plants.

  • Soak banana peels in water for 2 days and use the water for watering.

2. Eggshell Fertilizer

Excellent source of calcium.

  • Crush eggshells into powder and mix into the soil or soak in water overnight before watering.

3. Compost Tea

Provides a nutrient-rich boost and improves soil microorganisms.

  • Steep compost in water for 24 hours, strain, and apply as liquid fertilizer.

4. Coffee Grounds

Contain nitrogen and improve soil texture.

  • Mix used coffee grounds with potting soil or sprinkle a thin layer on the surface.

5. Epsom Salt Solution

Provides magnesium for leaf color and chlorophyll production.

  • Mix 1 tablespoon Epsom salt in 1 gallon of water; apply once a month.

8. Common Fertilizing Mistakes to Avoid

  1. Fertilizing dry soil: Always water plants first to avoid root burn.
  2. Using too much fertilizer: More is not better — excess nutrients can harm roots.
  3. Ignoring dormant periods: Plants don’t need food when they’re not growing.
  4. Skipping micro-nutrients: Focus on balanced fertilizers that include trace elements.
  5. Not shaking liquid fertilizers: Nutrients can settle at the bottom, making the first few doses too weak or too strong.

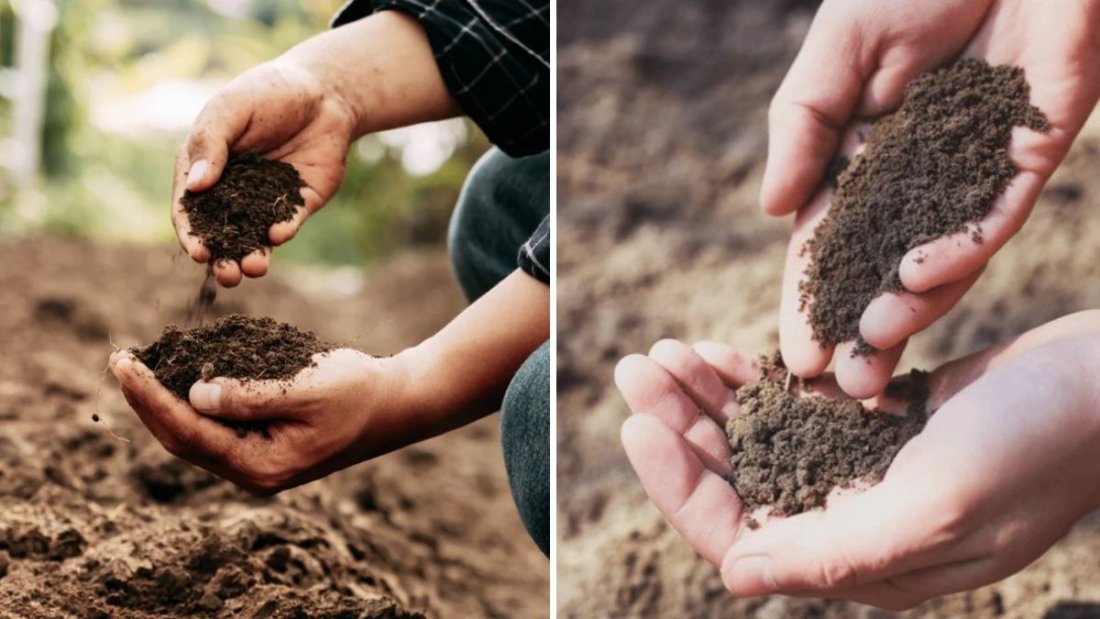
9. The Role of pH in Fertilization

Soil pH determines how well plants absorb nutrients. Most houseplants prefer slightly acidic to neutral pH (6.0–7.0). If your soil is too alkaline, plants might not absorb iron or magnesium even if you fertilize regularly.

Tip: You can use a simple soil pH tester. If the soil is alkaline, adding organic matter like compost, peat moss, or vinegar water can help restore balance.


10. Monitoring and Adjusting Your Routine

A successful fertilizing routine is not rigid — it evolves with your plants. Observe how your plants respond:

  • If growth is strong and leaves are vibrant, your schedule is perfect.
  • If leaves yellow, growth slows, or edges brown, reassess frequency or concentration.
  • Adjust with the seasons: feed more during spring and summer, less in fall, and stop in winter.

Keep a plant journal to record dates, fertilizers used, and plant reactions. Over time, you’ll develop an instinct for what each plant needs.


Conclusion

Creating a consistent fertilizing routine for houseplants is about finding balance — between providing enough nutrients and not overwhelming your plants. By understanding your plant types, choosing the right fertilizers, and aligning feeding with seasonal growth, you ensure that every drop of nourishment counts.

Consistency, observation, and care are your greatest tools. With a thoughtful fertilizing plan, your indoor garden will reward you with glossy leaves, vibrant flowers, and steady growth all year round — a sign of plants that are not just surviving, but truly thriving in your home.

How to Keep Indoor Plants Pest-Free Naturally

How to Keep Indoor Plants Pest-Free Naturally

Indoor plants add beauty, freshness, and life to any space, but when tiny insects start invading your green sanctuary, it can quickly become frustrating. Chemical pesticides may offer a quick fix, but they often come with side effects — harming beneficial organisms, causing unpleasant odors, or even posing risks to pets and humans. The good news is, you can protect your houseplants using natural, safe, and effective methods. Let’s explore how to keep indoor plants pest-free naturally while maintaining a healthy, thriving indoor garden.


1. Understand the Common Indoor Plant Pests

Before you can protect your plants, it’s important to know the most common culprits behind indoor infestations. These pests include:

  • Aphids: Tiny, pear-shaped insects that suck sap from plant leaves and stems, causing curling and yellowing.
  • Spider Mites: Minuscule red or brown mites that form fine webs and leave stippled marks on leaves.
  • Fungus Gnats: Small flies that hover around the soil, their larvae feeding on roots and organic matter.
  • Mealybugs: White, cotton-like clusters found on stems and leaf joints.
  • Scale Insects: Small, brown, shell-like insects that attach to stems and undersides of leaves.
  • Whiteflies: Tiny white insects that fly up in clouds when disturbed.

Identifying pests early is key to controlling them naturally before they spread to other plants.


2. Prevention: The Best Defense Against Pests

The most effective way to manage pests is to prevent them from entering or multiplying in the first place. Here are natural prevention strategies:

  • Inspect New Plants Carefully: Before bringing any new plant home, examine leaves (especially the undersides), stems, and soil for signs of insects or eggs.
  • Isolate New Arrivals: Keep new plants separate for at least two weeks to ensure they are pest-free before introducing them to your collection.
  • Keep Leaves Clean: Dust buildup can attract pests. Gently wipe leaves with a damp cloth or spray with a mix of water and a few drops of mild liquid soap.
  • Avoid Overwatering: Many pests, like fungus gnats, thrive in damp soil. Let the top layer of soil dry before watering again.
  • Ensure Proper Air Circulation: Stagnant air encourages pests and fungal growth. Use a fan or keep windows slightly open to improve air flow.

3. Natural Cleaning and Pest Control Sprays

Instead of chemical insecticides, several natural sprays can effectively eliminate pests without harming plants or your indoor environment.

Neem Oil Spray

Neem oil is one of the best natural pesticides available. It works by disrupting pests’ feeding and reproduction cycles.

How to Use:

  • Mix 1 teaspoon of neem oil with 1 liter of warm water.
  • Add a few drops of mild liquid soap to help the oil mix with water.
  • Shake well and spray on affected leaves, stems, and soil.
  • Repeat every 5–7 days until pests disappear.

Soap and Water Spray

A gentle soap solution can remove soft-bodied pests like aphids, mealybugs, and spider mites.

How to Use:

  • Mix 1 teaspoon of mild liquid dish soap in 1 liter of water.
  • Spray directly on pests and wipe leaves gently with a soft cloth.
  • Rinse after a few hours to prevent soap buildup.

Garlic and Chili Spray

Garlic and chili act as natural repellents due to their strong scent and antibacterial properties.

Recipe:

  • Blend 1 garlic bulb and 1 chili pepper with 1 liter of water.
  • Let it steep overnight, strain, and add a few drops of liquid soap.
  • Spray on plants weekly to keep pests away.

Alcohol Solution for Mealybugs

Mealybugs can be stubborn, but rubbing alcohol can dissolve their protective coating.

How to Use:

  • Dip a cotton swab in 70% isopropyl alcohol and dab directly on mealybugs.
  • Avoid spraying directly on sensitive plants, as alcohol may damage leaves.

4. Encourage Natural Predators (Even Indoors!)

You might be surprised, but some beneficial insects can live indoors temporarily to control pests naturally.

  • Ladybugs eat aphids, mealybugs, and spider mites.
  • Lacewing larvae feed on soft-bodied insects like thrips and whiteflies.

You can occasionally release a few of these predators indoors (available from garden suppliers) to control outbreaks in a natural way. Just make sure to release them in a well-contained plant corner or greenhouse area.


5. Use Natural Barriers and Soil Treatments

Healthy soil is your first line of defense against root pests and fungus gnats. Try these natural soil treatments:

  • Cinnamon Powder: Sprinkle cinnamon on the soil surface to prevent fungal growth and deter gnats.
  • Diatomaceous Earth (DE): A fine, natural powder made from fossilized algae. When sprinkled on soil or leaves, it kills pests by dehydrating them.
  • Hydrogen Peroxide Solution: Mix 1 part hydrogen peroxide with 4 parts water and pour into the soil once a month to kill gnat larvae and aerate the roots.
  • Sand or Pebble Layer: Covering the topsoil with a thin layer of sand or decorative pebbles can deter fungus gnats from laying eggs.

6. Strengthen Plants Naturally

Strong, healthy plants are less attractive to pests. Here’s how to keep your plants vigorous:

  • Use Organic Fertilizers: Compost tea, banana peel water, or diluted fish emulsion are gentle nutrient sources that promote healthy growth.
  • Ensure Adequate Light: Insufficient light weakens plants, making them more susceptible to insects. Move plants closer to windows or use grow lights.
  • Water Correctly: Overwatering or underwatering stresses plants, making them vulnerable to infestations. Always check soil moisture before watering.

7. Quarantine and Prune Infested Plants

If you notice pests, act immediately to stop the spread:

  • Isolate the affected plant from the rest of your collection.
  • Prune heavily infested leaves or stems and dispose of them outside your home.
  • Clean the area around the plant, including pots, saucers, and nearby surfaces, with a vinegar-water solution.

Quick action prevents a small problem from turning into a large infestation.


8. Homemade Pest-Repelling Mixtures

In addition to sprays, you can create pest deterrents that double as natural leaf shine:

Essential Oil Mix

Essential oils like peppermint, rosemary, and eucalyptus repel most indoor pests.

Recipe:

  • Add 10 drops of peppermint or rosemary essential oil to 1 liter of water.
  • Add 1 teaspoon of mild soap and mix well.
  • Spray lightly on leaves once a week.

Baking Soda Spray

For fungal and pest issues, baking soda can balance pH and discourage pest growth.

How to Use:

  • Mix 1 teaspoon of baking soda in 1 liter of water.
  • Add a few drops of soap and spray the leaves weekly.

9. Regular Inspection and Maintenance Routine

The key to a pest-free indoor garden is consistency. Follow this weekly routine:

  1. Inspect every plant — under leaves, near the soil, and at joints.
  2. Wipe leaves with a damp cloth or mist gently with neem spray.
  3. Rotate plants to ensure even light exposure.
  4. Trim dead or yellowing leaves that may attract pests.
  5. Refresh soil every few months to remove eggs or larvae.

This routine only takes a few minutes but can save you from long-term pest troubles.


10. When Natural Methods Aren’t Enough

Sometimes, infestations may become severe despite your best efforts. In such cases:

  • Repot the plant: Remove the plant from its pot, wash the roots thoroughly, and replace with fresh soil.
  • Use organic insecticidal soap or horticultural oil as a last resort. These are eco-friendly and safe for indoor use.

Remember, the goal is to restore balance, not eliminate every tiny creature. A few harmless insects are part of nature’s system.


Conclusion

Keeping indoor plants pest-free naturally is entirely possible with patience, observation, and consistency. By combining prevention, natural sprays, and healthy care practices, you can maintain a vibrant, pest-resistant indoor jungle without using harsh chemicals.

Your plants will not only look healthier but will also thank you with lush growth, clean air, and a peaceful green environment. A natural approach to pest control doesn’t just protect your plants — it protects your home, your health, and the planet too.

7 Indoor Plants That Can Handle Neglect

7 Indoor Plants That Can Handle Neglect

Indoor plants bring life, beauty, and a sense of calm into our homes. They purify the air, improve mood, and add natural aesthetics to any living space. However, not everyone has the time or memory to water, fertilize, or prune plants regularly. For busy professionals, forgetful plant owners, or frequent travelers, choosing low-maintenance, resilient plants is essential. Fortunately, some indoor plants thrive even when neglected, making them perfect candidates for those who want greenery without constant upkeep.

In this article, we will explore 7 indoor plants that can handle neglect, including their care tips, resilience factors, and aesthetic appeal, so you can confidently enjoy indoor gardening without stress.


1. Snake Plant (Sansevieria trifasciata)

The snake plant, also known as mother-in-law’s tongue, is one of the most forgiving houseplants. Its upright, sword-like leaves are not only striking but also extremely drought-tolerant.

Why it handles neglect:

  • Stores water in its thick leaves, allowing it to survive long periods without watering.
  • Can tolerate low light conditions, making it perfect for dim corners.
  • Resistant to pests and diseases.

Care tips:

  • Water sparingly; once every 2–3 weeks is sufficient.
  • Use well-draining soil to prevent root rot.
  • Clean leaves occasionally to remove dust and allow better photosynthesis.

Snake plants also have the added benefit of air purification, removing toxins like formaldehyde and benzene from indoor spaces.


2. ZZ Plant (Zamioculcas zamiifolia)

The ZZ plant is another superstar for neglectful plant owners. With glossy, dark green leaves, it adds elegance to any room while being incredibly resilient.

Why it handles neglect:

  • Stores water in its thick rhizomes, allowing it to survive drought.
  • Tolerates low light and fluctuating temperatures.
  • Slow-growing, which reduces the need for frequent pruning.

Care tips:

  • Water only when the soil feels completely dry.
  • Avoid overwatering; ZZ plants are prone to root rot in soggy soil.
  • Place in indirect light for best leaf coloration, though it tolerates shade.

Its sturdy nature makes it ideal for offices, apartments, and rooms where regular attention isn’t possible.


3. Pothos (Epipremnum aureum)

Pothos is a trailing vine loved for its adaptability, easy propagation, and ability to thrive in varied conditions. Its heart-shaped, variegated leaves add charm and vibrancy.

Why it handles neglect:

  • Survives in low light and variable temperatures.
  • Tolerates occasional missed watering.
  • Can grow in soil or water, giving flexibility in care.

Care tips:

  • Water only when the top inch of soil is dry.
  • Prune occasionally to maintain shape and encourage bushier growth.
  • Fertilize lightly every 2–3 months during the growing season.

Pothos can be placed on shelves, hanging baskets, or as a tabletop trailing plant, making it versatile and low-maintenance.


4. Spider Plant (Chlorophytum comosum)

Spider plants are known for their arched green-and-white striped leaves and small plantlets that dangle like spiders. They are forgiving and thrive under minimal care.

Why it handles neglect:

  • Can survive occasional droughts.
  • Tolerates a range of light conditions, from indirect sunlight to partial shade.
  • Resilient to temperature fluctuations and minor neglect.

Care tips:

  • Water moderately, allowing soil to dry slightly between waterings.
  • Remove dead leaves to maintain a clean appearance.
  • Propagate plantlets easily to create new plants.

Spider plants are also excellent for air purification, removing indoor pollutants like carbon monoxide and xylene.


5. Peace Lily (Spathiphyllum spp.)

Peace lilies are beloved for their glossy green foliage and elegant white flowers. They are surprisingly forgiving and thrive even when slightly neglected.

Why it handles neglect:

  • Can tolerate low light, though flowers bloom better in brighter areas.
  • Survives occasional missed watering.
  • Alerts owners when thirsty by drooping leaves, which recover quickly after watering.

Care tips:

  • Water when the top 1–2 inches of soil feel dry.
  • Keep in indirect sunlight; too much direct sun can scorch leaves.
  • Wipe leaves occasionally to remove dust and improve photosynthesis.

Peace lilies bring a touch of elegance to homes while being low-maintenance and forgiving, making them ideal for beginners.


6. Cast Iron Plant (Aspidistra elatior)

True to its name, the cast iron plant is incredibly hardy. Known for its dark green, upright leaves, it’s perfect for indoor areas that are often overlooked or neglected.

Why it handles neglect:

  • Tolerates low light, irregular watering, and fluctuating temperatures.
  • Extremely resistant to pests and diseases.
  • Slow-growing, which means minimal maintenance.

Care tips:

  • Water sparingly; let the soil dry between waterings.
  • Place in indirect light for best results, though it survives shade.
  • Occasionally remove dust from leaves to maintain appearance.

The cast iron plant is ideal for hallways, corners, and offices where attention is minimal but greenery is desired.


7. Jade Plant (Crassula ovata)

The jade plant is a succulent with thick, fleshy leaves that store water, making it one of the easiest plants to keep alive indoors. Its shiny green leaves and compact size make it aesthetically pleasing.

Why it handles neglect:

  • Stores water in leaves, tolerating long periods without watering.
  • Thrives in bright indoor light but can survive moderate shade.
  • Hardy against occasional temperature changes and inconsistent care.

Care tips:

  • Water thoroughly but infrequently; allow soil to dry completely between watering.
  • Provide bright, indirect light for optimal growth.
  • Prune occasionally to maintain shape and encourage new growth.

Jade plants are also believed to bring good luck and prosperity, making them a popular choice in homes and offices.


Additional Tips for Growing Low-Maintenance Indoor Plants

Even resilient plants benefit from basic care. Here are tips to ensure your “neglect-friendly” plants thrive:

  1. Choose the Right Soil: Use well-draining soil mixes to prevent waterlogging and root rot. Succulents like jade plants require cactus soil, while leafy plants like pothos or snake plants prefer standard potting mix with added perlite.
  2. Select Appropriate Containers: Use pots with drainage holes to prevent excess water accumulation. Avoid decorative pots without holes unless using a double-pot system.
  3. Monitor Light Conditions: Even hardy plants need appropriate light. Place low-light-tolerant plants like ZZ plants or cast iron plants in shaded corners, while succulents like jade plants need bright, indirect light.
  4. Watering Routine: Understand your plant’s needs. Most neglect-tolerant plants prefer underwatering to overwatering. A good rule is to check the soil moisture before watering.
  5. Temperature and Humidity: Most low-maintenance plants adapt to average indoor conditions. Avoid placing them near drafts, radiators, or heating vents for extended periods.
  6. Minimal Fertilization: Fertilize sparingly, perhaps once or twice a year for slow-growing plants, to avoid overloading soil with nutrients.
  7. Cleaning and Pruning: Dust leaves occasionally, and remove dead or yellowing leaves to maintain plant health and aesthetics.

Why These Plants Are Ideal for Busy or Forgetful Individuals

The common traits that make these 7 plants ideal for neglect include:

  • Water storage: Thick leaves or rhizomes allow them to survive drought.
  • Low light tolerance: Can thrive in shaded indoor areas.
  • Hardiness: Resistant to pests, temperature fluctuations, and occasional neglect.
  • Slow growth: Reduces the need for frequent pruning or repotting.

By choosing these plants, you can enjoy a lush, green indoor environment without the stress of daily care.


Conclusion

Indoor plants don’t have to be high-maintenance to be beautiful and beneficial. Snake plants, ZZ plants, pothos, spider plants, peace lilies, cast iron plants, and jade plants prove that resilience and style can go hand in hand. These seven low-maintenance species are perfect for busy lifestyles, forgetful plant owners, or anyone looking to add greenery without constant attention.

By selecting the right plant, providing basic care, and understanding their unique needs, even a novice or neglectful plant enthusiast can enjoy the calming, aesthetic, and air-purifying benefits of indoor greenery.

With these resilient houseplants, thriving indoor jungles are possible—even if you occasionally forget to water them.

How to Create a Layered Indoor Plant Arrangement

How to Create a Layered Indoor Plant Arrangement

Indoor plants are no longer just greenery—they’re a statement of style, a source of relaxation, and a way to bring nature indoors. But simply placing a few potted plants on shelves or windowsills doesn’t create the visual impact many plant lovers desire. That’s where layered indoor plant arrangements come in. Layering plants transforms a collection of greens into a cohesive, dynamic display that adds depth, texture, and life to any space.

In this article, we’ll explore how to create a layered indoor plant arrangement, covering plant selection, positioning, layering techniques, lighting considerations, and styling tips to help you craft a stunning indoor jungle.


1. Understanding the Concept of Layering in Indoor Plant Design

Layering in plant design means arranging plants at different heights, sizes, and textures to create a visually balanced composition. Rather than having all plants at eye level or on the floor, layering incorporates:

  • Vertical layers: Using tall plants, mid-sized plants, and low-growing plants.
  • Textural layers: Mixing plants with different leaf shapes, colors, and textures.
  • Spatial layers: Using shelves, stands, hanging planters, and floor pots to create depth.

The goal is to replicate the feel of nature, where plants grow at different levels, creating a lush, immersive environment. Layered arrangements are not only visually pleasing—they also allow each plant to receive the appropriate light and air circulation.


2. Choosing the Right Plants for Layered Arrangements

Selecting plants is the first step to a successful layered indoor display. Consider size, shape, foliage texture, and growth habits when creating layers.

a. Tall Plants for the Back Layer

Tall plants form the foundation of your arrangement. They anchor the display and provide a backdrop for smaller plants.
Examples:

  • Fiddle Leaf Fig (Ficus lyrata)
  • Rubber Plant (Ficus elastica)
  • Areca Palm (Dypsis lutescens)
  • Monstera Deliciosa

Tip: Place these plants in the farthest part of your arrangement or near walls to create height and structure.


b. Medium Plants for the Middle Layer

Mid-sized plants bridge the gap between tall and small plants, adding volume and visual interest.
Examples:

  • Calathea varieties
  • Philodendron species
  • Peace Lily (Spathiphyllum)
  • Dracaena

Tip: Group several mid-sized plants together to create a sense of lushness, and use varied textures to prevent monotony.


c. Small Plants for the Front Layer

Small plants complete the arrangement and fill in gaps. They add detail and make the arrangement look natural.
Examples:

  • Pothos
  • Fittonia (Nerve Plant)
  • Ferns like Boston Fern
  • Succulents or small cacti

Tip: Low-growing trailing plants are perfect for the front layer, cascading slightly over shelves or tables to create depth.


d. Hanging or Air Plants

Hanging plants or air plants create vertical interest and enhance the feeling of layers without taking up floor space.
Examples:

  • String of Pearls
  • Spider Plant (Chlorophytum comosum)
  • Hoya varieties

Tip: Use macramé hangers or wall-mounted planters to add floating layers above your main arrangement.


3. Selecting Planters and Containers

Planters play a key role in layered arrangements—they can emphasize height differences, add color, and create cohesion. Consider the following:

  • Size: Choose pots proportional to plant size. Tall plants need sturdy, larger pots, while small plants look better in compact containers.
  • Style: Mix textures like terracotta, ceramic, and woven baskets for visual interest.
  • Color: Use neutral tones for a minimalist look, or colorful pots to create contrast and vibrancy.
  • Consistency: To avoid a cluttered look, try a consistent theme such as matching materials, colors, or shapes.

For layered displays, planter stands, tiered shelves, and plant carts can help elevate smaller plants and create clear visual separation between layers.


4. Arranging Plants by Height and Texture

Layered arrangements are more than just placing tall plants in the back and small ones in front. Consider texture, leaf shape, and color for a harmonious display.

  • Texture: Combine broad leaves (like Monstera) with fine foliage (like ferns) for contrast.
  • Leaf color: Mix dark green, light green, variegated, and even purple foliage for depth.
  • Growth habit: Mix upright plants, trailing vines, and cascading species to create movement.
  • Balance: Avoid placing all large or bold plants on one side. Distribute visual weight evenly to create balance.

Tip: Use the “triangle rule”—arrange plants in triangular patterns to guide the eye naturally through the display.


5. Optimizing Light for Layered Arrangements

Layering can sometimes create shade for lower plants. To ensure all plants thrive:

  • Assess light requirements: Place sun-loving plants where they receive the most natural light, typically near windows.
  • Rotate plants: Move mid and low layers periodically to prevent uneven growth.
  • Use artificial light: Grow lights can supplement areas with insufficient sunlight, especially for lower layers.
  • Avoid overcrowding: Too many plants stacked closely can block airflow and light, causing leggy growth or leaf damage.

Tip: For layered arrangements in low-light areas, prioritize shade-tolerant plants like Pothos, ZZ Plant, or Calathea in lower layers.


6. Creating Depth with Stands, Shelves, and Wall Displays

Vertical and spatial layering is achieved with tools beyond plant height:

  • Plant stands: Elevate mid-sized plants to form a second tier.
  • Tiered shelves: Display multiple layers on a single piece of furniture.
  • Hanging planters: Suspend trailing plants above tabletop arrangements.
  • Wall-mounted planters: Add vertical interest without consuming floor space.
  • Corner arrangements: Place tall plants behind mid-sized and small plants to fill unused corners dynamically.

By combining these elements, you can create a three-dimensional plant display that feels lush and immersive.


7. Using Color, Patterns, and Accessories

Layering isn’t just about plant size; color and style are equally important:

  • Leaf color: Mix dark green foliage with variegated leaves to create visual contrast.
  • Flowering plants: Introduce seasonal blooms sparingly for pops of color.
  • Decorative elements: Incorporate pebbles, moss, or driftwood to enhance the natural aesthetic.
  • Pot pattern and color: Use neutral pots to highlight foliage or bold pots for a decorative statement.

Tip: Repeat colors and textures in multiple layers for harmony, while introducing small accents for focal points.


8. Maintenance of Layered Indoor Plant Arrangements

Layered arrangements require regular care to stay vibrant:

  • Watering: Adjust watering by plant type and position—top layers may dry faster than lower layers.
  • Pruning: Trim trailing and fast-growing plants to maintain balance.
  • Cleaning leaves: Dust can accumulate in dense arrangements, reducing photosynthesis. Wipe leaves gently with a damp cloth.
  • Repotting: Monitor growth; plants may need larger pots over time.
  • Monitoring pests: Dense arrangements can harbor pests; check leaves and stems regularly.

Tip: Keep a care schedule to prevent neglect and ensure each layer thrives.


9. Common Mistakes to Avoid

To ensure your layered arrangement is a success, avoid these pitfalls:

  • Overcrowding: Too many plants can block light and airflow.
  • Ignoring light needs: Not all plants can thrive in shaded lower layers.
  • Uneven watering: Different layers may need different watering schedules.
  • Neglecting plant growth habits: Some trailing plants may overtake smaller upright plants if not managed.
  • Ignoring pot size: Small pots for large plants can stunt growth; large pots for small plants can lead to overwatering.

By planning ahead and monitoring your arrangement, these mistakes can be avoided.


10. Inspiring Ideas for Layered Indoor Plant Arrangements

  • Indoor jungle corner: Combine a tall fiddle leaf fig, mid-sized ferns, and trailing pothos for a lush corner display.
  • Tiered shelf garden: Use floating shelves to display small trailing plants at different heights above mid-sized philodendrons.
  • Dining table centerpiece: Place a mix of small flowering plants and low-growing ferns in decorative pots with height variation.
  • Hanging plant cascade: Suspend string-of-pearls or hoya plants above a group of floor-standing tropical plants for vertical drama.

The possibilities are endless, limited only by your creativity and space.


Conclusion

Creating a layered indoor plant arrangement is both an art and a science. By carefully selecting plants of different heights, textures, and colors, choosing appropriate planters, and strategically arranging them with attention to light and care, you can transform any indoor space into a dynamic, lush, and inviting green oasis.

Layering not only enhances visual appeal but also mimics natural ecosystems, promoting healthier growth and stronger plants. With thoughtful design and maintenance, a layered arrangement becomes more than decoration—it becomes a living, breathing part of your home.

Remember, the key to a successful layered indoor plant display is balance—in height, texture, light, and care. Master that, and your indoor garden will thrive beautifully, captivating every eye that sees it.

Why Drainage Holes Matter for Indoor Plants

Why Drainage Holes Matter for Indoor Plants

Indoor plants have become an essential part of modern living spaces—adding life, freshness, and beauty to homes and workplaces. But while many plant lovers focus on sunlight, watering schedules, and fertilizers, one crucial factor often goes unnoticed: drainage holes.

At first glance, drainage holes may seem like a small design feature at the bottom of pots, but they play a huge role in keeping plants healthy. In fact, many cases of wilting, yellowing, or dying indoor plants can be traced back to poor drainage.

In this article, we’ll explore why drainage holes matter so much for indoor plants, how they affect root health, what happens when pots lack them, and practical tips for ensuring your plants thrive in the right containers.


1. Understanding Drainage: The Root of Plant Health

To understand the importance of drainage holes, it helps to first look at how plant roots work. Roots not only absorb water and nutrients but also require oxygen to function. Healthy soil should have a balance of water and air spaces, allowing roots to “breathe.”

When a pot lacks drainage holes, excess water gets trapped at the bottom. The soil becomes waterlogged, displacing oxygen and suffocating the roots. Over time, this leads to root rot, nutrient imbalance, and eventually plant death.

So, the primary purpose of drainage holes is to let excess water escape, maintaining the ideal moisture level in the potting soil.


2. Why Drainage Holes Are Essential for Indoor Plants

Let’s explore in detail why these small openings at the base of pots are essential to every successful indoor gardener.


a. Prevents Root Rot

Root rot is one of the most common and deadly problems in houseplants. It’s caused by fungal infections that thrive in soggy, airless soil.

When water cannot drain away, the roots remain constantly wet. Without oxygen, they begin to decay, turning soft, black, and mushy. Once root rot sets in, it can spread quickly, killing the entire plant.

Drainage holes allow water to flow freely, preventing prolonged saturation and ensuring the roots get enough air to stay healthy and firm.


b. Balances Soil Moisture

Every plant species has unique water requirements. Some, like ferns and peace lilies, enjoy slightly moist soil, while others, such as snake plants or succulents, prefer drier conditions. Drainage holes help create this balance naturally.

When you water, excess moisture exits through the holes, leaving just enough for roots to absorb. This prevents both underwatering and overwatering, ensuring your plant’s roots receive consistent hydration without drowning.


c. Flushes Out Excess Salts and Minerals

Each time you water your plants, minerals from fertilizers and tap water build up in the soil. Over time, these salts can accumulate and damage roots, leading to brown leaf tips, stunted growth, and nutrient lockout.

Drainage holes act as an escape route for these salts. When you water thoroughly, the excess solution carrying dissolved salts drains out the bottom, keeping the soil chemistry balanced and preventing toxic buildup.


d. Allows Healthy Root Expansion

Roots naturally grow downward in search of moisture and nutrients. When pots have good drainage, the lower soil layers remain breathable and hospitable, encouraging roots to spread evenly throughout the pot.

In contrast, in pots without holes, the bottom layer becomes stagnant and airless, discouraging root growth. As a result, plants may become root-bound or develop weak, shallow root systems.


e. Reduces the Risk of Pest and Fungal Growth

Moist, poorly drained soil is a magnet for fungus gnats, mold, and bacterial diseases. These pests thrive in wet environments and can spread rapidly between houseplants.

Proper drainage reduces this risk significantly by ensuring that the top layer of soil dries out between waterings—something fungus gnats hate. It also prevents the sour, anaerobic smell often found in waterlogged pots.


3. What Happens If a Pot Doesn’t Have Drainage Holes

Despite their importance, many decorative pots are designed without drainage holes for aesthetic reasons. While they may look sleek, they can create a dangerous environment for your plants.

Here’s what typically happens in pots without drainage:

  • Water stagnates at the bottom, creating a swampy zone.
  • Roots suffocate due to lack of oxygen.
  • Nutrients leach unevenly, leaving upper roots dry and lower roots rotting.
  • Foul odor develops, signaling bacterial growth.
  • Leaves yellow and drop, as the plant struggles to survive.

Over time, even hardy species begin to decline. That’s why every experienced plant keeper knows: a pot without drainage is like a bathtub without a drain—it will eventually overflow.


4. How to Ensure Proper Drainage in Indoor Plant Pots

If you want your indoor plants to thrive, you need to create an environment that mimics nature. Here are practical ways to ensure your pots have excellent drainage:


a. Always Choose Pots with Drainage Holes

Whenever possible, buy pots with pre-drilled holes at the bottom. These are specifically designed to support healthy root systems.

Look for:

  • Multiple holes for large pots to ensure even drainage.
  • Elevated bases or saucers to catch excess water without soaking roots.
  • Unglazed clay or terracotta pots, which naturally allow air and moisture to pass through.

If your favorite pot doesn’t have holes, you can drill them yourself using a ceramic or diamond-tipped drill bit. Just make sure to do it carefully and avoid cracking the pot.


b. Use a Double-Pot or Cachepot System

If you want to use a decorative pot without drainage holes, try the double-pot method.

Here’s how:

  1. Keep your plant in a standard plastic nursery pot with drainage holes.
  2. Place it inside a slightly larger decorative pot (called a cachepot).
  3. After watering, empty any water that collects at the bottom of the cachepot.

This method combines functionality with style—your plant stays healthy, and your décor looks elegant.


c. Layer the Bottom with Pebbles or Charcoal

If drilling holes isn’t an option, add a drainage layer at the pot’s base. Use small pebbles, gravel, or activated charcoal.

These materials create an air gap below the soil, allowing excess moisture to settle away from roots. Charcoal also absorbs odors and toxins, keeping the soil fresh.

However, note that while this method helps, it doesn’t replace proper drainage holes. Water can still accumulate if not managed carefully.


d. Choose the Right Soil Mix

Even with drainage holes, dense soil can hold too much water. For optimal results, use a well-draining potting mix suited to your plant type.

Examples:

  • For succulents and cacti: Use sandy or gritty soil with perlite.
  • For tropical foliage plants: Mix peat moss, coco coir, and perlite.
  • For ferns and moisture-loving plants: Use rich, loamy soil with some compost but still ensure light texture.

Light, airy soil prevents compaction and allows water to move freely through the pot.


5. How to Water Plants with Drainage Holes Properly

Drainage holes don’t mean you can water without care. The key is to water deeply but infrequently.

Follow this routine:

  1. Water thoroughly until excess begins to drain out of the holes.
  2. Discard any water that collects in the saucer after 15–20 minutes.
  3. Allow the soil to dry partially before the next watering.

This ensures that roots receive full hydration but are never left standing in stagnant water.


6. The Benefits of Good Drainage Beyond Plant Health

Beyond preventing root rot, proper drainage offers several long-term advantages:

  • Better oxygen flow: Healthy roots mean faster nutrient uptake and stronger growth.
  • Improved soil structure: Prevents compaction and maintains ideal porosity.
  • Simpler care routine: Less risk of overwatering, making plant care more forgiving for beginners.
  • Longer pot and plant life: Reduces mold, odor, and material decay in pots.

Simply put, drainage holes make your plant care easier and more successful in the long run.


7. What If You Already Have Pots Without Holes?

If your plants are already in non-draining pots, you can still fix the situation:

  • Check moisture regularly: Use your finger or a moisture meter before watering.
  • Water sparingly: Add small amounts of water gradually to avoid soggy soil.
  • Repot occasionally: Refresh the soil every 6–12 months to prevent salt buildup.
  • Monitor leaves closely: Drooping, yellowing, or browning can indicate water stress.

Whenever possible, repot into containers with drainage holes—the most reliable long-term solution.


8. Common Myths About Drainage Holes

Let’s clear up a few misconceptions many plant owners have:

  • Myth 1: “Pebbles at the bottom eliminate the need for holes.”
    → False. Pebbles may delay waterlogging but don’t provide true drainage.
  • Myth 2: “Indoor plants don’t need drainage because they’re watered less.”
    → False. Even small amounts of excess water can suffocate roots over time.
  • Myth 3: “Drainage holes make a mess.”
    → Not if you use saucers or liners—they catch excess water neatly.

Knowing these truths helps you make better potting choices for long-term plant success.


Conclusion

Drainage holes are one of the most vital yet overlooked aspects of indoor plant care. They protect roots from suffocating, prevent salt build-up, maintain moisture balance, and ensure your plants grow strong and vibrant.

A pot without drainage might look sleek, but it’s a silent killer for plants. Whether you’re a beginner or a seasoned indoor gardener, always prioritize function over form—choose pots that allow water to escape freely.

With the right drainage setup, your indoor plants won’t just survive—they’ll thrive, displaying lush foliage and steady growth season after season.

Remember: healthy roots equal a healthy plant, and drainage holes are the gateway to that health.

How to Prevent Salt Build-Up in Indoor Plant Pots

How to Prevent Salt Build-Up in Indoor Plant Pots

Indoor plants bring life, beauty, and freshness into our homes, but many plant enthusiasts unknowingly face one common issue that silently damages their beloved greens—salt build-up in plant pots. You may have seen white crusty deposits forming on the surface of the soil, around the rim of pots, or near the drainage holes. That’s excess salt, and while it may seem harmless, over time it can cause serious harm to your plants’ roots and overall health.

In this comprehensive guide, we’ll explore what causes salt build-up, how it affects plants, and the most effective ways to prevent and treat it—ensuring your indoor garden thrives beautifully year-round.


1. Understanding Salt Build-Up: What It Is and Why It Happens

Salt build-up refers to the accumulation of mineral salts in the potting soil. These salts come primarily from fertilizers, tap water, and sometimes from the potting mix itself. When water evaporates or plants take up moisture, salts remain behind and gradually accumulate in the soil.

Main causes of salt build-up include:

  • Over-fertilization: Using too much chemical or synthetic fertilizer adds an excess of mineral salts that plants can’t absorb quickly.
  • Hard tap water: Many regions have water rich in calcium, magnesium, or sodium, which can accumulate over time.
  • Poor drainage: When pots lack proper drainage, water doesn’t flush out excess salts, causing them to stay trapped in the soil.
  • Evaporation: As water evaporates from the top of the soil, salts are drawn upward, forming white crusts on the surface.

Though salts are essential in small amounts, high concentrations can be toxic to plants—making it crucial to understand how to prevent them.


2. How Salt Build-Up Affects Indoor Plants

Excess salts in the soil disrupt the delicate balance of water and nutrients that roots need to function properly. Here’s how salt accumulation harms your plants:

  • Root burn: Excess salts draw moisture away from roots through osmosis, causing dehydration and root damage.
  • Nutrient lockout: High salt concentrations interfere with the plant’s ability to absorb essential nutrients like nitrogen, potassium, and magnesium.
  • Stunted growth: Over time, salt-stressed plants grow slowly, develop weak stems, and may produce fewer leaves.
  • Leaf damage: Symptoms often appear as brown, crispy leaf tips or yellowing edges—especially in plants like peace lilies, dracaenas, and spider plants.
  • Soil compaction: Salt build-up can alter soil structure, making it less porous and reducing aeration.

If ignored, salt build-up can eventually kill indoor plants by suffocating roots and disrupting essential nutrient cycles.


3. Identifying Salt Build-Up: Key Signs to Watch For

To prevent damage, it’s essential to spot the early warning signs. Here’s how to identify salt build-up in your plant pots:

  1. White crusts or powder: A visible layer on the soil surface or pot edges.
  2. Discolored leaves: Brown or yellow leaf tips and edges are common symptoms of salt stress.
  3. Wilting despite moist soil: Indicates the roots are struggling to take up water due to salt concentration.
  4. Hard, compacted soil: The top layer feels crusty or resists water absorption.
  5. Reduced plant growth: Plants stop producing new leaves or seem dull even with regular care.

Spotting these early signs allows you to take corrective steps before irreversible damage occurs.


4. How to Prevent Salt Build-Up in Indoor Plant Pots

Preventing salt accumulation is much easier than treating it. By adopting the following habits, you can maintain healthy, salt-free soil for your indoor plants.


a. Use the Right Type of Water

Tap water often contains dissolved minerals that contribute to salt accumulation. Instead, use:

  • Filtered water or distilled water, which contains fewer mineral salts.
  • Rainwater, which is naturally soft and ideal for most indoor plants.

If you must use tap water, allow it to sit uncovered overnight. This helps chlorine evaporate and reduces some hardness before watering your plants.


b. Avoid Over-Fertilizing

One of the leading causes of salt build-up is over-fertilization. Always follow fertilizer label directions and dilute more than recommended for indoor use.

Best practices:

  • Fertilize only during the active growing season (spring and summer).
  • Avoid fertilizing during winter when plant growth slows.
  • Use organic or slow-release fertilizers—they release nutrients gradually and reduce salt accumulation.
  • Flush the soil regularly to remove residual salts (explained below).

Remember: it’s better to under-fertilize than to overdo it.


c. Ensure Proper Drainage

Good drainage is vital for leaching out excess salts. Always use pots with drainage holes at the bottom, and never let your plants sit in standing water.

Tips:

  • Add a layer of pebbles or coarse sand at the pot’s base for better drainage.
  • Empty the saucer under your pot after each watering session to prevent reabsorption of salty water.
  • Use well-aerated potting soil that drains easily, such as mixes with perlite, coco coir, or bark.

d. Leach the Soil Regularly

Leaching means flushing the soil thoroughly with water to wash away accumulated salts. This should be done every few months or when signs of salt build-up appear.

Steps to leach soil:

  1. Place the plant in a sink or outdoors.
  2. Slowly pour clean, room-temperature water through the soil until it drains freely.
  3. Use at least twice the volume of the pot in water to ensure salts are flushed out.
  4. Let the pot drain completely before returning it to its saucer.

Repeat this every 2–3 months for best results.


e. Repot Plants Periodically

Even with good care, some salts will accumulate over time. Repotting every 12–18 months gives your plants a fresh start with nutrient-rich, salt-free soil.

How to repot correctly:

  1. Gently remove the plant from the pot and shake off old soil.
  2. Trim damaged or salt-burned roots.
  3. Clean the pot thoroughly or use a new one.
  4. Refill with fresh potting mix suitable for the plant species.
  5. Water lightly and place in indirect light for a few days to help the plant recover.

This refreshes both the plant and soil, improving drainage and nutrient balance.


f. Clean Pot Surfaces

Salt deposits often appear on the rim or outer surface of pots. Regularly cleaning these prevents salts from re-entering the soil.

To clean:

  • Wipe the pot with a soft cloth soaked in a vinegar-water solution (1:1 ratio).
  • Rinse thoroughly with plain water and dry before refilling.

For terracotta or clay pots, soak them in vinegar water for a few hours, scrub gently, and rinse before reusing.


g. Choose the Right Potting Mix

Using the correct potting mix ensures salts don’t accumulate easily. Avoid heavy garden soil, which traps minerals and water. Instead, use light, well-draining potting media that allow easy leaching.

Ideal potting mix components include:

  • Coco coir or peat moss (for moisture balance)
  • Perlite or vermiculite (for aeration)
  • Compost (for nutrients)
  • Bark chips (to maintain structure)

This combination prevents salt build-up and supports root health.


5. Natural Remedies to Neutralize Salt Build-Up

If salt has already accumulated, you can use gentle, natural methods to restore soil health:

  • Vinegar rinse: Mix 1 tablespoon of white vinegar in 1 liter of water. Use this to flush the soil occasionally—it helps dissolve mineral residues.
  • Soil replacement: Replace the top 1–2 inches of soil with fresh mix every few months.
  • Activated charcoal: Add a thin layer to the pot base—it absorbs impurities and improves air circulation.
  • Epsom salt caution: Some gardeners use Epsom salts, but avoid frequent use—they add more magnesium and sulfur, worsening build-up if overused.

6. How to Save a Plant Damaged by Salt Build-Up

If your plant shows signs of severe salt stress (crispy leaves, poor growth), don’t lose hope. Follow these steps:

  1. Flush the soil thoroughly to remove salts.
  2. Trim damaged leaves and roots.
  3. Repot in fresh soil if symptoms persist.
  4. Reduce fertilizer use and water with filtered or rainwater.
  5. Mist foliage lightly to help with hydration (avoid wetting leaves too often in humid environments).

Within a few weeks, you’ll notice your plant bouncing back with new, healthy growth.


7. Long-Term Tips for Healthy, Salt-Free Indoor Plants

  • Use soft water whenever possible.
  • Follow a consistent watering routine—deep watering but less frequently encourages healthy roots.
  • Rotate fertilizers between organic compost teas or seaweed extracts to avoid chemical salt overload.
  • Keep an eye on pot rims and soil surface for white crusts.
  • Refresh or replace potting soil every 12–18 months.

Maintaining these habits ensures long-term health and vibrant foliage for your indoor plants.


Conclusion

Preventing salt build-up in indoor plant pots is one of the simplest yet most powerful ways to maintain thriving houseplants. Understanding the causes—like over-fertilization, poor drainage, and hard water—and taking preventive measures such as regular leaching, proper watering, and periodic repotting will keep your plants healthy from root to leaf.

By caring for the soil beneath your plants, you’re nurturing the very foundation of their growth. With the right attention, your indoor garden will remain lush, green, and full of life—free from the silent stress of salt build-up.

So the next time you water your plants, remember: a little care today prevents a lot of damage tomorrow.

How to Choose the Right Soil for Foliage Plants

How to Choose the Right Soil for Foliage Plants

Choosing the right soil for foliage plants can make the difference between a lush, vibrant indoor garden and one that struggles to survive. While sunlight, watering, and temperature often get the most attention, soil is the true foundation of healthy foliage. It determines how well roots breathe, absorb nutrients, and grow. For plant lovers—especially those growing ornamental foliage like Calatheas, Monsteras, or Pothos—understanding soil composition and how to select or create the perfect mix is essential.

In this article, we’ll explore how to choose the right soil for foliage plants, what ingredients to look for, how to customize mixes, and expert tips to help your plants thrive for years.


1. Why Soil Choice Matters for Foliage Plants

Foliage plants, unlike succulents or flowering varieties, have unique needs. Their primary energy investment goes into leaf growth rather than blooms. This means they rely heavily on consistent nutrients, moisture retention, and aeration in their root zone.

The right soil should:

  • Retain enough water to keep roots moist.
  • Drain excess water quickly to prevent rot.
  • Allow oxygen to reach roots easily.
  • Provide essential nutrients and organic matter.

Using garden soil or clay-based dirt indoors can suffocate roots and lead to compacted, soggy conditions. Instead, lightweight, airy potting mixes are best for foliage plants.


2. Understanding the Components of Good Soil

To create or choose the right mix, you need to understand the role of each key ingredient. Here’s a breakdown of the most common soil components for foliage plants:

a. Peat Moss or Coco Coir

These are the main moisture-retaining components.

  • Peat moss is light, spongy, and excellent at holding water while still allowing airflow.
  • Coco coir (made from coconut husks) is a sustainable alternative that retains moisture without becoming compacted.

Best for: Most tropical foliage plants like Philodendrons, Aglaonemas, and Peace Lilies.

b. Perlite

Perlite is a white, porous volcanic glass that boosts aeration and drainage. It prevents the soil from becoming too dense, ensuring roots can breathe.

Best for: Plants sensitive to waterlogging, such as Dracaenas and Calatheas.

c. Vermiculite

Vermiculite holds more moisture than perlite and releases it slowly, making it useful for plants that prefer evenly moist soil.

Best for: Ferns, Fittonias, and other humidity-loving foliage plants.

d. Compost or Organic Matter

Compost enriches soil with nutrients and beneficial microbes, promoting steady leaf growth. It also improves water retention and soil texture.

Best for: All foliage plants; use in moderation to avoid soggy soil.

e. Bark Chips or Pine Bark

These help create an airy structure and mimic the natural environment of many tropical plants that grow on trees (epiphytes).

Best for: Monsteras, Anthuriums, and Philodendrons.

f. Sand or Grit

Adding coarse sand improves drainage and structure. Avoid fine sand, which can compact easily.

Best for: Plants prone to root rot or those that prefer drier conditions like ZZ plants.


3. The Ideal Soil Texture for Foliage Plants

Foliage plants prefer loose, well-draining, and slightly acidic to neutral soil (pH 5.5–7.0). The soil should feel crumbly yet moist, never heavy or muddy.

You can test your soil’s texture easily:

  • Squeeze a handful: It should hold shape slightly but crumble easily when poked.
  • Water test: When watered, the mix should absorb moisture evenly without pooling on top.

If your soil stays soggy or compacts quickly, it’s too dense. Adding perlite, coco coir, or bark chips can fix the issue.


4. Pre-Made Potting Mixes vs. DIY Soil Mixes

You can either buy a ready-made potting mix or create your own custom blend. Let’s compare both:

Pre-Made Potting Mixes

Commercial potting mixes labeled for houseplants or tropical plants are convenient. They usually contain peat moss, perlite, and compost in balanced proportions.
Pros:

  • Easy to use and consistent quality.
  • Sterilized and pest-free.
    Cons:
  • May not suit all plant types perfectly.
  • Some contain added fertilizers or chemicals that sensitive plants dislike.

Good options: Mixes for “indoor tropicals” or “foliage houseplants.”

DIY Custom Soil Mix

If you want complete control, making your own soil mix is rewarding and often better for plant health.

Basic Foliage Plant Soil Recipe:

  • 2 parts peat moss or coco coir
  • 1 part perlite or vermiculite
  • 1 part compost or well-rotted leaf mold
  • Optional: ½ part bark chips for added aeration

This mix balances drainage, moisture retention, and nutrients—ideal for most indoor foliage plants.


5. Matching Soil Type to Plant Species

Different foliage plants have slightly different needs. Here’s a quick guide to help you choose the best mix:

Plant TypeIdeal Soil MixKey Features
Philodendron & MonsteraPeat + Bark + PerliteAiry, chunky, moisture-retaining
Pothos & SyngoniumPeat + Perlite + CompostLight, fast-draining
Calathea & MarantaCoco coir + Vermiculite + CompostMoist, rich, and soft
FernsCoco coir + Leaf mold + PerliteMoist but well-aerated
Dracaena & Snake PlantPeat + Sand + PerliteWell-drained, less water-holding
Peace LilyPeat + Vermiculite + CompostMoist and nutrient-rich

By understanding each plant’s natural environment, you can mimic those conditions through your soil mix.


6. Soil pH and Nutrient Balance

Soil pH affects how well foliage plants absorb nutrients. Most indoor plants prefer slightly acidic soil (pH 6.0–6.5).

  • If the soil is too acidic, nutrients like calcium and magnesium become less available.
  • If it’s too alkaline, iron and manganese lock out, leading to yellow leaves.

You can test pH using a simple soil test kit. Adjust if needed:

  • To raise pH (make it more alkaline): Add a little garden lime.
  • To lower pH (make it more acidic): Mix in peat moss or sulfur.

Also, remember that nutrients in potting mixes deplete over time. Replenish them by using organic liquid fertilizers or slow-release granules every few months.


7. Common Soil Problems and How to Fix Them

Even the best soil can face issues. Here’s how to identify and correct them:

a. Soil Compaction

Over time, repeated watering compresses soil, reducing airflow.
Fix: Loosen the top layer gently with a fork and add perlite or bark chips.

b. Poor Drainage

If water pools on the surface, roots may rot.
Fix: Ensure the pot has drainage holes and mix in more perlite or coarse sand.

c. Mold Growth

White fuzzy mold indicates excessive moisture or poor airflow.
Fix: Let the topsoil dry before watering again and improve ventilation.

d. Nutrient Deficiency

Pale leaves or stunted growth often signal depleted nutrients.
Fix: Refresh the soil every year or add organic compost and fertilizer.


8. When and How to Refresh the Soil

Foliage plants should have their soil refreshed every 12–18 months. Over time, salts and residues build up, and the mix loses structure.

To repot:

  1. Gently remove the plant and shake off old soil.
  2. Trim any damaged or rotting roots.
  3. Refill with fresh mix suited to the plant type.
  4. Water thoroughly and let excess drain.

This rejuvenates the plant and promotes stronger root growth.


9. Expert Tips for Long-Term Soil Health

  • Use clean tools and pots to prevent fungal contamination.
  • Avoid garden soil indoors—it’s heavy and often contains pests.
  • Add a top layer of mulch or moss to retain humidity for tropical plants.
  • Check moisture regularly—use your finger or a moisture meter to prevent overwatering.
  • Rotate and aerate soil occasionally to keep it loose and breathable.

Conclusion

Choosing the right soil for foliage plants is both science and art. The perfect soil mix balances air, moisture, and nutrients—creating the ideal environment for roots to thrive and leaves to flourish. Whether you buy a quality mix or craft your own, remember that soil is the lifeline of your indoor jungle.

By paying attention to the specific needs of your foliage species, testing pH, and refreshing soil regularly, you can ensure your plants stay healthy, glossy, and vibrant year-round. In short, great soil means great foliage—and that’s the secret behind every thriving indoor garden.