How to Save a Wilting Houseplant in Just a Few Steps

How to Save a Wilting Houseplant in Just a Few Steps

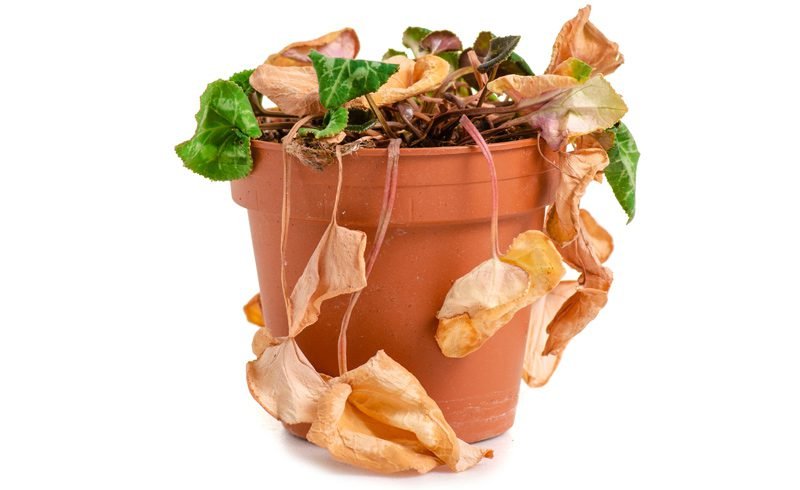
Nothing is more disheartening for a plant lover than watching a once-vibrant houseplant start to wilt. The leaves droop, colors fade, and the entire plant seems to cry out for help. Whether it’s from overwatering, too little sunlight, or neglect, a wilting houseplant is not necessarily a lost cause. With the right care and quick action, you can often revive it and bring it back to lush, thriving health.

Let’s explore how to save a wilting houseplant in just a few simple but effective steps, along with expert-backed insights to ensure it stays healthy in the long run.


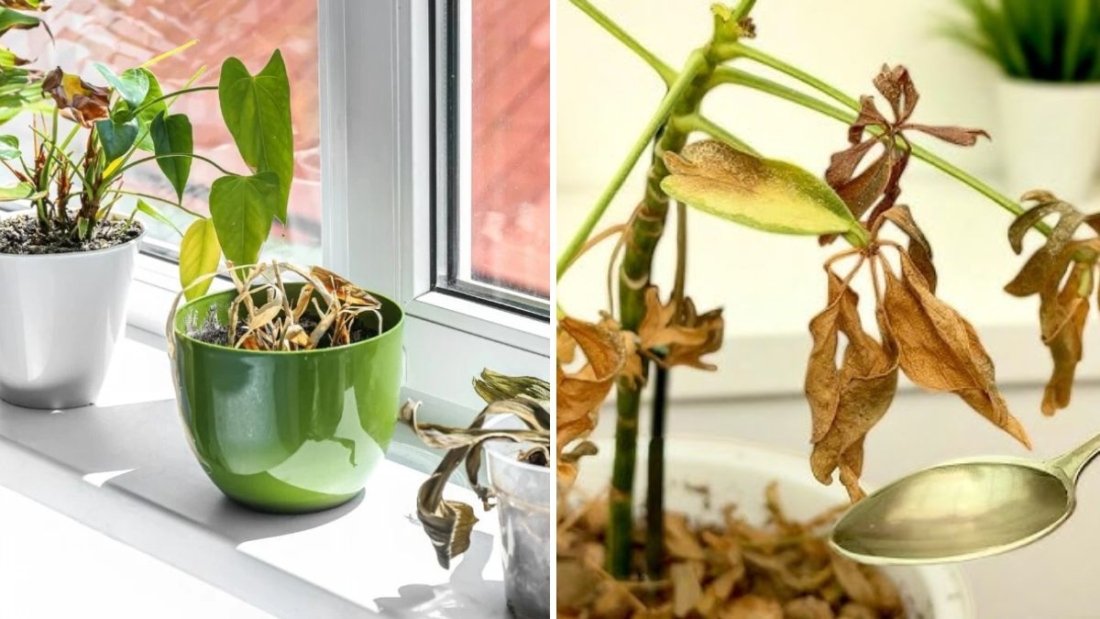
Step 1: Identify the Cause of Wilting

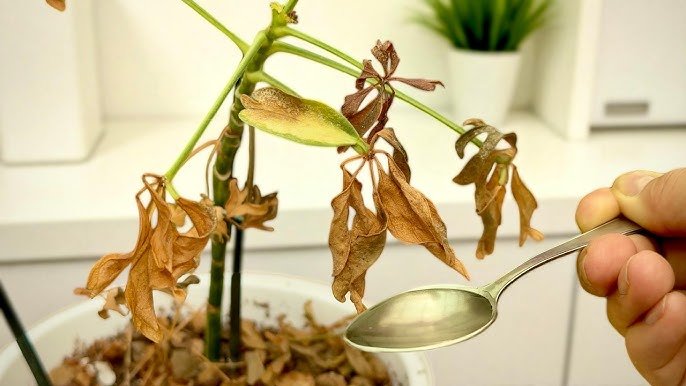
Before taking any corrective action, you must figure out why your plant is wilting. Wilting is a plant’s way of signaling distress — it could be too much water, too little water, or even environmental stress.

Common Causes of Wilting:

  1. Overwatering: Roots can suffocate and rot if the soil stays waterlogged.
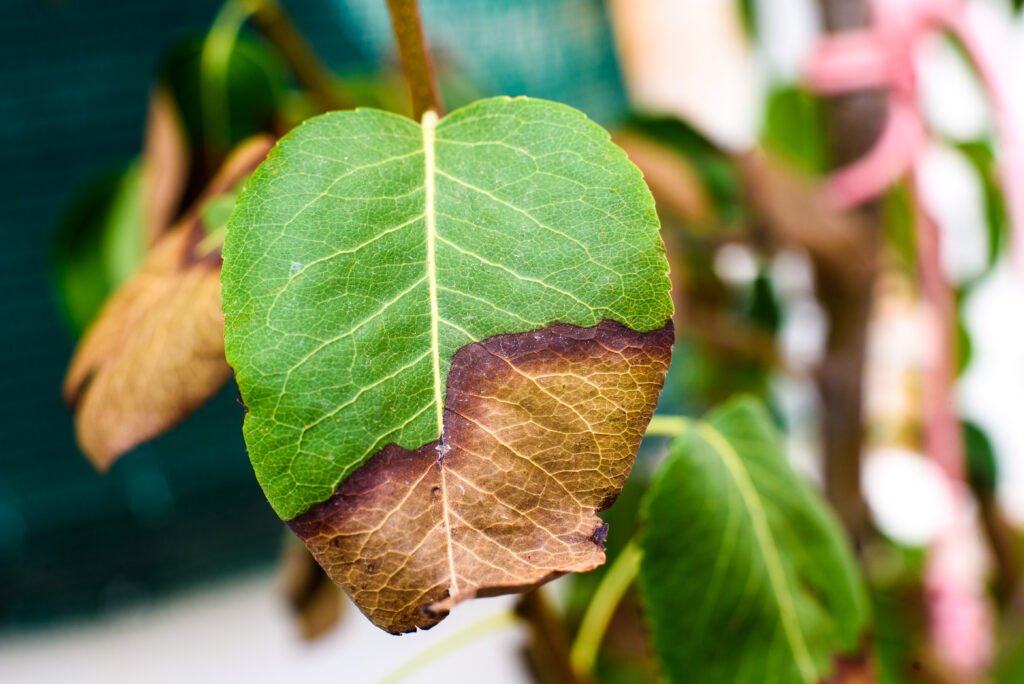
  2. Underwatering: Dehydration causes leaves to droop and curl as the plant struggles to retain moisture.
  3. Temperature stress: Sudden temperature changes can shock the plant.
  4. Pest infestations: Aphids, spider mites, or fungus gnats can sap the plant’s energy.
  5. Poor lighting: Too much or too little light affects photosynthesis and overall vitality.

What to Do First:
Gently inspect the plant and its soil. Touch the soil surface—if it’s soggy, you’re dealing with overwatering. If it’s bone dry and pulling away from the pot edges, underwatering is likely the culprit. Once you’ve identified the cause, you can take the right action to save your plant.


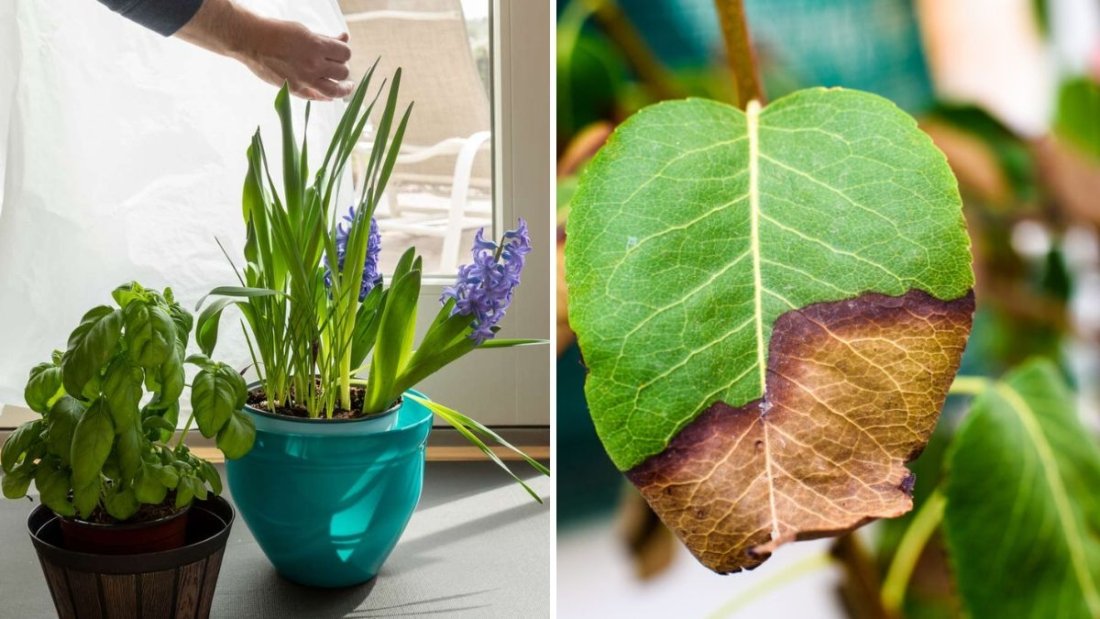
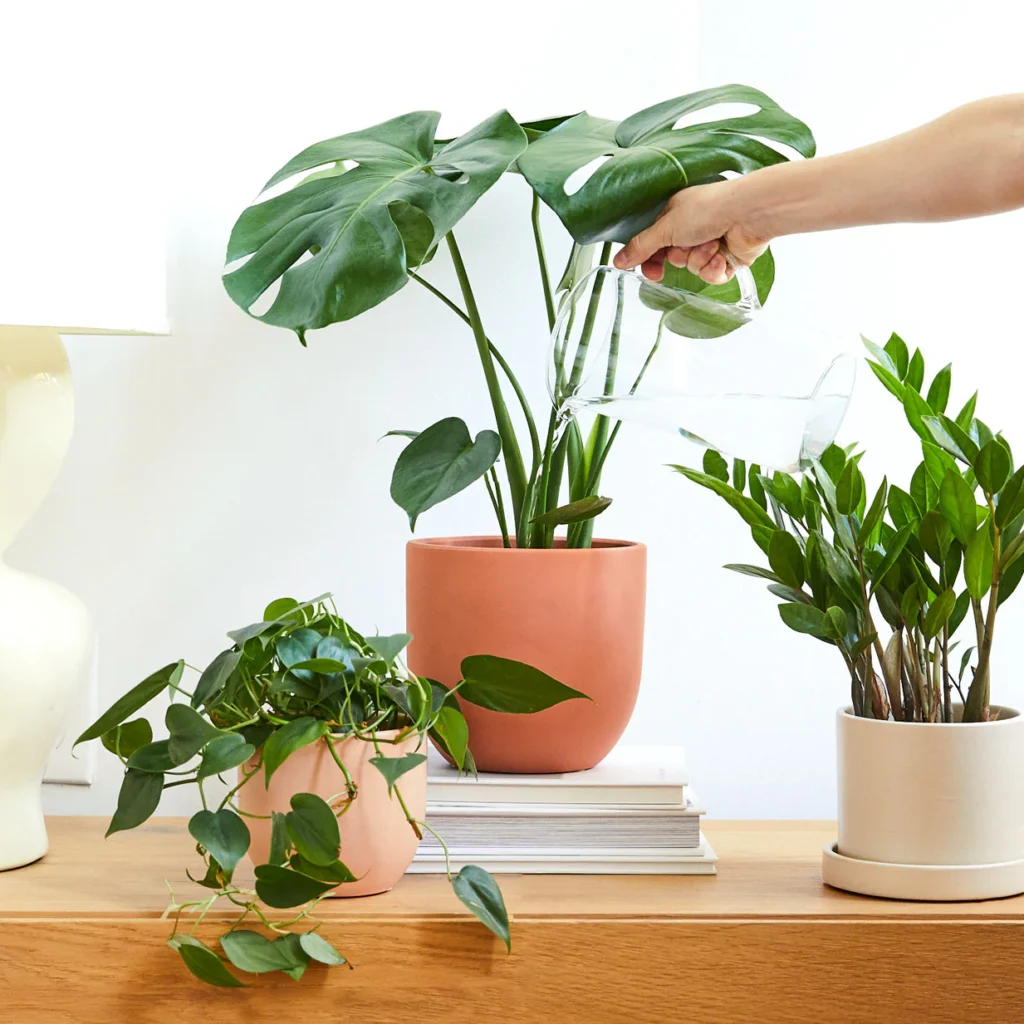
Step 2: Check the Soil Moisture

Soil moisture is the most crucial factor in rescuing a wilting plant. Often, the soil tells you more than the leaves do.

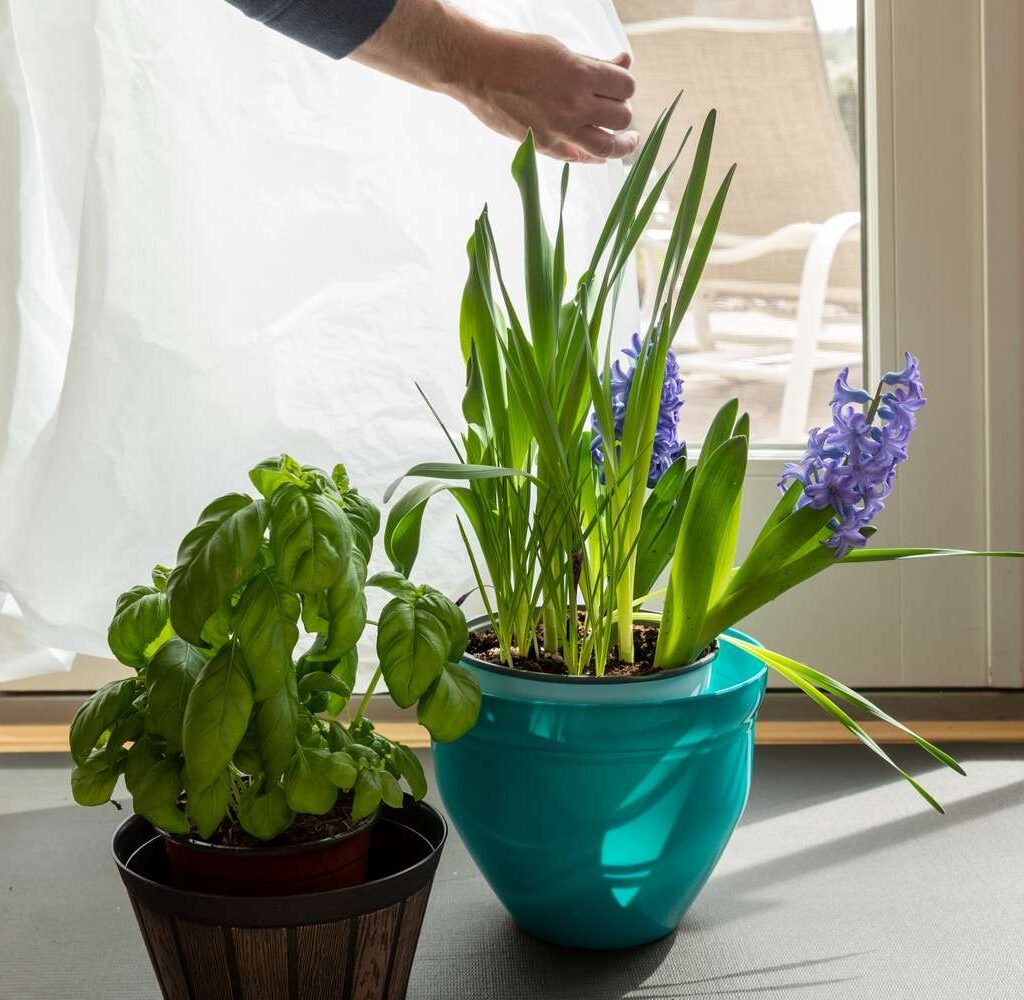
If the Soil Is Too Dry:

  • Give it a deep soak. Place the entire pot in a basin or sink filled with 2–3 inches of water. Let it sit for 15–30 minutes so the soil can absorb moisture through the drainage holes.
  • Drain well. Remove the pot and let excess water drain completely before placing it back.
  • Mist lightly. Misting the leaves can provide immediate relief, especially for tropical plants.

If the Soil Is Too Wet:

  • Stop watering immediately. Allow the soil to dry out before the next watering.
  • Loosen compacted soil. Use a chopstick or pencil to gently poke holes in the soil to improve aeration.
  • Remove excess water. If your pot doesn’t have drainage holes, carefully tip it to pour out any pooled water or transfer the plant into a well-draining pot.

Step 3: Examine the Roots

If the wilting persists even after addressing water issues, the next step is to inspect the roots. Roots are the lifeline of a plant, and if they’re damaged, your plant won’t recover without intervention.

How to Check:

  1. Gently remove the plant from its pot.
  2. Shake off excess soil to expose the roots.
  3. Observe the color and texture of the roots.

Healthy roots are firm and white or light tan.
Rotten roots are brown or black, mushy, and may have a foul smell.

What to Do:

  • Trim away any rotting or dead roots using sterilized scissors.
  • Repot the plant into fresh, well-draining soil.
  • Choose a pot with drainage holes to prevent future waterlogging.

If more than half the roots are healthy, your plant has a strong chance of recovery.


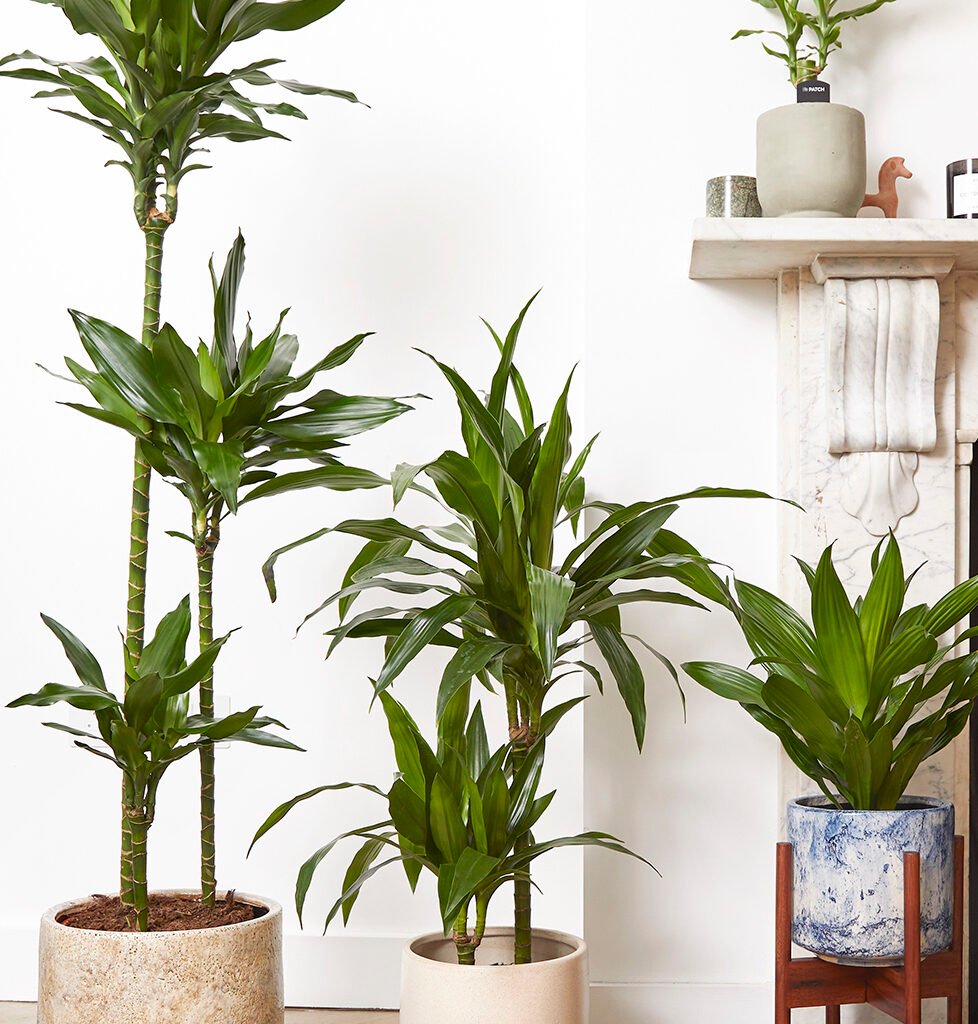
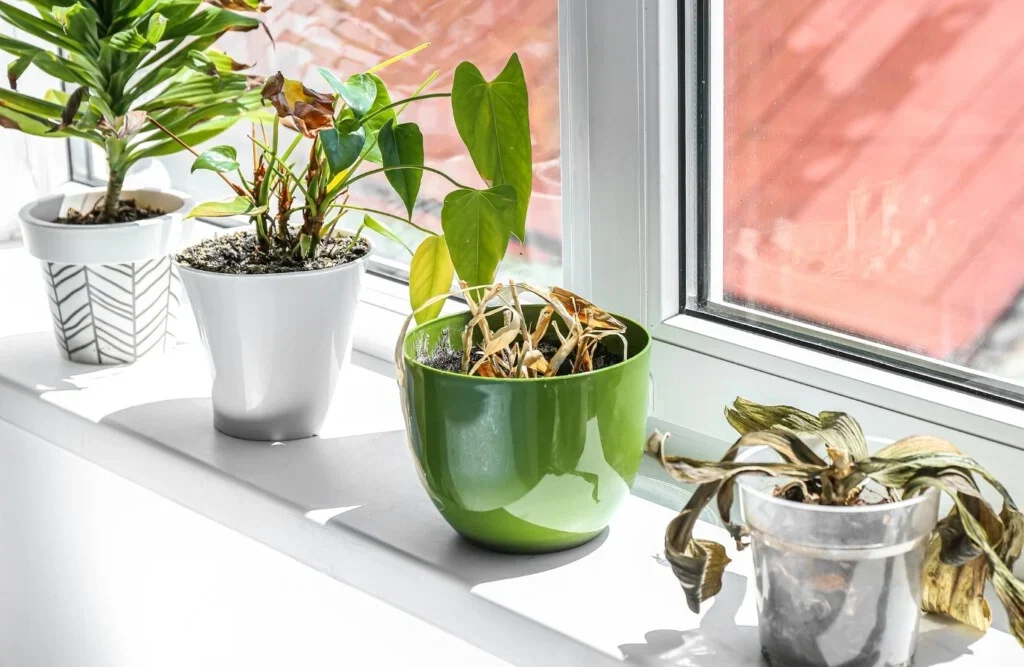
Step 4: Adjust the Lighting Conditions

Light plays a key role in your plant’s revival. Without adequate light, the plant cannot photosynthesize effectively, leading to further decline. However, too much direct sunlight can also scorch weakened leaves.

How to Find the Right Balance:

  • Bright indirect light: Most houseplants thrive in filtered light. Move them near an east- or west-facing window.
  • Avoid harsh midday sun: Plants like ferns, calatheas, and peace lilies prefer indirect light.
  • Use grow lights: If natural light is limited, supplement with a full-spectrum LED grow light for 10–12 hours daily.

For a severely wilted plant, avoid sudden exposure to intense light—gradually reintroduce it over several days.


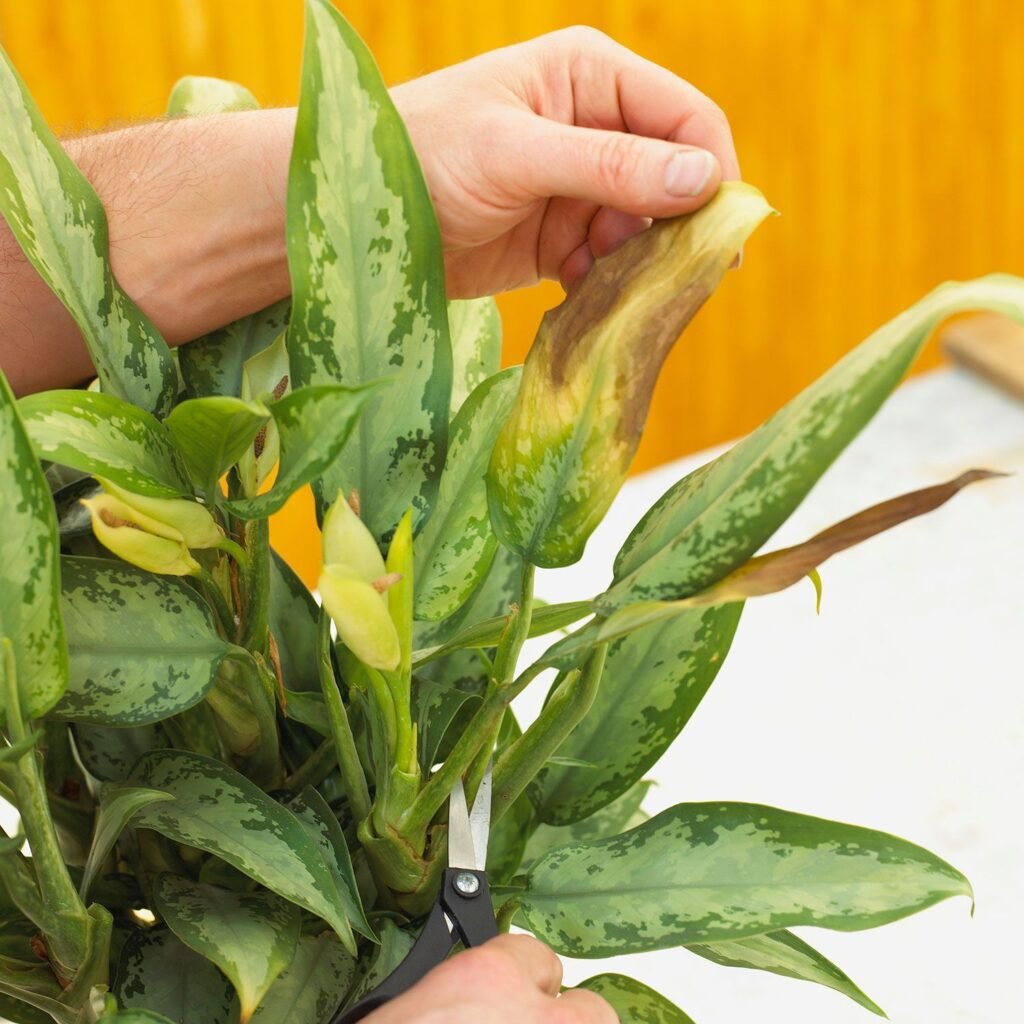
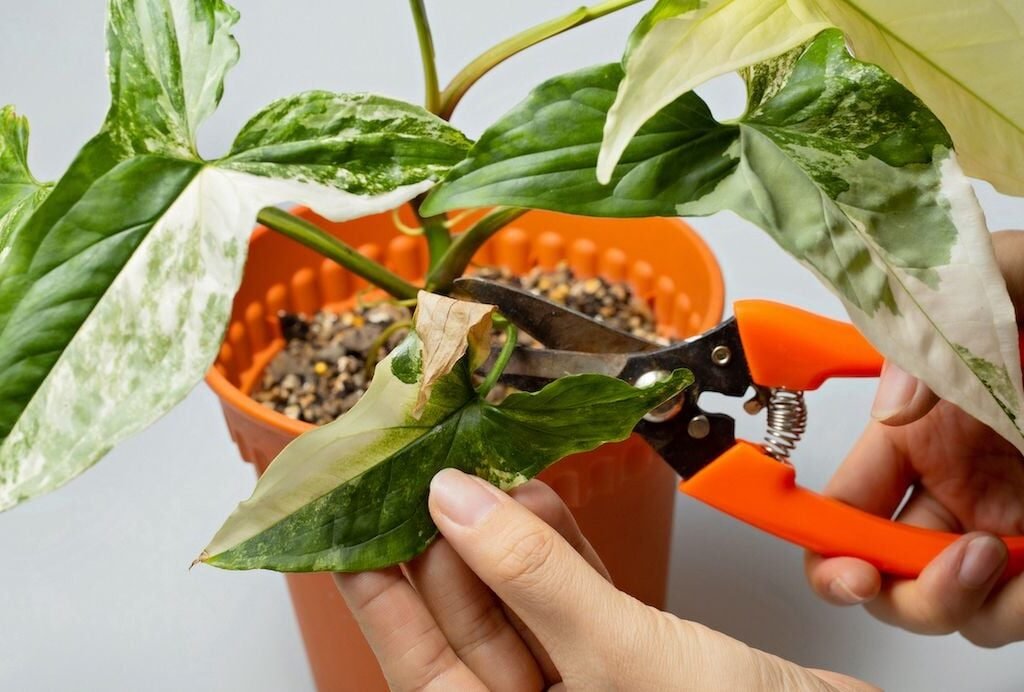
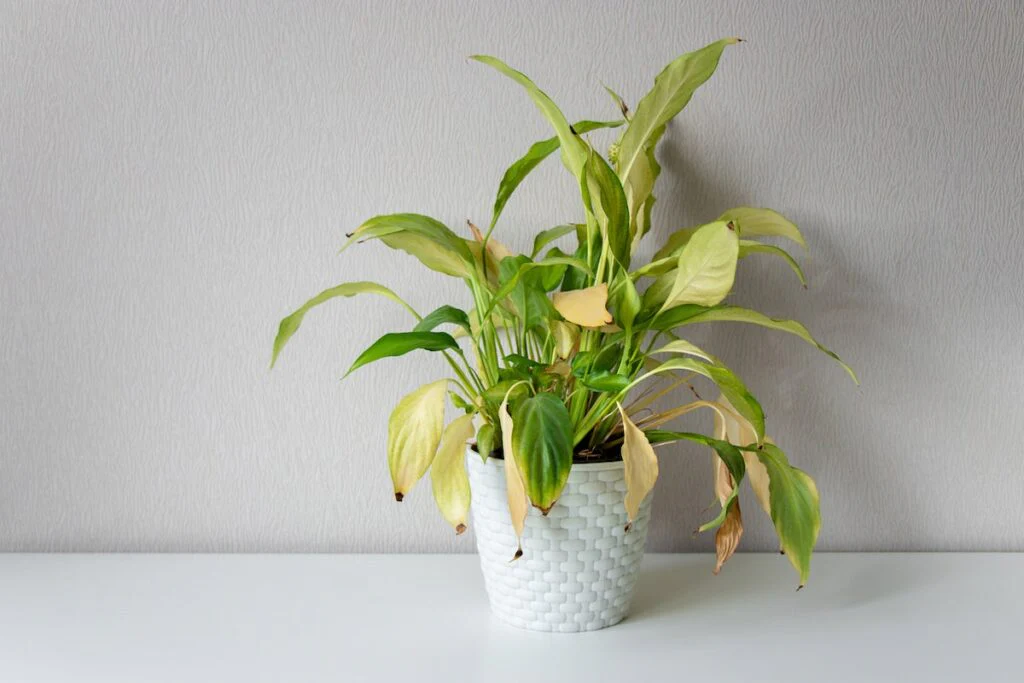
Step 5: Prune Damaged Foliage

Once you’ve stabilized the soil and light conditions, focus on helping the plant conserve energy. Wilted or yellowing leaves can no longer contribute to growth and instead drain the plant’s resources.

What to Do:

  • Use clean, sharp scissors to remove brown, shriveled, or damaged leaves.
  • Cut back stems that show no new growth.
  • For trailing plants, trim leggy vines to encourage fuller regrowth.

This helps redirect the plant’s energy toward producing new, healthy foliage.


Step 6: Replenish Nutrients with Fertilizer

When a plant is stressed, it may have used up much of the available nutrients in the soil. However, be cautious—fertilizing a severely stressed plant too soon can cause more harm.

What to Do:

  • Wait about two weeks after repotting or reviving the plant before fertilizing.
  • Use a balanced, water-soluble fertilizer (10-10-10 or 20-20-20) diluted to half strength.
  • Apply once a month during the growing season (spring and summer).

Avoid fertilizing during dormancy or when the plant shows no new growth—it needs time to recover first.


Step 7: Regulate Temperature and Humidity

Environmental conditions are often overlooked, but they play a crucial role in your plant’s recovery. Most houseplants prefer stable, warm conditions similar to their natural habitats.

Ideal Conditions:

  • Temperature: Between 65–80°F (18–27°C).
  • Humidity: Around 40–60%, depending on the plant species.

To Improve the Environment:

  1. Avoid drafts. Keep your plant away from air conditioners, heaters, or open windows.
  2. Increase humidity. Use a humidifier, place the pot on a pebble tray with water, or group plants together to raise humidity naturally.
  3. Avoid sudden temperature shifts. Consistency helps plants adjust and rebuild strength.

For tropical varieties like calatheas, ferns, and orchids, maintaining higher humidity can make the difference between survival and thriving.


Step 8: Monitor for Pests or Diseases

Sometimes, the reason for wilting isn’t watering or light—it’s pests. Tiny insects can weaken your plant by sucking sap from the leaves and stems, leading to dehydration and drooping.

Common Indoor Plant Pests:

  • Aphids: Small green or black insects on new growth.
  • Spider mites: Tiny, red specks that form fine webs on leaves.
  • Fungus gnats: Small black flies hovering around wet soil.

How to Treat Them:

  • Wipe leaves gently with a damp cloth.
  • Spray with insecticidal soap or a neem oil solution (1 tsp neem oil + a few drops of mild dish soap + 1 liter of water).
  • Isolate the infested plant to prevent spreading.

Regularly inspecting your plants can prevent a full-blown infestation that might lead to severe wilting.


Step 9: Be Patient and Observe

After following the corrective steps, your plant may take a few days—or even weeks—to show signs of improvement. Don’t expect instant results. Healing takes time, and plants rebuild slowly.

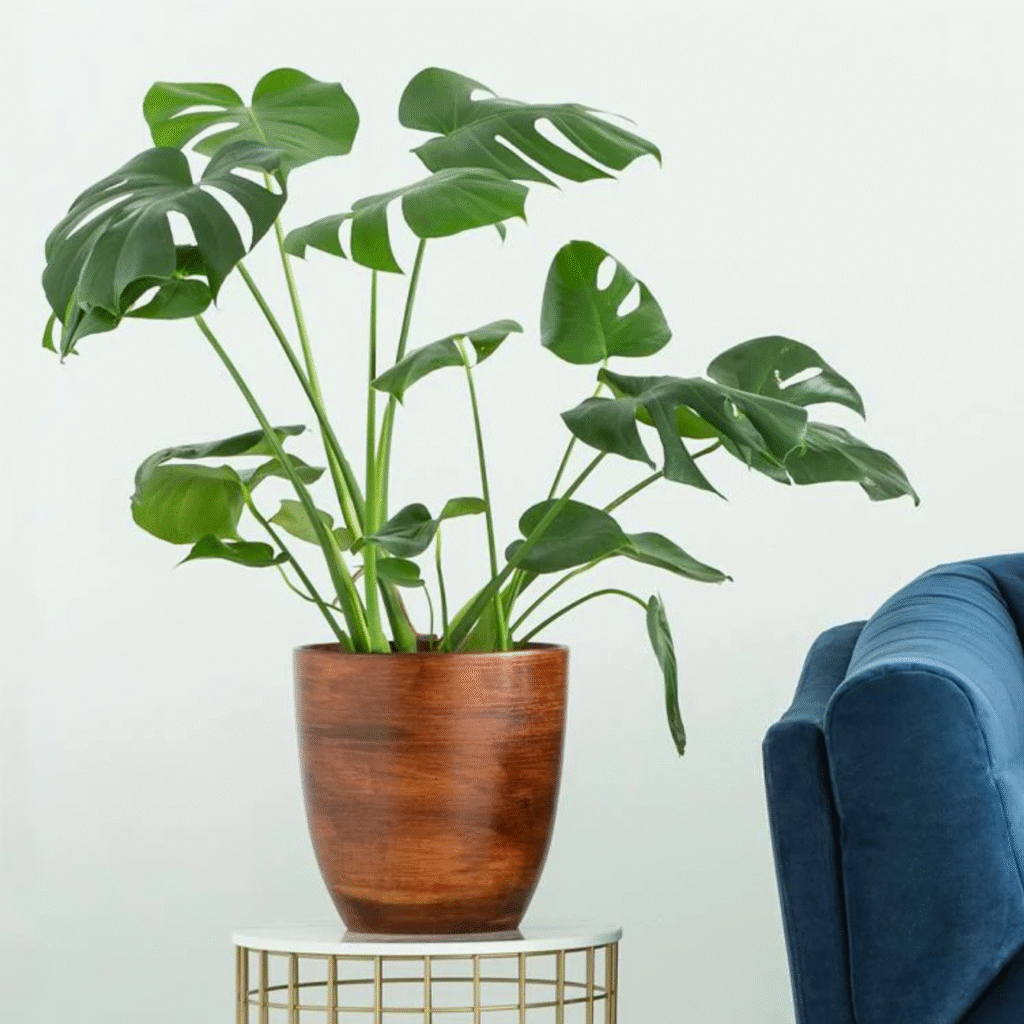
Signs Your Plant Is Recovering:

  • New leaf buds forming.
  • Leaves regaining firmness and color.
  • Soil maintaining moisture balance without wilting.

Consistency is key—continue observing your plant daily and adjusting care as needed.


Step 10: Prevent Future Wilting

Once your plant recovers, you’ll want to prevent the same issue from happening again. The best way to keep houseplants thriving is by maintaining a simple, consistent care routine.

Long-Term Care Tips:

  1. Follow the “soak and dry” rule: Water deeply, then wait until the top inch of soil is dry before watering again.
  2. Rotate plants monthly: This ensures even light exposure and balanced growth.
  3. Dust leaves regularly: Clean leaves absorb light more efficiently.
  4. Repot every 1–2 years: Refresh soil and check root health.
  5. Observe changes early: Wilting, yellowing, or drooping are early warnings—act quickly.

Healthy plants are resilient plants, and your careful observation makes all the difference.


Final Thoughts

A wilting houseplant might look hopeless, but with the right care and patience, most can bounce back beautifully. The key is understanding the root cause—literally and figuratively—and responding thoughtfully rather than hastily.

Remember: plants are living organisms that respond to their environment. They communicate distress through drooping leaves, yellowing edges, or slow growth. By tuning into these signs and taking action, you can not only save your plant but also become a more intuitive and confident plant parent.

So the next time your houseplant starts to wilt, don’t panic—just follow these steps. A little attention, the right environment, and consistent care are all it takes to turn a drooping plant back into a thriving, green masterpiece.

5 Reasons Your Indoor Plant Isn’t Growing—and What to Do

5 Reasons Your Indoor Plant Isn’t Growing—and What to Do

Indoor plants add color, life, and a touch of calm to any space. From elegant peace lilies to trailing pothos and towering fiddle leaf figs, these green companions can completely transform your home’s atmosphere. But sometimes, even with your best intentions, you might notice your plant just isn’t growing. The leaves remain the same size, new shoots don’t appear, and the once-thriving greenery seems to have come to a standstill.

If you’ve been wondering why your indoor plant’s growth has slowed—or stopped altogether—you’re not alone. Many houseplant lovers face this issue at some point. The good news is that most of the reasons behind stunted growth are fixable with a little observation and care.

Let’s look at five common reasons your indoor plant isn’t growing—and what you can do to get it thriving again.


1. Not Enough Light

Light is the fuel that drives your plant’s growth. Without enough of it, plants can’t photosynthesize efficiently, which means they can’t produce the energy they need to grow new leaves and roots. Many people underestimate how much light indoor plants actually need. Even plants labeled “low light” don’t thrive in dark corners—they simply tolerate those conditions better than others.

Signs Your Plant Lacks Light:

  • The leaves look pale, dull, or yellowish.
  • Growth is slow or nonexistent.
  • The plant stretches toward the nearest light source, becoming leggy.

What to Do:

  1. Move your plant closer to a window. Most houseplants thrive in bright, indirect light. East- or west-facing windows are ideal for many species.
  2. Supplement with artificial light. If natural light is limited, use full-spectrum LED grow lights for 10–12 hours a day.
  3. Clean your windows and leaves regularly. Dust buildup can block precious light from reaching the plant.

For example, succulents and cacti need direct sunlight to thrive, while plants like the snake plant or pothos can tolerate lower light levels but will still grow faster near a window with filtered light.


2. Overwatering (or Underwatering)

Watering issues are one of the most common causes of poor indoor plant growth. Too much water can suffocate roots, while too little can cause them to dry out. Both conditions lead to stressed plants that stop growing to conserve energy.

Signs of Overwatering:

  • Yellowing, drooping leaves.
  • Mushy stems or roots.
  • Fungus gnats hovering around the soil.

Signs of Underwatering:

  • Crispy, dry leaves that curl inward.
  • Soil pulling away from the sides of the pot.
  • Wilting even after watering.

What to Do:

  1. Check the soil before watering. Stick your finger about an inch deep—if it’s still moist, wait a few days.
  2. Ensure proper drainage. Always use pots with drainage holes and a well-draining potting mix.
  3. Adjust watering frequency by season. Plants generally need more water during active growth (spring and summer) and less in winter.

Remember: it’s better to underwater slightly than to overwater, as plants can recover from mild drought but not from root rot.


3. Poor Soil and Lack of Nutrients

Even if your plant gets the right amount of light and water, it won’t grow if the soil lacks nutrients. Over time, indoor plants deplete the minerals in their potting mix. If you’ve had the same soil for over a year, it may no longer provide the nutrients your plant needs.

Signs of Nutrient Deficiency:

  • Leaves are smaller or pale green.
  • Growth is noticeably slower.
  • Older leaves yellow and fall off.

What to Do:

  1. Feed your plant regularly. During the growing season (spring through early fall), use a balanced, water-soluble fertilizer (like a 10-10-10 or 20-20-20 formula) every 4–6 weeks.
  2. Refresh the soil. Every 1–2 years, repot your plant with fresh, nutrient-rich potting mix. This also prevents soil compaction, which restricts root growth.
  3. Choose the right soil for your plant type. Cacti and succulents need a sandy, well-draining mix, while tropical plants like monsteras and philodendrons prefer loamy, moisture-retentive soil.

A simple rule of thumb: if your plant hasn’t been repotted in over two years, it’s time for a fresh start.


4. The Pot Is Too Small (or Too Big)

Roots need space to grow, but that doesn’t mean “bigger is better.” A pot that’s too small can restrict root expansion, while one that’s too large retains too much moisture, leading to rot. Either way, your plant’s growth will slow down as it focuses on root survival rather than producing new foliage.

Signs the Pot Size Is the Problem:

  • Roots are circling the bottom of the pot or growing out of drainage holes.
  • Water drains too quickly or not at all.
  • Growth has stalled despite good care.

What to Do:

  1. Check the roots. Gently remove the plant from its pot. If you see dense, spiraling roots, it’s root-bound and needs more space.
  2. Repot properly. Choose a pot only 1–2 inches larger in diameter than the current one. This ensures stability and prevents excess water retention.
  3. Use the right potting mix. A fresh, airy mix allows roots to breathe and absorb nutrients efficiently.

When repotting, gently tease apart compacted roots and remove any dead or rotting sections. After repotting, water lightly and keep the plant out of direct sunlight for a few days to help it recover.


5. Temperature and Humidity Issues

Indoor plants are sensitive to changes in their environment, especially temperature and humidity. Most houseplants originate from tropical or subtropical regions, so they dislike sudden temperature fluctuations or dry air from heaters and air conditioners.

Signs of Temperature or Humidity Stress:

  • Brown leaf tips or edges.
  • Drooping or curling leaves.
  • Growth slows or stops during extreme weather.

What to Do:

  1. Keep plants away from drafts. Avoid placing them near air vents, heaters, or frequently opened doors.
  2. Maintain consistent temperatures. Most indoor plants prefer 18–27°C (65–80°F).
  3. Increase humidity. Use a humidifier, mist leaves occasionally, or place plants on a pebble tray filled with water.
  4. Group plants together. This naturally increases the humidity in the immediate area.

If your home gets dry in winter, humidity-loving plants like ferns, calatheas, and orchids may struggle unless you boost moisture levels in the air.


Bonus Tip: Seasonal Dormancy Might Be the Cause

Some plants naturally slow down during certain seasons, especially in winter. This period of rest allows them to conserve energy for the next growth cycle. If your plant looks healthy but isn’t producing new growth during colder months, it may just be in its dormant phase.

What to Do:

  • Reduce watering and stop fertilizing during dormancy.
  • Provide steady, indirect light.
  • Resume regular care when new growth appears in spring.

Dormancy is completely normal for species like fiddle leaf figs, alocasias, and ZZ plants. Patience and gentle care are key during this time.


Final Thoughts

When an indoor plant stops growing, it’s a signal that something in its environment isn’t quite right. Light, water, soil quality, pot size, and temperature all play essential roles in your plant’s well-being. By observing the signs and adjusting your care routine, you can revive your plant and help it flourish again.

Remember: plants communicate through their appearance. Drooping, discoloration, or stunted growth are all ways they tell you something’s wrong. With a bit of attention, patience, and the right conditions, your once-stalled plant can become lush, vibrant, and full of new growth again.

Your indoor jungle doesn’t have to be a mystery—just a mindful relationship between you and your green companions. With the right adjustments, every plant can return to thriving, reminding you that even a little change can spark beautiful growth.

How to Revive Plants After Coming Back From Vacation

How to Revive Plants After Coming Back From Vacation

Going on vacation is a wonderful way to recharge, but leaving your plants behind can be stressful—for both you and them. Even with careful preparation, plants may arrive at your return looking a little worse for wear: leaves droop, soil dries out, or some stems may have browned. The good news is that most plants are resilient and can recover quickly with attentive care. Knowing how to revive plants after coming back from vacation ensures your indoor or outdoor greenery bounces back to full health and continues thriving long after your trip.

This guide offers practical, detailed advice on reviving plants, understanding their needs, and preventing long-term damage after a period of neglect.


1. Assess the Damage Immediately

The first step upon returning is careful inspection. Look over each plant individually to determine the extent of stress.

  • Leaves: Check for drooping, yellowing, or crispy edges. These are signs of dehydration or nutrient deficiency.
  • Soil moisture: Some plants may have dried out completely, while others could have become waterlogged due to automatic watering systems or rainy conditions.
  • Pests or mold: Dry conditions can attract pests like spider mites, while overly wet soil can lead to fungal growth.

Documenting the state of each plant helps you prioritize which ones need urgent care and which can be gradually returned to their normal routine.


2. Start With Hydration

Most vacation-stressed plants suffer from water deprivation. Providing proper hydration is essential, but the method depends on the plant type.

Step-by-Step Rehydration:

  1. Check soil moisture: Use your finger or a moisture meter. Plants with dry soil need watering; soggy soil should be left to dry slightly.
  2. Water gradually: Pour water slowly at the base to allow absorption, avoiding runoff or oversaturation.
  3. Soak if necessary: For severely dried-out plants, immerse the pot in a shallow container of water for 10–15 minutes. This allows the roots to rehydrate evenly.
  4. Avoid overwatering afterward: Once rehydrated, let the soil drain well. Overwatering can cause root rot in weakened plants.

Hydration is the first step toward recovery, but it must be balanced carefully to avoid additional stress.


3. Remove Damaged or Dead Foliage

Pruning is critical to help the plant redirect energy toward healthy growth.

  • Trim brown or yellow leaves: Dead foliage cannot recover and can harbor pests or disease.
  • Remove broken stems: Snip off broken or damaged branches to encourage new growth.
  • Clean leaves: Dust and dirt reduce photosynthesis, so gently wipe or rinse leaves.

Healthy leaves are the plant’s energy factories, so removing damaged ones allows your plant to focus on recovery.


4. Adjust Light Exposure Gradually

After a vacation, your plants may have been exposed to less light or moved from their optimal position. Abruptly returning them to bright sunlight can cause sunburn or additional stress.

Light Recovery Tips:

  • Indoor plants: Move them near their usual light source but gradually reintroduce them to full exposure.
  • Outdoor plants: Shade them for a few days if they were partially protected or indoors, then slowly reintroduce them to sunlight.
  • Rotate plants weekly to ensure even growth.

Gradual light adjustment helps restore their natural photosynthetic rhythm.


5. Check Soil and Repot if Necessary

Soil quality may have deteriorated while you were away. Salts and minerals can build up, and overwatered soil can become compacted or moldy.

  • Inspect the soil: If it’s hard, crusty, or smells sour, it may need refreshing.
  • Repot weak or root-bound plants: Use fresh, well-draining soil to promote root health.
  • Fertilize lightly: After the plant shows signs of recovery (usually new leaves or stems), resume regular feeding to replenish nutrients.

Healthy soil is the foundation of plant recovery, and addressing this early accelerates revival.


6. Reestablish Proper Humidity

Indoor plants, particularly tropical species, may suffer from dry air during your absence. Leaf tips can brown, and plants may appear wilted even after watering.

  • Group plants together: This creates a humid microclimate.
  • Use pebble trays or a humidifier: Add moisture around plants to mimic natural tropical conditions.
  • Mist leaves carefully: Only lightly mist to avoid fungal issues.

Restoring humidity is particularly important for ferns, calatheas, and other tropical plants that are sensitive to dry air.


7. Monitor for Pests and Diseases

Vacation stress can weaken plants, making them more susceptible to pests and disease. Inspect carefully:

  • Check leaves, stems, and soil: Look for mites, aphids, mealybugs, or fungal growth.
  • Treat promptly: Use neem oil, insecticidal soap, or other organic solutions depending on the issue.
  • Isolate affected plants: Prevent infestation spread to healthy plants.

Early intervention prevents minor issues from escalating into major problems.


8. Adjust Watering Schedule for Recovery

Plants often need a temporary change in watering after a period of stress:

  • Dehydrated plants: Water thoroughly but allow soil to dry slightly between sessions.
  • Overwatered plants: Ensure soil drains well; reduce watering until roots recover.
  • Observation: Monitor leaves and soil daily for signs of stress, adjusting as needed.

Consistency and moderation are key to stabilizing plants post-vacation.


9. Encourage New Growth

Once your plants have stabilized, help them regain vigor:

  • Light pruning: Encourage bushier growth and remove old or unproductive stems.
  • Fertilization: Use a balanced, diluted fertilizer to provide nutrients for new shoots.
  • Support weak stems: Stake tall or floppy plants to prevent further stress.

By promoting new growth, your plants can quickly regain their natural shape and vitality.


10. Prevent Future Stress During Vacations

Reviving plants after a trip is easier if you prepare for the next vacation. Consider these strategies:

  • Watering systems: Use self-watering spikes, capillary mats, or a drip irrigation system for long trips.
  • Move sensitive plants: Place them in areas with consistent light and temperature.
  • Delegate care: Ask a friend or neighbor to check and water plants if necessary.
  • Group plants together: Creates humidity and makes watering more manageable.
  • Use slow-release fertilizers: Provides nutrients over the vacation period.

Preparation reduces the likelihood of severe stress and minimizes post-vacation recovery work.


11. Special Care for Different Plant Types

Different species recover differently:

  • Tropical plants: Sensitive to humidity and temperature; focus on moisture and gentle light reintroduction.
  • Succulents and cacti: May need only light watering; avoid overhydration.
  • Flowering plants: Deadhead spent flowers to encourage blooms; fertilize lightly after recovery.
  • Herbs and vegetables: Prune damaged leaves and resume regular watering and feeding gradually.

Knowing your plant type ensures the most effective revival strategy.


12. Patience is Key

Reviving plants is not an instant process. Some species may take weeks to fully recover, and occasional leaf loss is normal. Track progress carefully:

  • Monitor new leaf growth and stem firmness.
  • Watch for color improvement in leaves.
  • Adjust care routines gradually rather than making drastic changes.

With patience and consistent attention, most plants bounce back stronger than before.


Conclusion

Coming back from vacation to find drooping or stressed plants can be alarming, but most greenery is remarkably resilient. By assessing damage, rehydrating properly, pruning dead leaves, adjusting light, restoring humidity, monitoring pests, and encouraging new growth, you can revive your plants and help them thrive again.

Remember, the key is to act quickly but gently—giving your plants the right environment and care after a period of neglect ensures they regain their strength, beauty, and vitality. With these strategies, vacation-stressed plants can bounce back fully, rewarding you with lush foliage, vibrant blooms, and a healthier indoor or outdoor garden.

How to Keep Tropical Plants Healthy in Cold Weather

How to Keep Tropical Plants Healthy in Cold Weather

Tropical plants bring vibrant color, lush greenery, and a touch of paradise to any home or garden. But when cold weather sets in, these heat-loving beauties face a real challenge. Originating from warm, humid regions, tropical plants are highly sensitive to temperature drops, dry air, and lack of sunlight. Without proper care, their health can quickly decline—leaves wilt, growth slows, and roots may even rot or freeze.

Fortunately, with some planning and understanding of their needs, you can help your tropical plants not just survive, but thrive through the winter. This detailed guide will walk you through everything you need to know about how to keep tropical plants healthy in cold weather, from temperature control and humidity management to lighting, watering, and long-term care.


1. Understanding Why Tropical Plants Struggle in Cold Weather

Tropical plants evolved in warm, stable climates with consistent temperatures and high humidity levels. When exposed to cold, they experience stress because their cells and roots are not adapted to sudden temperature drops or dry air.

Here’s what happens when they encounter cold conditions:

  • Chilled roots: Cold soil prevents roots from absorbing water and nutrients effectively.
  • Leaf damage: Frost or cold drafts can cause browning or yellowing of leaves.
  • Low humidity: Dry indoor air causes leaf tips to crisp and curl.
  • Reduced sunlight: Shorter days limit photosynthesis, slowing plant growth.

Recognizing these challenges helps you create an environment that mimics their natural tropical habitat, even during winter months.


2. Bringing Outdoor Tropical Plants Indoors Before Frost

If you grow tropical plants outdoors during the summer—like hibiscus, banana plants, or palms—you’ll need to bring them indoors before temperatures dip below 55°F (13°C). Most tropicals begin to suffer at this threshold.

Steps for Safe Transition:

  1. Inspect for pests: Before moving them inside, check leaves (especially undersides), stems, and soil for pests like aphids, spider mites, or whiteflies. Wipe with a damp cloth or use neem oil to remove any insects.
  2. Prune damaged growth: Trim off any yellowed or dead leaves to help the plant focus energy on healthy growth.
  3. Clean the foliage: Dusty leaves block sunlight; wipe them with a damp sponge or give a gentle shower rinse.
  4. Acclimate gradually: Before moving indoors permanently, place the plants in a shaded, sheltered area for a few days to reduce shock from the sudden environment change.

This slow adjustment helps your tropicals adapt more smoothly to indoor conditions.


3. Maintaining Optimal Indoor Temperature

Temperature control is the key to tropical plant survival in cold weather. Most tropical plants thrive between 65°F and 80°F (18°C to 27°C) during the day and should never be exposed to temperatures below 55°F (13°C) at night.

Tips to Keep Temperature Stable:

  • Keep plants away from cold drafts from windows, doors, or vents.
  • Avoid placing them near heating sources like radiators or fireplaces, which can dry them out.
  • If your home is cool, consider using a small space heater nearby—but not directly on the plants—to maintain warmth.
  • In particularly cold climates, place plants on insulated mats or stands to prevent root chill from cold floors.

A consistent temperature helps prevent stress and encourages steady growth even in winter.


4. Managing Humidity Levels

Tropical plants thrive in 60–80% humidity, but indoor winter air often drops to 20–30%, which can cause leaves to brown and curl. Restoring moisture to the air is essential for keeping them healthy.

Ways to Boost Humidity:

  1. Humidifiers: A cool-mist humidifier placed near plants can recreate tropical-like moisture levels.
  2. Pebble trays: Fill trays with pebbles and water, then place pots on top. As the water evaporates, it increases humidity around the plants.
  3. Grouping plants: Cluster tropicals together; they naturally create a mini microclimate of higher humidity.
  4. Misting: Lightly mist leaves with water once a day (avoid overdoing it to prevent fungal issues).
  5. Bathroom or kitchen placement: These rooms naturally have higher moisture levels—ideal for ferns, calatheas, and orchids.

Proper humidity management prevents dehydration and keeps tropical foliage lush and vibrant.


5. Providing Adequate Light During Shorter Days

During winter, the sun’s rays weaken and daylight hours shorten, which can leave your tropicals starved for light. Because these plants are used to bright, consistent sunlight, you’ll need to supplement what nature can’t provide.

Lighting Tips:

  • Move plants to south- or east-facing windows, where they’ll receive maximum natural light.
  • Clean windows and leaves regularly to improve light absorption.
  • Rotate plants every week to ensure even growth.
  • If natural light is insufficient, invest in grow lights. LED or full-spectrum fluorescent lights work best, mimicking sunlight for 10–14 hours daily.
  • Avoid placing plants too close to glass in cold regions, as it can cause leaf burn from cold surfaces.

The right balance of light prevents weak stems, faded leaves, and slow growth during gloomy months.


6. Adjusting Watering Practices

Tropical plants’ water needs change significantly in winter. Overwatering is a common mistake that leads to root rot because plants grow more slowly and use less water in the cold season.

Winter Watering Guidelines:

  • Check soil moisture before watering—only water when the top 1–2 inches feel dry.
  • Use room-temperature water to avoid chilling roots.
  • Ensure pots have proper drainage; never let roots sit in stagnant water.
  • Reduce watering frequency for dormant species like hibiscus, but continue moderate watering for evergreens like palms and ferns.

Remember: It’s better to underwater slightly in winter than to drown your tropical plants.


7. Feeding and Fertilization

Tropical plants typically slow down growth during cold months, so their nutrient requirements decrease. Feeding too much can lead to salt buildup and root damage.

Best Practices:

  • Stop or reduce fertilizing from late fall through early spring.
  • Resume feeding only when you see new growth, usually in spring.
  • If plants are actively growing under artificial light, use a diluted balanced fertilizer (half-strength) once a month.

This seasonal feeding schedule ensures plants aren’t overwhelmed while conserving energy during their slower growth period.


8. Pruning and Cleaning for Health

Clean, well-pruned plants handle winter stress better. Dead or diseased foliage can attract pests and block light.

Tips:

  • Remove yellow or damaged leaves to encourage healthy growth.
  • Prune lightly to shape the plant and improve air circulation.
  • Wipe dust from leaves regularly using a damp cloth or soft brush—this enhances photosynthesis.

Healthy leaves are the plant’s energy source, so keeping them clean and functional is vital during low-light months.


9. Preventing Common Winter Problems

Even with the best care, tropical plants can show signs of stress. Here’s how to address common issues:

  • Brown leaf tips: Usually caused by low humidity. Increase moisture or use a humidifier.
  • Yellow leaves: Could indicate overwatering or poor drainage. Check soil moisture and adjust watering.
  • Leaf drop: Often due to sudden temperature or light changes. Keep conditions steady and avoid moving plants frequently.
  • Pest infestations: Dry indoor air encourages spider mites and whiteflies. Use neem oil or insecticidal soap as a natural remedy.

Early detection and prompt care can prevent minor problems from turning into major damage.


10. Special Care for Specific Tropical Plants

Different tropical plants have unique winter requirements:

  • Orchids: Prefer bright indirect light and high humidity; water sparingly when dormant.
  • Fiddle Leaf Fig: Keep in bright filtered light; avoid drafts and sudden moves.
  • Bird of Paradise: Needs strong light and slightly moist soil.
  • Peace Lily: Enjoys consistent moisture and high humidity—avoid letting soil dry out completely.
  • Philodendron and Monstera: Tolerate lower light but need regular misting to prevent crispy leaves.

Understanding each species’ preferences helps tailor care precisely for optimal health.


11. Preparing for Spring Recovery

As the weather warms up, your tropical plants will start showing signs of new growth. Here’s how to help them transition back to their active growing phase:

  • Gradually increase watering and feeding.
  • Move them closer to bright light sources or outdoors once temperatures stay above 60°F (15°C).
  • Re-pot if roots have outgrown containers.
  • Resume regular pruning and grooming to encourage bushy growth.

With proper reintroduction, your tropical plants will bounce back beautifully after their winter rest.


Conclusion

Keeping tropical plants healthy in cold weather might seem challenging, but it’s absolutely achievable with the right care routine. By maintaining consistent warmth, adequate humidity, proper lighting, and balanced watering, you can recreate a miniature tropical paradise inside your home—even when snow blankets the ground outside.

Cold weather doesn’t have to mean dormancy or decline for your tropical beauties. With attention and patience, they’ll continue to fill your space with vibrant life, glossy leaves, and a sense of eternal summer, no matter what season it is outside.

How to Move Plants Safely During Seasonal Shifts

How to Move Plants Safely During Seasonal Shifts

Plants, like people, can be sensitive to changes in their surroundings. Whether it’s the transition from summer’s blazing heat to autumn’s cool breeze or the move from indoor warmth to spring’s outdoor sunshine, seasonal shifts can stress your plants. However, with careful planning and the right approach, you can help them adjust smoothly and continue to thrive all year round.

This guide covers everything you need to know about how to move plants safely during seasonal changes—from understanding their needs and minimizing shock to preparing the perfect environment for a stress-free transition.


1. Understanding Why Seasonal Shifts Affect Plants

Before moving your plants, it’s important to understand how seasonal changes impact them. Each season brings unique temperature, humidity, and light variations that can affect plant health.

  • Temperature changes: Sudden exposure to heat or cold can shock plants. Tender indoor species like tropical houseplants are especially vulnerable to chilly drafts or frost.
  • Light fluctuations: As daylight hours shorten in fall or lengthen in spring, plants may struggle to adapt to new light conditions.
  • Humidity levels: Winter heating and summer air conditioning can dry out the air, while rainy seasons may increase humidity beyond what some plants prefer.
  • Soil moisture: Seasonal evaporation rates vary, affecting how quickly the soil dries out.

Recognizing these shifts allows you to plan movements strategically, reducing the stress plants experience.


2. Assessing Which Plants Need to Be Moved

Not every plant needs relocation during seasonal transitions. Identify which ones are most affected by changes:

  • Tender tropical plants (like Monstera, Calathea, or Fiddle Leaf Fig) need protection from cold drafts and must move indoors before temperatures drop below 50°F (10°C).
  • Outdoor annuals (such as petunias or impatiens) may not survive frost, so they can be overwintered indoors or replaced the next season.
  • Hardy perennials can stay outdoors but may need mulch protection around the base.
  • Indoor plants may need repositioning closer to windows during winter to maximize light exposure.

Take note of your region’s average seasonal temperature range to determine which plants should be relocated and when.


3. Timing the Move Correctly

Timing is everything when relocating plants. Moving them too abruptly from one environment to another can cause transplant shock or leaf drop.

  • Spring Transition (Indoors → Outdoors): Wait until nighttime temperatures remain consistently above 55°F (13°C). Start by placing plants outdoors for a few hours each day in partial shade, gradually increasing their exposure to sunlight and outdoor conditions over one to two weeks.
  • Fall Transition (Outdoors → Indoors): Before the first frost, start bringing plants inside gradually. Move them to a shaded porch or covered area for a few days, then indoors. This helps them adapt to reduced light and humidity levels.

A gradual adjustment—usually over 7–10 days—helps plants acclimate without stress.


4. Preparing Plants for the Move

Before you move any plant, give them the care they need to handle the transition:

a. Inspect for Pests

Check leaves (especially undersides), stems, and soil for insects like spider mites, aphids, or mealybugs. Wipe the leaves with a damp cloth, and if necessary, use an organic insecticidal soap.

b. Prune and Clean

Trim off dead or damaged leaves and spent flowers. Clean dusty leaves gently with water to help plants breathe and photosynthesize better in their new environment.

c. Repot if Necessary

If roots are growing out of drainage holes or the plant seems too crowded, repot it before the move. However, avoid repotting right after relocation—plants need time to settle before handling additional stress.

d. Water Strategically

Water thoroughly a day before the move, allowing soil to drain properly. Avoid moving plants with soggy soil, as wet roots are more vulnerable to damage during transport.


5. Creating the Ideal New Environment

Each move—whether to a sunny patio or a cozy windowsill—requires careful environmental matching. Observe the following factors:

a. Light

  • For indoor moves, find the brightest location that suits your plant type. South- or east-facing windows work best for most species.
  • For outdoor moves, avoid direct harsh sun exposure immediately. Gradual sun introduction prevents leaf scorch.

b. Temperature

Keep plants away from direct air vents, heaters, or drafty windows indoors. Outdoors, place them in sheltered spots during extreme heat or cold.

c. Humidity

Indoor heating in winter can cause dry air, leading to crispy leaf edges. Group plants together, use pebble trays filled with water, or run a humidifier to maintain comfortable moisture levels.

d. Air Circulation

Ensure good airflow, especially in humid conditions, to prevent mold or fungal diseases. A small fan can help circulate air indoors.


6. Transporting Plants Safely

When physically moving plants—whether across the house, to a patio, or into storage—handle them with care.

  • Use sturdy containers: Move pots in trays or boxes lined with newspaper to prevent tipping.
  • Support tall plants: Tie long stems gently with soft twine to avoid breakage.
  • Avoid extreme temperatures: Never move plants during the hottest part of the day or when it’s freezing.
  • Cover fragile foliage: For outdoor moves, use light cloth or paper covers to protect leaves from windburn or sun scorch.

If you’re moving plants between homes or greenhouses, keep them shaded and hydrated during transport.


7. Helping Plants Adjust After the Move

Once the move is complete, your plants need time to settle in. Expect minor changes—like a few yellow leaves or slower growth—but help them recover by maintaining consistent care.

a. Observe Closely

Watch for signs of stress such as drooping, discoloration, or wilting. Adjust light, temperature, or watering if needed.

b. Maintain Watering Balance

Avoid overwatering, as roots might take time to adjust. Check soil moisture before each watering—moist but not soggy is best.

c. Gradual Feeding

Wait at least two weeks before fertilizing newly moved plants. Once they start producing new growth, resume a balanced feeding schedule.

d. Rotate Regularly

Turn plants weekly to encourage even light exposure and symmetrical growth, especially indoors where sunlight is directional.


8. Special Considerations for Different Seasons

Each season demands a tailored approach to plant movement and care.

Spring

  • Gradually reintroduce sunlight to wintered plants.
  • Begin fertilizing to support new growth.
  • Watch for pests as outdoor temperatures rise.

Summer

  • Protect shade-loving plants from scorching midday sun.
  • Maintain humidity and consistent watering to combat heat stress.
  • Move sensitive plants indoors during heatwaves.

Autumn

  • Start reducing watering and fertilizer as growth slows.
  • Bring tender species indoors before the first frost.
  • Check for bugs before moving plants inside.

Winter

  • Position plants near bright windows to compensate for shorter days.
  • Maintain humidity with trays or humidifiers.
  • Avoid cold drafts and sudden temperature drops.

Adapting your plant care routine with the season ensures long-term health and year-round beauty.


9. Common Mistakes to Avoid

Even experienced gardeners sometimes make missteps when moving plants. Avoid these common pitfalls:

  • Moving too quickly: Sudden exposure to new conditions leads to shock.
  • Ignoring pests: Indoor infestations often start with unchecked outdoor plants.
  • Overwatering after relocation: Roots under stress need oxygen as much as moisture.
  • Placing plants in unsuitable light: Adjust light exposure slowly to prevent leaf burn or drop.

A little patience and observation can make a huge difference in how successfully your plants adapt.


10. The Rewards of Seasonal Movement

Moving plants with the seasons isn’t just a necessity—it’s a way to create dynamic, healthy, and ever-changing greenery in your home or garden. Seasonal shifts allow plants to rest, regrow, and thrive in sync with nature’s rhythm. By paying attention to their environmental cues and adjusting carefully, you’ll enjoy lush foliage, vibrant blooms, and thriving roots year-round.


Final Thoughts

Learning how to move plants safely during seasonal shifts is about building a partnership with nature. You’re not just relocating greenery—you’re helping living organisms adjust, adapt, and flourish despite changing conditions. With patience, planning, and gentle transitions, your plants can sail smoothly through every season—stronger, healthier, and more beautiful than ever.

The Best Winter Blooming Indoor Plants for Colorful Rooms

The Best Winter Blooming Indoor Plants for Colorful Rooms

When winter arrives and the outdoor world fades into shades of gray, your indoor spaces don’t have to follow suit. With the right selection of winter-blooming indoor plants, you can fill your home with vibrant colors, delightful fragrances, and a refreshing touch of nature. These resilient bloomers not only brighten rooms during the coldest months but also improve air quality and boost mood—an essential dose of cheer during shorter, darker days.

In this article, we’ll explore some of the best winter-blooming indoor plants that thrive indoors, offering practical care tips, light and temperature requirements, and creative ways to display them for maximum visual impact.


Why Choose Winter Blooming Indoor Plants?

Winter blooming plants bring life and energy into your home at a time when most outdoor gardens lie dormant. They’re perfect for those who crave a natural burst of color during chilly months. Beyond aesthetics, these plants contribute to:

  • Improved air quality: Many indoor plants help purify the air by removing toxins.
  • Enhanced well-being: Colorful flowers and greenery reduce stress and promote relaxation.
  • Year-round interest: Rotating seasonal plants keeps your interiors dynamic and refreshing.

Whether you have a bright sunroom or a cozy apartment corner, there’s a winter bloomer for every indoor environment.


1. African Violet (Saintpaulia)

Color Palette: Shades of purple, pink, white, and blue
Light Needs: Bright, indirect light
Temperature: 65–75°F (18–24°C)

African violets are among the most popular indoor flowering plants because they bloom almost year-round—including through winter. Their compact size makes them ideal for small spaces, and their velvety petals add an elegant texture to any room.

Care Tips:

  • Keep the soil consistently moist but not soggy.
  • Avoid getting water on the leaves to prevent spots.
  • Fertilize monthly with a balanced, water-soluble fertilizer designed for blooming plants.

Pro Tip: Place African violets near an east-facing window where they receive gentle morning sunlight. They can also thrive under fluorescent grow lights during darker months.


2. Christmas Cactus (Schlumbergera bridgesii)

Color Palette: Pink, red, white, orange, or purple
Light Needs: Bright, indirect light
Temperature: 60–70°F (15–21°C)

A holiday favorite, the Christmas cactus bursts into colorful blooms in winter when most plants rest. Unlike desert cacti, this species originates from Brazilian rainforests and prefers humidity and shade.

Care Tips:

  • Keep soil slightly moist; allow the top inch to dry between waterings.
  • Maintain bright but indirect light to encourage flowering.
  • Provide cooler night temperatures (around 55°F) for a few weeks in fall to trigger blooms.

Pro Tip: After blooming, prune lightly to shape the plant and encourage branching for fuller growth next season.


3. Cyclamen (Cyclamen persicum)

Color Palette: White, pink, red, and purple
Light Needs: Bright, indirect light
Temperature: 50–65°F (10–18°C)

Cyclamens are beloved for their upswept petals and heart-shaped, marbled leaves. They thrive in cool indoor environments, making them ideal for winter windowsills.

Care Tips:

  • Water from below by placing the pot in a saucer of water for 15–20 minutes.
  • Keep the crown (center of the plant) dry to prevent rot.
  • When flowering ends, let the plant rest by reducing watering until new leaves appear in autumn.

Pro Tip: Cyclamen perform best in cooler conditions—avoid placing them near heating vents or radiators.


4. Kalanchoe (Kalanchoe blossfeldiana)

Color Palette: Bright red, orange, pink, yellow, and white
Light Needs: Bright light to full sun
Temperature: 60–85°F (15–29°C)

Kalanchoe is a low-maintenance succulent that adds a burst of color through winter with its clusters of small, long-lasting flowers. Its fleshy leaves retain moisture, making it one of the easiest flowering plants to care for.

Care Tips:

  • Water only when the top inch of soil feels dry.
  • Provide at least 6 hours of light daily for continuous blooming.
  • After flowering, prune spent blooms to encourage new buds.

Pro Tip: Kalanchoe benefits from a rest period—reduce watering for a month after blooming, then resume regular care for another flush of flowers.


5. Amaryllis (Hippeastrum)

Color Palette: Deep red, white, pink, orange, and striped varieties
Light Needs: Bright light, direct sun for part of the day
Temperature: 60–70°F (15–21°C)

Amaryllis bulbs are famous for producing massive, trumpet-shaped flowers during the winter season. Often used as holiday décor, they can continue blooming year after year with proper post-flowering care.

Care Tips:

  • Water sparingly until new growth appears, then keep the soil lightly moist.
  • Support tall stems with stakes if needed.
  • After flowers fade, cut the stalk but keep leaves intact to recharge the bulb.

Pro Tip: Store bulbs in a cool, dark place for 8–10 weeks before replanting for next winter’s bloom cycle.


6. Orchid (Phalaenopsis and Dendrobium varieties)

Color Palette: White, pink, purple, yellow, and patterned hybrids
Light Needs: Medium to bright indirect light
Temperature: 60–80°F (16–27°C)

Orchids are elegant and long-lasting, making them a perfect choice for winter color. Phalaenopsis orchids, in particular, are ideal for beginners—they bloom for several months with minimal care.

Care Tips:

  • Use a well-draining orchid mix and water once the top layer feels dry.
  • Mist regularly or use a humidity tray to maintain moisture.
  • Fertilize every 2–3 weeks with an orchid-specific fertilizer.

Pro Tip: To encourage reblooming, provide a slight temperature drop (about 10°F cooler at night) for several weeks in fall.


7. Peace Lily (Spathiphyllum)

Color Palette: Elegant white blooms with glossy green foliage
Light Needs: Low to moderate indirect light
Temperature: 65–80°F (18–27°C)

Peace lilies are known for their air-purifying abilities and graceful white “spathes” that appear throughout the year, including winter. Their simplicity makes them perfect for modern or minimalist interiors.

Care Tips:

  • Keep soil consistently moist but not waterlogged.
  • Wipe leaves regularly to prevent dust buildup.
  • Avoid direct sunlight, which can scorch leaves.

Pro Tip: If blooms fade, cut them off at the base to direct energy toward new growth.


8. Begonia (Rieger or Tuberous Begonias)

Color Palette: Vibrant orange, yellow, red, pink, and white
Light Needs: Bright, indirect light
Temperature: 60–75°F (15–24°C)

Winter-blooming begonias, particularly Rieger hybrids, are bred for indoor flowering during colder months. Their lush petals and glossy leaves make them showstoppers in any space.

Care Tips:

  • Keep soil lightly moist and provide good air circulation.
  • Avoid overwatering—begonias dislike soggy conditions.
  • Pinch off faded flowers to extend the blooming period.

Pro Tip: Begonias thrive in humid conditions—group them with other plants or place them on a pebble tray to maintain moisture.


9. Jasmine (Jasminum polyanthum)

Color Palette: White or pale pink blooms with a strong fragrance
Light Needs: Bright light and cool temperatures
Temperature: 55–65°F (13–18°C)

For both color and scent, winter jasmine is unbeatable. It produces clusters of fragrant blooms in mid to late winter, filling the air with a sweet aroma that feels like spring in advance.

Care Tips:

  • Provide bright light, including some direct sun.
  • Keep soil evenly moist during the growing season.
  • After blooming, prune lightly to shape and encourage new shoots.

Pro Tip: A few weeks of cool night temperatures (50–55°F) in early winter help trigger flowering.


10. Azalea (Rhododendron simsii – Indoor Varieties)

Color Palette: Pink, red, coral, and white
Light Needs: Bright, indirect light
Temperature: Cool indoor temperatures (50–65°F / 10–18°C)

Indoor azaleas are compact shrubs that bloom spectacularly through winter. Their dense clusters of flowers create a stunning focal point in living spaces or sunrooms.

Care Tips:

  • Keep the soil consistently moist—never let it dry out completely.
  • Use acidic potting soil (like azalea or rhododendron mix).
  • Remove spent flowers to encourage new blooms.

Pro Tip: Mist regularly to maintain humidity, especially when indoor air is dry due to heating systems.


Arranging and Displaying Winter Bloomers Indoors

The way you display your plants can enhance both aesthetics and health:

  • Cluster plants with similar light and humidity needs for easier care and a lush, jungle-like look.
  • Use colorful pots or baskets that complement your room’s décor.
  • Rotate plants weekly to ensure even growth and exposure to light.
  • Add reflective surfaces like mirrors or glass to maximize natural light in darker corners.

Maintaining Bloom and Health Through Winter

Even winter bloomers need special care during the cold season. Follow these general maintenance practices:

  1. Provide consistent humidity: Use humidifiers or pebble trays to counteract dry indoor air.
  2. Avoid temperature extremes: Keep plants away from heaters, radiators, and cold drafts.
  3. Prune and deadhead regularly: This encourages continuous blooms and prevents disease.
  4. Feed lightly: Use diluted fertilizer once every 4–6 weeks during active blooming.

Conclusion

Winter doesn’t have to mean dull interiors or lifeless windowsills. With the right combination of winter-blooming indoor plants, you can create a colorful, vibrant, and refreshing atmosphere even during the darkest months.

From the velvety hues of African violets to the dramatic flowers of amaryllis and the delicate fragrance of jasmine, each plant brings its own charm and personality to your home. By providing adequate light, humidity, and care, these winter bloomers will not only survive—but thrive—making your home a bright sanctuary of natural beauty all season long.

So, embrace the art of indoor gardening this winter—your colorful oasis awaits right inside your living room.

How to Keep Holiday Plants Alive Long After the Season

How to Keep Holiday Plants Alive Long After the Season

The holiday season brings joy, warmth, and beauty into our homes—and often, a delightful collection of festive plants. From the iconic poinsettia and Christmas cactus to amaryllis, cyclamen, and Norfolk Island pine, these plants make perfect seasonal decorations and gifts. However, once the festivities fade, many of these plants start to wilt or lose their charm. The good news? With the right care, your holiday plants can thrive well beyond the season, bringing greenery and cheer to your home year-round.

This article will walk you through how to keep your holiday plants alive long after the holidays by understanding their unique needs, adjusting care routines, and transitioning them from festive displays to thriving houseplants.


Understanding Holiday Plants and Their Natural Cycles

Before learning how to care for them long-term, it’s important to understand the natural growth cycles of popular holiday plants. Most are tropical or subtropical species that are forced into bloom during winter through careful greenhouse conditions. Once they return to normal indoor environments, they need time and care to adapt.

Here are a few common holiday plants and their typical post-holiday behavior:

  • Poinsettia: Native to Mexico, poinsettias are tropical perennials. After their bright red bracts fade, they rest before producing new growth in spring.
  • Christmas Cactus: This plant thrives for decades if cared for properly, blooming annually with minimal effort.
  • Amaryllis: A bulb plant that can rebloom every winter with the right cycle of watering, feeding, and rest.
  • Cyclamen: Prefers cool temperatures and partial light; enters dormancy after flowering but can regrow the following fall.
  • Norfolk Island Pine: A living Christmas tree that can become a year-round indoor plant with consistent care.

Each plant follows a rhythm of growth, dormancy, and rebloom, and understanding that rhythm is the secret to keeping them alive.


Step 1: Transitioning Plants After the Holidays

Once the holiday decorations come down, your plants will need to move from “display mode” to “growth mode.” The main goal here is to ease them out of their festive conditions and help them adapt to regular household environments.

Tips for Post-Holiday Transition:

  1. Remove decorative materials: Glitter sprays, foil wraps, and ribbons can trap moisture or block drainage. Remove these immediately to allow air circulation around the soil.
  2. Check drainage: Many holiday plants are placed in pots without drainage holes. Transfer them to containers with holes to prevent root rot.
  3. Provide proper light: Place plants near bright, indirect sunlight. Most holiday plants prefer natural light without harsh direct sun exposure.
  4. Adjust temperature: Avoid placing them near heaters, fireplaces, or drafty windows. Most thrive in moderate indoor temperatures (60–75°F / 16–24°C).

Pro Tip: Sudden environmental changes can shock plants. Transition them gradually to their new spots, especially if they’ve been under artificial lights or in colder display areas.


Step 2: Adjusting the Watering Routine

Overwatering is one of the most common reasons holiday plants fail after the season. Many people continue watering at the same rate used during peak bloom, even when the plants enter rest or dormancy.

General Watering Guidelines:

  • Poinsettia: Water only when the top inch of soil feels dry. Avoid letting it sit in water.
  • Christmas Cactus: Keep soil slightly moist, but reduce watering after flowering ends.
  • Amaryllis: Water sparingly after flowers fade until new growth begins again in spring.
  • Cyclamen: Water from below (soaking the pot in a saucer) to avoid wetting the crown, which can rot easily.
  • Norfolk Island Pine: Maintain evenly moist soil—never let it dry out completely or become soggy.

Pro Tip: Always empty saucers after watering to prevent waterlogged roots. During dormancy periods, most holiday plants prefer a “less is more” approach.


Step 3: Providing the Right Light and Temperature

After the holidays, indoor light levels are often much lower than plants received in greenhouse conditions. Without enough light, they may drop leaves or lose color.

Lighting Tips:

  • Place plants in bright, indirect light—near an east or south-facing window.
  • Rotate pots every week to ensure even growth.
  • If natural light is insufficient, supplement with grow lights for 6–10 hours daily.

Temperature Considerations:

  • Avoid extreme fluctuations.
  • Keep plants away from cold drafts and heat vents.
  • Ideal range: 60–75°F (16–24°C) for most holiday species.

Some, like cyclamen, prefer cooler temperatures (50–60°F / 10–16°C), while poinsettias enjoy slightly warmer conditions.


Step 4: Feeding and Fertilizing Post-Holiday Plants

Once your plants have adjusted and show new growth, it’s time to feed them. However, avoid fertilizing right after the holidays, as plants are often entering a rest phase.

When and How to Fertilize:

  1. Wait until spring: Start fertilizing when you notice new leaves or shoots forming.
  2. Use a balanced fertilizer: A diluted, all-purpose houseplant fertilizer (10-10-10 or 20-20-20) every 2–4 weeks works well.
  3. Avoid overfeeding: Dormant plants can’t absorb nutrients effectively, leading to fertilizer burn.

Plant-Specific Feeding Notes:

  • Amaryllis: Feed once leaves appear after dormancy to help rebuild bulb strength.
  • Poinsettia: Begin monthly fertilizing in spring to encourage new growth and maintain green foliage.
  • Christmas Cactus: Feed every two weeks during active growth (spring through summer).

Step 5: Managing Dormancy and Rebloom Cycles

Understanding each plant’s natural cycle will help you keep it alive—and even reblooming—year after year.

Poinsettia Reblooming Guide:

  • In late spring, prune stems to 4–6 inches.
  • Move to bright, indirect light and increase watering.
  • In fall (around October), give 12–14 hours of complete darkness each night for 8 weeks to trigger red bracts.

Amaryllis Care for Next Season:

  • After flowering, keep watering and feeding until leaves die back.
  • Store bulbs in a cool, dry place for 8–10 weeks.
  • Replant and resume watering to encourage winter blooms.

Christmas Cactus Reblooming Guide:

  • Provide short days (12–14 hours of darkness) and cooler nights (around 55°F / 13°C) for 6 weeks before the next bloom cycle.

By mimicking natural seasonal cues—light, temperature, and rest—you can bring your holiday plants back to life year after year.


Step 6: Repotting and Pruning for Long-Term Health

As your holiday plants settle into their new lives as houseplants, occasional repotting and pruning help maintain vigor.

Repotting Tips:

  • Repot every 1–2 years in fresh, well-draining soil.
  • Choose a pot only slightly larger than the current one.
  • Avoid heavy garden soil—use a peat-based or cactus mix depending on the plant type.

Pruning Tips:

  • Poinsettias: Prune to maintain shape and encourage bushy growth.
  • Christmas Cactus: Trim after blooming to control size and promote branching.
  • Norfolk Island Pine: Remove only dead or yellowing branches—never cut the central leader.

Regular maintenance ensures better airflow, healthy growth, and future blooms.


Step 7: Pest and Disease Prevention

Post-holiday plants often struggle with pests due to indoor stress or overwatering. Watch for fungus gnats, spider mites, aphids, and mealybugs.

Preventive Measures:

  • Inspect plants regularly, especially under leaves.
  • Keep soil slightly dry between waterings to deter gnats.
  • Wipe leaves with a damp cloth or mild soapy water.
  • Isolate infected plants until pests are eliminated.

Pro Tip: Use neem oil or insecticidal soap as a natural remedy for most common pests.


Why Saving Holiday Plants Matters

Keeping your holiday plants alive long after the season isn’t just rewarding—it’s sustainable. Instead of treating plants as disposable décor, nurturing them promotes environmental consciousness, reduces waste, and deepens your connection with nature. Many of these plants can live for years, offering beauty, cleaner air, and seasonal joy every winter.


Conclusion

Holiday plants may start as festive accents, but with the right care, they can become long-lasting companions. The key lies in understanding their natural cycles—when to water, rest, feed, and repot—and making small adjustments as they transition from the glow of holiday lights to the steady rhythm of everyday life.

By following these seasonal care steps—transitioning gently, watering wisely, providing light and nutrients, and managing dormancy—you can transform your short-lived holiday plants into vibrant, year-round treasures.

So, the next time you unwrap a poinsettia or admire your amaryllis blooms, remember: with a little attention and patience, the holiday magic doesn’t have to end when the decorations come down. It can keep growing—leaf by leaf—all year long.