How to Prepare Garden Beds for Winter for a Strong Spring Start

How to Prepare Garden Beds for Winter for a Strong Spring Start

As autumn’s colors fade and the chill of winter begins to settle in, most gardeners start packing away their tools and waiting for spring. But the secret to a lush, thriving garden next year actually begins right now—in the fall. Properly preparing your garden beds for winter is one of the most valuable investments you can make for your plants and soil.

If you skip this step, winter’s freeze-thaw cycles, nutrient depletion, and pest buildup can leave your garden weak and unproductive come spring. However, with the right late-season care, your soil will stay rich, your perennials will stay protected, and your entire garden will wake up healthier, stronger, and ready to grow.

Here’s a complete expert guide on how to prepare garden beds for winter for a strong spring start—from cleaning up spent plants to enriching the soil and protecting roots from frost.


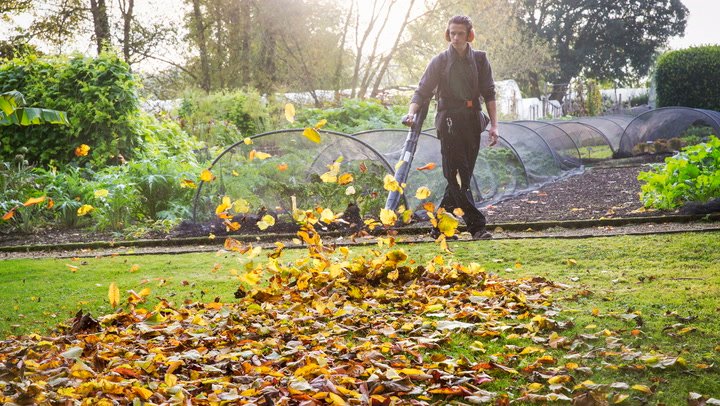
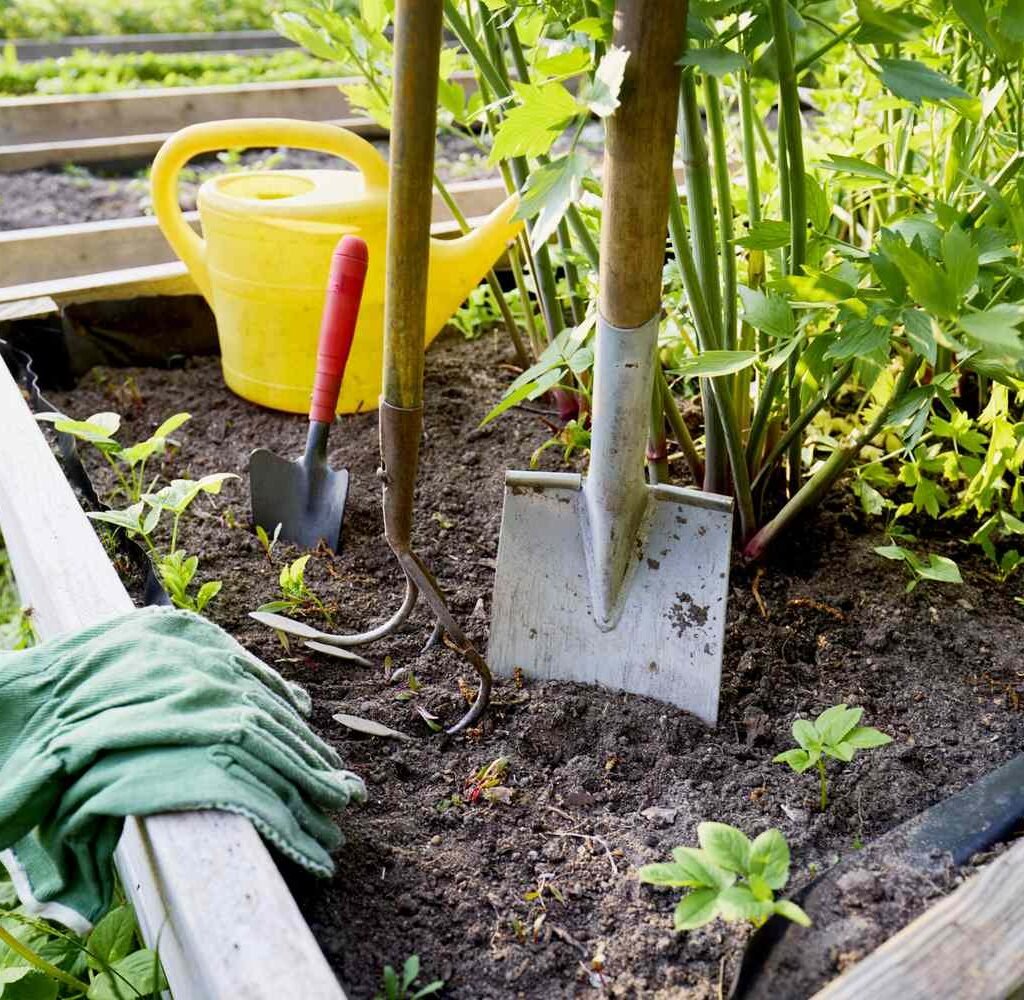
1. Clear Out Dead and Diseased Plants

The first step in winter preparation is a thorough cleanup. While some plant material can stay for structure and wildlife, dead or diseased plants are a major risk for next year’s growth.

Spent annuals, vegetable vines, and flowers that have finished blooming often harbor fungal spores, pest eggs, and bacteria that survive winter and reemerge stronger in spring.

How to Do It:

  • Pull out all annuals and vegetables that are past their prime.
  • Check for disease—leaves with spots, blackened stems, or powdery mildew should go straight into the trash, not the compost.
  • Leave healthy organic matter, such as the roots of nitrogen-fixing plants (beans or peas), which naturally enrich the soil as they break down.

Expert Tip:

If you’re unsure whether a plant is diseased, err on the side of caution and discard it. Even a few contaminated leaves can infect new seedlings next year.

A clean garden bed ensures pests and diseases don’t overwinter in your soil and guarantees a healthy start in spring.


2. Remove Weeds Before They Go Dormant

Weeds are tougher than most garden plants. If you let them stay through winter, they’ll drop seeds and spread rapidly once the soil warms up. Taking time to remove them now saves hours of back-breaking work next spring.

How to Do It:

  • Pull weeds out by the root to prevent regrowth.
  • For deep-rooted perennials (like dandelions or dock), use a hand weeder or trowel.
  • If you have time, spread a layer of mulch or cardboard to suppress any late-sprouting weeds.

Bonus Tip:

Add compost or leaf mold right after weeding. This helps replenish nutrients that weeds may have stolen from your soil.


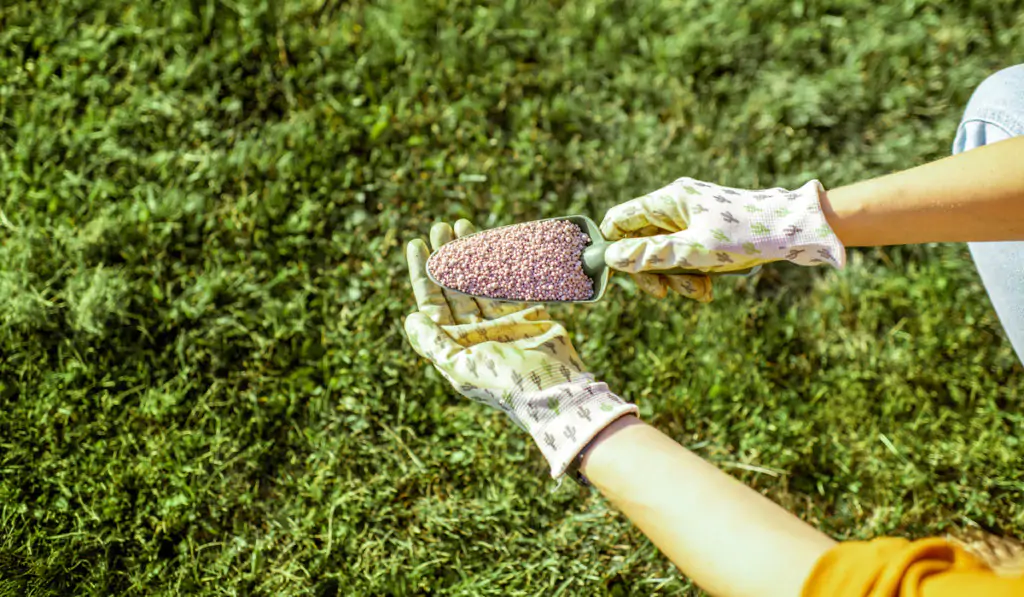
3. Add Compost or Organic Matter to Replenish the Soil

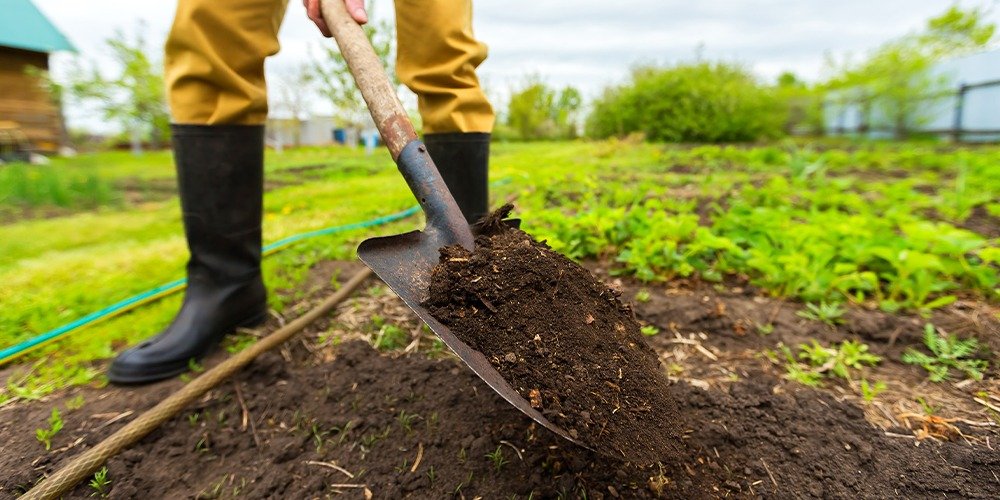
After a season of heavy growth, your soil is often depleted of nutrients. Before winter, feed it with rich organic matter to restore fertility and improve structure.
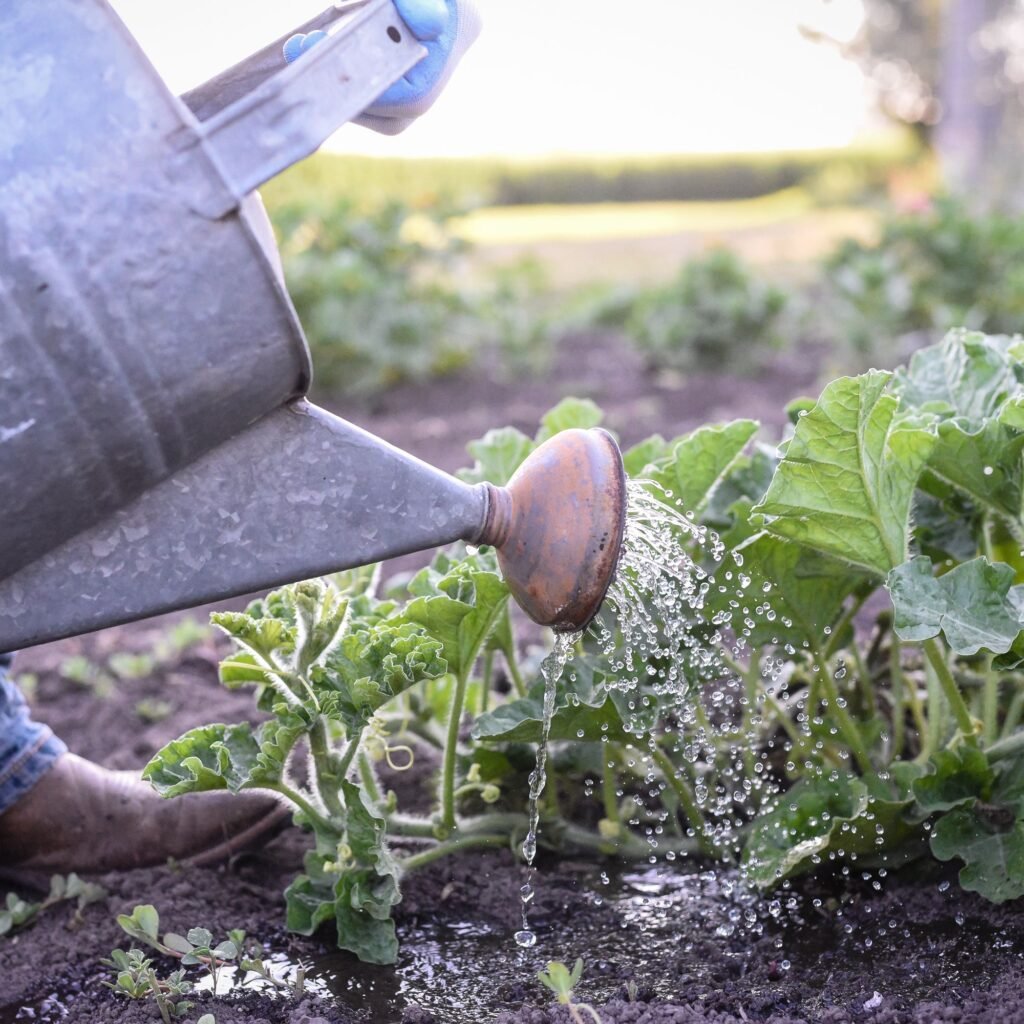
How to Do It:

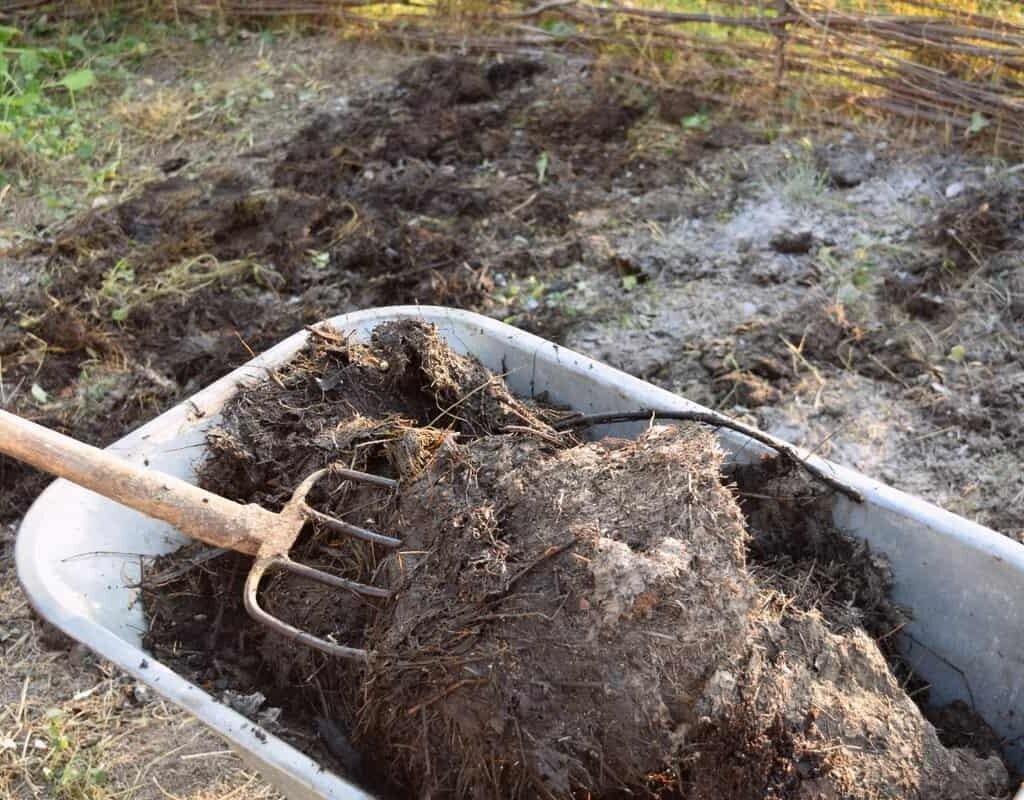
  • Spread 2–3 inches of compost, aged manure, or leaf mold over the surface of your beds.
  • Lightly turn the soil or rake it in so it mixes with the top few inches of dirt.
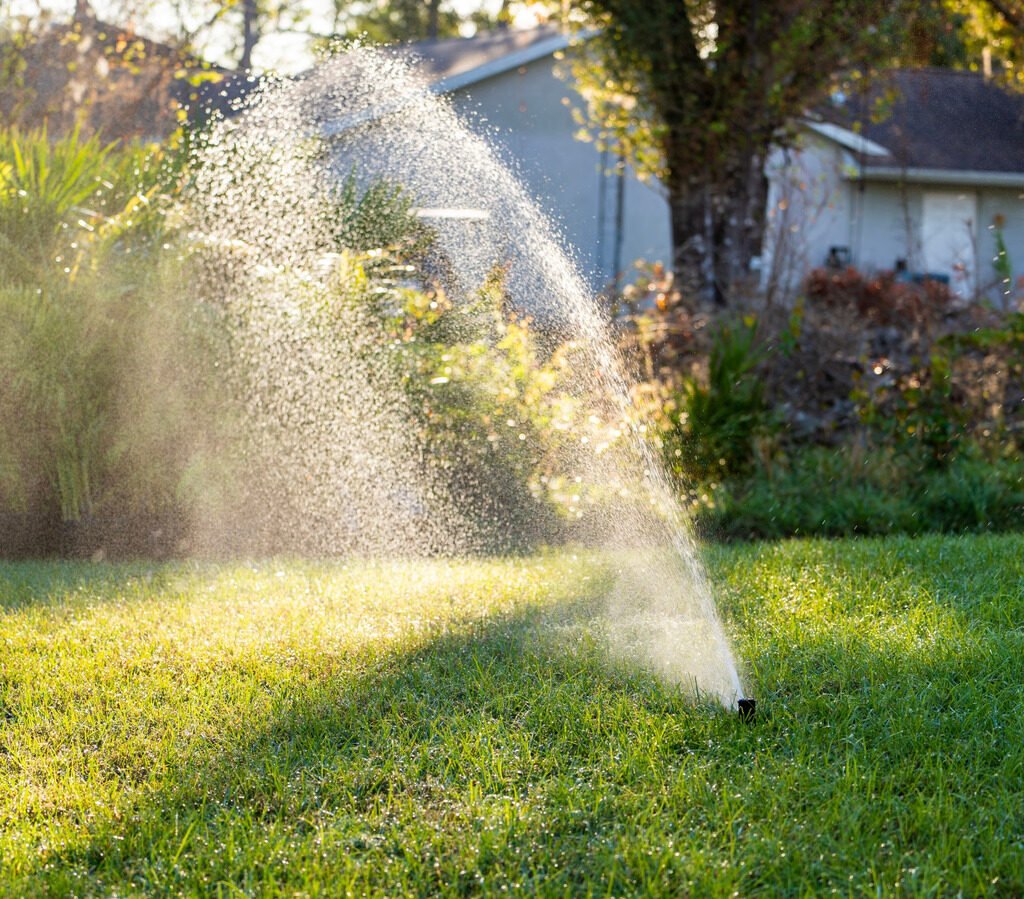
  • Water thoroughly to help nutrients seep deeper into the ground.

As winter’s freeze-thaw cycles break down the organic material, your soil will become more fertile and crumbly by spring.

Expert Tip:

If you use animal manure, make sure it’s well-aged (at least six months old)—fresh manure can burn roots and introduce harmful bacteria.


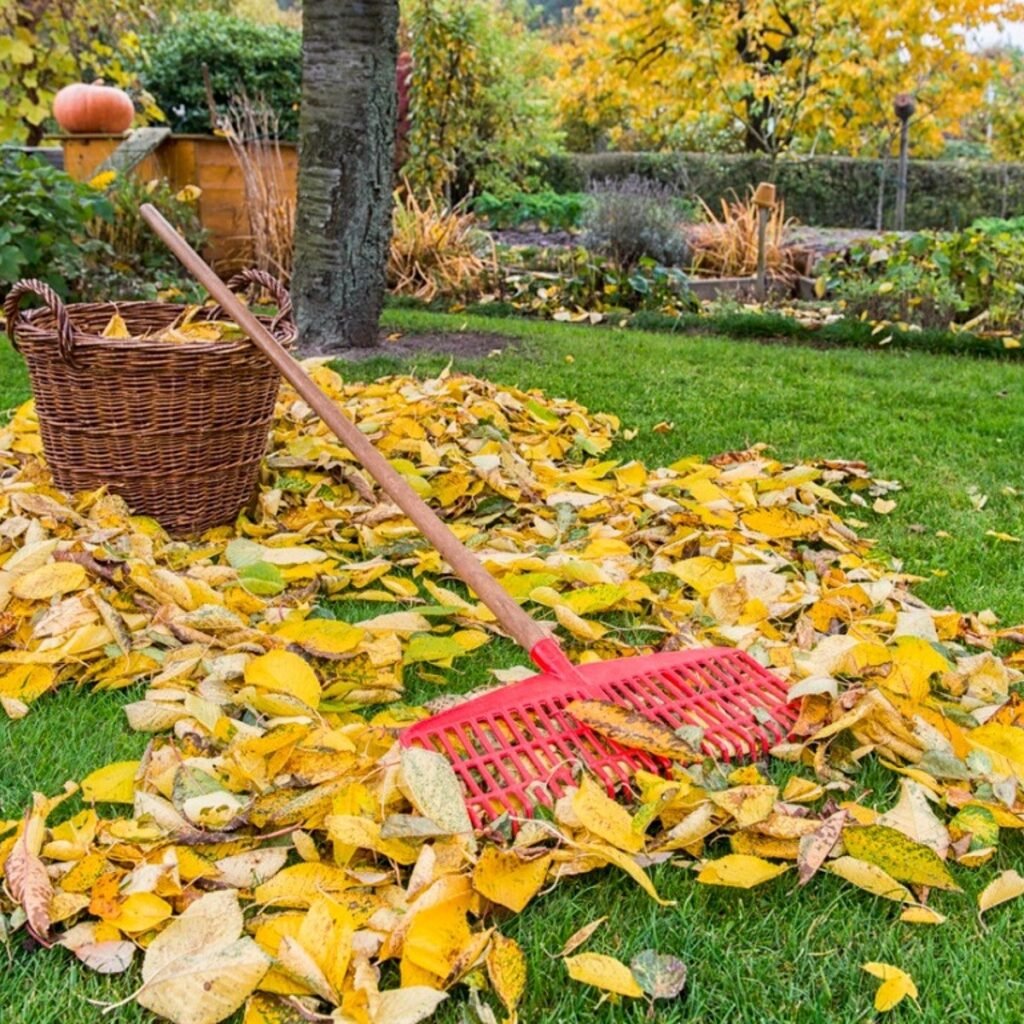
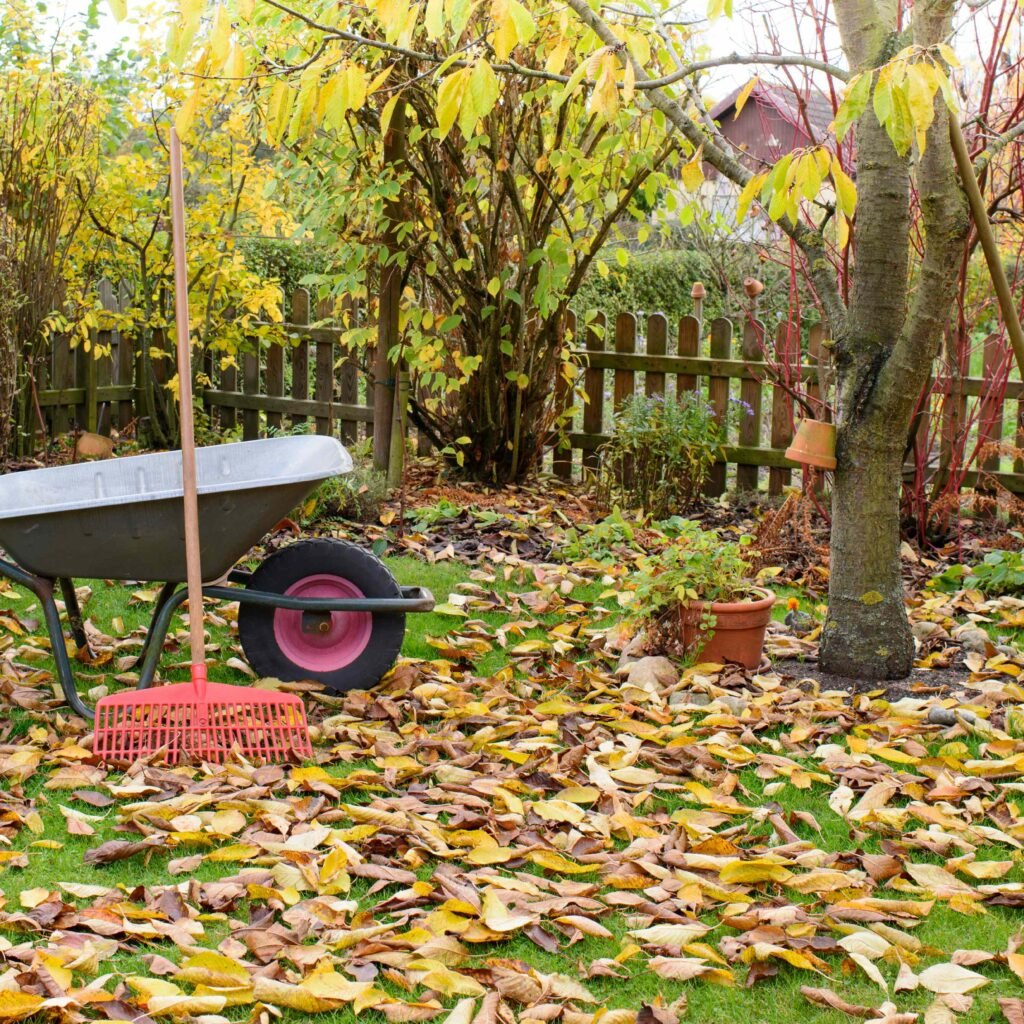
4. Protect Soil With Mulch or Cover Crops

One of the best ways to protect your garden over winter is to cover the soil—either with mulch or a living cover crop. Bare soil is vulnerable to erosion, nutrient loss, and compaction from heavy rain and snow.
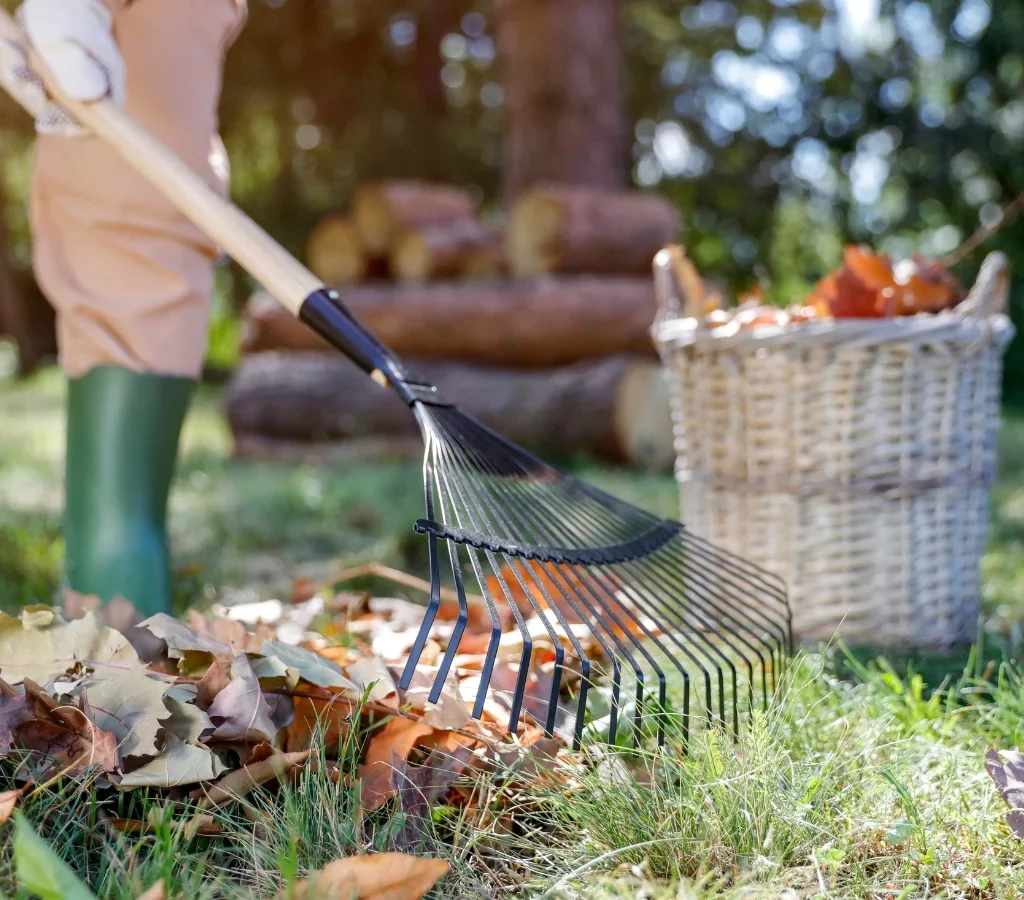
Option 1: Mulch

Mulch acts as a natural blanket, insulating roots and preventing weeds from sprouting.

  • Use organic materials like shredded leaves, straw, wood chips, or pine needles.
  • Spread 2–4 inches over the surface, keeping mulch a few inches away from plant crowns to prevent rot.

Option 2: Cover Crops

If you prefer a living cover, plant green manures such as clover, rye, vetch, or winter peas. These protect the soil while also adding nitrogen when tilled in spring.

Why It Matters:

Both methods prevent erosion and enrich the soil with organic matter, ensuring that when you start planting again, your beds are nutrient-rich and well-structured.


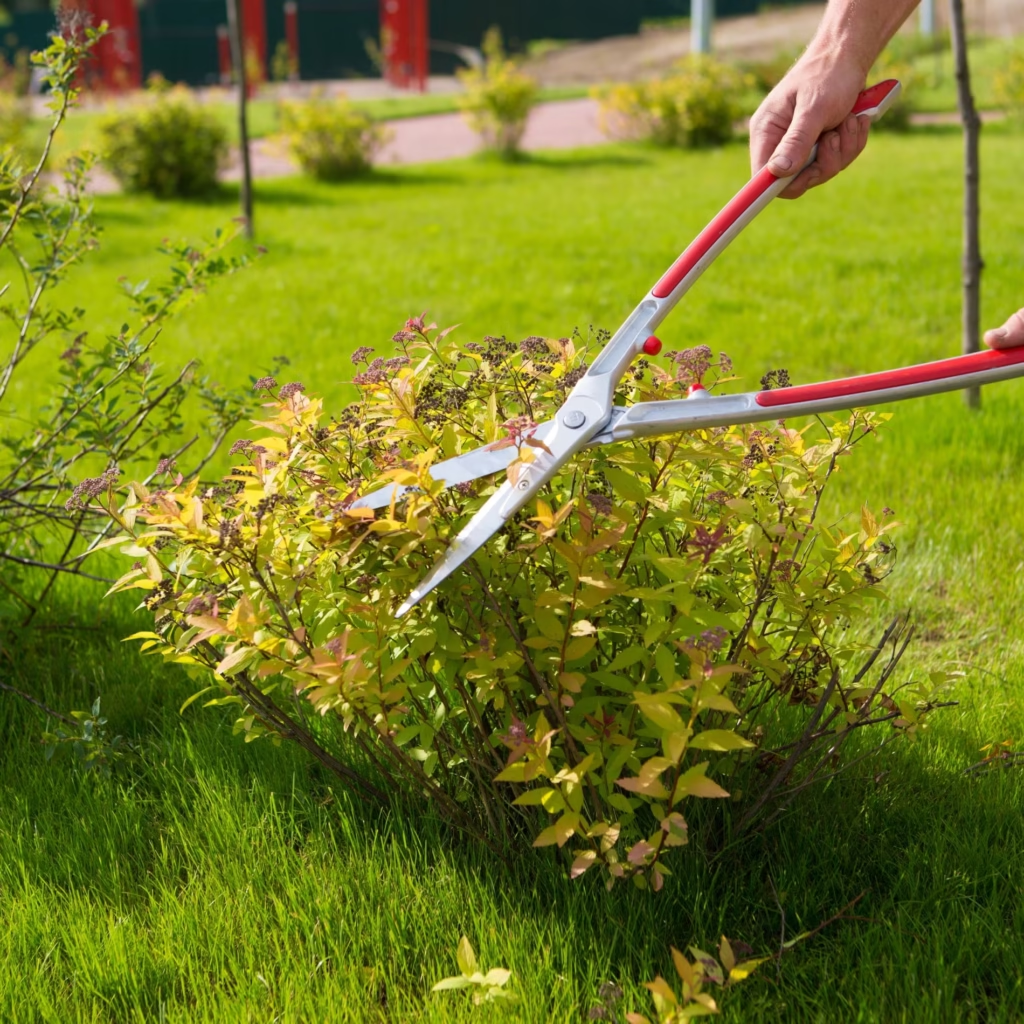
5. Cut Back Perennials—But Not Too Much

Perennial plants benefit from a gentle trim before winter, but cutting too early or too low can damage them. You want to strike the right balance—removing dead growth while leaving enough foliage to protect crowns and provide wildlife habitat.

How to Do It:

  • Wait until after the first frost to cut back perennials.
  • Trim stems to 2–3 inches above the soil.
  • Leave ornamental grasses, sedums, and coneflowers standing; they add winter beauty and feed birds with their seeds.
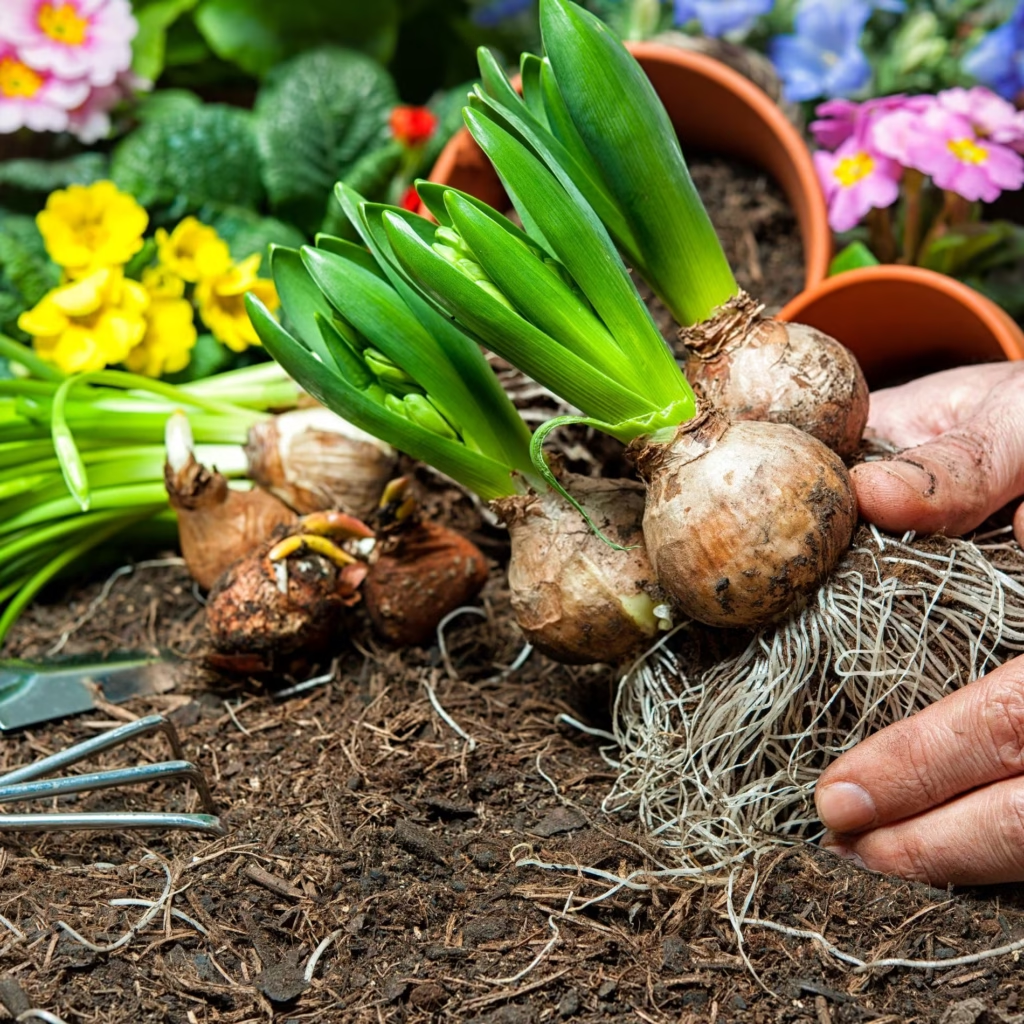
  • For tender perennials (like dahlias or cannas), dig up the bulbs or tubers, dry them, and store them in a cool, dry place until spring.

Expert Tip:

Apply a layer of mulch around perennial crowns to insulate them from extreme cold and temperature fluctuations.


6. Test and Amend Your Soil

Late fall is the perfect time to test your soil’s pH and nutrient levels. This allows you to correct imbalances now so that nutrients are available as soon as plants start growing in spring.

How to Do It:

  • Use a soil testing kit or send a sample to your local extension office.
  • Based on the results:
    • Add lime if your soil is too acidic (below pH 6.0).
    • Add sulfur or peat moss if it’s too alkaline (above pH 7.5).
    • Mix in compost or specific nutrients like bone meal or wood ash as needed.

By adjusting your soil before winter, you give amendments time to integrate naturally, setting up an ideal environment for new growth.


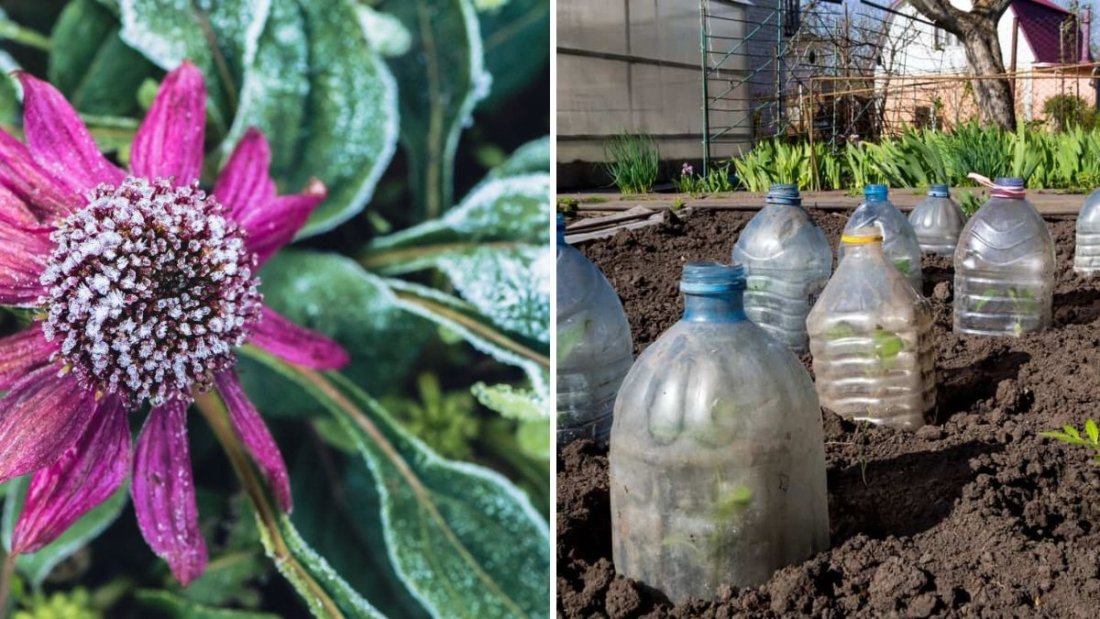
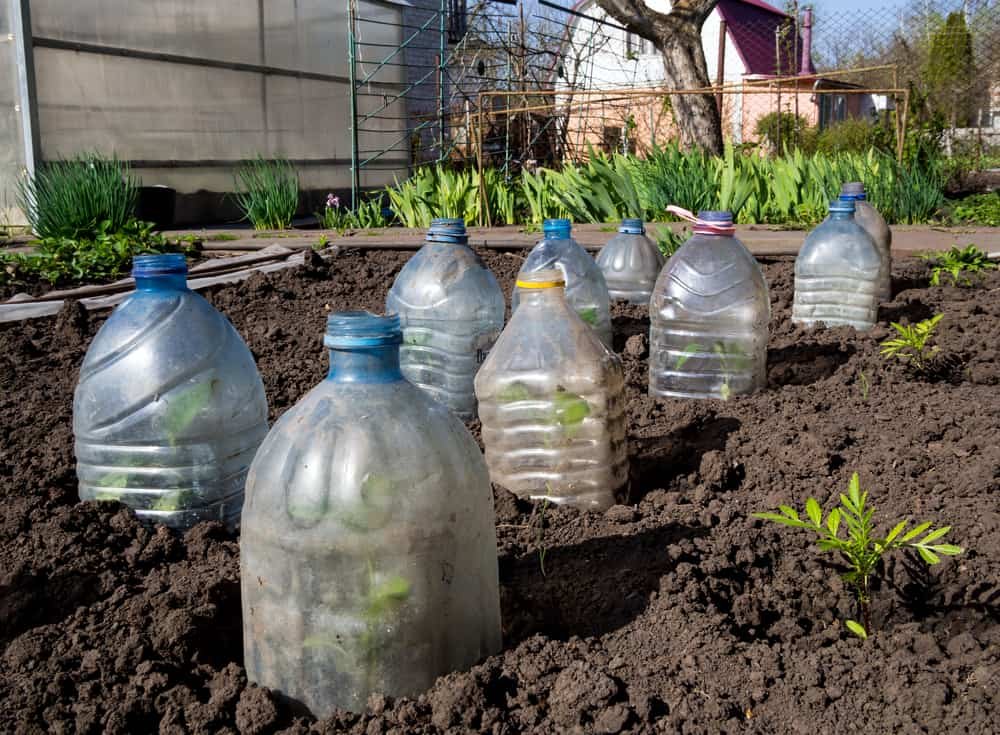
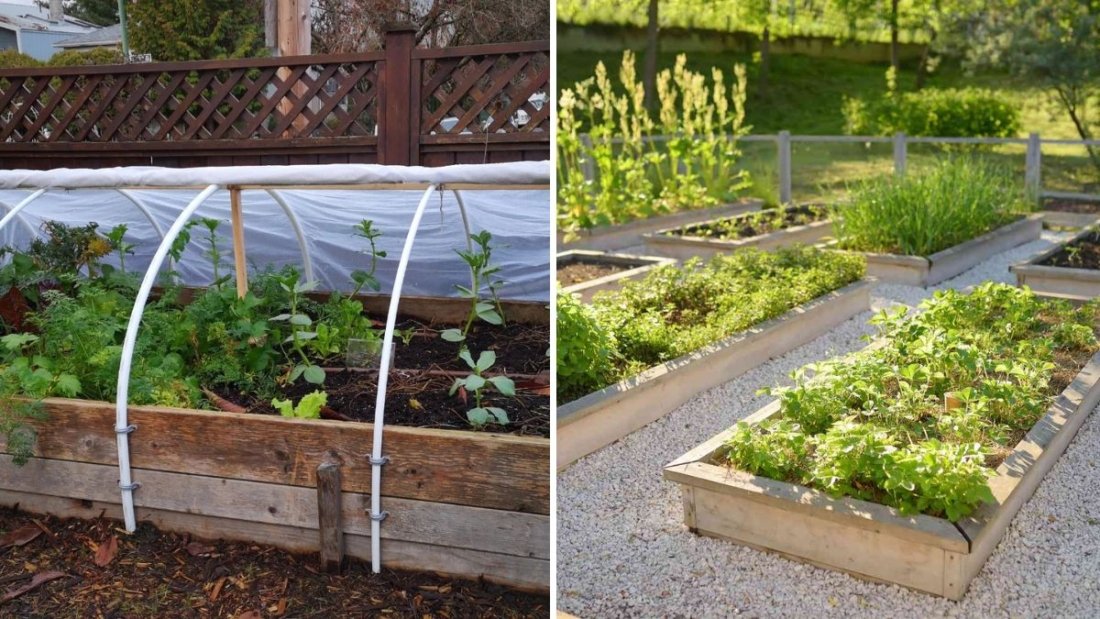
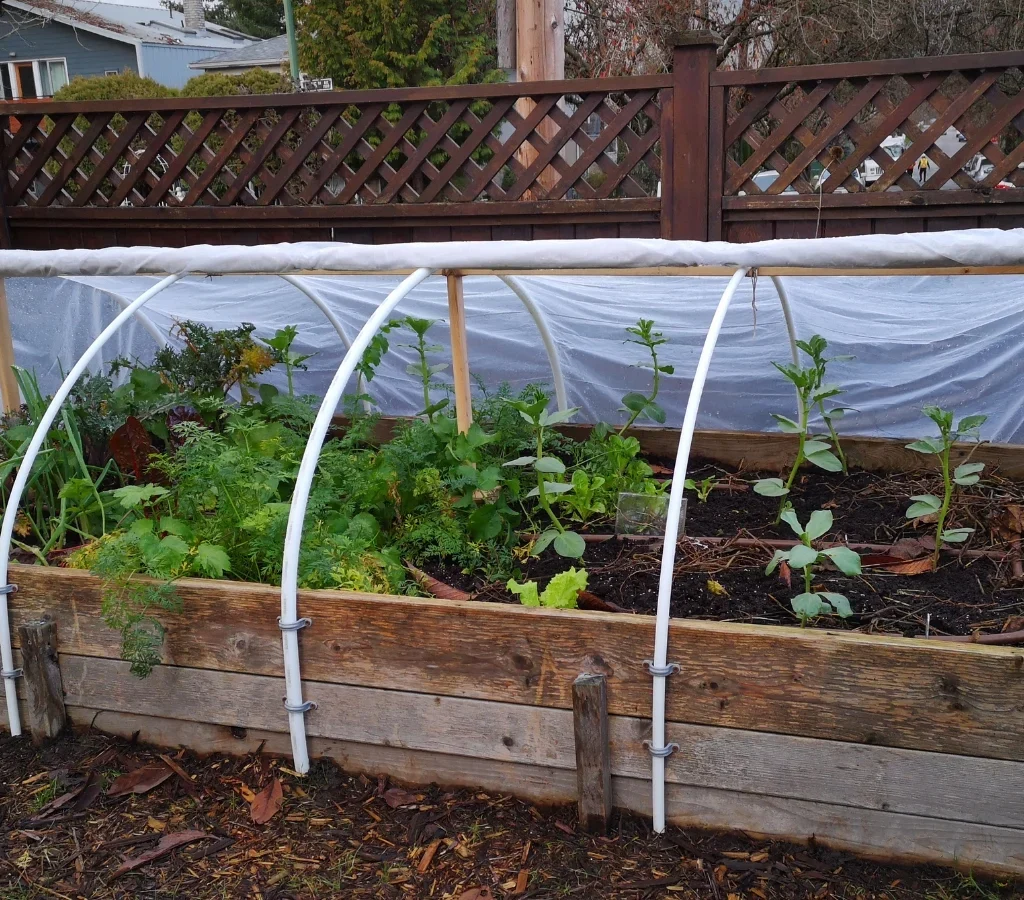
7. Cover Tender and Bare Areas

Some areas of your garden—especially those with young plants or exposed soil—need extra protection to survive the cold.
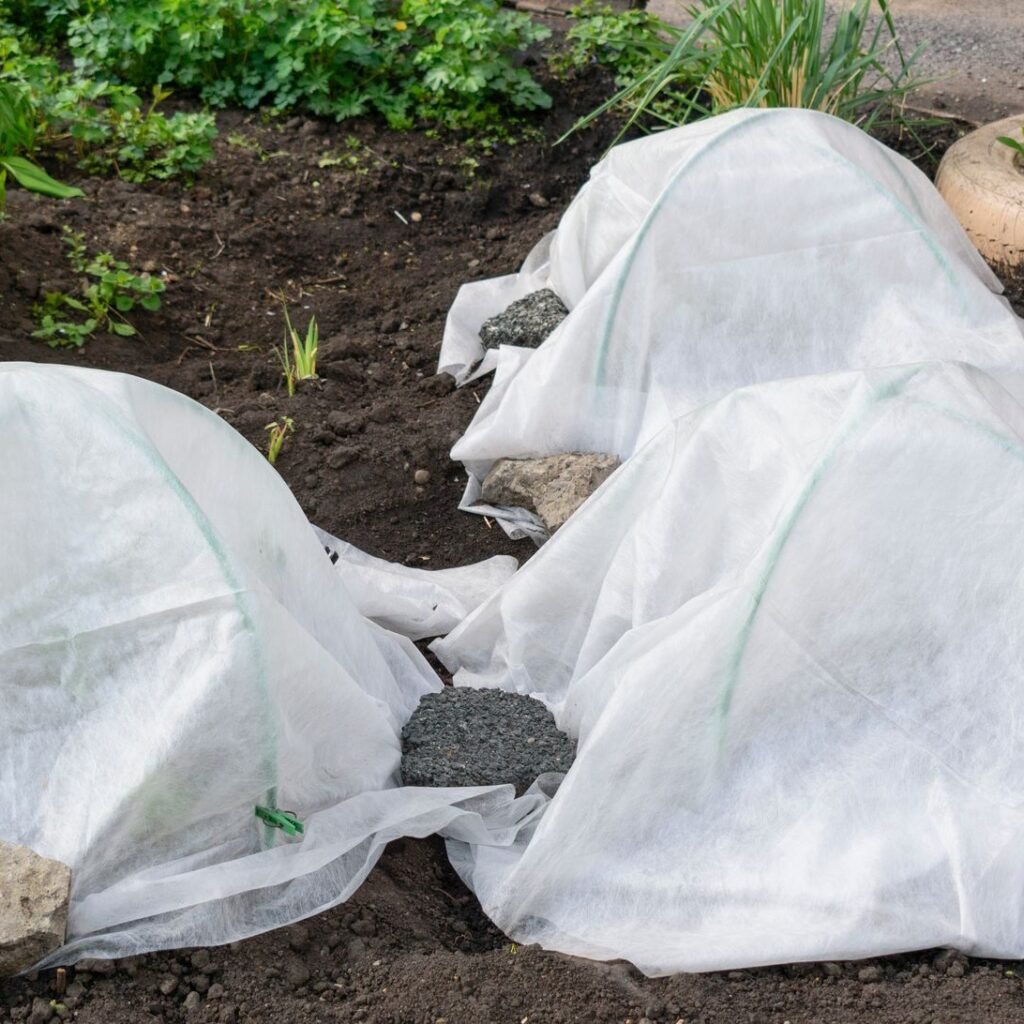
How to Do It:

  • Cover delicate plants with burlap, straw, frost blankets, or old bedsheets during severe cold snaps.
  • Secure coverings with rocks or stakes to prevent wind from blowing them away.
  • For raised beds, consider using cold frames or mini hoop houses to extend the growing season or shield overwintering crops like kale, spinach, and carrots.

Budget Tip:

You don’t need to buy fancy materials—recycled cardboard, shredded leaves, or old towels can serve as effective frost barriers in a pinch.


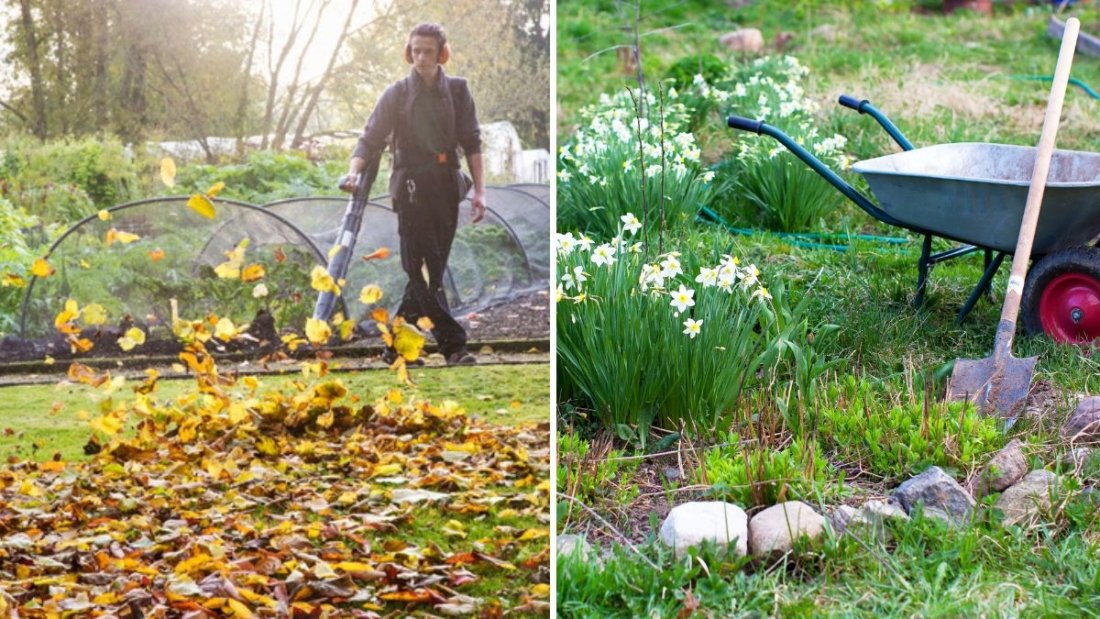
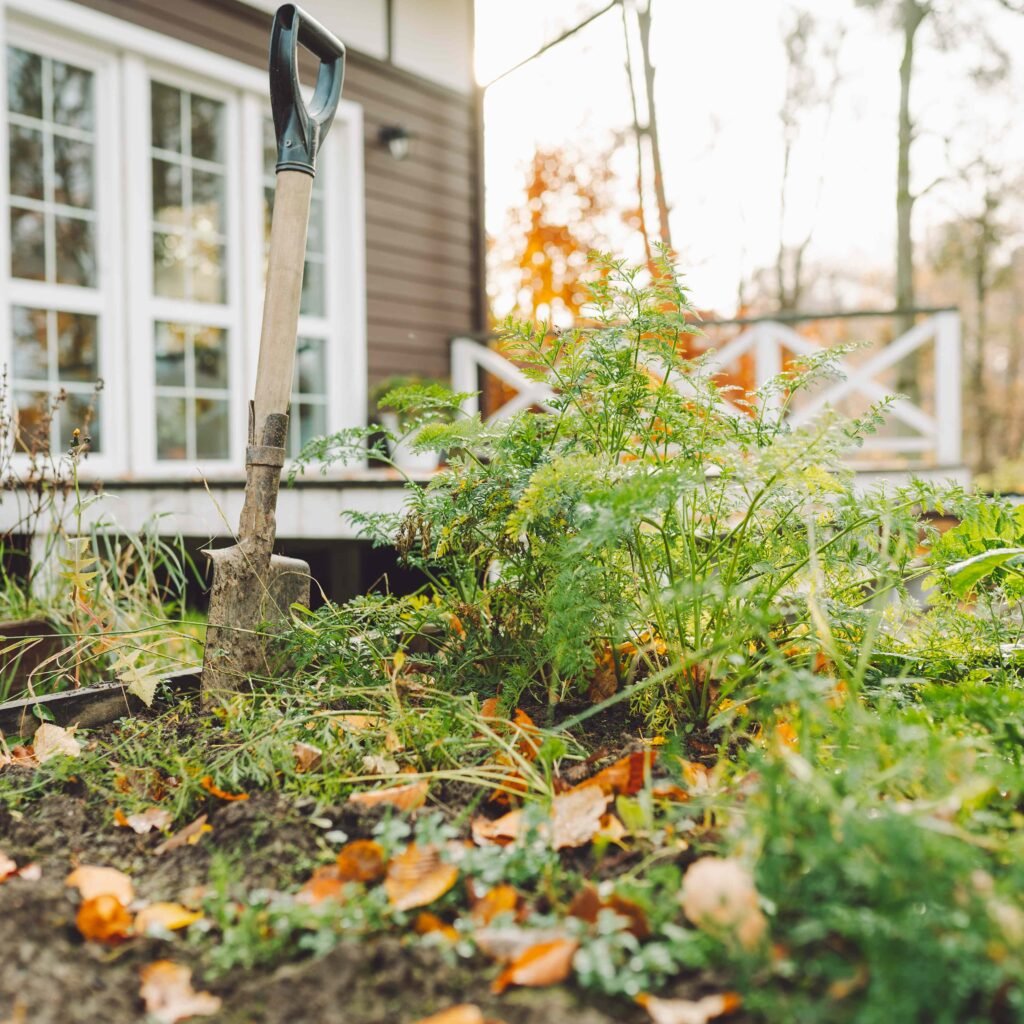
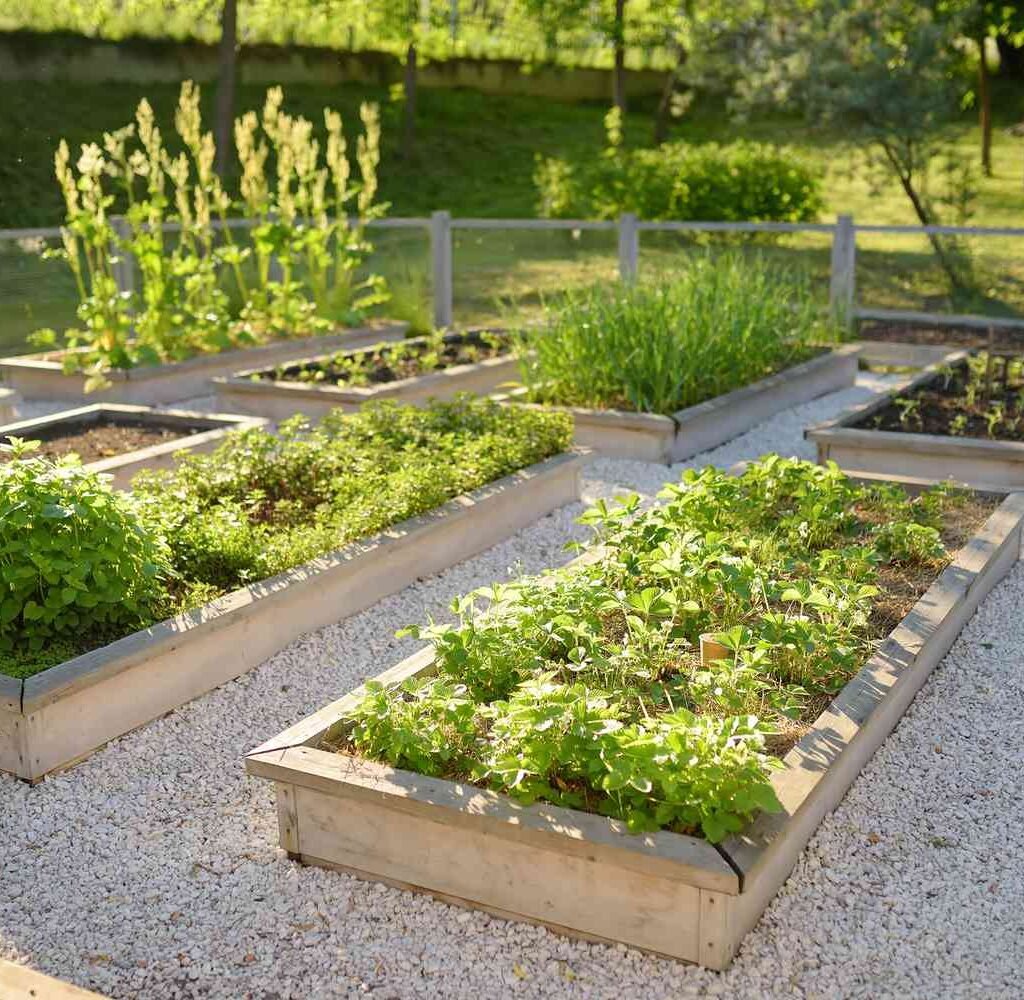
8. Edge and Define Garden Beds

Winter winds and melting snow can blur the boundaries of your garden beds. Taking time to edge them neatly in fall creates a clean appearance and prevents grass or weeds from creeping in come spring.

How to Do It:

  • Use a sharp spade or edging tool to create clean lines between the garden bed and lawn.
  • Add a border of stones, bricks, or wood for definition.
  • Top off raised beds with compost or fresh soil to replace any lost during the growing season.

This not only improves your garden’s appearance but also keeps soil from washing out during heavy rains.


9. Plan for Spring (and Take Notes)

Preparing for winter is also the perfect opportunity to evaluate your garden’s performance and plan improvements for next year.

What to Record:

  • Which plants thrived and which struggled
  • Areas that received too much or too little sunlight
  • Soil or pest issues you noticed
  • Where perennials or vegetables are planted (for crop rotation)

By keeping a simple garden journal, you’ll have a clear strategy when spring planting season arrives.


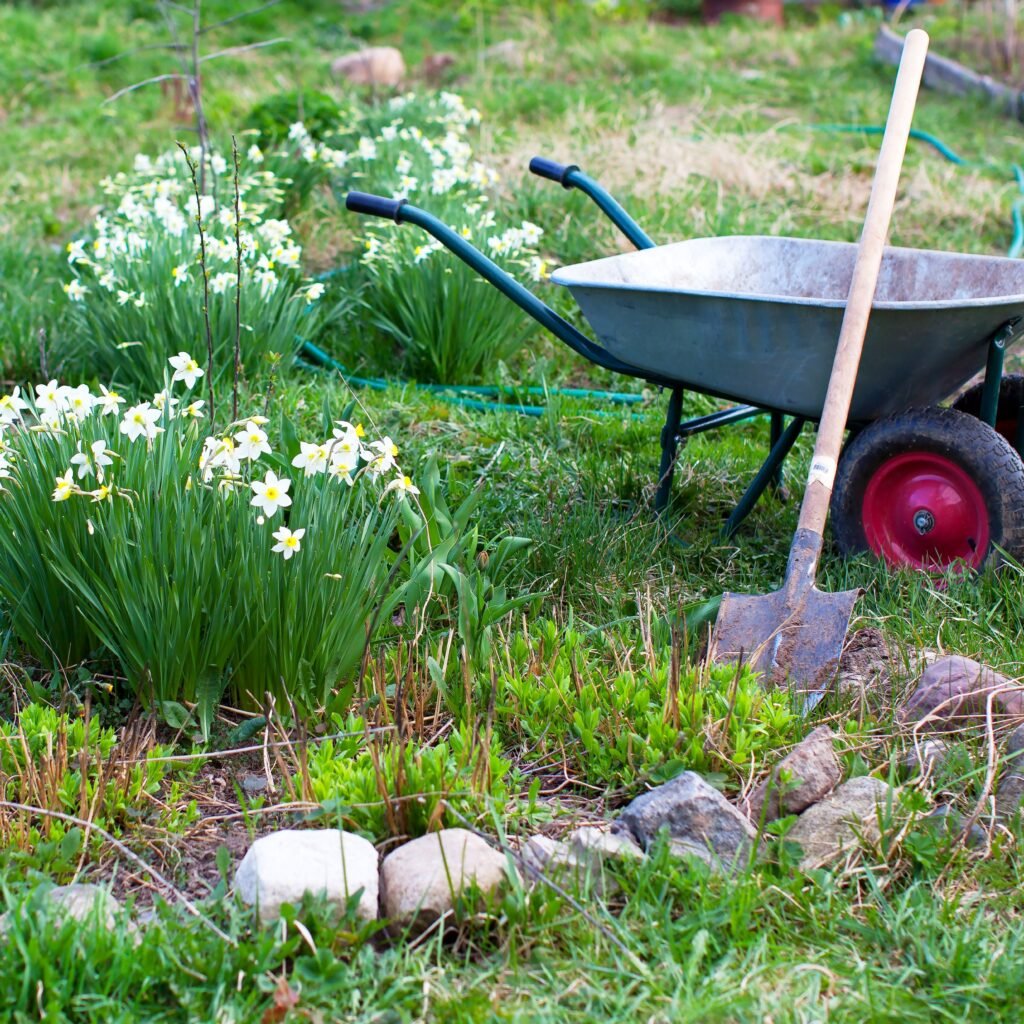
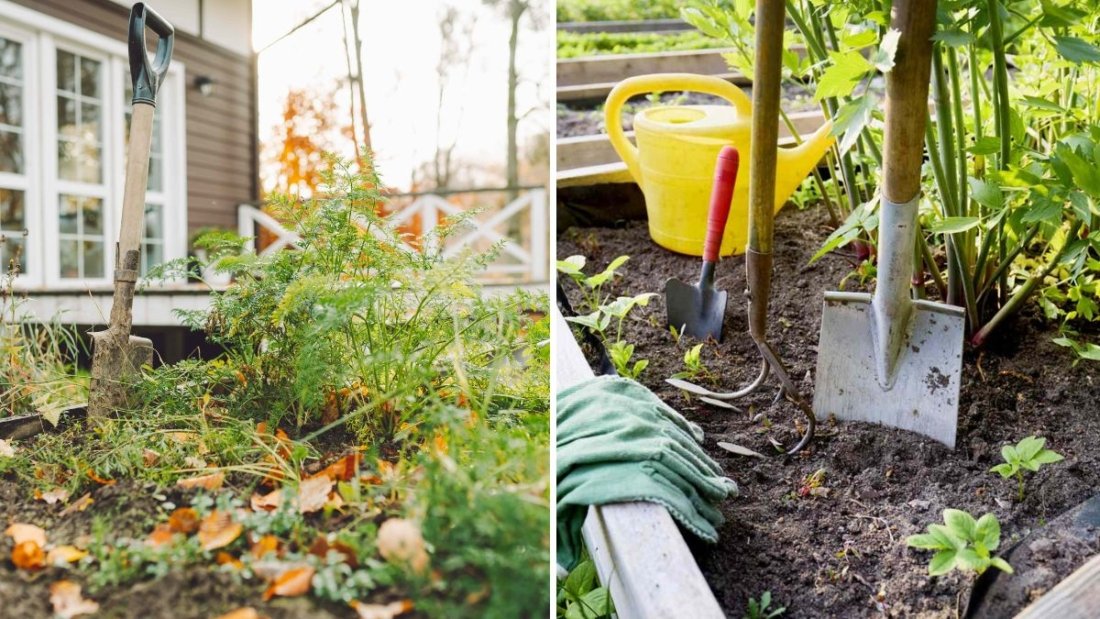
10. Clean and Store Tools Properly

Your plants aren’t the only part of the garden that needs attention before winter—your tools do too. Rust, sap, and soil left on tools over winter can shorten their lifespan.

How to Do It:

  • Wash tools with soapy water and dry thoroughly.
  • Disinfect with a solution of 1 part bleach to 9 parts water.
  • Sharpen blades and apply a light coat of oil to prevent rust.
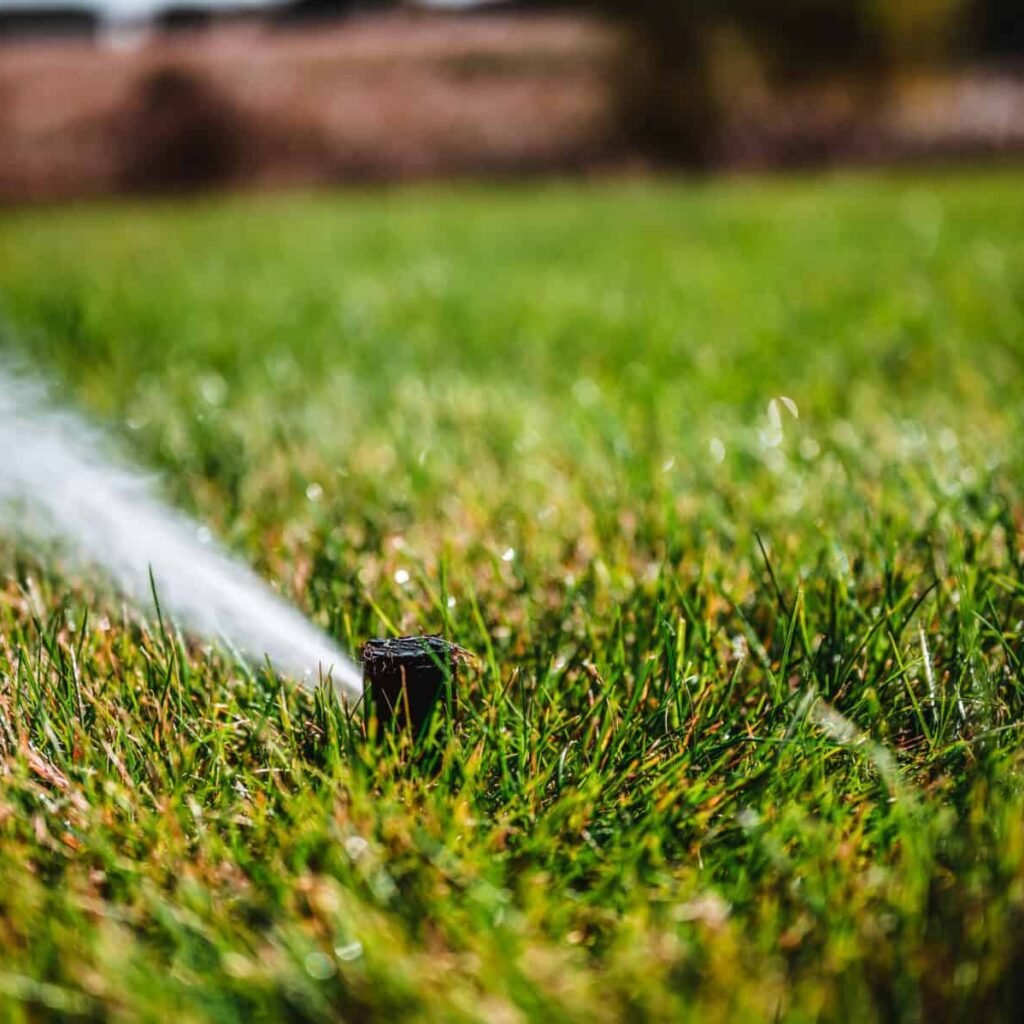
  • Drain hoses and irrigation lines, then store them indoors.

Expert Tip:

Hang tools or store them upright to prevent handles from warping or cracking in damp environments.


Why Winter Preparation Pays Off

Taking a few hours now to prepare your garden beds can lead to dramatic improvements in the spring:

  • Healthier soil: Compost and mulch build structure and fertility.
  • Fewer weeds: Clean, covered beds discourage unwanted growth.
  • Reduced pests and disease: Removing debris cuts off overwintering habitats.
  • Better moisture retention: Mulch helps soil hold water through dry winter air.
  • Faster spring planting: When the ground thaws, your beds will already be ready.

Your garden will reward your efforts with stronger plants, earlier blooms, and a smoother start to the growing season.


Final Thoughts

Winter is not the end of your gardening year—it’s the beginning of next season’s success. By clearing debris, enriching the soil, protecting roots, and covering exposed areas, you create a stable environment where your plants can rest and recharge.

Remember:

A garden that sleeps well in winter wakes beautifully in spring.

So before you hang up your gloves, spend a little time preparing your garden beds for winter. You’ll be amazed at how much healthier, richer, and more productive your garden will be when the snow melts and the first green shoots appear once again.

When to Stop Watering Your Lawn Before Winter Sets In

When to Stop Watering Your Lawn Before Winter Sets In

As autumn arrives and temperatures begin to drop, many homeowners start wondering: When should I stop watering my lawn before winter? It’s a common question—and an important one. Timing your final watering properly can make the difference between a lush, green lawn in spring and a patchy, brown one.

While it might seem harmless to stop watering once the weather cools, your grass still needs the right amount of moisture before it goes dormant. Stop too soon, and roots may dry out. Wait too long, and you could risk diseases caused by excess moisture and frost.

In this guide, lawn care experts explain exactly when to stop watering before winter, how to prepare your irrigation system, and how to protect your grass during the cold months for a strong comeback in spring.


Why Late-Season Watering Matters

Before we dive into timing, it’s crucial to understand why watering in late fall is so important. Your grass may not look like it’s growing much above ground, but below the surface, roots are still active. During this period, they’re absorbing nutrients and strengthening before dormancy.

If your lawn goes into winter too dry, the roots can become dehydrated and vulnerable to frost damage. On the other hand, if it’s overwatered, the soil can become waterlogged and suffocate the roots when freezing temperatures arrive.

So, the goal is balance—ensuring your lawn has enough moisture to survive winter without being saturated.


1. Know Your Grass Type—Cool vs. Warm Season

The ideal time to stop watering depends primarily on your grass type and local climate.

Cool-Season Grasses

These include fescue, ryegrass, Kentucky bluegrass, and bentgrass—common in northern climates. They grow most actively in spring and fall when temperatures are cooler.

  • When to stop watering: Typically 2–3 weeks before the first hard frost.
  • Why: These grasses need time to absorb water and nutrients before dormancy. Once soil temperatures consistently drop below 50°F (10°C), growth slows, and water needs decrease significantly.

Warm-Season Grasses

These include Bermuda, zoysia, St. Augustine, and centipede grass—common in southern or warmer regions.

  • When to stop watering: When daytime temperatures drop consistently below 60°F (15°C).
  • Why: Warm-season grasses enter dormancy earlier than cool-season types and don’t need much water during winter.

Expert Tip:

If you’re unsure of your grass type, look at its behavior. If your lawn stays green into fall and thrives in cooler temperatures, it’s likely a cool-season variety. If it starts to brown early in fall, it’s warm-season.


2. Watch Soil Temperature, Not Just Air Temperature

One of the biggest mistakes homeowners make is relying on air temperature alone. Instead, focus on soil temperature, which is a more accurate indicator of your lawn’s activity.

When the soil consistently remains below 50°F (10°C) at a depth of 4 inches, your grass roots have slowed enough to reduce watering. At this point, it’s safe to taper off irrigation gradually.

How to Check Soil Temperature:

  • Use a soil thermometer (available at garden stores or online).
  • Insert it 3–4 inches into the ground in several spots around your yard.
  • Average the readings for accuracy.

If your soil holds steady below 50°F for about a week, it’s time to stop watering.


3. Observe Your Lawn’s Visual Cues

Even without tools, your lawn can tell you when it’s time to reduce watering. Look for these natural signs:

  • Slower growth: If mowing frequency has dropped, the grass is preparing for dormancy.
  • Cooler, shorter days: Less sunlight means reduced photosynthesis and lower water needs.
  • Soil stays moist longer: If the ground remains damp 2–3 days after watering, it’s time to cut back.
  • Morning frost appears: Regular frost on your lawn is a clear indicator that watering should soon stop.

Expert Insight:

Overwatering during this period can cause frost heaving, where freezing and thawing cycles push grass roots upward, making them more vulnerable to winter kill.


4. Adjust Watering Gradually—Don’t Stop Abruptly

It’s best to taper off watering rather than stopping suddenly. This helps your lawn transition naturally into dormancy.

A Gradual Reduction Schedule:

  • 4–6 weeks before the first frost: Water deeply once a week to encourage root growth.
  • 2–3 weeks before frost: Cut watering to once every 10–14 days.
  • 1 week before frost: Give one last deep soak (about 1 inch of water) to ensure the roots are hydrated.
  • After that, stop watering completely.

This final deep watering helps your lawn store moisture and withstand the dry winter air.


5. Check Your Irrigation System

If you use sprinklers or an automatic irrigation system, fall is the time to prepare it for winterization. Failing to do so can lead to cracked pipes and costly repairs.

Steps to Winterize Your Irrigation System:

  1. Turn off the water supply to the system.
  2. Drain the lines—either manually, automatically, or with an air compressor blowout.
  3. Remove hoses from outdoor spigots and store them indoors.
  4. Insulate exposed pipes or faucets to prevent freezing.
  5. Check sprinkler heads for clogs or damage before shutting down completely.

Pro Tip:

If you’re unsure how to blow out your irrigation lines safely, hire a professional—compressed air can cause damage if not used correctly.


6. Don’t Forget About Newly Seeded Lawns

If you’ve recently overseeded or planted new grass in early fall, you’ll need to continue watering a bit longer. Newly germinated grass requires consistent moisture to establish roots before winter.

How to Manage It:

  • Keep the top inch of soil moist until the grass reaches about 3 inches tall.
  • Gradually reduce watering as temperatures drop.
  • Stop watering once the new grass has been mowed twice and the soil starts to cool below 50°F.

Neglecting young lawns too early can result in weak roots and poor regrowth next spring.


7. Balance Watering With Rainfall

In many regions, fall brings more frequent rainfall, which naturally reduces your need for irrigation. However, don’t assume all rain is enough—light showers may not penetrate deeply.

Use a rain gauge or simply place a small container (like a tuna can) on your lawn to measure rainfall. Your grass needs about 1 inch of water per week (including rain) during active growth. Once the combination of rainfall and soil moisture meets that, you can safely reduce watering.

Expert Tip:

Avoid watering if the soil feels damp 1–2 inches below the surface. Overwatering in cool weather can invite mold and root rot.


8. Consider Your Region’s Climate

Your geographical location plays a major role in determining the ideal time to stop watering. Here’s a general guide:

RegionTypical Time to Stop Watering
Northern U.S. & CanadaLate October to early November
MidwestMid to late October
Pacific NorthwestEarly to mid-November (depending on rainfall)
Southern U.S.Late November to early December
Mountain & High PlainsEarly October

Always adjust based on local weather patterns and soil conditions rather than strict calendar dates.


9. The Benefits of Proper Timing

Stopping watering at the right time doesn’t just protect your lawn—it sets you up for success next spring. Here’s how:

  • Prevents winterkill: Proper hydration helps grass roots resist cold, dry air.
  • Reduces fungal diseases: Drier soil in late fall discourages mold and mildew.
  • Saves water and money: You avoid wasting resources when the lawn no longer needs it.
  • Prepares for spring greening: Healthy, hydrated roots lead to faster recovery once temperatures rise.

10. Post-Watering Care for a Healthy Winter Lawn

After you stop watering, focus on these final fall maintenance steps to keep your lawn strong:

  • Aerate the soil: Improves drainage and prevents compaction.
  • Apply a fall fertilizer: Use a slow-release, nitrogen-rich formula to support root growth.
  • Keep leaves off the lawn: Rake regularly to prevent smothering and mold.
  • Mow one last time: Trim the grass to about 2.5 inches before winter.

Together, these steps ensure your lawn enters dormancy in peak condition and wakes up vibrant in spring.


Final Thoughts

Knowing when to stop watering your lawn before winter sets in is all about understanding your grass type, watching soil temperature, and responding to seasonal cues. A gradual reduction in watering—timed before the ground freezes—helps your lawn store enough moisture to endure the winter months.

Remember:

A well-prepared lawn in fall equals a beautiful, resilient lawn in spring.

So, as the leaves change color and frost begins to sparkle on the grass, don’t just pack up the hose and forget about your lawn. Give it the right care at the right time—and it will reward you with lush, green growth when warmer days return.

7 Signs Your Garden Needs a Fall Cleanup (and How to Do It Right)

7 Signs Your Garden Needs a Fall Cleanup (and How to Do It Right)

As summer fades and autumn’s chill rolls in, your once-blooming garden begins to look a little tired. Fallen leaves pile up, perennials start to wilt, and vegetable beds show the remains of a busy growing season. While it may be tempting to ignore the mess until spring, experts say fall cleanup is one of the most important gardening tasks of the year.

A proper fall cleanup doesn’t just make your garden look neat—it also prevents diseases, controls pests, and prepares the soil for next season’s success. But how do you know when it’s time to roll up your sleeves and get started?

Here are seven telltale signs your garden needs a fall cleanup—plus step-by-step guidance on how to do it right without overworking yourself.


1. Spent or Diseased Plants Are Taking Over

One of the first and clearest signs your garden needs attention is when plants are spent, diseased, or dying back. Blackened leaves, spotted foliage, or shriveled stems signal it’s time for removal. If left in place, these plants can harbor fungal spores, insect eggs, and bacterial diseases that overwinter and attack your garden in spring.

How to Fix It:

  • Remove and discard any diseased plant material immediately—especially tomato vines, squash leaves, and rose foliage.
  • Don’t compost infected material; toss it in the trash instead.
  • Healthy plants can be cut back and composted to enrich your soil.

Expert Tip:

Keep a bucket of disinfectant (one part bleach to nine parts water) handy to dip pruning shears between cuts. This prevents spreading disease from one plant to another.

A clean start now means fewer pest and disease problems when temperatures rise again.


2. Your Garden Beds Are Buried in Fallen Leaves

A scattering of fall leaves can add charm to your garden—but thick, soggy piles are trouble. When leaves mat down and stay wet, they suffocate the soil, encourage mold growth, and create perfect hiding places for slugs and other pests.

How to Fix It:

  • Rake up and shred excess leaves using a lawnmower or leaf shredder.
  • Use shredded leaves as free, nutrient-rich mulch for flower beds and around trees.
  • Compost the rest for future soil improvement.

Budget Tip:

There’s no need to buy mulch—shredded autumn leaves are just as effective and cost nothing!

By cleaning up leaf litter, you prevent pest infestations and promote healthy air circulation in your garden beds.


3. Overgrown Perennials Are Crowding Each Other

If your perennial beds are looking tangled or overcrowded, it’s a sign they need dividing and trimming before winter. Plants that compete for light and nutrients weaken each other, leading to poor flowering and disease vulnerability.

How to Fix It:

  • Cut back perennials like daylilies, hostas, and irises to about 2–3 inches above the soil.
  • Divide crowded clumps by digging them up and gently separating the roots. Replant the healthiest sections in fresh soil.
  • Leave ornamental grasses, sedums, and coneflowers standing through winter—they add structure and provide seeds for birds.

Expert Tip:

Dividing perennials every 3–4 years keeps them vigorous and improves bloom production. Early fall is ideal because plants still have time to establish roots before the ground freezes.


4. Weeds Have Gone to Seed

By late fall, even the most well-maintained gardens have a few unwelcome guests. When weeds start producing seeds, it’s a red flag. If you don’t act fast, you’ll be battling thousands of new weeds next spring.

How to Fix It:

  • Pull weeds from the roots before seeds disperse.
  • For large areas, lay down mulch or cardboard to smother leftover weeds.
  • Compost weeds only if they haven’t gone to seed. Otherwise, bag and discard them.

Expert Tip:

Moistened soil makes weeding easier—try pulling them right after a rain or watering session.

By tackling weeds now, you reduce your spring workload and ensure your garden soil stays clean and fertile.


5. Vegetable Beds Look Spent and Untidy

After a productive summer, your vegetable garden may be full of dead vines, rotting produce, and withered stems. These leftovers attract pests and disease while depleting the soil of nutrients.

How to Fix It:

  • Remove all spent vegetable plants and fallen fruits or vegetables.
  • Add a 2-inch layer of compost or aged manure to replenish nutrients.
  • Consider planting a cover crop like clover, rye, or vetch to prevent erosion and improve soil structure over winter.

Expert Tip:

Mark which beds grew heavy feeders (like tomatoes or corn) so you can rotate crops next year and maintain soil health.

A tidy vegetable garden now ensures a strong, fertile start for next year’s crops.


6. Your Tools and Equipment Are Scattered and Dirty

A messy tool shed or forgotten hose might not seem like a gardening issue, but unmaintained tools can shorten their lifespan and even spread disease. Dirty pruners can carry fungal spores, and uncoiled hoses may crack in cold weather.

How to Fix It:

  • Wash all tools with warm, soapy water and dry them thoroughly.
  • Sharpen blades and oil metal parts to prevent rust.
  • Drain hoses, sprinklers, and drip lines before freezing weather arrives.
  • Store everything neatly in a shed or garage.

Budget Tip:

Use household mineral oil or vegetable oil to coat tools—it’s cheaper and effective for preventing corrosion.

Taking time to care for your equipment now saves you money on replacements later and keeps your spring gardening smoother and more efficient.


7. Bare Soil and Exposed Roots Are Showing

If you notice areas of bare soil or exposed plant roots, your garden is at risk of erosion and frost damage. Cold temperatures and wind can strip moisture from unprotected soil, leaving roots dry and vulnerable.

How to Fix It:

  • Apply 2–3 inches of organic mulch (like shredded leaves, straw, or wood chips) around exposed areas.
  • For slopes or large bare spots, plant ground covers or spread compost to enrich and protect the soil.
  • Check for frost heaving—a condition where roots push upward due to freezing and thawing cycles—and gently press plants back into place if needed.

Expert Tip:

Mulch acts as an insulator, keeping soil temperatures stable and protecting root systems all winter long.


How to Do Fall Cleanup the Right Way

Now that you know the signs, here’s a quick expert-approved plan to clean up your garden effectively without overdoing it:

Step 1: Start with a Visual Survey

Walk through your garden and note problem areas—diseased plants, weeds, debris piles, or compacted soil. This helps you prioritize your efforts.

Step 2: Tackle One Area at a Time

Begin with vegetable beds, then move to perennial borders and finally to trees and shrubs. Breaking the work into sections keeps it manageable.

Step 3: Compost Smartly

Only compost healthy plant material. Diseased or pest-infested debris should go in the trash. Turn your compost pile regularly for faster decomposition.

Step 4: Feed and Mulch

Once beds are clear, add compost to enrich the soil. Then mulch to insulate roots and suppress weeds through winter.

Step 5: Protect and Plan Ahead

Cover delicate perennials with straw or frost cloths if hard freezes are expected. Then take notes—what worked well this year? What needs improvement next spring?


Bonus: What Not to Clean Up Too Early

While fall cleanup is crucial, don’t overdo it. Some elements of your garden should be left as they are for ecological balance and visual interest:

  • Seed heads of coneflowers, rudbeckias, and sunflowers feed birds.
  • Leaves under shrubs provide shelter for pollinators and beneficial insects.
  • Ornamental grasses add texture and prevent soil erosion in winter.

The key is balance—clean up what invites disease or pests but leave nature’s beneficial elements intact.


Final Thoughts

Your garden speaks to you—and the signs it needs a fall cleanup are easy to recognize once you know what to look for. From dying plants and weed invasions to bare soil and neglected tools, each indicator is a gentle reminder that your garden deserves a little seasonal care.

By following these steps and using materials you already have—leaves, compost, old blankets, or simple tools—you’ll protect your plants, improve soil health, and set the stage for a stunning spring revival.

Remember, fall cleanup isn’t just about tidiness—it’s about nurturing your garden’s long-term health. So grab your gloves, take a deep breath of that crisp autumn air, and give your garden the attention it deserves before winter arrives. Come spring, you’ll be rewarded with thriving blooms, stronger plants, and a landscape that bursts with life and color.

How to Protect Your Perennials From Frost Without Spending a Fortune

How to Protect Your Perennials From Frost Without Spending a Fortune

As the crisp chill of autumn deepens and winter draws near, gardeners everywhere start to worry about their beloved perennials. These hardy plants are the backbone of most gardens—returning year after year with vibrant color and life. But even the toughest perennials can suffer when frost arrives unexpectedly.

The good news? Protecting your perennials from frost doesn’t have to cost a fortune. With some planning, creativity, and simple household materials, you can keep your garden safe through winter’s worst. In this guide, we’ll show you budget-friendly, expert-approved methods to shield your plants from frost and ensure they thrive when spring returns.


Understanding Frost and Why It’s a Threat to Perennials

Before diving into the solutions, it helps to understand what frost actually does to plants. Frost forms when the air temperature drops below freezing, causing water vapor to condense and freeze on leaves, stems, and soil surfaces.

When this happens, the water inside plant cells also freezes, expanding and damaging cell walls. This leads to blackened leaves, wilted stems, and even plant death if exposure is prolonged.

Perennials, by nature, are more resilient than annuals—but young, tender growth or newly planted perennials can still be vulnerable. Frost damage can delay spring regrowth and reduce flowering potential.

Expert Insight:

According to horticulturists, even frost-tolerant perennials can benefit from protection during temperature dips below 28°F (-2°C), especially in exposed areas or windy spots.


1. Mulch: Your Perennial’s Winter Blanket

Mulching is one of the most effective and inexpensive ways to insulate your perennials from frost. A thick layer of mulch helps regulate soil temperature, preventing rapid freezing and thawing that can damage roots.

What to Use:

  • Shredded leaves
  • Straw or hay (avoid seed-heavy hay)
  • Pine needles
  • Compost or bark chips

How to Apply:

Wait until the ground has started to freeze lightly, then spread 2–4 inches of mulch around the base of each plant. Don’t cover the crown directly—leave a small space for air circulation.

Budget Tip:

You don’t need to buy mulch! Collect fallen leaves from your yard or ask neighbors for their leaf bags. Shred them with a mower, and you’ve got a perfect, free insulator.


2. Use Recycled Materials as Frost Covers

When a hard frost is forecast, covering your plants can make all the difference. Instead of purchasing expensive frost cloths or garden fabrics, repurpose household items to create effective barriers.

Free or Low-Cost Frost Covers:

  • Old bed sheets, blankets, or towels
  • Burlap sacks
  • Cardboard boxes
  • Plastic buckets or storage bins (for short perennials)
  • Newspaper layers (secure with rocks or stakes)

These materials trap heat from the soil and create a temporary greenhouse effect, keeping your plants several degrees warmer.

How to Use:

  • Drape the material loosely over plants before sunset.
  • Anchor edges with stones or garden stakes to prevent wind from blowing them away.
  • Remove the covers during the day to let sunlight and airflow reach your plants.

Expert Tip:

Avoid letting plastic touch the foliage directly—it can cause more damage. Use a frame (like wire hoops or sticks) to keep it slightly elevated above plants.


3. Water Your Garden Before a Frost

It may sound counterintuitive, but watering your perennials before a frost can help protect them. Moist soil retains heat better than dry soil, keeping root zones warmer through cold nights.

How to Do It:

  • Water thoroughly a day or two before an expected frost.
  • Focus on the root area, not the foliage.
  • Avoid watering if temperatures are already below freezing, as ice formation can damage plant tissue.

Budget Tip:

No special tools needed—just a watering can or hose. For smaller beds, collect rainwater in barrels or buckets to save on water bills.


4. Build Simple Cloche Protectors

A cloche is a small, dome-like cover that shields individual plants from cold, wind, and frost. While store-bought versions can be pricey, you can easily make DIY cloches using common materials.

DIY Cloche Ideas:

  • Plastic milk jugs: Cut off the bottom and place the jug over the plant (remove the cap for ventilation).
  • Large soda bottles: Perfect for smaller perennials and seedlings.
  • Glass jars or mason jars: Provide extra insulation and look charming in the garden.

Expert Tip:

Remove cloches during warm days to prevent overheating, then replace them before nightfall when frost is expected.

This technique works especially well for protecting young perennials or newly divided plants still establishing roots.


5. Group and Shelter Potted Perennials

Container perennials are more vulnerable to frost since their roots are exposed to cold air from all sides. But you can protect them easily without spending on fancy garden wraps.

How to Do It:

  • Move pots close together near a wall or fence to block wind.
  • Wrap them with bubble wrap, burlap, or old blankets for insulation.
  • For extra warmth, place pots on wood planks or thick cardboard instead of directly on concrete (which transfers cold).

Budget Tip:

If you have a shed, garage, or covered porch, temporarily move delicate potted perennials there during freezing spells.


6. Take Advantage of Natural Windbreaks

Wind intensifies the impact of frost by drawing heat away from plants. Creating or using natural windbreaks is a no-cost strategy to protect your perennials.

Options:

  • Position vulnerable plants near fences, shrubs, or walls.
  • Stack hay bales, wooden pallets, or even leaf bags to block cold winds.
  • Use low garden fencing or bamboo screens to create temporary protection zones.

Expert Insight:

Even a partial windbreak can raise the temperature around your plants by a few degrees—often enough to prevent frost injury.


7. Reuse Plastic or Fabric Row Covers

If you have a larger garden, covering entire beds is more efficient than covering individual plants. Commercial row covers can be expensive, but you can make your own for free or cheap.

DIY Row Cover Ideas:

  • Use PVC pipes or flexible branches to create hoops.
  • Drape old bedsheets, shower curtains, or painter’s drop cloths over them.
  • Secure with garden clips, clothespins, or heavy stones.

This setup traps warmth, prevents frost from settling directly on plants, and allows air circulation during the day.

Bonus Tip:

Clear plastic helps trap more heat but must be removed during sunny days to prevent overheating.


8. Delay Pruning Until After Frosts Pass

It might be tempting to tidy up your garden before winter, but cutting back perennials too early can expose tender growth to frost damage. Those dead-looking stems actually act as natural insulation.

What to Do:

  • Leave the foliage and stems intact through winter.
  • Wait until spring, once new shoots emerge, to prune away dead material.
  • Plants like coneflowers, ornamental grasses, and sedum benefit greatly from this natural protection.

Budget Tip:

Nature does the work for you—no extra materials or tools needed.


9. Add a Temporary Mulch Mound for Extra Cold Snaps

For perennials in especially exposed locations, you can mound extra mulch, straw, or compost over the crown during severe cold spells. This provides a temporary buffer against freezing air.

How to Do It:

  • Pile a few inches of loose material over the crown when temperatures drop sharply.
  • Remove or thin the mulch in early spring to prevent rot as temperatures warm up.

This technique is ideal for marginally hardy plants like lavender, coreopsis, or echinacea in colder zones.


10. Plan Ahead for Future Frosts

The best frost protection begins before winter arrives. Planning your garden with hardiness zones and microclimates in mind helps you avoid future losses.

Tips for Next Season:

  • Plant tender perennials in slightly sheltered spots (near walls or fences).
  • Choose native or cold-hardy varieties suited to your region.
  • Keep a frost calendar to anticipate weather changes early.

By observing how frost forms in your garden, you’ll learn which areas are most vulnerable and can plan protection accordingly.


Final Thoughts

You don’t need expensive equipment or commercial frost blankets to safeguard your garden. With a little creativity, household materials, natural barriers, and smart timing can protect your perennials just as effectively.

From leaf mulch and old blankets to homemade cloches and water management, these simple techniques ensure your garden survives winter with minimal effort and cost.

When spring arrives, your perennials will bounce back strong and vibrant—proof that with resourcefulness and care, you can protect what you love without breaking the bank.

So before the next frost hits, take a walk through your garden, gather a few supplies, and give your plants the cozy protection they deserve. Your future self—and your blooming perennials—will thank you.

The Best Bulbs to Plant in November for Early Spring Color

The Best Bulbs to Plant in November for Early Spring Color

As autumn fades and the chill of November settles in, many gardeners think it’s time to hang up their trowels and wait for spring. But in reality, November is one of the best times to plant bulbs that will burst into color as soon as winter ends. Whether you live in a region with mild winters or one where the ground freezes solid, the right bulbs can transform your garden into a lively, colorful space early in the year.

According to gardening experts, planting bulbs in late fall allows them to establish strong roots before the soil freezes. When the temperature rises again, they reward you with an early display of cheerful blooms that signal spring’s return.

Here’s your expert-approved guide to the best bulbs to plant in November—plus detailed tips on how to ensure they thrive.


Why November Is Still a Good Time to Plant Bulbs

If you’ve missed the typical bulb-planting season in October, don’t worry—November isn’t too late. Most bulbs actually prefer cooler soil temperatures (around 40–50°F / 4–10°C) for proper root development. As long as the ground isn’t frozen, your bulbs can still settle in comfortably.

Planting late also helps protect bulbs from rot, since the cooler soil discourages fungal growth. And even if you experience a light frost, most hardy bulbs can withstand it easily.

Expert Tip:

Before planting, check your local frost date. You want to get bulbs in the ground at least 2–3 weeks before the soil freezes solid to give them time to establish roots.


1. Daffodils (Narcissus)

Few flowers say “spring is here” like daffodils. Their cheerful yellow and white blooms bring brightness to gray early-spring days. Daffodils are incredibly hardy and forgiving, making them perfect for late planting.

Why Plant in November:

Daffodil bulbs are resilient and can handle colder soil, allowing you to plant them well into November in most climates. They naturalize easily, returning year after year with little maintenance.

Planting Tips:

  • Depth: 6–8 inches deep
  • Spacing: 4–6 inches apart
  • Soil: Well-draining, slightly acidic to neutral
  • Bonus Tip: Mix early, mid, and late-blooming varieties to extend your daffodil season from March through May.

Popular varieties: ‘Tête-à-Tête’, ‘Ice Follies’, ‘Carlton’, ‘Mount Hood’.


2. Crocuses

If you’re dreaming of flowers that bloom when snow is still on the ground, crocuses are your answer. These petite bulbs push through the frost to deliver purple, yellow, and white blossoms that announce spring’s arrival.

Why Plant in November:

Crocuses are small and quick to root. As long as the soil isn’t frozen, they’ll establish themselves quickly before dormancy. They’re also deer-resistant and ideal for naturalizing in lawns and borders.

Planting Tips:

  • Depth: 3–4 inches deep
  • Spacing: 2–3 inches apart
  • Soil: Light, well-drained soil
  • Bonus Tip: Plant them in clusters or drifts for a more natural look. For extra impact, scatter and plant where they fall.

Popular varieties: ‘Ruby Giant’, ‘Flower Record’, ‘Pickwick’.


3. Tulips

Tulips are classic spring bulbs known for their dazzling range of colors, shapes, and heights. While they’re often planted in October, many gardeners don’t realize tulips actually prefer cold soil. Planting them in November can even reduce the risk of fungal diseases like tulip fire.

Why Plant in November:

The cooler temperatures of late fall provide ideal conditions for tulips. Plus, planting late helps deter rodents and squirrels, which are less active in colder weather.

Planting Tips:

  • Depth: 6–8 inches deep
  • Spacing: 4–6 inches apart
  • Soil: Loose, sandy, well-drained
  • Bonus Tip: For a professional look, plant tulips in groups of 10–15 bulbs of the same color for bold visual impact.

Popular varieties: ‘Apricot Beauty’, ‘Queen of Night’, ‘Red Impression’, ‘Angelique’.


4. Hyacinths

Known for their strong fragrance and dense flower clusters, hyacinths add both beauty and scent to your spring garden. Their jewel-toned blooms—pink, blue, purple, and white—are stunning in borders and containers.

Why Plant in November:

Hyacinths need a chilling period to bloom properly, and late fall provides just that. The bulbs are hardy enough to handle frosty soil.

Planting Tips:

  • Depth: 5–6 inches deep
  • Spacing: 4–5 inches apart
  • Soil: Fertile, well-drained soil enriched with compost
  • Bonus Tip: Wear gloves when handling bulbs—they can irritate skin due to natural alkaloids.

Popular varieties: ‘Woodstock’, ‘Blue Jacket’, ‘Pink Pearl’, ‘Carnegie’.


5. Snowdrops (Galanthus)

As their name suggests, snowdrops are among the first flowers to bloom—sometimes appearing even before the last snow melts. Their dainty white, nodding blooms are a subtle but charming signal that winter is ending.

Why Plant in November:

Snowdrops are extremely hardy and thrive when planted late. They establish roots in cool soil and bloom reliably in early spring.

Planting Tips:

  • Depth: 2–3 inches deep
  • Spacing: 2–3 inches apart
  • Soil: Moist but well-draining
  • Bonus Tip: Snowdrops look best in naturalized drifts beneath trees or along garden paths.

Popular varieties: ‘Flore Pleno’, ‘Atkinsii’, ‘Viridapice’.


6. Grape Hyacinths (Muscari)

Small but mighty, grape hyacinths produce clusters of tiny blue or purple flowers resembling bunches of grapes. They’re excellent for borders, rock gardens, and layering with larger bulbs like tulips.

Why Plant in November:

These bulbs are very cold-tolerant and easy to establish even in late fall. They multiply quickly, creating dense patches of color over time.

Planting Tips:

  • Depth: 3–4 inches deep
  • Spacing: 2–3 inches apart
  • Soil: Well-drained, slightly sandy
  • Bonus Tip: Combine them with yellow daffodils for a stunning blue-and-gold spring palette.

Popular varieties: ‘Armeniacum’, ‘Latifolium’, ‘Album’.


7. Alliums

If you love architectural flowers, alliums (ornamental onions) are perfect. Their globe-shaped blooms stand tall above the garden and add height and texture to spring and early-summer borders.

Why Plant in November:

Alliums require a cold period to develop properly and are highly frost-tolerant. Planting in late fall gives them plenty of time to establish roots.

Planting Tips:

  • Depth: 4–6 inches deep
  • Spacing: 6–8 inches apart
  • Soil: Well-drained, fertile soil
  • Bonus Tip: Mix tall varieties like ‘Globemaster’ with smaller ones such as ‘Purple Sensation’ for layered visual interest.

Popular varieties: ‘Purple Sensation’, ‘Globemaster’, ‘Mount Everest’.


8. Fritillaria (Crown Imperials and Checkered Lilies)

Fritillarias are less common but incredibly striking bulbs that bloom in early to mid-spring. Their bell-shaped flowers hang elegantly and add an exotic flair to garden beds.

Why Plant in November:

They thrive in cool soil and prefer being planted later in the fall, after the hottest months have passed.

Planting Tips:

  • Depth: 5–6 inches deep (plant sideways to prevent rot)
  • Spacing: 6–8 inches apart
  • Soil: Well-drained with a bit of grit
  • Bonus Tip: Handle bulbs gently—they can be fragile and dislike being disturbed after planting.

Popular varieties: ‘Crown Imperial’, ‘Meleagris’, ‘Rubra Maxima’.


9. Iris Reticulata (Dwarf Iris)

For a burst of purple, blue, or yellow in very early spring, dwarf iris are unbeatable. Their elegant, sword-like foliage and vivid blooms make them a standout choice for borders or rock gardens.

Why Plant in November:

Dwarf irises are hardy enough to be planted late and bloom early. They’re small bulbs that root quickly, making November an ideal time for planting.

Planting Tips:

  • Depth: 3–4 inches deep
  • Spacing: 3 inches apart
  • Soil: Well-drained and sunny location
  • Bonus Tip: Perfect for containers or front edges of garden beds for an early color pop.

Popular varieties: ‘Harmony’, ‘Katharine Hodgkin’, ‘Pixie’.


General Bulb-Planting Tips for Success

  • Choose the right spot: Most spring bulbs love full sun or partial shade.
  • Ensure good drainage: Waterlogged soil causes bulbs to rot. Add sand or compost if necessary.
  • Plant pointed side up: This helps shoots emerge properly.
  • Water after planting: Moisture helps bulbs settle into the soil and begin root growth.
  • Add mulch: A 2-inch layer of mulch insulates bulbs against temperature swings and retains moisture.

Final Thoughts

Planting bulbs in November might seem late, but it’s actually a secret window of opportunity that savvy gardeners take advantage of. The soil is cool but workable, the air is crisp, and pests are less active—creating perfect conditions for bulbs to root quietly through winter.

Come spring, your garden will reward you with an explosion of color—from the golden glow of daffodils and deep purples of crocuses to the heady fragrance of hyacinths.

So don’t let November’s chill stop you. Grab your trowel, choose your favorite bulbs, and tuck them into the soil now. By the time the first warm breeze of spring arrives, you’ll have a garden bursting with life—proof that a little late-season effort can lead to early-season beauty.

9 Fall Garden Tasks You Should Never Skip, According to Experts

9 Fall Garden Tasks You Should Never Skip, According to Experts

As the days grow shorter and the air turns crisp, many gardeners breathe a sigh of relief and think it’s time to hang up their gloves for the year. But according to gardening experts, fall is one of the most important times to care for your garden. What you do (or fail to do) during these crucial months determines how healthy and vibrant your plants will be next spring.

From soil preparation to pruning and planting, here are nine essential fall garden tasks you should never skip—because a little effort now pays off in lush blooms and strong growth later.


1. Clean Up Dead and Diseased Plants

One of the first steps in preparing your garden for the colder months is a thorough cleanup. Dead annuals, spent perennials, and fallen leaves may seem harmless, but they can harbor fungal spores, pests, and diseases that overwinter and attack your plants in spring.

Expert Tip:

Remove all plant debris—especially tomato vines, squash leaves, and other disease-prone plants—and dispose of them in the trash, not the compost pile. If the material is healthy, you can chop it up and compost it to return nutrients to the soil.

Cleaning up now not only prevents pest problems but also makes your garden look tidy and well-maintained through winter.


2. Cut Back Perennials (But Not All of Them)

Cutting back perennials helps keep your garden healthy and manageable. Many plants like daylilies, hostas, and peonies benefit from having their dead foliage trimmed to about 2–3 inches above the ground.

However, don’t cut back everything. Some perennials, such as coneflowers, sedum, and ornamental grasses, add winter beauty and provide seeds for birds.

Expert Tip:

Gardeners recommend a balanced approach—trim what’s diseased or unsightly but leave plants that offer structure and food for wildlife. You can always tidy them up in early spring before new growth starts.


3. Mulch and Protect Your Soil

Mulching in fall is one of the most overlooked yet powerful ways to protect your garden. A 2–3 inch layer of organic mulch—like shredded leaves, bark, or compost—acts as a blanket for your soil. It helps regulate temperature, retain moisture, and prevent winter erosion.

Expert Tip:

Apply mulch after the ground begins to freeze slightly to prevent rodents from nesting in it. Use leaf mulch or compost for vegetable beds and fine bark mulch for flower gardens. Over time, this organic layer breaks down and enriches the soil, giving you a healthier garden next year.


4. Plant Spring-Blooming Bulbs

Fall is the perfect season to plant tulips, daffodils, crocuses, and hyacinths for a stunning spring display. These bulbs require a period of cold dormancy to bloom, which makes autumn planting essential.

Expert Tip:

Plant bulbs about two to three times deeper than their height and in well-draining soil. For a natural look, scatter bulbs randomly rather than planting them in straight rows. Adding bone meal or bulb fertilizer at planting time helps them establish strong roots before winter.

This simple step rewards you with cheerful color right when you need it most—after months of gray winter.


5. Feed and Amend Your Soil

Healthy soil is the foundation of a thriving garden. Fall is an excellent time to add organic matter, compost, or well-rotted manure, giving it time to break down and improve soil texture over winter.

According to experts, feeding the soil now means feeding your plants later. Nutrients will slowly become available as the soil warms up in spring, ensuring your plants have the energy they need to grow strong and resilient.

Expert Tip:

After clearing your beds, spread a 1–2 inch layer of compost over the surface. You can lightly till it into the top few inches or simply let winter rains help it seep in naturally.


6. Rake and Reuse Fallen Leaves Wisely

Fallen leaves can be both a blessing and a curse. While thick layers can smother your lawn or garden beds, shredded leaves make excellent mulch or compost.

Experts suggest raking leaves from your lawn to prevent fungal issues but using them strategically elsewhere. When shredded, they improve soil structure, increase microbial activity, and retain moisture.

Expert Tip:

Run your lawnmower over a pile of dry leaves to shred them easily. Spread the mulch around perennials, shrubs, and trees, or add it to your compost bin as a carbon-rich ingredient.

This not only saves money but also turns yard waste into garden gold.


7. Prune Trees and Shrubs (But with Care)

Fall pruning helps shape trees and shrubs and removes dead or damaged branches that could break under snow or ice. However, timing matters—avoid heavy pruning of spring-blooming shrubs like lilacs and azaleas since they form buds in fall for next year’s flowers.

Expert Tip:

Focus on removing crossing, diseased, or weak branches that could cause problems. Late fall, after leaf drop but before deep frost, is the best time for structural pruning. Always use sharp, clean tools to prevent disease spread.

By pruning strategically, you encourage healthy growth and reduce storm damage risk during winter.


8. Water Deeply Before the Ground Freezes

One of the biggest mistakes gardeners make is forgetting to water in fall. Even though temperatures drop, your plants still need moisture to survive winter. Dry roots can suffer severe damage from frost heaving or dehydration.

Expert Tip:

Give trees, shrubs, and perennials a deep soak before the first hard freeze. Focus on evergreens and newly planted specimens, as they lose moisture through their leaves even in cold weather. Water early in the day so excess moisture can absorb before nightfall.

If you live in a region with dry winters, this single step can make the difference between survival and loss.


9. Protect Tender Plants and Garden Equipment

Before winter hits, take time to protect tender plants and prepare your tools for storage. Move container plants indoors or into sheltered areas. Wrap sensitive shrubs like roses or hydrangeas with burlap or cover them with frost cloth to prevent cold damage.

Expert Tip:

Drain garden hoses and store them indoors to prevent cracking. Clean, sharpen, and oil your gardening tools before putting them away—this prevents rust and keeps them ready for spring.

If you have raised beds, consider adding a cold frame or row cover to extend your growing season or protect winter greens.


Bonus: Plan Ahead for Next Year

Once the garden is tucked in for winter, take a few moments to plan for next season. Make notes on what thrived, what struggled, and what new plants you’d like to try. Fall is also a great time to order seeds, sketch bed layouts, and dream up new color combinations.

Expert Tip:

Keep a garden journal or take photos throughout the year to guide your future planting decisions. By reflecting now, you’ll save time and avoid repeating mistakes in spring.


Final Thoughts

Fall gardening isn’t just about closing the season—it’s about setting the stage for success. Each of these nine tasks plays a role in protecting your plants, enriching your soil, and ensuring your garden thrives year after year.

By cleaning up, mulching, planting, watering, and planning ahead, you’re giving your garden a head start while nature rests. As experts remind us, gardening is a year-round commitment, and those who invest time in fall reap the most colorful, abundant rewards when spring returns.

So before you put away your gloves, give your garden a little extra love this autumn—it will thank you with lush blooms, healthier plants, and a vibrant outdoor space that welcomes the new season beautifully.

How to Keep Indoor Plants Healthy in Air-Conditioned Rooms

How to Keep Indoor Plants Healthy in Air-Conditioned Rooms

Indoor plants are more than just decorative elements; they bring life, color, and a sense of calm to our living and working spaces. However, caring for plants in air-conditioned rooms presents unique challenges. Air conditioning, while essential for comfort in hot climates, can reduce humidity, circulate dry air, and create temperature fluctuations—all of which can stress indoor plants.

Maintaining plant health in such conditions requires understanding their environmental needs and adjusting care routines accordingly. This article explores the best strategies to keep indoor plants thriving in air-conditioned rooms, including humidity management, watering techniques, lighting adjustments, and pest prevention.


1. Understanding the Impact of Air Conditioning on Indoor Plants

Air conditioners lower the indoor temperature and reduce humidity levels. While this creates a comfortable environment for humans, it can have several negative effects on houseplants:

  • Dry air: AC units remove moisture from the air, leading to low humidity levels (often below 40%), which is stressful for tropical and subtropical plants.
  • Temperature fluctuations: Air-conditioned rooms can have cool drafts that may shock plants, causing leaf drop or stunted growth.
  • Increased water needs: Dry air increases transpiration, causing plants to lose water faster.
  • Pest attraction: Stressed plants are more susceptible to pests like spider mites and aphids.

Understanding these effects is crucial for creating a care routine that helps your indoor plants adapt and thrive in AC environments.


2. Choose the Right Plants for Air-Conditioned Rooms

Not all plants tolerate air-conditioned environments equally. Selecting species that are more resilient to low humidity and cooler temperatures increases your chances of success.

Ideal Plant Choices

  • Snake Plant (Sansevieria): Extremely tolerant of low humidity and infrequent watering.
  • ZZ Plant (Zamioculcas zamiifolia): Thrives in low-light and dry indoor conditions.
  • Spider Plant (Chlorophytum comosum): Adaptable and hardy, ideal for air-conditioned spaces.
  • Pothos (Epipremnum aureum): A low-maintenance plant that tolerates dry air and cooler temperatures.
  • Peace Lily (Spathiphyllum): Prefers moderate humidity but adapts well with proper care.

Avoid plants that require high humidity, like ferns and calatheas, unless you plan to use additional humidity solutions such as pebble trays or humidifiers.


3. Maintain Proper Humidity Levels

Air conditioners can significantly reduce indoor humidity, which can stress tropical plants. Here’s how to manage humidity effectively:

a. Use Pebble Trays

Place a shallow tray filled with pebbles and water under your plant pots. As the water evaporates, it raises the local humidity around the plants without waterlogging the roots.

b. Group Plants Together

Plants naturally release moisture through transpiration. Grouping several plants together creates a small microclimate with higher humidity.

c. Use Humidifiers

For rooms with very low humidity, small ultrasonic or cool-mist humidifiers can maintain a stable level of moisture, especially beneficial for ferns, orchids, and calatheas.

d. Occasional Misting

Lightly mist plants once or twice a week. Avoid over-misting, which can cause fungal growth if leaves remain wet for long periods.

Optimal Humidity Range

Most tropical indoor plants thrive at 50–70% humidity. Even a slight increase in room humidity can make a noticeable difference in plant health.


4. Adjust Watering Practices

Air conditioning accelerates water loss from soil and leaves. Overwatering is a common mistake, but underwatering can also stress plants in dry conditions.

Tips for Effective Watering

  1. Check soil moisture: Use your finger or a moisture meter to gauge when watering is needed. Water only when the top inch of soil is dry.
  2. Water thoroughly: When watering, ensure water reaches the roots, allowing excess to drain out of the pot. Avoid letting the plant sit in stagnant water.
  3. Use room-temperature water: Cold water can shock roots, while warm water enhances absorption.
  4. Increase frequency carefully: Dry AC air may require slightly more frequent watering than in natural humidity conditions.

Maintaining consistent soil moisture is key to preventing wilting, brown leaf tips, and stunted growth.


5. Optimize Light Exposure

Indoor lighting is often limited in air-conditioned rooms, and AC units can reduce natural light intensity by circulating cool air near windows.

Tips for Adequate Light

  • Place plants near bright, indirect light: East or west-facing windows are ideal for most indoor plants.
  • Rotate plants regularly: Ensures even growth and prevents leaning toward light sources.
  • Supplement with grow lights: LED or fluorescent grow lights can compensate for insufficient natural light, particularly for tropical plants that need moderate brightness.

Proper lighting enhances photosynthesis, helping plants recover from stress caused by dry air.


6. Temperature Management

Sudden temperature fluctuations and cold drafts can harm indoor plants. Here’s how to stabilize temperature:

  • Avoid placing plants directly under AC vents: Direct airflow can dry leaves and damage stems.
  • Keep plants away from cold drafts: Position plants on shelves, corners, or rooms with moderate airflow.
  • Monitor indoor temperature: Most indoor plants thrive between 65–75°F (18–24°C). Extreme cold or hot pockets from AC units can stress plants.

Consistency in temperature ensures healthy growth and reduces vulnerability to pests and diseases.


7. Soil and Pot Considerations

The type of soil and pots you use can impact plant health in air-conditioned rooms:

Soil

  • Use well-draining potting mix to prevent waterlogging while retaining adequate moisture.
  • Consider mixing perlite or coco coir to improve aeration and water retention.

Pots

  • Clay pots: Porous and allow airflow, but dry out faster in AC rooms.
  • Plastic pots: Retain moisture longer but may need proper drainage to prevent root rot.
  • Choose pots with drainage holes to maintain soil health and prevent stagnant water.

Proper soil and pot selection supports water balance and root health under dry indoor conditions.


8. Preventing Pests and Diseases

Air-conditioned environments can stress plants, making them more susceptible to pests such as spider mites, aphids, and mealybugs.

Natural Prevention Methods

  • Regular inspection: Check leaves, stems, and soil for early signs of pests.
  • Neem oil spray: Acts as a natural deterrent for most common indoor pests.
  • Clean leaves periodically: Wipe dust off leaves to improve photosynthesis and prevent fungal issues.
  • Maintain proper spacing: Avoid overcrowding, which reduces airflow and encourages pest infestations.

Healthy, unstressed plants are naturally more resistant to pests and diseases.


9. Additional Tips for Thriving Indoor Plants in AC Rooms

  • Rotate seasonal plants: Some species may tolerate AC better during certain seasons.
  • Use reflective surfaces: Mirrors or light-colored walls can enhance indirect light.
  • Monitor growth patterns: Adjust care routines if leaves curl, yellow, or drop.
  • Use slow-release fertilizers: Boost plant nutrition without excessive watering, which is helpful in dry conditions.

By observing your plants and responding to their needs, you can create an indoor garden that thrives year-round—even in air-conditioned spaces.


10. Conclusion

Keeping indoor plants healthy in air-conditioned rooms requires careful attention to humidity, watering, light, temperature, and soil conditions. While air conditioning can create a challenging environment, with proper adjustments, it is entirely possible to maintain vibrant and thriving plants.

Key takeaways:

  • Choose plants that tolerate low humidity and cooler temperatures.
  • Use pebble trays, humidifiers, or plant groupings to raise humidity.
  • Monitor soil moisture carefully and water appropriately.
  • Optimize lighting and protect plants from direct AC drafts.
  • Maintain clean leaves and check for pests regularly.

By combining these strategies, you can create a harmonious indoor ecosystem where your plants flourish despite dry air. With a little observation, care, and creativity, air-conditioned rooms can support lush, healthy indoor gardens that enhance your living space aesthetically and emotionally.

Healthy plants in cool, dry air not only thrive—they also enrich your home environment with oxygen, vibrancy, and a touch of nature’s serenity.