How to Grow Loads of Cherry Tomatoes in Plastic Bottles — Easy, Affordable, and Space-Saving Method

How to Grow Loads of Cherry Tomatoes in Plastic Bottles — Easy, Affordable, and Space-Saving Method

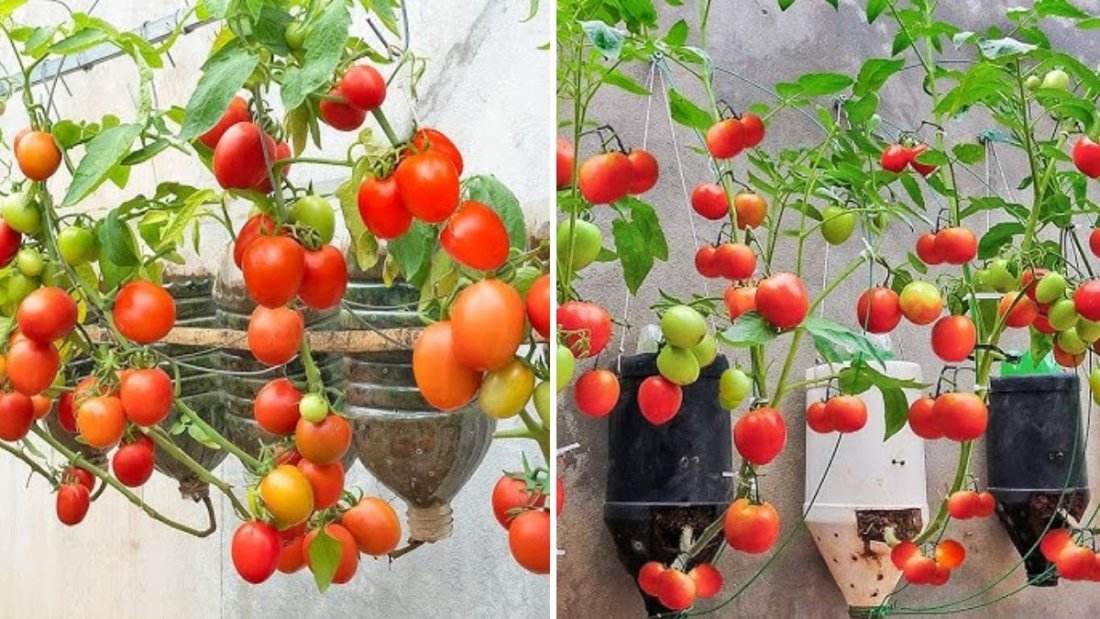
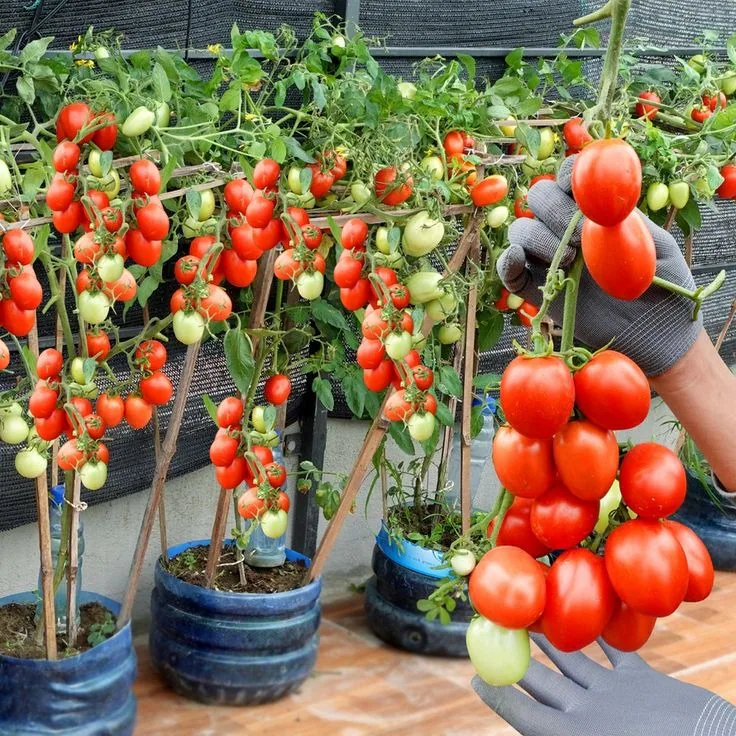
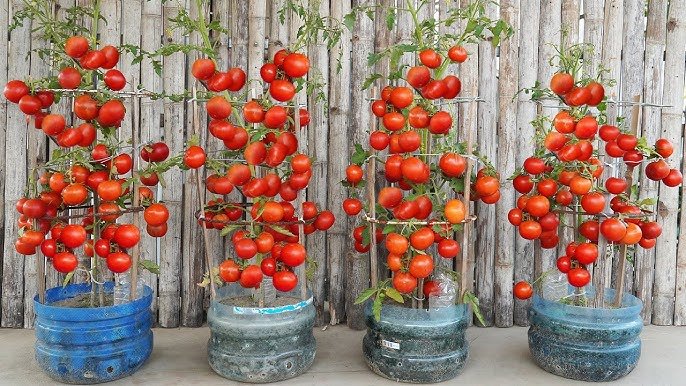
Imagine stepping out to your balcony or backyard and picking handfuls of sweet, juicy cherry tomatoes straight from repurposed plastic bottles. Sounds too good to be true? Not anymore!

You don’t need a big garden, expensive planters, or special equipment to grow your own cherry tomatoes. With just a few plastic bottles, some potting soil, and a little care, you can grow many cherry tomato plants even in the smallest spaces.

This sustainable, budget-friendly method not only saves space but also helps the environment by recycling plastic bottles into mini garden pots. In this guide, we’ll show you step-by-step how to grow an abundant harvest of cherry tomatoes in plastic bottles—from setup to harvest—no matter where you live.


Why Grow Cherry Tomatoes in Plastic Bottles?

Cherry tomatoes are among the easiest vegetables to grow, even for beginners. They’re fast-growing, productive, and adaptable to container gardening. But what makes plastic bottles such a great option?

Here are the top reasons:

  1. Recycling for a Purpose: Instead of throwing away used plastic bottles, turn them into eco-friendly planters.
  2. Cost-Effective: No need to buy fancy pots or containers—use what you already have.
  3. Space-Saving: Perfect for balconies, patios, windowsills, or rooftops.
  4. Portable: Lightweight and easy to move for optimal sunlight exposure.
  5. Water Efficient: Plastic bottles retain moisture well, reducing the need for constant watering.
  6. Fun DIY Project: Great for kids and families who love hands-on gardening activities.

Whether you’re living in an apartment or just want to start small, this method makes it easy to grow lots of cherry tomatoes with very little space.


What You’ll Need

Before you begin, gather these simple materials:

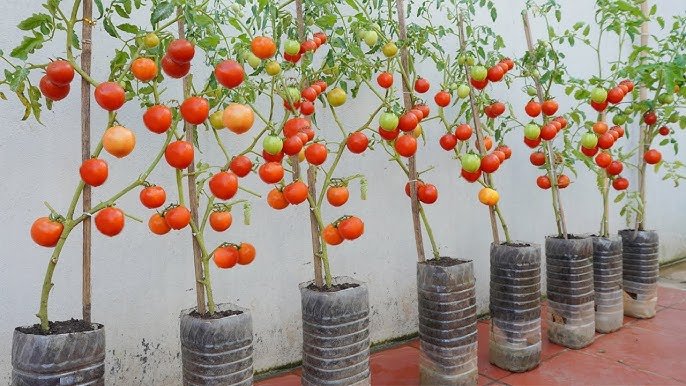
  • Plastic bottles: Choose 2-liter or 5-liter bottles (depending on how big you want your plant to grow).
  • Sharp knife or scissors: For cutting the bottles.
  • Potting mix: A mix of garden soil, compost, and coco peat or perlite for drainage.
  • Cherry tomato seeds or seedlings: Choose a compact or dwarf variety suitable for container gardening.
  • Fertilizer: Organic compost, liquid fertilizer, or tomato-specific feed.
  • Watering can or spray bottle: To keep the soil moist.
  • Small stick or stake: For plant support as it grows.

Optional:

  • Twine or hanging wires if you want to hang your bottles vertically.
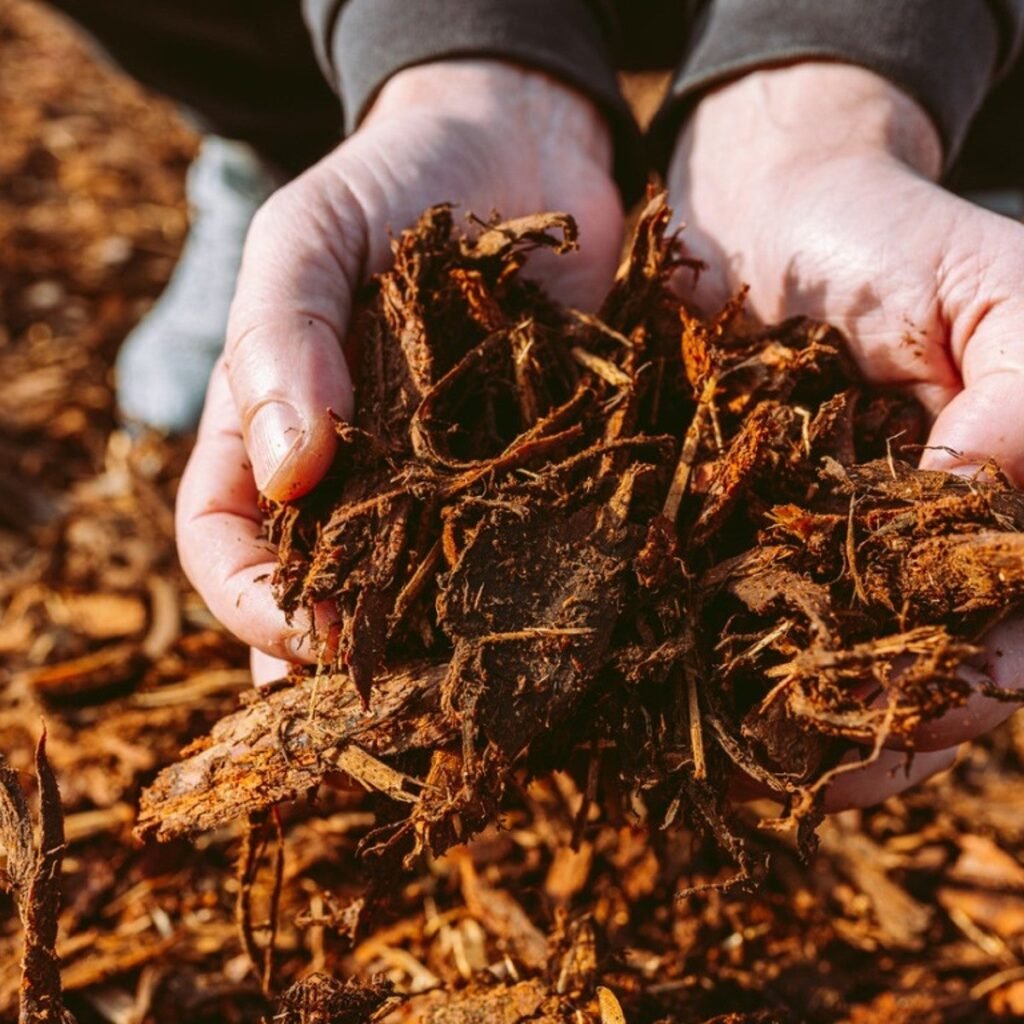
  • Mulch or dry leaves to retain soil moisture.

Step-by-Step Guide: How to Grow Cherry Tomatoes in Plastic Bottles

1. Choose and Prepare Your Bottles

Start with clean, empty plastic bottles. Remove any labels and rinse them thoroughly to eliminate residue.

You can use bottles in two main ways:

  • Top-Open Planters: Cut off the top portion of the bottle, keeping the bottom 6–8 inches as your planting container.
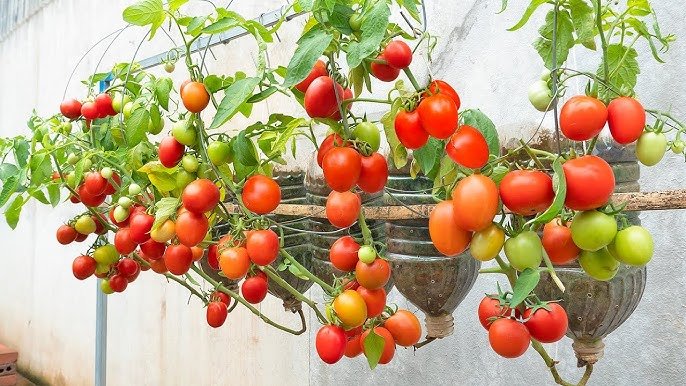
  • Upside-Down Hanging Planters: Cut the bottom off and hang the bottle upside-down, letting the plant grow through the opening (perfect for vertical gardens).

Whichever method you choose, make drainage holes at the bottom (or cap area for inverted setups) to prevent waterlogging.


2. Add the Soil Mix

Cherry tomatoes thrive in rich, well-draining soil. Create a mix using:

  • 50% garden soil or potting mix
  • 30% organic compost or manure
  • 20% coco peat or perlite

Fill the bottle about three-quarters full, leaving space at the top for watering. The compost provides nutrients, while coco peat helps retain moisture.


3. Plant Your Cherry Tomato Seeds or Seedlings

If using seeds, plant 2–3 seeds about half an inch deep in the center of the bottle.
If using seedlings, gently transplant one healthy plant into each bottle.

Water lightly and place the bottles in a sunny location—cherry tomatoes love warmth and light. Aim for 6–8 hours of sunlight daily.


4. Watering and Drainage

Tomatoes need consistent moisture, but soggy soil can cause root rot. Here’s how to manage watering effectively:

  • Water once daily during hot weather, or every 2–3 days in cooler conditions.
  • Check by touching the soil—if the top inch feels dry, it’s time to water.
  • Ensure that excess water drains out freely through the holes.

Pro Tip: To make watering easier, insert a small piece of cloth or wick from the bottom hole into a shallow tray of water. This creates a self-watering system, keeping the soil consistently moist.


5. Add Support for the Growing Plant

As your tomato plant grows, it will need support to hold the weight of its branches and fruit. Insert a small stick or bamboo skewer into the soil and gently tie the main stem using twine.

For taller plants, tie the stems to nearby walls or railings using soft plant ties or strings.


6. Fertilize Regularly

Cherry tomatoes are heavy feeders and will produce better with regular feeding. Every 10–14 days, apply:

  • Liquid compost tea or diluted organic fertilizer
  • Tomato-specific fertilizer (if available)

Avoid over-fertilizing—too much nitrogen leads to leafy plants with fewer fruits. Focus on balanced nutrients rich in phosphorus and potassium for flowering and fruiting.


7. Pruning and Maintenance

Keep your plants healthy and productive by pruning regularly:

  • Remove the lower yellowing leaves to improve airflow.
  • Pinch off suckers (small shoots that grow between the main stem and branches).
  • Trim off overcrowded leaves to direct energy toward fruit production.

This helps prevent fungal diseases and promotes faster ripening.


8. Pollination and Flowering

If you’re growing cherry tomatoes outdoors, natural wind and pollinators will do the job.

For indoor setups, gently shake the flowers or use a small paintbrush to transfer pollen between blooms. This ensures good fruit set and bigger yields.


9. Pest Control

Tomatoes are sometimes attacked by aphids, whiteflies, or mites. Keep pests away naturally with:

  • A neem oil spray (mix 1 teaspoon neem oil with 1 liter of water and a few drops of mild soap).
  • Spraying garlic or chili extract as a natural deterrent.
  • Keeping your plants clean and checking the undersides of leaves weekly.

Healthy plants in well-drained soil are far less likely to attract pests.


10. Harvesting Time

After about 60–75 days, your cherry tomato plants will start producing clusters of small green fruits that soon turn bright red or yellow (depending on the variety).

Harvest when they’re fully colored but still firm. Pick regularly to encourage more flowering and fruiting.

Each plastic bottle plant can yield 20–50 cherry tomatoes under the right conditions!


Creative Ways to Arrange Your Plastic Bottle Garden

Once your tomato plants are growing well, you can arrange your bottles in fun and space-saving ways:

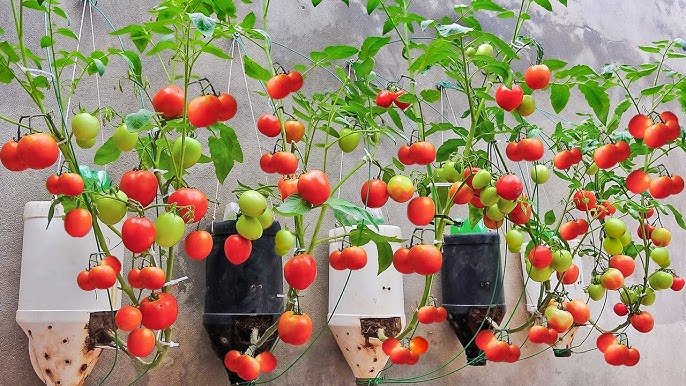
  1. Vertical Hanging Garden: Hang bottles upside down along a wall or balcony railing.
  2. Tiered Rack Setup: Stack bottles on shelves or stands for easy access.
  3. Fence Garden: Attach cut bottles horizontally to a fence or wall.
  4. Recycled Stand System: Use wooden frames or metal rods to hold multiple bottles vertically.

These setups make your space look green, lively, and eco-friendly.


Benefits of Growing Cherry Tomatoes in Plastic Bottles

This simple method offers a surprising number of benefits beyond saving space:

  • Reuses Waste Materials: Reduces plastic pollution and supports sustainability.
  • Easy for Beginners: No complex gardening tools required.
  • Highly Productive: Even one small balcony can produce dozens of tomatoes.
  • Portable and Flexible: Move bottles to sunny spots or indoors during rain.
  • Educational: Great learning activity for kids about plant growth and recycling.

Plus, nothing beats the taste of freshly picked, sun-ripened cherry tomatoes!


Common Mistakes to Avoid

To ensure success, avoid these common beginner mistakes:

  1. Overwatering: Leads to root rot. Always ensure drainage holes work properly.
  2. Insufficient Sunlight: Without at least 6 hours of light, plants may grow tall but weak.
  3. Neglecting Fertilizer: Tomatoes need regular feeding to produce fruits.
  4. Crowded Plants: Give each plant its own bottle to prevent competition.
  5. Ignoring Pests: Check leaves regularly and treat early if you spot trouble.

Final Thoughts: A Simple Way to Grow Fresh Food at Home

Growing cherry tomatoes in plastic bottles is more than just a gardening hack—it’s a sustainable lifestyle choice. You’re recycling waste, saving money, and enjoying the satisfaction of harvesting your own food.

Whether you have a big garden or just a sunny balcony, this method lets you grow plenty of fresh, flavorful cherry tomatoes right at home.

So don’t throw away those empty plastic bottles—turn them into tiny, thriving gardens that bring color, flavor, and freshness to your life. With just a little care and creativity, you can enjoy homegrown cherry tomatoes all year round!


SEO Keywords:
grow cherry tomatoes in plastic bottles, DIY tomato garden, plastic bottle gardening, vertical gardening ideas, grow tomatoes at home, container gardening tips, sustainable gardening, cherry tomato care, urban gardening ideas, recycle bottles for plants.

How to Build an Easy Vertical Hydroponics System Without Using Pots

How to Build an Easy Vertical Hydroponics System Without Using Pots

If you’ve ever dreamed of growing fresh vegetables, herbs, or leafy greens at home—but don’t have the space or time for traditional gardening—vertical hydroponics might be the perfect solution for you. This innovative gardening method allows you to grow more plants in less space, using water and nutrients instead of soil.

And the best part? You can easily build your own vertical hydroponics system without using pots, right at home, with inexpensive materials.

In this guide, we’ll break down exactly how to set up your own vertical hydroponic tower system, the materials you’ll need, how to keep it running efficiently, and tips to ensure a healthy, thriving harvest year-round.


What Is a Vertical Hydroponics System?

Hydroponics is a soil-free growing method where plants receive nutrients directly from a water-based solution. A vertical hydroponics system takes this a step further by stacking plants vertically, saving enormous amounts of space while maximizing yield.

Instead of planting in pots or garden beds, you grow plants in holes or net cups placed along a vertical pipe or frame. The nutrient-rich water circulates through the system, feeding the roots directly.

This setup is ideal for urban gardeners, apartment dwellers, or anyone looking to grow more in limited space.


Why Build a Hydroponic System Without Pots?

Traditional hydroponic systems often rely on small net pots to hold the plants. However, this DIY version skips the pots entirely—making it simpler, cheaper, and easier to maintain.

Here’s why building a hydroponics system without pots can be a smart choice:

  1. Lower Cost: You eliminate the need for net pots or containers, reducing startup expenses.
  2. Less Plastic Waste: Eco-friendly and sustainable, since you’re reusing materials like PVC pipes or recycled bottles.
  3. Simplified Setup: Fewer parts mean easier cleaning and faster assembly.
  4. Better Root Growth: Without the restriction of pots, roots have more space to spread and absorb nutrients.
  5. Space Efficiency: Perfect for vertical gardening in small areas like balconies, patios, or rooftops.

Materials You’ll Need

Before you begin, gather the following supplies (most are affordable and easily available at hardware or garden stores):

  • PVC Pipe (4–6 inches in diameter): Acts as the main tower for your vertical hydroponic system.
  • PVC Elbows or Connectors: To help shape and support the structure.
  • Drill and Hole Saw: For cutting planting holes into the pipe.
  • Water Pump: To circulate the nutrient solution through the system.
  • Reservoir Tank: A large plastic container or bucket to hold the water and nutrients.
  • Tubing: Connects the pump to the top of the tower for water circulation.
  • Hydroponic Nutrients: Balanced fertilizer specifically formulated for hydroponic growing.
  • Growing Medium: Such as coco coir, rockwool, or perlite (to support seedlings).
  • Seedlings or Seeds: Choose fast-growing plants like lettuce, spinach, basil, or kale.

Optional additions:

  • A timer for automated watering cycles.
  • A LED grow light if you’re setting up indoors.

Step-by-Step Guide to Building the System

1. Prepare the PVC Tower

Start with a large PVC pipe (around 4–6 inches in diameter). This will serve as the main column where your plants will grow.

  • Mark evenly spaced holes along the pipe using a marker.
  • Use a hole saw drill bit (2–3 inches wide) to create openings.
  • Space each hole about 6–8 inches apart, ensuring enough room for plant growth.

These holes are where your seedlings will be placed—no need for pots!

2. Create the Base and Support

  • Attach a PVC cap to the bottom of your pipe to prevent leaks.
  • Mount the pipe vertically onto a support base—you can use wood, metal stands, or another sturdy PVC frame.
  • Position the tower over your reservoir tank, where the nutrient solution will be stored.

This setup allows the nutrient water to drain back into the tank, creating a closed-loop system.

3. Set Up the Water Circulation

  • Place the water pump inside your reservoir tank.
  • Attach a length of tubing from the pump to the top of your PVC tower.
  • Drill a small hole at the top of the pipe and insert the tubing, allowing water to flow down through the tower.

As the pump pushes the nutrient solution upward, it trickles down through the tower—feeding all the plants along the way before returning to the reservoir.

4. Mix the Nutrient Solution

In hydroponics, the nutrient solution is the lifeline of your plants.

  • Fill your reservoir with clean water.
  • Add the recommended amount of hydroponic fertilizer according to the instructions on the package.
  • Stir well and check the pH level, aiming for a range between 5.5 and 6.5.

You can test this with an inexpensive pH meter or strips from a garden store.

5. Insert the Plants

Now comes the fun part—planting!

  • Place your seedlings into the holes of the PVC pipe.
  • Use a small piece of coco coir or rockwool to support the roots and keep them moist.
  • Ensure the roots have contact with the nutrient solution as it flows through the system.

Because this setup doesn’t use pots, roots will grow directly inside the tower, accessing all the nutrients they need.

6. Power On and Monitor

  • Plug in your water pump and check for even water flow through the system.
  • Make sure every planting hole receives a gentle trickle of nutrient solution.
  • Adjust the flow rate if necessary—too much can drown the roots, while too little can dry them out.

For best results, run the pump for 15–30 minutes every 2–3 hours, or use a timer for automatic control.


Plants That Grow Best in Vertical Hydroponics

While almost any small plant can be grown hydroponically, some species thrive especially well in vertical setups. Try starting with:

  • Lettuce and leafy greens (romaine, butterhead, spinach, kale)
  • Herbs (basil, parsley, cilantro, mint)
  • Strawberries
  • Small peppers or cherry tomatoes (with proper support)

Avoid root-heavy or tall plants like carrots or corn, which need deeper soil and stability.


Maintenance and Care Tips

Keeping your hydroponic tower system healthy doesn’t require much effort, but consistency is key.

  1. Monitor Nutrient Levels: Refill your reservoir as water evaporates, and top up with nutrients weekly.
  2. Check pH Regularly: Incorrect pH levels can block nutrient absorption.
  3. Clean the System Monthly: Flush with clean water to prevent algae or mineral buildup.
  4. Provide Light: If indoors, use LED grow lights for 12–16 hours daily.
  5. Inspect Roots: Healthy roots should look white and firm; brown roots indicate overwatering or poor oxygen flow.

Benefits of Building a Vertical Hydroponics System Without Pots

This DIY project offers several long-term benefits that make it ideal for modern gardeners:

  • Space Efficiency: Perfect for apartments or small patios—grow up instead of out!
  • Water Conservation: Uses up to 90% less water than soil gardening.
  • No Weeding or Soil Pests: Cleaner, faster, and low-maintenance growing.
  • Year-Round Production: With a simple indoor setup, you can grow fresh produce all year long.
  • Faster Growth: Plants receive direct nutrients, promoting quicker and healthier development.

It’s an eco-friendly, sustainable way to grow food right where you live.


Common Mistakes to Avoid

Even with an easy design, beginners often face a few challenges. Watch out for these common mistakes:

  1. Clogged Tubes or Pumps: Regularly check for algae buildup or debris.
  2. Inconsistent Water Flow: Uneven water distribution can starve some plants.
  3. Ignoring pH Levels: Too acidic or alkaline water can harm roots.
  4. Overcrowding Plants: Leave enough space for air circulation and light.
  5. Insufficient Light: Indoor plants need strong LED lights to grow properly.

A little attention goes a long way in keeping your hydroponic system thriving.


Final Thoughts: Grow Smart, Grow Vertical

Building your own vertical hydroponics system without pots is not just a fun DIY project—it’s a step toward sustainable living. With a few affordable materials, you can grow your own fresh herbs, greens, and veggies in a compact, mess-free setup that works indoors or outdoors.

You’ll save money, enjoy fresher produce, and reduce your environmental footprint—all while watching your plants thrive in a futuristic, soil-free garden.

Whether you’re a beginner gardener or a seasoned grower looking to experiment, this simple hydroponic tower system is your gateway to efficient, high-yield, and eco-friendly gardening.

So, roll up your sleeves, grab a PVC pipe, and start building your own vertical oasis today—you’ll never look at grocery store greens the same way again.


Keywords for SEO Optimization:
vertical hydroponics system, hydroponics without pots, DIY hydroponics setup, how to build a hydroponic tower, soil-free gardening, indoor gardening, hydroponic growing guide, sustainable food system, grow vegetables indoors, urban hydroponics.

Growing Potatoes in Soil Bags: How to Grow Endless Potatoes Without Spending Money

Growing Potatoes in Soil Bags: How to Grow Endless Potatoes Without Spending Money

If you love fresh, homegrown food but have limited space or time, growing potatoes in soil bags is a simple, affordable, and surprisingly productive solution. Forget digging huge garden plots or spending money every month on store-bought potatoes—once you master this easy method, you can enjoy a continuous supply of delicious, chemical-free potatoes right at home.

In this guide, we’ll walk you through everything you need to know: from choosing the right seed potatoes and soil mix to bag selection, watering, and harvesting tips. Whether you live in an apartment with a balcony or have a small backyard, soil bag potato gardening will completely change the way you grow your food.


Why Grow Potatoes in Soil Bags?

Potatoes are one of the most rewarding crops to grow—and when grown in soil bags, they become even easier. Here’s why so many gardeners are switching to this method:

  1. Space-Saving: Soil bags fit perfectly in small spaces—balconies, patios, or even rooftops.
  2. No Digging Required: Say goodbye to back-breaking garden work. The soil bag method makes planting and harvesting clean and easy.
  3. Pest and Disease Control: Growing in bags reduces the risk of soil-borne diseases and pests that often attack potatoes in the ground.
  4. Better Drainage: Bags provide excellent drainage, preventing waterlogging and root rot.
  5. Reusable and Cost-Effective: Once you invest in a few soil bags, you can reuse them for years—saving money on both groceries and gardening supplies.

The best part? With just a little attention, you can harvest pounds of potatoes from a single bag!


What You’ll Need to Get Started

Before you start planting, gather these basic supplies:

  • Seed Potatoes: Choose certified disease-free seed potatoes from a nursery or gardening store. Avoid using store-bought potatoes, as they’re often treated to prevent sprouting.
  • Soil Bags or Grow Bags: Choose breathable fabric grow bags or thick plastic soil bags (10–15 gallons). These allow air circulation and prevent roots from rotting.
  • Soil Mix: Use a loose, well-draining mix—half compost and half garden soil or potting mix. You can also add a bit of perlite or sand for aeration.
  • Fertilizer: Organic compost or slow-release vegetable fertilizer works great for nutrient-rich soil.
  • Watering Can or Hose: Consistent moisture is key to healthy growth.

Step-by-Step Guide to Growing Potatoes in Soil Bags

1. Prepare Your Seed Potatoes

  • A few days before planting, place your seed potatoes in a warm, bright spot to encourage chitting—the process of sprouting small eyes.
  • Once the sprouts are about 1 inch long, cut larger potatoes into chunks with at least 2–3 eyes per piece. Let them dry for a day before planting to prevent rot.

2. Fill the Bag with Soil

  • Start by filling your grow bag one-third full with the prepared soil mix.
  • Mix in a small amount of organic compost or fertilizer. This will provide an early nutrient boost for your potatoes.

3. Plant the Seed Potatoes

  • Place 3–4 seed potatoes evenly on top of the soil, eyes facing upward.
  • Cover them with another 3–4 inches of soil.
  • Water lightly to moisten the soil but avoid overwatering.

4. Hill Up as They Grow

  • When your potato plants reach about 6 inches tall, add more soil to cover the stems, leaving only the top leaves visible.
  • Repeat this process every 2–3 weeks until the bag is full.
  • This “hilling up” encourages the plants to grow more tubers along the buried stems—resulting in a bigger harvest.

5. Water and Feed Regularly

  • Potatoes love consistent moisture. Water thoroughly whenever the top inch of soil feels dry.
  • During the growing season, feed your plants with a liquid organic fertilizer or compost tea every 2–3 weeks to support healthy growth.

6. Monitor for Pests and Diseases

While growing in bags greatly reduces the risk, it’s still wise to check for:

  • Aphids or Beetles: Spray with neem oil or use natural predators like ladybugs.
  • Blight or Rot: Ensure proper airflow and avoid overwatering to prevent fungal problems.

When and How to Harvest Potatoes

Your plants will start flowering after about 8–10 weeks—this signals that small, “new” potatoes are ready to harvest.

  • For baby potatoes, gently dig into the soil with your hands and pull out a few tubers without disturbing the plant.
  • For mature potatoes, wait until the foliage turns yellow and dies back. Then, dump the entire bag out onto a tarp and collect your harvest.

After harvesting, let the potatoes dry for a few hours in a cool, shaded area. Then store them in a dark, ventilated space—such as a pantry or basement—to extend their shelf life.


How to Keep Your Potato Supply Going Year-Round

One of the biggest advantages of growing in soil bags is that you can stagger your planting. Instead of planting all your potatoes at once, plant a new bag every 3–4 weeks.

This simple trick ensures a continuous harvest throughout the year. You’ll always have fresh potatoes on hand—without ever needing to buy them from the store again.


Common Mistakes to Avoid

Even though growing potatoes in soil bags is simple, a few common mistakes can reduce your yield. Avoid these pitfalls:

  1. Overwatering: Too much water leads to rot. Always check the soil moisture before watering.
  2. Poor Drainage: Make sure your bag has enough drainage holes to allow excess water to escape.
  3. Lack of Sunlight: Potatoes need at least 6 hours of full sun daily for best results.
  4. Skipping Fertilizer: Potatoes are heavy feeders—regular feeding ensures large, healthy tubers.
  5. Harvesting Too Early: Wait until foliage dies back to get the biggest and tastiest potatoes.

Advantages of Using Grow Bags Over Traditional Soil Beds

If you’re still wondering whether grow bags are worth it, here’s how they compare to traditional soil beds:

FeatureSoil BagsGround Planting
SetupQuick and portableRequires digging and bed prep
SpaceIdeal for small areasNeeds more space
DrainageExcellentDepends on soil type
Pest ControlEasier to manageHigher risk of pests and rot
HarvestingSimple and cleanRequires digging and sorting
ReusabilityReusable for yearsSeasonal maintenance required

Clearly, soil bags offer convenience, flexibility, and better results for urban gardeners and beginners alike.


Eco-Friendly and Budget Benefits

Growing potatoes in soil bags isn’t just convenient—it’s also environmentally friendly and budget-conscious.

  • You’ll reduce food waste by harvesting only what you need.
  • You’ll cut grocery expenses since each bag can yield up to 10–15 pounds of potatoes.
  • You’ll recycle organic waste by turning compost and kitchen scraps into nutrient-rich soil.
  • And you’ll reduce your carbon footprint, since your potatoes don’t need to travel from a farm to your kitchen.

It’s a sustainable cycle that helps both your wallet and the planet.


Final Thoughts: Grow Your Own Endless Potatoes

Growing potatoes in soil bags is one of the easiest and most satisfying ways to produce your own food—no matter how small your space is. It’s affordable, low-maintenance, and provides a steady supply of fresh, delicious potatoes all year long.

So next time you’re about to buy another bag of potatoes from the store, consider investing in a few soil bags instead. With just a little effort and patience, you can create a self-sufficient mini potato farm right at home—and never run out of potatoes again.


Keywords for SEO Optimization:
potatoes in soil bags, how to grow potatoes, grow bags for potatoes, container gardening, growing potatoes at home, urban gardening, potato growing tips, soil bag gardening, sustainable food growing.

Should You Prune Fruit Trees in Fall? Experts Weigh In

Should You Prune Fruit Trees in Fall? Experts Weigh In

Fall is a season of transition in the garden. Leaves turn brilliant shades of red, orange, and yellow, temperatures drop, and gardeners begin preparing their outdoor spaces for winter. Among the many questions that arise this time of year, one stands out for fruit tree owners: “Should I prune my fruit trees in fall?”

Pruning is essential for maintaining healthy, productive fruit trees. It encourages strong structure, removes diseased or damaged branches, and can improve fruit yield. However, timing is crucial. Pruning at the wrong time—or in the wrong way—can weaken trees, invite disease, and reduce next year’s harvest.

In this article, we explore what experts say about fall pruning, the benefits and risks, and the best practices to ensure your fruit trees remain healthy and productive.


Why Pruning Matters for Fruit Trees

Pruning is more than just aesthetic. For fruit trees, proper pruning:

  • Encourages air circulation: Reduces fungal disease by allowing sunlight and wind to penetrate the canopy.
  • Improves light penetration: Ensures fruit receives sufficient sunlight for ripening and color development.
  • Removes dead or diseased wood: Helps prevent the spread of pathogens.
  • Controls tree size and shape: Makes harvesting easier and maintains a strong structure to support heavy fruit loads.
  • Stimulates new growth: Promotes vigorous shoots and potentially higher fruit production.

The timing of pruning is what determines whether it benefits or harms the tree.


The Case for Fall Pruning

Some gardeners believe fall is an ideal time to prune because:

  1. Trees are entering dormancy: By late fall, deciduous fruit trees are mostly dormant. Pruning during dormancy may reduce sap loss and stress.
  2. Easier to see the structure: With leaves gone, the branching structure is more visible, making it easier to identify which limbs to remove.
  3. Removes damaged wood before winter: Dead, broken, or diseased branches that might not survive the cold can be safely removed.

Certain situations may justify light fall pruning:

  • Removing broken branches caused by storms or heavy fruit loads.
  • Clearing diseased or pest-infested wood to reduce overwintering issues.
  • Trimming branches that interfere with structures, fences, or pathways.

Expert Insight: Many horticulturists agree that minor corrective pruning in fall is acceptable and can improve tree safety and appearance without severely impacting next year’s growth.


The Risks of Pruning Fruit Trees in Fall

While light corrective pruning can be beneficial, heavy pruning in fall is generally discouraged for most fruit trees. Here’s why:

  1. Increased vulnerability to disease: Fresh cuts in fall are at higher risk for fungal infections, particularly from pathogens like bacterial canker or Botryosphaeria. Warm, wet autumns make trees more susceptible to disease.
  2. Stimulates new growth at the wrong time: Pruning encourages buds to form. In fall, new growth may emerge too late to harden off before frost, leaving tender shoots exposed to winter damage.
  3. Delayed wound healing: As trees enter dormancy, their ability to seal cuts slows down. Pruned branches may remain open and vulnerable until spring.
  4. Potential reduction in next year’s fruit: For some species, heavy fall pruning can remove potential fruiting spurs, leading to a smaller harvest.

Expert Consensus: While light, corrective pruning is safe, major structural pruning is best done in late winter or early spring—just before new growth begins.


Timing Matters: Late Winter vs. Fall

Most fruit tree experts recommend pruning during late winter for optimal results. Here’s the reasoning:

  • Late winter pruning occurs just before bud break. The tree is still dormant, but the risk of stimulating tender new growth too early is minimized.
  • Dormant trees respond quickly in spring with strong shoots and healthy fruiting buds.
  • Wounds heal faster in late winter, reducing disease susceptibility compared to fall.

For trees like apples, pears, peaches, and plums, the safest approach is to reserve major pruning for late winter. Fall pruning should focus on light corrections and safety concerns.


Tips for Safe Fall Pruning

If you decide to prune in fall, follow these expert recommendations:

  1. Focus on dead or damaged branches: Remove branches that are broken, diseased, or crossing other limbs.
  2. Avoid heavy thinning: Remove no more than 10–15% of live wood in fall. Heavy pruning increases disease risk.
  3. Use clean, sharp tools: Disinfect pruners or saws with 70% alcohol or a bleach solution between cuts to prevent spreading disease.
  4. Prune on dry days: Avoid pruning when the tree is wet, as moisture can carry pathogens into fresh cuts.
  5. Keep cuts clean and angled: Cut just above a bud or lateral branch, angling away from the bud to encourage water runoff and faster healing.

Expert Tip: For large branches, make three cuts to prevent tearing: an undercut, a top cut slightly further out, and a final trim to remove the stub.


Species-Specific Considerations

Some fruit trees respond differently to fall pruning. Understanding your tree’s needs can help you make better decisions:

  • Apple and Pear Trees: Light fall pruning is okay for removing damaged wood. Major structural pruning should wait until late winter.
  • Stone Fruits (Peach, Plum, Cherry): Fall pruning is risky because cuts heal slowly and diseases like silver leaf can infect wounds. Light trimming only.
  • Citrus Trees: Generally evergreen, these trees can be pruned lightly in fall, but heavy pruning is better in early spring.
  • Fig Trees: Can tolerate fall pruning in mild climates, but pruning before a hard frost can expose wood to damage.

Expert Insight: Always research the species-specific guidelines for your trees, as pruning timing can vary depending on climate, tree type, and local disease risks.


After Pruning Care

Even light fall pruning requires attention afterward to protect tree health:

  1. Clean up debris: Remove all pruned branches and fallen leaves to reduce disease overwintering.
  2. Mulch and protect roots: Apply 2–4 inches of organic mulch around the base, keeping it 2–3 inches from the trunk. This helps retain soil moisture and moderate soil temperature.
  3. Monitor for pests: Check trees for overwintering insects like scale or aphids. Treat if necessary before dormancy sets in.
  4. Avoid fertilizing: Fertilizing after pruning in fall can stimulate growth that will not harden off before winter. Wait until early spring for nutrient applications.

When Fall Pruning Makes Sense

In summary, fall pruning has a place—but only under specific circumstances:

  • Removing dead, damaged, or diseased branches
  • Correcting safety hazards such as branches interfering with walkways or power lines
  • Light shaping or aesthetic corrections

For all other purposes, especially major structural pruning or thinning for fruit production, late winter is the safer and more effective option.


Conclusion: Expert Guidance on Fall Pruning

Pruning fruit trees is both an art and a science. Fall is not the ideal season for heavy pruning, but light corrective work can prevent damage and keep trees healthy. Understanding the risks—disease, winter damage, and lost fruit buds—helps gardeners make informed choices.

Key Takeaways from Experts:

  1. Light fall pruning is safe for removal of dead, damaged, or diseased wood.
  2. Heavy structural pruning should wait until late winter or early spring.
  3. Species-specific guidelines matter—what works for apples may not be safe for stone fruits.
  4. Use clean, sharp tools and proper techniques to reduce risk of infection.
  5. Protect pruned trees through winter with mulch, pest management, and proper care.

By following these guidelines, you can ensure your fruit trees remain healthy through winter and produce abundant, high-quality fruit next season. Remember—pruning isn’t just about shaping trees; it’s about preserving life, productivity, and beauty in your orchard year after year.

How to Bring Tender Plants Indoors Before Frost Hits

How to Bring Tender Plants Indoors Before Frost Hits

As the crisp chill of autumn settles in and daylight begins to fade, gardeners everywhere face a familiar challenge—protecting tender plants from the first frost. Those tropical beauties, succulents, herbs, and flowering annuals that thrived all summer in the warmth of your garden or patio are suddenly at risk. The key to saving them lies in acting early and wisely—bringing your tender plants indoors before frost hits.

Transitioning plants from outdoor to indoor conditions isn’t as simple as moving pots inside. It requires planning, inspection, cleaning, and acclimatization to prevent stress, pests, or disease. In this detailed guide, we’ll cover everything you need to know about safely and successfully bringing your tender plants indoors for the winter—so they stay healthy and ready to thrive again when spring returns.


Why You Need to Bring Tender Plants Indoors Before Frost

Frost occurs when temperatures drop to around 0°C (32°F) or lower, causing ice crystals to form on plant tissues. For tropical and subtropical plants—like hibiscus, coleus, begonias, and succulents—this can be deadly. Even a light frost can damage leaves and stems or kill roots in containers.

Why It Matters:

  • Prevents frost damage: Tender plants can’t survive freezing temperatures.
  • Saves time and money: Overwintering plants indoors means you won’t have to repurchase them next year.
  • Protects root systems: Pots freeze faster than ground soil, making potted plants especially vulnerable.
  • Maintains plant maturity: Mature plants resume growth faster in spring than new seedlings.

Expert Tip: Check your local frost dates online or via your weather app. Plan to start the moving process 2–3 weeks before the first expected frost.


Step 1: Identify Which Plants Need to Come Indoors

Not every outdoor plant needs to be brought inside. Some can withstand light frost, while others must be rescued before temperatures dip below 50°F (10°C).

Plants You Should Bring Indoors:

  1. Tropical plants – Hibiscus, bougainvillea, mandevilla, and banana plants.
  2. Tender perennials – Geraniums, fuchsias, and begonias.
  3. Herbs – Basil, lemongrass, and rosemary (though hardy varieties like thyme can stay out longer).
  4. Houseplants summering outdoors – Spider plants, pothos, ferns, or palms that enjoyed fresh air during summer.
  5. Succulents and cacti – Especially varieties not adapted to cold, such as echeveria or jade plants.

Expert Tip: Hardy perennials like lavender, coneflower, and hostas can safely remain outside; just add mulch for insulation.


Step 2: Inspect Plants for Pests and Diseases

Before bringing any plant indoors, it’s critical to ensure it’s pest-free. Even a few small insects can multiply quickly in the warm, closed environment of your home, infesting other houseplants.

How to Inspect:

  • Examine leaves (top and underside), stems, and soil surface for pests such as aphids, spider mites, mealybugs, and whiteflies.
  • Check for signs of disease like yellowing leaves, sticky residue, or mold on soil.

How to Treat:

  • Rinse foliage with a strong stream of water to dislodge pests.
  • Wipe leaves with a mild soapy water solution (1 teaspoon of mild dish soap per liter of water).
  • For severe infestations, use neem oil or an insecticidal soap and keep the plant isolated for a few days before moving it indoors.

Expert Tip: Submerge smaller pots in a bucket of lukewarm water for 15–20 minutes to flush out soil-dwelling pests like fungus gnats or ants.


Step 3: Prune and Clean Plants Before Moving Them

Before making the move, give your plants a mini spa day. Cleaning and pruning help reduce pests, promote healthy regrowth, and make them easier to manage indoors.

How to Do It:

  • Prune dead or damaged leaves and stems. This reduces stress and encourages fresh growth.
  • Trim long or leggy branches. This helps the plant fit your indoor space and improves airflow.
  • Wipe dust off leaves. Use a damp cloth to clean surfaces so plants can absorb light more effectively indoors.

Expert Tip: Avoid heavy pruning right before bringing plants inside—light trimming is best. Major pruning can shock them just as they’re adjusting to a new environment.


Step 4: Repot or Refresh Soil if Needed

If your plants have been outside all summer, their soil may be compacted, depleted, or harboring insects. Repotting gives them fresh nutrients and a clean environment for the winter.

When to Repot:

  • If roots are growing out of drainage holes.
  • If the soil looks dry, hard, or has mold.
  • If the plant’s growth slowed significantly over summer.

How to Do It:

  1. Choose a pot 1–2 inches larger in diameter than the current one.
  2. Use a well-draining indoor potting mix (avoid using garden soil indoors).
  3. Gently loosen roots before repotting.
  4. Water lightly after transferring to help the soil settle.

Expert Tip: Add a small layer of perlite or pebbles at the bottom of the pot for extra drainage—this prevents root rot in indoor environments.


Step 5: Acclimate Plants Gradually to Indoor Conditions

Plants don’t like sudden changes. The transition from bright, outdoor sunlight to lower indoor light levels can stress them, causing leaf drop or slowed growth.

How to Acclimate:

  • About 7–10 days before moving indoors, start placing plants in a shaded or sheltered outdoor area for part of the day.
  • Gradually increase the time they spend in shade and decrease watering slightly.
  • Move them indoors permanently after a week or so, once they’ve adjusted to reduced light and humidity.

Expert Tip: Avoid placing plants near heat vents, radiators, or cold drafts once inside—these can cause temperature stress.


Step 6: Choose the Right Indoor Location

Different plants have different light and temperature needs, so placing them correctly indoors is crucial.

Best Locations:

  • South- or west-facing windows: Ideal for sun-loving plants like hibiscus, geraniums, and succulents.
  • East-facing windows: Perfect for medium-light plants such as ferns, begonias, and herbs.
  • Low-light corners: Good for hardy houseplants like pothos, snake plants, and peace lilies.

Temperature Tips:

  • Maintain 60–75°F (15–24°C) during the day and no lower than 55°F (13°C) at night.
  • Keep plants away from cold windowpanes in freezing weather.

Expert Tip: If your home lacks natural light, use grow lights to supplement daylight—especially for flowering or tropical plants.


Step 7: Adjust Watering and Humidity

Plants need less water indoors during the winter because growth slows down and evaporation decreases. Overwatering is one of the most common mistakes gardeners make when overwintering plants indoors.

How to Water Properly:

  • Check soil moisture before watering—only water when the top inch feels dry.
  • Use room-temperature water to avoid shocking roots.
  • Empty saucers after watering to prevent soggy roots.

Humidity Tips:
Indoor air tends to be dry in winter. Increase humidity by:

  • Grouping plants together (they create a mini humid microclimate).
  • Using a humidifier or placing a tray of water and pebbles beneath pots.
  • Misting occasionally—but not excessively, to avoid mold.

Expert Tip: Plants like ferns and calatheas thrive with higher humidity, while succulents and cacti prefer drier air. Adjust care accordingly.


Step 8: Continue Light Maintenance All Winter

Your plants may grow more slowly indoors, but they still need attention. Check them regularly for pests, monitor light exposure, and rotate them occasionally for even growth.

Winter Care Checklist:

  • Inspect weekly for signs of pests or leaf yellowing.
  • Dust leaves once a month to ensure good light absorption.
  • Fertilize sparingly—once every 6–8 weeks using diluted liquid fertilizer (unless plants are dormant).
  • Rotate pots every few weeks for balanced growth.

Expert Tip: If some leaves drop soon after moving indoors, don’t panic. It’s a natural adjustment response—new leaves will appear once the plant settles.


Step 9: Plan for the Move Back Outdoors in Spring

When the threat of frost has passed, it’s time to prepare your plants for life outdoors again—but do it gradually.

How to Transition Back:

  • Start by placing plants outside in a shaded area for a few hours a day.
  • Increase sun exposure gradually over 10–14 days.
  • Resume normal watering and feeding once active growth restarts.

Expert Tip: Never move plants outdoors until nighttime temperatures consistently stay above 50°F (10°C).


Conclusion: Protecting Tender Plants for a Thriving Garden Year After Year

Bringing tender plants indoors before frost hits isn’t just about saving them—it’s about extending their lifespan and preserving the beauty and hard work you’ve put into your garden all season. With careful inspection, gradual acclimation, and proper indoor care, your tropicals, herbs, and delicate flowers can flourish through the winter months.

When spring arrives, you’ll have healthy, mature plants ready to return outdoors—stronger, fuller, and more beautiful than ever. By mastering the art of overwintering, you’ll not only save money but also enjoy the satisfaction of nurturing your garden’s life year-round.

5 Mistakes to Avoid When Mulching in Fall

5 Mistakes to Avoid When Mulching in Fall

Mulching is one of the best things you can do for your garden—especially in the fall. A well-applied layer of mulch helps regulate soil temperature, retain moisture, suppress weeds, and protect plant roots from harsh winter conditions. However, while the benefits of mulching are undeniable, doing it incorrectly can do more harm than good.

Many gardeners make simple mistakes in fall mulching that can lead to problems like root rot, pest infestations, and poor plant growth come spring. To help you protect your plants and make your garden thrive year-round, here are five common mulching mistakes to avoid this fall—plus expert tips on how to do it the right way.


1. Piling Mulch Too High (“Volcano Mulching”)

One of the most common and damaging mistakes gardeners make is piling mulch up high around the base of trees and shrubs—a practice often called “volcano mulching.” While it may look tidy, it creates a mound that traps moisture and encourages rot at the base of plants.

Why It’s a Problem:

  • Trapped moisture can lead to bark decay and root rot.
  • It creates a cozy environment for rodents and insects, which may chew on bark or roots.
  • Excess mulch can suffocate roots by limiting air and water movement into the soil.

The Right Way:

  • Spread mulch in a flat, even layer, keeping it 2–3 inches deep.
  • Leave a 2–4 inch gap between the mulch and the base of trees or plant stems.
  • For large trees, extend mulch to the drip line (the area beneath the outermost branches) to protect the root zone.

Expert Tip: If you already have mulch piled too high, gently pull it back from the trunk or crown to allow airflow and prevent rot.


2. Using the Wrong Type of Mulch for the Season

Not all mulch is created equal—and using the wrong kind in fall can cause more problems than it solves. Organic mulches like wood chips, shredded bark, and leaves decompose over time, enriching the soil. But some mulches, like fresh wood chips, can temporarily rob the soil of nitrogen as they break down.

Why It’s a Problem:

  • Fresh or unfinished mulch can deplete nutrients from the soil.
  • Certain materials, like dyed or rubber mulch, may contain chemicals that are harmful to plants and soil microbes.
  • Mulch that retains too much water (such as thick layers of grass clippings) can create excess moisture, leading to fungal growth or mold.

The Right Way:

  • Use aged organic mulch, such as shredded bark, composted leaves, or straw, which enriches the soil while protecting plants.
  • Avoid thick mats of grass clippings or sawdust, which can compact and block air circulation.
  • Choose mulch that suits your plant type—pine bark for shrubs, compost or leaf mold for flower beds, and pine needles for acid-loving plants like azaleas or blueberries.

Expert Tip: Combine coarse mulch (like bark chips) on top of finer mulch (like compost) for a balance of insulation and nutrient value.


3. Applying Mulch Too Early (or Too Late)

Timing matters more than most gardeners realize. Mulching too early in the fall can trap warm air in the soil, encouraging plants to keep growing instead of going dormant. On the other hand, mulching too late may leave roots exposed to the season’s first hard frost.

Why It’s a Problem:

  • Early mulching can lead to premature growth, making plants vulnerable when temperatures drop.
  • Late mulching means roots aren’t insulated in time, risking frost damage.

The Right Way:

  • Wait until the first few hard frosts have occurred but before the ground freezes completely.
  • This ensures plants are dormant, and the mulch acts as insulation rather than a heat trap.
  • In most regions, the ideal time is late October to mid-November, depending on local climate.

Expert Tip: If you’re unsure, do a quick soil test—if the soil feels cold and firm but not frozen, it’s the perfect time to mulch.


4. Ignoring Weed Growth Before Mulching

Many gardeners rush to spread mulch without clearing weeds first, assuming that a thick layer will smother them. While mulch does help suppress new weed growth, existing weeds can still thrive underneath if not properly removed. Their roots can continue spreading and even push through the mulch layer in spring.

Why It’s a Problem:

  • Weeds compete with plants for water and nutrients.
  • Some hardy weeds, like dandelions or bindweed, can grow through thick mulch.
  • Leaving weeds behind can make next season’s cleanup much harder.

The Right Way:

  • Before mulching, thoroughly remove all weeds, including roots and runners.
  • Apply a weed barrier—such as cardboard, newspaper, or a layer of compost—underneath your mulch to block light and prevent new growth.
  • Aim for a mulch depth of 2–4 inches, which is thick enough to discourage weed seedlings but still allows air and water to penetrate.

Expert Tip: Avoid using plastic sheeting under mulch. It prevents water and oxygen from reaching plant roots and can cause soil health to decline over time.


5. Forgetting to Maintain Mulch Throughout the Season

Many gardeners treat mulching as a “set it and forget it” task—but that’s a mistake. Over the winter, mulch can compress, blow away, or decompose unevenly, reducing its effectiveness. Ignoring it can lead to exposed soil, poor drainage, or even root stress when temperatures fluctuate.

Why It’s a Problem:

  • Compacted mulch prevents air and water from reaching roots.
  • Thin or displaced mulch leaves soil vulnerable to freezing.
  • Decomposing mulch may introduce mold or fungus if not refreshed periodically.

The Right Way:

  • Inspect mulch every few weeks throughout the fall and winter.
  • If it has compacted, gently fluff it with a rake to restore airflow.
  • If areas look thin or bare, add a light top-up layer to maintain even coverage.
  • Remove decayed or moldy sections before adding fresh material.

Expert Tip: In spring, rake away some of the old mulch to let soil warm up and breathe—this prevents mold and encourages new plant growth.


Bonus Tips for Fall Mulching Success

  1. Measure Depth Carefully: Aim for 2–3 inches for most plants. Too little won’t insulate roots, and too much can suffocate them.
  2. Keep Mulch Dry Before Applying: Wet mulch clumps easily, making it harder to spread evenly.
  3. Don’t Mulch Annual Beds Too Early: Wait until after removing spent plants to prevent spreading disease or pests.
  4. Use Mulch Around Perennials Wisely: Keep the crown area (where stems meet roots) free from mulch to avoid rot.
  5. Mix Old and New Mulch: Refresh existing mulch by turning it and blending in new material to maintain consistency and nutrient balance.

The Benefits of Getting Fall Mulching Right

When done correctly, mulching in fall provides long-term rewards for your garden. Here’s what you gain:

  • Better Soil Health: Organic mulch breaks down over winter, adding nutrients for spring growth.
  • Improved Moisture Retention: Prevents soil from drying out during windy, cold months.
  • Temperature Regulation: Insulates plant roots from extreme cold and prevents freeze-thaw cycles that can heave plants out of the soil.
  • Fewer Weeds: A consistent mulch layer blocks sunlight, reducing early spring weed germination.
  • Healthier, More Resilient Plants: Protects root systems and ensures a strong start when growing season returns.

Conclusion: Mulch Smart, Not Hard

Mulching is a simple, affordable, and incredibly effective way to protect your garden—but only if you do it right. By avoiding common mistakes like piling mulch too high, using the wrong materials, or applying it at the wrong time, you’ll give your plants the best possible chance to thrive through winter and beyond.

Think of fall mulching as an investment: the care and attention you put in now will pay off when your garden bursts back to life in spring. A little effort today ensures healthy soil, stronger roots, and a more beautiful, resilient garden year-round.

5 Shrubs That Stay Gorgeous Through Fall and Winter

5 Shrubs That Stay Gorgeous Through Fall and Winter

When the warm hues of summer fade and the chill of autumn creeps in, many gardens begin to lose their color and vibrancy. But with the right plant choices, your outdoor space can remain a stunning display of beauty even through the coldest months. Some shrubs are true four-season performers—offering colorful foliage, striking berries, and attractive textures that stand out against frost or snow.

Here are five incredible shrubs that keep your garden gorgeous through fall and winter, along with expert tips on how to care for them so they thrive year-round.


1. Winterberry Holly (Ilex verticillata)

If you’re looking for a burst of color in the middle of winter, Winterberry Holly is an unbeatable choice. This deciduous holly loses its leaves in late fall, leaving behind bright clusters of scarlet-red berries that cling to the branches well into winter. These berries not only add striking color to your landscape but also attract birds, bringing life and movement to your garden during the quiet months.

Why It’s Gorgeous Year-Round:

  • Fall: Deep green leaves turn a warm yellow before dropping.
  • Winter: Red berries shine vividly against the snow or bare branches.
  • Spring and Summer: Glossy green foliage adds a lush backdrop to other plants.

Growing Tips:

  • Light: Full sun to partial shade.
  • Soil: Moist, slightly acidic soil.
  • Care: Plant both a male and female shrub nearby for berry production. Mulch well before winter to protect the roots from deep freezing.

Expert Tip: To create the best winter display, plant Winterberry near evergreens or ornamental grasses for contrast.


2. Red Twig Dogwood (Cornus sericea)

Few shrubs offer as much winter drama as Red Twig Dogwood. Once its green leaves fall away in autumn, the shrub’s brilliant red stems take center stage—illuminating your garden with bold color even on the grayest days.

Why It’s Gorgeous Year-Round:

  • Fall: Leaves turn a lovely purple-red before dropping.
  • Winter: Vibrant red stems stand out against snow or mulch.
  • Spring and Summer: White flowers and blue-white berries attract pollinators and birds.

Growing Tips:

  • Light: Prefers full sun for best stem color, though it tolerates partial shade.
  • Soil: Moist, well-drained soil is ideal.
  • Care: Prune in early spring to remove older stems—new growth produces the brightest color.

Expert Tip: Plant Red Twig Dogwood in groups for a more striking effect. The color contrast looks particularly beautiful near evergreens or ornamental grasses.


3. Mahonia (Mahonia x media or Oregon Grape Holly)

Mahonia is a hardy evergreen shrub that delivers both structure and color throughout the year. Its spiky, holly-like leaves stay green through the cold months, while clusters of fragrant yellow flowers bloom in late winter or early spring—often when little else is flowering.

Why It’s Gorgeous Year-Round:

  • Fall: Leaves may develop purplish tints.
  • Winter: Glossy evergreen foliage remains attractive; yellow blooms add early color.
  • Spring and Summer: Bright flowers give way to blue-black berries, providing food for birds.

Growing Tips:

  • Light: Partial to full shade—great for woodland gardens.
  • Soil: Moist but well-drained, rich in organic matter.
  • Care: Prune after flowering to maintain shape and encourage dense growth.

Expert Tip: Combine Mahonia with ferns or hellebores for a lush, winter-ready shade garden.


4. Boxwood (Buxus sempervirens)

Boxwood is a timeless classic that provides structure, texture, and evergreen beauty all year long. It’s especially valuable in winter when its dense, glossy green foliage forms the backbone of the garden. Whether used in hedges, topiaries, or containers, boxwood adds elegance and formality that endures through snow and frost.

Why It’s Gorgeous Year-Round:

  • Fall and Winter: Deep green foliage remains vibrant, adding contrast to bare trees and brown landscapes.
  • Spring and Summer: Serves as a lush background for colorful annuals and perennials.

Growing Tips:

  • Light: Full sun to partial shade.
  • Soil: Well-drained, slightly alkaline soil.
  • Care: Protect from harsh winter winds with burlap wrapping; avoid late-season fertilizing to prevent tender growth before frost.

Expert Tip: Use boxwood to frame pathways, garden beds, or entryways—it provides instant structure and evergreen appeal.


5. Witch Hazel (Hamamelis spp.)

When most plants are dormant, Witch Hazel brings the garden back to life with its ribbon-like, fragrant flowers that bloom from late fall into winter. Its blooms—ranging from yellow to orange and even red—appear on bare branches, offering a delightful surprise during the bleak months.

Why It’s Gorgeous Year-Round:

  • Fall: Golden-yellow leaves light up the landscape before dropping.
  • Winter: Fragrant, spider-like flowers bloom when little else does.
  • Spring and Summer: Attractive green foliage fills in the garden structure.

Growing Tips:

  • Light: Full sun to partial shade.
  • Soil: Moist, well-drained, acidic to neutral soil.
  • Care: Minimal pruning is needed—just remove dead or crossing branches after flowering.

Expert Tip: Plant Witch Hazel where you can easily enjoy its scent and color in winter—near an entryway, window, or pathway.


Designing a Garden That Shines in Every Season

To make your fall and winter garden pop, combine shrubs with different textures, colors, and forms. For instance:

  • Pair Red Twig Dogwood with Winterberry Holly for a mix of red stems and red berries.
  • Use Boxwood as a backdrop for Witch Hazel blooms or Mahonia’s yellow flowers.
  • Mix evergreen and deciduous shrubs for year-round visual balance.

Add a layer of mulch around all your shrubs before the ground freezes—it not only protects roots but also keeps your garden beds looking tidy.


Care Tips to Keep Shrubs Looking Great Year-Round

  1. Water Before Frost: Ensure shrubs go into winter well-watered—dry roots are more prone to freeze damage.
  2. Mulch Generously: A 2–3 inch layer of mulch regulates soil temperature and retains moisture.
  3. Prune at the Right Time: Most shrubs should be pruned in late winter or early spring to encourage new growth.
  4. Protect from Windburn: Wrap vulnerable evergreens like boxwood or young Mahonias in burlap if your area gets strong winter winds.
  5. Feed Lightly in Spring: Use a balanced, slow-release fertilizer once the ground thaws to support new growth.

Conclusion: Keep Your Garden Alive All Year Long

A garden doesn’t have to fade into gray as soon as temperatures drop. By choosing the right shrubs—like Winterberry Holly, Red Twig Dogwood, Mahonia, Boxwood, and Witch Hazel—you can ensure that your outdoor space remains beautiful, textured, and colorful through every season.

These plants offer far more than cold-weather charm—they create structure, attract wildlife, and provide year-round interest. With a little planning and care, your garden can be a vibrant, living landscape from the first frost to the first bloom of spring.